My baby girl is 8 months old already! I can’t believe it. She crawls all over the place, and pulls herself up to standing constantly. She’s even started moving between objects while standing, transferring from couch to coffee table to Dany’s crate etc. Will is terrified she is going to walk any day now.
Julius is doing really great with his letter recognition. He can tell you what different letters in books are, and what they sound like. He is really close to being able to read I think. I need to get some beginner reader books for him!
As for me, I’ve taken up a new hobby – needle felting! I have described this recently as the equivalent of making sculpey animals, only out of wool. Who knew that poking a pile of fiber over and over again with a barbed needle could produce such amazing things! Here’s a few of my little creations – it all started with the little gnome in the center. My library held a free virtual felting class a few months ago that included all the supplies for the little guy you see there. I was so excited to sign up for a spot – it was one of the few organized activities I did while on my maternity leave (or really before I was vaccinated).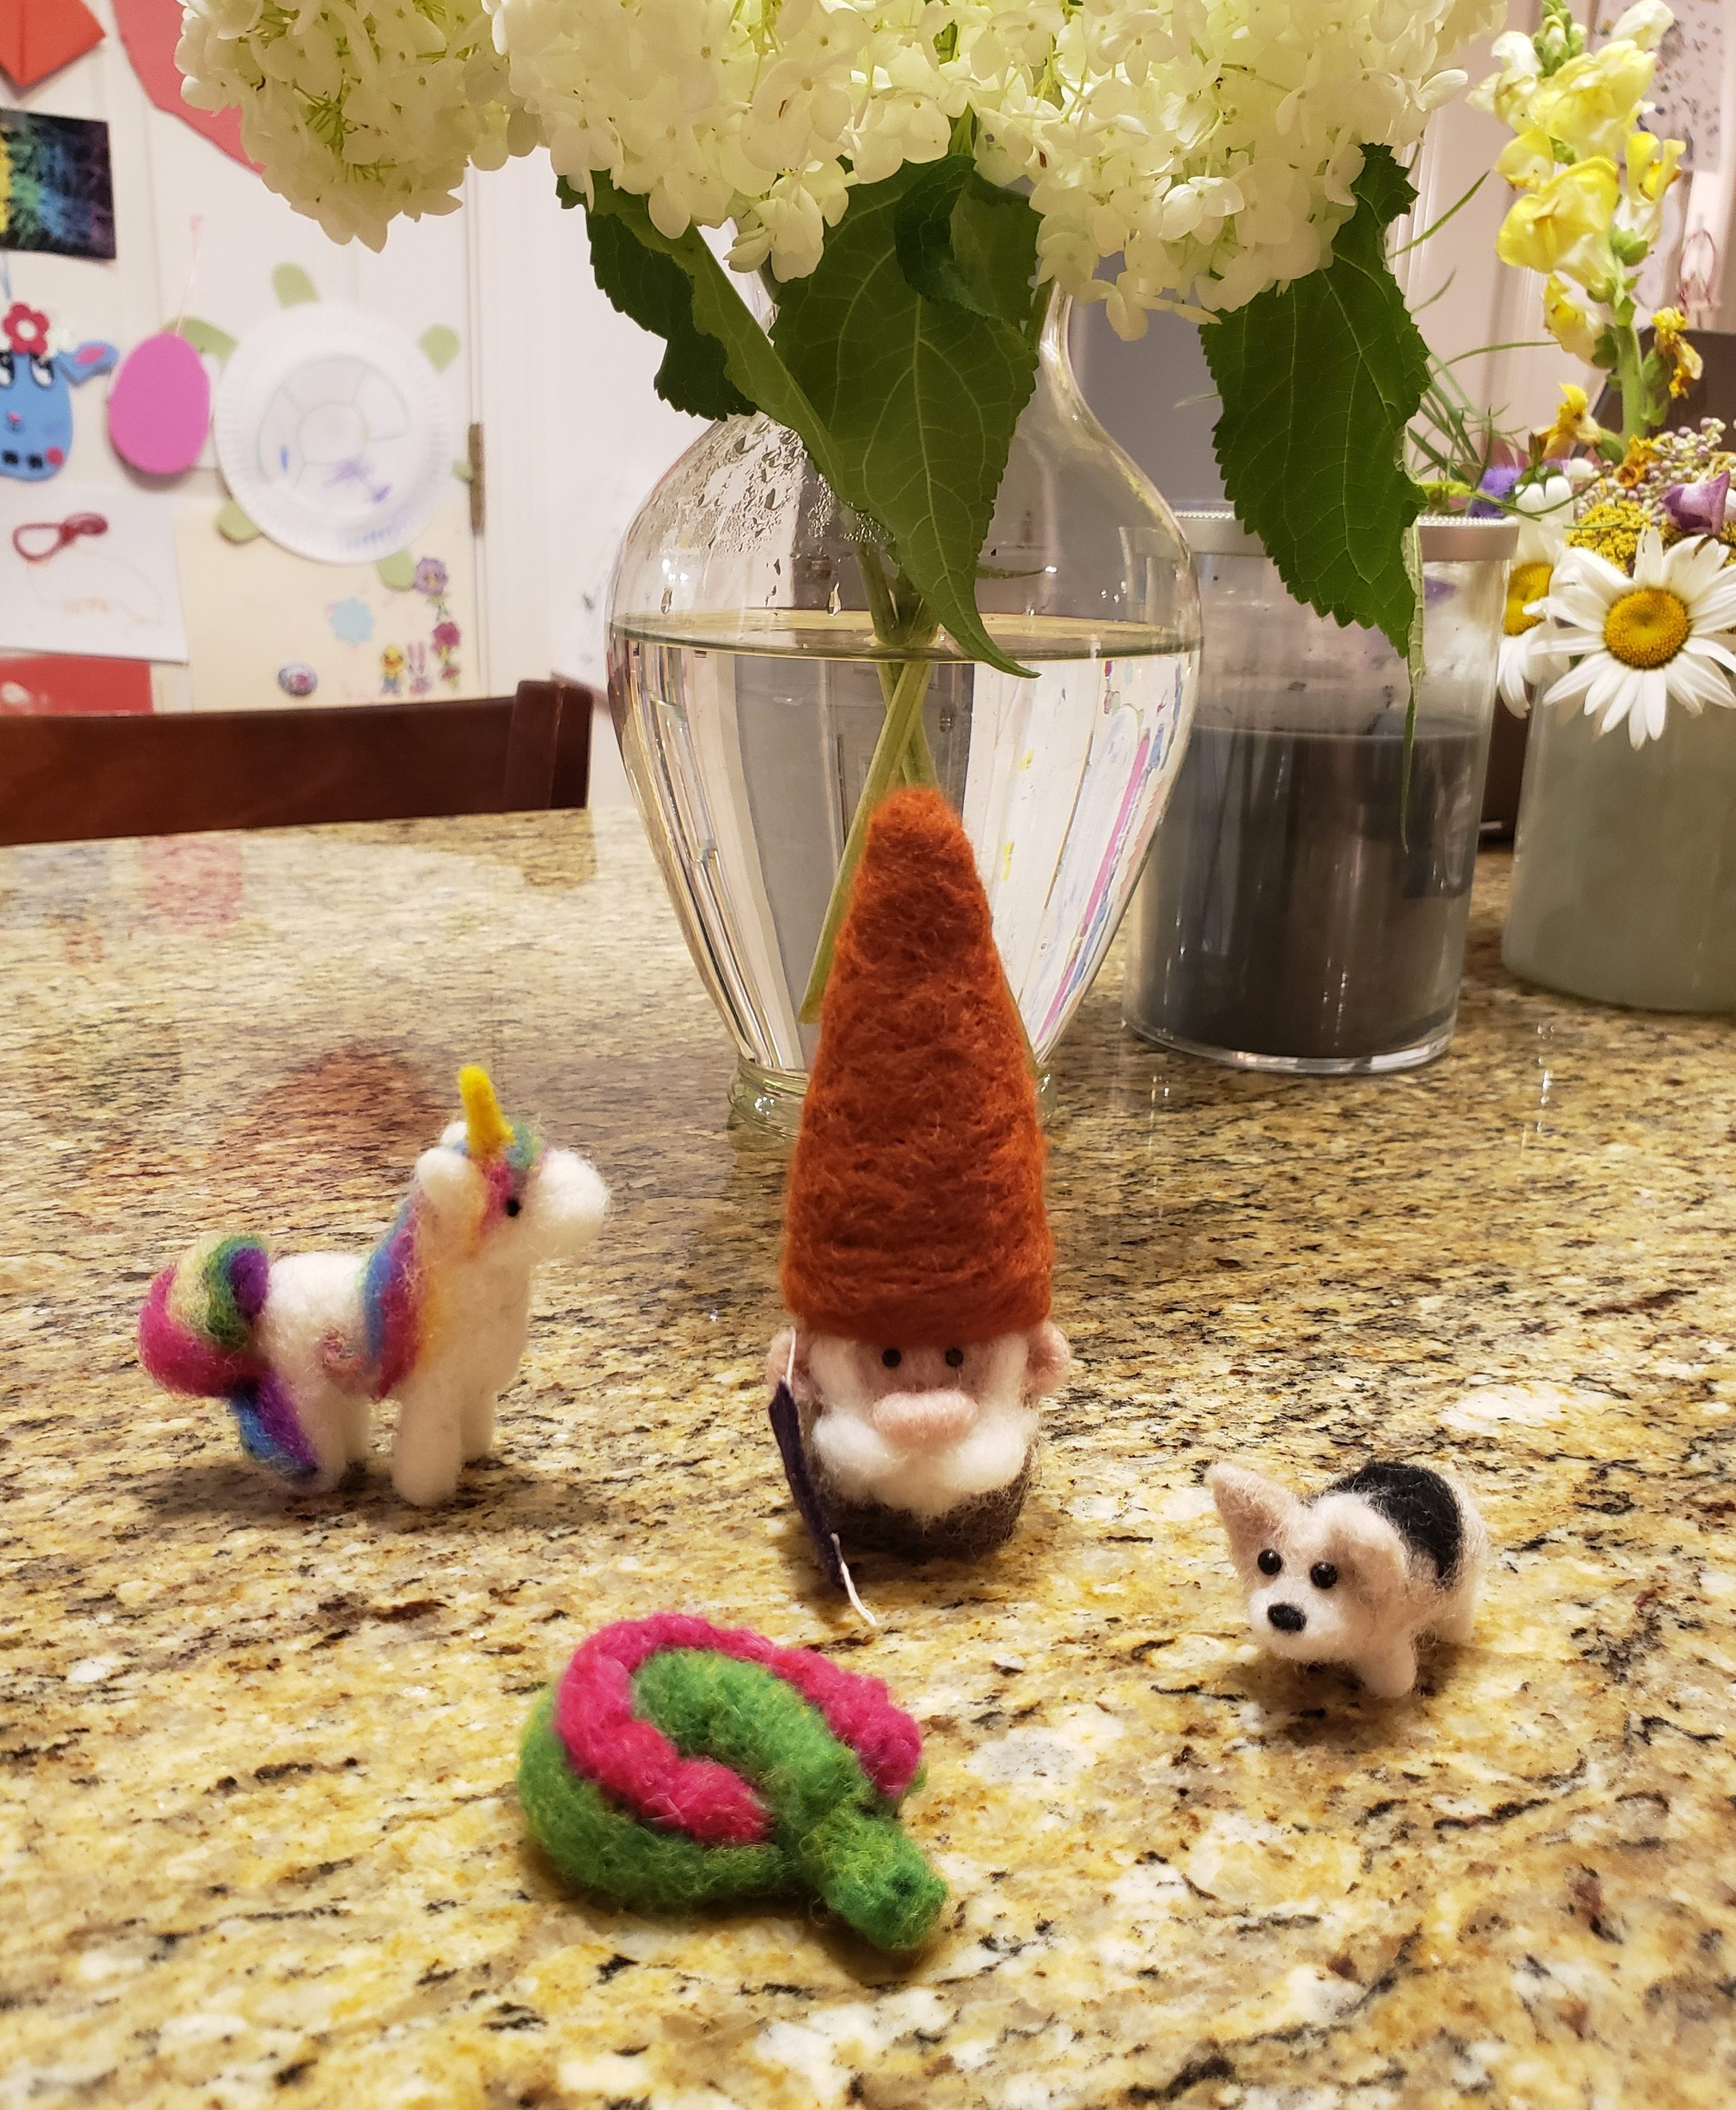
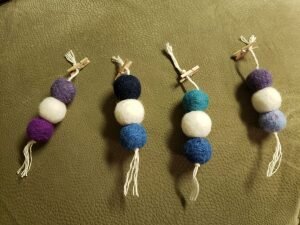
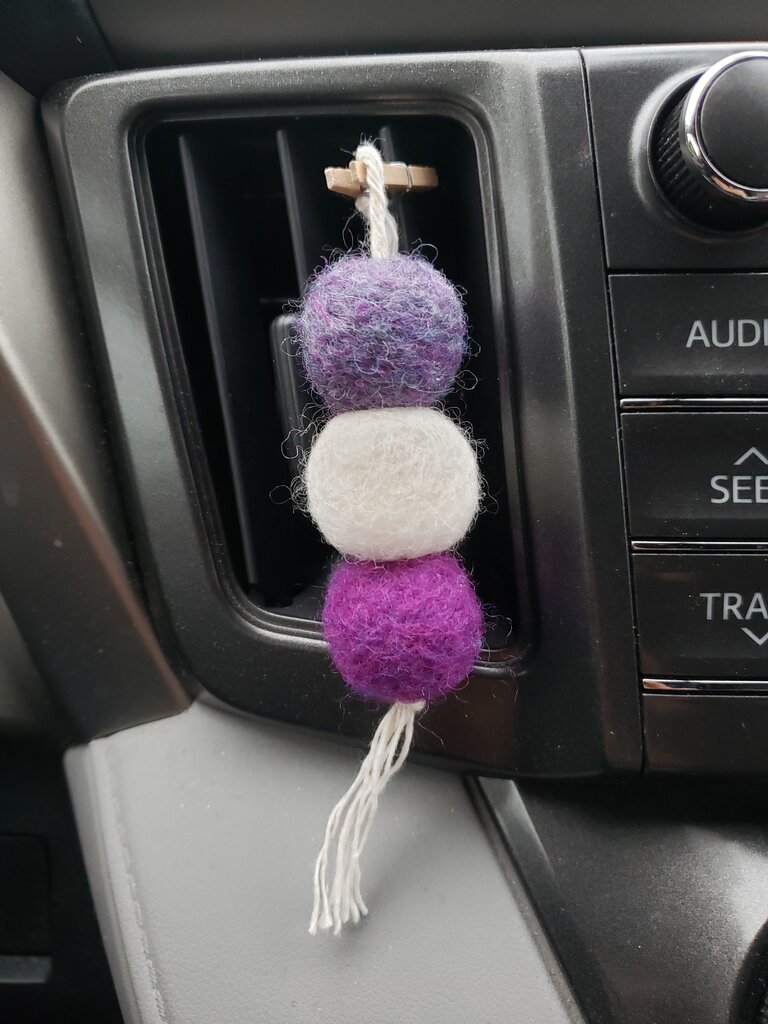
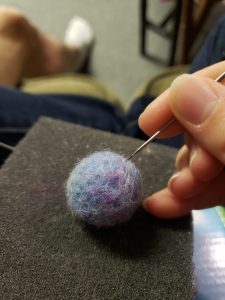
They key to felting is poking the needle semi randomly, while turning your shape. If you randomly poke more in one single area, that spot will start to flatten out and then eventually indent. The more you poke, the firmer your felted creations will become. After I’d made a bunch of animals, I decided to make some essential oil diffusers for the car. You just need to add a few drops of your favorite essential oil to the wool balls, and then clip to your vent. When the air blows you’ll get wafts of essential oil aroma.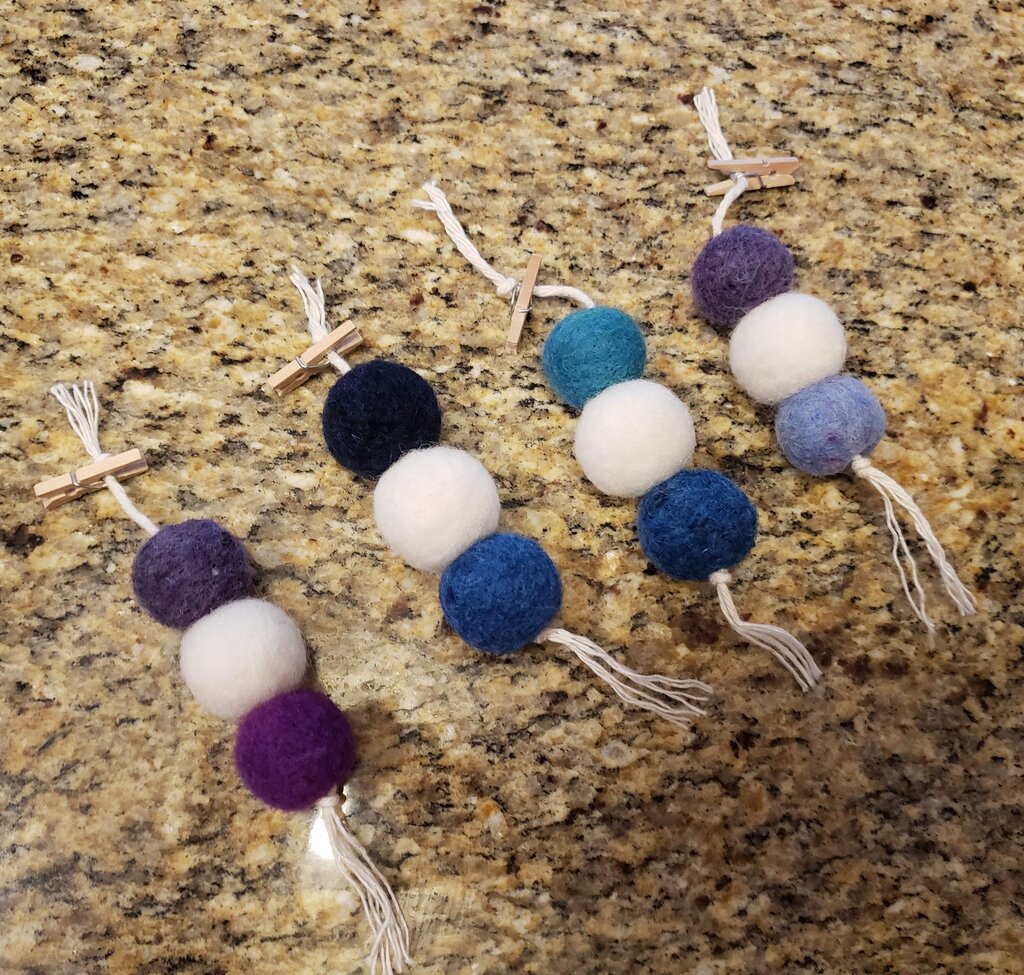
Wool Diffuser
What you’ll need:
- 3 different colors of wool roving .1 oz each
- felting needle and foam
- kitchen twine
- tapestry needle
- tiny clothespin (mine was only 1″ long, but you could go larger)
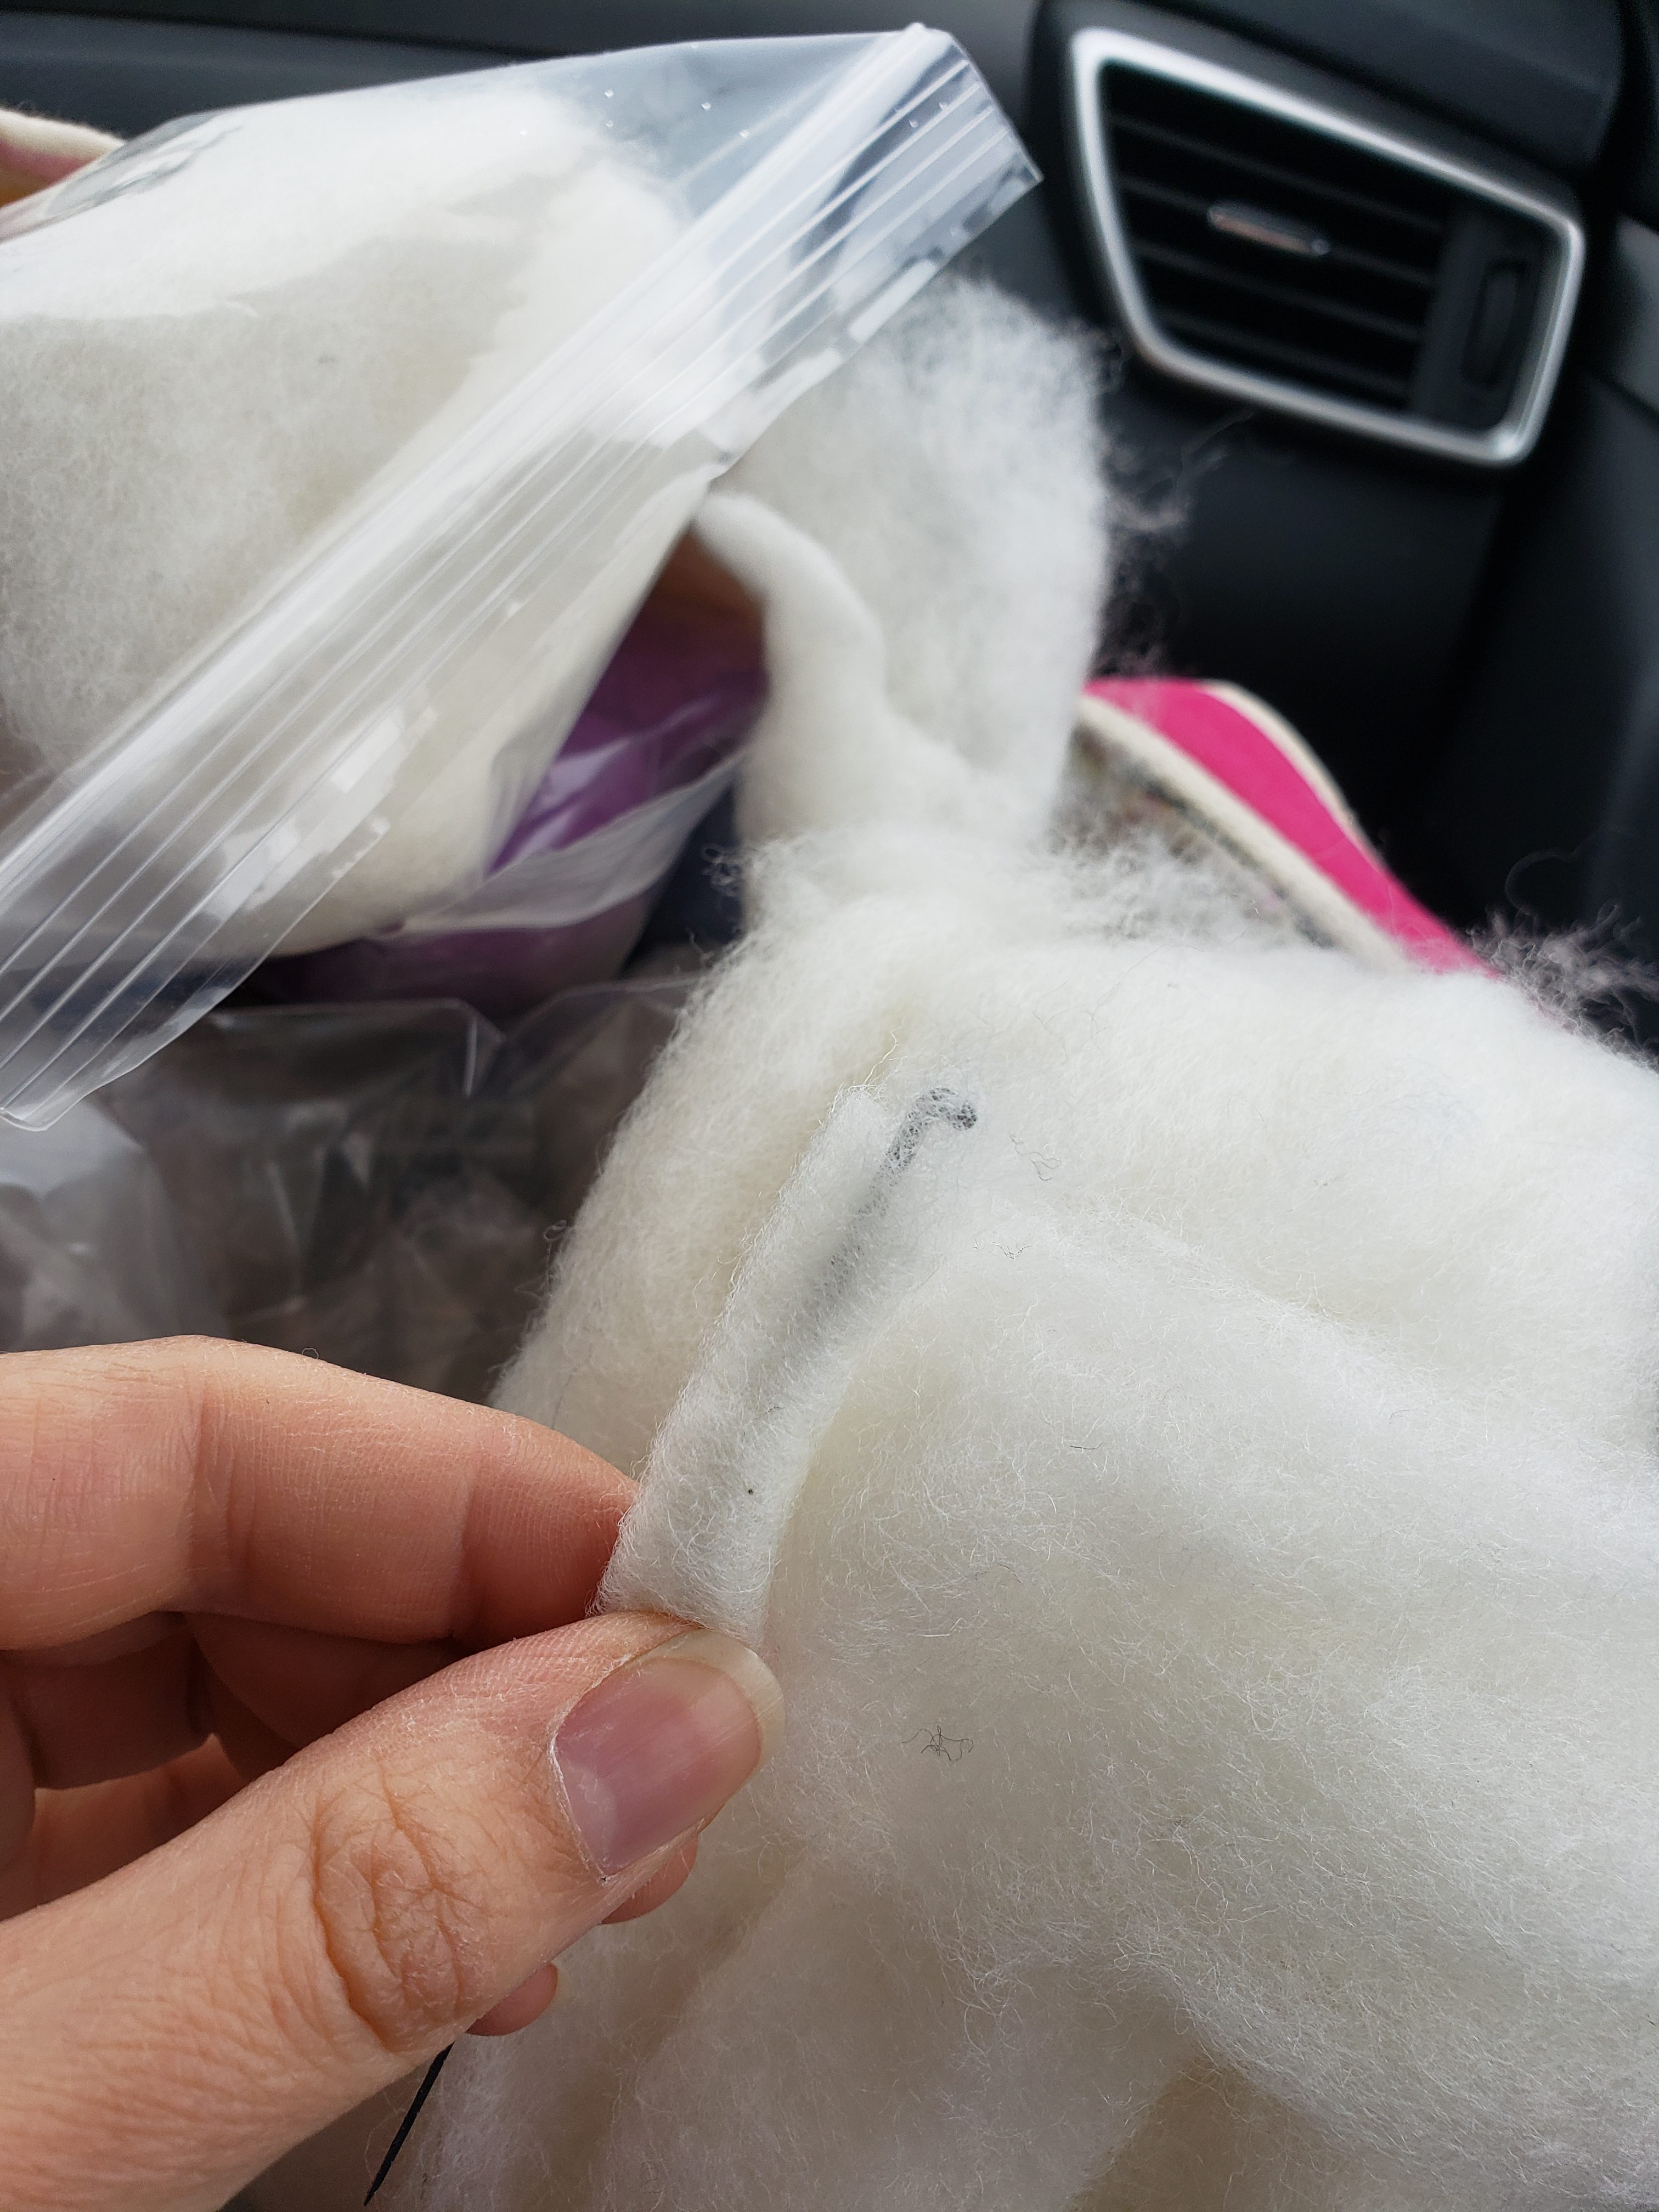
- Take one color of wool and split it in half, to form two long strips. Wrap the strip tightly around the handle of the needle.

- Slide the wool off the needle, and wrap the other strip of wool around the first, perpendicular to how you wrapped around the needle. You’ll have a blockish looking shape.

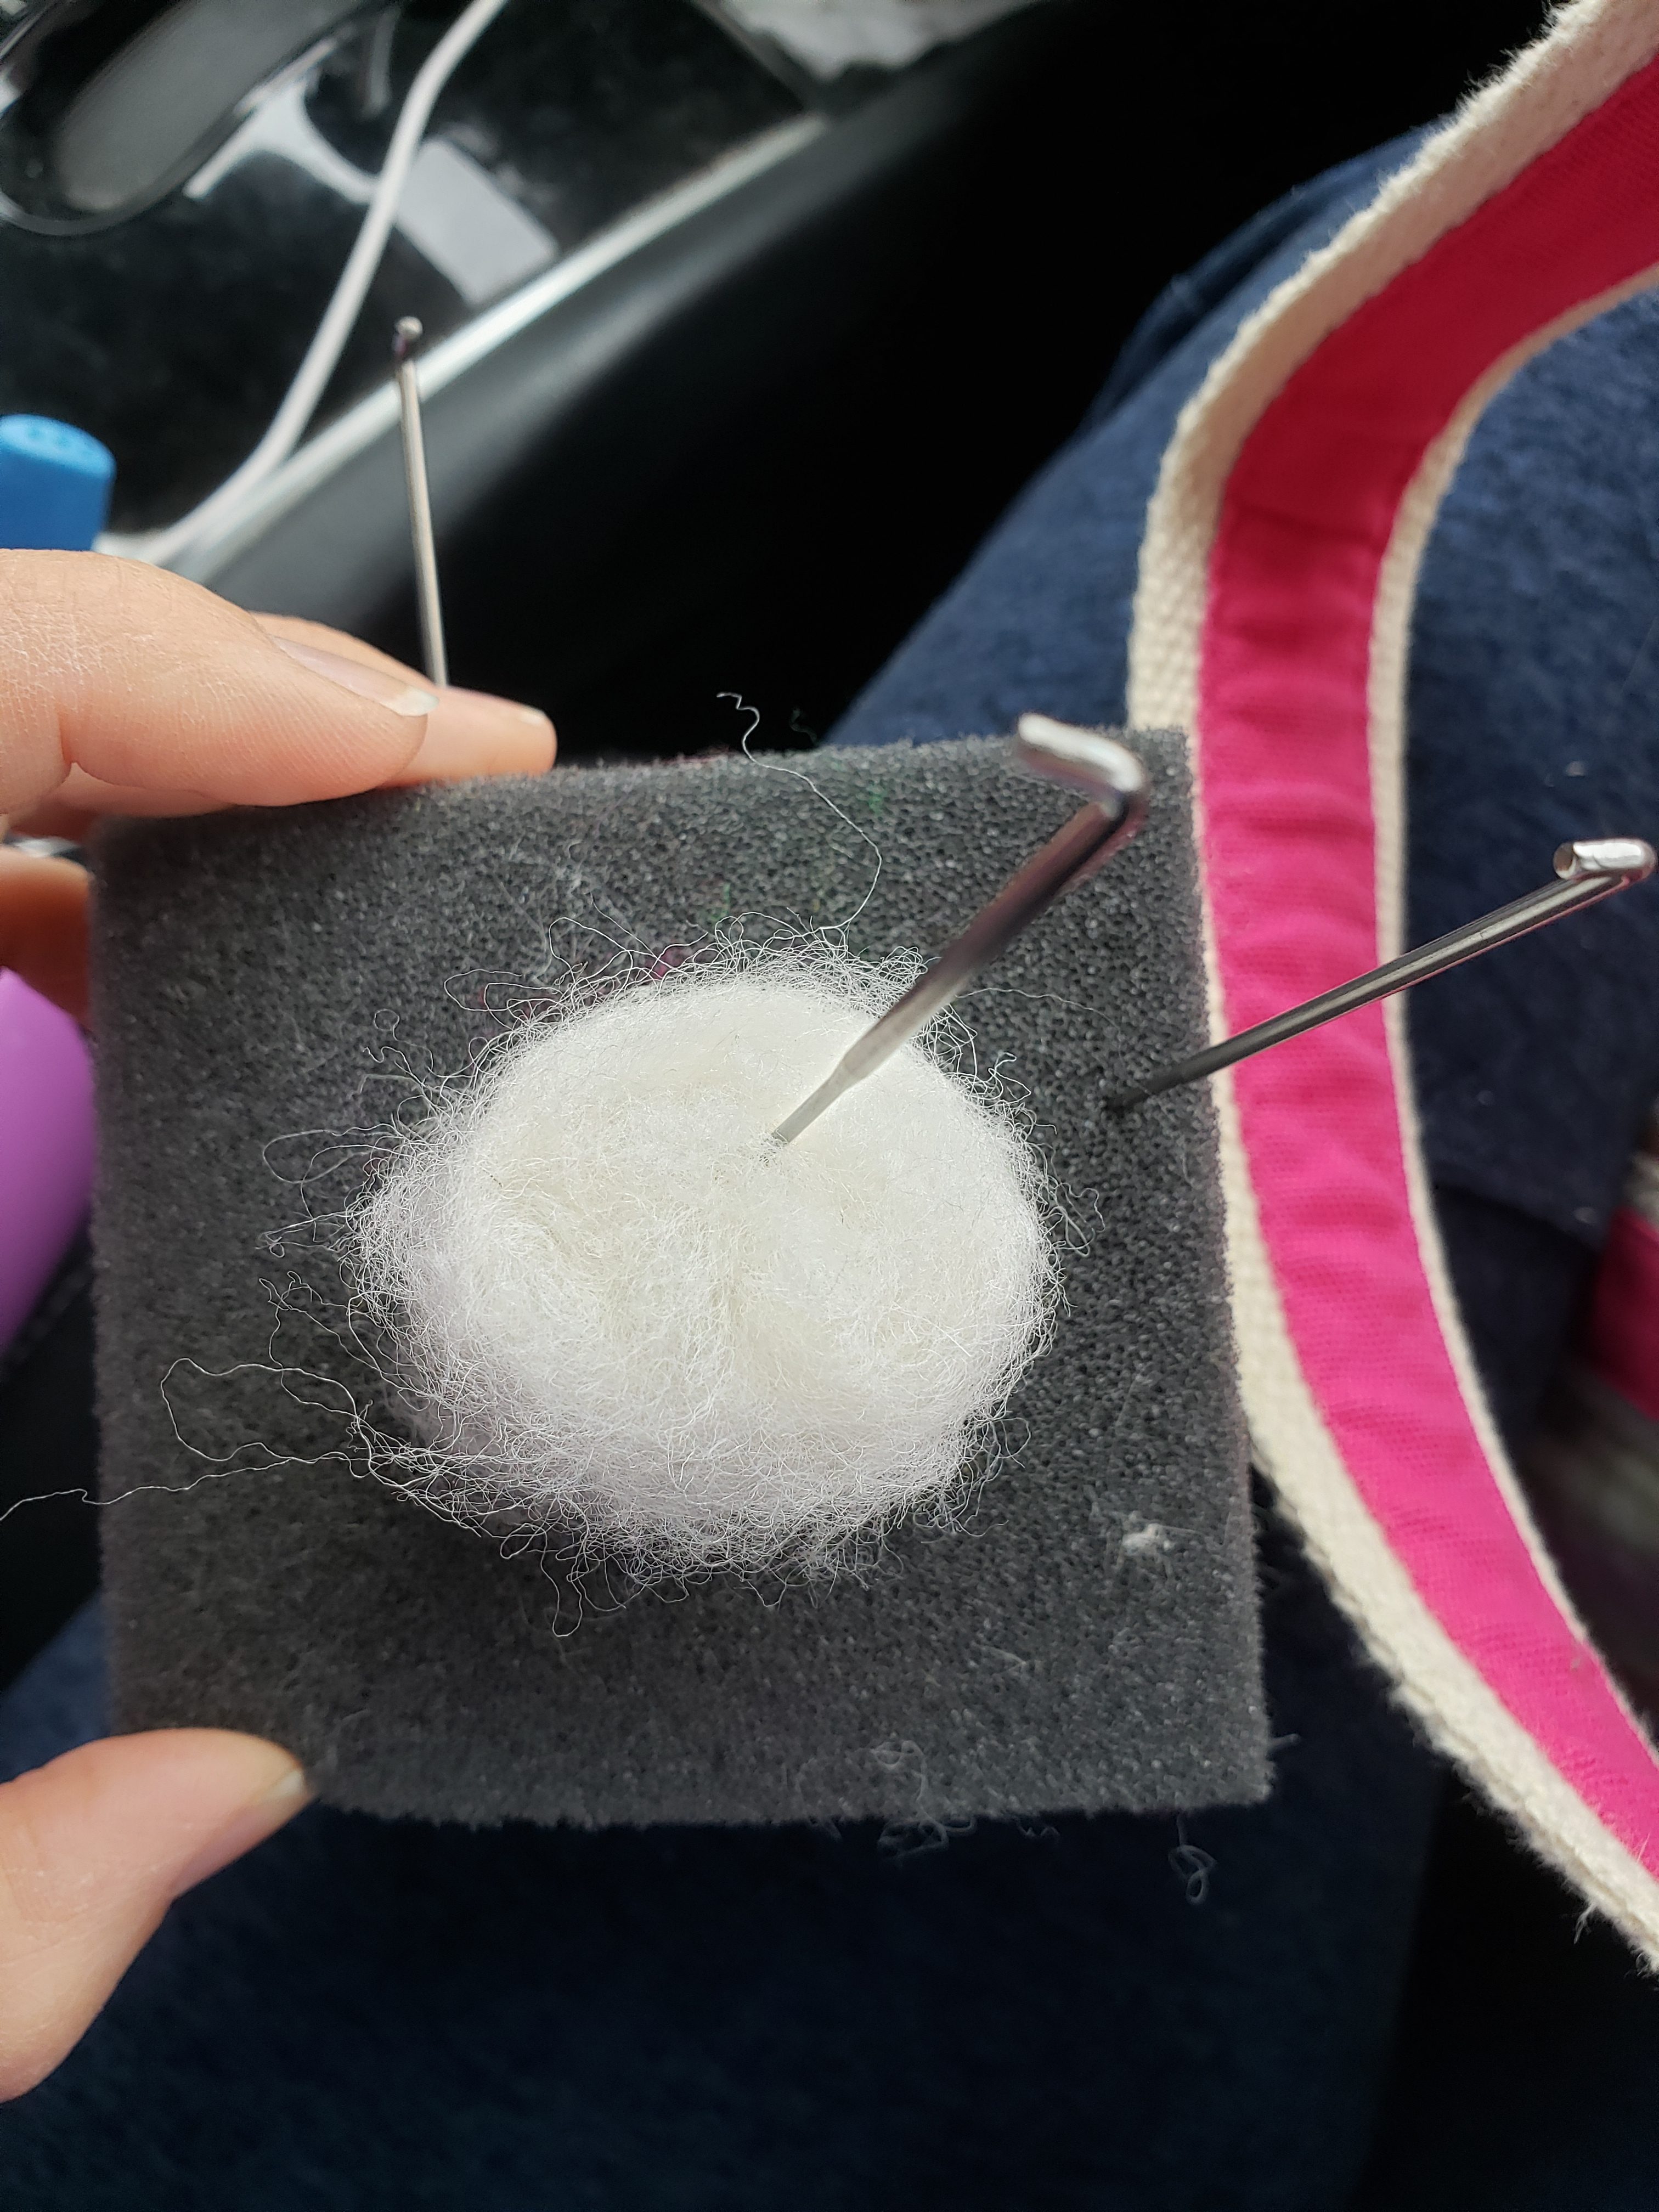
- Start poking the block all around the center doing one full rotation. Turn the block and rotate so you are poking around the sides the contain the un-poked ends.

- Continue poking and rotating along the plane formed by corners opposite from each other.

- Continue poking and rotating along all axes until the wool has reduced in size by 1/3 and is ball like in shape.
(Sorry I switched roving colors here)
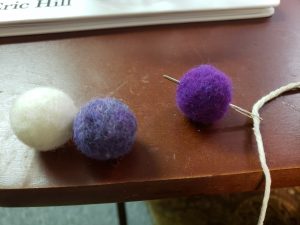
- Repeat for the other two colors.
- When 3 balls are complete and roughly the same size, thread your tapestry needle with the kitchen twine
- Tie a knot in the end of the twine, leaving a tail of about 1.5″.
- Thread the three balls onto the kitchen twine (if you can’t get the kitchen twine through use something thinner like embroidery thread)
- Tie a knot 1″ above the last ball, then thread on the clothespin. Tie another knot above the clothespin to secure it, and leave a tail 1/2″ – 1″ long as desired.
- Fray the ends of the tails of twine.
- Add a few drops of essential oil to each ball. Clip onto your air vents and turn the air on slightly to let circulate.