
Well I’m officially late to post this. For the last several 6 days we have been traveling the southwestern national parks. We saw the Grand Canyon, Antelope Canyon, Glen Canyon and Bryce Canyon. All the canyons were beautiful and we got to go on some cool hikes, see some petroglyphs and ancient native American ruins. So far so good! I’ll give a better update in a few days.

Bryce Canyon (which technically isn’t a canyon) isn’t it gorgeous? It snowed one of the days we were there…
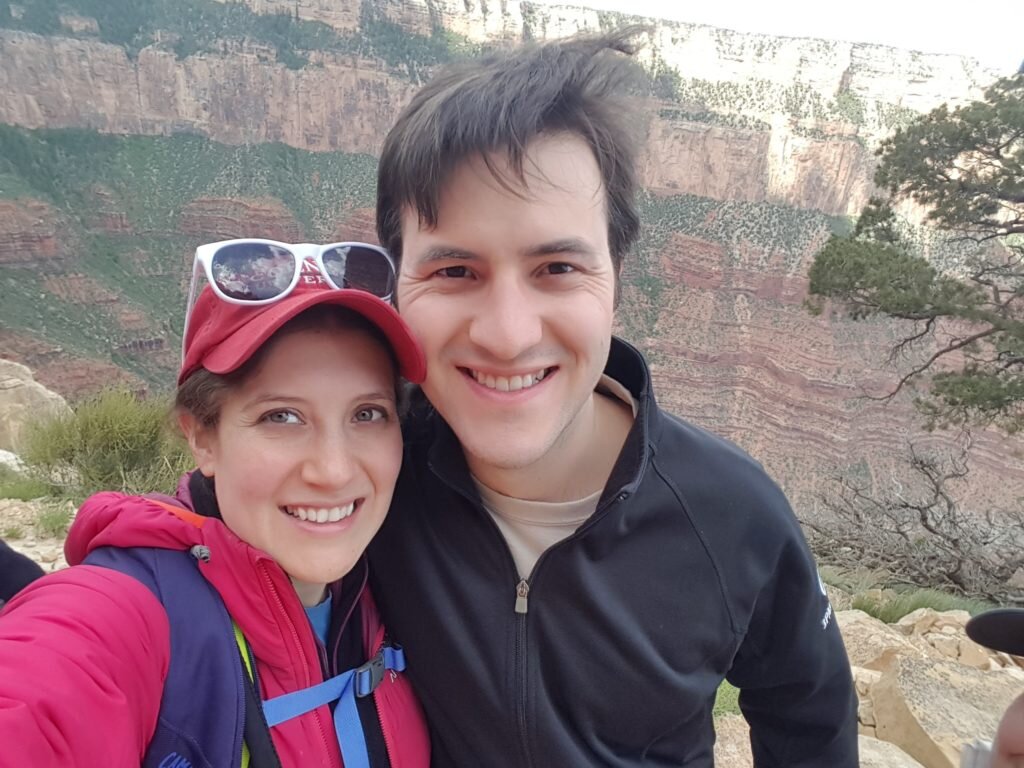
Just one of many pictures of the view from our hikes into/around the Grand Canyon.
Before we left I celebrated our friend Emma’s marriage to our friend Andrew via a bachelorette party. It was a lot of fun. To celebrate I made her some cookies (which are not PG-13 and thus won’t be on my blog, but just trust me they are hilarious.) I also made her a sash with the words, “Future Mrs. Pitman”. (That I can show on the blog.) It was pretty quick! If you have a die cutter it would be even easier, but I don’t, so it took me about an hour.
DIY Bride-to-Be Sash
- 5 feet of 3″ ribbon
- 10″x10″ Glitter Heat Transfer Vinyl Sheet
- Exacto Knife
- Fold ribbon in half. You want the ribbon to sit on the bride’s right shoulder and hit the bride’s left hip. Stitch on the diagonal near the left hip.
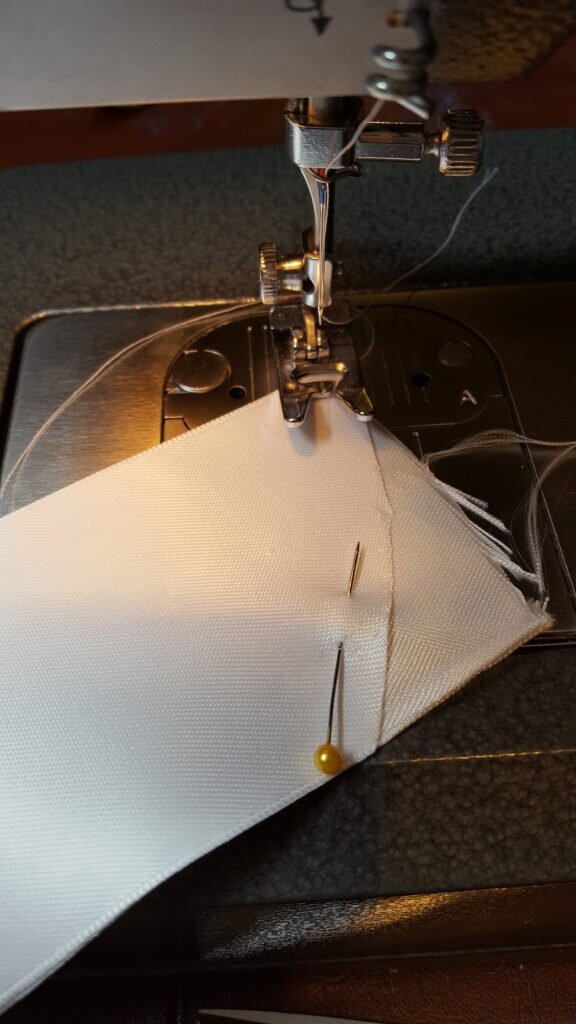
Fold ribbon, stitch on the diagonal.
- Type out your desired message (“Future Mrs. So-and-So”) in your desired word processing program in size 175 Edwardian Script ITC.
- Print.
- Tape your print out face down onto glitter vinyl sheet so it is facing backwards.
- Using exacto knife trace around the message. Press firmly, but you do not need to cut through the transfer sheet.
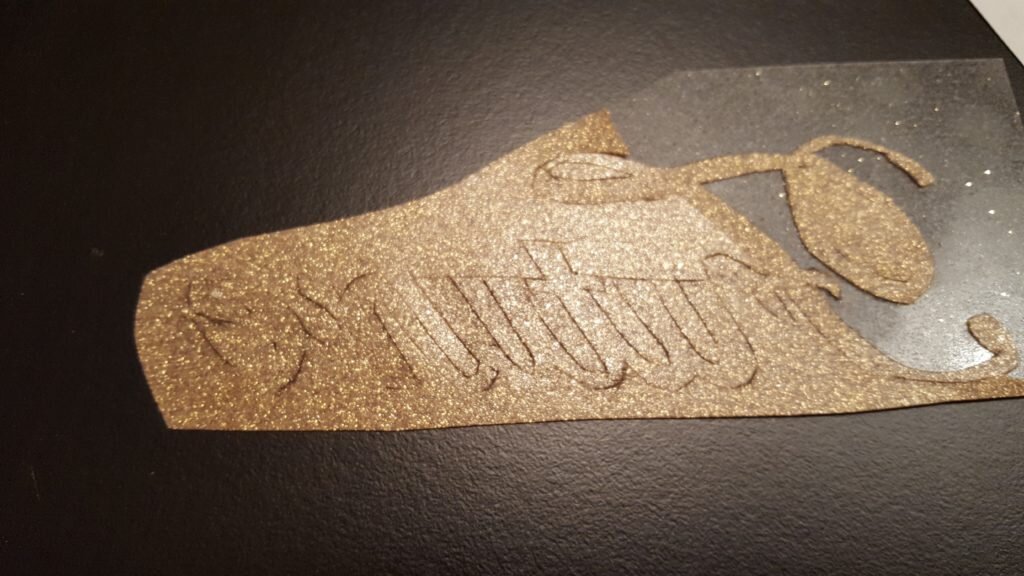
Placing paper over the vinyl, trace with x-acto knife. Do not cut all the way through the backing.
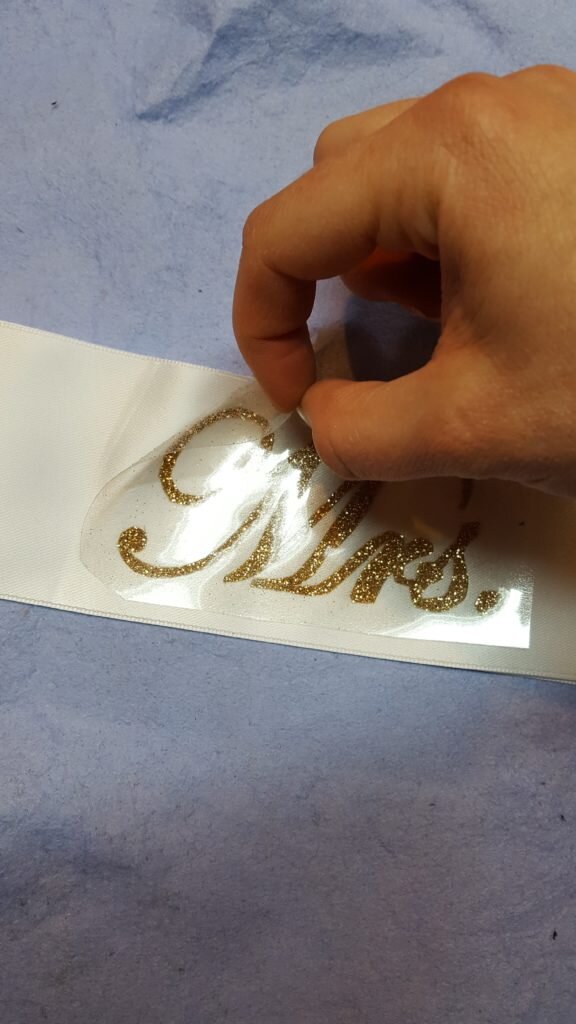
- Trim around each word and remove the glitter from the negative space areas.
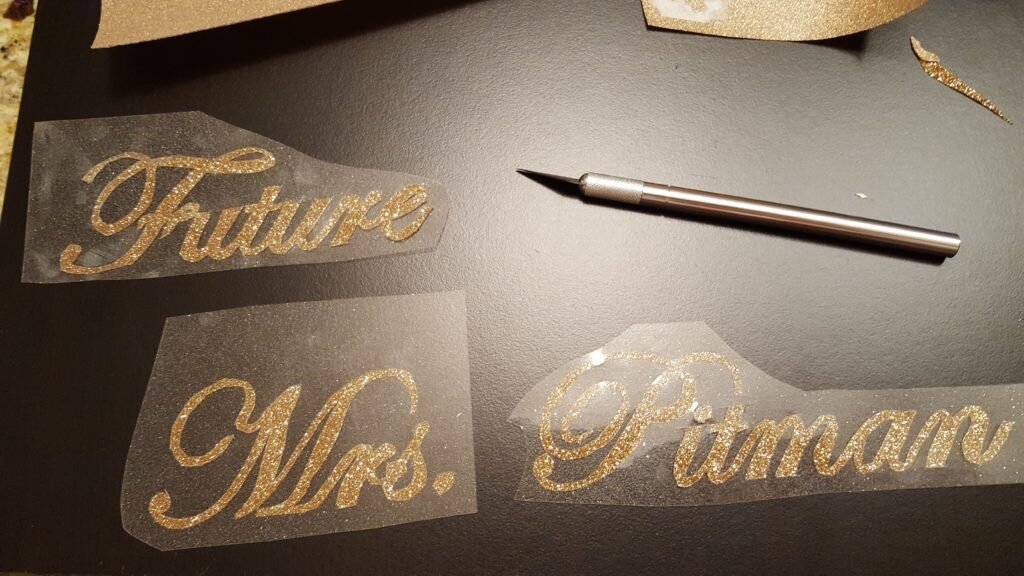
Remove glitter from negative spaces.
- Place each word face down on the sash, spacing evenly. The transfer paper should be on the top, and the words should be face up through the transfer paper.
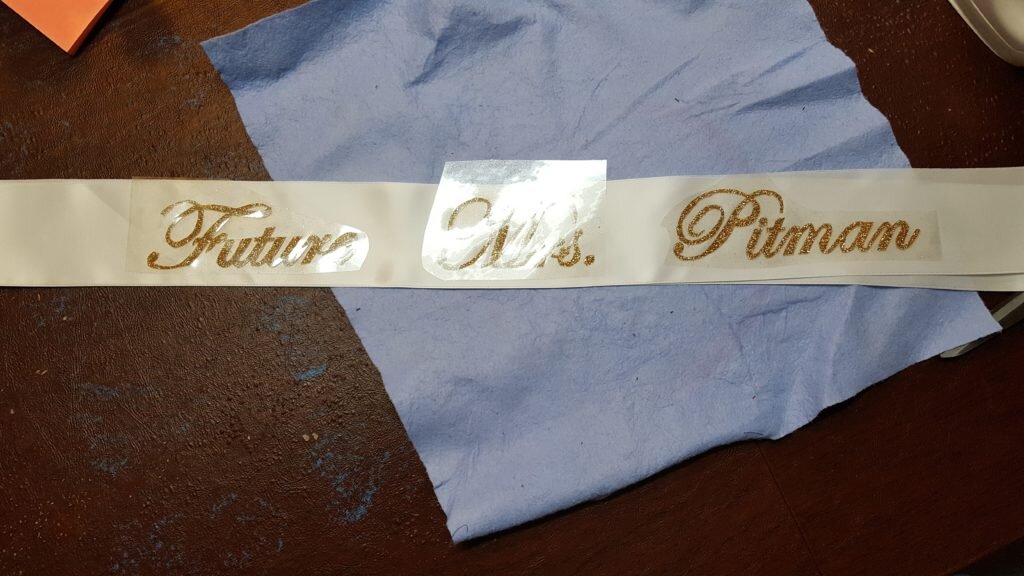
Position words right side up on ribbon.
- Place parchment paper over the transfer paper.
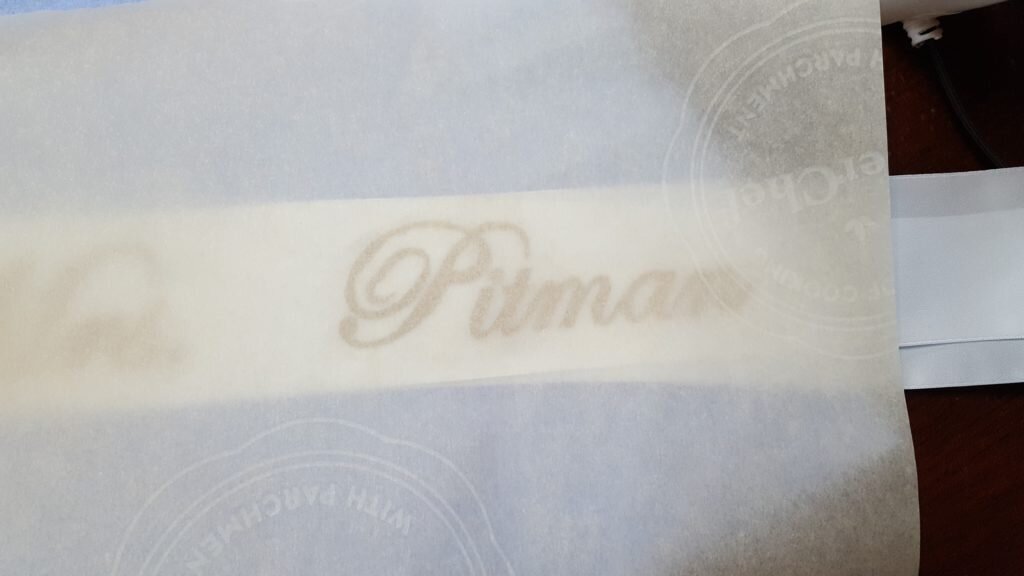
Place parchment paper over vinyl.
- Using iron on the highest setting (320 degrees F), press for 10-15 seconds.
- Gently peel and remove the transfer film while still hot.
After ironing, peel and remove transfer paper while still hot.
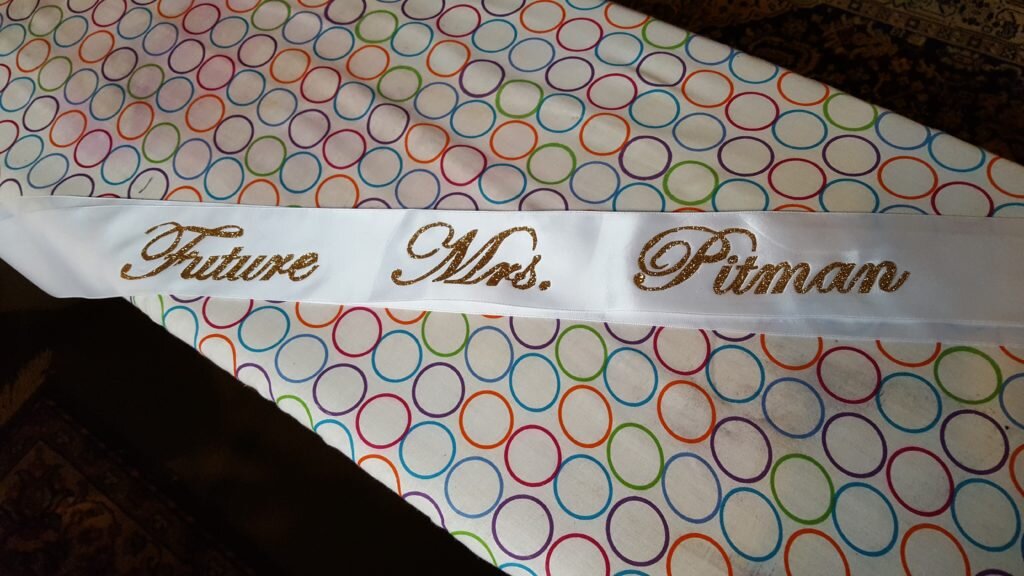
Finished sash!
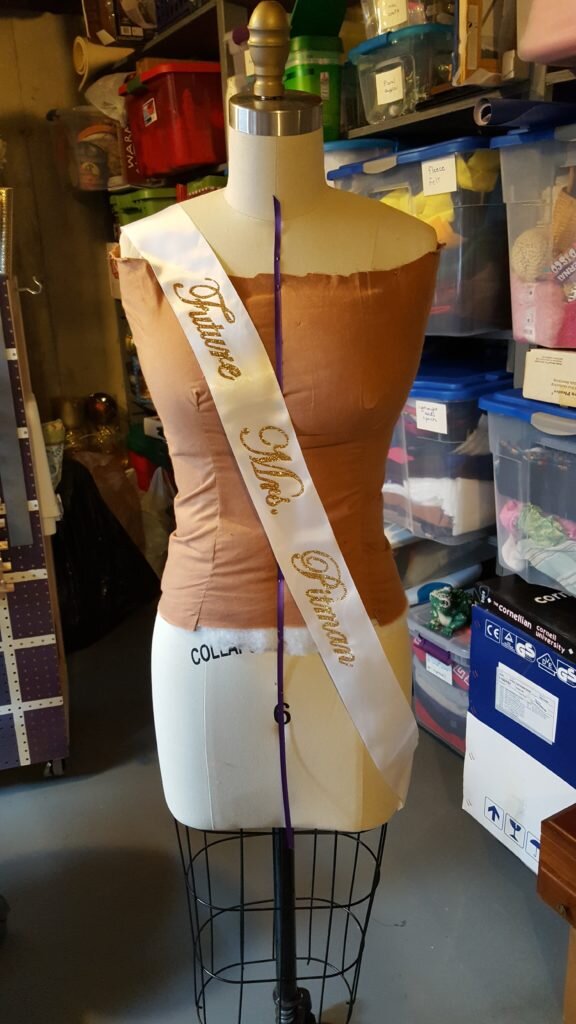
I sadly don’t have one of the bride wearing the sash, but here’s my lovely mannequin displaying the sash!

I loved my Future Mrs. Pitman sash! Thank you so much for coming and making it!
Haha! Anytime Emma! So glad you liked it! Can’t wait for the wedding!!