
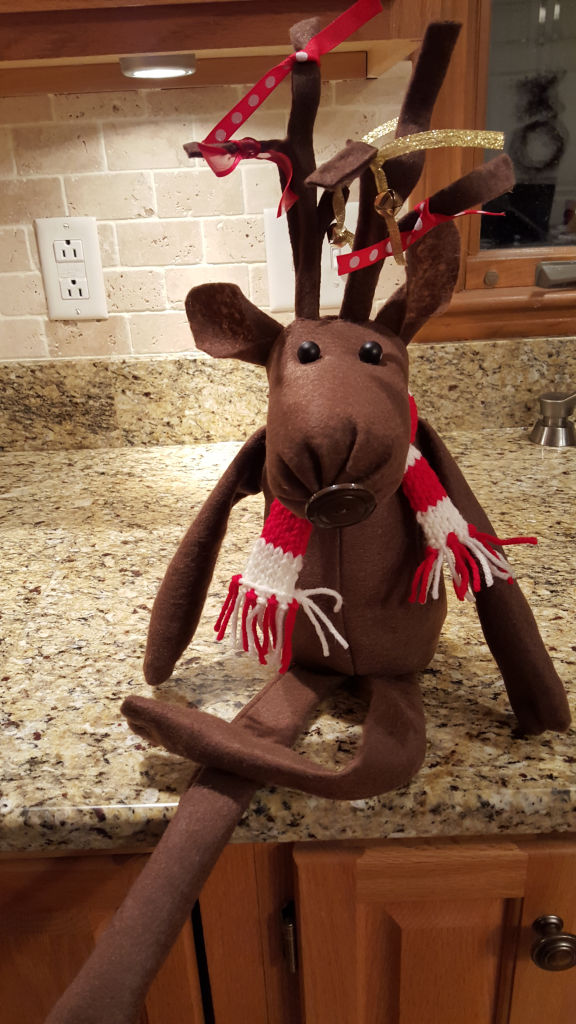
First off – thanks to Ka and Andrew for commenting on my Christmas Traditions post! You both are getting a ChristMoose and you should receive it very soon (if you haven’t already). For those of you who didn’t enter the give away – below are the instructions and pattern to make one of your very own! It is a bit lengthy compared to the other patterns I’ve posted, so if you have any questions definitely send me a note! You’ll notice at the end that they all look a little bit different (just like in real life)! Depending on how long you make the nose, where you put the antlers, or how you position the eyes and ears you’ll end up with a moose with a different personality. So play around with it!
Before I start you off on the moose pattern I wanted to mention that I’m going to be doing one give-away every month this year, so check back every Monday to better your odds of winning. We’ll have some cookbooks and some other homemade items up for grabs. I’m also working on a very beginner sewing series for those who want to get into sewing but have no idea where to start. I’ll hope to have some info on that soon too. I’ve also been working for the last couple weeks to get my sewing studio in order (aka basement). It is taking forever, and since it is an unfinished basement I’m trying my best to make it feel less like I’m sitting between the oil burner and the oil tank… I’ll show you some pictures of that too this month. Okay, without further adieu I give you instructions to make this little cutie!
To make a dapper Christmas Moose you’ll need:
- About a yard of brown felt or fleece material (I used felt)
- Brown thread to match
- About 2 feet of covered floral wire
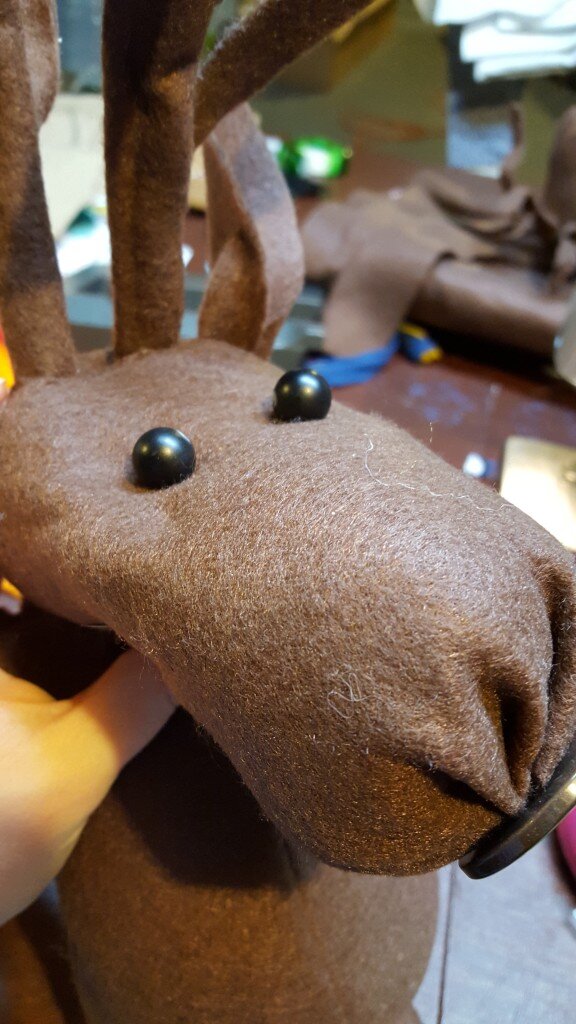
- A large button for the nose (mine were about 1 3/8″ wide)
- Two large black beads for the eyes (mine were about 1 cm wide)
- scrap fabric for a beanbag
- sand, rice or beans for the beanbag filling
- stuffing
- scrap ribbon and bells to adorn the moose’s antlers
- fabric or yarn for a scarf
- A glue gun
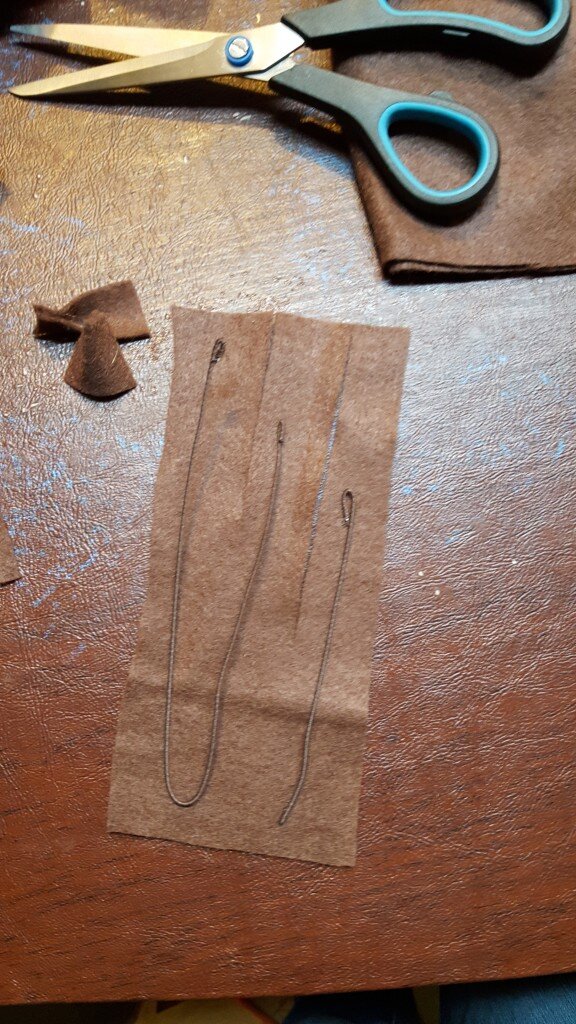
- Pattern here:
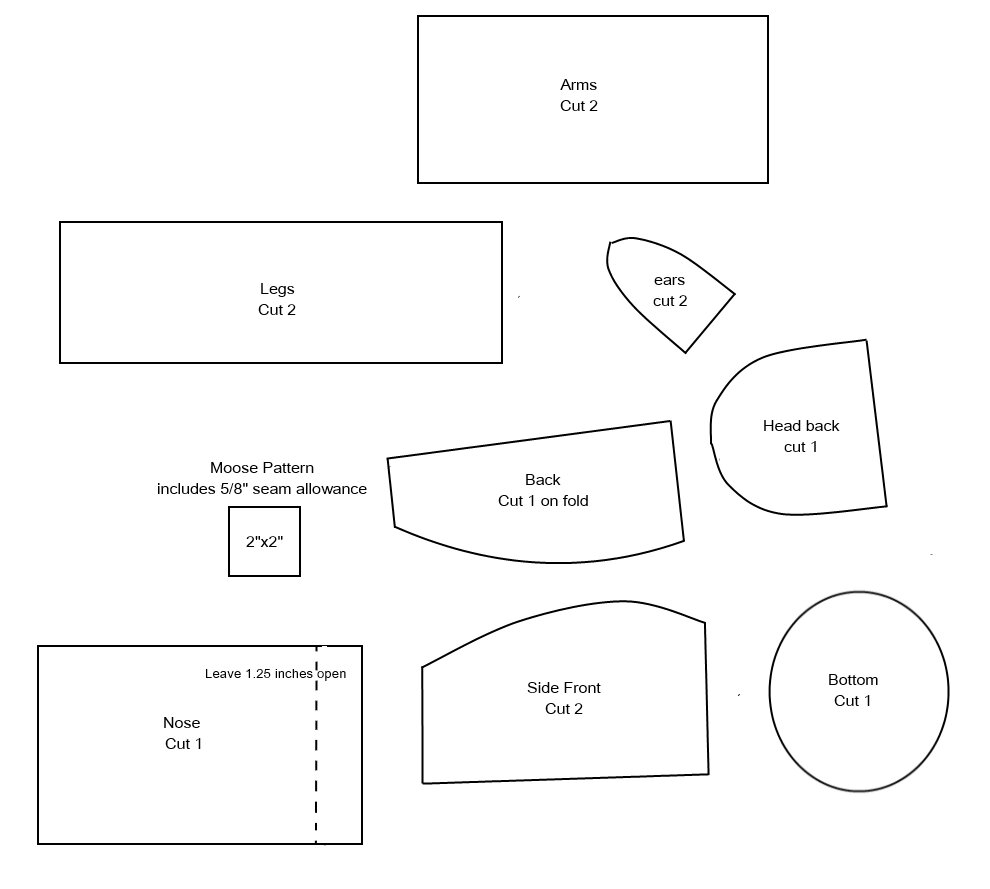
- Start by cutting out all your pattern pieces from the pattern above. They already include 5/8″ of seam allowance. Make sure when you print it it is scaled to match the 2×2 square.
- Using brown felt or fleece (I used felt) cut out all pattern pieces.
- Take the two front pieces and pin and stitch down center front, forming the moose’s belly.
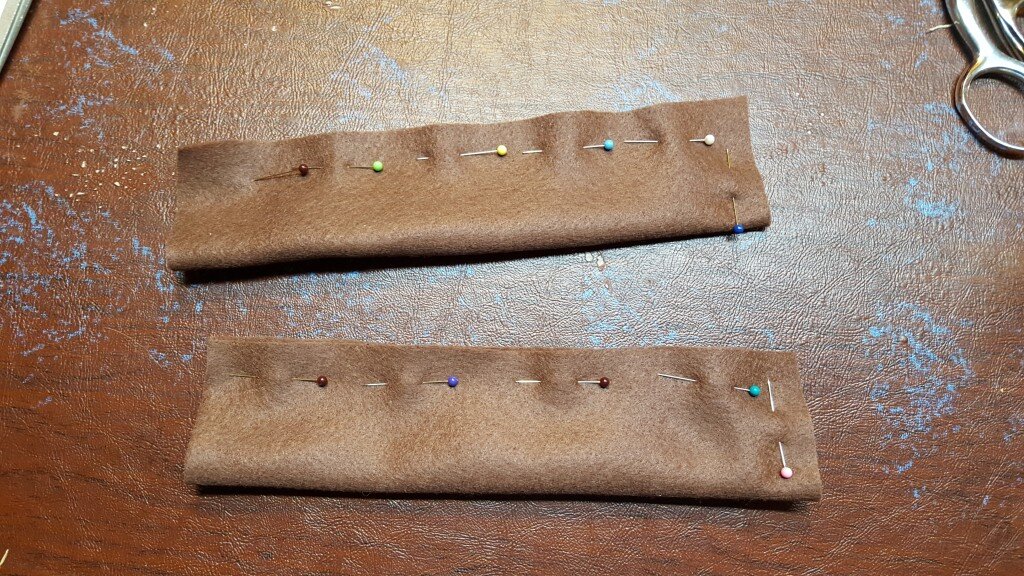
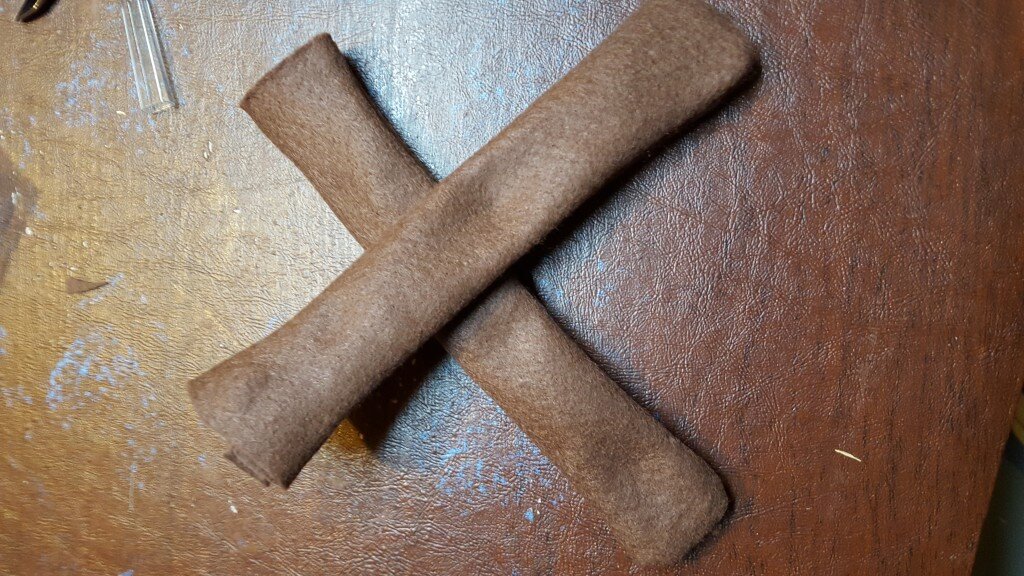
- Fold the rectangle for one arm in half lengthwise. Pin and stitch on the length and one end, leaving the other end opened.
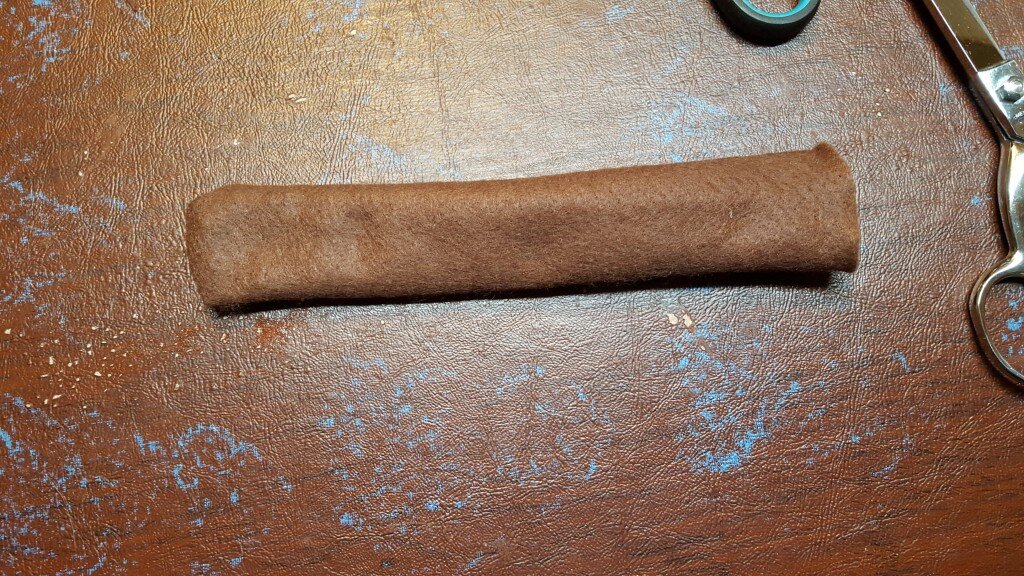
- Turn out the arm so the right side is facing outwards. You may need a chop stick or long object to help with this.
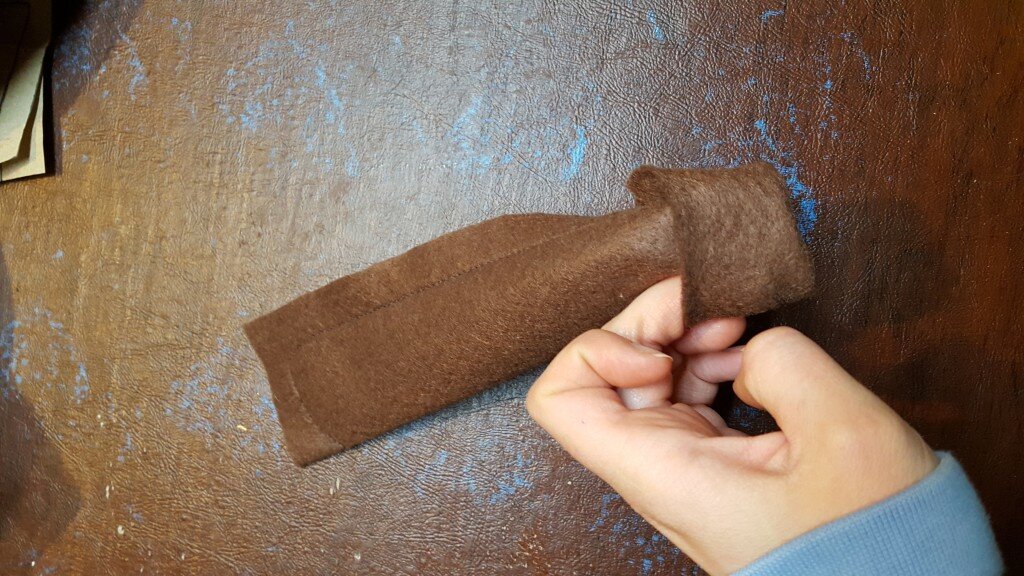
- Put a tiny bit of stuffing in the “hoof”, enough to make the hoof a bit puffy for about an inch and a half.
- Repeat step 4,5,6 with the other arm and both legs.
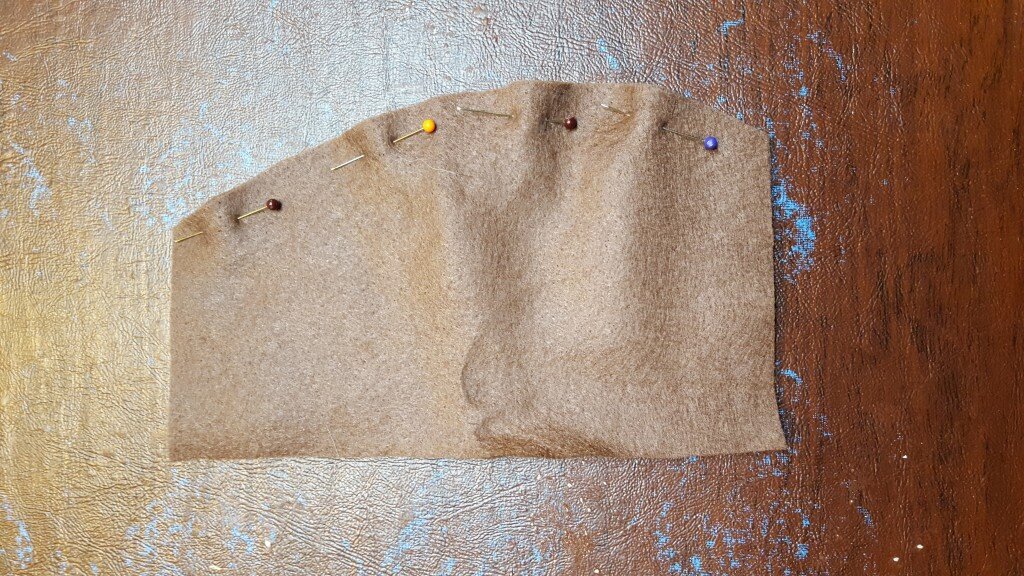
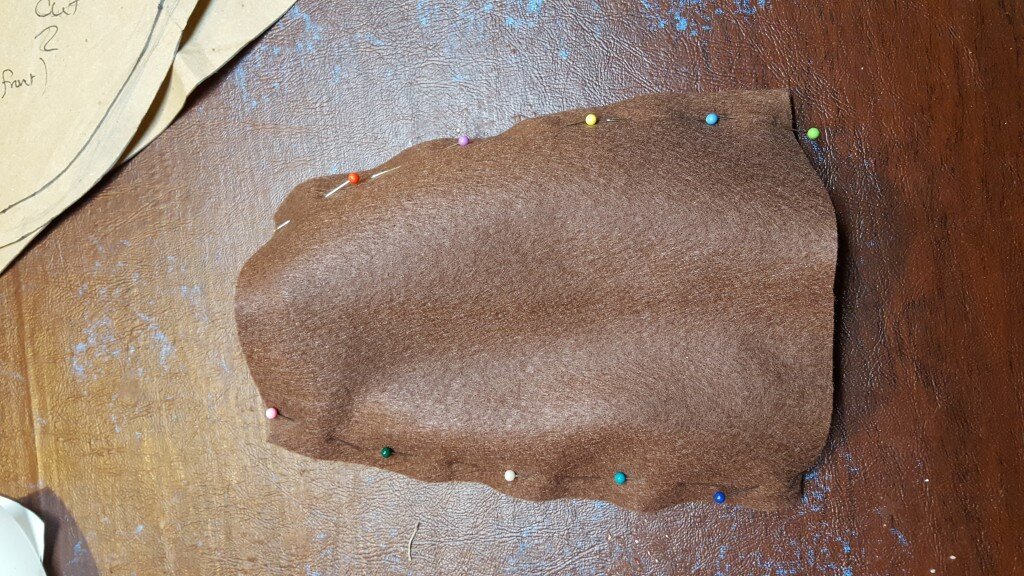
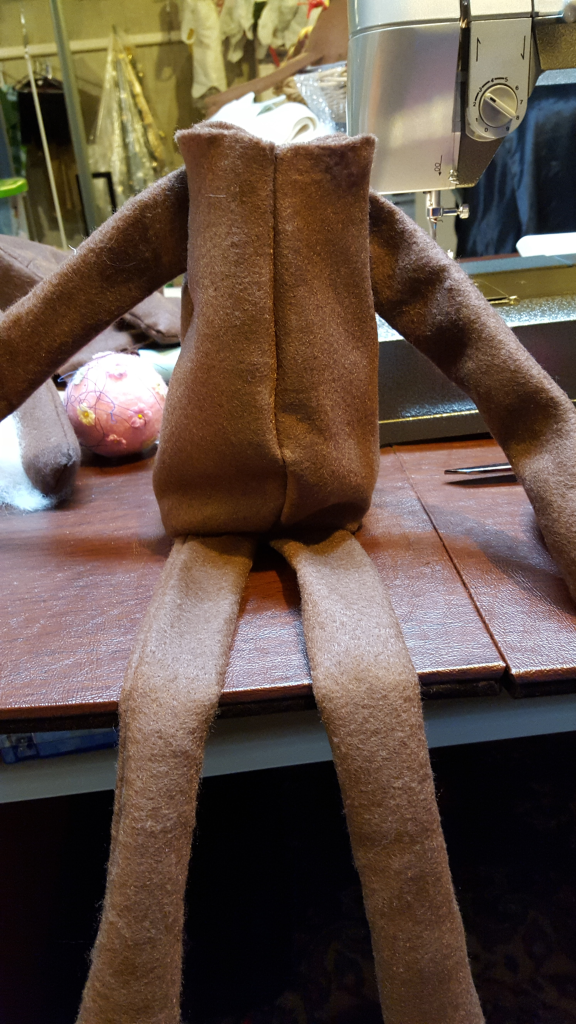
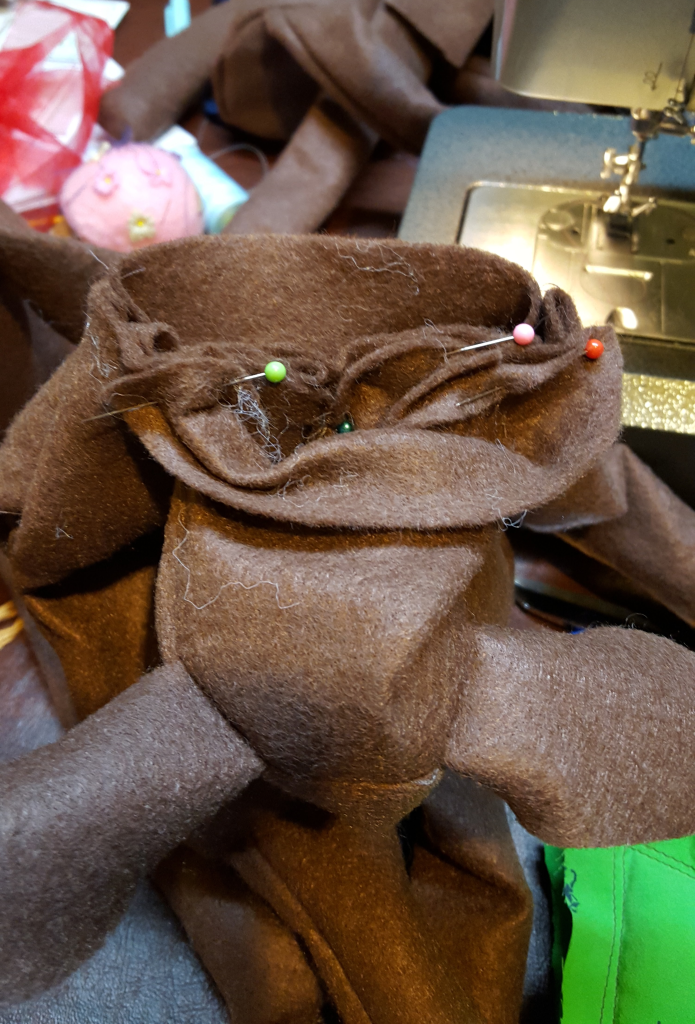
- Pin each side front to each side back, right sides together to form the moose’s torso.
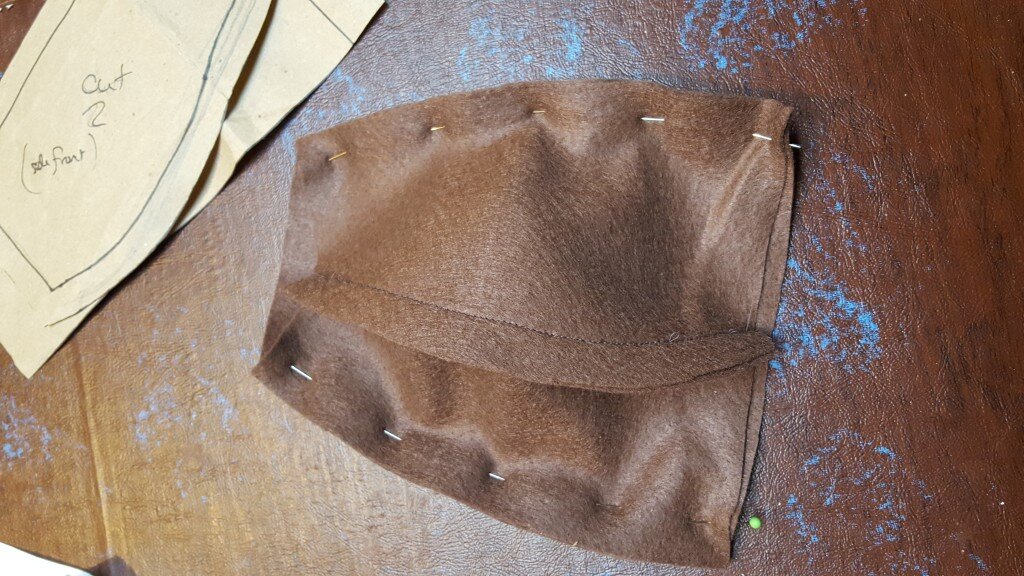
- Cross the arms, and insert into the moose torso.
- Remove the top two pins at the neck area on each side and re-pin, inserting the arms at a 45 degree angle. Stitch side seams.
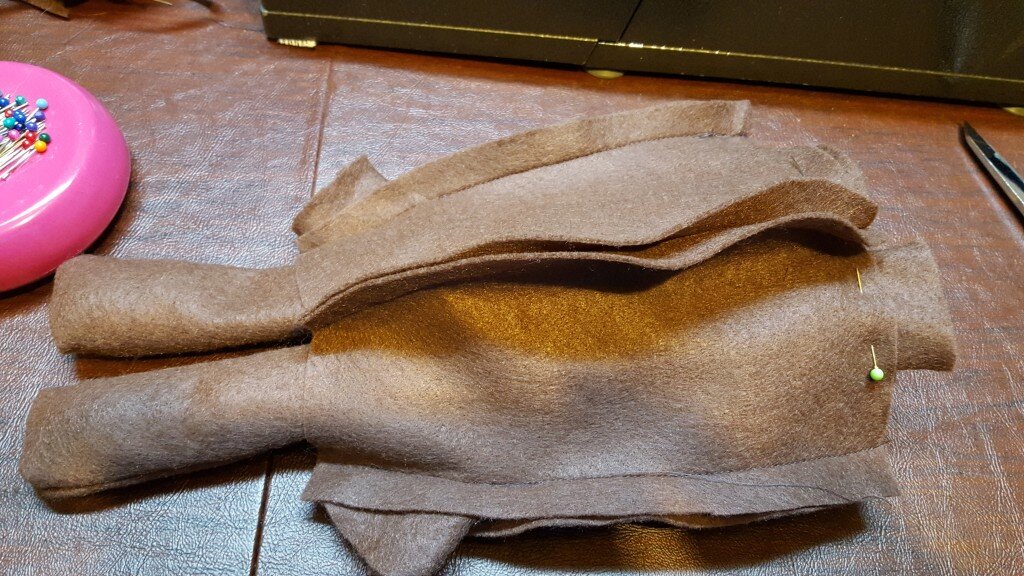
You can see here the legs pinned at center front and the arms sewn into the side seams.
- Pin both legs side by side on either side of center front no the inside of the torso. You’ll want them to touch but not overlap (see above).
- Pin the bottom circle along the torso to form the moose’s rump. When you get to the pins holding the legs, remove the pins and reinsert to hold all layers of fabric together.
- Stitch & open out the moose.
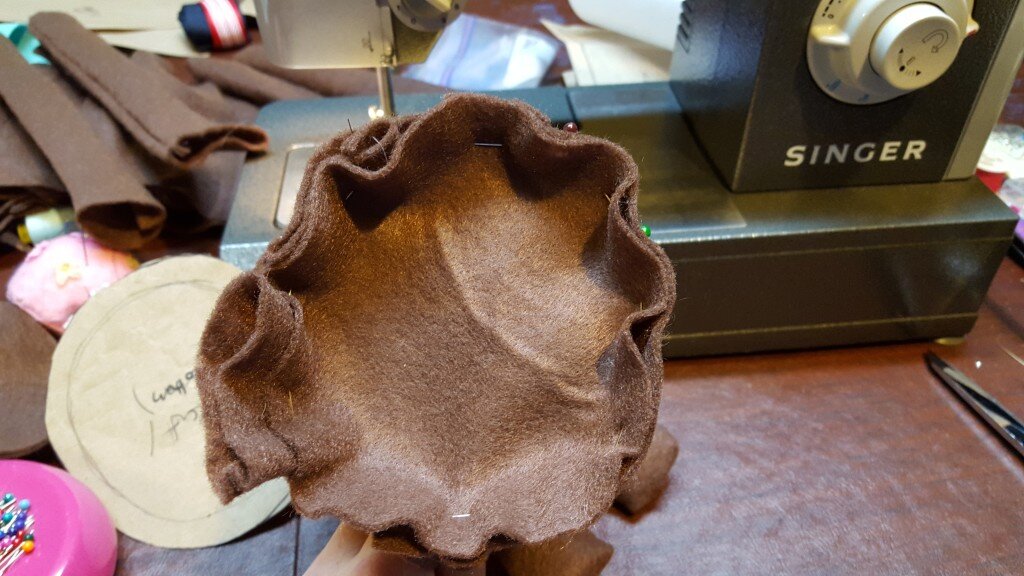
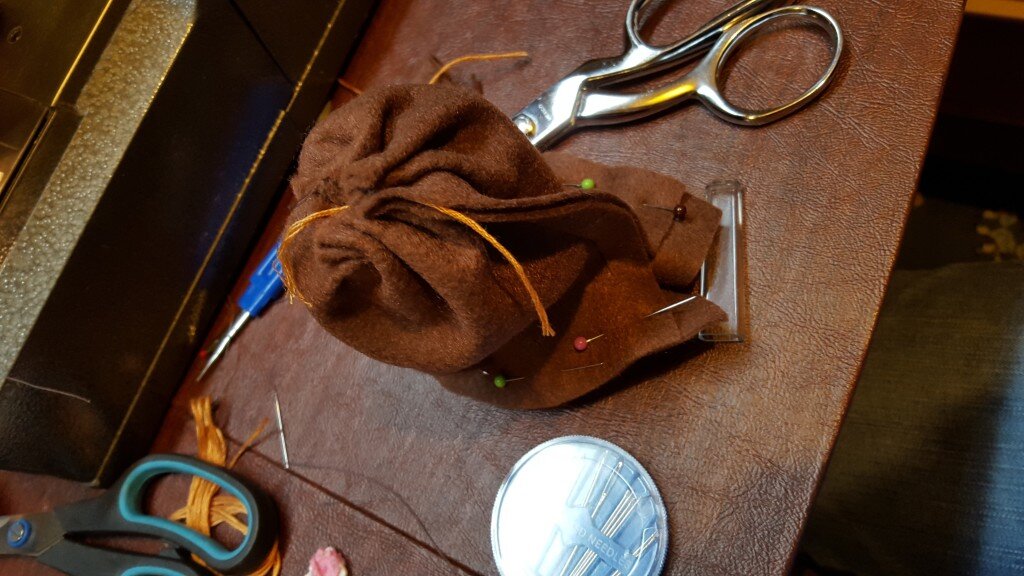
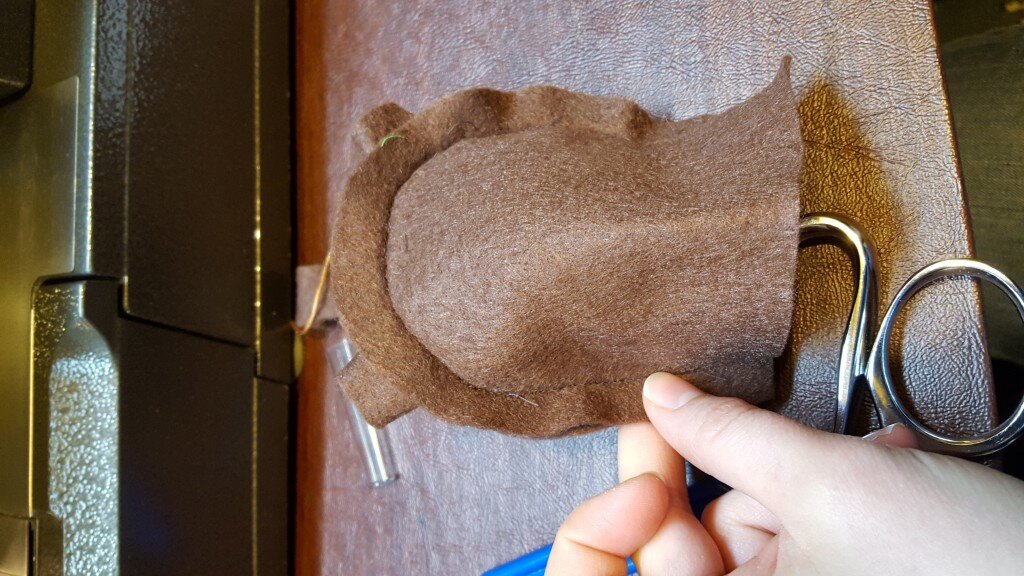
- Next create the moose’s head by folding the moose’s head piece in half along the width.
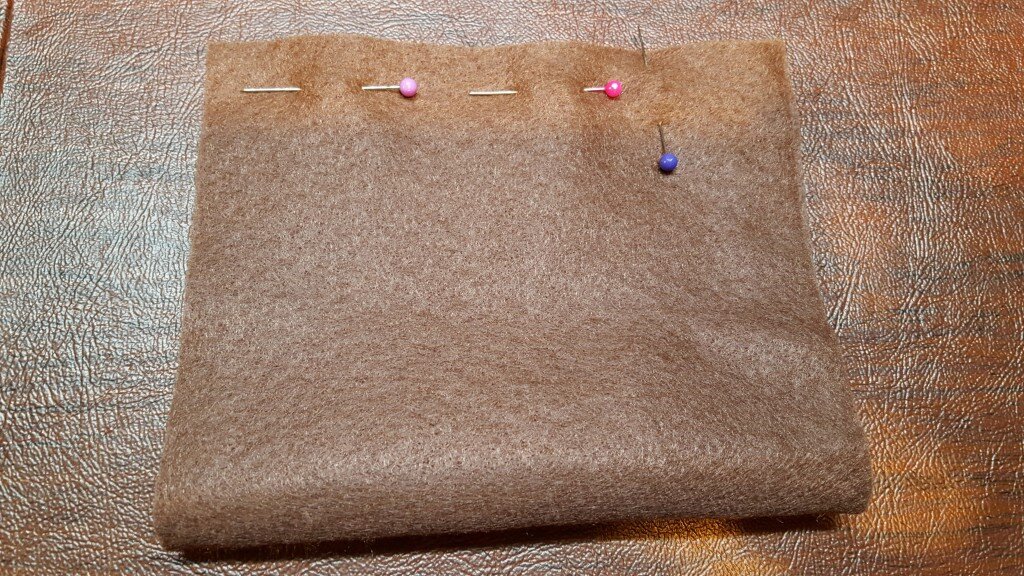 Pin & stitch, leaving 1.5 inches opened.
 - Using a doubled thread, stitch a running stitch half an inch from the bottom of the tube formed by step 14. Do this on the wrong side of the nose.
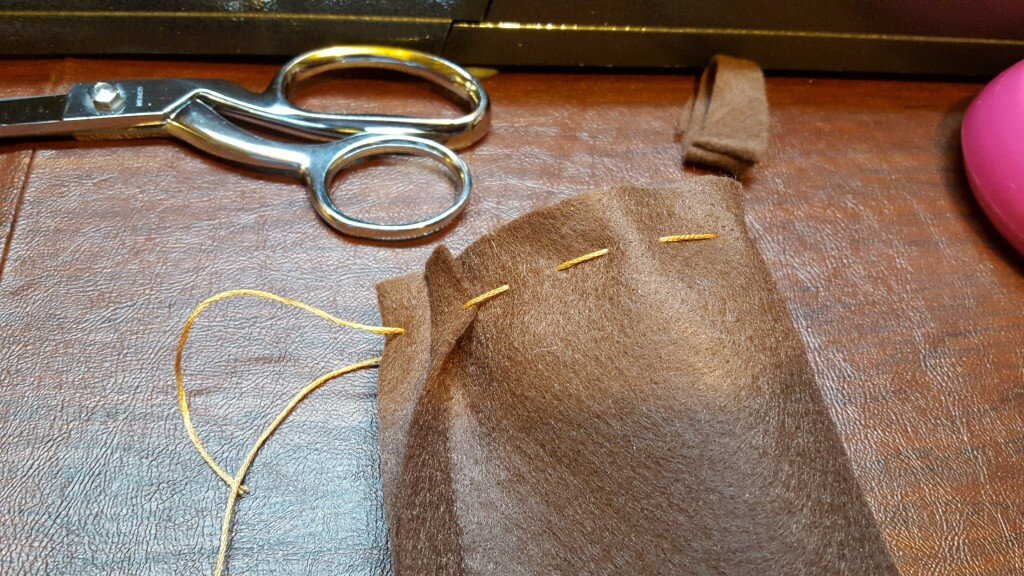
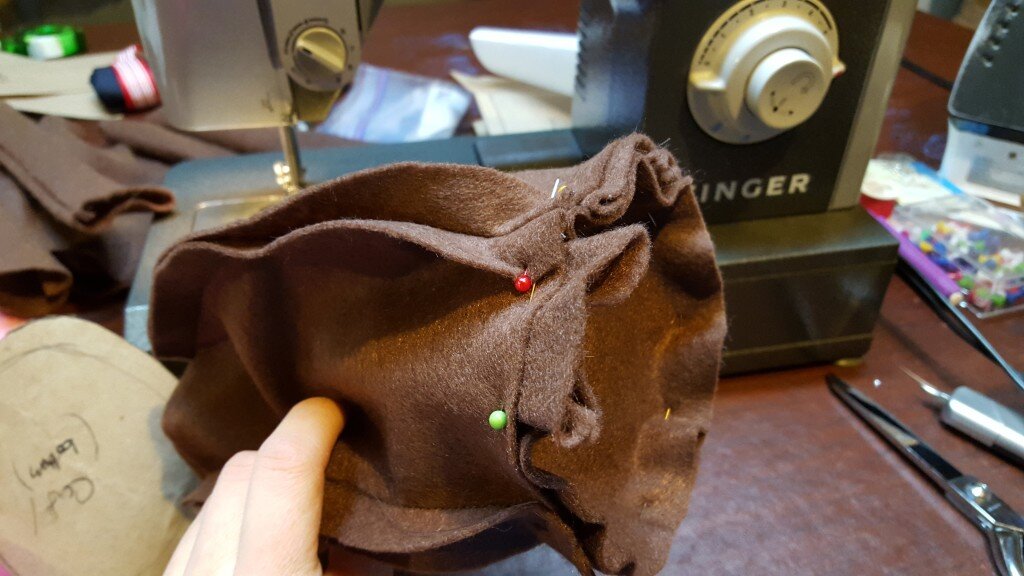
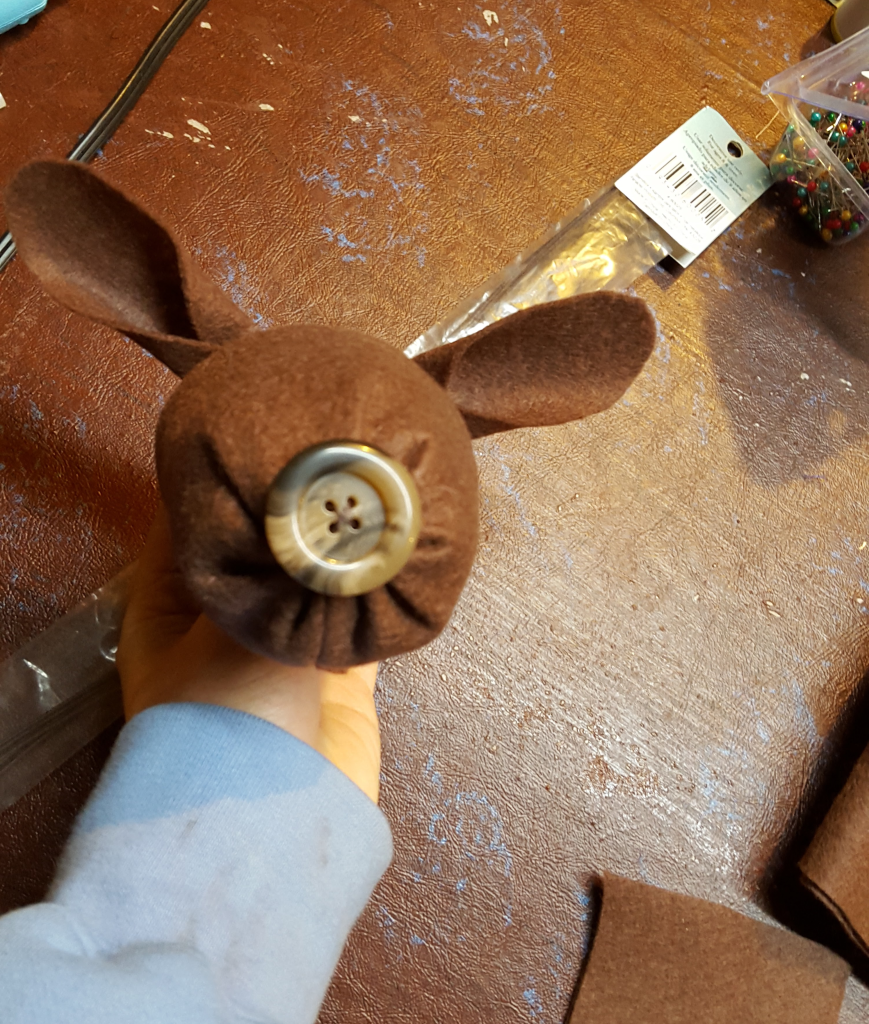
- Pull both ends of the thread to gather tightly to form the moose’s nose. Tie securely.
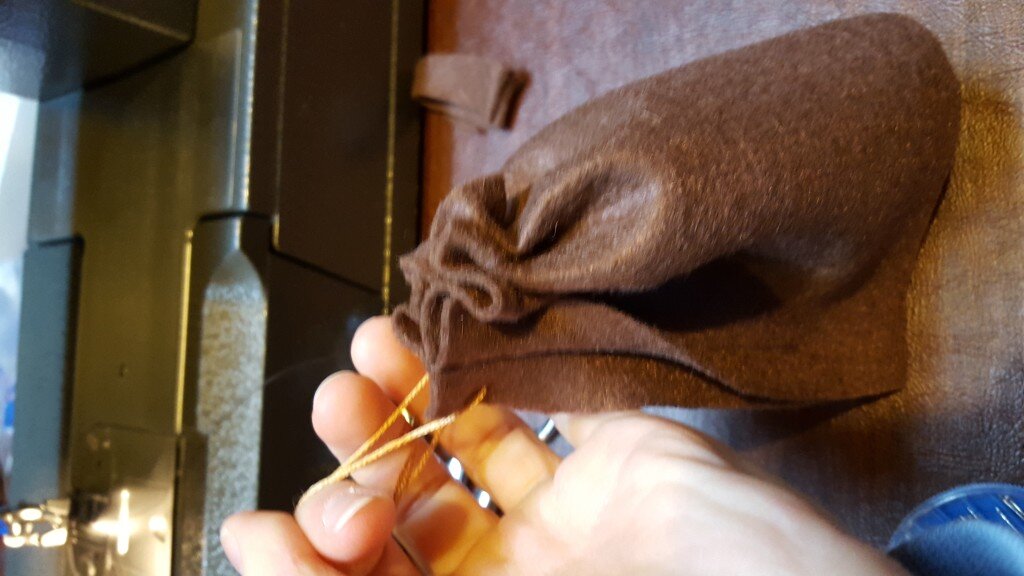 When folded right side out it will look like this.
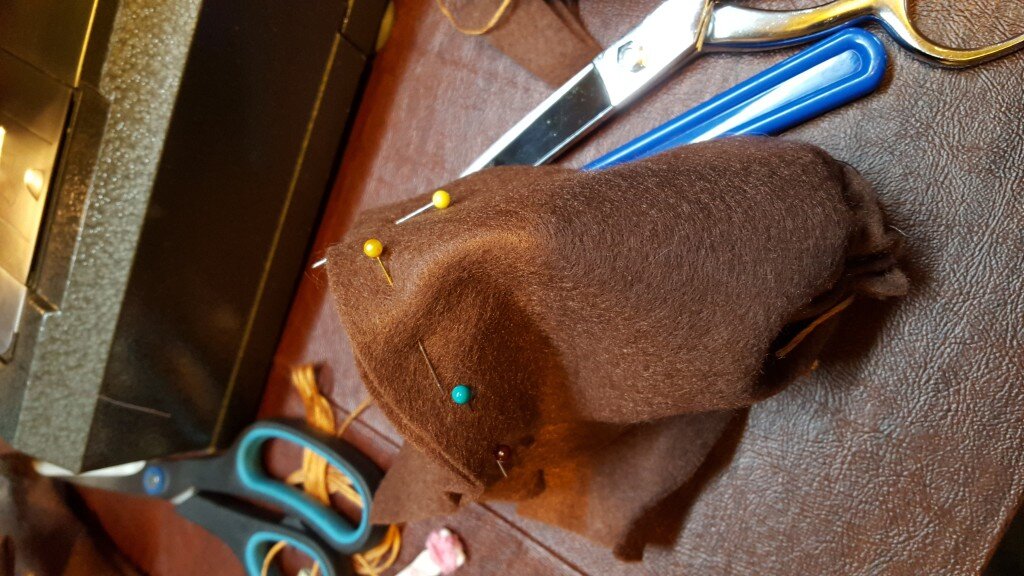
- Pin the back of the head piece onto the nose cylinder. Be sure to align the nose properly by folding the tube in half and matching this to the top of the rounded back piece.
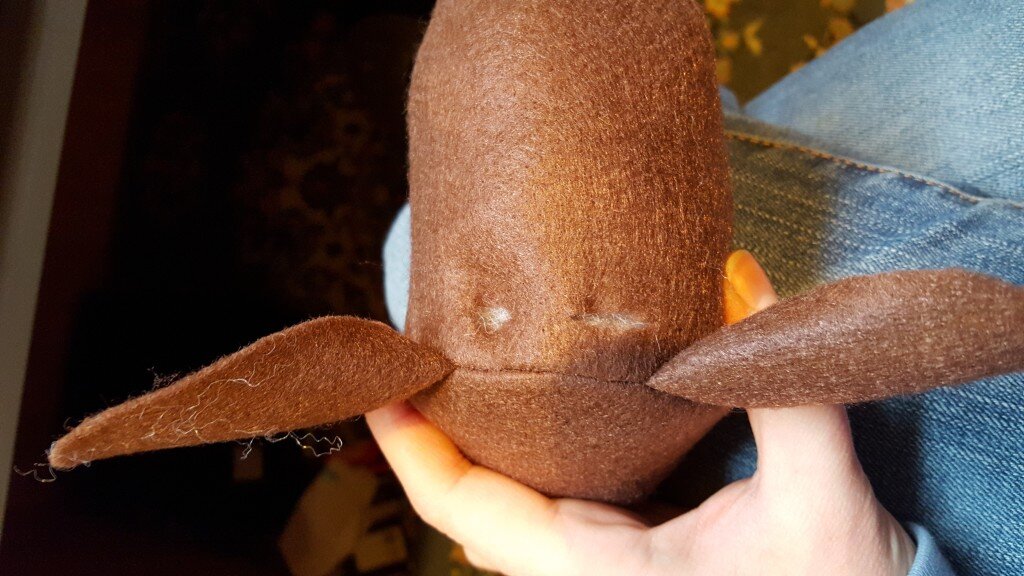
- Take and ear and pinch both sides of the bottom inwards to give the ear some depth.
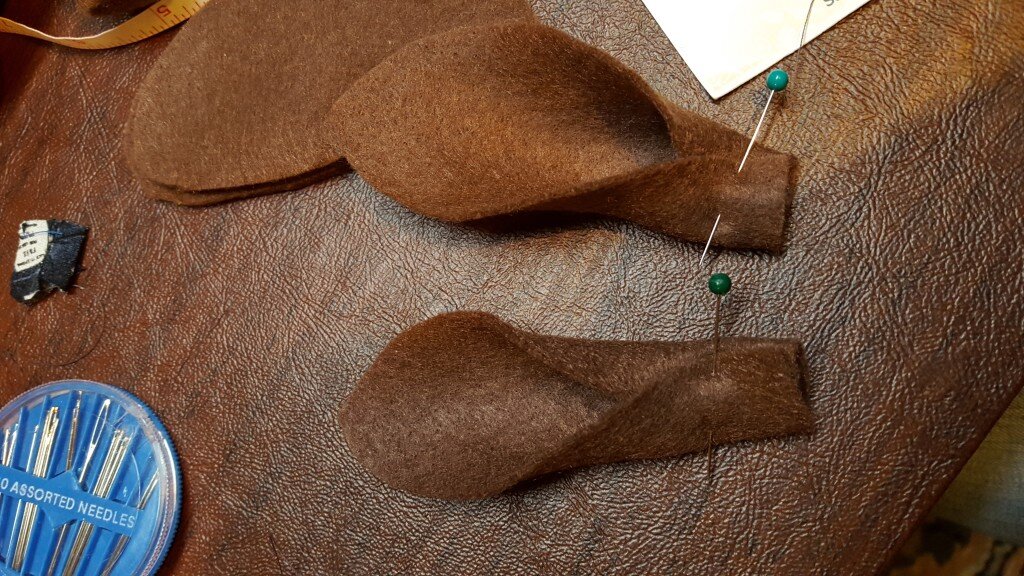
- Pin the ears on the inside of the head an inch or so off from the top center. Make sure ears are facing down when you insert them like so. (Shown here on the outside for clarity, but make sure to actually put these on the inside.)
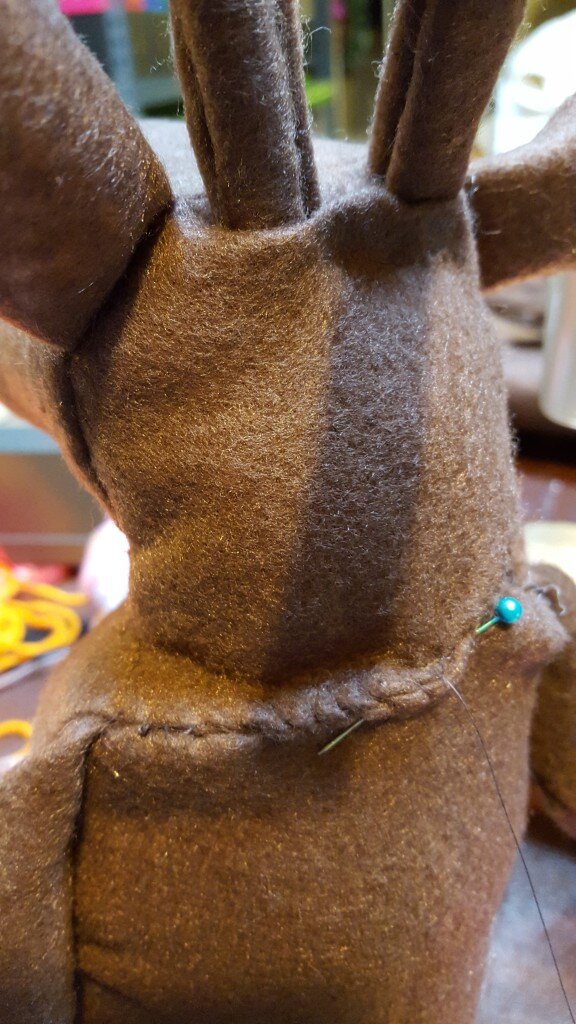
- Stitch, leaving the neck opened.
- Open out.
- Sew button nose on snout covering the gathers.
- Pin the right sides of the neck front together and sew leaving the back of the neck opened.
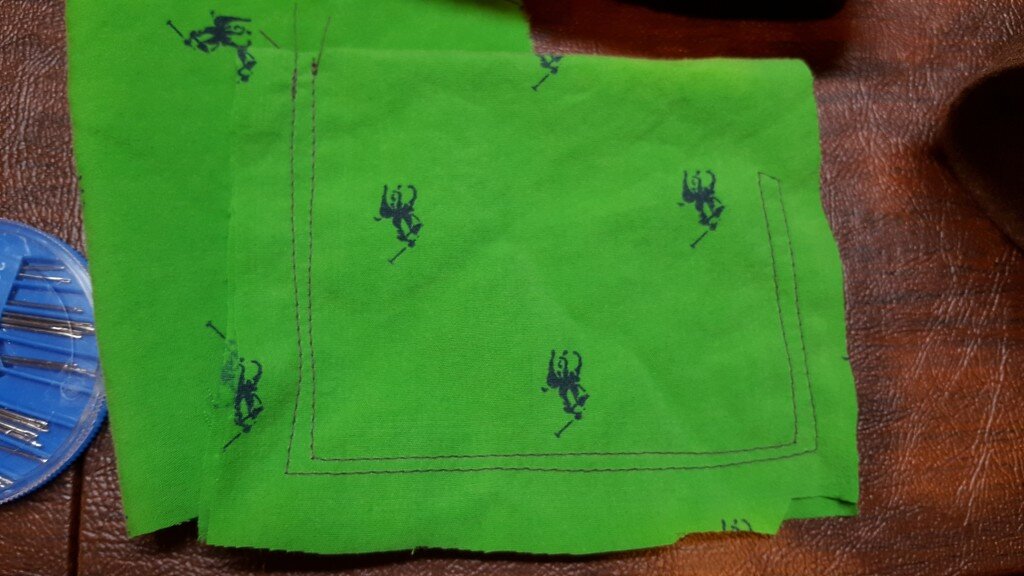
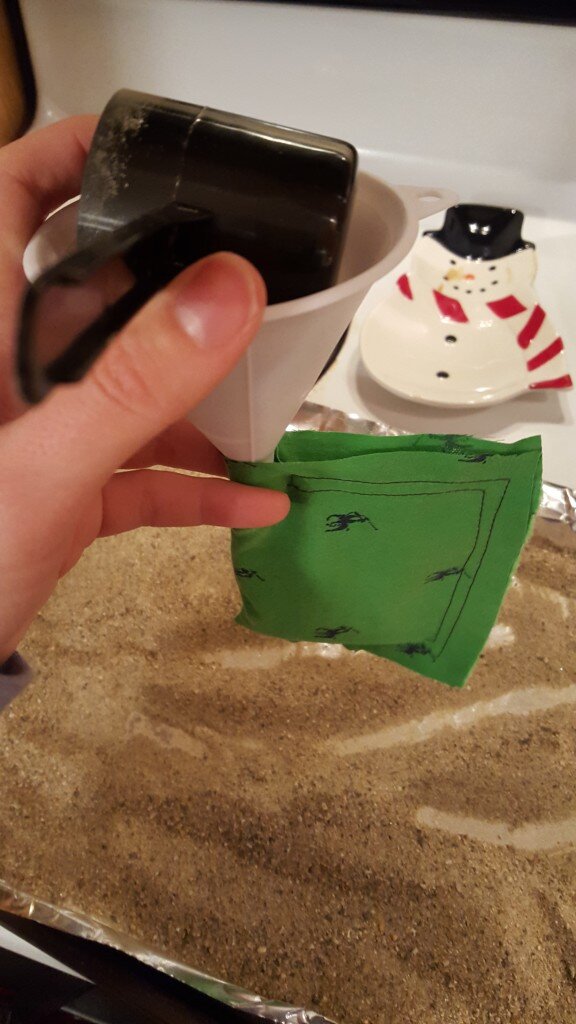
- Next create a bean bag to weight the moose’s bottom. I used scrap material to cut an 8 inch by 3 inch square that I then cut in half. I stitched along the edges (twice about 1/4 inch apart for security) then left a 3/4″ opening on the bottom to fill.
- Using a funnel I poured in 1/2 cup of clean sand. You can use dried beans or rice instead, or anything fairly heavy.
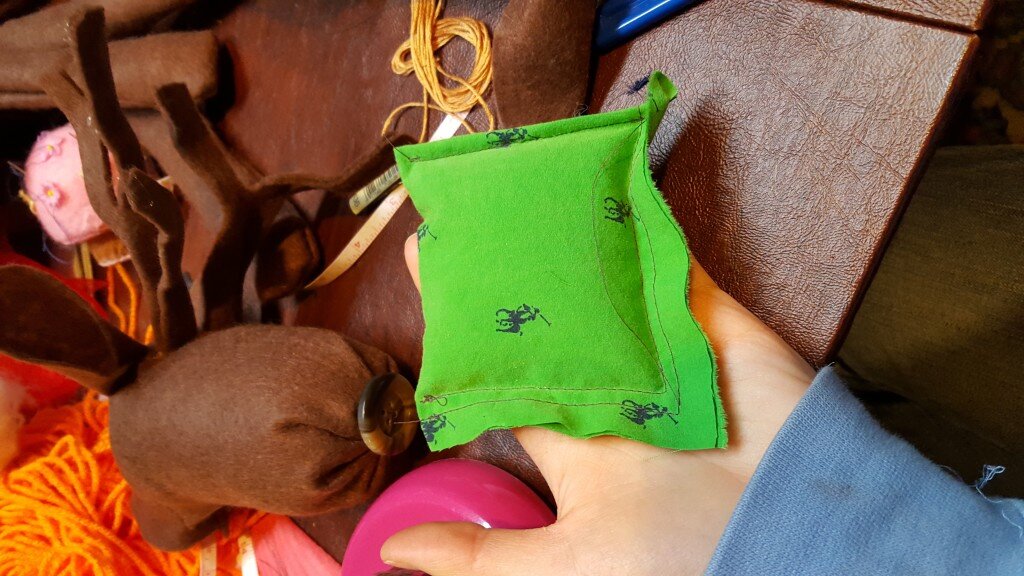
- Next fold the unfinished edge over on itself and sew closed.
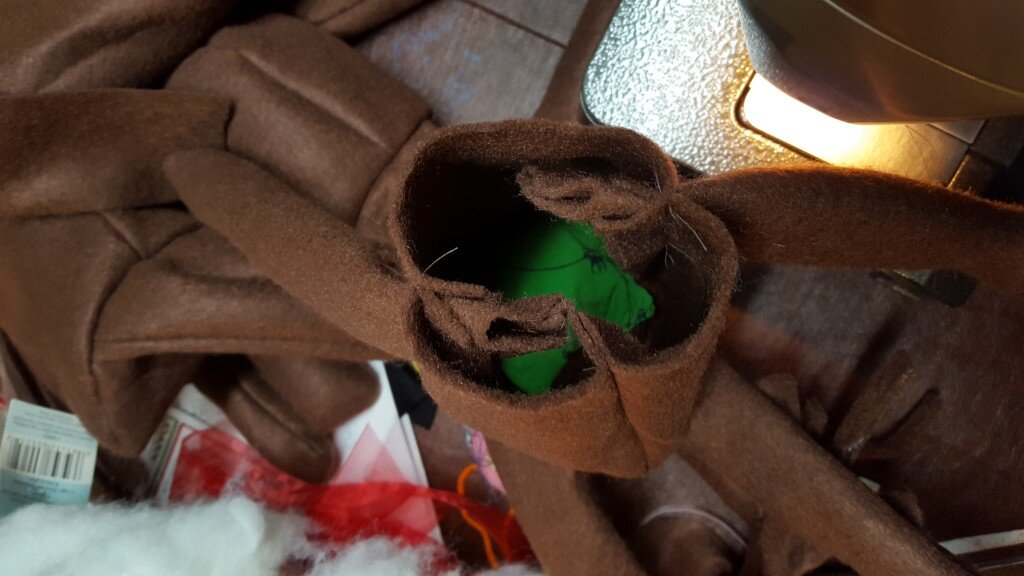
- Insert the beanbag in the moose’s body so it lies flat.
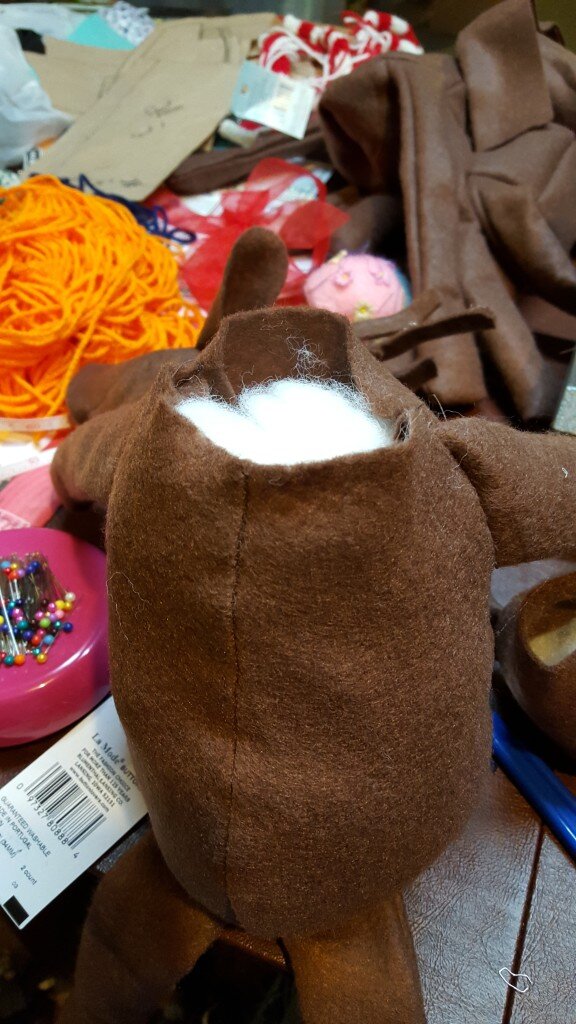
- Stuff the moose with stuffing in both body and head.
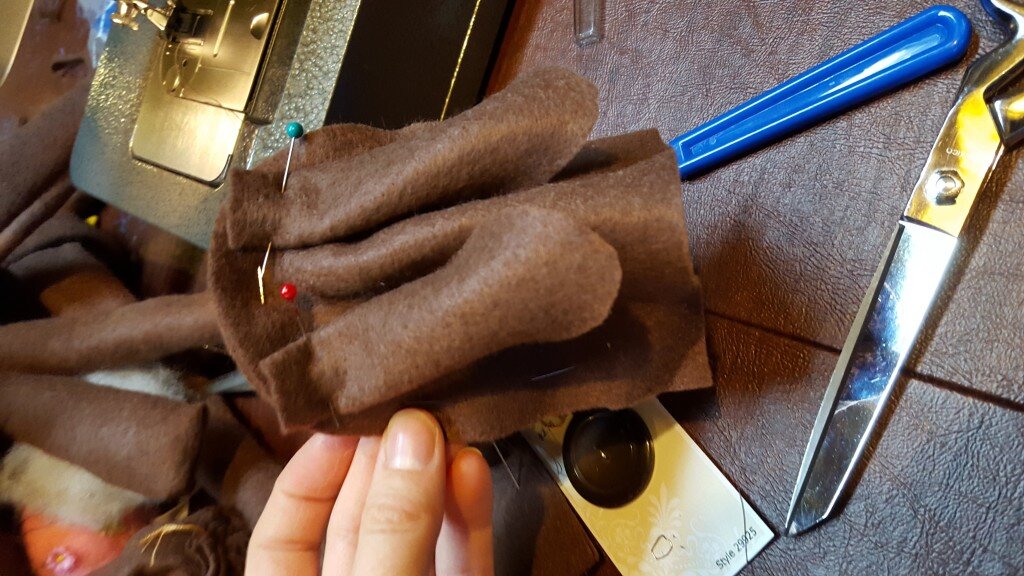
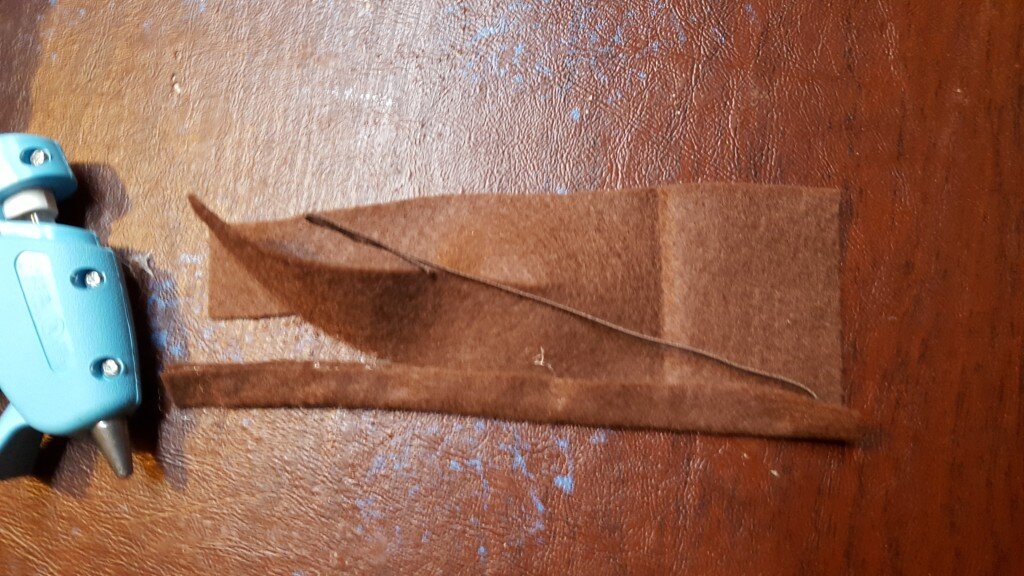
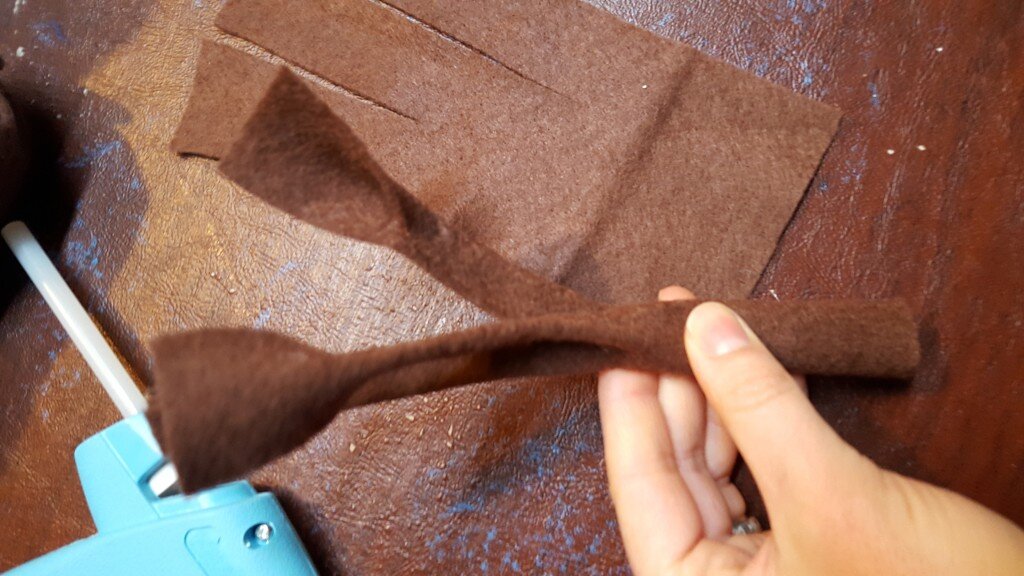
- Next create the antlers. Cut two rectangles of 3×8 fabric and cut down the fabric on the one inch marks along the vertical 1/3 of the way and 2/3 of the way down. See picture.
- Cut a length of cloth covered floral wire so you can fold it in half and it will cover the length of the first two antler prongs (the second prong slightly shorter than the first.
- Cut a second shorter length of wire for the third antler prong.
- Using a hot glue gun, glue the wire inside the first antler prong and fold the fabric in half to enclose the wire.
- Do the same for the second antler prong.
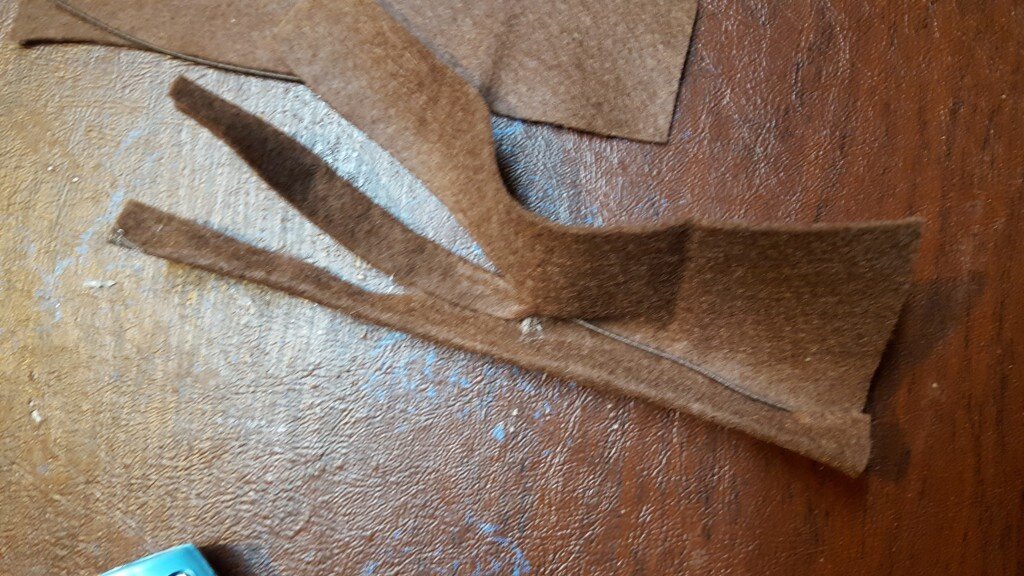
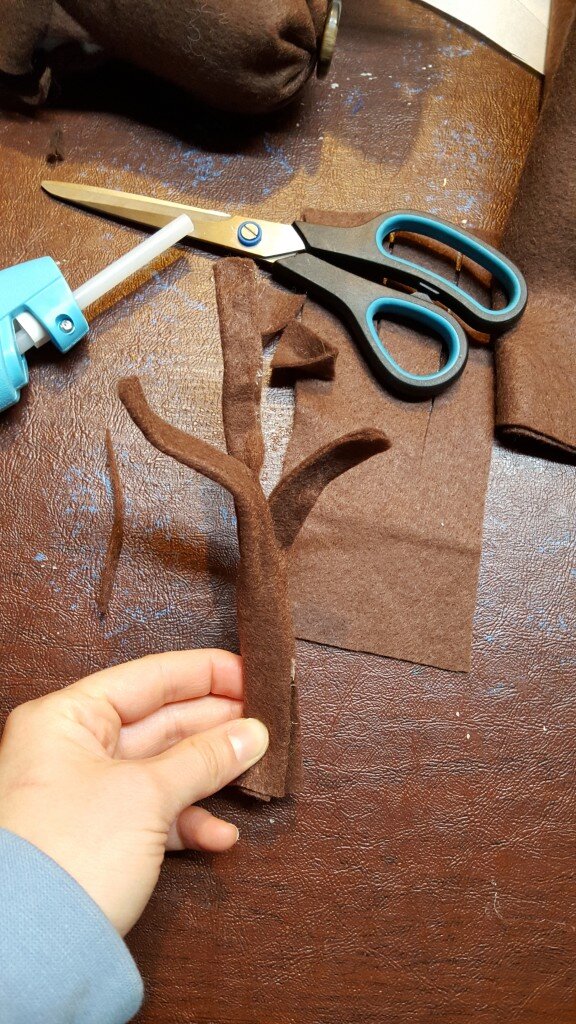
- For the third prong, secure the smaller piece of wire inside the top of the prong.
- Next fold the third prong under and secure with glue at the base of the antler.
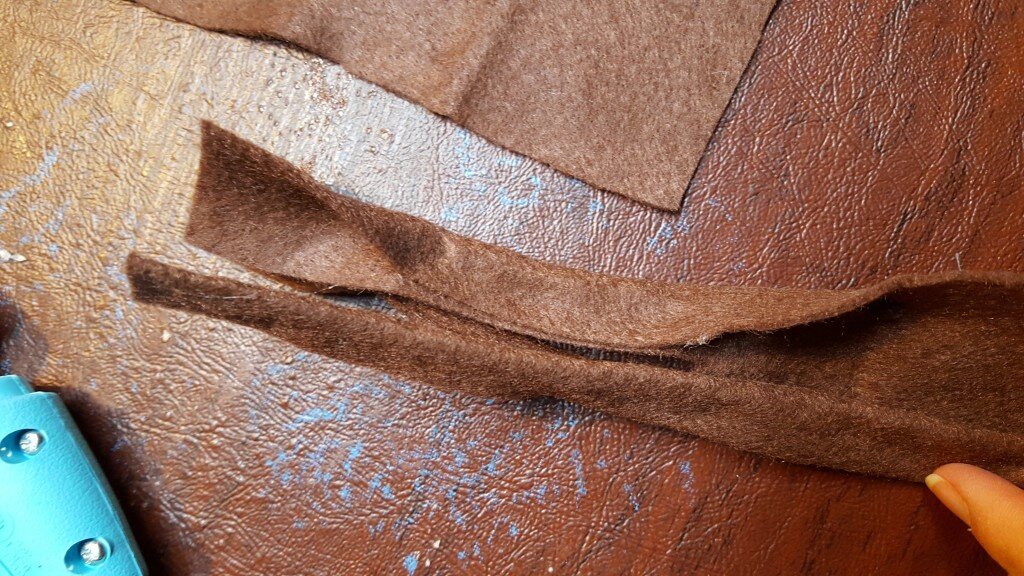
- Trim the two side prongs down a bit just above the floral wire to make them uneven lengths. Your antler should look something like this when you’re done:
- Repeat steps 30 through 36 for the second antler.
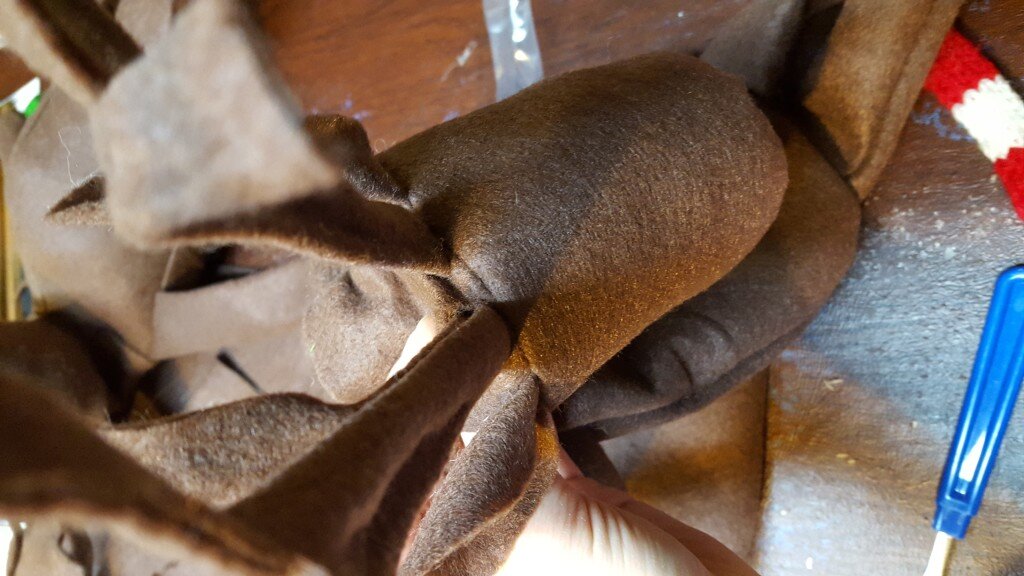
- Using a stitch ripper or small scissor make incisions on the moose’s head for the antlers. Depending on preference you can make the incisions in front of the ears or behind the ears.
- Push the base of each antler through the hole and use a hot glue gun to secure.
- Hand stitch the back of the neck closed.
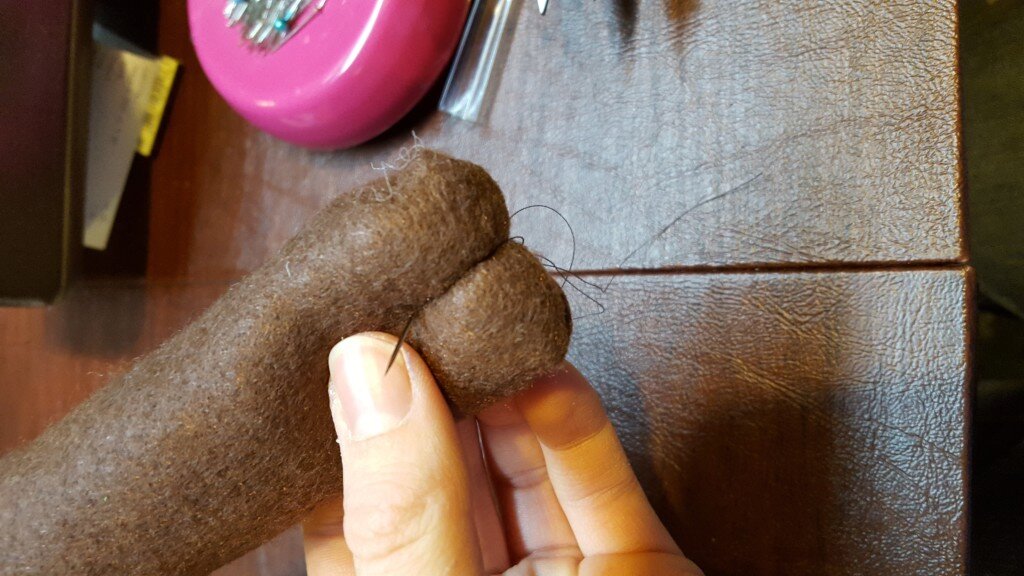
- Whip stitch 3/4″ up the bottom of the arms and legs to form hooves.
- Attach eyes by securing thread to bottom of neck and sewing through head to where you want to secure the eye. Add bead and pull slightly taunt to form an indentation.
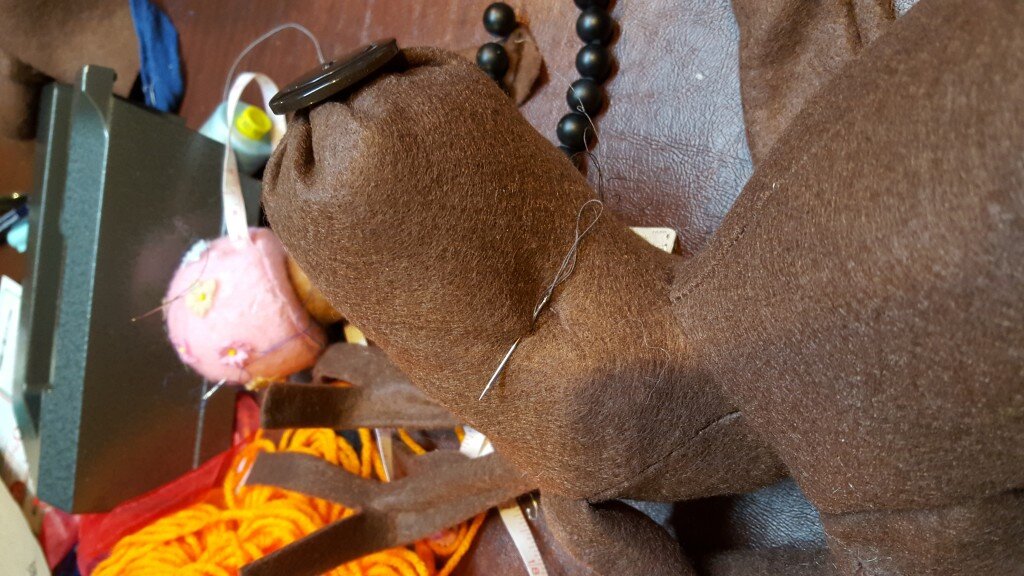
- Secure again at bottom of neck. Repeat for second eye.
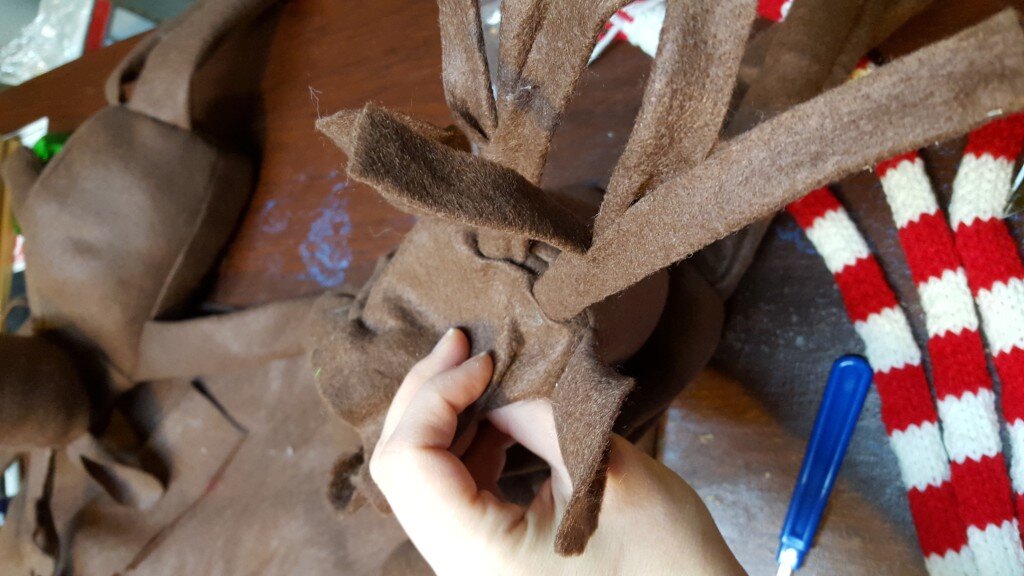
- Next create a scarf for the moose (or cut one out of fabric if you don’t feel like knitting! My scarf recipe was just a basic stockinette stitch, 8 stitches wide, 6 rows wide of alternating red & white, 17 blocks long. I added fringe at both ends.
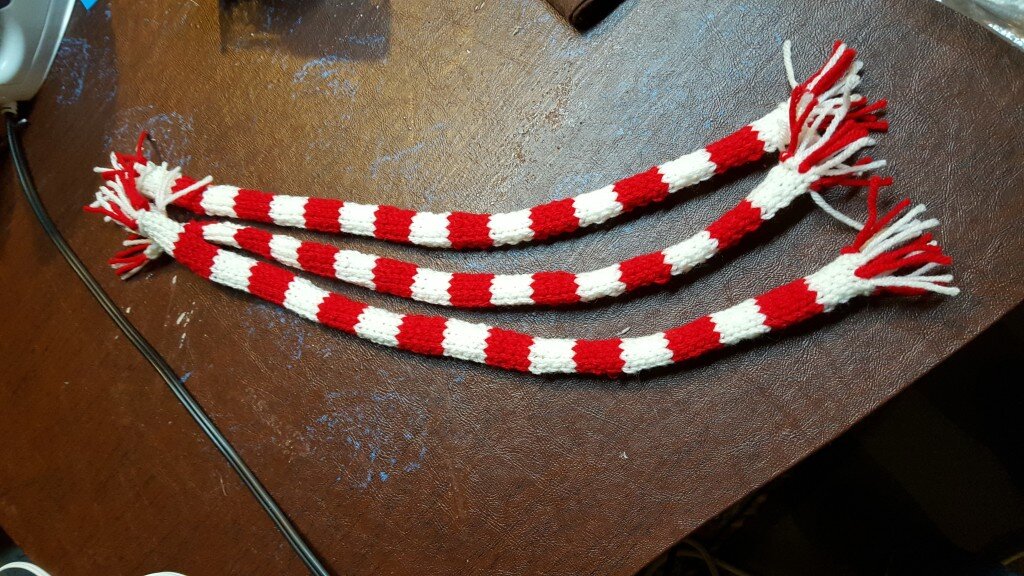
- Adorn your moose with the scarf and bits of mismatched ribbon with a few jingle bells tied on.
Now your moose is ready for a party with friends!
