
I have been dyeing to try screen printing for a while now. (See what I did there?) I have been re-reading “Fabric Painting and Dyeing for the Theatre“*, a book I got for my college costume class, and I’ve wanted to try some of the other techniques. Two weekends ago I finally got around to it! DanyCon inspired me to create t-shirts and at first I was convinced I was going to stamp them all. I still haven’t posted instructions for the cute stamped tea towels I made as favors for Erin’s shower, but I promise I will at some point. Well stamping is fun and all but I wanted to try something new! Enter screen printing, my new obsession.
*Holy cow this book now retails for $90 on Amazon!
The book tells you how to make your own frame, or where to find one, but I had a better idea. My mom has been buying me frames (for that project I swear I will eventually tell you about). The last one had a painting that I would describe as awesome if I had drawn it myself (I would really be proud of it). But I didn’t draw it myself so I decided to reuse the canvas as a screen for printing.
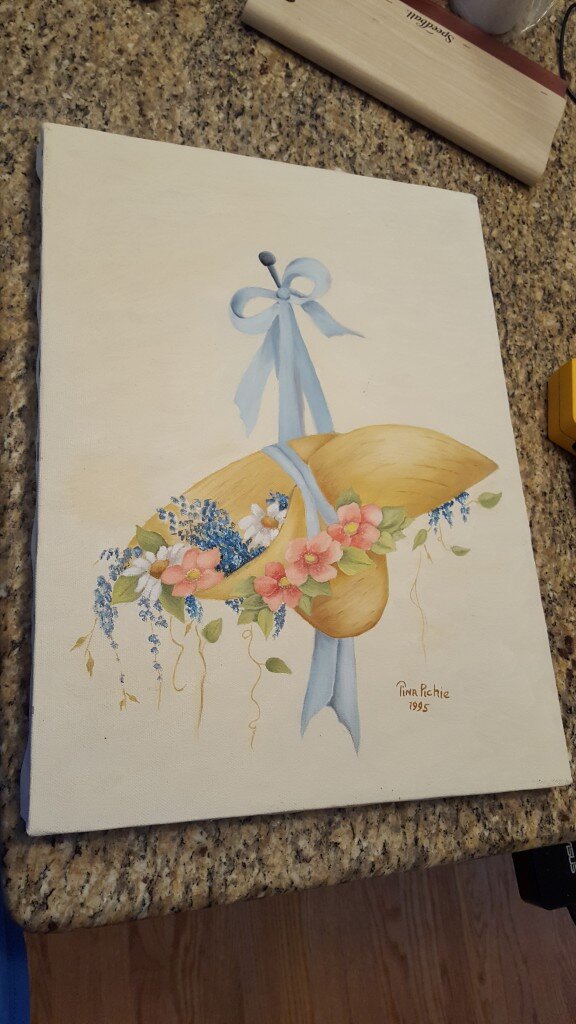
Wouldn’t you have been proud of this painting if you’d done it? Well I didn’t, so I cannibalized the canvas.
I then purchased a squeegee (can you believe that is a real word), screen printing ink, and mesh screen off amazon. When I decided I also wanted to screen print the welcome bags, but I could not iron the Oly*Fun I also purchased a screen printing ink fixer off amazon.
Basic Screen Printing 101
What you’ll need:
- Old Canvas from an ugly painting (or screen printing frame)
- Flat head screwdriver (to remove staples)
- Staple gun & staples
- Screen printing mesh (I used this kind – mesh count 160 – I will discuss this later)
- brown packing paper (like the kind I rescue out of amazon packaging)
- blue painter’s tape
- exacto knife & cutting mat or cardboard
- Squeegee (like this one)
- A piece of scrap wood or plexiglas about the size of your screen.
- Screen Printing Ink (I used this kind)
- Screen Printing Ink Fixer (optional – unless you cannot heat set. I used this stuff)
- Remove the staples from the sides of your canvas. (Skip this step if you purchased a screen printing frame).
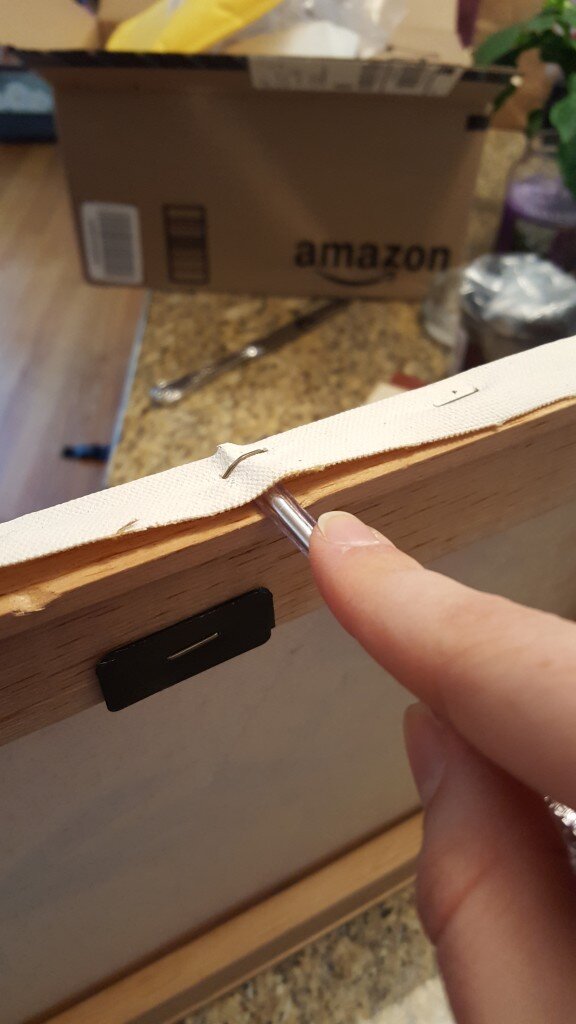
Remove the staples from the canvas
- Mark the center of the frame on all sides.
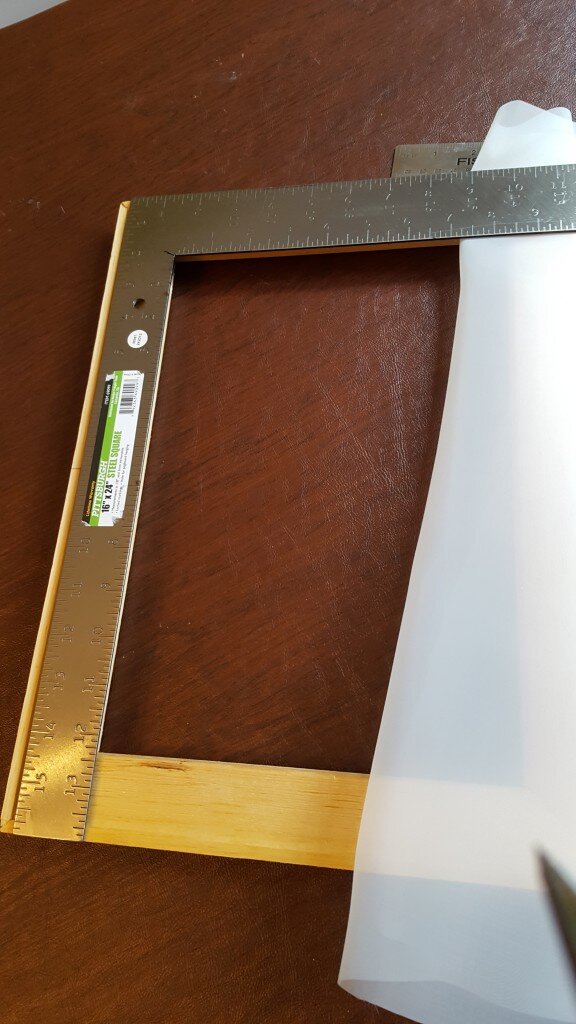
Mark the center of each side of your frame.
- Cut a piece of screen printing mesh slightly larger than your frame. You’ll be wrapping the fabric around the frame, similar to how a canvas is stretched on a frame, so slightly larger than the measurements of the canvas you removed is great.

Cut a piece of mesh slightly larger than your frame.
- Iron the mesh on a low synthetic setting.
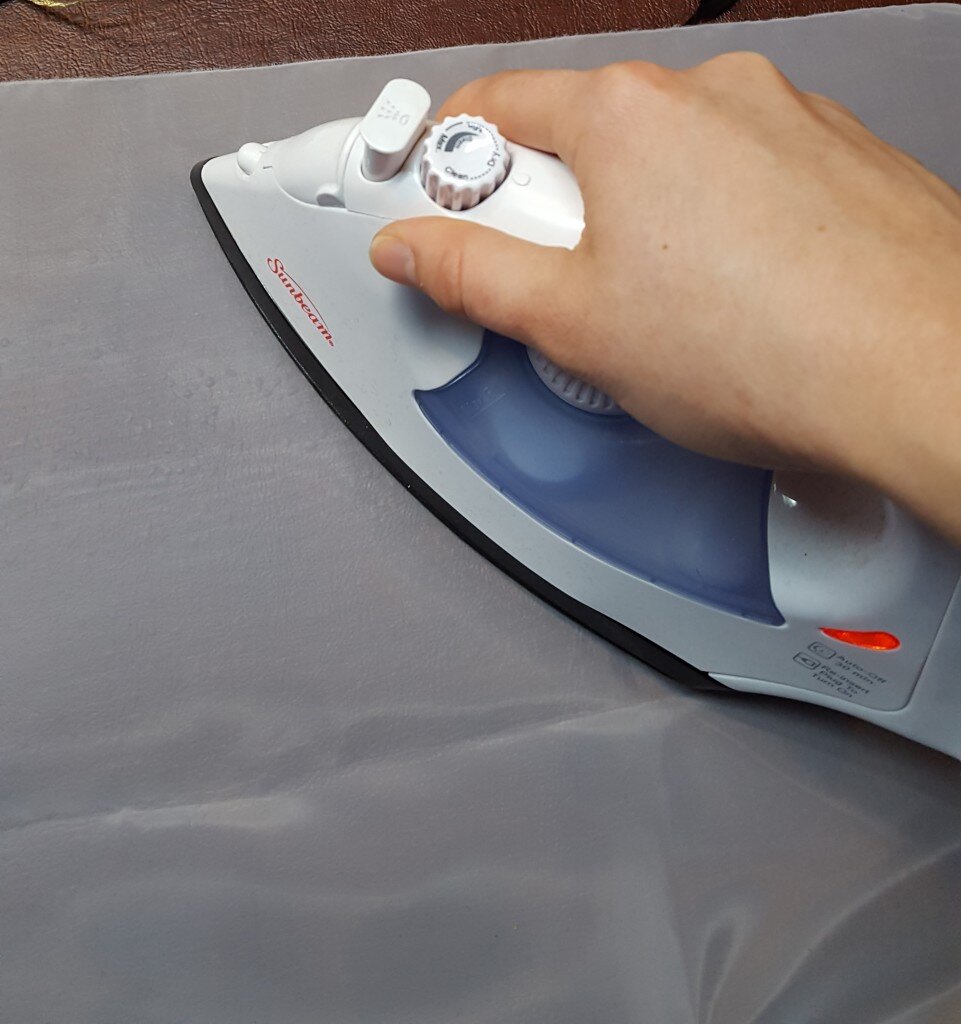
Iron mesh on synthetic setting.
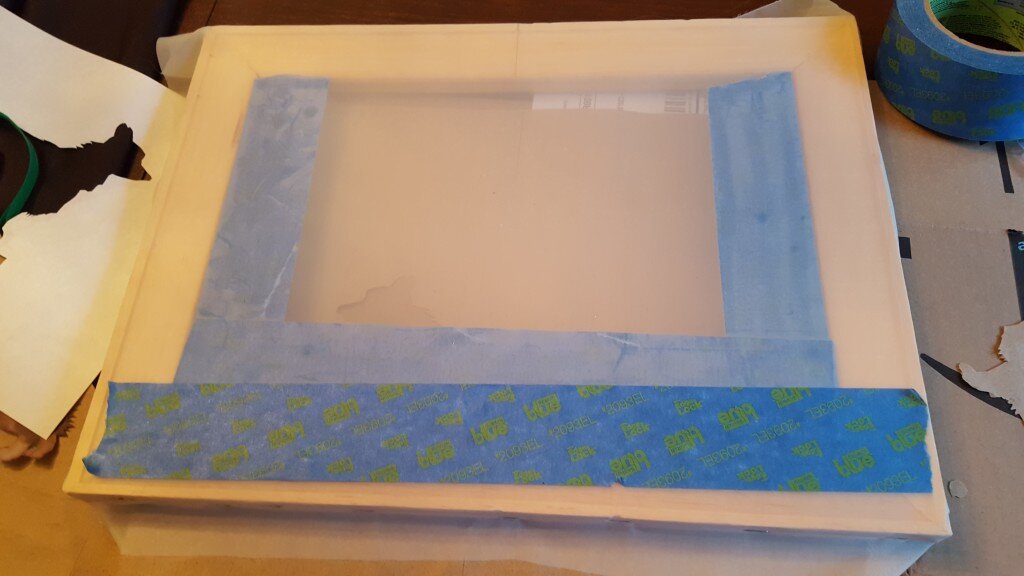
- Staple the mesh to the width of the frame. I found the easiest way to do this was to start as one end on one side of the frame and gently stretch and staple along the width of the frame. When I completed one side I moved to the opposite side of the frame and first pulled it taunt then stapled again as above, making sure this time I’m taunt in both the horizontal and vertical directions.
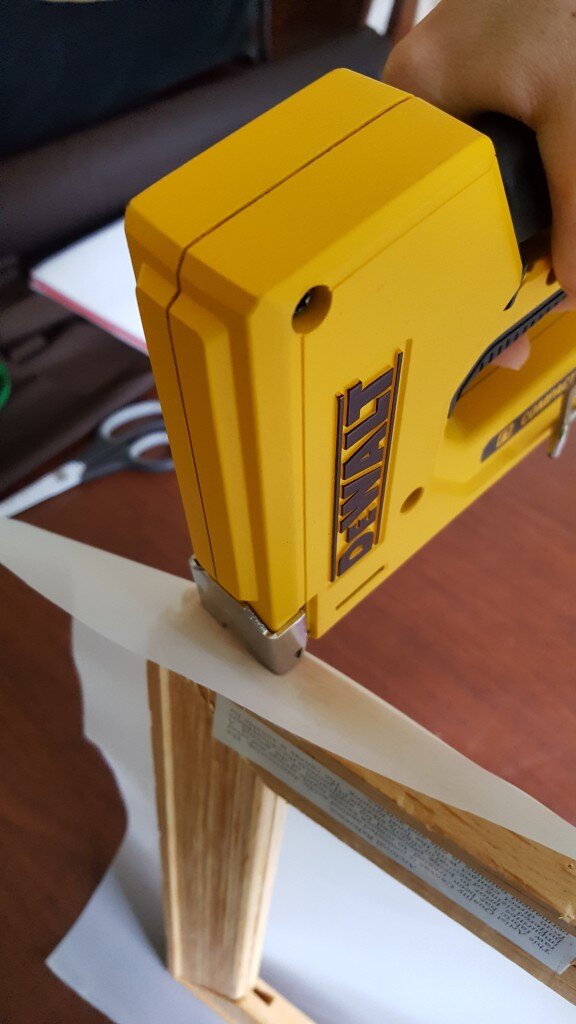
Staple mesh to frame.
- Staple the end of the frame. Here I followed the same procedure as above, keeping the entire end taunt. When I got to each corner I folded under and stapled the excess fabric, like you’d do hospital corners on a bed. I repeated at the other side. By this point my screen was evenly taunt with no slack anywhere. **If you have slack anywhere in the frame you will have issues with printing. If you see any slack or bowing, removing the staples causing the problem, pull taunt again and readjust.
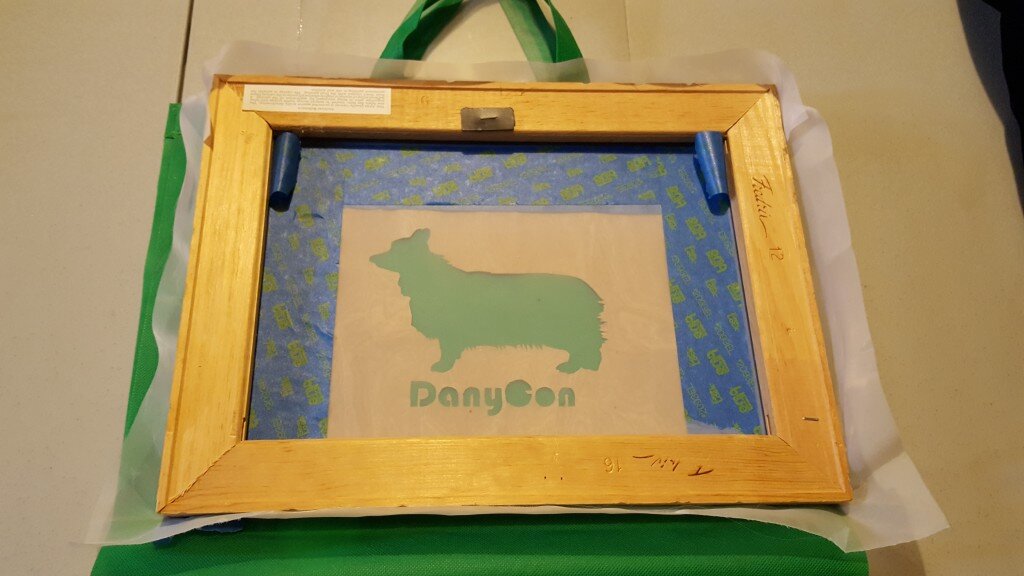
- Next you’ll want to create your stencil. The art of screen printing at its very base is really just a way to stencil on fabric. There are many different ways to prepare your screen with an image. Some sources online use photoresist ink, I’ve seen folks that coat the negative areas of the screen in modge podge to resist the screen printing ink. What I did was suggested in my fabulous dyeing book and worked amazingly well. It also meant I didn’t have to do anything other than rinse with water to reuse the screen afterwards. I’m calling this the “brown paper” technique.
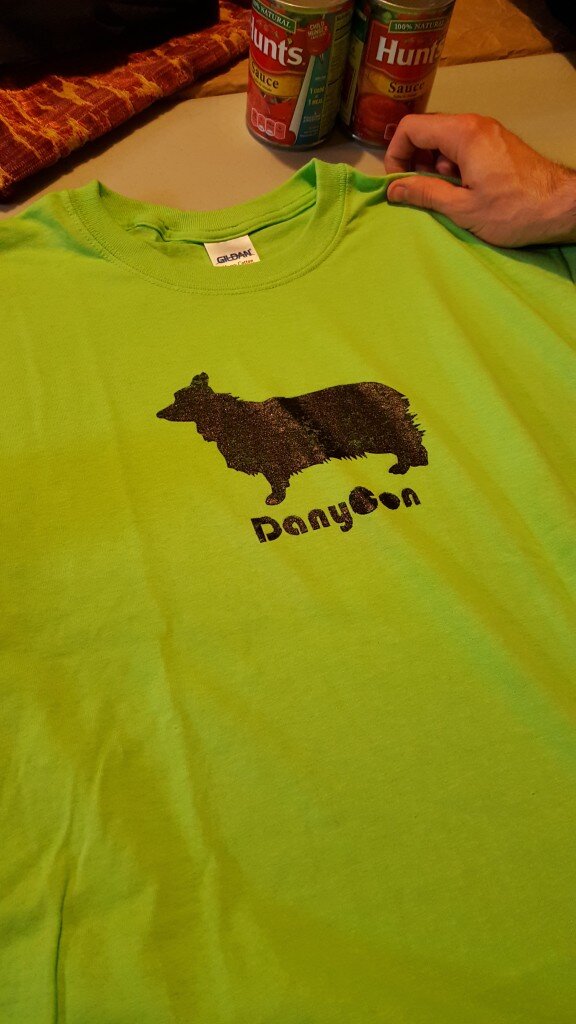
- Here I printed out my image of Dany and some lettering I wanted to include below the picture. Big, blocky letters are critical. One problem with the brown paper technique is that you cannot leave whitespace dots anywhere in your image unless they are connected somehow to the rest of the negative area of the image. This technique works great for blocky designs, and silhouettes. The image I used might look familiar – a version of it is hanging on my wall.

Chunky shapes are easiest.
- Cut a piece of brown craft paper (or recycled amazon packing paper like me) slightly larger than your screen and make sure it is perfectly flat. I always iron my paper to make sure it is flat.
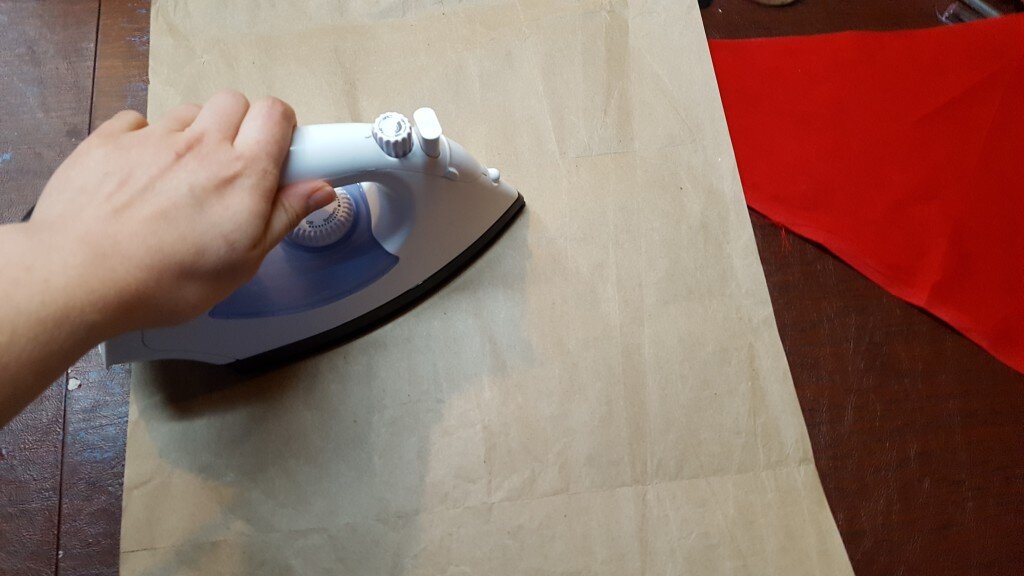
Iron your brown craft paper flat.
- Center your image over the craft paper on top of a piece of heavy cardboard or a cutting mat. Cut out your image with the exacto knife – make sure you are cutting through the brown paper as well.
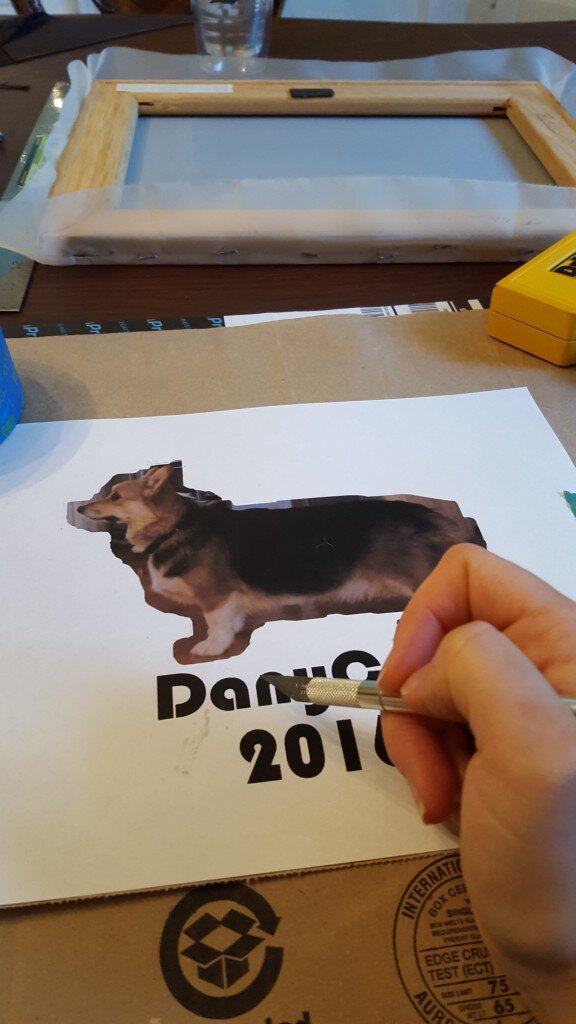
Cut your image out with an X-acto knife.
- Gently remove the areas you cut from the brown paper. This is your stencil!
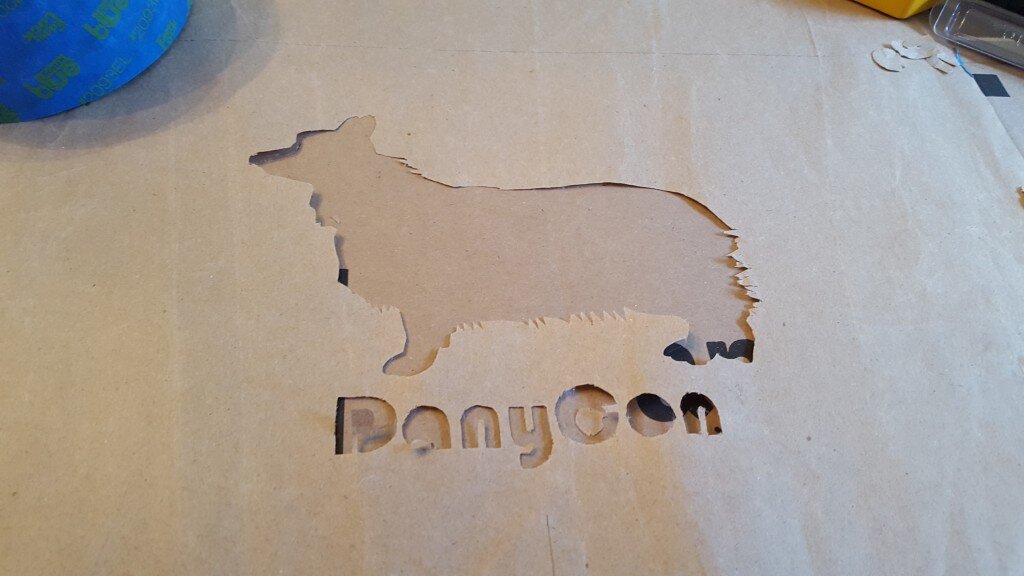
This is your stencil!
- Next mask off the edges of your screen with blue tape on both sides. You’ll want a spot at the top to use as a “well”. This is for added safety since the brown paper should resist the ink.
Mask off area around image.
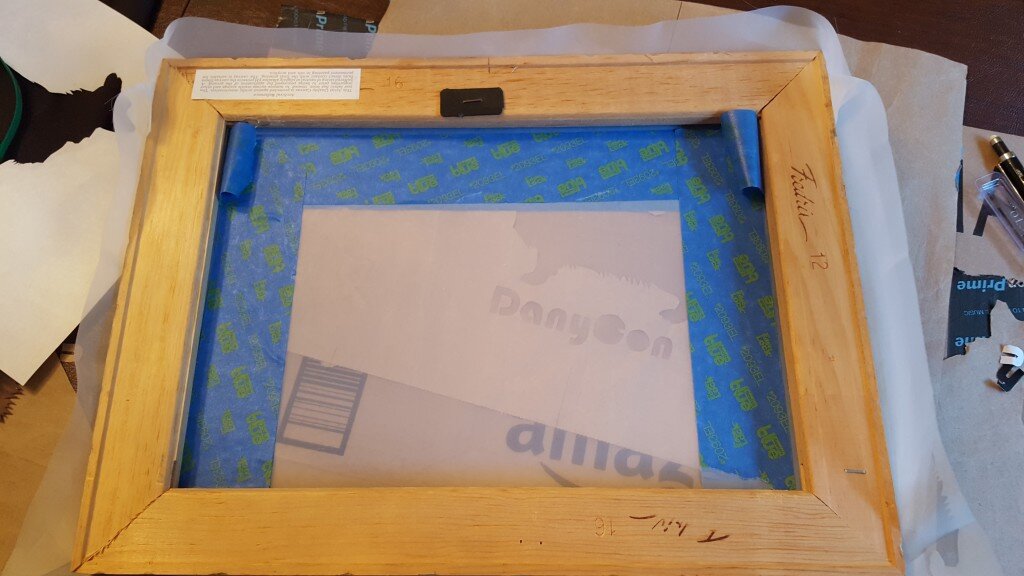
Mask on both sides of screen.
- Insert your plexiglas or wood into your shirt or between your fabric and the table. Without the plexiglas or wood, your design may bleed through the fabric to the other side.
- For the first print put the brown paper stencil down exactly where you want the image to be. Put your screen down on top of the stencil, lining up your center mark on the screen with the center of the stencil (and center of the shirt or fabric).
For the first print place down the stencil first with the screen on top of it.
- Next add your ink in a line to the “well” created by blue tape above the image. You’ll have to experiment with using more or less ink. Too much ink will flood your screen, too little and you will run out of ink before you hit the bottom of the screen. *I found the more ink the better.

Add ink to your “well” at the top.
- Here I had my husband (or a bunch of soup cans) hold the silk screen down. It is easiest with a second person. Using your squeegee and one fluid motion, drag and press the ink down the screen. *This is something else you’ll want to experiment with. I believe my ink may have been too thick for the fine mesh I purchased. I found that dragging the ink down with medium firmness once then going over the screen a second time, pushing more firmly, had the best results. My squeegee also kept hitting the bottom partway through the text. I think I should have moved my design upwards more so I wouldn’t have this issue.
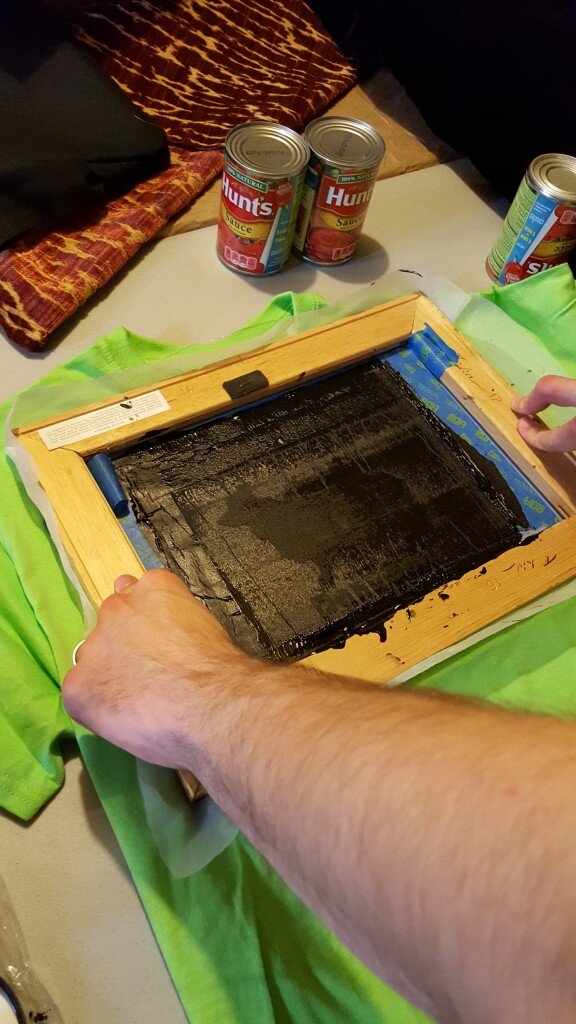
Will held down the screen as I used the squeegee. This is post squeegee. (Notice the discarded soup cans that were attempting to hold the screen in place.)
- When you are finished squeegeeing, have your partner slowly let go and you can gently lift the screen off the fabric. You’ll notice that the brown paper will come with the screen (since according to my book it will be held on with capillary action between the threads and paper).
Here’s what it looked like with the screen removed.
- Gently remove the wood or plexiglas from the shirt/fabric and hang the shirt or fabric until dry. At this point follow the instructions to set the ink or fixer.
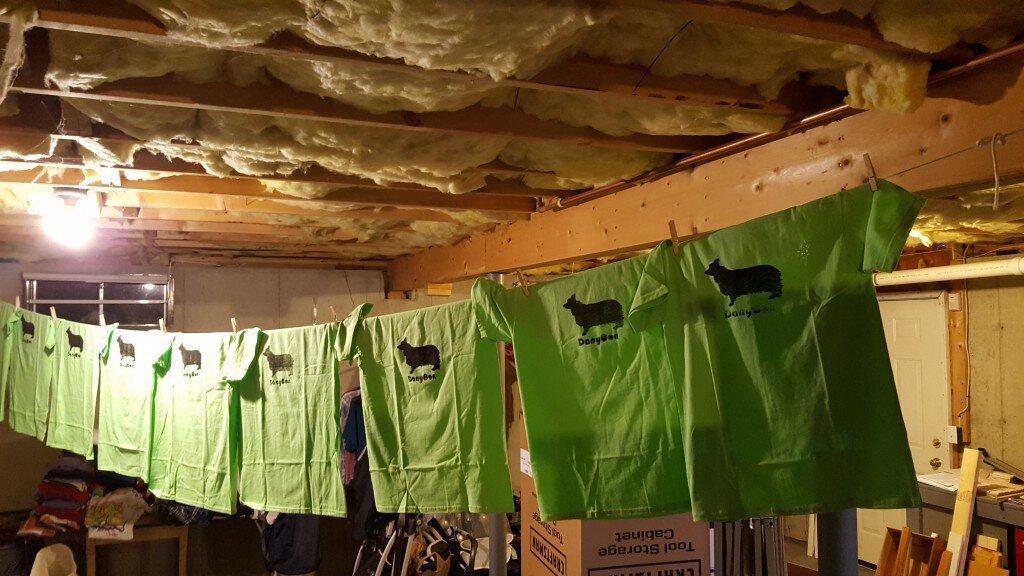
My basement looks like a screen print shop!
- Repeat steps 13-18 until you’re done with all your prints, then remove the brown paper, rinse the screen out and remove the taped off areas to start again!
Total cost for all supplies
- $3 per shirt (11 shirts total plus 10 bags total)
- $16.41 for 3 yards of mesh (that will last me for 12 screens)
- $16.41 for screen print ink (I probably used 1/8 of the container for all the shirts and bags)
- $21 for the fixer (this was pricey and I barely used any of it, will probably last me 100 years).
- $11 for the squeegee
$65 plus the cost of shirts
The total cost per shirt (if you assume I have to buy everything again next time, which I won’t) was $9. Really not too bad even considering that, but the cost of materials that I actually used (including the cost of the screen) was only around 55 cents per shirt. $3.50 a shirt’s not too bad at all!
