
Will and I spent this past weekend at PAX East, an extravaganza of nerd-dom. We played video games and board games, demoed a new role playing game, bought some dice, watched this comic strip drawn to life, hung out with lots of friends and even played a giant session of Secret Hitler. It was definitely a great PAX and I can’t wait for next year!
Aside from PAX, Will and I have been doing plenty of nerdy things, including playing a campaign of D&D. Will’s friend is the dungeon master and we’ve had some great times battling were-weasels, rooting out pirates and smugglers, befriending gnomes and following around our newly born mechanical front liner. Many of the people in the group are in multiple campaigns and they have some nifty gadgets to make role playing games easier.
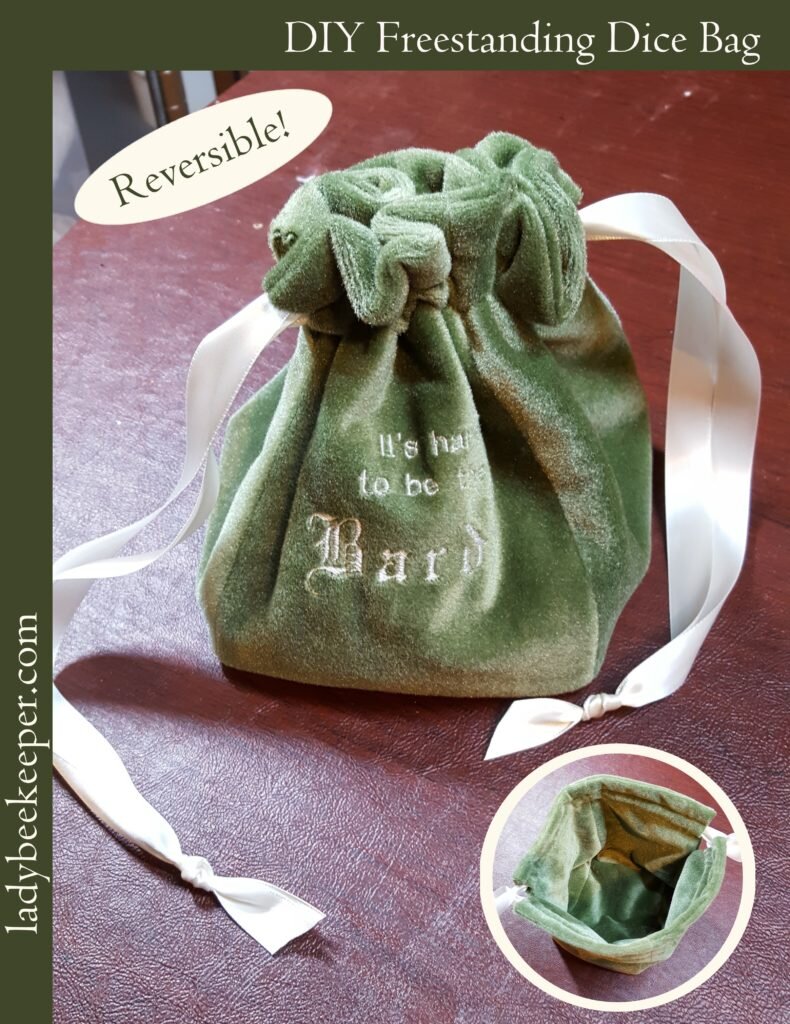
What Will was particularly coveting were their awesome dice bags like these and these. The cool thing about these bags is that they are HUGE, they stand on their own, and they are reversible. Not too shabby. Well I decided to make my own version and give it to Will for Valentine’s Day (in addition to those Carbonite PB cups). Mine is a bit different (because, well, I like doing things differently), but it boasts the same awesome features.
Freestanding Dice Bag
What You’ll Need:
- 1/2 yard of upholstery velvet
- 1 yard of double face satin ribbon
- Cut 8 8″x6″ rectangles and 2 6″x6″ squares. If you want to use 2 alternating colors, cut 4 8″x6″ and 1 6″x6″ of each color.
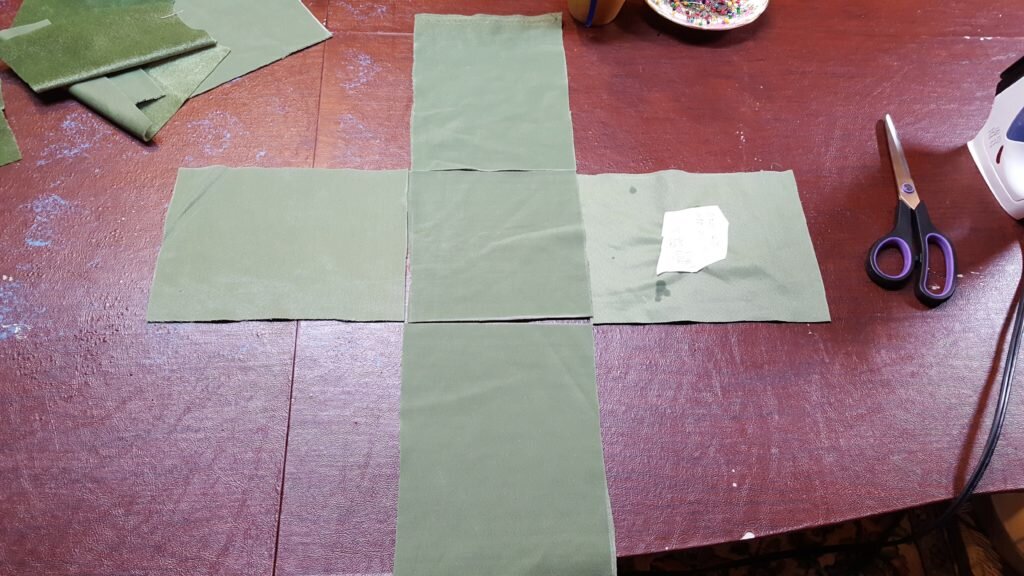
Cut 8 rectangles, 2 squares.
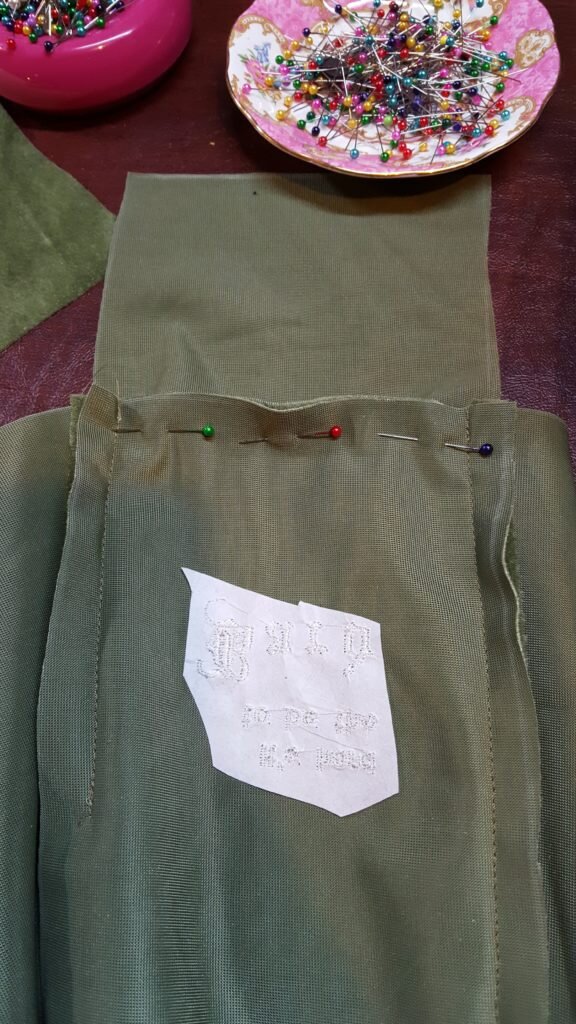
- Place 2 8″x6″ rectangles together, right sides facing. Pin on one edge, stopping 2″ from the top. Stitch. Repeat for other 6 rectangles.
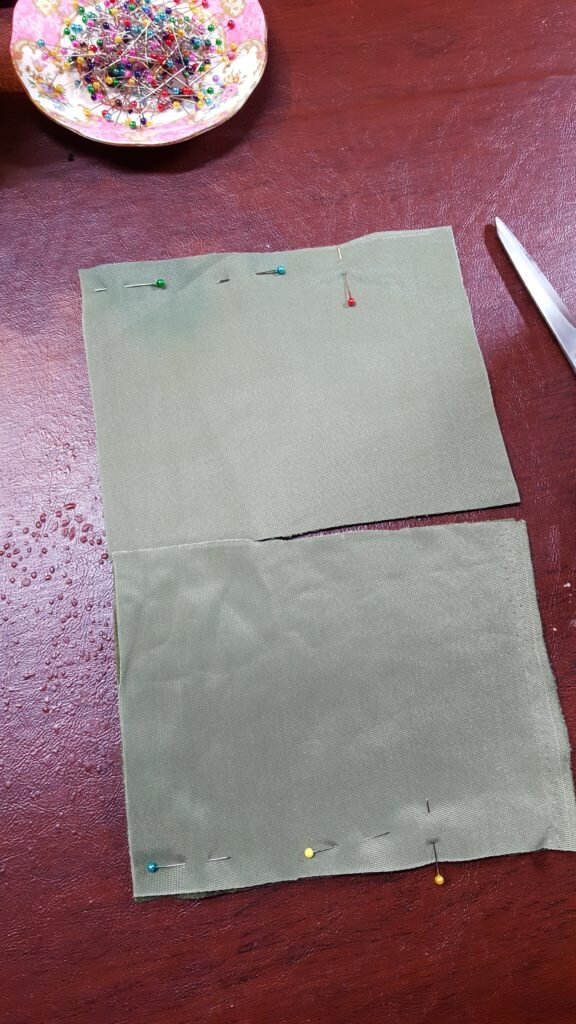
Pin rectangles on one side, leaving a 2″ gap from the top.
- Place 2 double rectangle pieces together, right sides together and pin along edges. Make sure that the edges with the 2″ gaps are on the same side. Stitch the entire length. Repeat for the other set of rectangles.
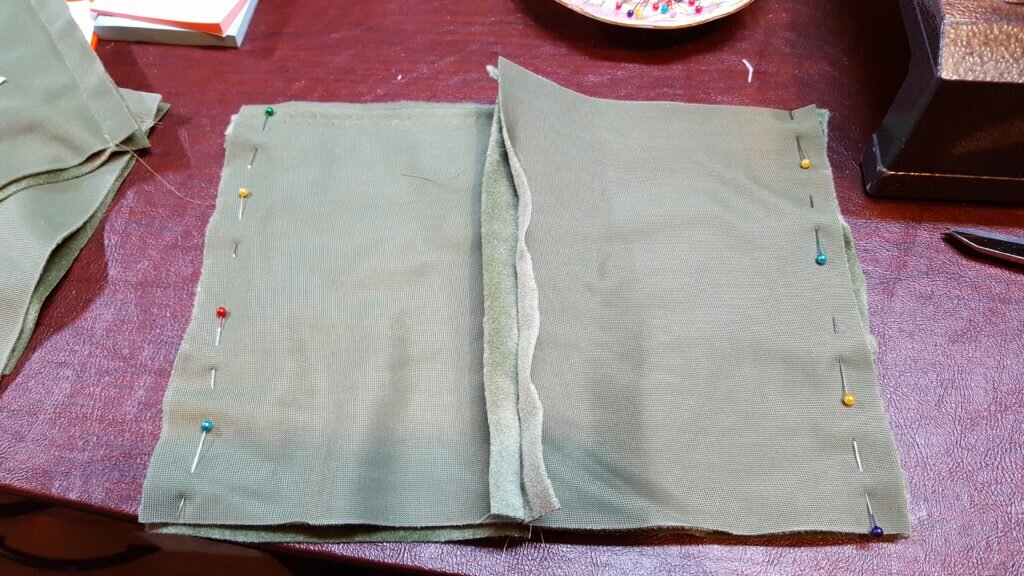
Pin two combined rectangles from above step along both edges.
- Pin one edge of the square to one edge of the bottom of the box you created in step 3 (right sides facing). This should be the side without the 2″ gaps. Stitch from the stitching to the other side of stitching. Be sure to avoid catching other fabric in the seam.
Pin bottom square to bottom of sides.
- Repeat with the other 3 sides.
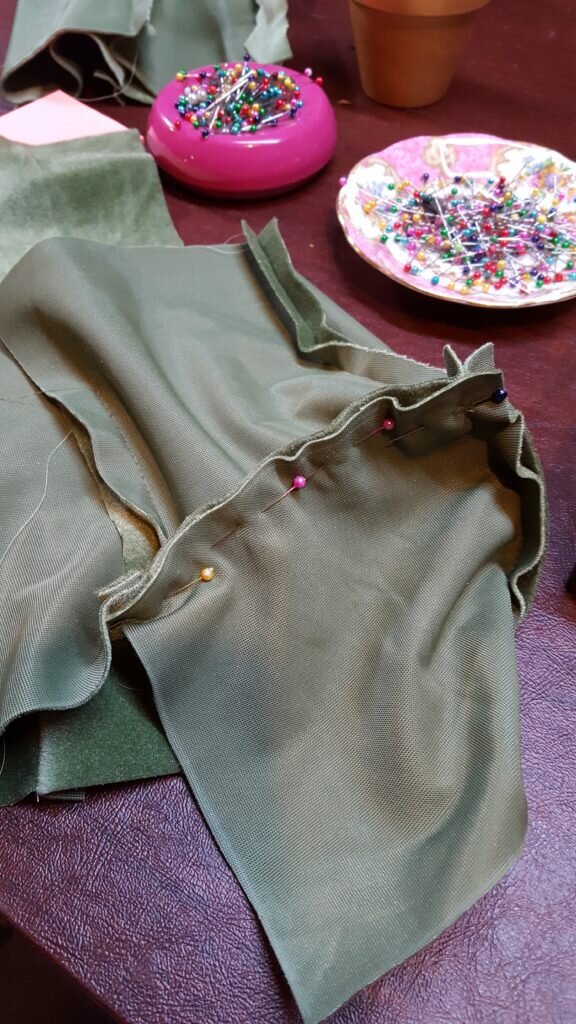
Repeat with other sides.
- Repeat for second box bottom and box.
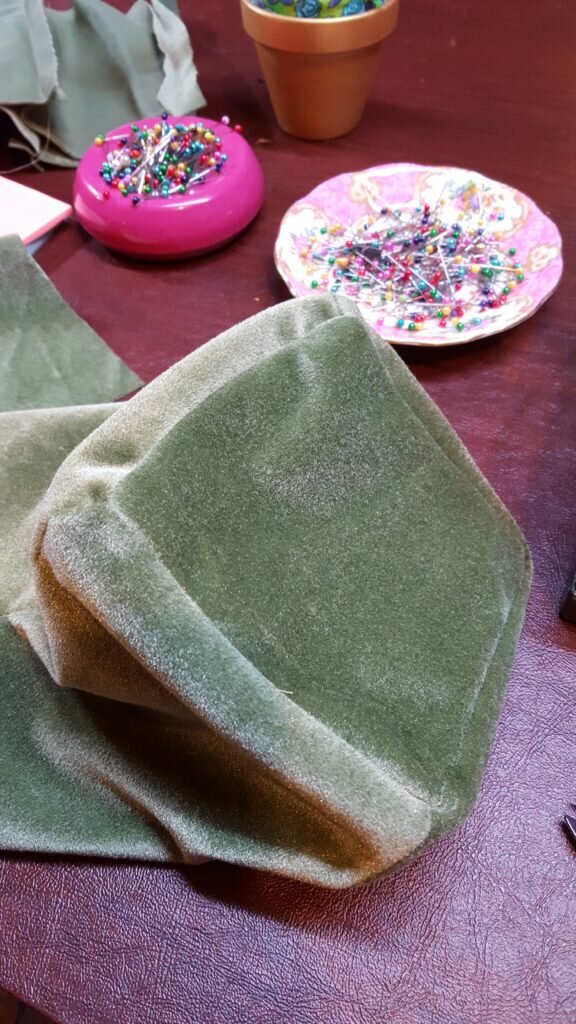
Bottom of one finished half.
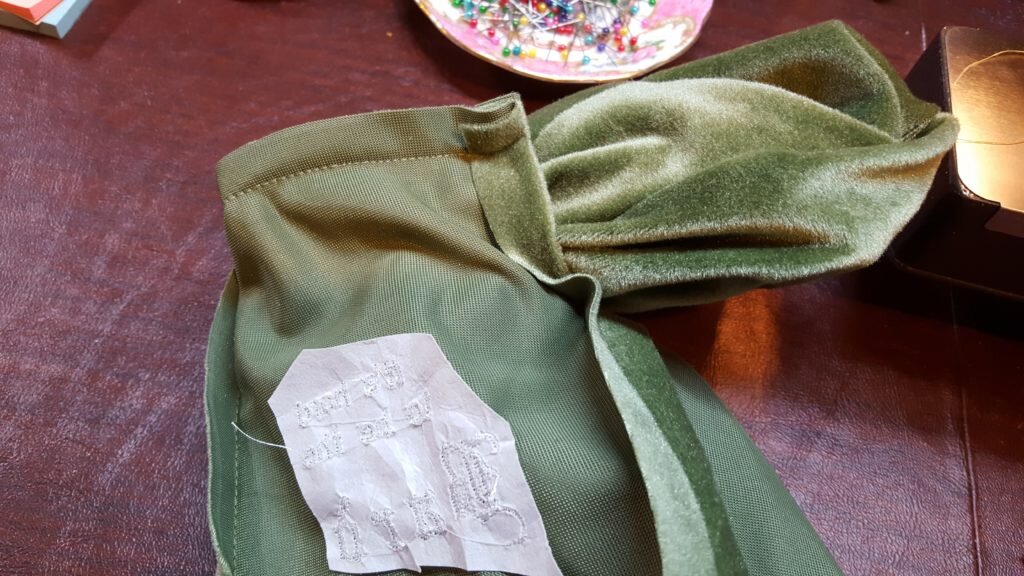
- Trim corners and seams on the bottom of the box.
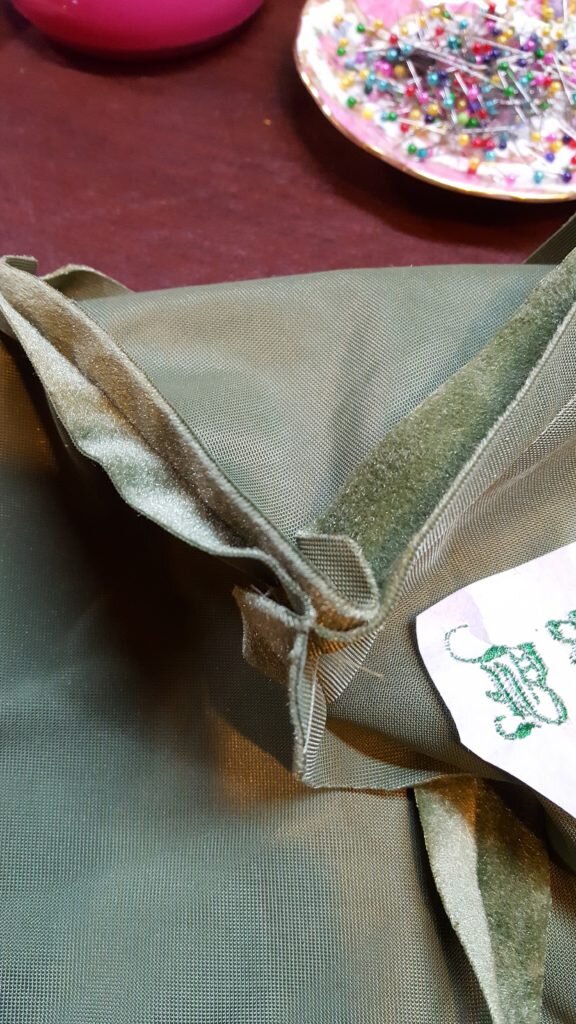
Trim corners and seams along the bottom of the bag.
- Press along the seams, even along the 2″ gaps you left at the top.
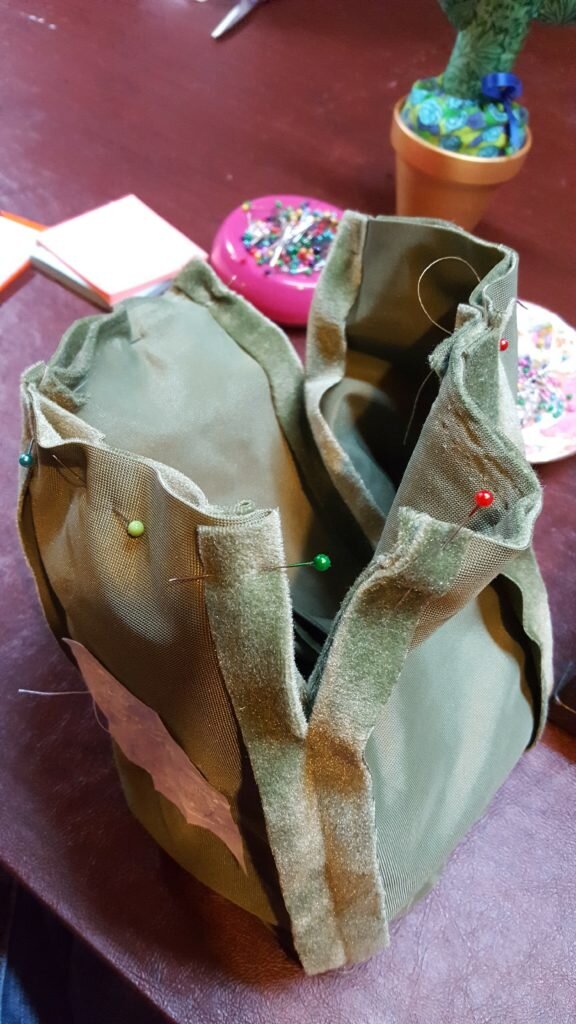
Press seams. Pin two halves of bag together along top edge.
- Pin the two halves of the bag, right sides together, along the unfinished edge of the bag.
- Stitch.
- Turn bag right side out through one of the 2″ gaps you left.
Turn bag right side out through gap.
- Adjust the bag properly, then pin the top of the bag.
Pin the top of the bag.
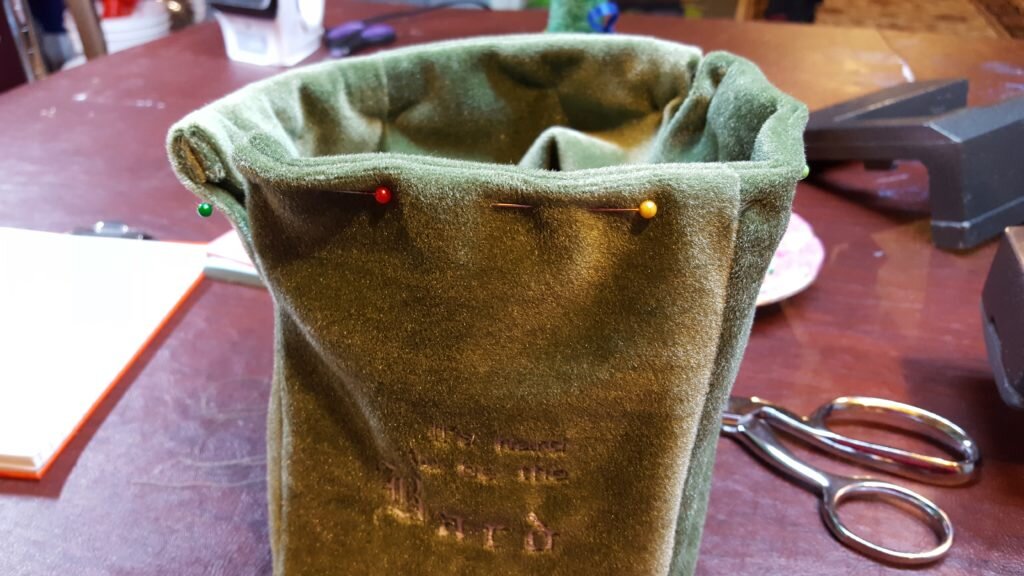
- Stitch 1/2″ from the top seam, then stitch again, slightly above where the 2″ gap starts, about 3/4″ below the first row of stitches.
Stitch 1/2″ top and 3/4″ from 1/2″ line.
- Using a yarn needle, insert 1/2 yard of ribbon through one opening of the bag, out and into the openings on the opposite end and back out through the opening next to where you started. Tie ends together in an overhand knot.
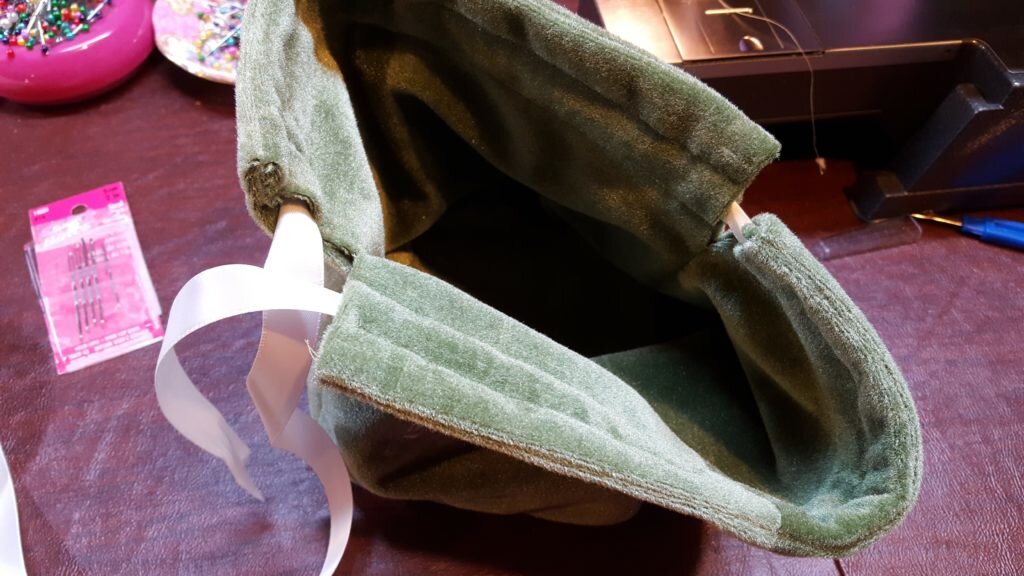
Insert ribbon through bag cinch.
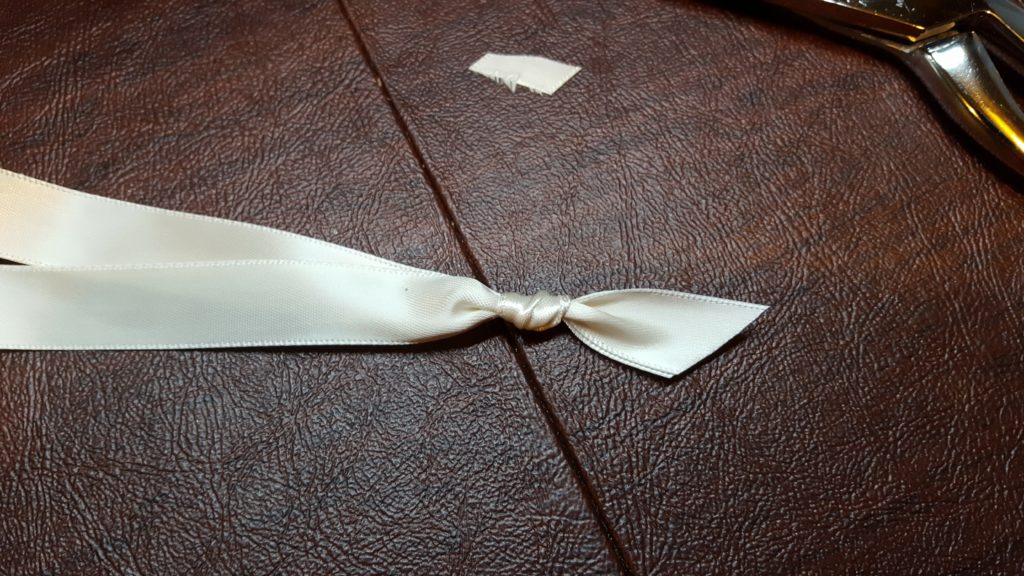
Overhand knot end of ribbon.
- Repeat with the other 1/2 yard of ribbon, starting at the opposite openings.
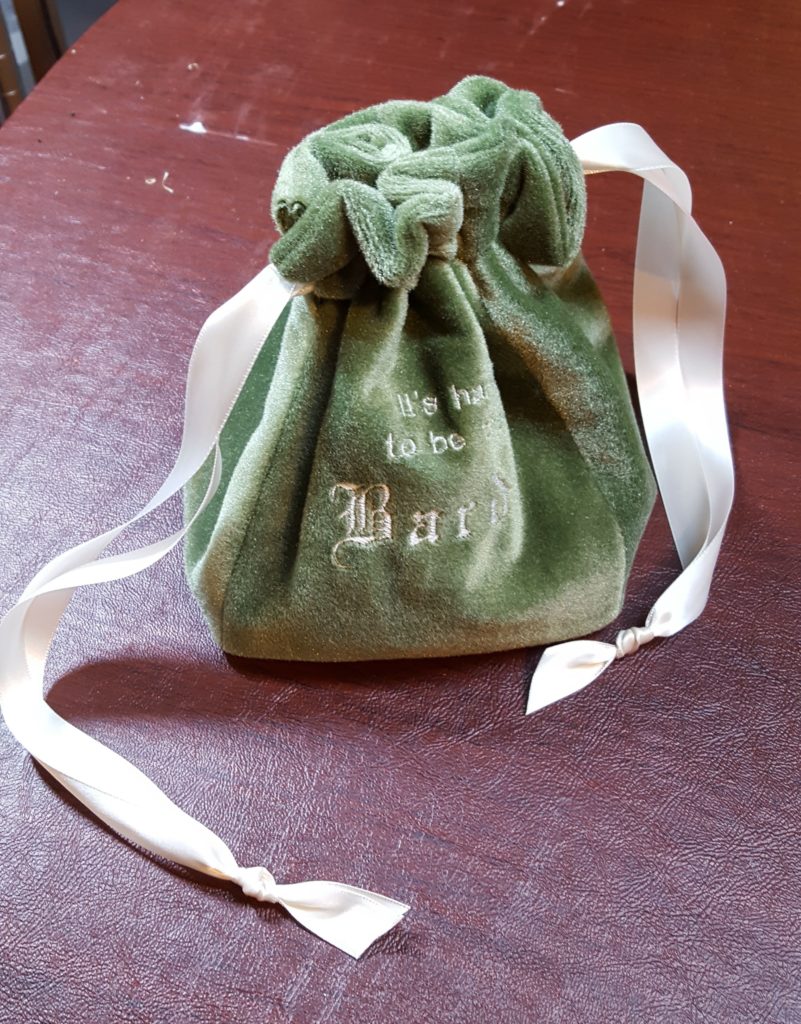
- Fill with dice and enjoy!
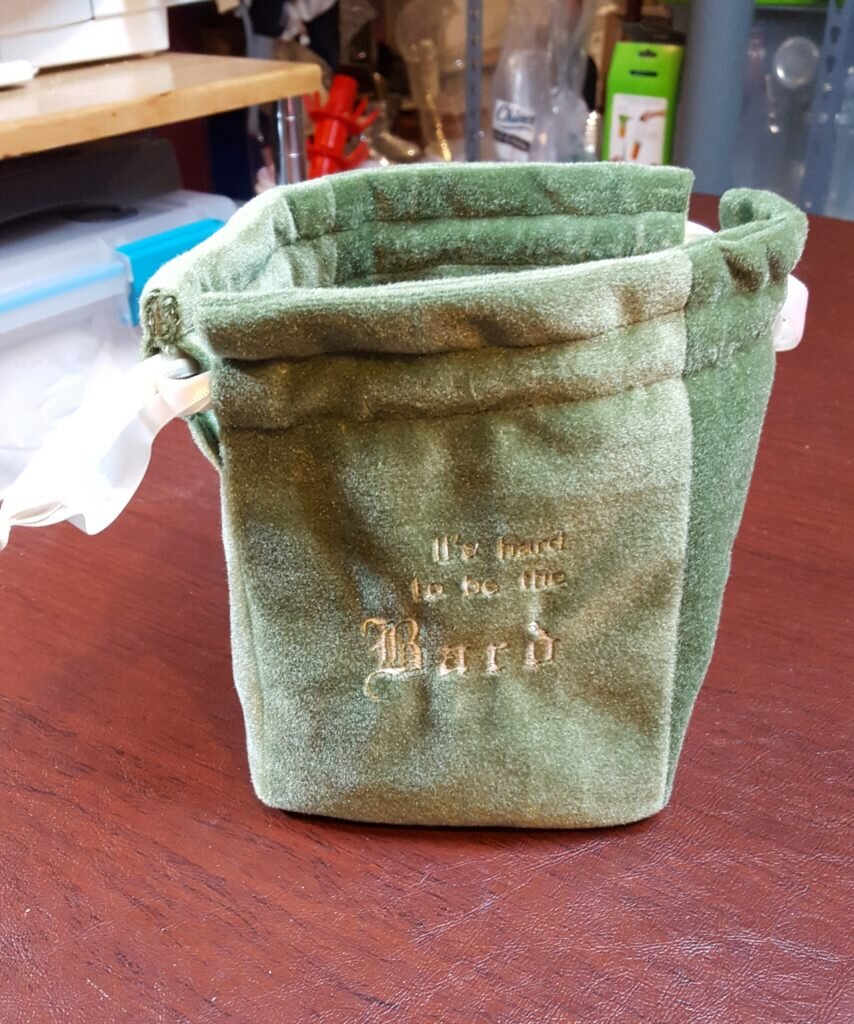
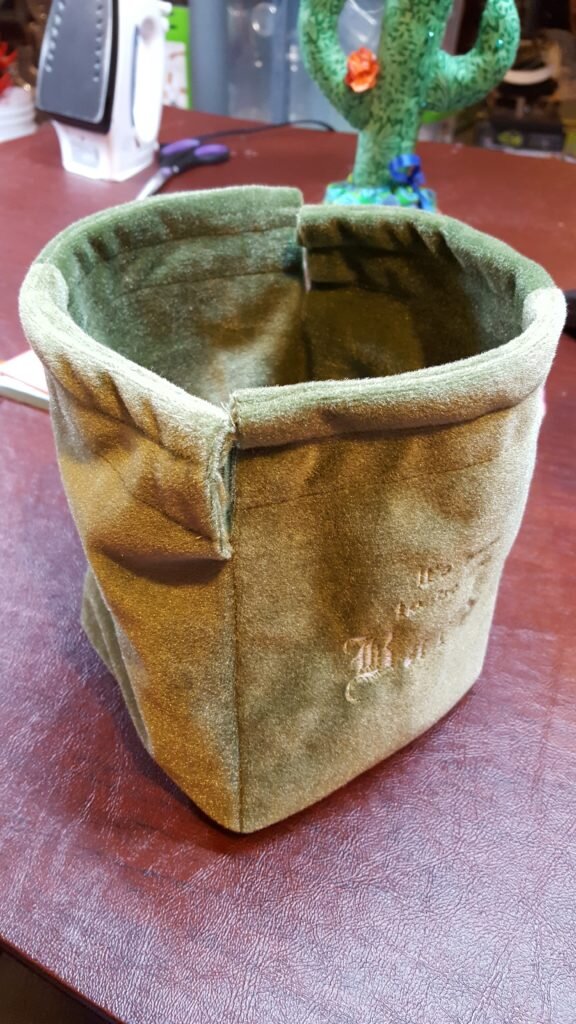
Finished bag, free standing while opened.
You may have noticed the bag reads “It’s hard to be the bard”. Will is a bard this campaign, and that quote is from a play we saw recently called Something Rotten. (In the case of the play they are referring to Shakespeare, but I think it is equally applicable to DnD.)
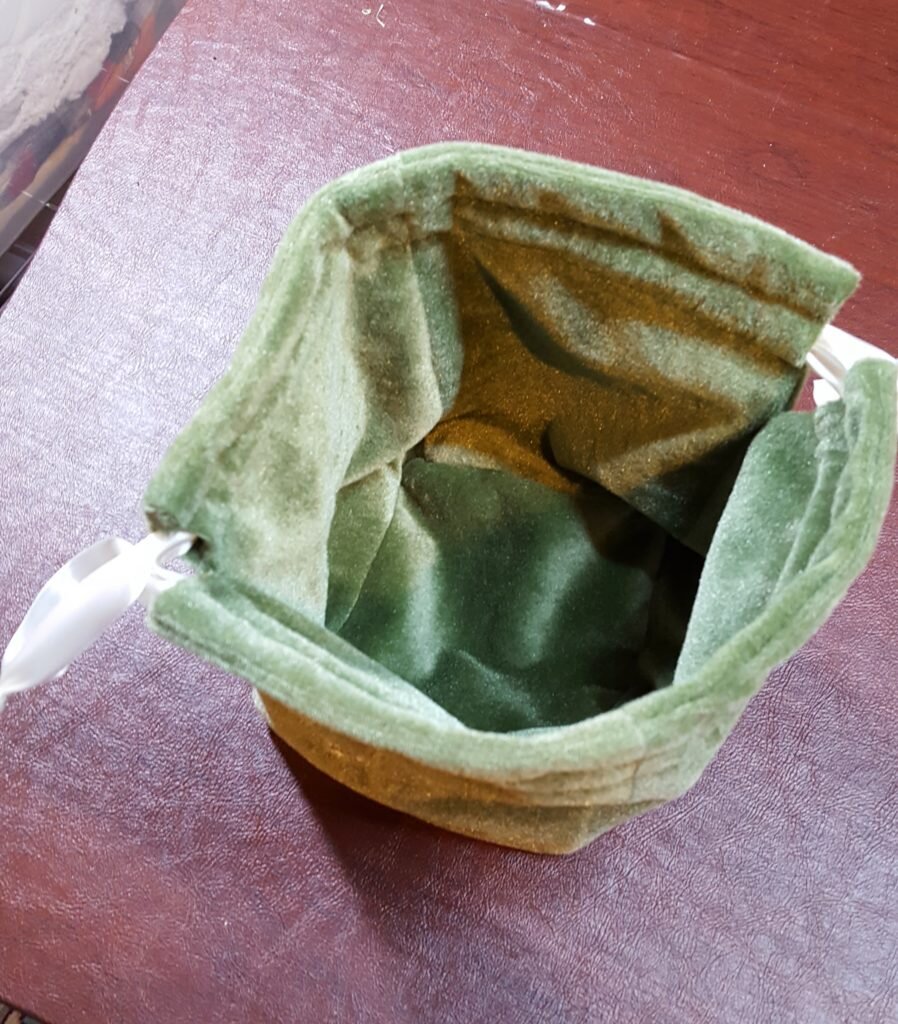
Look at all that room inside for dice!

The bag is awesome! We bought a bunch of dice at PAX to start to fill the bag up too. I am going to go put those in the bag right now!
This idea is freaking awesome! I can never find a bag I like. Thank you for a solution.
So glad you like it!! We use ours all the time! Let me know if you need any help following the pattern.