
I’ve been working on revamping my basement corner into a cute little sewing nook that I’m not embarrassed to take pictures of. I’ll show you my before and after in a couple posts, but the whole thing that inspired me to re-organize was that my fabulous husband got me this awesome wooden thread holder last year for my birthday. I had all my thread on it, but the stand takes up 2.5×2.5 square feet of space on my desk, which is about half the size of my sewing desk!
Since my sewing room is in my unfinished basement there are no walls to hang anything on. I guess I could run something from the ceiling, but that seemed like it would be in the way. What I really wanted was a rolling pegboard. I was thinking about something like this design, but in order to keep the very tall pegboard upright the legs would have to be fairly side to counterbalance the thing so it didn’t just topple over. This seemed like a waste of space in my small basement nook.
While I was contemplating all this, Joann Fabrics had a crazy sale on this Gutterman thread tower around Thanksgiving. Unfortunately it was such a good deal that you could only get it in stores because the online stock sold out instantaneously. At the time of the sale we were in Nashville visiting Will’s family for Thanksgiving… but I had to have it so we drove 45 minutes to the nearest Joann Fabrics and then had to figure out how to get it home in our luggage. I didn’t even want the stand because I already had my fabulous thread holder, but when I got the behemoth home the thread spools didn’t fit on my thread holder so I had to keep it! So now I had another thing to store!
This lead me to more poking around and I found this guy’s plans for a rolling pegboard with shelves for tools! Perfect! This seemed pretty practical, though in actuality I don’t think this design would be stable at all so don’t really try it. Since I was concerned about the stability and material costs are expensive I designed mine slightly differently.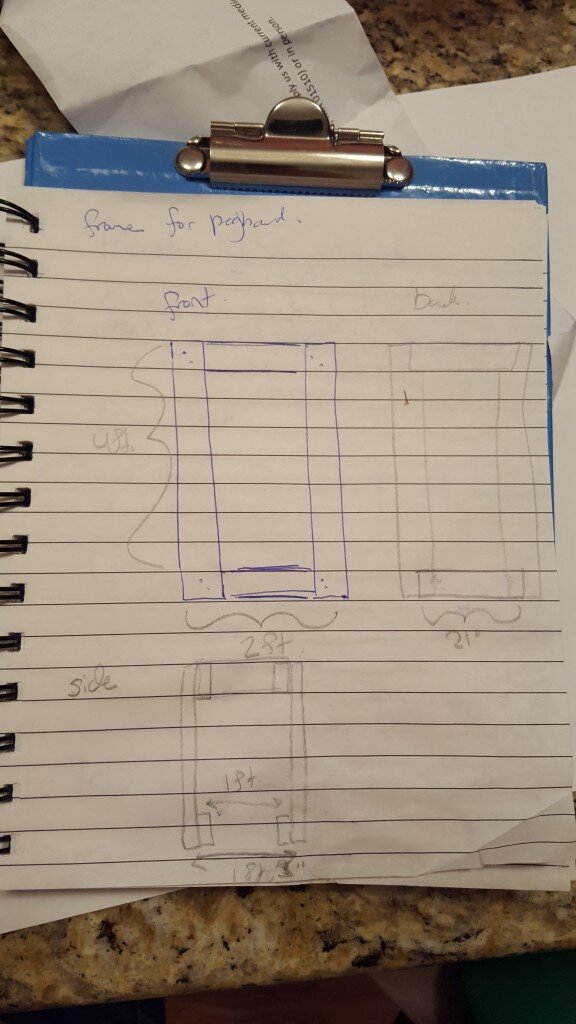
You can see from my rough plans above my frame is built from 2×4’s and is 4 feet high x 2 feet across on the front faces (exactly the dimensions of pegboard from home depot). The depth of the piece is 1 foot 3 inches (which gives an inside depth of 1 foot). Several years ago my friends had created and brought an “ice luge” to one of our parties which included a stand built of some crazily screwed together 2x4s. When they left they told us we could “keep the stand for firewood”. Its been sitting in my basement for 4 years taking up room so I finally disassembled it and got about half the wood for free from that. Thanks Joe & Kayla!!
So here’s how I built it:
Materials:
- 4 – 4′ 2×4’s
- 4 – 21″ 2×4’s
- 4 – 1′ 2×4’s
- 2 – 4’x2′ pegboards
- 3 – 1’x2′ pieces of plywood or other wood for shelving.
- 4 casters
- angle brackets to hold up shelves (I used 4)
- screws in assorted sizes
The first step is cutting everything down to size. My friend Amy recently told me about this device that would have dramatically increased the precision of my circular saw cutting, but she was 2 days too late! I will have to invest in one for my next woodworking project.
Assemble the front and back faces, use a dog to help. 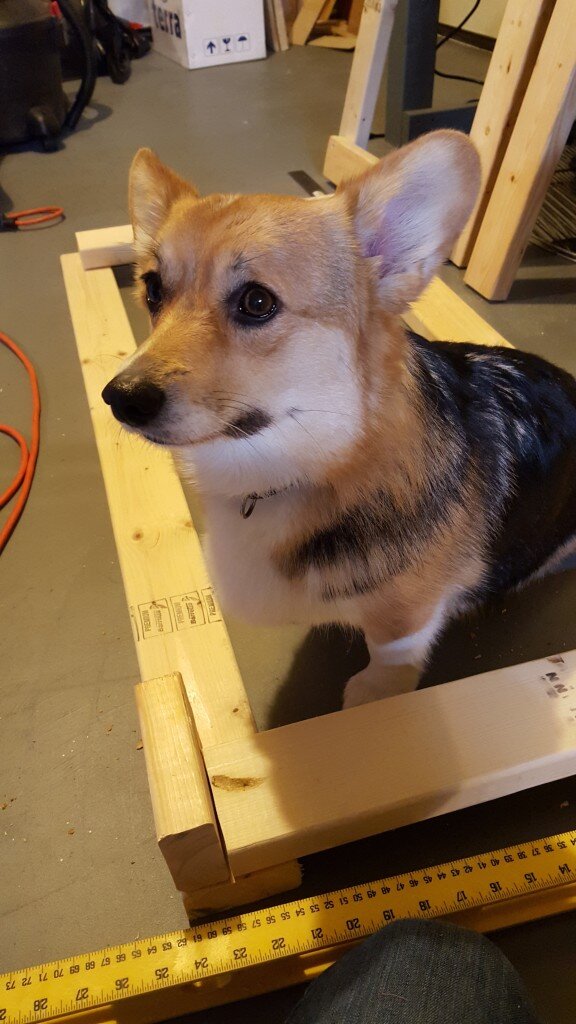
I used two pieces of scrap 2×4 and a right angle ruler to align the pieces.
Attach the sides to the front and back faces.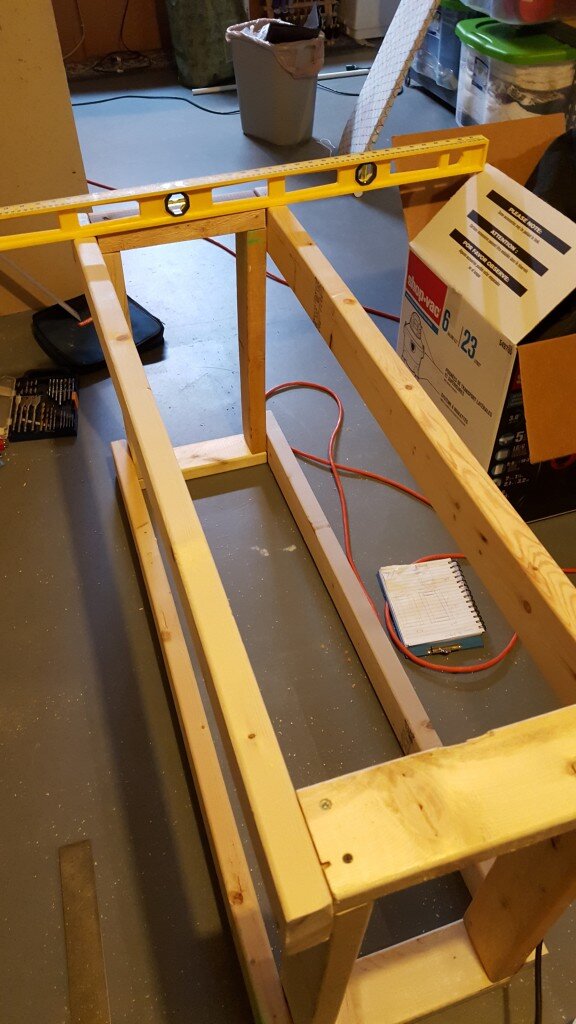
With the frame assembled I screwed the pegboard to the faces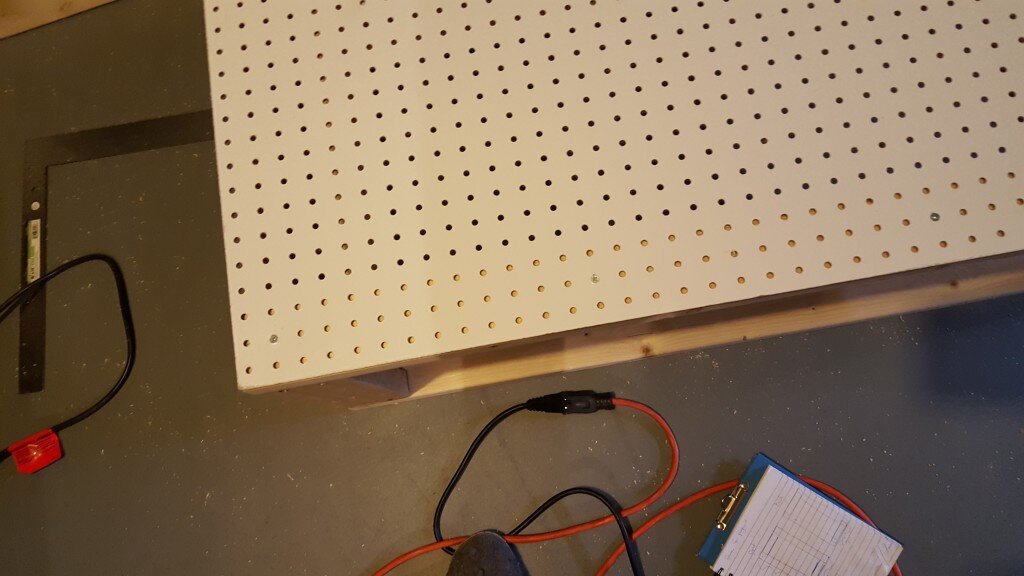
Finally I attached the casters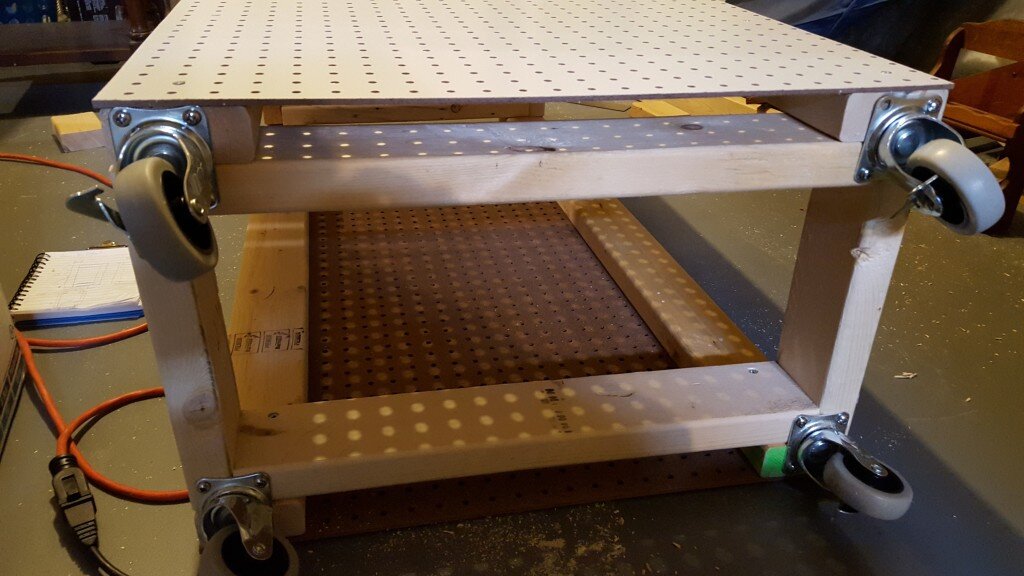
The depth I used makes the whole thing very secure. There is no chance of tipping over here. I shoved the thing several times to make sure.
Next I decided where I wanted to position the middle shelf and screwed in the angle brackets (being sure they were level).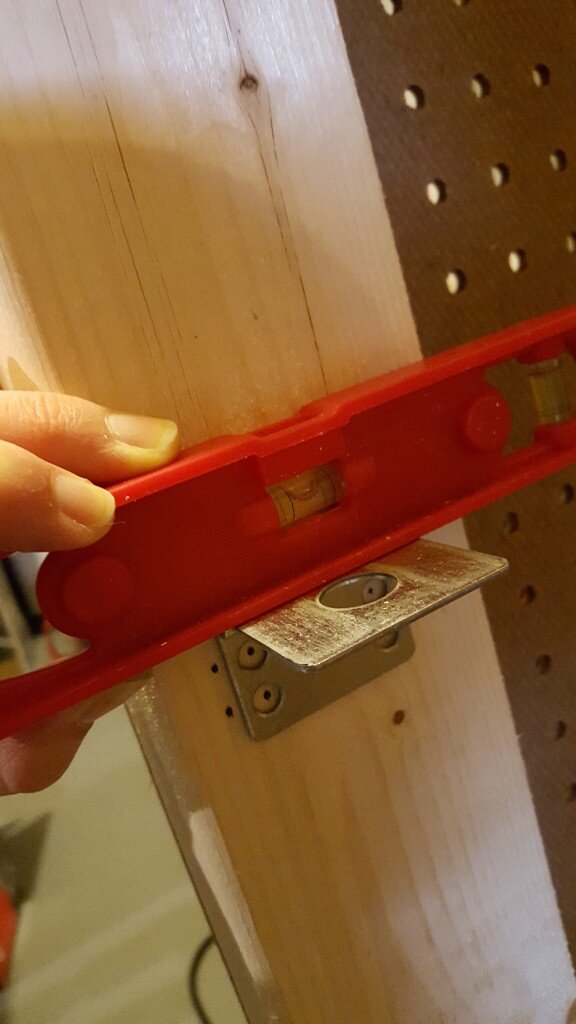
I attached shelves to the bottom and top of the organizer with screws. I used scrap wood for all of the shelves. The bottom is a piece left over from the kitchen bookshelf project, the top is a piece of particle board used from one of the damaged drawers that were previously part of the kitchen bookshelf, and the middle piece is left over from some ugly shelving the previous owners had in our “man cave”.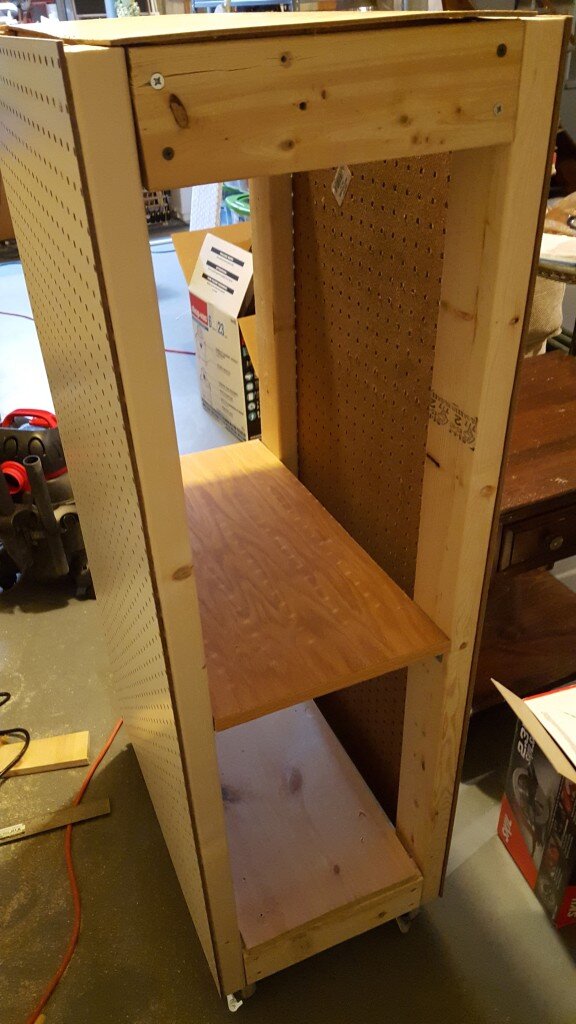
The next steps are optional…
After it was assembled I thought it could use a little pizzaz so I decided to paint it. You’ll see in a couple posts that my craft room is predominantly blue. This is mostly because I was reusing what I had on hand. If I had my way it would be pink or purple instead. So I decided to do a blue to purple ombre paint job on one pegboard face.
Materials Needed:
- 8oz of red paint
- 8oz of blue paint
- 8oz of black paint
- 8oz of white paint
- 1″ masking tape or painter’s tape.
- foam brush
- cups for paint
- polyurethane
- teaspoon
This was a fun art project. For starters I divided the board up evenly into rectangles. Since I had 1 inch tape and a 24″ wide pegboard I could divide width-wise into 5 columns 4 inches wide. Height wise it was 48″ which yielded 7 rows 6 inches high.
I marked off the location of the tape in permanent marker and then I applied the tape. 
I made sure the tape was secure and even.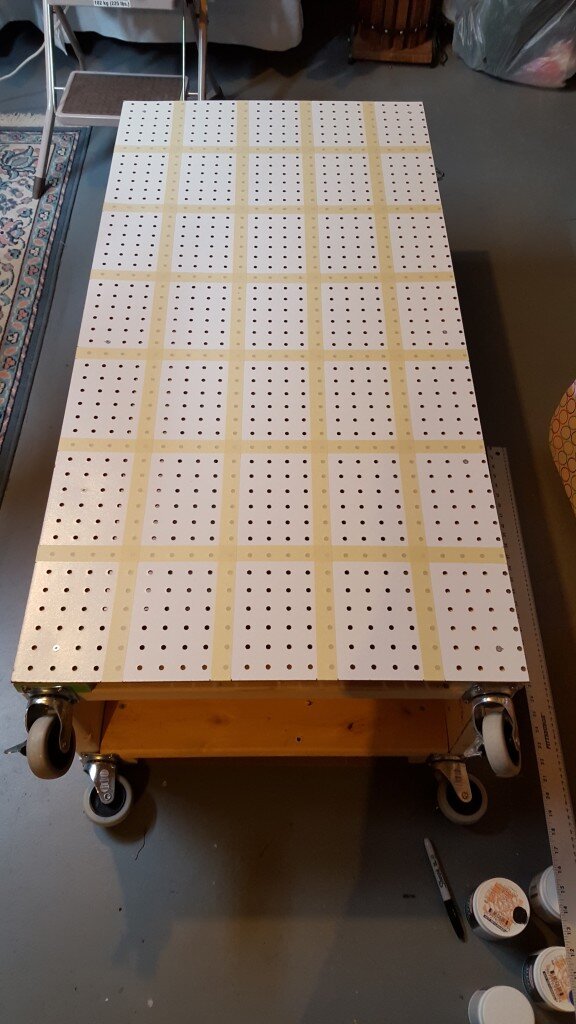
Once the taping was done I began mixing paint. I decided that horizontally from left to right my rectangles would go from blue to purple. From top to bottom my rectangles would go from dark to light. My plan was to start with cups of blue to purple paint and then add white gradually to make them lighter and gradually add black from the same starting point to make the paint darker. For this reason I needed a “dark” set of paints and a “light” set of paints.
I took equal amounts of blue paint (1 Tbsp I believe) and added it to 5 cups. Next I added red paint to the blue paint incrementally forming a deep purple. I left the first cup alone, added one tsp red to the second, 2 tsp red to the third and so. I repeated this process for another set of 5 cups.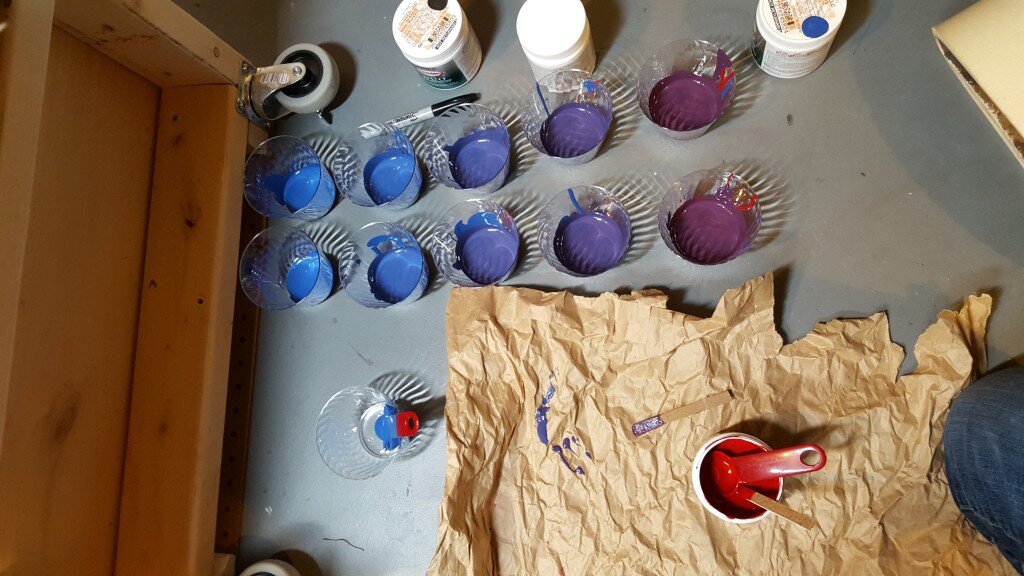
I then painted the middle 5 squares with the original blue to purple colors. 
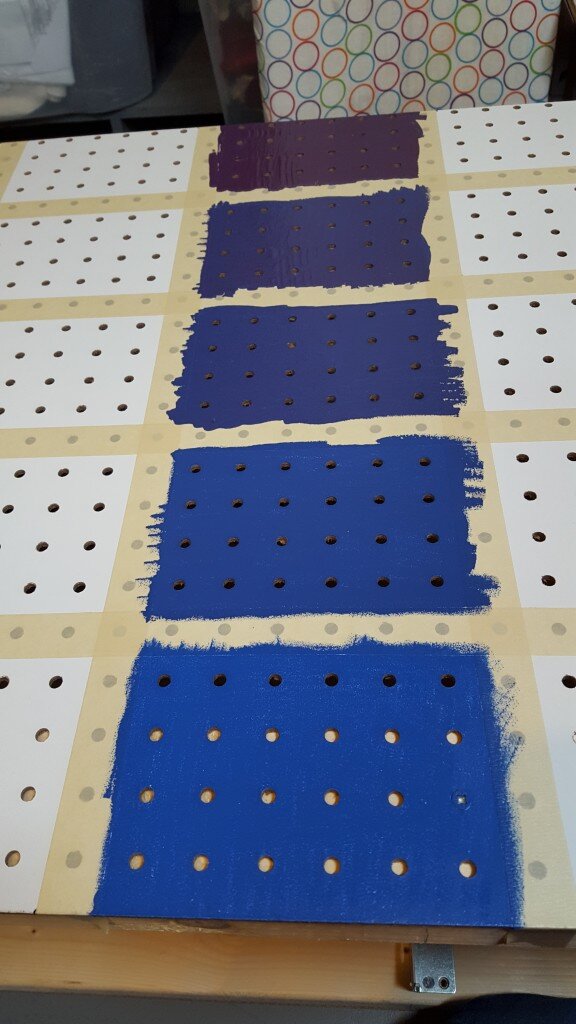
I took one set of colors and added 1 tsp of black paint to the first cup. I then painted a square. I added another tsp black paint to the cup and then painted another square I repeated this process until I came to the top. 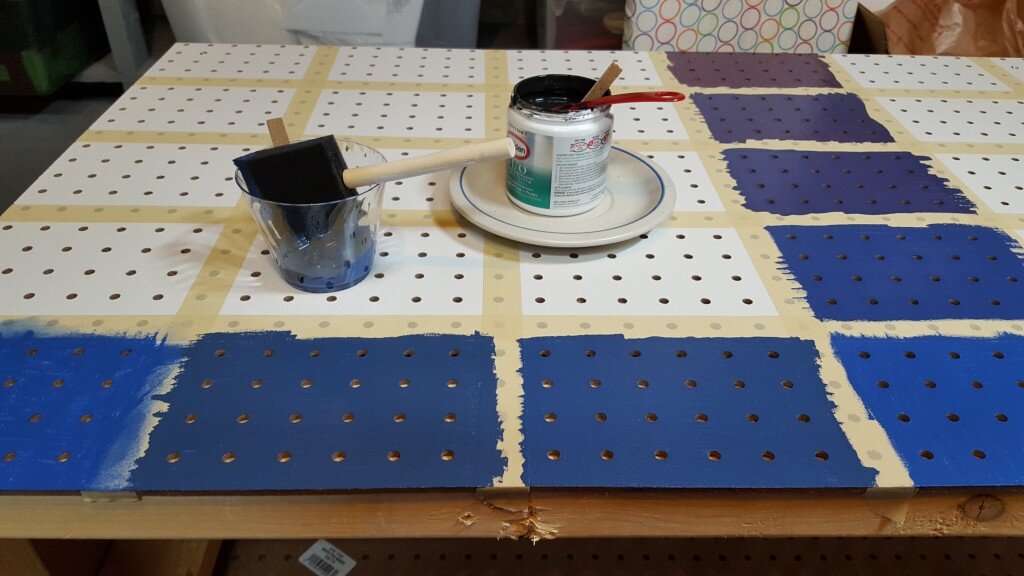 I repeated this process for each color.
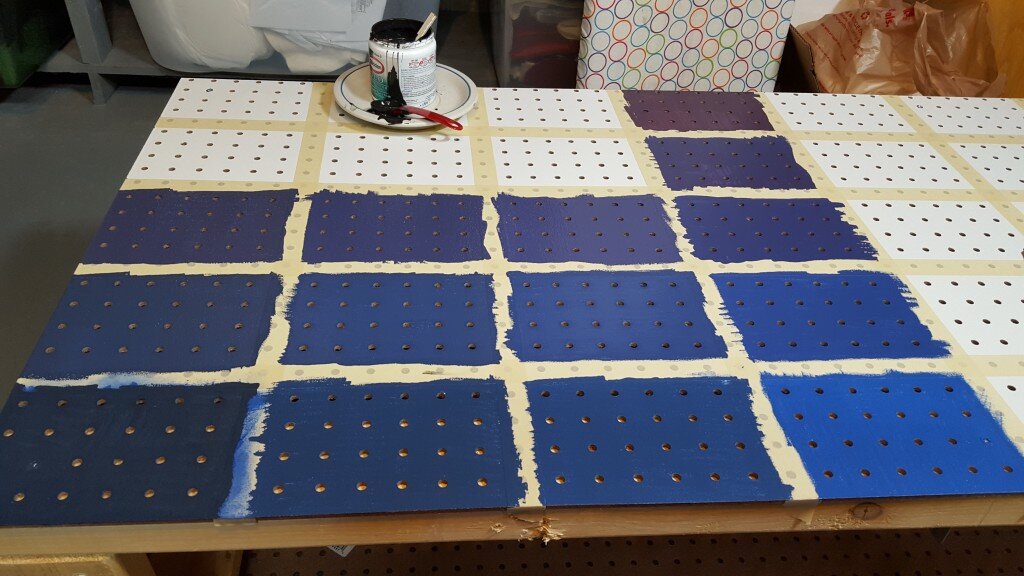 I repeated the same process with the other set of cups and the white paint.
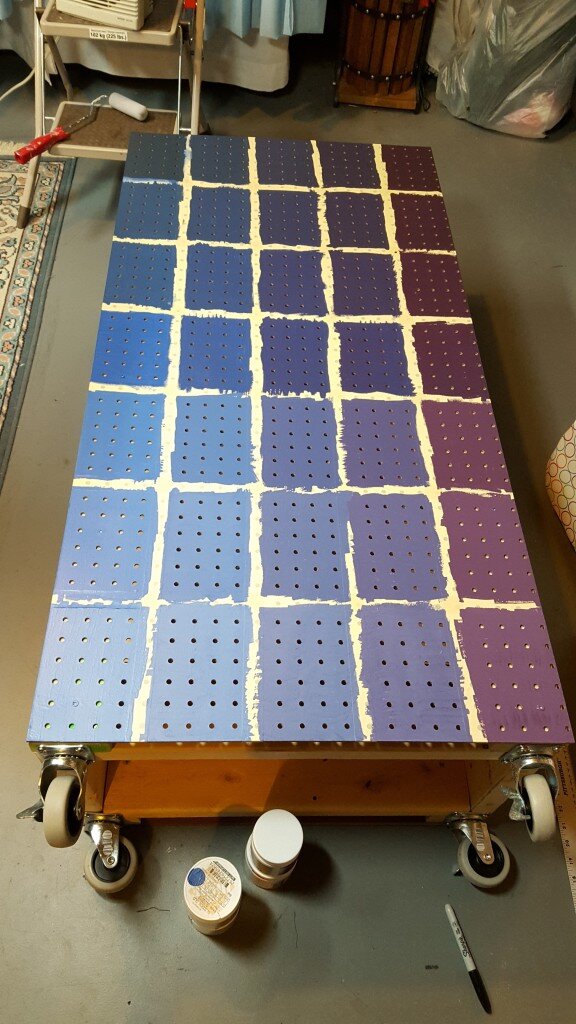
After it was dry I carefully removed the painter’s tape. Dany inspected my work
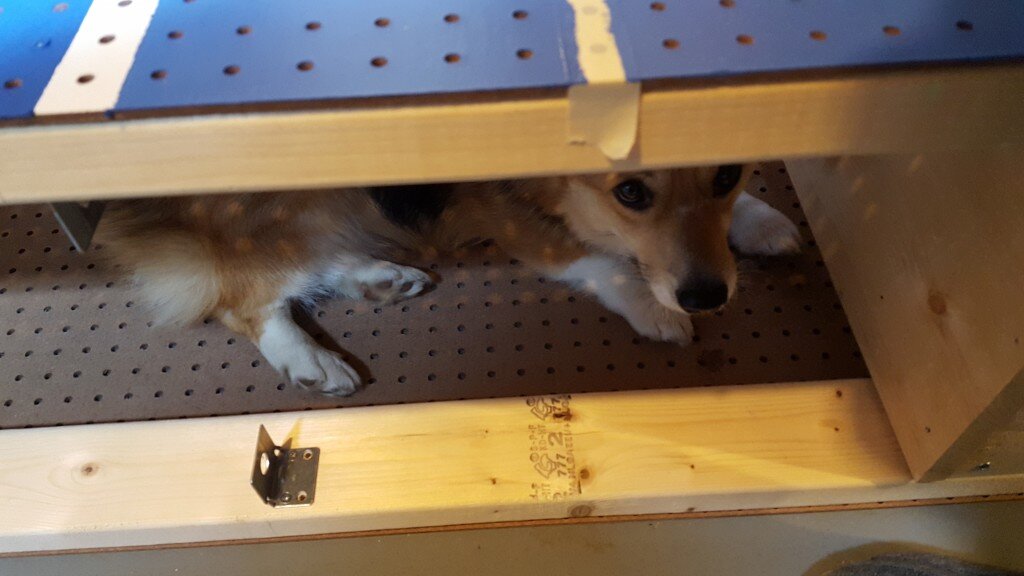
Supervisor Dany
I then applied a coat of polyurethane to seal everything. 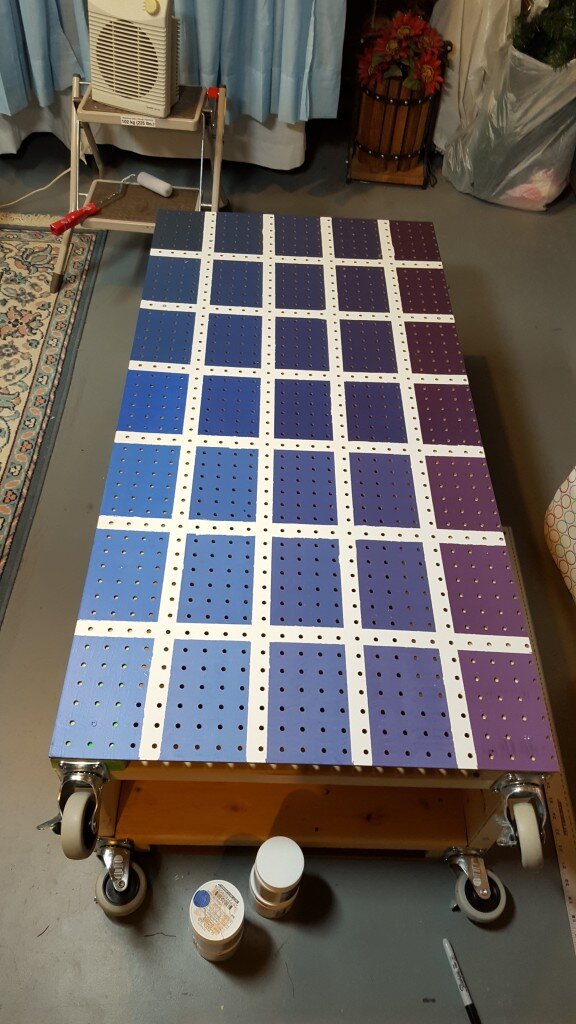
Here’s the finished product – you can see I added some hooks to hang up my ironing board which also lacks a wall to hang on. 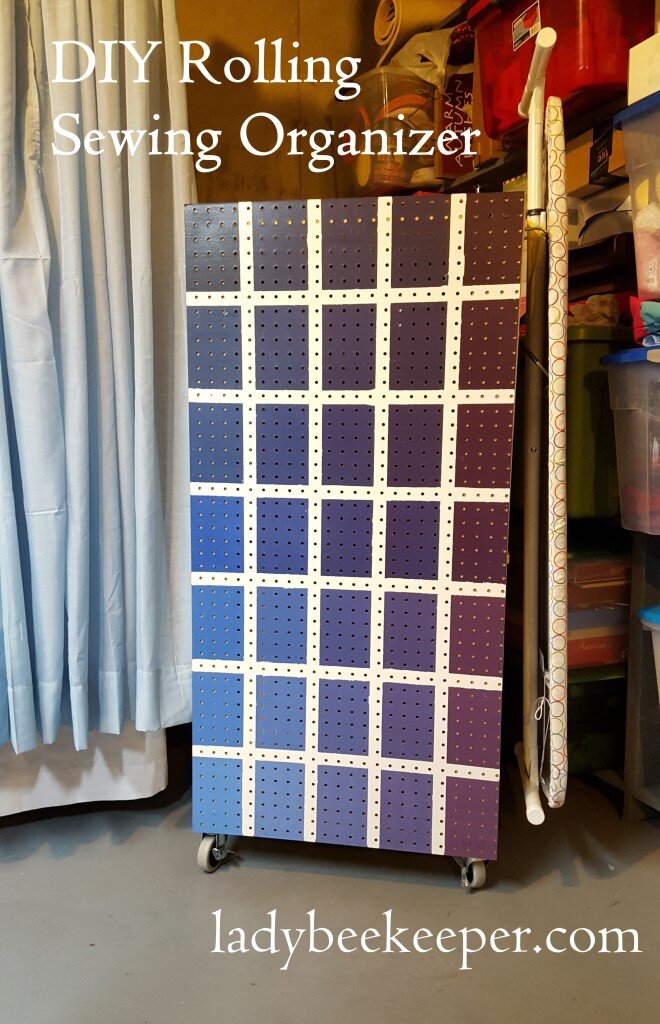

This is such a great idea! I want to see it with all your sewing supplies on it! Love to see the ironing board on it too!