
This past weekend was Danycon 2019. Everyone has left on their flights now, so sitting at home in the quiet is quite bittersweet. Will and I think it was our best Danycon yet! I, of course, will have several posts about Danycon and Danycon prep in the coming weeks.
Before I tell you about today’s project I have to relate a cute Julius story to you. In the past, we’d know Julius was awake and ready to get up because he’d cry and wail. In the past month or so, however, he’s started becoming a much more cheerful waker. Usually he’ll babble a bit, and if we don’t come get him, he’ll raise the decibel level until we come in. The other day, though, when I was home alone with Julius I woke up to the sound of him singing! He was saying the word “ba” at different pitches. I’m not sure how long he was doing it for, but I listened to him for a few minutes before deciding to go in and thank him for the serenade. It was completely adorable.
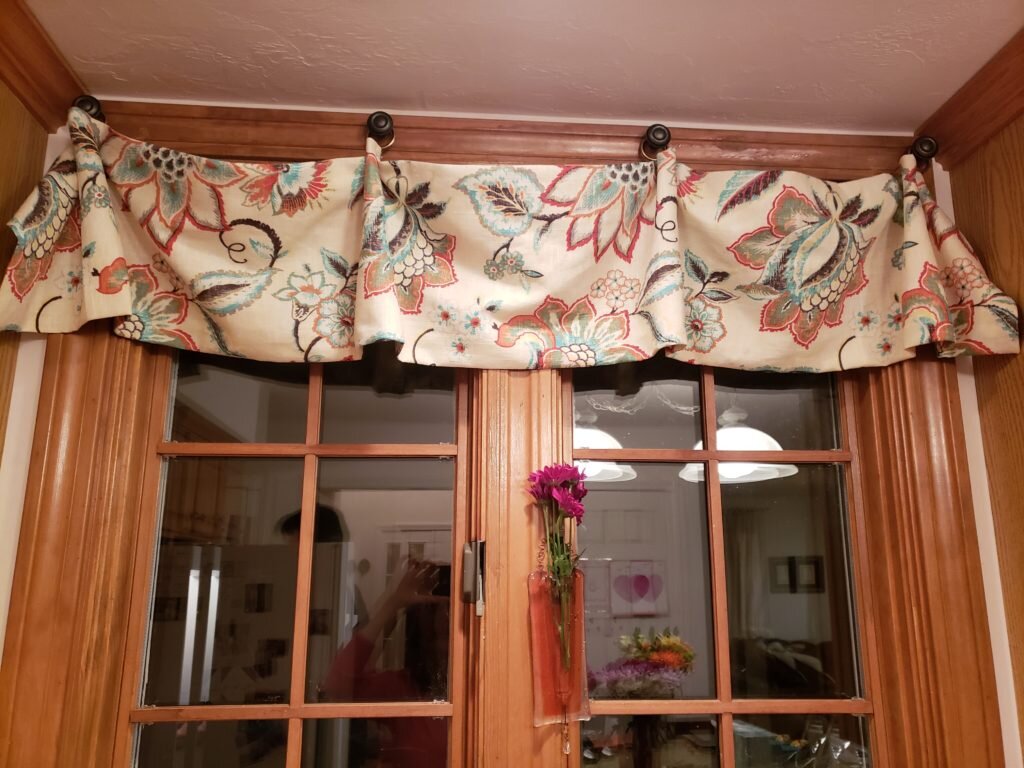
In a complete non-sequitur, remember that chocolate mishap I mentioned occurring during the last ladies’ night? The one where chocolate got on the floor, ceiling and curtains? I told my friend (who accidentally caused the chocolate fiasco) that there was no need to clean the chocolate off the curtain, because now I finally had an excuse to make the the kitchen curtain I’d been putting off for so long. She didn’t believe me, but I really was telling the truth! I’d bought the fabric to make new kitchen curtains at least 3 years ago (definitely well before Julius was born). The weekend after the mishap I buckled down and made the curtain. I think it came out pretty good, and it was actually very easy to make.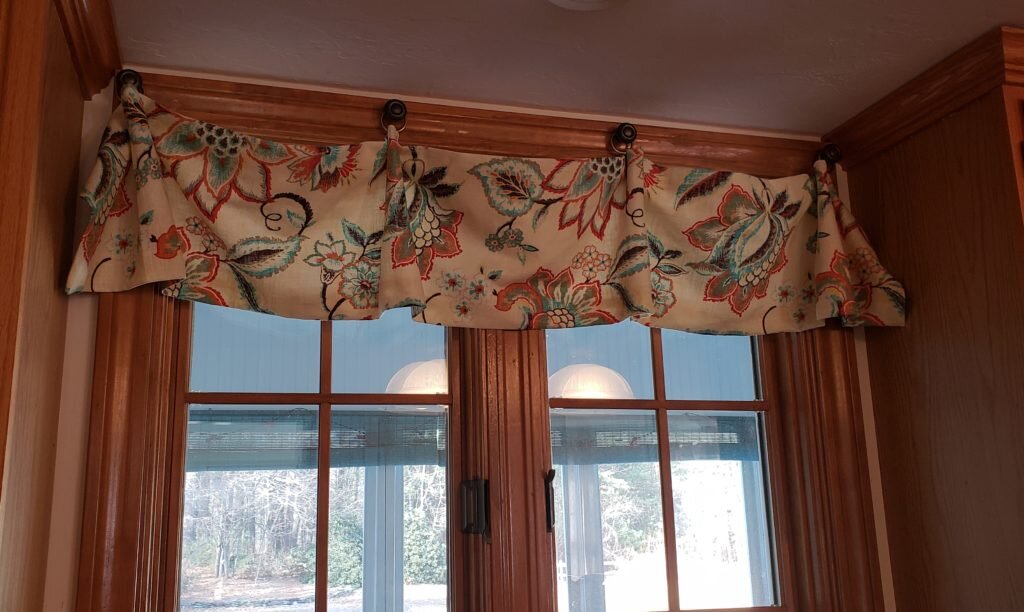
Draped Swag Curtain
What You’ll Need:
(For a 42.25″ wide window*)
- 1 yard of home decorating fabric
- 1 yard of lining fabric
- 4 curtain clip rings
- 4 knobs
- 4 hangar bolts in bolt thread size of knobs
- Create a 70″x 13″ rectangle of home decorating fabric by matching patterns and stitching together (or if you intend to make more than one curtain like me, use more than 1 yard of fabric and cut one continuous 70″ long strip)
- Create a 66″x 9″ rectangle of lining fabric by stitching together (or if you intend to make more than one curtain like me, use more than 1 yard of fabric and cut one continuous 66″ long strip)
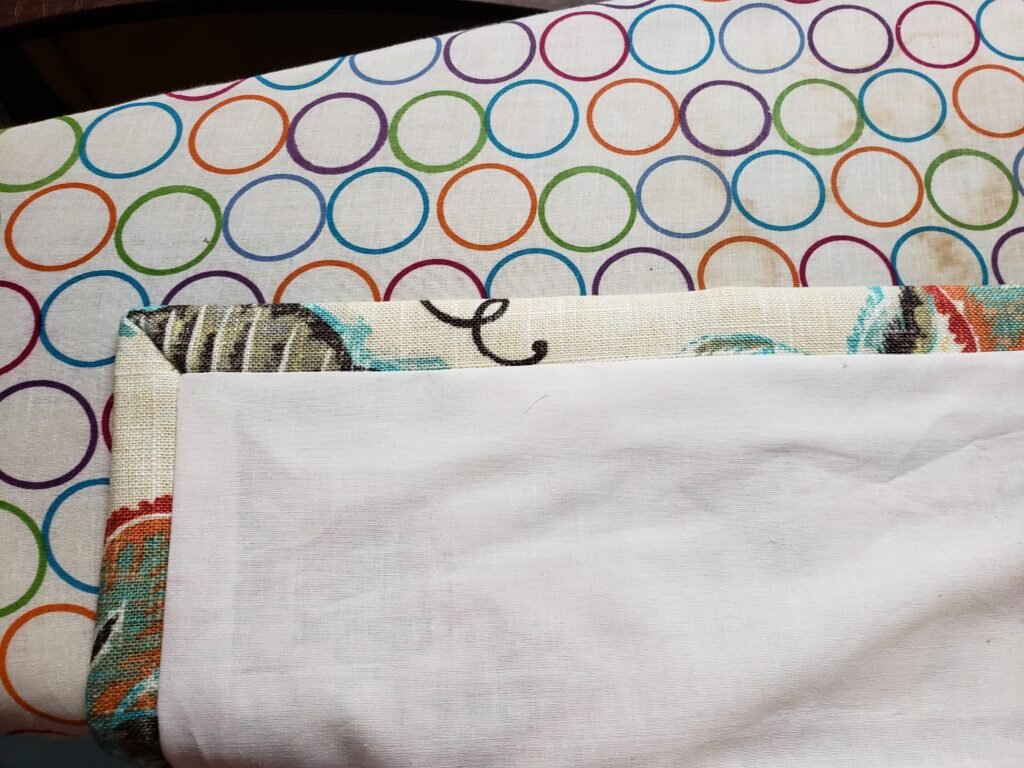
- Press 1.5″ under of every edge of decorating fabric.
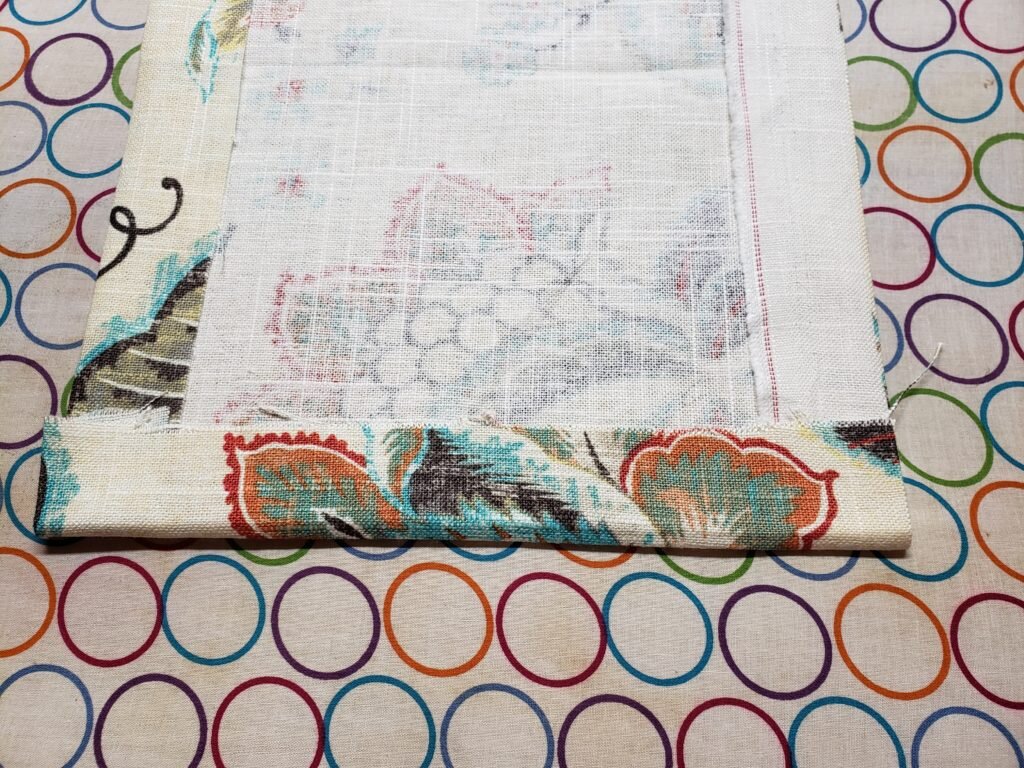
- Miter corners.
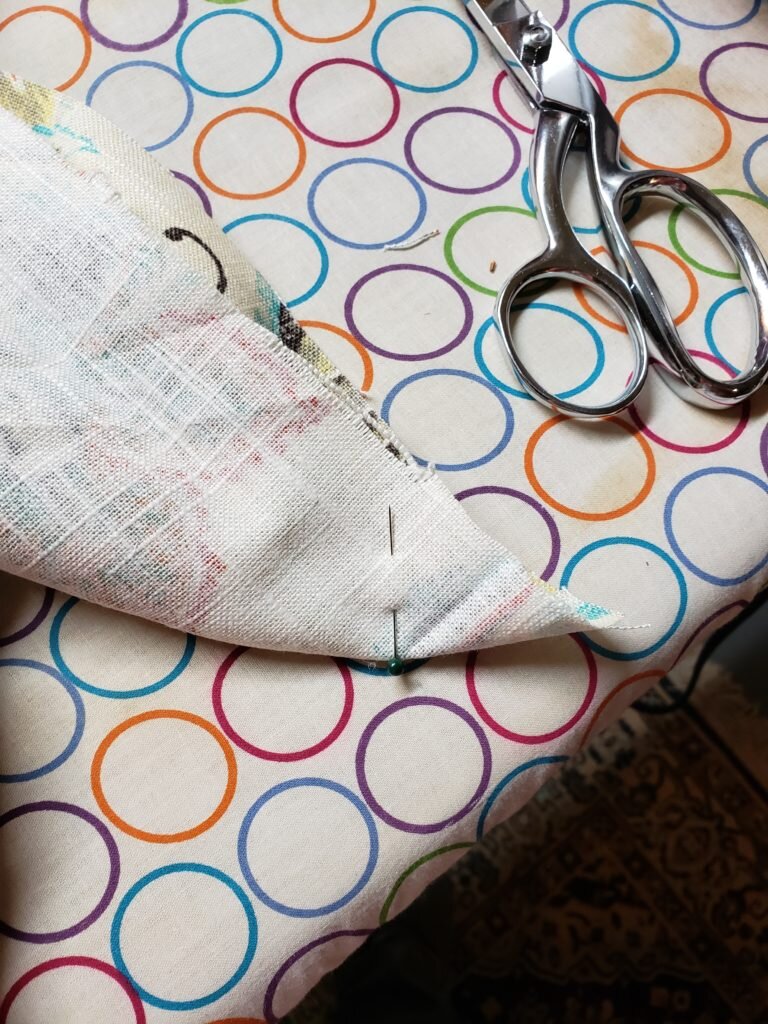
- Line lining fabric up with one long edge of decorating fabric (note I used an extra 1/2″ of seam allowance so in my picture the lining fabric isn’t perfectly lined up with the decorating fabric, but yours should be). Start the lining fabric 1/2″ before the mitered fold line. Pin. Repeat for 2 other sides of fabric, leaving one short end opened. Stitch.
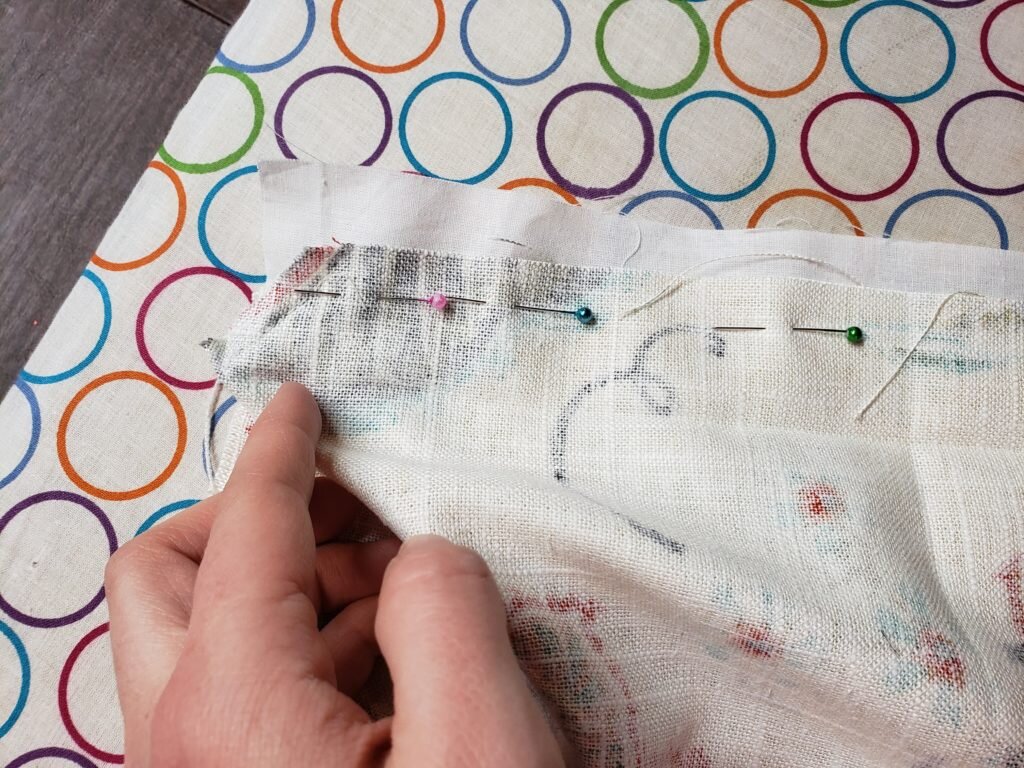
- Turn right side out and press the unfinished short end of the lining fabric under so only the fold shows. Flat catch stitch the short end of lining to the selvedge of the decorating fabric.
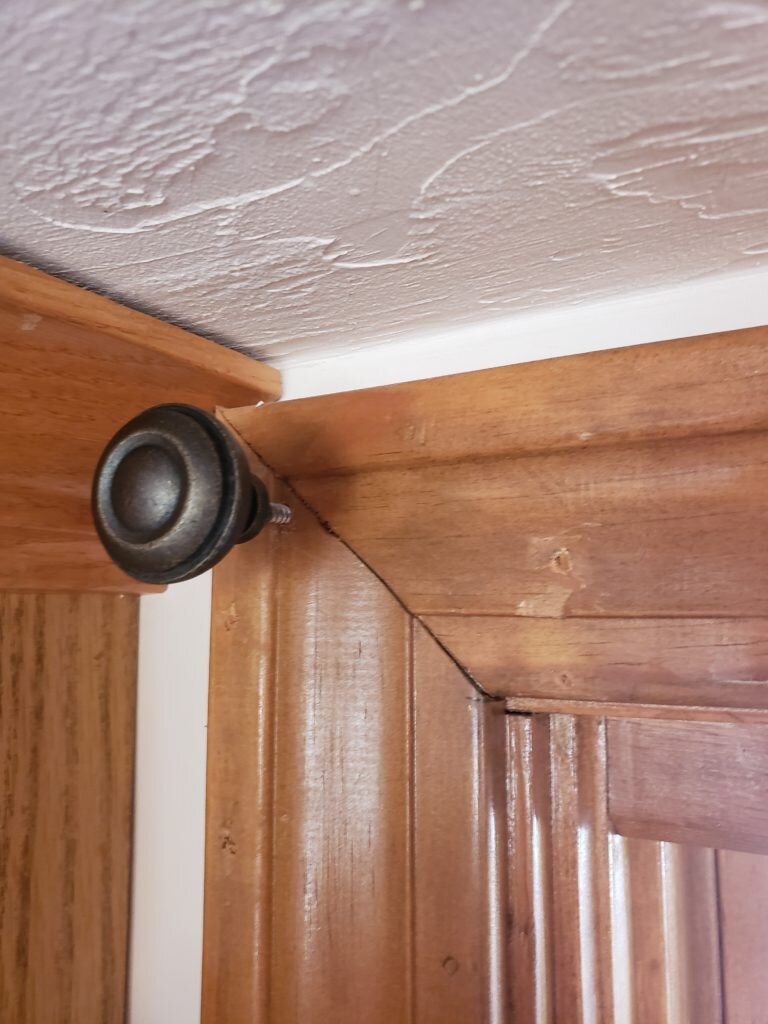
- Insert 4 hangar bolts in or above your window frame so the spacing is equidistant. You will probably have to pilot drill a hole so the screw end of the hangar bolt goes in easily. Use the knob to turn the screw into the hole.
- Mark your curtain at 6.75″, 25.25″, 43.75″, 62.25″.
- We left 3.5″ in between each swag to fold and clip onto the curtain hook. Fold at each mark, keeping the lining on the inside of the fold. After the fold is about an inch deep, fold in the fabric on either side of the fold making a pleat. Adjust so this second set of folds sits about .5″ below the first fold. Clip here. Repeat for other markings.
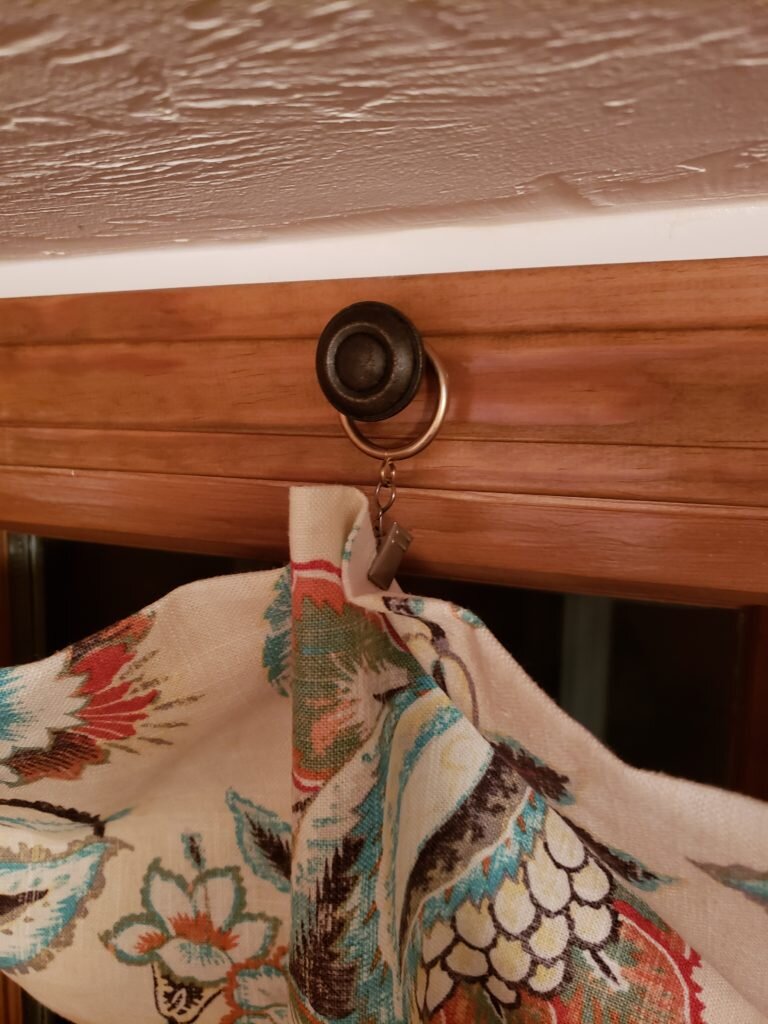
- To hang curtain, unscrew knob, place curtain ring over hangar screw and screw knob in place to secure.
*If you would like to make your curtain wider for a wider window, simply measure the width of your window, then calculate the number of knobs you will use. Your final curtain length will be (1.11 * width/(#knobs – 1) + 3.5″) * (#knobs – 1) + 10″. You can then add 3″ length for the decorative fabric in step 1 (1.5″ seam allowance per side) and 1″ length for your lining fabric in step 2 (.5″ seam allowance). In step 8, you will mark your curtain at the same intervals, adding 18.5″ until you reach the end.
