I just want to take a quick minute to say something to all my readers out there. Thank you for reading! Your support and continued cheery comments, or remarks on my projects when I see you in person, are the reason I haven’t given up on this blog endeavor. Do you know how much I love hearing from you, readers? Well, every few days I manually go through the comments on my blog. 99.6% of them are spam from Russian bots or ads for penis enhancements, but for every 249 disturbing spam comments I find that one real comment from you, dear readers, that puts a smile on my face. That one real comment is the reason I continue to manually weed through my comments day in day out. “Why don’t you just get a better plugin to weed out the spam comments?” I hear you ask. Well, that’s a good question.
As promised, this week and next week I’m going to show you how to make another craft from Julius’ first birthday party. After the birthday segment concludes I’ll show you some of the Christmas crafts that I’m making for folks this year. (This is partially because I don’t want to give any family reading my blog any spoilers, but mostly because I haven’t made anything yet. Oops.)
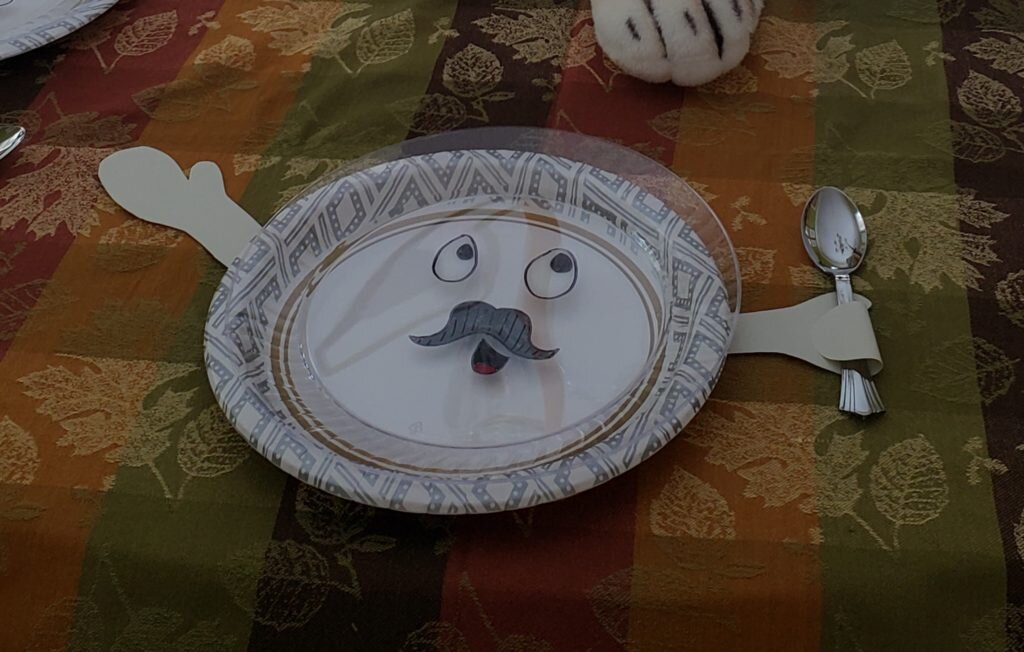
This week I’m going to show you how I did the “Hey Diddle Diddle” dish ran away with the spoon plates. For this project, I had a lot of help from my brother and sister in law when they should have been sleeping while their son slept! Thank you both! For this craft you’ll need two plates per place setting, one in clear and one in an opaque color scheme. Ideally two plates that fit inside one another like these are the best choice. I know, I know, the environmentalist in me is kicking herself for doubling the trash. If you’re like me you’ll get plates that are at least recyclable or compostable…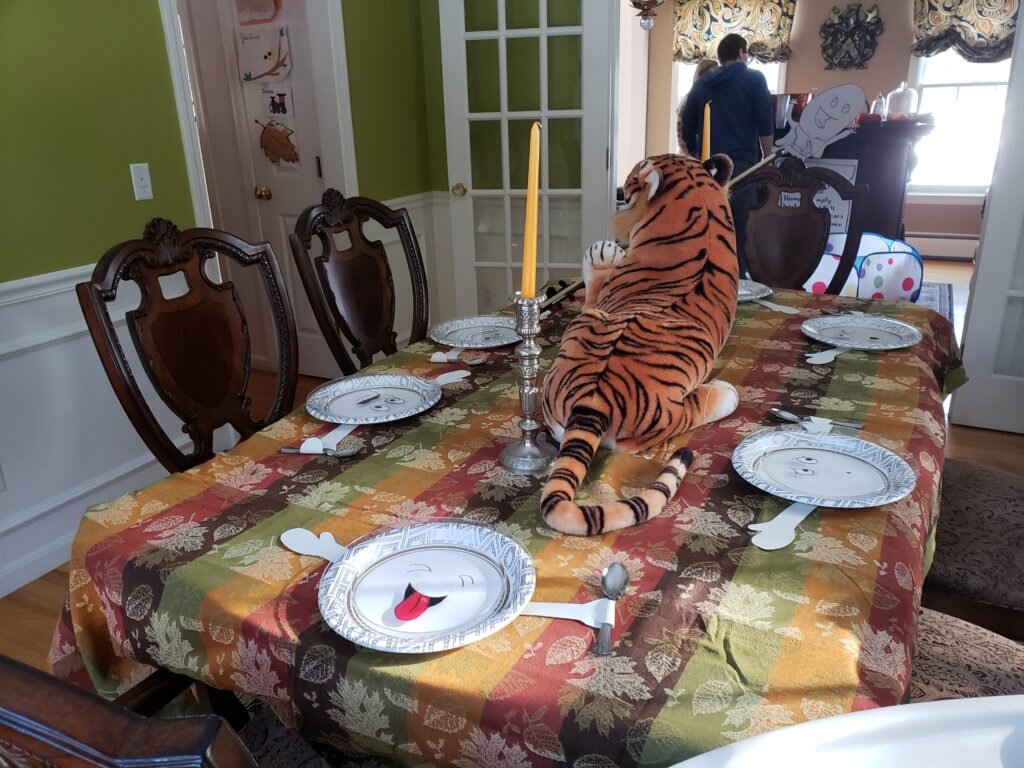
Dish-Ran-Away-with-the-Spoon Plate
What you’ll need (per plate):
- 1 clear plastic plate (see note above)
- 1 opaque plate (see note above)
- 1 plastic spoon
- 1 sheet of cardstock
- black sharpie
- acrylic paint
- Glue tape or Advanced tape glider or even a glue gun would work
- arm pattern and face templates here
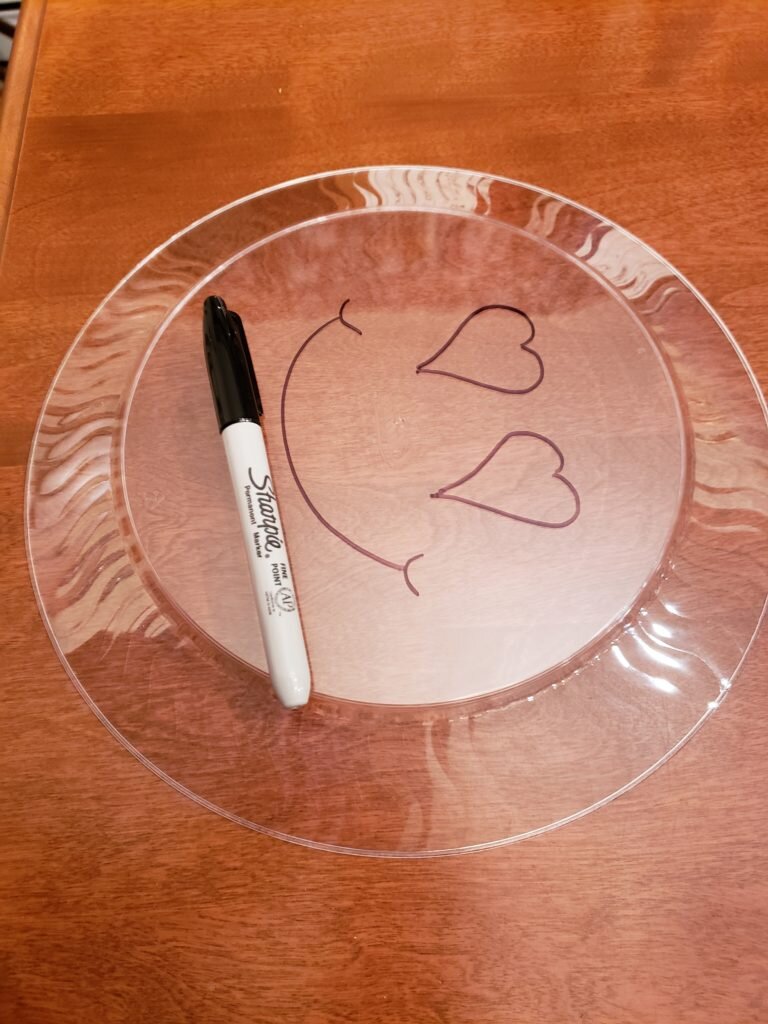
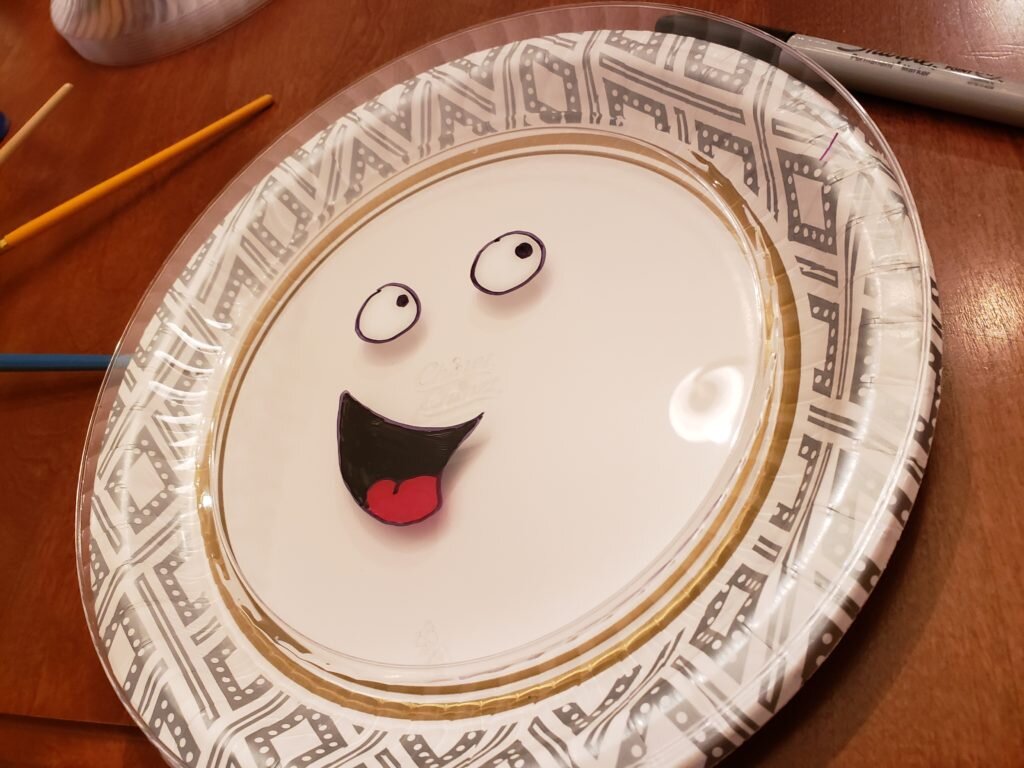
- Take one of your clear plates and flip is so the back side is facing you.
- Draw a cartoon face on the back of the plate in sharpie (Can’t draw? Print these sheets out then trace one of these designs my brother created instead!)
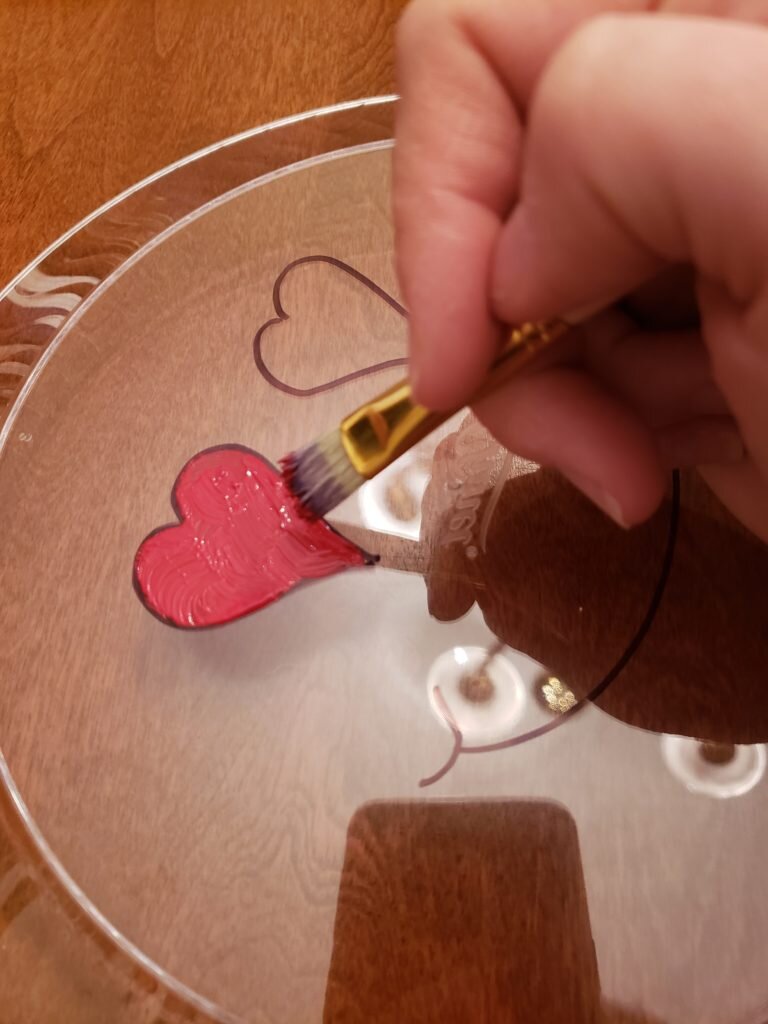
- Using a paintbrush, color in any areas where you don’t want the plate color to show through. For instance – the whites of eyes, mustaches, teeth, tongues etc. Let dry.
- When the paint has dried, apply a bit of glue tape around the top edge of the opaque plate and press the clear plate on top. (My plates didn’t quite fit within each other so I couldn’t quite do this.)
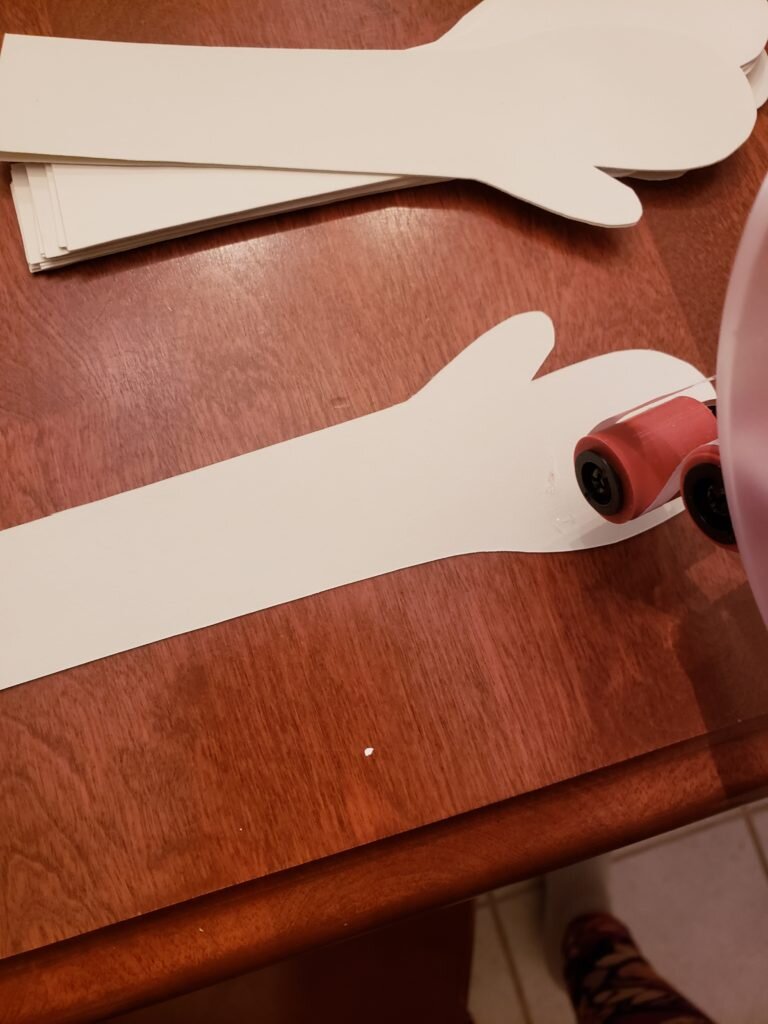
- Next, cut out two arms on your cardstock using the template provided.
- Arrange the arms on a table under your plate as you’d like them to appear. The arms must be under the base of the plate by at least an inch.
- Make sure the thumbs are facing the correct direction, then remove the plate and put a bit of tape glue on the base of each arm. Firmly press the plate on top of the arms, fixing them in place.
- Take your spoon and place it in the palm of one of the hands you just glued. Apply glue tape to the side of the spoon closer to the wrist. Gently curve the mitten portion of the hand over the spoon and into the blob of glue tape, pressing firmly to secure.