Bugs and Babies

Massachusetts lifted the mask mandate this past weekend which a lot of people are very excited about.  I’m not one of them since I still have two unvaccinated children and the chance of spread from a vaccinated person to an unvaccinated person is possible, albeit low.  That being said, it is not the vaccinated people spreading it that I’m concerned about.  I’m worried about the antivaxxers.  In the past, you could spot the people without masks from a mile off and keep your distance.  Julius makes a wide berth around adults without masks, and we do too.  Those people who couldn’t be bothered to wear masks during a global pandemic to protect others, probably are not listening to the science behind vaccines either.  Luckily many folks in MA are actually listening to science…

We are so lucky to live in one of the only countries that is wealthy enough to buy (multiple doses of) vaccines for all their citizens. While I don’t mind wearing my mask enough that I’m going to ditch it yet, I do mind the anxiety that the pandemic has caused.  It was amazing – as soon as I got that shot in my arm I felt that sense of dread lift.  I’m now even able to look back at the situation around us and reflect on it without panicking.  The reflection has brought me to a couple realizations.  The most uplifting insight is that the pandemic has brought about the mentality to “not put off until tomorrow what you can do today” (except cleaning – definitely still putting that off until tomorrow, or next week, or next month).  I mean just look at my random accomplishments!  I have finished projects I started when Julius was just born, mended items that have needed mending for years, started and finished dozens of projects and have reorganized half the house.  I’m pretty proud of myself.  I’m wondering how long that mentality is going to last when we start leaving the house and the piles of unfinished things blend into the background again…

So this post is dedicated to anti-procrastination!  The project I’m going to show you might be the epitome of anti-procrastination, or it might be some serious hardcore procrastination.  I’m not sure.  Before Julius was born I wanted to create a hot air balloon mobile for Julius and ended up buying one instead.  I love the mobile I bought him, so it all worked out.  For Patricia I again had dreams of making a mobile.  I envisioned a mobile with bees and flowers to match her room’s poppy theme.  I had a harder time finding one I liked this time around, so I had slightly more motivation to make one.  I wanted to finish one before Patricia moved from her bassinet into her crib so that she had something to stare at, but that (as expected) didn’t happen.  She outgrew her bassinet very quickly and by mid January we were sick of tiptoeing in and out of our room every night so not to wake her.  At this point though I was fully motivated.  I had a concept in my head that I sketched down and completed February 22nd.  I bought some supplies and spent many nights making tiny bugs and flowers out of felt to adorn her mobile.

When I had the bugs and flowers all ready, I spiked a fever and thought I had come down with covid from the one stranger that came into our house during the pandemic.  Will was also convinced I had covid so I ended up quarantined in my room until I got the results of my covid test.  Will and Julius left me food outside the room and I’d feed Patricia completely masked.  I was super scared and just stared at my phone waiting for the test results, which took two solid days (in the past they only took 12 hours).  Luckily my fever broke and the test came back negative, and that’s when I realized that it had probably had been mastitis the whole time.  At some point though, Will decided I could quarantine in the basement instead and I managed to finish stringing the mobile together instead of being bored out of my mind.  So mid-March I finally finished Patricia’s mobile and I’m so happy with how it came out!  I am pretty proud of myself that given a deadline I only missed the mark by 2 months, despite a toddler and infant and a fever.

Anyway, I’ll try to post the flowers and bugs in a future post, this is just how I strung the whole darn thing together.

Bugs and Flowers Mobile

What you’ll need:

  1. Cut a 2 foot length and three 2-yard pieces of crochet thread.  Knot the 2 foot length to form a loop then hang from a coat hanger.
  2. Thread your needle with on of the 2 yard pieces of thread. Pass the needle through the center of a pompom, through the loop, and back down through the center of the pom pom.  Remove the needle from the thread, and then pull the thread so the ends hang even. Repeat for the other two 2 yard pieces of thread.
  3. Hold the 12″ wide wreath ring about 6″ below the bottom of the knotted thread loop.
  4. Pass one end of a strand of crochet thread through the center of the 12″ ring, around the top and back down.  This should hold loosely using the friction of the thread on the ring (I’ll call this a friction knot for lack of a better term).
  5. Repeat step 4 with the opposite end of the strand of crochet thread.  Make sure the friction knot is directly across from the other one.
  6. Grab a new strand of crochet thread and repeat step 4 6 inches away from the previous friction knot.  Repeat step 5 for this thread.
  7. Repeat step 6 for the final thread.
  8. Adjust all threads so the hoop hangs parallel to the ground.
  9. Knot each thread onto the hoop so it will hold tightly.
  10. Cut two more 2 yard pieces of thread.
  11. Thread your needle with a piece of thread, then again pass it through the center of the pom pom, through the loop, and back down through the center of the pom pom as in step 2.  Even it out so the center of the thread sits at the pom pom.
  12. Repeat step 11 with the last piece of thread but instead of evening out the thread, instead knot just below the pom pom, pass one end of the needle and thread back up through the pom pom and trim so the end of the thread is hidden in the pom pom.  You should now have 3 threads hanging down the mobile unattached.
  13. Hold the 6″ ring about 5″ below the 12″ hoop.
  14. Pass one end of a strand of crochet thread through the center of the 6″ ring, around the top and back down.  Repeat for the other two threads, spacing the threads evenly around the 6″ ring.
  15. Knot each thread onto the hoop so it will hold tightly.
  16. Thread your needle with one of the central 3 threads.  Pass through two pompoms and into the top of an insect/flower.  Tie a loose knot to hold in place.
  17. Thread your needle with another central thread.  Pass through 1 pompom and into the back of an insect/flower. Tie a loose knot to hold in place.
  18. Repeat steps 16 and 17 for all insects and 3 flowers, alternating one pompom and 2 pompoms and alternating different insects and flowers.
  19. Using regular sewing thread stitch a poppy onto the 12″ and 6″ hoop where each thread meets the ring.
  20. Adjust the insect/flower height in the larger ring so when the inner ring spins it will not hit the insects.  My insects were around 10″ below the 12″ ring.
  21. Adjust the insect/flower height in the smaller ring so the insect/flowers don’t hit the outer insect/flowers when the rings turn.  These were about 10″ below the 6″ ring.
  22. Knot the insects/flowers, then thread the crochet thread back through the flower or insect and trim excess to hide the thread.
  23. Adjust the pom-poms on each thread so they are centered between the hoop and the insect/flower.

    Patricia checking out her mobile from above.

    Patricia admiring her mobile from below

    Patricia’s view


Posted in Crafts & Sewing | Leave a comment

Ch-ch-ch-chia

Wow it is late.  In the interest of me going to bed at a reasonable hour, I’ll tell you a Julius story, and then let you in on a secret.

I am still eating vegetarian, which means Julius and Will (and Patricia) eat vegetarian for dinner too.  After my year of vegetarianism I decided to have fish once a month or so.  Some internet research has lead me to believe that eating farmed bivalves is actually pretty good for the environment as far as eco impact goes.  Sorry I digress – today we were making coconut shrimp (I know these aren’t bivalves) and Julius really wanted to help me cook.  I suggested that he wash and dry the shrimp.  He got right to it and started telling a story about how the shrimp were getting washed and ready for bed.  I didn’t have the heart to tell him we were going to eat the shrimp and they were already dead, so I played along and asked if they were all shrimp brothers and sisters.  He responded instantly, “no they are all cute little baby shrimp”.  Will and I looked at each other horrified for a second.  If you want someone to go vegetarian just have Julius help you with meal prep.

Okay, now for the secret.  I love chia seeds.  It started by me trying to find a healthy snack to eat in the evenings. (Okay it probably really started with the chia pet I got when I was a kid…)  I was kind of over-doing it on Siggi’s yogurt, which actually has quite a bit of sugar in it.  I had a bunch of chia seeds leftover from who knows what in my closet.  I’ve tried chia seed pudding before and thought it was good, but remembered it contained a bunch of sugar. (The version I made for Ladies’ night had four times the amount of sugar as my current version!!)  Here’s the version I’ve settled on for my go-to late night snack.  Since it doesn’t have dairy it provides a significant amount of vegetarian iron, as well as protein!

Vanilla Chia Seed Pudding

  • 1/2 cup of chia seeds
  • 2 cups of almond milk or coconut milk**
  • 1.5 tsp of vanilla extract
  • 1 Tbsp of maple syrup

Combine chia seeds and coconut milk, stir vigorously until all the chia seeds sink.  Add vanilla and maple syrup and stir again.  Refrigerate overnight.  Makes 5 servings.

**coconut milk has almost no nutritional value but it is low in fat.  I find the shelf stable version tastes a teensy bit creamier.  Almond milk is higher in calories, but has a lot more nutrients.  I also think it tastes much creamier.


Posted in Culinary Delights | Leave a comment

DanyCon and Friends

Hello dear friends!  What a beautiful weekend it was!  We decided to leave our houses and go to an outdoor public event for the first time in months!  Will and I decided it was time to determine how safe we felt at Davis Farmland – one of our favorite places of all time.  Julius had a great time, though he wasn’t as excited as we thought he would be about going there.  He told us “well I’m not too excited, but I am a little bit excited.”  Whatever that means, no one knows for sure.

Overall we felt fairly safe, and since they require masks almost every adult we saw had one on (with the exception of 1 piece of hot garbage).  Julius wore his mask the whole time (which made us feel better since we are still paranoid after all).  Will told me that Julius’ mask-wearing prompted an unmasked little boy that Julius was playing with to ask his mom for his mask.  Nothing beats that.

Okay so forget Davis Farmland, the real wildness is that I WENT GROCERY SHOPPING!  INDOORS!  It was the first time in 14 months that I have set foot inside a grocery store.  Can I tell you, it was weird… you all probably have seen the inside of a store in the past year, but this hyper paranoid hypochondriac has been avoiding retail since I found out I was pregnant.  It was surreal.  There were so many signs!   “You must wear a mask at all times” and “maintain 6 feet between customers” and “only 90 people allowed in the store at a time”.  I felt like Cillian Murphy in the beginning of 28 days later when he wakes up after the zombie apocalypse has ravaged the city and is quietly walking around and piecing it all together.  I didn’t know where to stand for the cash registers, I wasn’t sure how the deli worked anymore and I made awkward unintelligible chatter at the checkout people because I have only spoken to about 14 humans face to face in the last year.  But other than that it was great!!  I didn’t even have a panic attack!

All that progress aside, despite the CDC updates, I still have two unvaccinated children, and I can’t see myself hosting any indoor parties anytime soon, vaccinated friends or not.   Luckily one good thing that has come out of this horror show is virtual parties!  Sure, sure, compared to in person parties they suck.  But, I’ve seen more of my far away friends in the last year than I have in the last 5 years combined!  And think of the commute time you save for those of my friends who are “local”!  One of the best parties that works for the online format is board games.  While our entire collection isn’t available online, a great assortment of games are available on free sites like Yucata and Board Game Arena.  Since the beginning of the pandemic Will and I became paying members of Board Game Arena and I don’t think we’ll stop anytime soon.  Throwing a virtual board game party is the next best thing to live board games!  Read on below to hear about our latest adventure…

DanyCon and Friends

You all have heard about DanyCon, the family convention we throw for the Collins/Colton Family every year.  Since last year’s DanyCon was such a hit virtually, we knew we could scale the event easily without much extra effort.  So thanks to the pandemic we decided to host our first ever DanyCon and Friends!***

Theme

A Lexi party wouldn’t be complete without a theme.  Themes for virtual parties are rather loose, but I tried my best to tie it together.  For DanyCon and Friends, Will and I decided “carnival” would be the theme.  Our invite emails used carnival vernacular like “step right up” and “extravaganza”.  The virtual game rooms oozed theme.  The swag makes me think of a carnival every time I look at it.

Could you guess the theme from this alone?

Registration

We learned what worked from DanyCon and did a slightly more stream lined version for DanyCon and Friends.  Instead of having folks learn multiple platforms we hosted the entire DanyCon and Friends on just Board Game Arena.  For communication we used Discord chat and voice channels only since we found video didn’t add much for DanyCon.  Though we initially wanted to have a multi-day convention, we decided that with two young kids one day was enough.

To register we asked people to do the following:

Reply to this email with the following information:
BGA username:
Are you a premium BGA member? Y/N
Discord username:
Mailing address:

We then sent out a link that people could click to join Will’s discord server.  He granted access to the sites below when they joined.

Hosting

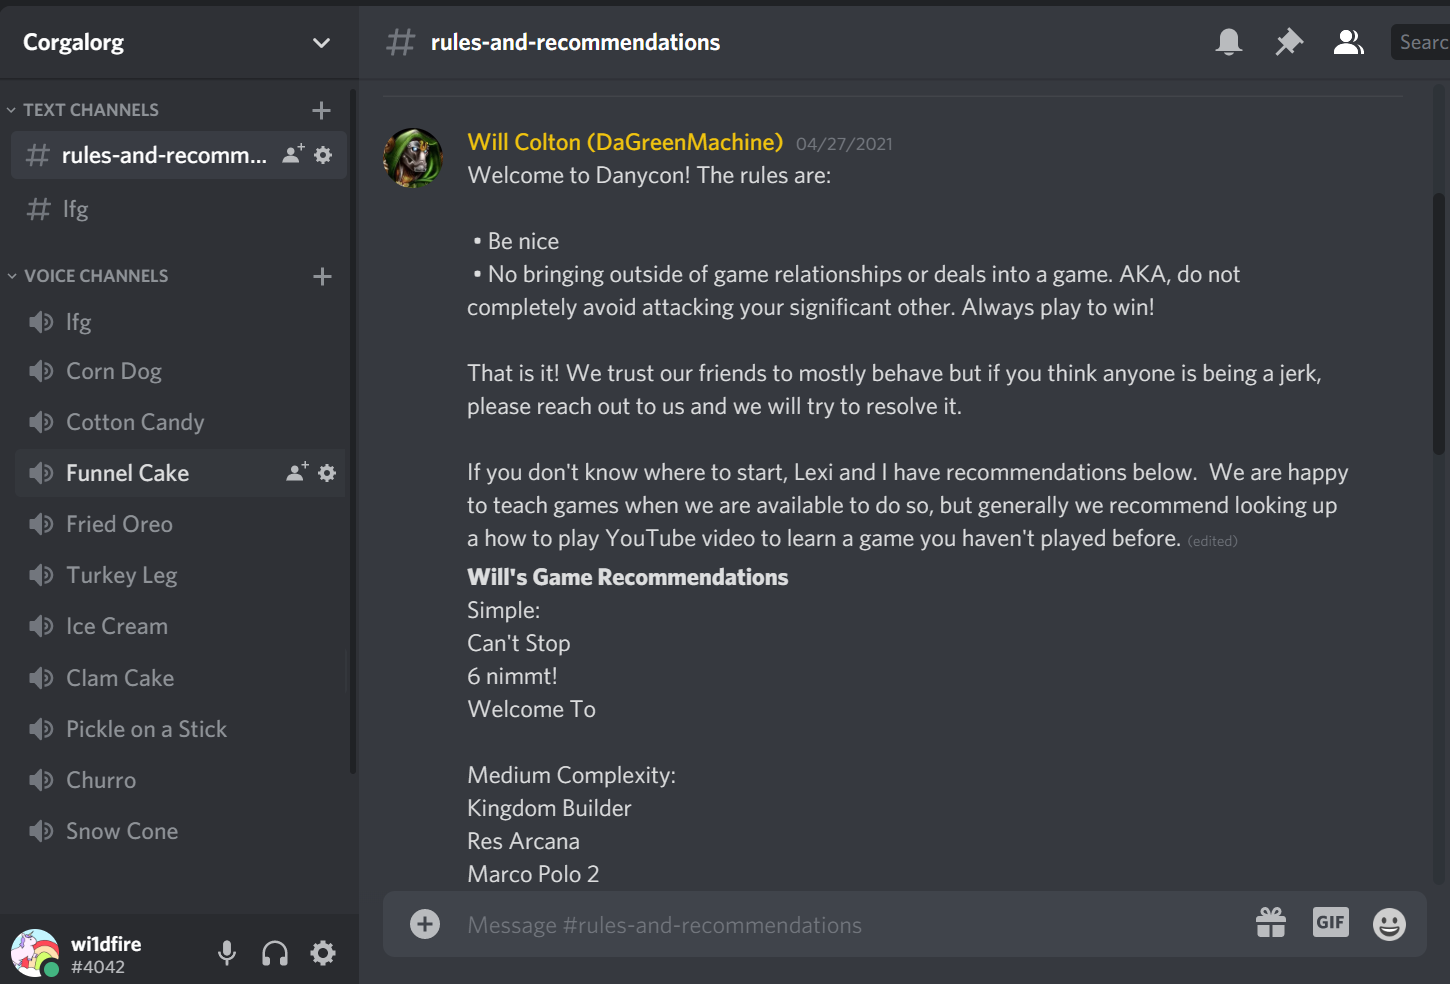
For discord we created several channels:

#rules and recommendations – text channel that only Will and I could edit.  We posted the rules of the Con here as well as any updates as the day went on.  On this board we asked everyone to change their discord name on Will’s server to their real name to avoid confusion for everyone.  The only other rules were our normal board game house rules:

  • Be nice
  • Do not bring outside of game relationships or deals into a game. AKA, do not completely avoid attacking your significant other. Always play to win!

#LFG – text channel where you could post when you were looking for a game.

LFG – voice channel where you could hang out when looking for a game.  At the top of this channel we pinned a decoder ring with everyone’s name and their board game arena handle for easy access.  Premium users were bolded since some games require one person with a premium account to play.

10 different voice channels where guests “hung out” when they found a game to play.  Someone thought it would be neat to see which rooms were used the most often, but sadly we couldn’t get that info off discord.  I personally spent the most time in Pickle on a Stick through no choice of my own, and I don’t think I saw anyone in Churro ever.

  • Corn Dog
  • Cotton Candy
  • Funnel Cake
  • Fried Oreo
  • Turkey Leg
  • Ice Cream
  • Clam Cake
  • Pickle on a Stick
  • Churro
  • Snow Cone

Bingo

What convention would be complete without side quests and prizes?!  I decided to send out bingo cards to everyone who registered.  I created the cards with this nifty site and sent out individual links to folks via timed email so they’d get the bingo card at the start of DanyCon.  Folks were instructed to email me with their line or full cards and I gave prizes (amazon gift cards) to the first 3 people who sent me their cards, plus the only person to complete a full card.
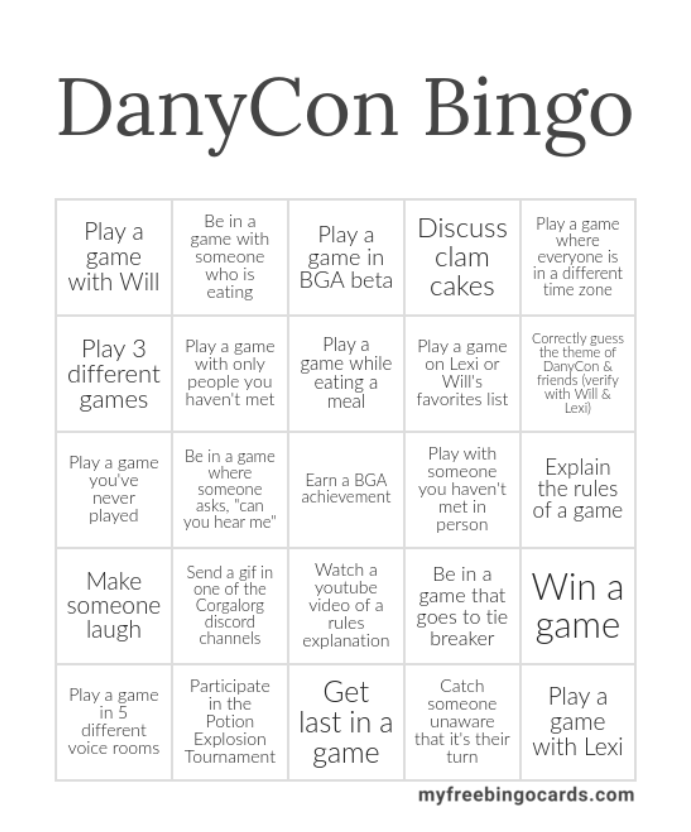
Tournament

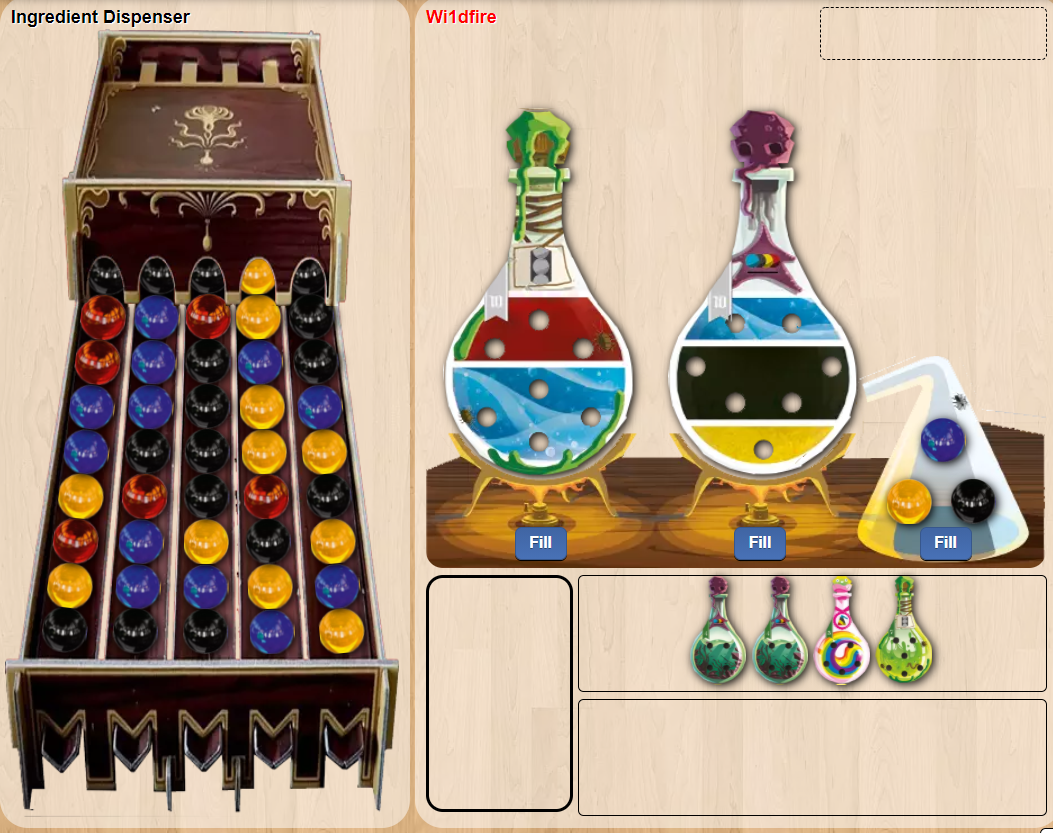
On top of Bingo, I was looking to create some worthy adversaries to fuel my Potion Explosion addition.  (Hands down this is my favorite game on Board Game Arena.)  I had folks sign up for the tournament and then we created a not quite round robin bracket and picked a premium BGA member in each game group create a game to play.  We played asynchronously and actually finished the tournament later in the week.  This meant we didn’t take any precious time away from real time board games during DanyCon.  The winner (Erin) took home an amazon gift card and was declared the Potion Master.

My favorite BGA game.

Swag

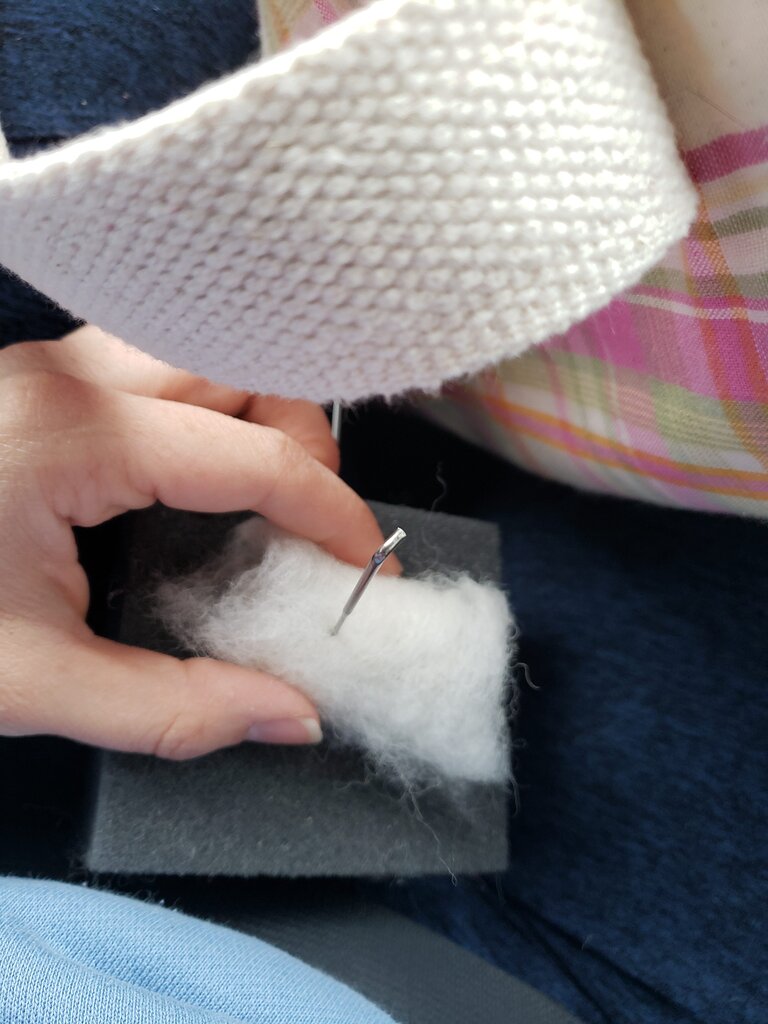
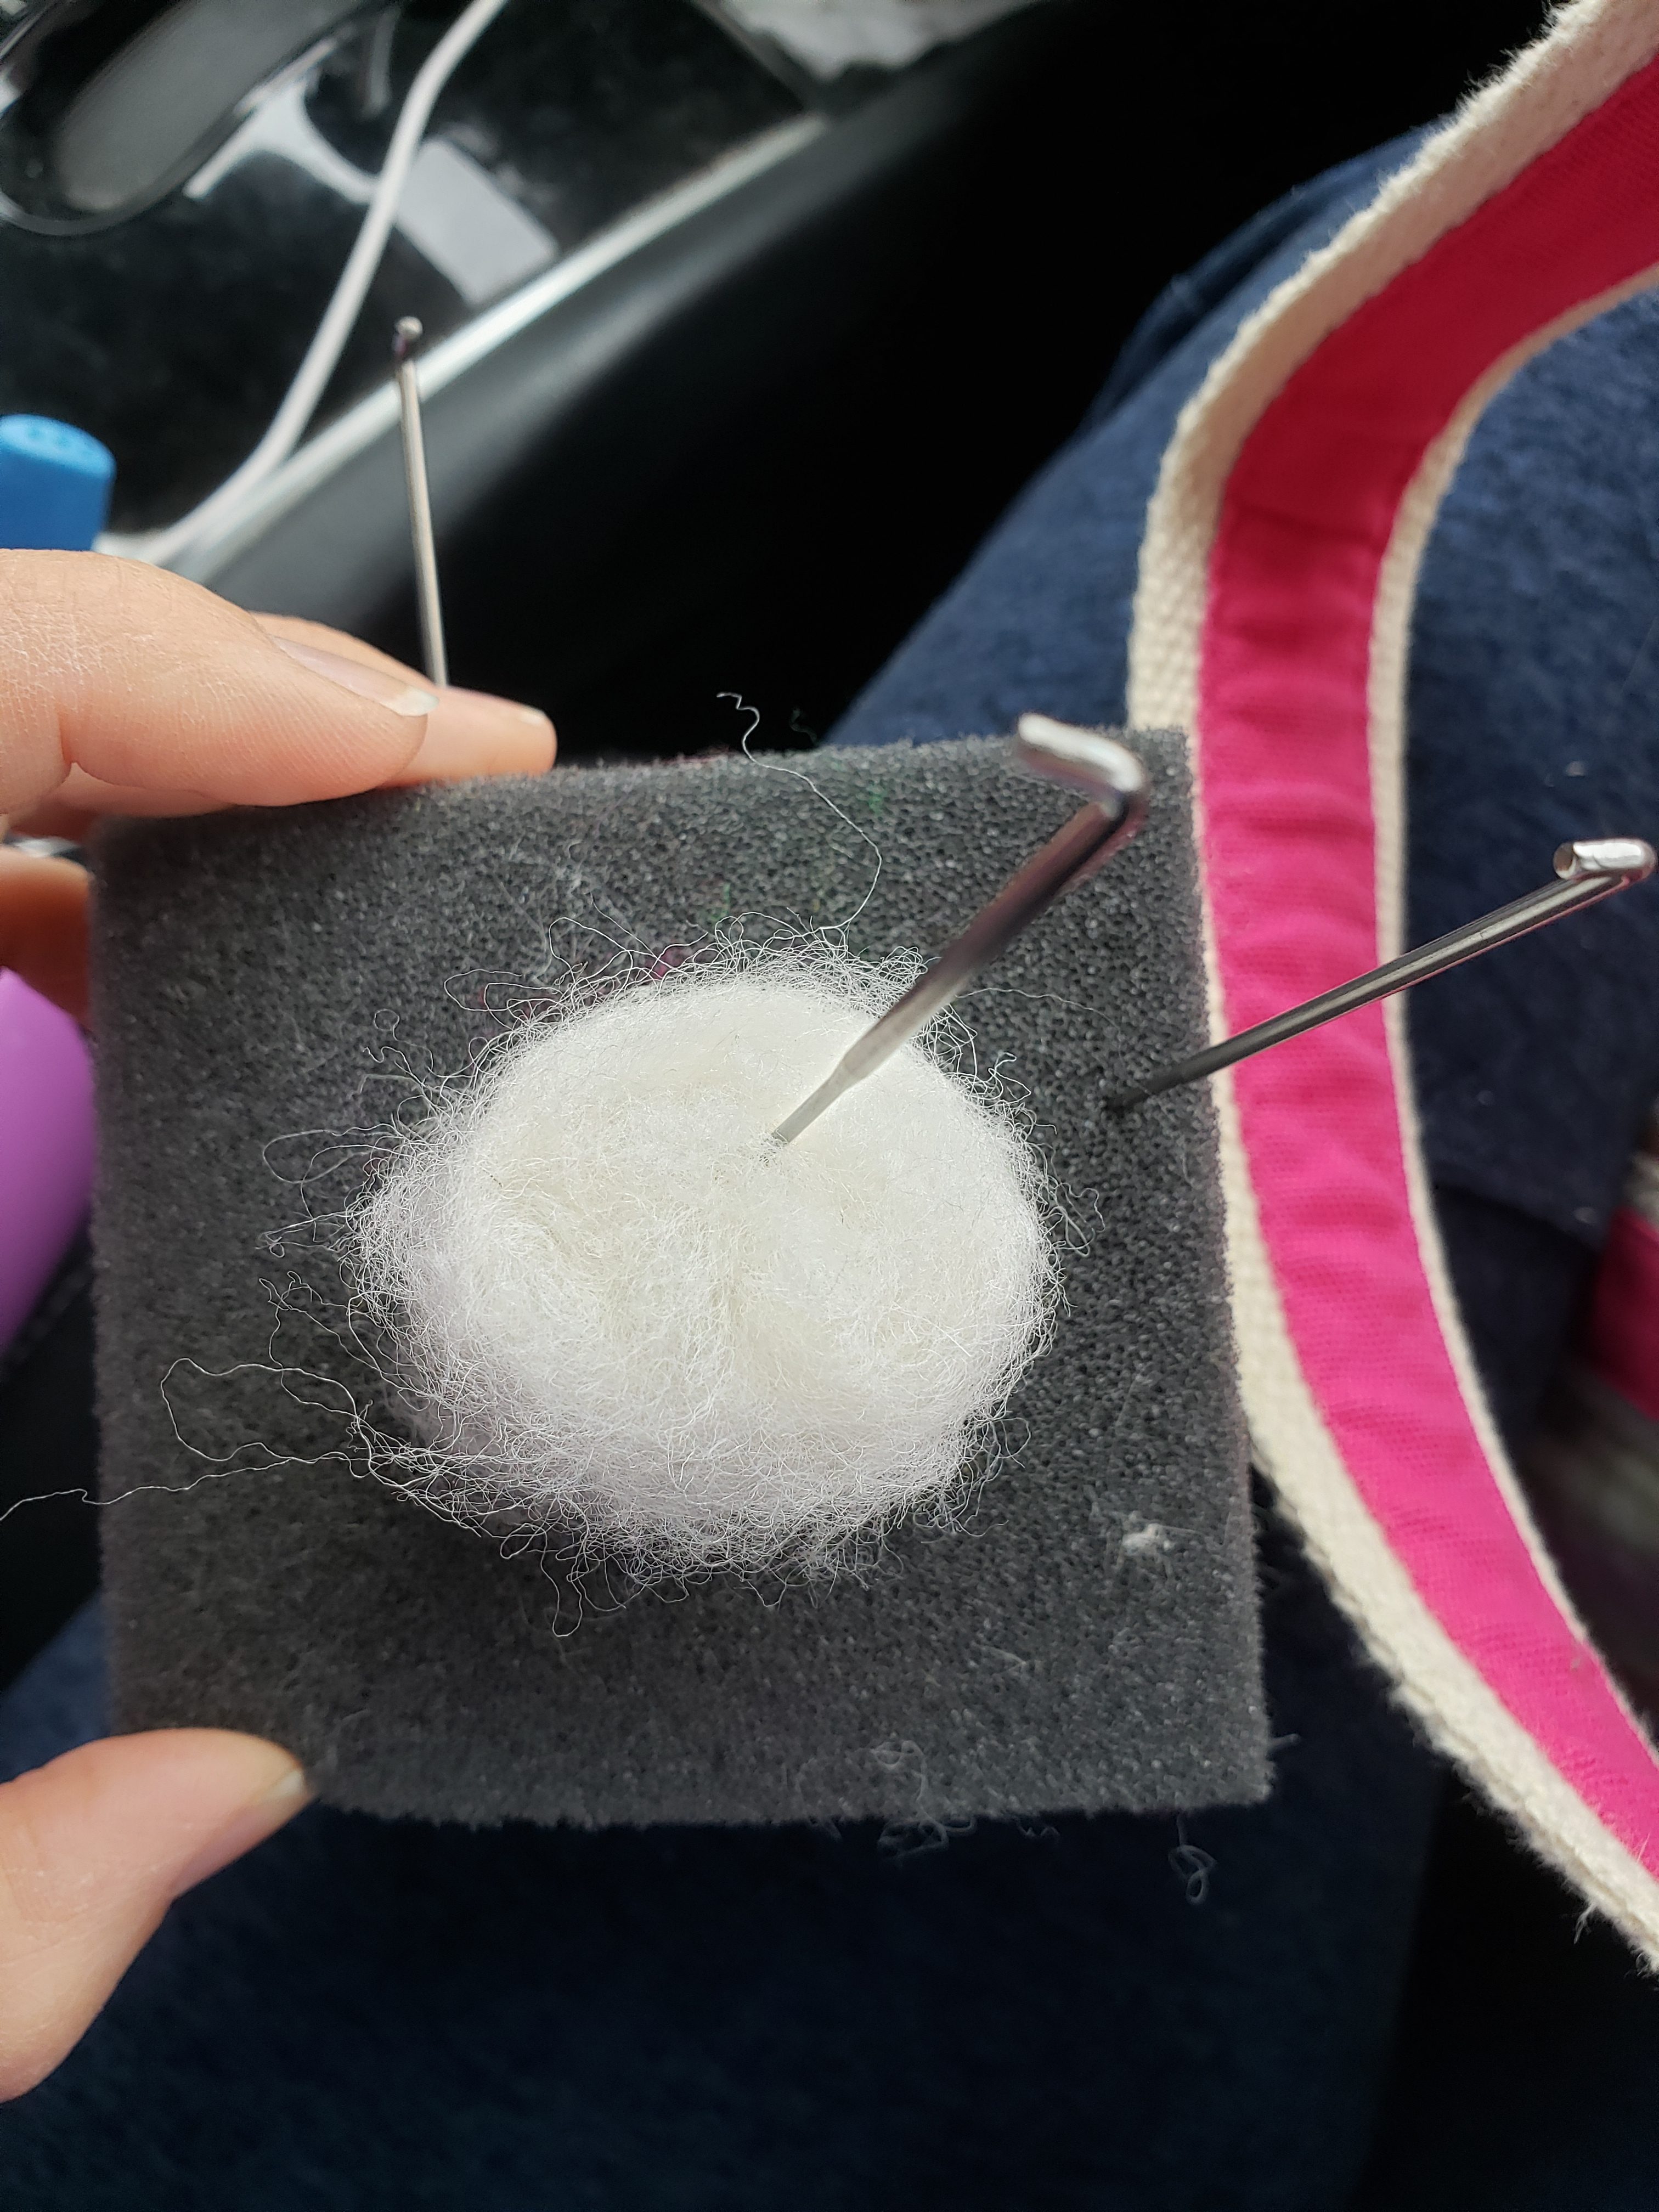
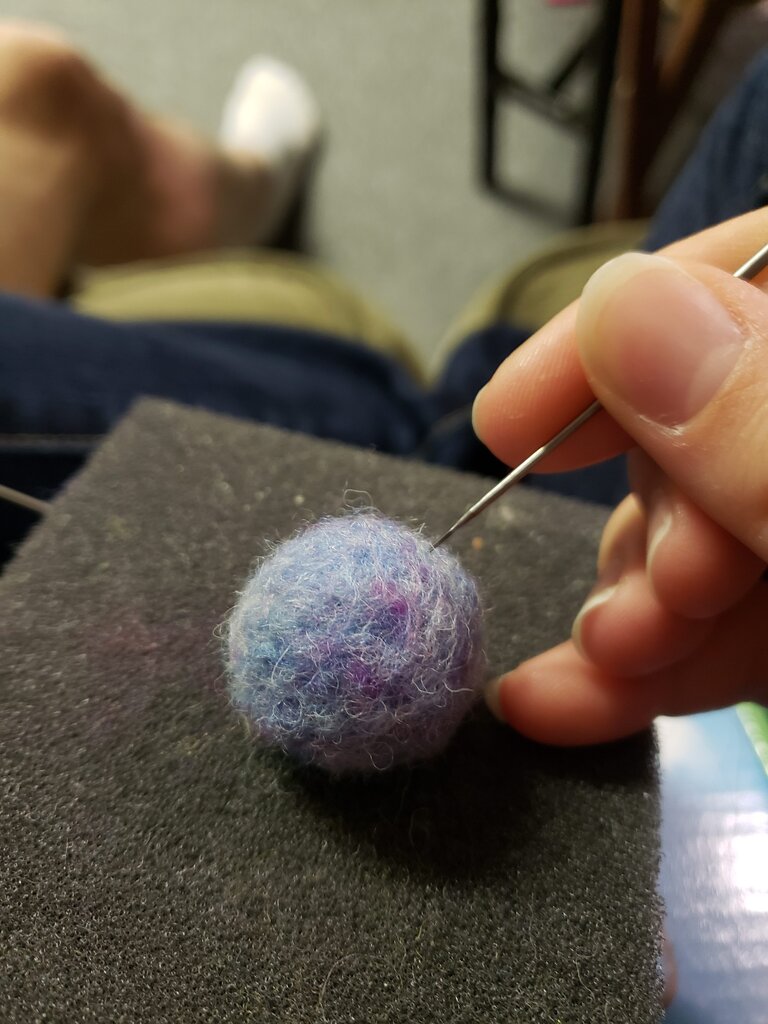
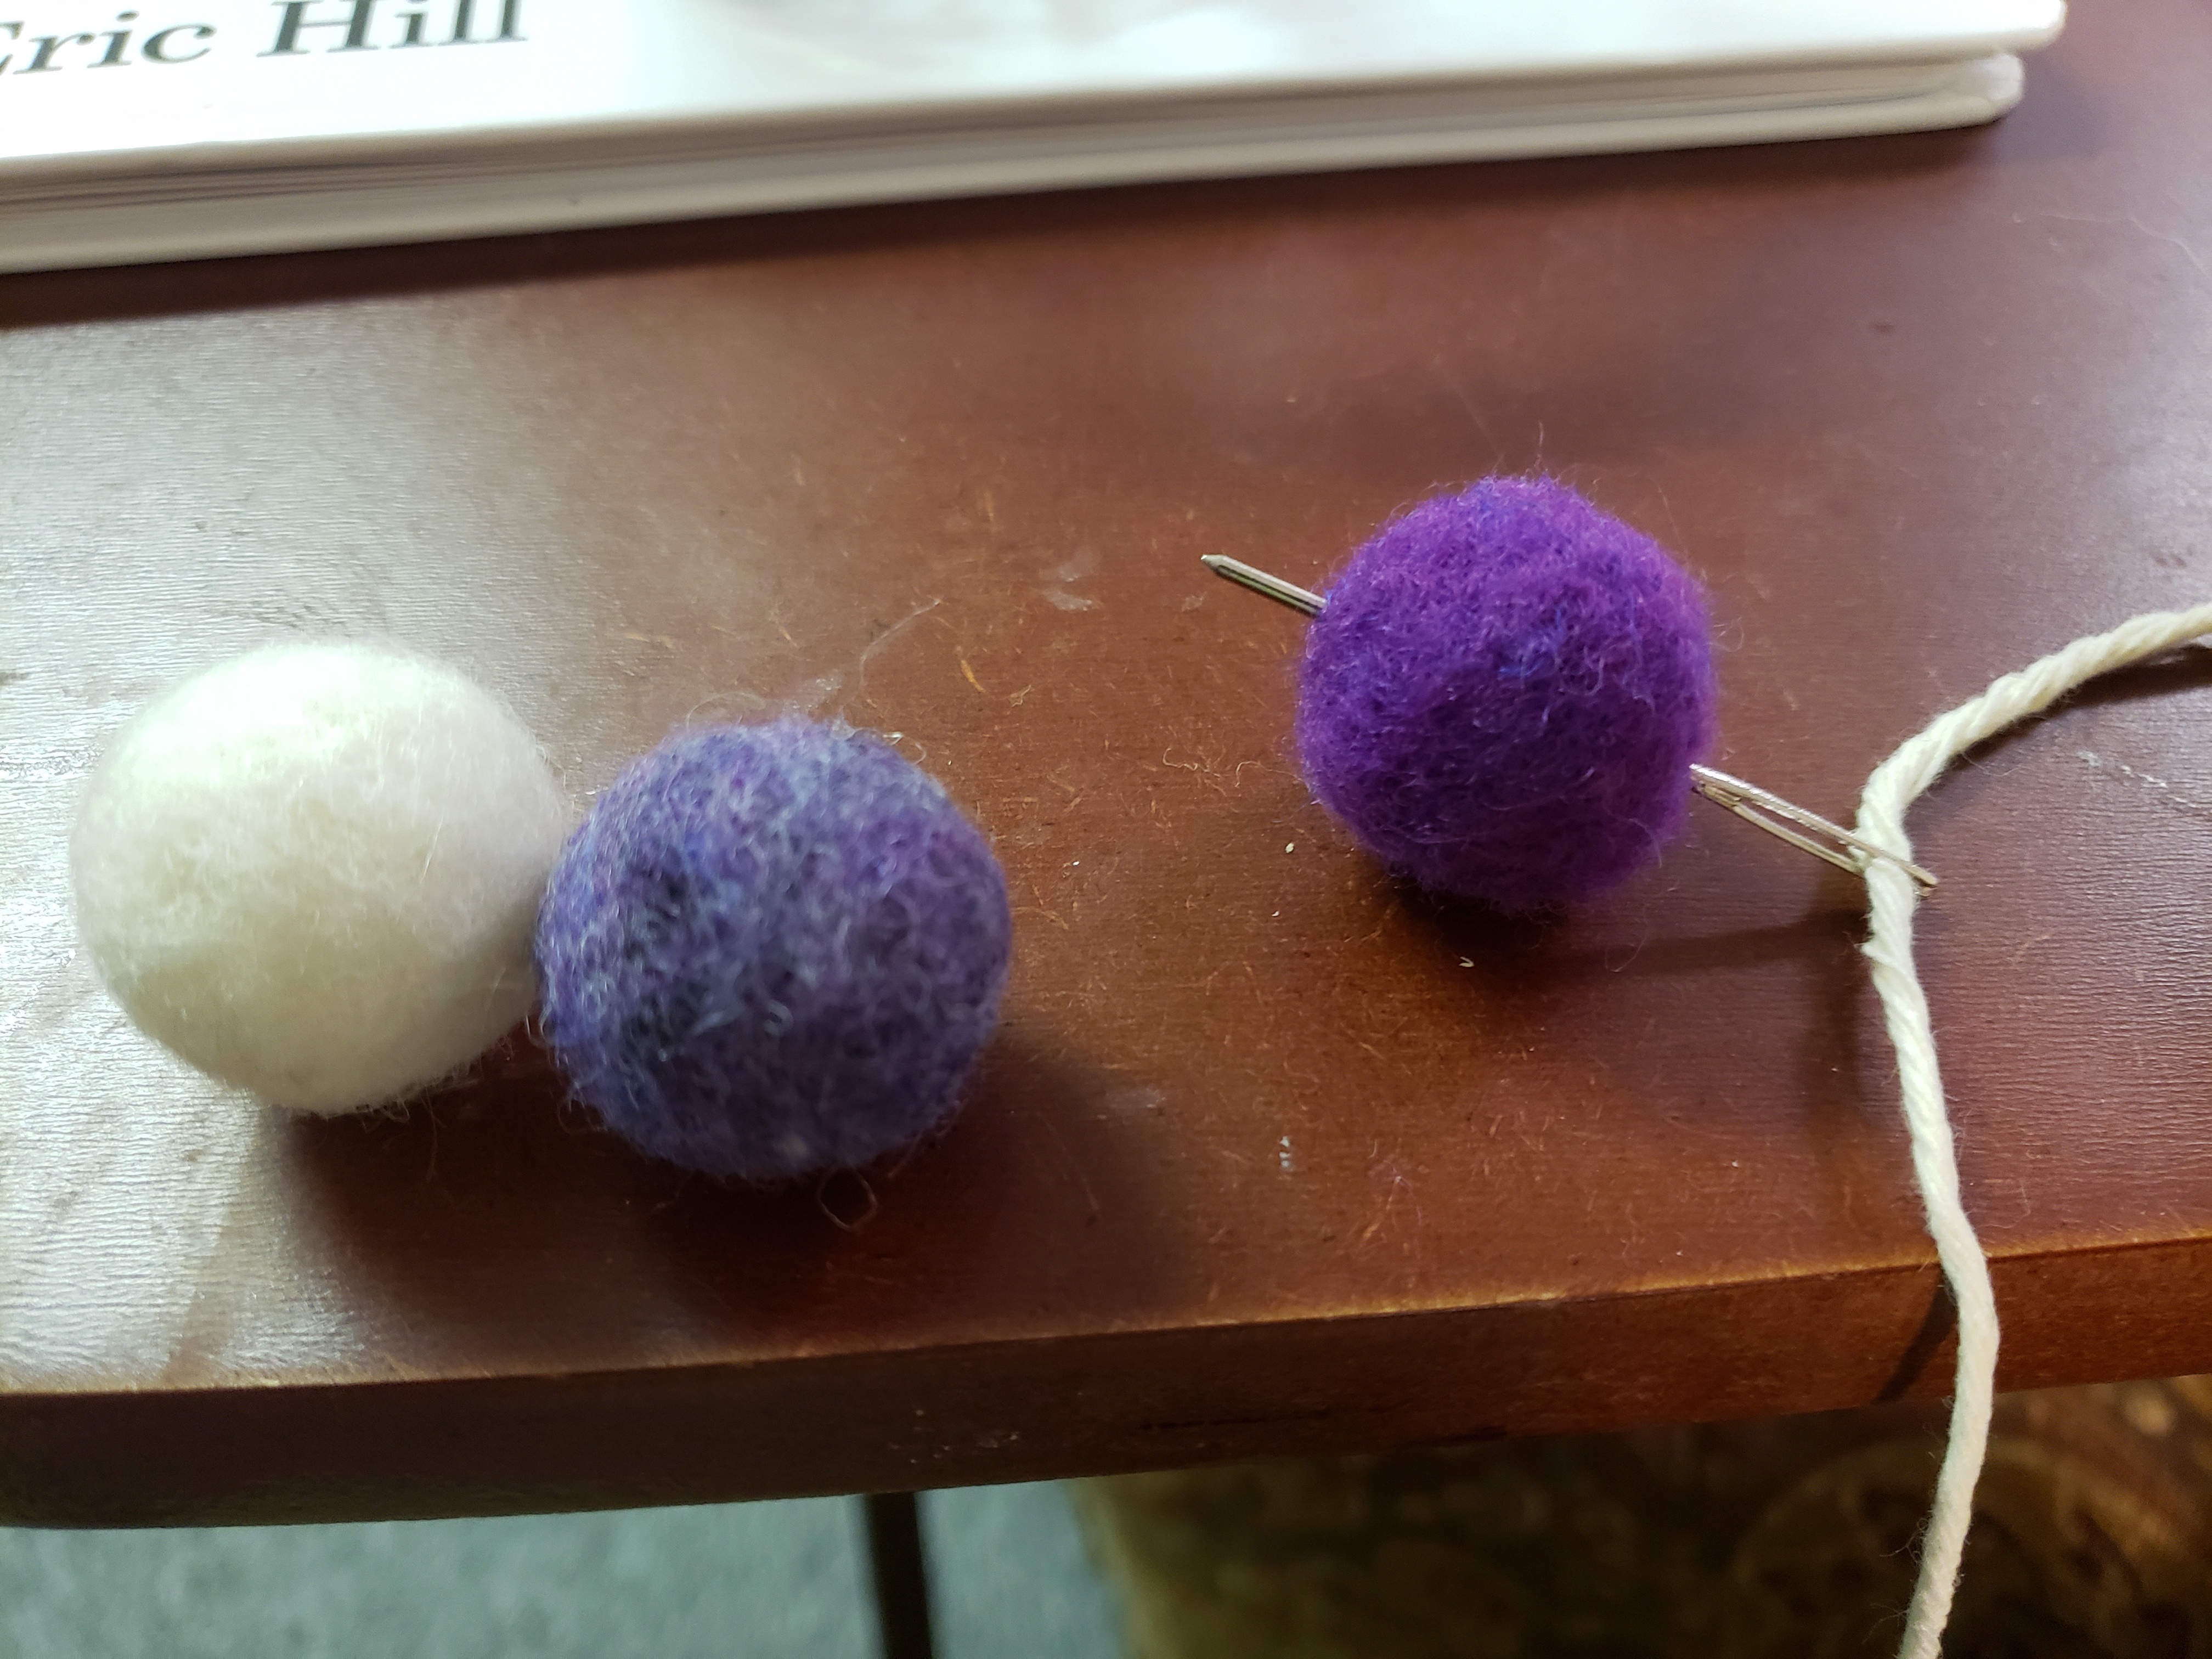
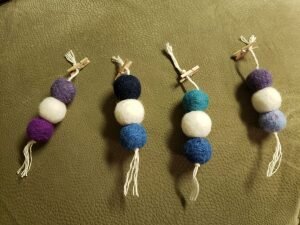
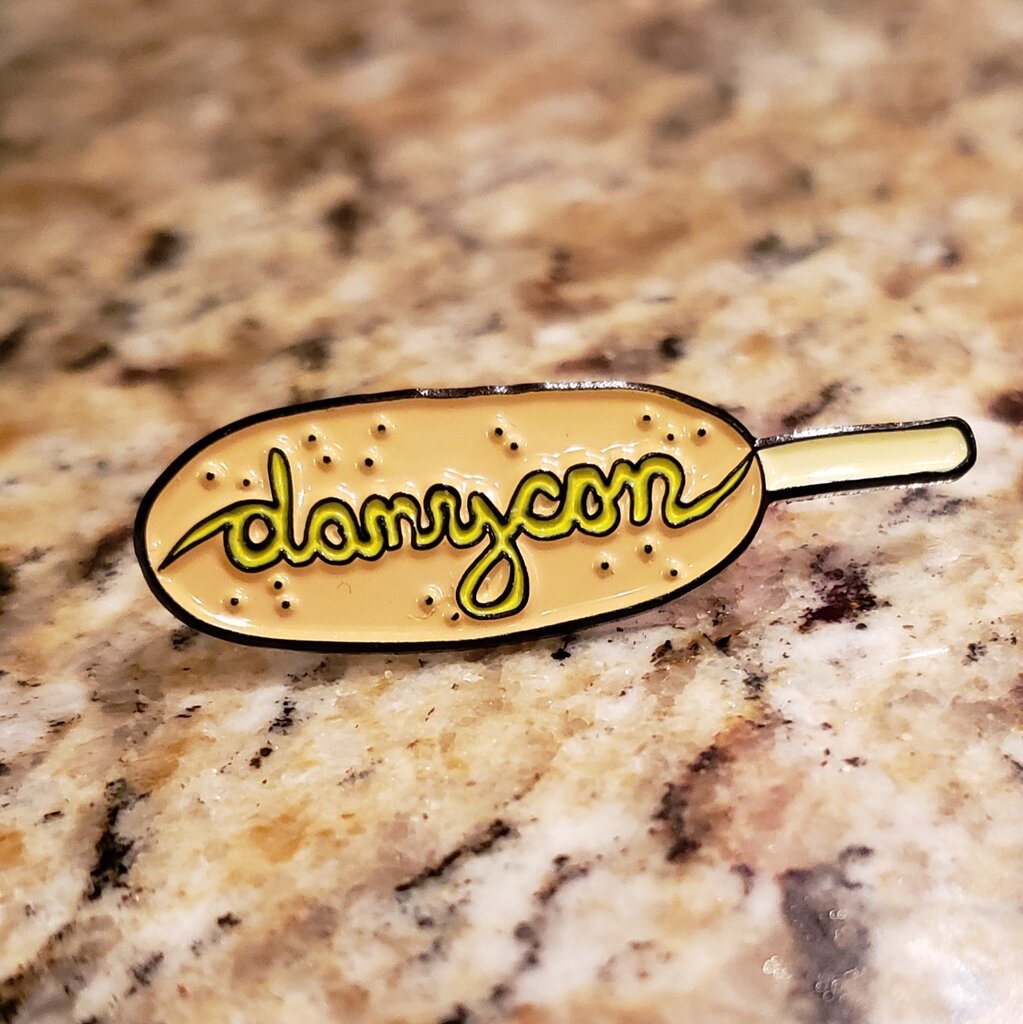
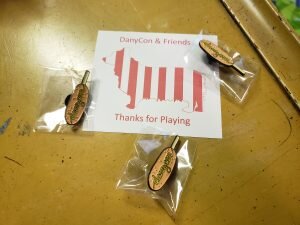
I love to give out swag, but this time around I couldn’t make swag for all the people we invited and still be sane.  Instead we decided that giving a pin would be a fun idea since Will and I love silly pins.  Originally I wanted to do the usual Dany silhouette in red and white stripes like a carnival tent, but it looked way too much like the Japanese Rising Sun flag so I scrapped it.  Instead we decided we’d keep the Dany silhouette for our family DanyCon.  In a stroke of inspiration I sketched up a corn dog, with some DanyCon mustard.  We used Wizard Pins to create our pins and we had a great experience!  The pins are going out via USPS tomorrow.  (Sorry to ruin the surprise!)

Retrospective

Overall it was a GREAT time, and a perfect end to my last week of maternity leave. I learned some games, played some old favorites, enjoyed some fun party games, and made some new friends.  We had around 30 people join us for games and fun, and could easily have accommodated many, many more.  My only regret is that I didn’t get to play a game with everyone who came!  We will definitely do this again soon!

***If for some reason you didn’t get invited this time, please let us know, it is because either we meant to invite you but were too sleep deprived with an infant when we made the invite list or we just didn’t realize you liked board games.  (In all seriousness, because of the number of friends we mistakenly left off this time, we plan to make an email distribution for next time.)

Posted in Parties | 4 Comments

Cozy Posy

Well I’ve got one (6 day) week under my belt, though I felt less than useless for most of it.  It turns out that 6 months is a long time and I think it will be a while before I feel confident in my job again.  On the bright side I got to spend a nice mother’s day recuperating with my family on Sunday.

I guess I’ll get all cheesy for the next few paragraphs since yesterday was mother’s day and now I’m the lucky mama of two cuties.  Will and I decided that two cuties is probably the number of cuties that we can handle so I started giving away our baby clothes and baby gear.  I’m so happy for everything to go to new homes and get reused but I was getting a little nostalgic.  When we found a taker for our bassinet I was simultaneously happy that someone else would be able to use it and sad at what it meant for us.  No more babies.  And on top of that I had a paranoid thought, what if we did decide we were going to have another baby?  Will pointed out in that case we would just get a new bassinet, but then I irrationally started thinking about this theoretical baby and how it wouldn’t get to share the bassinet that Patricia and Julius had shared.  I told my friend Amy this and she helpfully suggested that I try the Mari Kondo method of thanking the object I’m giving away for the joy it brought me.  What a great idea.  Unfortunately it lead to me sobbing in the basement while stroking the bassinet and murmuring, “thank you bassinet, you were a good bassinet.  You were so helpful at holding our babies and keeping them safe”.  I’m tearing up just thinking about it again.

It’s crazy how fast Patricia is growing.  Tomorrow she will be six months old.  She never felt like a squishy little baby like Julius did.  She has always been sturdy and independent.  She is not completely mobile yet, but she is constantly squirming over to the detritus Julius has left behind to try and eat whatever random artwork or toys Julius has left on the floor.  And she just adores Julius.  While Will and I may have gotten Patricia to laugh first, Julius was the first person to make her really laugh spontaneously.  Patricia and I were sitting on the floor watching Julius make a silly tower and he made some silly hand gesture and she burst out laughing.  He progressed to sillier and sillier movements to the tune of more laughter and Julius’ greatest fan was born.  Now Patricia watches his every move smiling, waiting for whatever hilarious thing he’s going to do next.

Julius has progressed from adorable baby (or tiny angel as Will referred to him the other day) to precious toddler to little man.  He has an incredible vocabulary and listening to him create sentences of adult words in his little child voice is just the best thing ever.  He has a great imagination and is incredibly silly.  He invents all sorts of imaginary tales about imaginary friends doing ridiculous things.  He is careful and gentle around Patricia, and is thoughtful and attentive to her needs.  Many times Patricia will cry and Julius will bring her something to play with without any prompting on my behalf.  No wonder Patricia adores him.  And he is my big helper, constantly trying to help.  He has decided that certain jobs in the kitchen like peeling garlic and spinning the salad spinner that are his duties.  If you try to do his jobs without him in the interest of putting dinner on the table quickly he gets extremely upset that you’d even consider such a thing.

I’m just the luckiest mama in the world to have two sweet kiddos that are constantly making me smile.

In addition to my homage to my kiddos I wanted to tell you today about some of the wall art for Patricia’s room.  The theme of her room (if you couldn’t tell) is poppies.  I personally think they are such happy, fluttery looking flowers, like stationary butterflies.  The first thing I made for Patricia’s room was the watercolor poppy painting between her windows.  I’ve always loved watercolor.  I think it stems from my childhood when as a little girl I slept over my neighbor (my babysitter’s) house for one night of Hanukkah.  Our neighbor Wendy gave me an Eric Carle-esque art book with ideas for drawing little creatures.  She instructed me that the brush that came with the book was very nice and that I needed to be very careful with it and not push too hard to flatten it out.  I took this responsibility very seriously and only colored in the book a handful of times, reverently, so not to damage my brush.  Since then I’ve painted watercolors with Julius a number of times and watched Julius get better and better.  I’m not sure I’ve gotten better, but it is always so satisfying to create something from a blank canvas.

Recently I realized that I could also cut my own mats for framing (as long as they are less than 11.5″ wide).  This makes experimental painting more reasonable because I’m not obligated to pay more than the cost of some poster board, and a frame from the thrift store to frame my “artwork”.  For Patricia’s room I made two mats, one for my watercolor, and another for a botanical sketch of a poppy.  If the botanical art looks familiar it is because it is from the same book that I used to decorate my dining room.

Poppy botanical print

Picture Frame Mats

  • poster board in the color of your choice
  • cricut with a deep cut blade
  • cricut design space
  1. Add a square to your canvas.

    Add a square

  2. Click the “more” button on the top center and then click the lock button on the next screen to unlock the square.

    Unlock to turn it into a rectangle

  3. Adjust to a rectangle in the size you desire.
  4. Repeat steps 1-3 for the inner portion of the mat, positioning the smaller rectangle on top of the larger rectangle.

    Add a second rectangle.

  5. Select both rectangles then click “Slice” in the bottom right of the layers menu.

    Select both rectangles

  6. Select the eyeball next to each full size rectangle to hide them and view your frame mat.
  7. Load your posterboard onto your mat.
  8. Make the project using the posterboard setting.
  9. Carefully bend back the circuit mat to remove the frame mat.


Posted in Crafts & Sewing, Home Improvement | 4 Comments

Goodnight Moon

Well guys, it was my first day back today!!  Weirdly I wasn’t even dreading it.  I used to get a feeling of dread a couple days before the end of a long vacation.  I’d just picture myself going into work and sitting down at my cubicle and somehow that brought me dread.  This time I didn’t want to go back exactly, but at least I didn’t feel paralyzed with anxiety for the whole weekend beforehand.  I’m wondering if it was because instead of imagining going into work, I imagined going into my basement where my desk is.  Hmmm perhaps there is something to that.  Or maybe it’s the fact that I’m constantly a ball of dread and anxiety lately so what’s a little more dread?

Or maybe it was just that a weekend of board games and hanging out with the little ones overshadowed my dread?  Julius was so cute this past week.  He was constantly “snug-a-bugging” me.  “Snug-a-bugging” is where Julius snuggles up against you saying “I’m gonna snug-a-bug you” and gives you hugs.  He was very nice to Patricia too.  She adores him, and thinks pretty much everything he does is hilarious.  The more unexpected and surprising the better.   I like to “talk” for Patricia and voice aloud what I imagine Patricia is thinking.  For example, “Patricia thinks you’re so funny Julius.  She says, ‘Julius why do you have that sock on your head?'”  My commentary and interpretation of Patricia’s silly sounds confuses Julius a little bit and he frequently asks me, “does she talk?”   Sometimes though he goes along with it and answers her.  The other day he was very excited and shouted, “MAMA THE MOON IS OUT!”  This was surprising because it was the middle of the day.  His wild gesticulations at the moon caused Patricia to have a very confused look on her face so I replied, “Patricia is wondering what a moon is Julius”.  He instantly responded, “well Patricia, a moon is when you go to sleep.”

Well I feel like it is only fair that since we showed you Patricia’s room, we’ll show you what Julius’ big boy room looks like now!  For comparison, here was the original layout.

Door view of his room. No more changing table or crib!

Julius got a big boy bunk bed! He likes to alternate where he sleeps for bedtime and naps (on the rare occasions he takes those).

We moved Julius’ reading nook to the window and we moved the mobile from over his bed to over the chair. I think it’s still cute and I’ll probably leave it up until he thinks it’s too baby-ish


Posted in Home Improvement | Leave a comment

The Yellow Paint Saga

I’m trying desperately not to count down the few days I have remaining of my maternity leave.  Will started his leave a week early to try to get Patricia to take a bottle.  This means I’ve got a bit of time to take care of some loose ends.  The biggest loose end is my plan to clear out the basement in two months.  We are refinishing our basement and at the time it seemed like it would be fairly easy for me to reorganize and clear out the basement before I went back to work.  Of course after I decided that, I ended up with lots of other projects to finish – like Patricia’s room, ladies’ night and easter presents.  Fast forward to, well, today and I am making progress!  That being said, I’m not even close to done.  It turns out we have accumulated a lot of stuff over the past 10 years…

I know I shouldn’t challenge myself to finish in a week what I said I would get done in two months, but would I really be Lexi if I didn’t set completely unrealistic and unachievable goals and burn the midnight oil (and my sanity) trying to meet them?  No.  So here we are and I’m getting a bit downtrodden already considering that it’s Monday and I’m definitely not one fifth of the way through.  Shoot, I wasn’t supposed to be counting down days.  Scratch all that.

Well, one of the things I did finish is Patricia’s room.  Or rather I am declaring that Patricia’s room done enough.  Patricia’s room transformation is something we’ve been working on for… 8 months? Maybe 9 months?  You see, Patricia’s room used to be Will’s office.  This meant we had to vacate the office and move Will…. somewhere.  The logical place was the man cave (the room over the garage) which was the previous owner’s home office.  It even has a separate entrance and doorbell!  It took several months to get everything moved over there.  I even had to cut down a set of Will’s Ikea board game shelves to make room for Will’s desk, but now it looks like it has always been there.

So then the next step was to get the room painted and furniture ready.  Well, sit right back and let me tell you the tale of the great yellow paint fiasco of 2020.  Will has done all the rest of the interior painting in the house and he has gotten really good at it.  We usually use Behr or Valspar but during the pandemic we didn’t want to set foot inside a physical store to pick out paint.  I ended up going with this company called ECOS paints which conveniently mails you swatches and paint (and claims to not have harmful vapors but my belief in that is low).  I wanted another bright cheerful room color like Julius’ (which looks like a sunny blue sky) so I decided to paint the room a happy yellow.  After getting a bunch of swatches, I picked a yellow that I liked, got the paint, prepped the walls and trim and Will started painting.  After the first coat the walls looked horrible.  I mean HORRIBLE.  It was super streaky, and just kind of gross and dirty looking.  In the other rooms in our house we have never bothered with primer since the previous owners left all the walls white and we have never had a problem.  This paint job though was very concerning.  On top of that, Will used an entire gallon of paint on a single coat in a room that is only 10×12.  Julius’s room is slightly larger and it only took him a gallon (and two coats from that gallon) for really good coverage.

So I contacted ECOS and to their credit they responded rather quickly that I needed to use a white primer underneath that they were going to give us free of charge.  They also told us that for our room size we would need 2 gallons because yellow is a tricky color and may require more paint than usual.  This surprised me since a couple years ago I painted our bathroom a very pale yellow and we never had any problems with that.  Okay, he was giving me free primer and we’d already committed to this color so I bought 2 more gallons of the paint.  (Did I mention that this paint is NOT cheap??? So we’re up to over $200 in paint at this point, and that doesn’t count the cost of the primer.)

We get the paint and primer and Will starts again.  I was heartened.  One gallon of the primer completely covered the walls, and the horrible streaky yellow paint.  The walls were white as can be.  Surely the lack of primer was the problem.  Will paints on the first coat of yellow.  Gross, nasty, dirty, streaky yellow again.  This time though Will has wisened up.  He is painting very thin coats to minimize streakiness, so he only went through half the can of paint.  Will paints a second coat.  Still ugly, still streaky.  He opens the second can and paints a third coat.  By now it is getting a teensy bit less streaky, but it looks so much worse than any other room in our house.  On top of this, I hold up the swatch and realize that the color on the walls is like 4 shades darker than the swatch.  It looks uncannily like French’s mustard.  I tell Will this.  He completely agrees.  We decide maybe it will look better in the daylight.

This is the disastrous color after all was said and done. To be fair, what sane person picks the color lemon zest for their walls?  My sister called it “big bird yellow”.

It doesn’t.  It still looks streaky and dirty mustard colored.  I tell Will I can live with it.  He says he might as well do the last coat to see if the streakiness goes away.  It doesn’t.   Don’t get me wrong, the streakiness looks way better than when he started but at this point Will is 6 coats in.  Maybe two more gallons and we’d have the solid mustard colored walls of our nightmares dreams.  Will knows I am sad about the walls.  He is also sad about the walls.  He has spent many hours turning this room into the inside of a condiment container.  I tell him again that I can probably live with the walls (but inside I’m thinking, what kind of child will Patricia become if she is forced to live in a room with mustard laden walls?  Will she be driven to madness?)  He tells me, resigned, to go get new paint.  (After being married to me for nearly 10 years he can read my mind.)

We leave the walls for a couple days to mull things over.  Julius tells us he likes the color (which makes me even more suspicious since he can’t tell the difference between blue and yellow).  My mom sees the wall color and immediately gets us swatches from Home Depot and tells us she will pick up paint for us (I guess she also questions the sanity of a child forced to live in a mustard room).  We get the Behr Marquee paint which claims to only need one coat, but I pick a color that they don’t guarantee to work with just one coat.  Will paints it directly over the ugly yellow mustard.  It looks beautiful.  He still has paint left in the can and uses it up for a second coat.  It looks spectacular.  It only took eight coats of paint total, but I’m in love with the color.  Moral of the story?  No idea.

Anyway, without further ado here is Patricia’s room..

Patricia’s door has a lovely pink ribbon that Amy embroidered for some cute photos of Patricia all swaddled and wrapped up with a bow.

View from the entrance. You can tell from here the room is themed around poppies…

I was deliberating on making a quilt myself (something I really didn’t want to do, even though I loved the little quilt Julius was gifted) and Amy saved me by making this beautiful quilt for the wall! I told her I wanted to steal it for myself!

The quilt perfectly matches the mobile I made! (I will post about that someday.)

Another view of the quilt and mobile. I’m obsessed.

This is the one side of the room I finished before Patricia was born. I’ll probably post about some of them later, but I made the painting, curtains, and pillow. I found the nightstand years ago at a thrift store and it’s been sitting in the basement waiting to be refinished.  I painted it white and added the little basket for all her swaddles and baby blankets.

The chair was in the room when it was Will’s office, and we just decided to leave it. It is actually super comfortable for nursing Patricia. It’s more comfortable than the chair I bought especially for that in Julius’ room…

This dresser used to be in the guest room (before it was Julius’ room) and then spent a while at my parents’ house. I painted it white to match the crib and trim. On top sits all her clip on bows and socks.  The wall hanging is actually a holder for more bows. (I’ll probably post about that later too.)  This is also probably the most accurate view of the wall color.  

That ducky coat hanger is a relic from my childhood. It’s perfect for all her tiny hoodies. That yellow duck is about the same shade as the original wall color.

This bookcase used to be all white. I felt it was missing something so this past weekend I added the wallpaper to the back. Now I think it’s perfect…

The changing table is the same one we used for Julius and houses all our cloth diapers (and some backup disposables).  The picture of poppies is from the same book used for our dining room pictures

Patricia chilling in her room.

Posted in Home Improvement | 4 Comments

Bittersweet

Well this is my second to last week of maternity leave.  It’s been nice spending time with Julius and Patricia, and I am sad to “go back” to work and “leave” these munchkins.  I just have to keep reminding myself that it will be nice to communicate with adults other than Will on a daily basis again.  That and not having to be a preschool teacher anymore (another job I’m really not qualified for) make the future bearable.  But boy did time really fly.  I’m sure I’ve said it before but a co-worker once told me that the first year of a child’s life is “a short year with long days”.  Once again he couldn’t have been more right!

Julius’ first year flew by and there are huge chunks that were straight up missing from my memory.  That lack of sleep really takes a toll on you, as I’m sure all you new and seasoned parents are finding out/already know.  Well I am here to tell you not to worry! Those chunks of time are not lost from your memory; they are in there somewhere!  I had made peace with the likelihood that Julius would be an only child and found some solace in the knowledge that at least I wouldn’t have to go through the sleep deprivation and baby blues/ppd again.  But when our little Patricia beat the odds to make us a family of four, I found that this time around I wasn’t in a complete fog the entire time.  On top of that, while experiencing Patricia’s newness I have been able to recall similar happenings and evaporate some of the fog from Julius’ first year.  Just another reason to love Patricia!

One of the things I recalled recently from out of the fog, is that I made a playmat for Julius… but he never used it.  We have this adorable little playmat with a piano attached (an older version of this one).  It’s great because the babies can lie on their backs and bat the toys without the toys escaping.  Unfortunately it doesn’t work as well when the babies start to sit up because they can’t get close enough to the toys while propped.  My friends Maren and Matt made a super cute version for their daughter out of PVC pipe and fittings which got me thinking.  I had some leftover PVC from a hoop greenhouse I made long before Julius was born.  I think by the time I finished my playmat proof of concept Julius was already crawling!  So I left it in a corner somewhere.

Enter Patricia!  The same things happened to Patricia that happened to Julius – she couldn’t get close enough to the toys while sitting up AND it seemed like the little hoop was inhibiting her roll over skills.  That’s when I recalled my half finished project!  Originally I made the playmat proof of concept to be attached to any blanket you had on hand for portability.  I used clip on curtain rings to attach the blanket to the hoops.  I don’t think that’s terribly safe (but you can use your own judgement) so I scrapped that this time around and added some loops to an adorable Monica and Andy receiving blanket** Patricia got from my friend Ka and has already outgrown.  It works great, looks adorable and means she can use the little blanket for longer!  Since I used scrap pvc and recycled ribbon and fabric for this project, it didn’t cost me a thing.  If you have to purchase everything new it would still cost less than $15, a fraction of the cost of buying a play gym.

DIY Play Gym

What you’ll need:

  • 2 – 66″ lengths of 3/4″ pvc pipe
  • 2 – 3.5″ x 74″ strip of cotton fabric (I had to stitch two pieces together to form a long enough piece)
  • scrap 5/8″ grosgrain ribbon
  • scrap 1″ grosgrain ribbon
  • upcycled receiving blanket or 32″x32″ piece of fabric that doesn’t have much stretch
  1. Cut 4 15″ lengths of 5/8″ grosgrain ribbon for ties.
  2. Cut 8 3.5″ lengths of 5/8″ grosgrain ribbon for the playmat loops.
  3. Fold the short end of a 74″ strip of fabric under 1/2″ and 1/2″ again.  Stitch to form a finished edge. Repeat for other edge.
  4. Place a tie (15″ length of grosgrain ribbon) at one end of the 74″ strip.  Overlap the tie over the finished edge of the strip, so the tie extends 14″ out from the fabric strip.  Stitch.
  5. Repeat step 4 for other end.
  6. Fold a 74″ strip of fabric the long ways, right side in, and pin.
  7. Fold it in half and mark 6″ from the center on either side, and 12″ from the center on either side.
  8. Fold one of the 3.5″ lengths of ribbon in half, and insert inside the strip of fabric you pinned in step 3.  Pin the ribbon in place at one of the marks you made in step 4.  Repeat for other 3 lengths of ribbon.

    Make sure to line the unfinished edges up when you place the loop inside for stitching.

  9. Stitch entire length of 74″ strip, leaving 1/2″ seam allowance and backstitching at each loop for reinforcement.
  10. Turn the tube right side out.  Insert a PVC pipe into the fabric tube.
  11. Repeat steps 3-10 for the other ribbons, fabric strip and PVC pipe.
  12. Finish the edges of your 32″x32″ piece of fabric (if not using receiving blanket)
  13. Cut 4 3.5″ lengths of ribbon for loops on the blanket.  (I used 3/4″, but 5/8″ or whatever you have on hand will work just as well.)
  14. Fold under 3/8″ of the end of each loop, then fold in half.
  15. Pin loop to the wrong side of the blanket in a corner along the seamline.  Turn to the front side and stitch along the seam line.  Repeat for other corners and loops.
  16. Cut a length of ribbon 34″ long to secure the play gym.  I used 1″ ribbon, but you could use 5/8″ if that is all you have.

To assemble:

  1. Make sure the PVC piping is centered in its casing.
  2. Thread the tie ribbon on one end of a PVC pipe casing through a loop on one corner of the blanket.  The blanket should have the loop facing the ground.  Fasten with an overhand knot or slip knot (or both like I did).
  3. Repeat step 1 for the opposite corner of the pipe and blanket.  The PVC should gently bow to form the hoop.
  4. Repeat steps 1&2 for the other pipes and corners of the blanket.
  5. To secure the two hoops, stand them upright so they are centered.
  6. Drape the 34″ long ribbon on top of the play gym where the two hoops meet.  Center.
  7. Tie an overhand knot on the underside of the hoops.
  8. Loop the ribbons up above where the two hoops meet, through the two sides of the hoop that haven’t been secured with ribbon.  Tie an overhand knot above the hoops, then finish with a bow.

    Happy Baby!

    Look at that concentration

    Why yes she is chewing on the rocket ship I made!

**Monica and Andy makes some really adorable stuff.  My mother in law bought us a bunch of cute outfits for Patricia from there with several matching little hats.  The hats looked like really strange shaped gnome hats.  My mother in law usually has really good taste, but I thought these were kind of a miss.  They were really weird and ugly, so I didn’t put them on Patricia for more than a couple minutes.  Later, (read: today when I was writing this blog post) I realized that the Monica and Andy hats are supposed to be knotted at the top and not gnome hats at all.  Totally adorable, and not weird and ugly.  I think I have to write them a letter to tell them to pre-knot them or include instructions for idiots like me.

Weird gnome hat

Adorable hat…

Posted in Crafts & Sewing | 2 Comments

Virtual Spa Night

Today is Monday, Monday string beans, all you hungry children come and eat it up!  Julius and I have started practicing days of the week and I have that song in my head (from the Eric Carle book Today is Monday.  I’ve spent the last 30 years thinking that the first page of the Eric Carle book was “Monday spaghetti”.  I even shout MONDAY SPAGHETTI at Will whenever we have spaghetti.  My world is shattered.  On top of this travesty, it has become clear while rereading the book with Julius that the best thing in the entire book is Wednesday’s “ZOOOOP” page which depicts an elephant eating some strange rainbow soup.  It’s okay though because zoooop is now my new favorite word.   Julius and I even had zoooop for lunch (or breakfast as he calls it; maybe I should work on mealtime names next) in honor of Wednesday zoooop.  Hmm.  Perhaps eating zoooop on Monday was a bad decision.  What if every time Julius eats soup he shouts at his partner “MONDAY ZOOOOP”.

On Friday (fresh fish) we had another Virtual Ladies’ Night!  What a fun night.  This one I’ve been thinking of for a while, but only got everything together over the past month. As you probably know I like to host a Galentine’s day event for some of my local lady friends in February.  Obviously I couldn’t do that this year, so I went a different route.   I wanted this to be a fun little surprise for everyone, so I mailed out spa day care packages to my friends without telling them.  I got lots of happy texts when people opened their packages, so I would say mission accomplished.

Picture from my friend Danielle when her package arrived

Virtual Spa Day

Goodies

The packages were filled with nail polish, nail stickers, a nail file, a headband, face mask, a custom tea bag, a tiny lavender beeswax candle, and lavender foot soak.  Making several of the things inside the package helped to keep costs down.  I purchased the nail polish and nail files at Kiko Milano.  The colors were really cute, and everything was very inexpensive.  The nail stickers I made myself with my Cricut.  The headband you saw in last week’s post.  The face mask is the Que Bella brand that is sold at Target.  I’ve used their peel off masks a bunch and I always enjoy them.  They’re also a great price.  The tea bag I made (post coming in the future) and filled with Indigo Punch from my absolute favorite purveyor, Harney and Sons.   The lavender beeswax candle Julius and I made together, so that is coming in a future post.  Finally the foot soak is just packaged lavender epsom salt that I put in their own bags.

Items prepped for my assembly line

Foot soak waiting to go into bags

Polishes packaged

Packaging

I wanted to make the entire package look cohesive, so I used my Cricut to make matching stickers and tags for everything.  For the Epsom Salt that I repackaged into it’s own bag using my vacuum sealer, and the tea bags, I added instructions and ingredients to the back.  I finished it all off by slipping in a little note with a QR code for the hangouts link, and a “spa menu” on the reverse.  The whole Kaboodle was wrapped inside a piece of tissue paper with a matching “Treat yo self” sticker on the front; a favorite mantra from one of my favorite shows.

Bundle of fun

The contents of the spa package

Tea bag front and back

Close up of polish kit

Foot soak front and back

Shipping

All 22 of the packages (including shipping) cost me about the same (or less than) a Ladies’ night party with dinner.  Crazily the shipping cost quite a bit more than the goods inside!  Part of this was because I had to send the packages via ground transport only (USPS Parcel Select) since nail polish has a high flash point and is a flammable material!  For this reason there are a couple rules you have to follow.  When I wrote this post the criteria was that I had to package the nail polish inside another container with padding and material to absorb the nail polish if there was any breakage.  I took care of this with bubble wrap, and more heat sealing bags.  None of the nail polishes were reported damaged so I guess it worked!  Each package also needed to have a “limited quantity” label to indicate it was hazmat.  I was able to print these off onto sticker paper I had at home, I just had to be careful that the tags met all the requirements including color and size.

Each kit I put inside a recycled padded mailer.  I have been saving padded mailers because I hate throwing them out.  For this ladies’ night I went through nearly my entire stash!  Will had told me I was never going to use all of them, so I felt vindicated!   On top of all that I got another chance to use Pirate Ship, which is a cool program my friend Ka told me about.  They find you the best shipping price for USPS and also make sending bulk packages very easy.  As a bonus the program made tracking all 22 packages super easy – since I am crazy and frenetically tracked all the packages.  I shipped the packages out 19 days before the party, and all of the packages arrived before the date!  (Though one I had to submit an inquiry for!)

The Party

The actual Ladies’ Night was lots of fun.  I think in total we had 15 people show up on Google Hangouts, which is an insane amount for an interactive call.  I told everyone before the party that I just wanted to laugh and asked them to come with their best stories.  This meant we took turns listening and telling crazy stories, which worked pretty well for the number of people.  While we listened folks drank tea, put on face masks and did their nails.  The headbands were worn in multiple styles.  Many of us had robes on.  Some dedicated souls took footbaths.  Overall it was great fun, and so good to see everyone’s smiling face. <3

My spa setup

Tea

Candid shot of the “party”.


Posted in Parties | Leave a comment

April Fools?

We had fun celebrating our generic spring bunny themed holiday this past weekend.  Julius has started to remember holidays from years past, which is amazing.  Last year, you may or may not remember, I made Julius all the presents in his Easter basket because it was the start of the pandemic.  At that point in time virtually no stores had curbside pick up so it was very difficult to get things without getting them shipped to you, or risk going into a store.  I was also in my “no buying anything online to save the planet” phase, before I had to let that cave a few months later when we decided not to leave our house.  Julius remembered for some reason that the bunny brought him cookies, so that is what he expected from the Easter bunny again.  I decided this year to make him everything in his basket again and envisioned a puzzle, sugar egg, cookies and stuffed animal.

For the stuffed animal I envisioned using up some of the leftover foam from Julius’ climbing wall padding to make an animal that looked like one of those Squishmallows.  I thought a dragon would look pretty cute and would be fairly easy.  Skip ahead to the day before Easter.  Envision me telling Will at around 7:30pm that I should have just bought a stuffed animal because I hadn’t drafted or made anything.  Will suggested I just skip the stuffed animal.  But how could I skip the stuffed animal?  My son loves stuffed animals.  So I compromised and told him instead of making the dragon I would make a bunny which had a lot less pieces and should be easier.

Skip ahead an hour and I had a pattern drafted to test out.  I was copying the photo of this bunny who is pretty darn cute.  I created the embroidery pattern quickly and looked through my fabric stash for some fabric to use.  I really don’t have a lot of nice stuffed animal fabrics so I decided to use some dark grey fleece for the body, and after much deliberation decided to use some black faux fur for the inside of the ears and the belly.  I cut out my pattern and got to work.

The face came out darn cute so I thought I was in good shape.  That’s when it all went wrong.  It pretty quickly became clear that using the fleece with the faux fur was a bad idea.  The faux fur was stiff.  Not your usual soft stuffed animal faux fur but something more like a beard… At this point I was committed, so I kept at it and sewed the ears together and the body together.  The ears were a nightmare.  The thick faux fur, which was supposed to be the underside of the ear, pulled the fleece and made the ears contort in weird ways.  Okay, bad.  I thought maybe I’ll just go with it and see what it looks like.  At this point Will is downstairs with me, stuffing Easter eggs while I sewed.

It didn’t look too bad, so I decided to stuff it.  This is when I realized that the foam I had was way too stiff.  Obviously even the soft foam core for a crash pad is going to be way firmer than something inside a stuffed animal called a squishmallow…  I started kicking myself for not realizing this and debated using the stiff foam anyway.  Ultimately I decided that giving Julius a rock was probably worse than just stuffing it with ordinary polyester batting.  So I stuffed the whole thing with batting.  It looked ridiculous.  I wish I had taken a picture of it, but I was so annoyed with the whole thing by this point that there was no documentation going on.  Will looked up from his egg stuffing to see what all the cursing was about and burst out laughing.  His comment, “that bunny had the weirdest beard I’ve ever seen”.  Darn it, I’d been paying so much attention to the demented ears and lack of shape due to the foam form missing that I didn’t notice that the too-stiff fur on the chest of the bunny looked like the chest hair of some burly lumberjack.

In retrospect this is when I should have noticed the bunny had chest hair.

Okay so now I’m assessing this lumpy, hairy, lumberjack bunny thing and all I can see is that the underside of the ears is also this too-stiff fur, and not only is it contorting the ears, but it reminds me of armpit hair.  GAH!  So now I have this burly testosterone heavy, hairy, lumpy bunny with the cutest darn face you’ve ever seen.  It is midnight and I am tired.  I spent several more iterations trying to get the ears to stick out less weirdly and the body to be less lumpy.  The ears won’t cooperate.  I decide in a moment of brilliance that I will just cut the ears down and make it into a cat.  Cats have furry tummies, maybe it won’t look so weird.

The end.

Except not really.  I didn’t do the right thing and remake some ear triangles out of leftover fabric because now it’s 12:30.  I just cut off the tips of the bunny ears and set them in as ears.  They don’t really look like cat ears.  So who the heck knows what animal this thing is.  I assess my creation.  Too late to make a new one, it is only mildly disturbing, into the Easter basket it goes.

What was the Easter bunny thinking?

Easter morning Julius looks for his Easter basket.  He had just hunted for Easter eggs and gotten some really great stickers, yogurt raisins, fruit snacks and a few candies in his eggs. He is pretty excited.  He finds the Easter basket and he grabs the bunny/cat/? out of the basket, takes one look at it and literally throws it over his shoulder.  This is the boy who hugs every stuffed animal he has ever gotten.  Confirmation of this creature’s uncanniness.  Will asks Julius, “what was that animal the Easter bunny brought you?”  Julius responds, without even glancing over his shoulder, “some sort of bear”.

That is indeed the bunny/cat/bear behind him after he threw it.

Needless to say, I will not be posting the instructions for the Franken-bear (unless someone begs me).  But you can have my face embroidery file because that was darn cute.

Here’s something that is actually cute:

My little bunny

UPDATE!  Patricia loves the creature!  He has the perfect amount of chest hair that makes him easy for infant fingers to grab!  


Posted in Crafts & Sewing | 1 Comment

Hippies (NSFW, but most of you are WFH anyway)

It probably won’t surprise you that we are the type of parents that don’t use cutesy names for sex organs.  When Julius first noticed his penis and testicles he asked what they were called, and we told him.  That seems like ages ago.  Now the little guy even pees standing up.  (Literally my worst nightmare about being a boy mom.)  One day I just walked in to the bathroom to check on him and he was peeing standing up.  His aim isn’t as horrible as I had imagined, but my imagination is pretty wild.  Basically don’t judge me too hard when you’re finally able to come visit us and all the bathrooms in our house smell like urine and Clorox.

Anyway, I digress.  Using the anatomical name for sex organs, plus Julius’ recent obsession with his, means I have been getting lots of questions like, “where is your penis, Mama?”  “Is your penis hiding?” “Do you have a really tiny penis?” Or most recently “if you don’t have a penis do you pee out your bum bum?”  (That one sent Will off into a fit of hysterical laughter.)  Despite what I’ve told him over and over again, it is obvious from his questions that he believes I have a penis somewhere, but that I’m hiding it from him.  That’s silly though.  As we all know from, well, being a human in the world, if I had a penis I’d be obligated to loudly proclaim so or at least erect some phallic monuments.

On the opposite note, I’ve been putting together the next ladies’ night activity.  I made a lot of the stuff for it so I’ll be sharing some of those projects over the next couple weeks.  First up is a quick headband I made because I loved the one my mother in law gave me for Christmas.  Hair accessories have become a necessity to prevent Patricia from ripping my hair out, or my hair getting in my way.  I haven’t cut my hair since February of 2020.  Ironically I told my hairdresser right before the pandemic that “I wanted to grow my hair out” and not to cut it too short.  I guess I got my wish.  This headband is super simple, and the original company claims you can use it for anything from a headband to a bandeau top…  I wouldn’t go that far, but I like the fact that you can decide how wide to make the headband.  You can scrunch it fairly thin, fold it or wear it wide and stretched out.  And you can wear it parallel to the ground, “hippie style” or like a regular headband.

This is the easiest tutorial I may have ever posted.  The key to making this headband is finding the right fabric.  The ideal fabric I found so far is a 4-way stretch jersey knit, with some spandex.  Knit fabrics, because of the way they are created (exactly like someone knitting with needles), have some horizontal and vertical stretch built in compared to woven fabrics, which just have stretch on the bias.  If you add spandex into the materials it is like adding elastic in, so your fabric will bounce back or recover to the original shape.  From what I can tell the 4 way stretch just means it is really darn stretchy for a knit.  For the headbands I made, they have 70% stretch.  Which means that if I take a 10″ piece of fabric it will stretch to 17 inches.

Versatile Headband

What you’ll need:

  1. Make sure to cut your fabric so the stretchiest part is the 20″ portion. This usually means the 20″ is perpendicular to the selvedge along the “grain”.

    For the Ladies’ night version I only made them 5″x20″ because I ran out of fabric. You can change the size to make them narrower to your liking.

  2. Fold the fabric to form a 10×10 rectangle with the right side in.
  3. Stitch along the edge with 2 open 10″ sides, with .5″ seam allowance.  I used a regular old straight stitch here, even though almost everyone will tell you to never ever do this.  In this case you are almost never going to stretch perpendicular to the grain so it won’t matter.  If it makes you feel better, sew a wide zig zag or straight stretch stitch.
  4. I also didn’t bother to do anything about the unfinished edges.  Technically it is possible that they will unravel.  Since we’re going to be tucking the fabric under at the edges I don’t think this matters.  And the headbands are so darn quick to make that hemming the edges would triple the labor involved.  Again, feel free to serge the edges if you are so inclined, but in this case definitely DO NOT use a straight stitch.  You’ll need something that encompasses the huge amount of stretch.
  5. Tuck under the edges and wear.

    I’ve made dozens of these now.  This one is from when Patricia was 2.5 months old…


Posted in Crafts & Sewing | Leave a comment