Will and I celebrated our 8th anniversary last week. We dropped Julius off at daycare and took the day off of work to do “adult” things like go karts, escape rooms and hibachi. Okay, there was a reason I put the word adult in quotation marks. It was one of the best days off of work I’ve had in a long time!
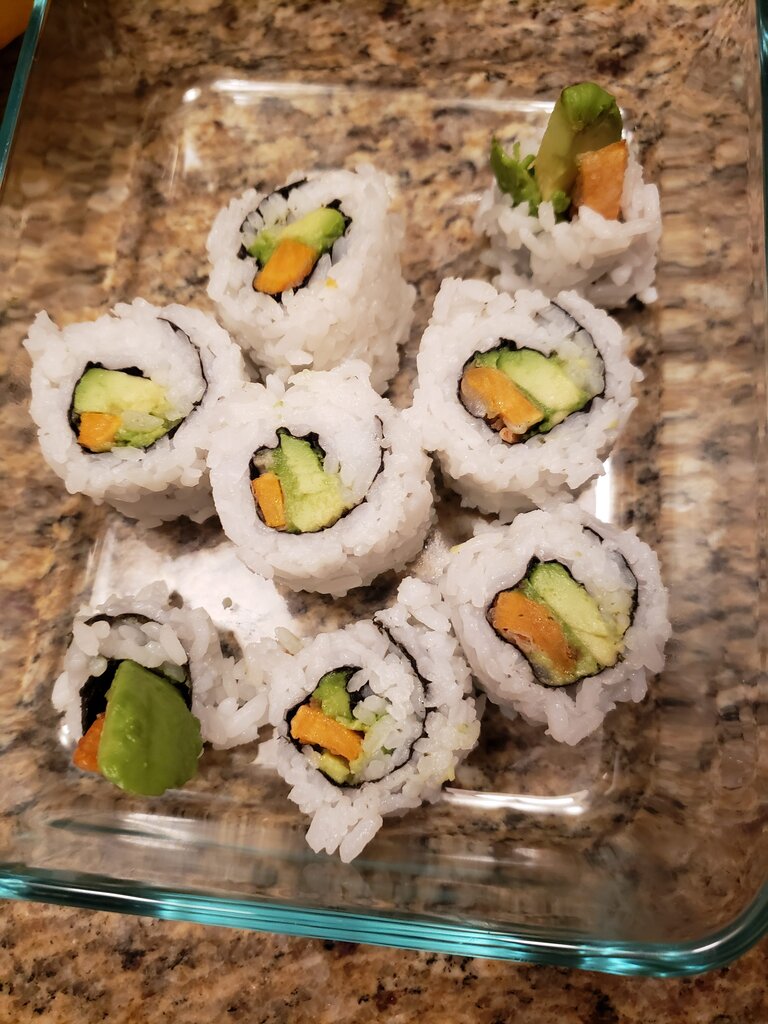
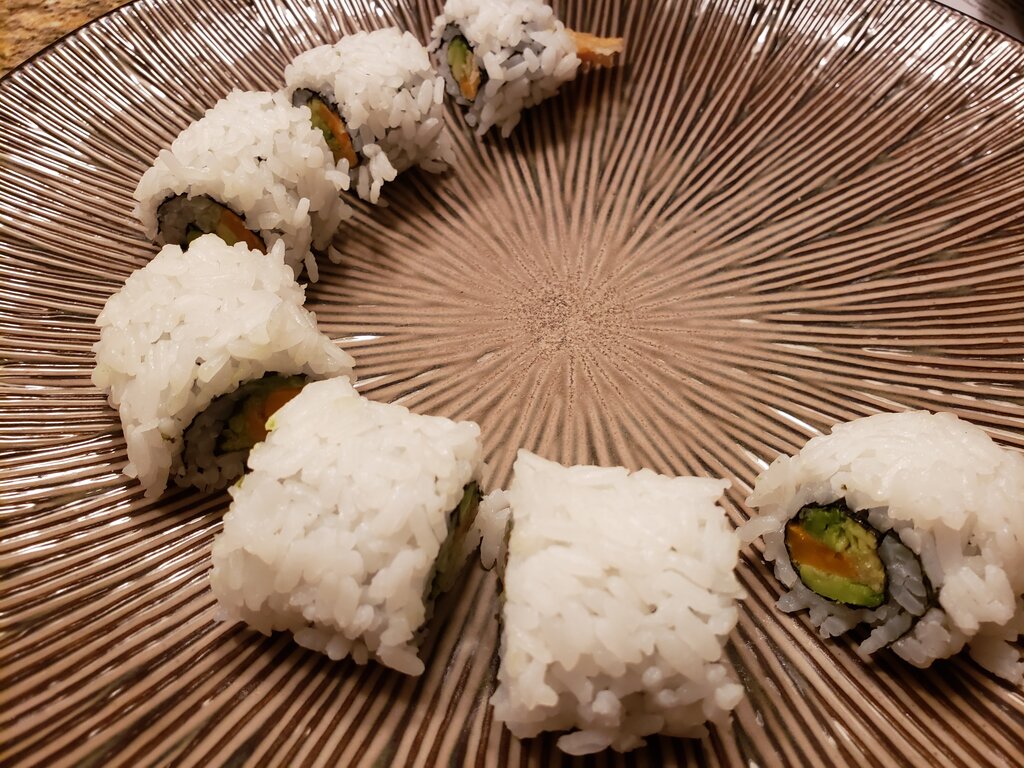
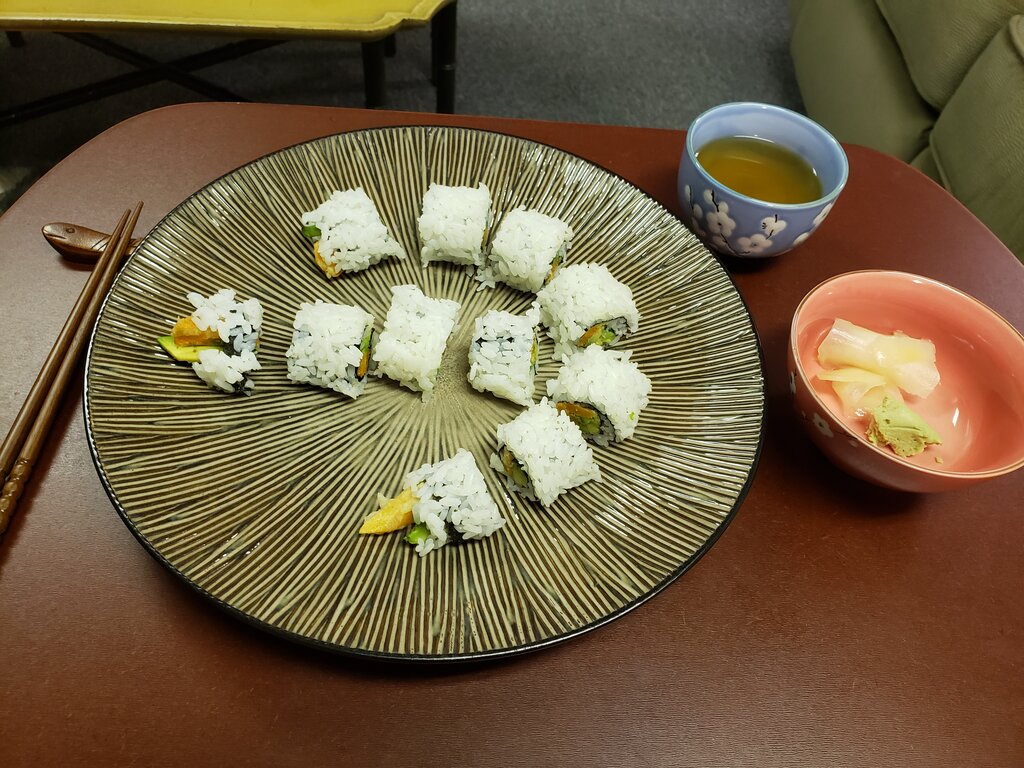
For dinner I made vegetarian Idaho sushi rolls after Julius went to bed. They are tempura sweet potato and avocado wrapped in nori paper surrounded by rice. We wanted real wasabi and sushi ginger to go with our sushi, so after our adventure filled morning we enjoyed a kid-free visit to Whole Foods, where we each even got to pick out a cookie. (“Adult” day.) I highly recommend the Idaho rolls. They were amazing, and didn’t take very long, even though there are a lot of steps. I even thought the sushi rolling was easy and fun! According to the interwebs I did everything un-Japanese and wrong, but they still looked and tasted amazing to us!
Idaho Rolls
Ingredients
- 1.5 cups sushi rice
- 1/4 c rice vinegar
- 1 Tbsp sugar
- 1 tsp salt
- 1 cup flour
- 1 large egg
- 1 cup ice water
- 2 cups vegetable oil for frying
- 1 small sweet potato cut into 1/8″x1/2″ strips
- 2 avocados sliced in half and then into 1/8″ strips
- 3 sheets of nori paper, halved using kitchen shears.
Cook sushi rice according to package directions. When cooking is complete, microwave vinegar, sugar and salt for 1 minute or until sugar and salt has dissolved. Pour over the hot cooked rice and gently stir. Set aside with the cover on to keep warm while you prepare the rest.
While rice cooks, begin to prepare your tempura batter*. Place a handful of ice cubes into the cup of water. Sift flour into a bowl. Chop veggies. Cut sheets of nori in half.
At this point, bring your oil to 350 – 375 degrees F. I hate the smell of cooking oil in the house, so I’ve been deep frying things outside using the burner on my propane grill, a tip taught to me by someone on a yoga retreat. I just wish I had a real frying thermometer.
While oil is coming to temperature, lightly beat an egg in a small bowl using chop sticks, basically just breaking up the yolks. Straining out the ice, pour one cup of water from your ice water cup into a measuring cup. Lightly beat the cup of water into the egg using the chop sticks. Add flour to egg/water mixture and gently mix with chop sticks until just incorporated. You will still see lumps of flour in the batter all over the place.
When oil is at temperature, use the chop sticks to dip a sweet potato piece into batter and then drop into the oil. Repeat for 6 to 8 pieces. Retrieve slices using a kitchamajig or slotted spoon after the batter looks crispy (but not brown) and have been frying for about 2 to 3 minutes. Drain on paper towels. Let oil come back up to temperature again then repeat until all the sweet potato is used up.
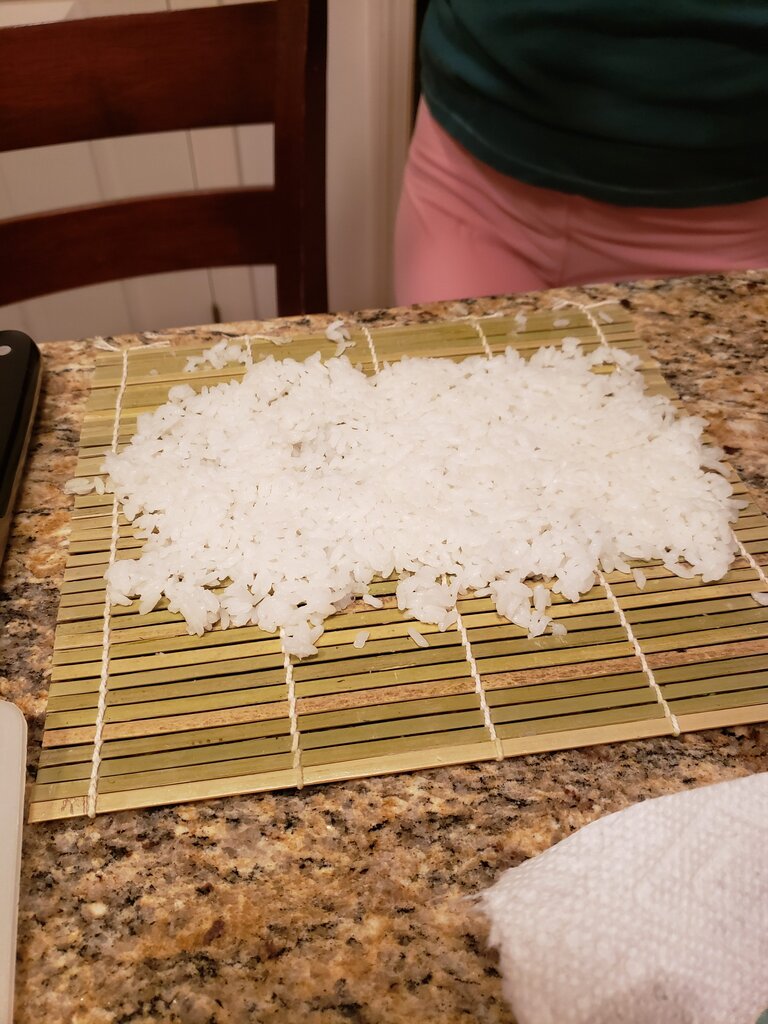
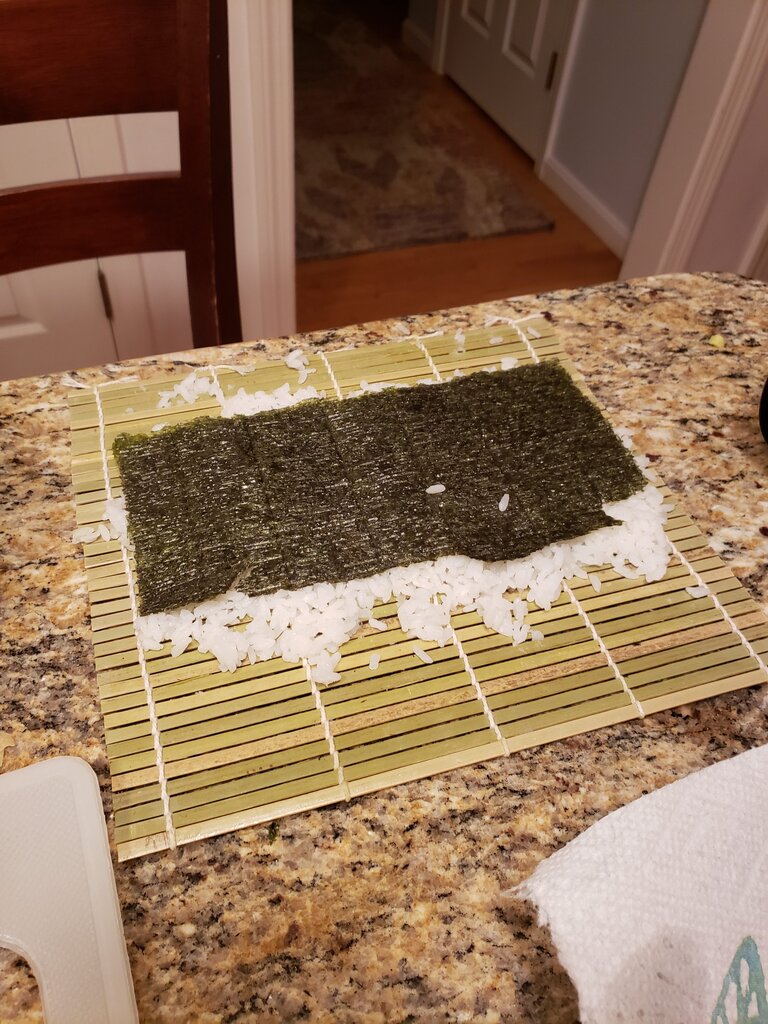
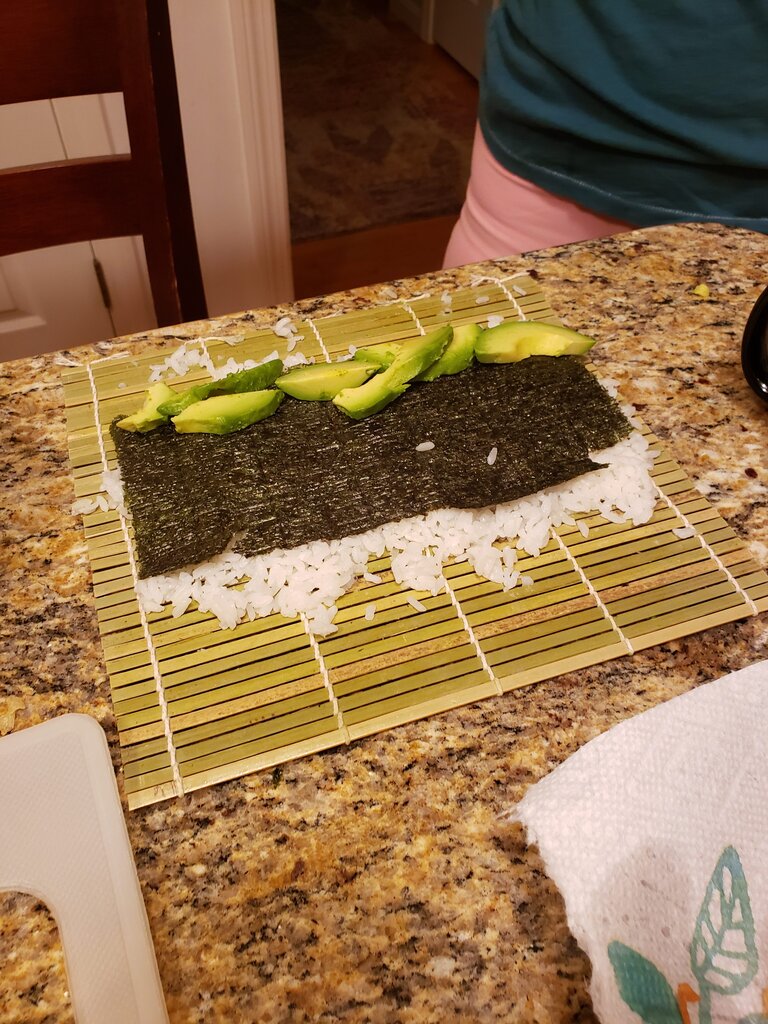
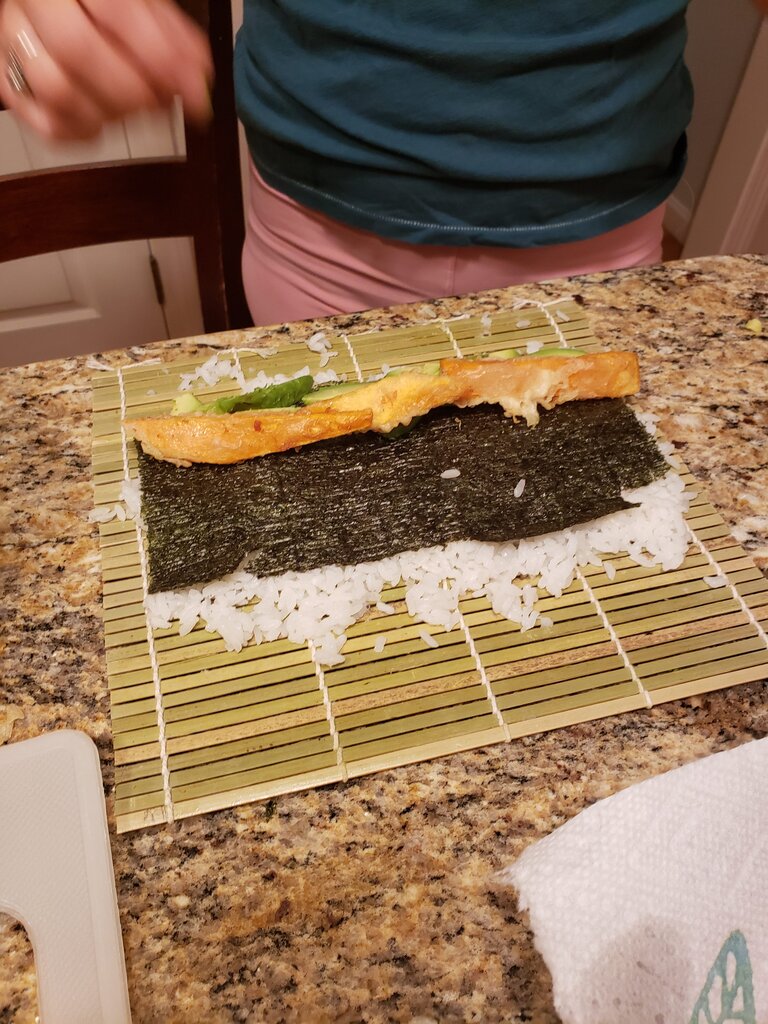
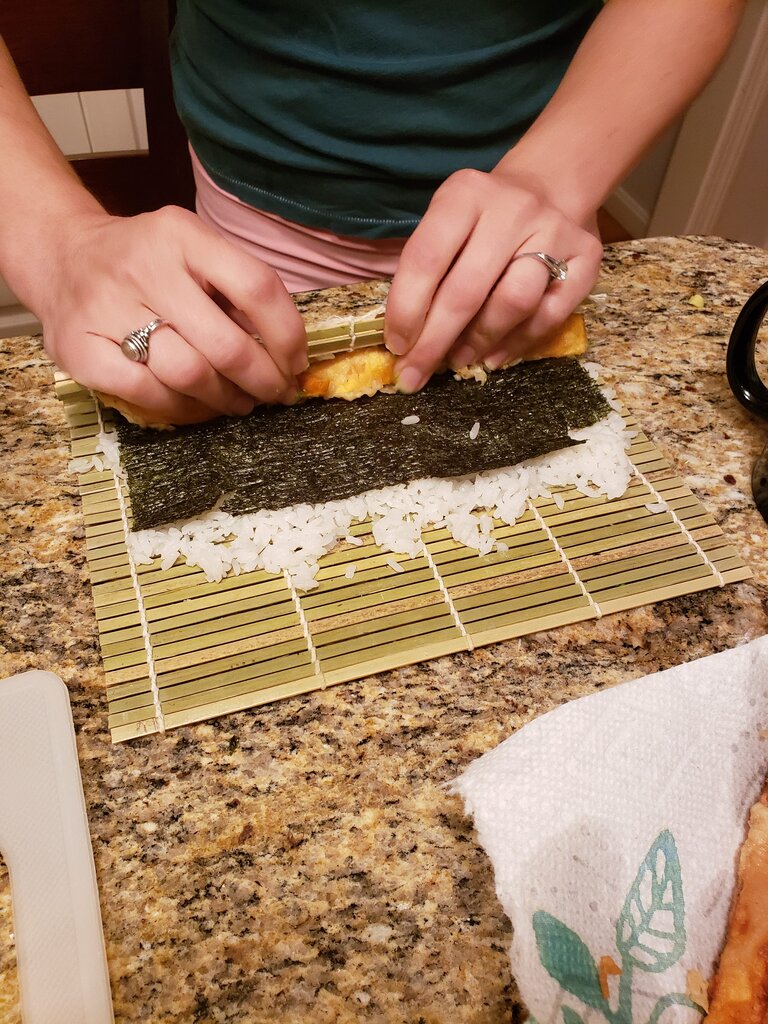
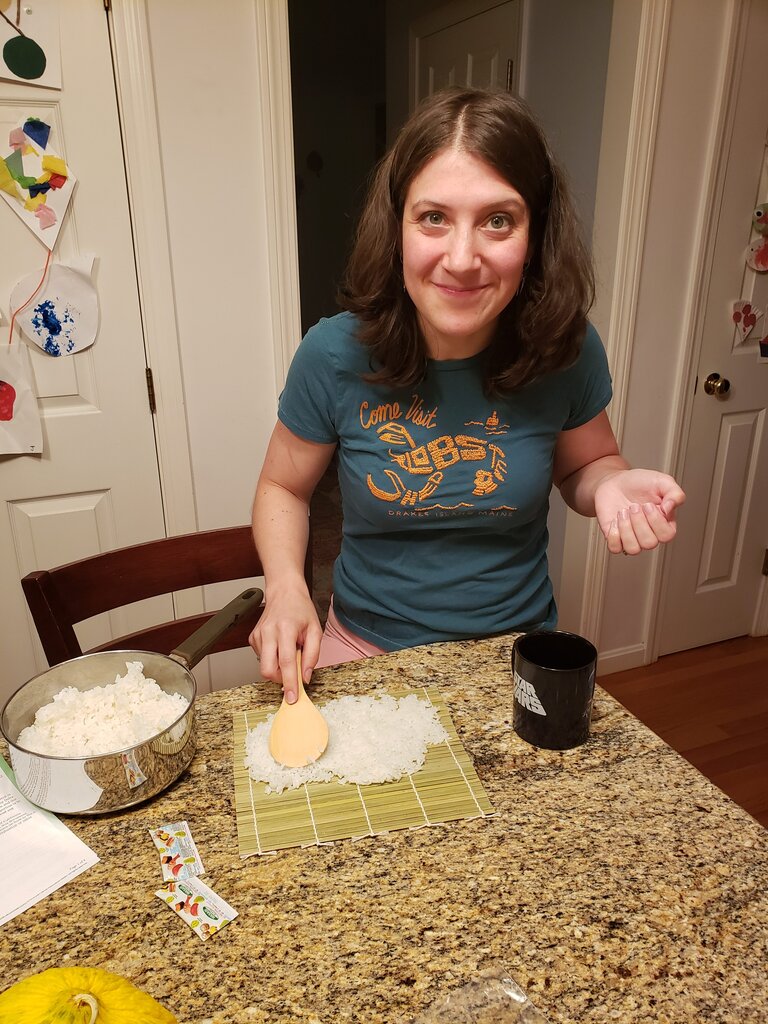
Now it’s time to get rolling! Place rice on the bottom edge of your mat, pressing with the back of a spoon to form a rough rectangle about 7″ wide by 4″ high. Place a half sheet of nori (shiny side up) on the rice and press down firmly to flatten out the rice a bit more. At the bottom edge of the rice/nori place a couple layers of avocado slices, overlapping. In front of that place 2 or 3 layers of tempura sweet potato.
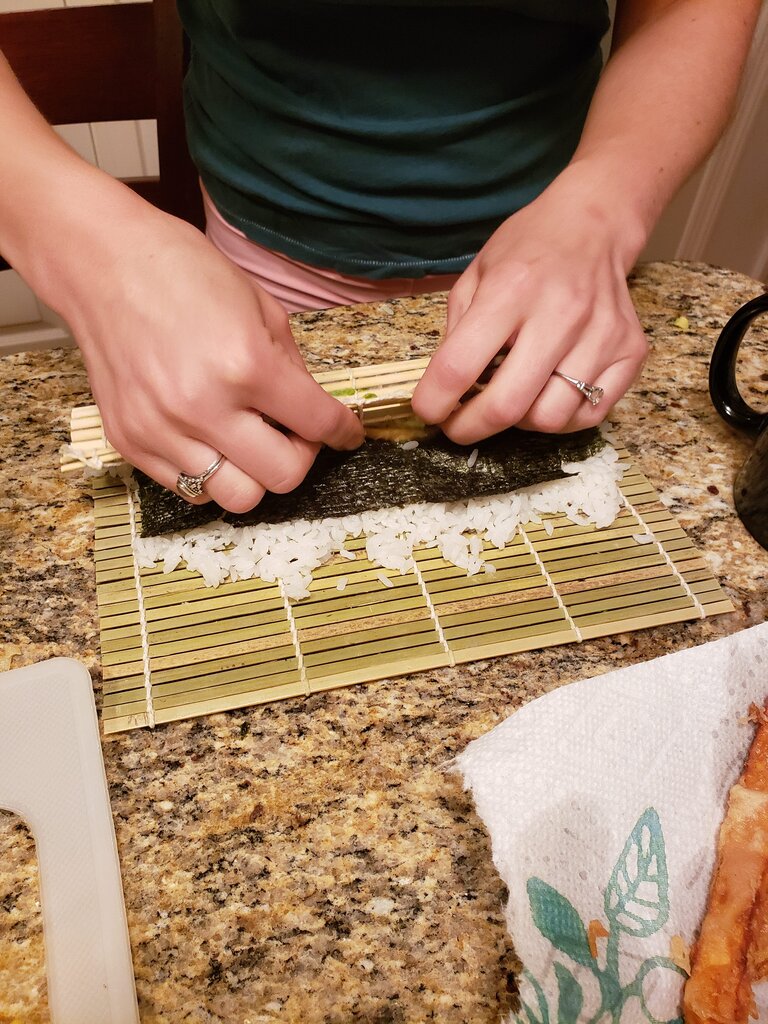
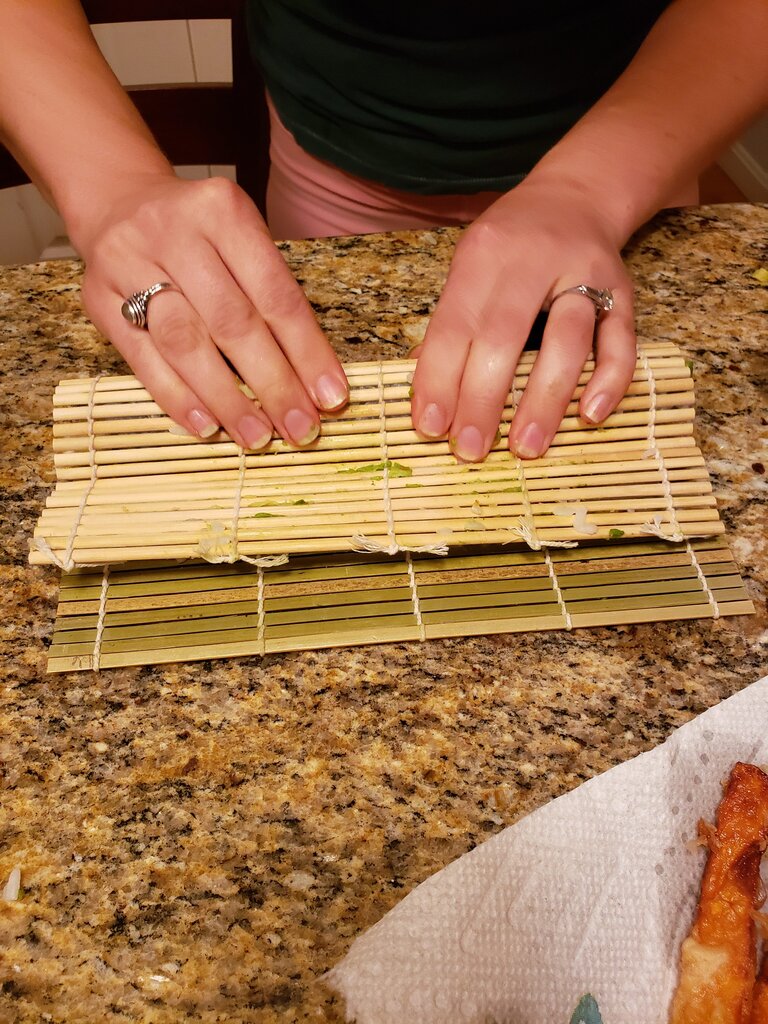
Pick up the bottom edge of the mat with the heels of your hands while pressing the sweet potato and avocado into the mat with your fingers. Roll the mat over the sweet potato and avocado while pressing the back of the mat gently. Gently start to release the bamboo mat from the rice you just rolled by pulling gently, bamboo piece by bamboo piece, while rolling the whole thing more with the heels of your hands. Continue, applying firm pressure until you have incorporated all the rice. Gently pull the bamboo mat away from the rice until the entire roll has been released.
Using a very sharp knife cut into 6 to 8 1″ slices. Repeat for other 5 rolls
Serve with sushi ginger, wasabi and soy sauce for dipping. Makes around 6 rolls with 8 pieces each.
*(I used the tempura recipe from The Spruce Eats who I love and always has great recipes. The amount of ads on the site make it difficult to read, so I have paraphrased the recipe here for your sanity. I do encourage you to read the lovely article there first.)