Over the second half of the second trimester when I was feeling a bit better I decided to get my act together and start freezing meals for when the baby is born. It has been extremely hard to not eat all of them in the third trimester, but I have somehow resisted! Will’s biggest qualm is that he would see me making something, and a few days later say something like, “hey whatever happened to that turkey pot pie I saw you making”. I then have to explain to him that I froze it for later and he gets a bit sad. I guess at least he likes my cooking enough to get sad that he has to wait to eat something.
Though I froze a lot of meals – chicken noodle soup(6), lentil soup(2), split pea soup(1), random vegetable soup(1), baalti sauce(5), veggies from my farmshare (corn, cauliflower, beets), meatballs(2), lasagna(2), turkey pot pie(2), eggplant parm(1), stuffed peppers(2) etc. – I have heard I won’t have time to plan what to eat. I was thinking I’d do some meal planning so I have some semblance of a plan for shopping and cooking and don’t use up all my frozen supplies immediately. The plan is to make one recipe whose ingredients can be used twice during the week. In between those days I have some easy recipes, many that I can prepare the day before if I’m feeling motivated. Finally two of the days each week will be filled in by frozen meals of my choice (or leftovers from earlier in the week). As a side note, Will and I have salad with dinner every night, but I’m not including this in the shopping list. If you think this is a bit light on the veggies that’s why.

I’ve frozen some turkey pot pies, eggplant parm, lasagnas, and stuffed peppers. I’m also desperately in need of defrosting.
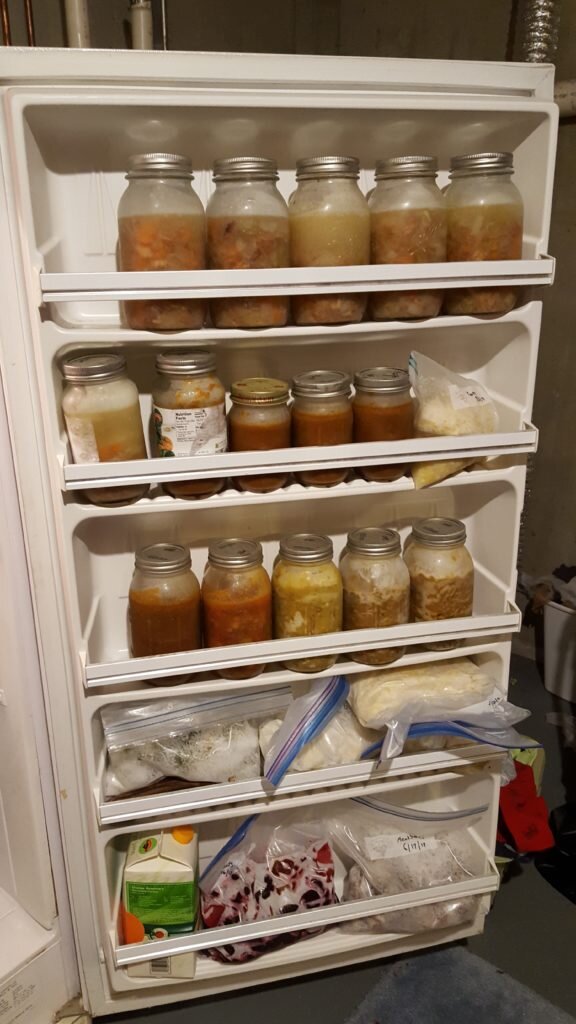
This is my supply of frozen sauces and soups. Top shelf is chicken noodle, second shelf is baalti sauce, third shelf is assorted soups, and the bottom shelves are all frozen veggies (and meat balls).
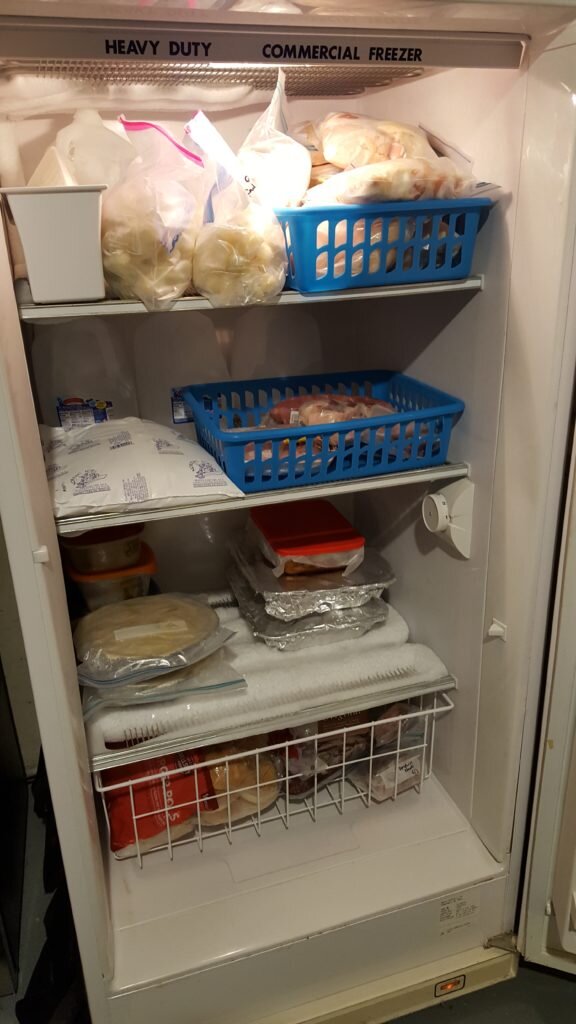
Top shelf has currently cauliflower and frozen chicken (in the basket). Second shelf just has frozen pork (in basket). The third shelf houses a bunch of frozen meals. The bottom basket contains beef.
Here’s what I came up with:
Week 1
- Ham, scalloped potatoes, green beans
- Chicken parm (can freeze chicken breasts before cooking) over pasta with broccoli
- Lentil soup with ham, dinner rolls (I use this recipe as a basis, but I omit the spinach and vinegar, use canned tomato sauce in place of the crushed tomatoes and in step 2 I also add a ham bone and pieces of ham, plus 2 chicken boullion cubes.)
- Broccoli, green bean fritatta
- Hamburger stroganoff with peas (Will calls this tasty beef)
Grocery list
Meat:
Small bone in honey roasted ham, 1 lb ground beef, eggs
Vegetables:
green beans, onion, carrots, celery, tomato, head of broccoli, peas (frozen)
Other:
lentils, scalloped potatoes, 1 can cream of mushroom soup, pasta, pasta sauce, mozzarella cheese, parmesan cheese, sour cream, pillsbury dinner rolls
Week 2
- Chicken tacos (made with salsa chicken)
- Sausage and kale over pasta
- Shepherd’s pie (using boxed potatoes) with corn and peas
- Chicken enchiladas (made with leftover salsa chicken)
- Shrimp scampi
Grocery list:
Meat:
4 chicken thighs, 1 lb ground italian sausage, 1 lb ground beef, 1 lb frozen shrimp
Vegetables:
kale, lettuce, red onion, corn (frozen), peas (frozen), shallot
Other:
boxed mashed potatoes, pasta sauce, pasta, 2 jars salsa, guacamole, 2 packs of soft flour tacos, sour cream, cheddar cheese, cream cheese, Parmesan cheese
Week 3
- Breakfast burritos
- Pork chops with sweet potatoes and beets
- Veggie Quesadillas
- Pot roast with mashed potatoes
- Chicken and yellow rice
Grocery List
Meat:
1 lb boneless chicken breasts or chicken thighs, 2 lb pot roast, chorizo, 1 lb pork chops, eggs
Vegetables:
red bell pepper, 3 onions, carrots, celery, sweet potato, beets (frozen), peas (frozen), yukon gold potatoes
Other:
sour cream, shredded cheddar cheese, ketchup, bbq sauce, can of black beans, 1 package of fajita sized flour tortillas, salsa, goya yellow rice
Week 4
- American chop suey
- Pulled pork sandwiches
- Teriyaki garlic roasted salmon with roast potatoes, green beans
- Stuffed peppers using beef from american chop suey
- Turkey thighs with apples and green beans
Grocery List
Meat:
2 lbs ground beef, 1.5 lbs country ribs, 2 lbs turkey thighs, 1 lb salmon,
Vegetables:
onion, 2 green bell peppers, green beans, 4 cortland apples, shallots, small potatoes
Other:
bbq sauce, jar of pasta sauce, pasta, cheddar cheese, apple cider, onion rolls or french bread
You’ll notice that many of the ingredients are the same between weeks – like the cheeses. I’m also debating if I want to buy a lot of the meat in advance and then freeze it until I’m ready to use it to make shopping easier. Most of these recipes I make so often that I don’t need recipes, but I’ve added some of my recipes plus links to the ones I originally got from the internet… please let me know if you want some instructions on how I make something!