
Well Will returned from Texas and brought me back the flu. I’ve been in bed with a fever for 5 days straight. Tonight I finally feel well enough to get out of bed and do something other than sleep or read 50 Shades of Grey. Honestly its a good thing I had that book sitting on my bookshelf and have never bothered to read it because I finished Brave New World the second day and was not going back to the library. But as usual I digress! Let me bring the story back to better times – last Monday – well before I was sick. It seems like a lifetime ago!
Last Monday I held a Galentine’s Day party for my girl friends. If you’ve read my blog at all you know I love hosting Ladies’ Nights. Primarily because it gives me a chance to drink wine with my girlfriends, but secondarily it is an excuse to play Martha Stewart (and my friends are such good sports about it). Well it may be dawning on you now based on the title of this post that another one of my idols (although fictional) is Leslie Knope. I have a bit of a reverence for her. She’s a type A go-getter like myself, and she is loyal and lovable albeit slightly abrasive. Not to mention she has the same taste in men I do! (I’m pretty sure they based Ben Wyatt’s character on my husband, but they intelligently changed his occupation.)
Anyway, if I were Leslie Knope I would have thrown a breakfast brunch for all my girlfriends. But I’m not actually Leslie Knope so instead I threw a spa evening! I think it was a total hit. I set up several “spa” areas in two bathrooms, my living room and kitchen. For dinner I served a buffet with a slant towards foods with health benefits. The buffet consisted of items that I could entirely make ahead so I could enjoy the festivities myself. And as a special treat I had a traveling massage therapist show up and and give 15 minutes chair massages to all the guests.
I hope you’ll peruse my pictures of the food and activities, and gather ideas for your own spa event! It would be a fun idea for a bachelorette party or bridal shower.
Spa Activities
It was suggested that guests show up in sweats or comfy clothes and bathrobes. When guests arrived they were greeted and shown around the “spa facilities”. I had the lights dimmed, candles in every room and a soothing playlist playing throughout the house.
Spa Menu
Face Masks
1st Floor Bathroom
Manicures/Pedicures
Kitchen/Living Room
Foot Spa
2nd Floor Bathroom
Massages
Study
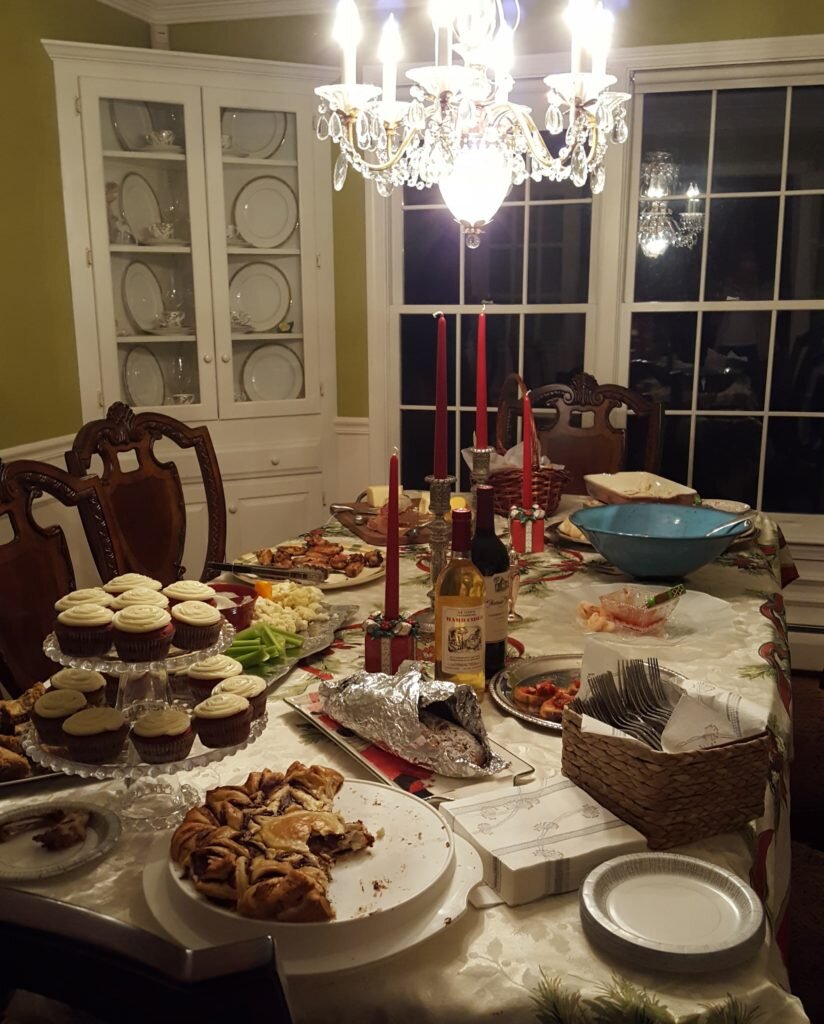
Spa Dining
Dining Room
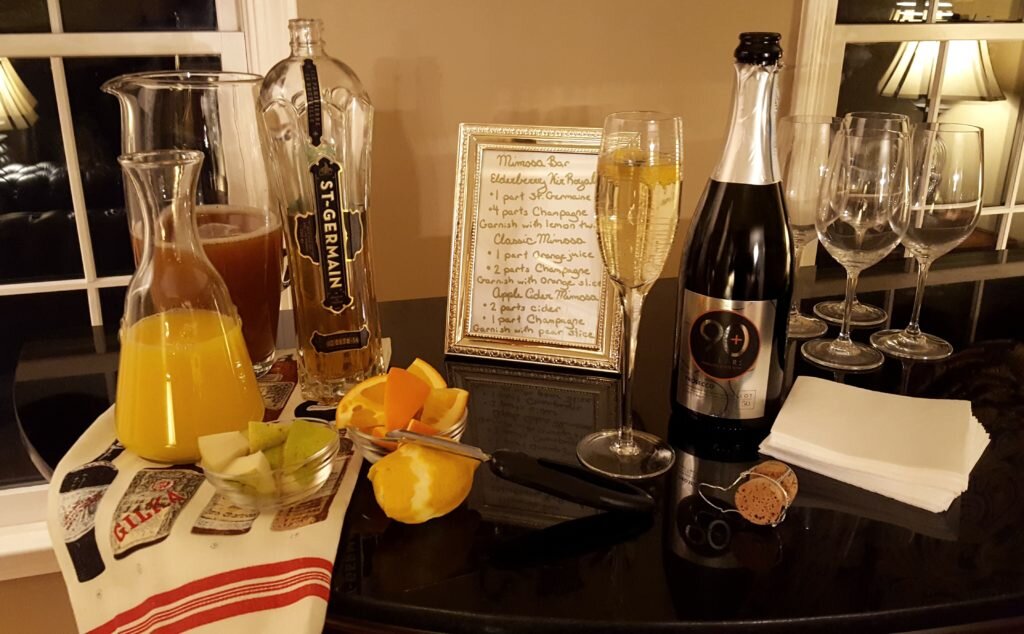
Alcoholic Beverages
Bar Room
Infused Waters
Kitchen
Facials
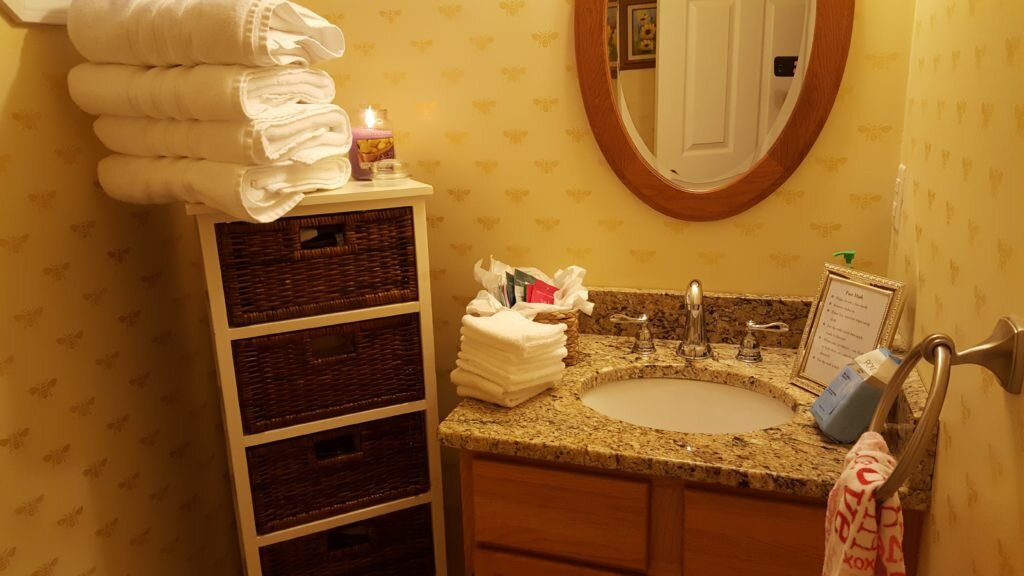
The first floor bathroom held the supplies for face masks: $2 Que Bella face masks from target, make up remover, face cloths, and towels.
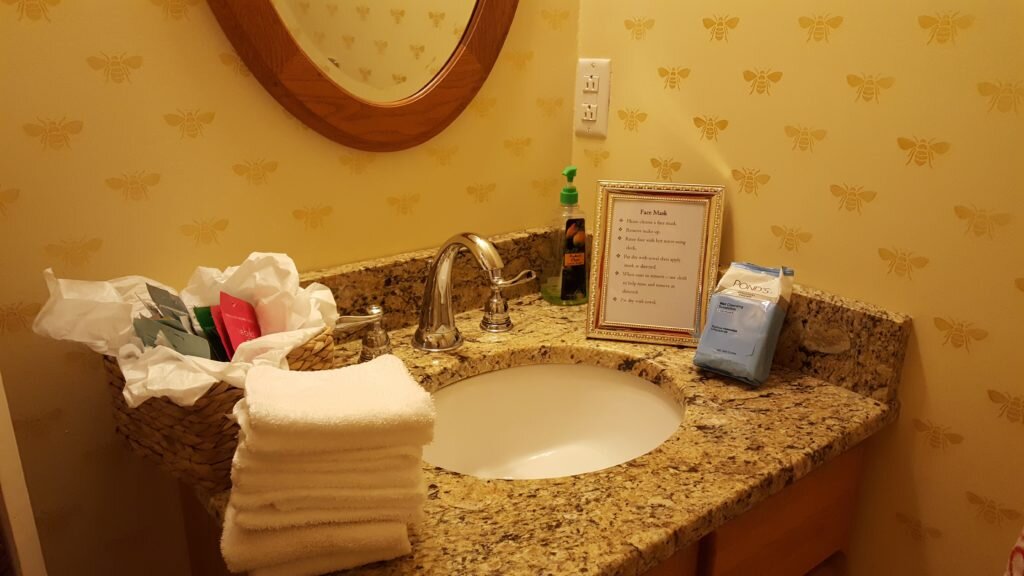
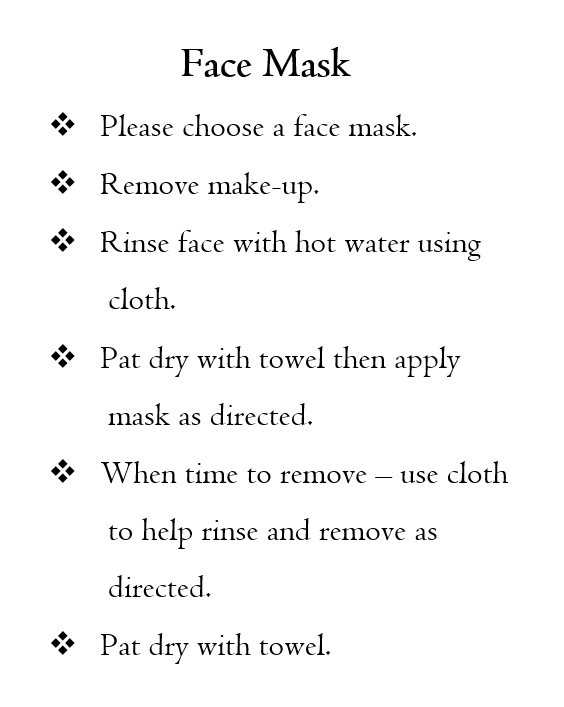
A frame held instructions for the facials.
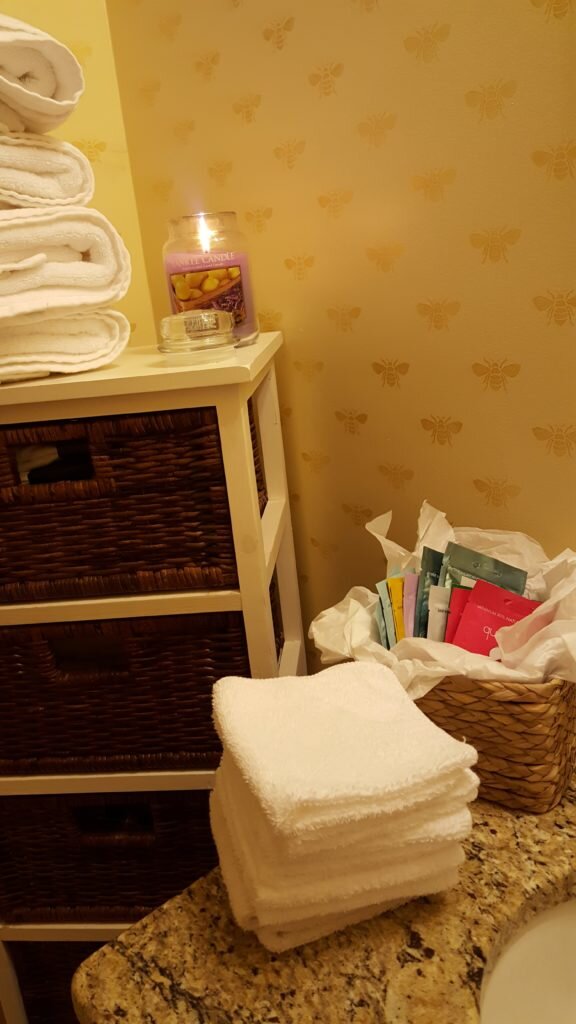
Everyone tried a different face mask – the colorful basket held different kinds of Que Bella masks providing different benefits. My guests had fun picking out the best one for them! (I personally love all the peel off ones!)
Foot Spa
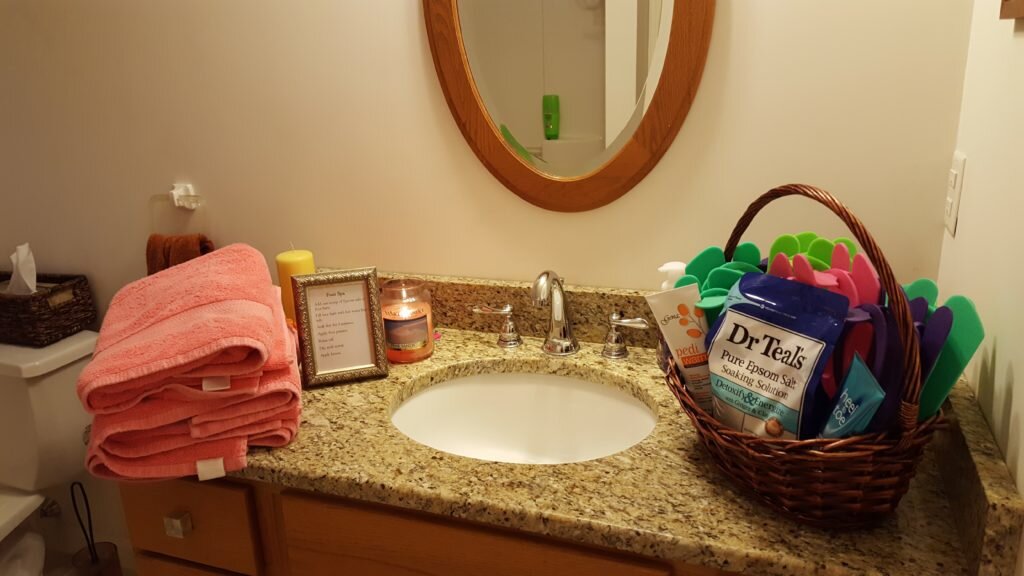
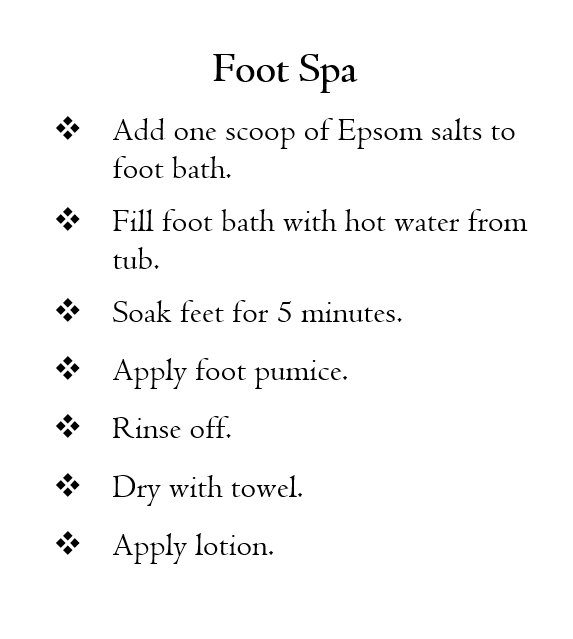
I provided epsom foot soak, foot scrub, and lotion and laid out towels and spa flip flops (from Sally’s Beauty supply). I included the instructions for preparing the foot bath in a frame.
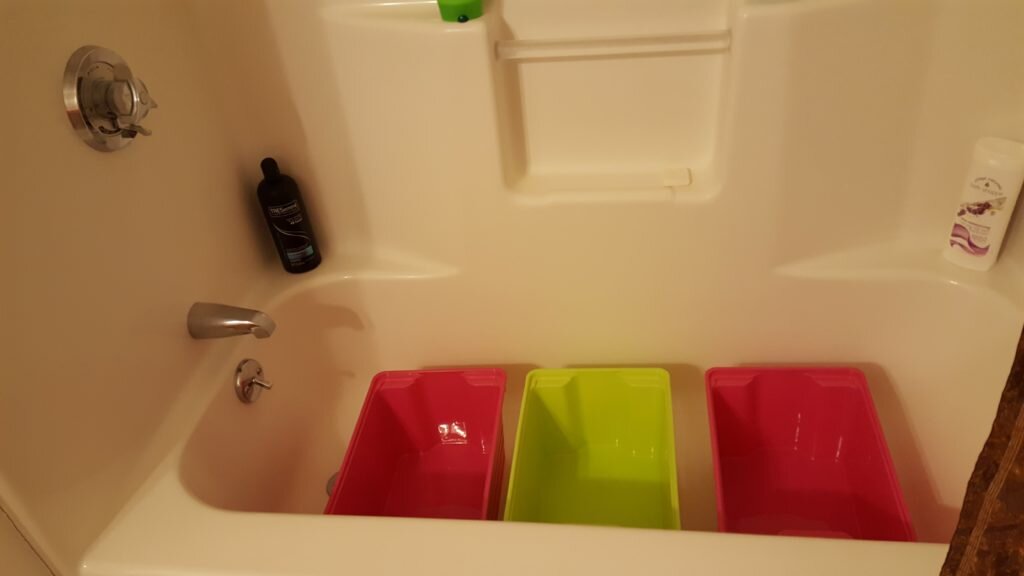
I purchased foot sized buckets so guests did not have to share the same bath water for their foot bath.
Manicure/Pedicure Station
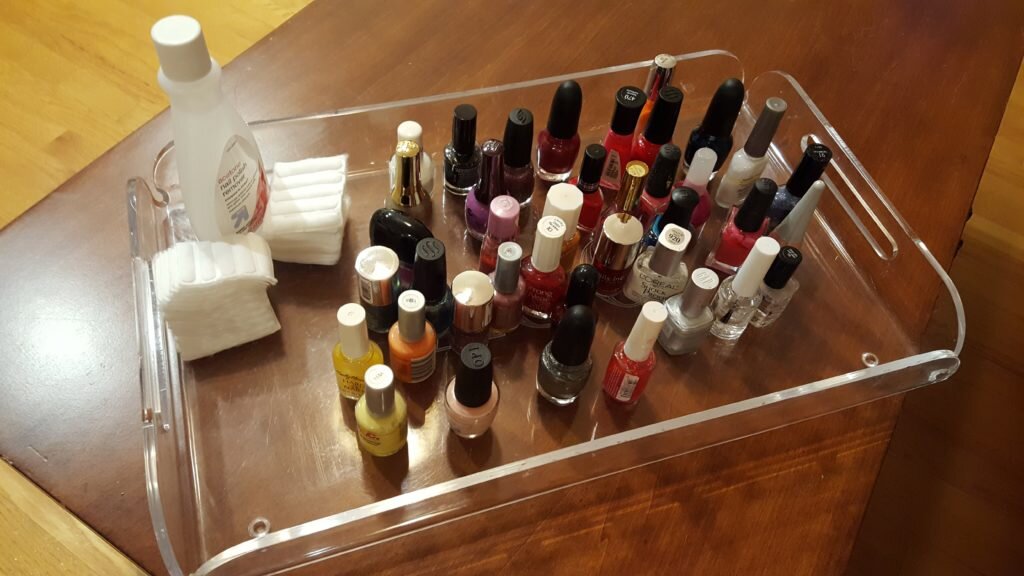
I set up two stations for manicure/pedicures. This one held lots of nail polish, and nail polish remover.
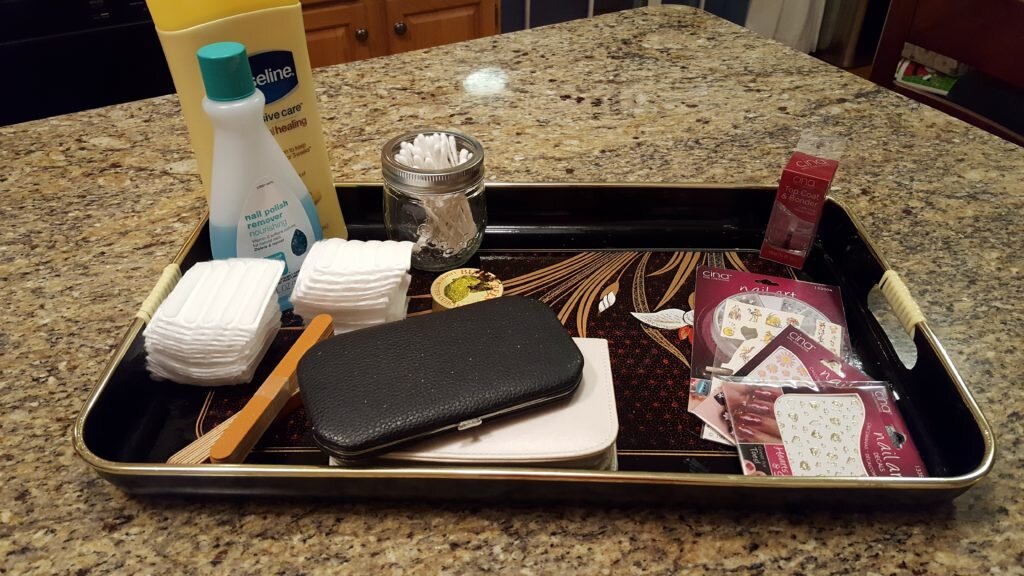
The second tray contained manicure kits, emory boards, cuticle cream, lotion, nail jewels and top coat in addition to nail polish remover.
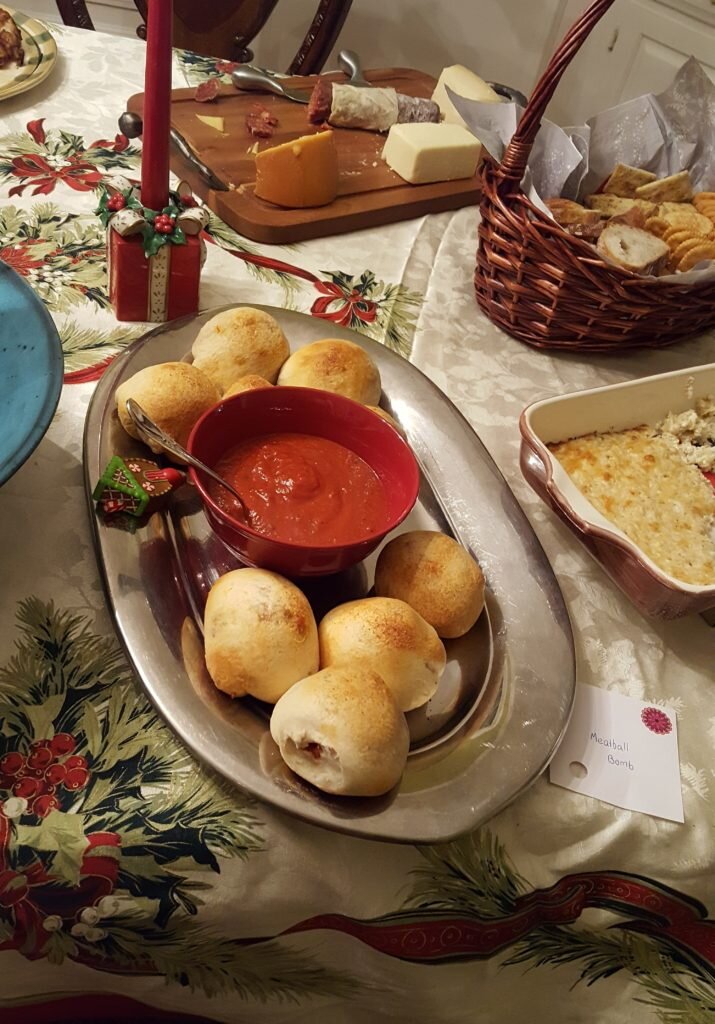
Food and Drink
I tried to keep food and drink for the party along a healthy theme. I used meats cooked in non-fatty methods (like poaching) and included lots of fruits, veggies, and ancient grains on the menu. For non-alcoholic drinks I stuck to infused water. For alcoholic beverages my friend brought tropical juices and alcohols to go with the spa theme, and I also made sangria.
Spa Dining Menu
Drinks
Lavender lemon infused water
served still
Strawberry hibiscus infused water
served still
House Sangria
sans sparkling water and maraschino cherries
Food
Fresh veggie platter
Carrots, cucumber, celery, hummus, ranch
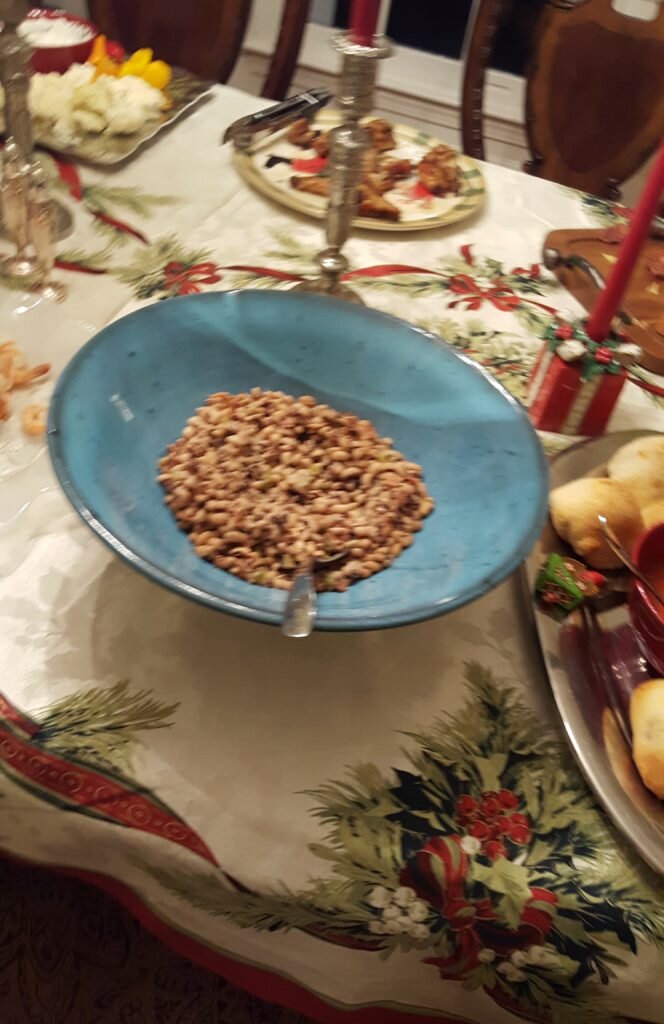
Quinoa Salad
Served chilled
Tossed Salad
Vermont cheddar, red and green leaf lettuce, cucumber, red onion, New England hothouse tomatoes
Poached Salmon
Served with cucumber raita
Curried chicken salad
Red grapes, almonds, poached chicken, bacon
Fresh fruit platter
Starfruit, mango, strawberries, pineapple with homemade yogurt
Chia seed pudding
Vanilla or chocolate
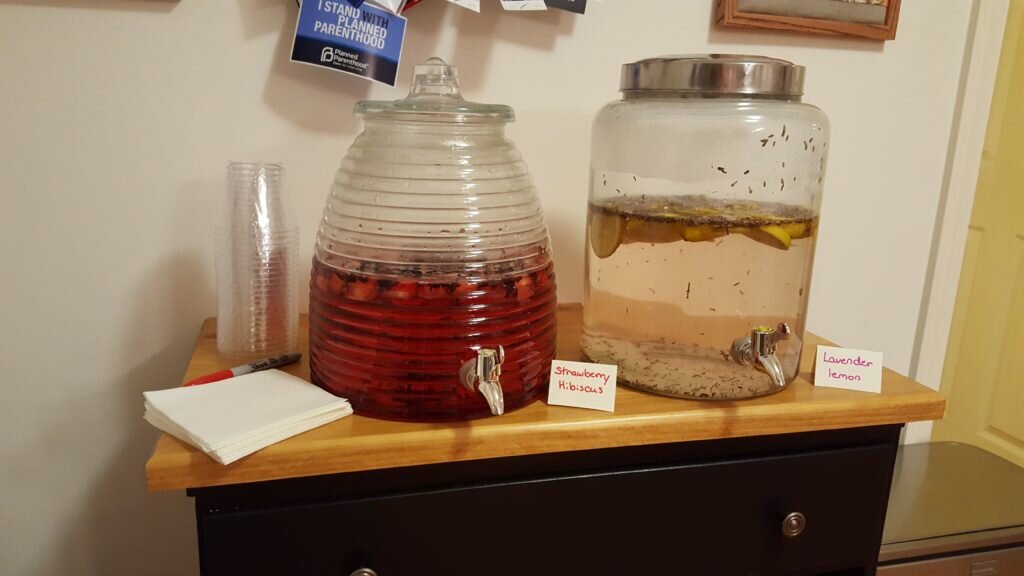
Infused water bar in the kitchen included a marker to write your name on your cup.
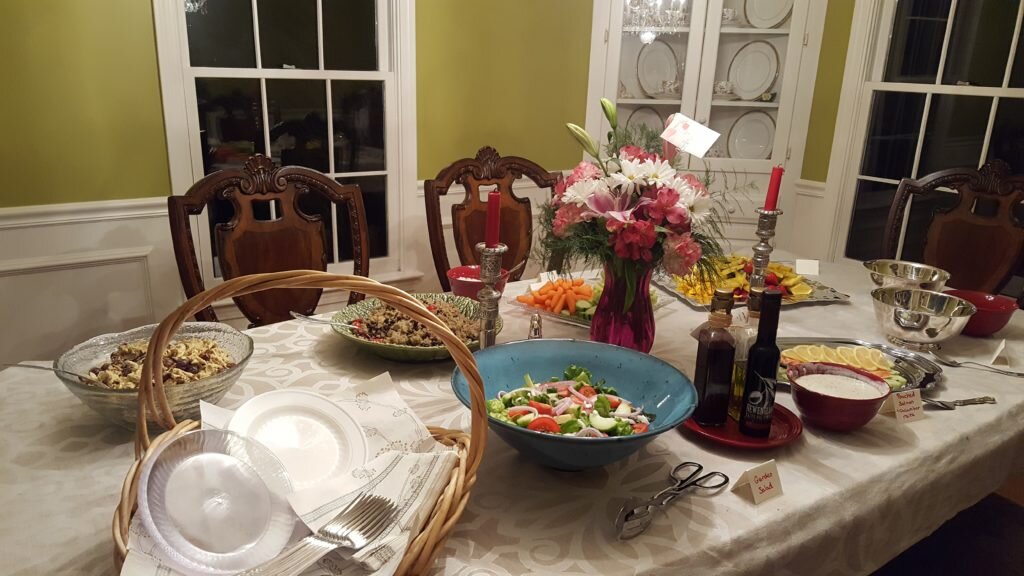
The spa dining setup. A basket contains plates, utensils and napkins.
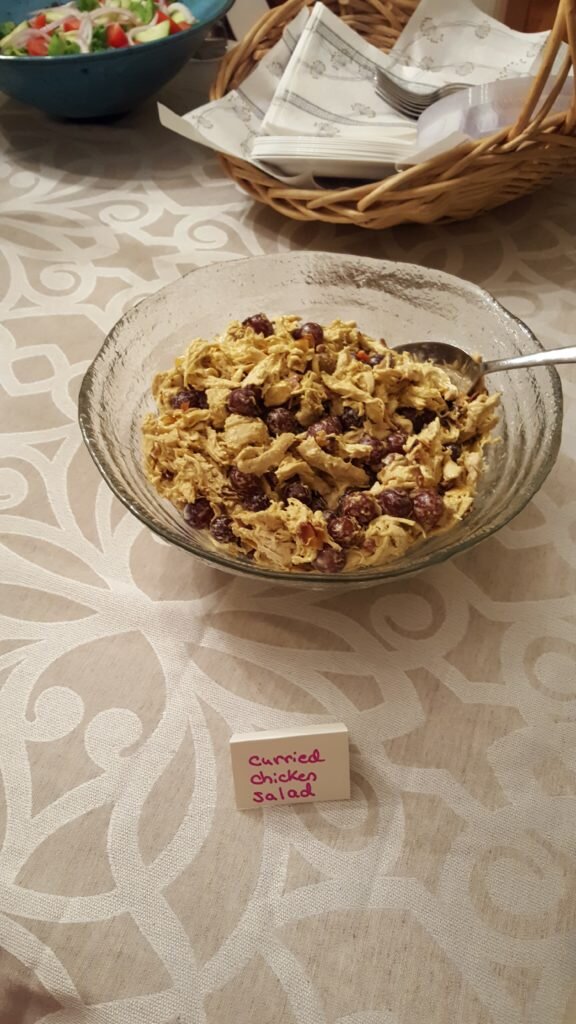
Curried chicken salad
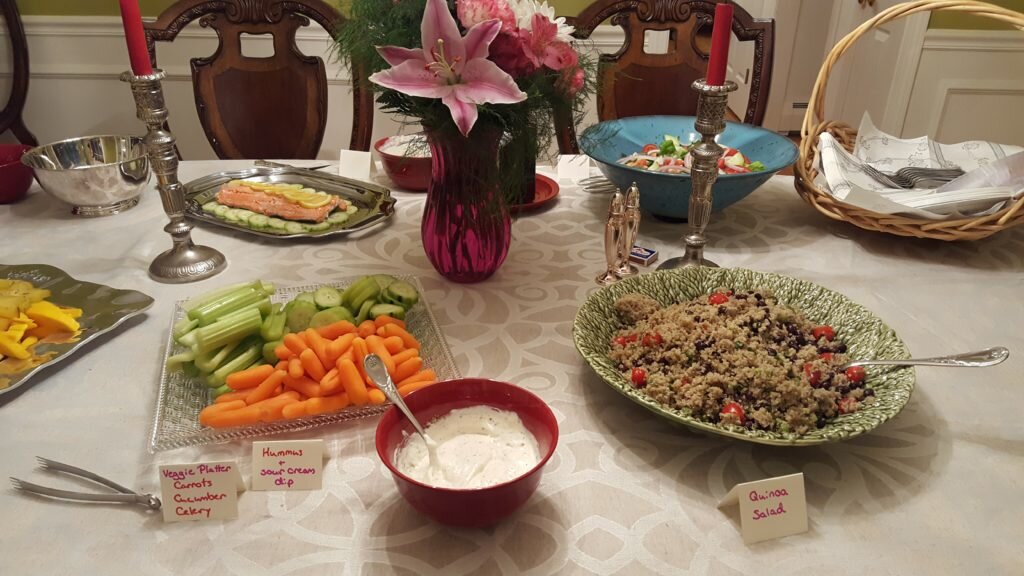
Veggie platter and quinoa salad
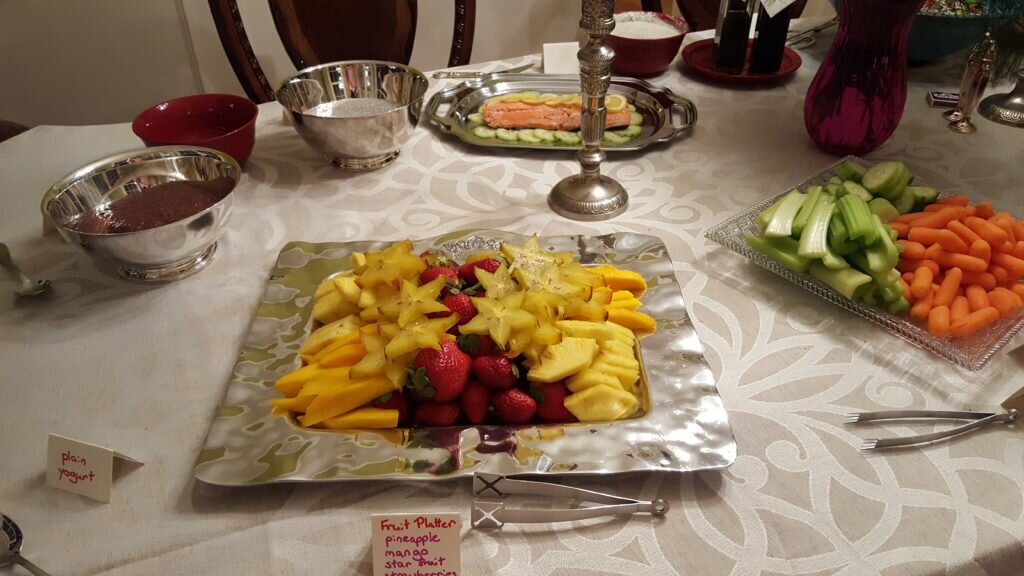
Fruit platter
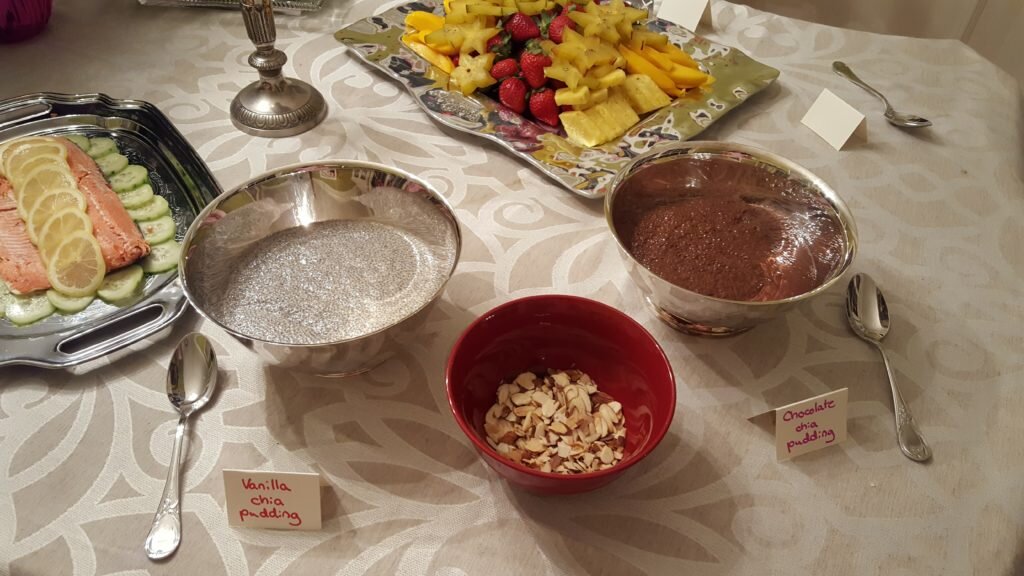
Vanilla and chocolate chia seed pudding

Poached Salmon with cucumber raita

Garden salad with oil and vinegar dressing


