
Happy May! I hope you all had a great May Day and are ready to celebrate some mothers this weekend. Julius has been asking me every morning when he wakes up “is it Father’s Day yet?” He then proceeds to accidentally tell me something he’s working on in preschool as my Mother’s Day surprise because he has confused the day with Father’s day. It’s frankly adorable. Patricia comes home on the days when Will picks her up shouting “mama, mama, mama, mama” until I come up from the basement or pick her up. It is also adorable. She is such a snuggle bug.
As a Mother’s Day gift to myself I booked tulip photos with our favorite photographer again. I cannot wait until I get to see them. The poor kids were cold though because despite the 65 degree weather there was a sea breeze. The tulip photos came with 20 tulips so we picked some for the kids’ teachers (don’t forget it’s teacher appreciation week) and myself. They are so pretty, check out these beauties!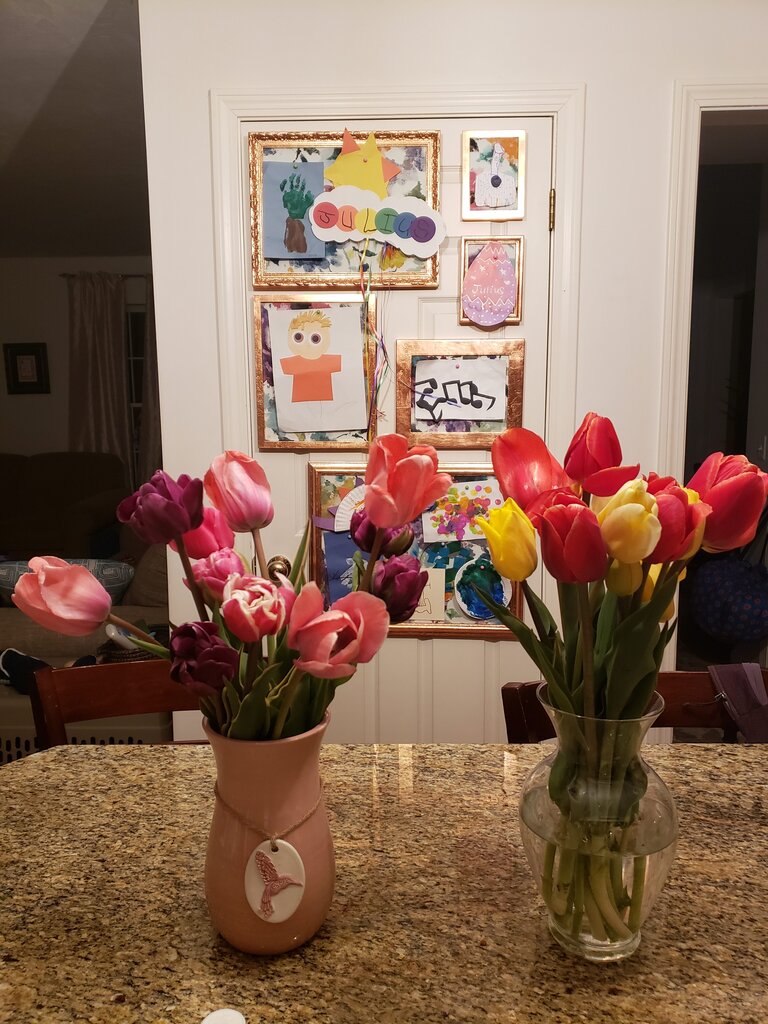
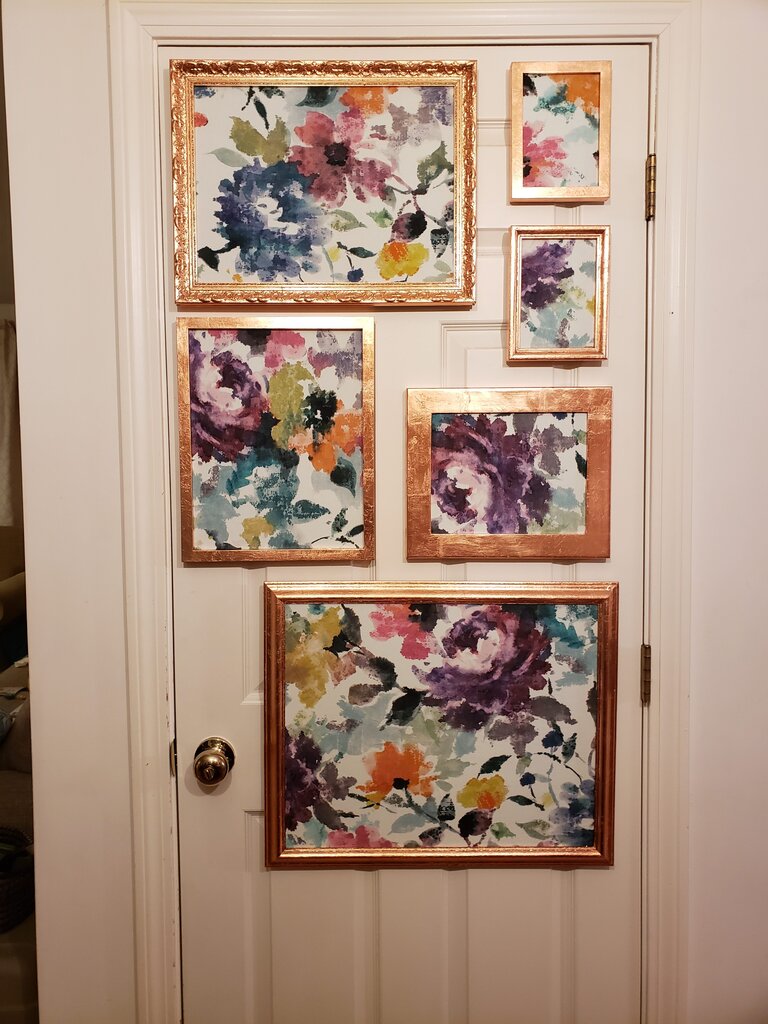
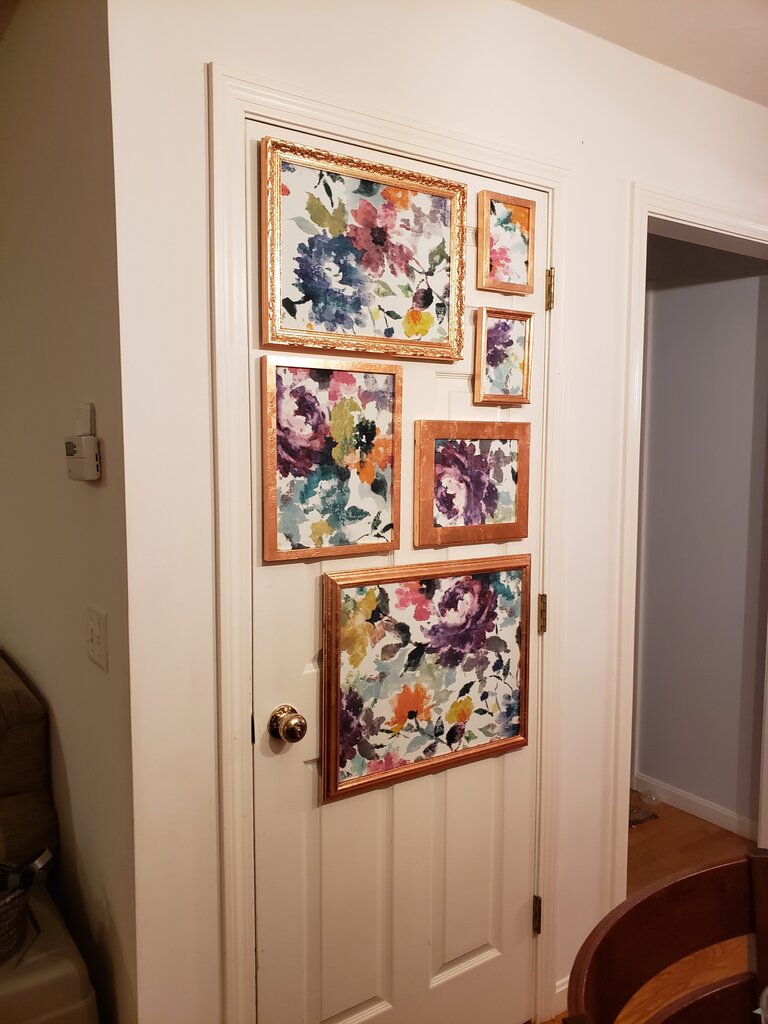
Okay, I’ll admit it that was a bit of a trick to show you my latest project! See that art gallery wall behind the tulips? That is my new favorite thing! We were using so much tape on kid’s art projects, and sticking them everywhere. Julius at one point filled the entire door, and the spaces to the left and the right. While I adore my kid’s works of art it was a bit ridiculous. The door to the basement is pretty much the only space available for an art gallery, and honestly, it’s as good a spot as any. The biggest concern with me making a gallery wall on the door is that things had to be secure. Opening and closing the door all the time meant no heavy frames. I accomplished this by removing the glass and using extremely light polystyrene foam. (We’ll have to see how this holds up.) The art wall also had to be easy to change art in and out of. We get new art daily so I had to be able to quickly remove things. The frames also limit the art expansion and prevent the art from exploding to every surface in the house. Short story – I am in love with them!
Before I show you the how-to I want to tell you the winners of the April Contest! I really appreciated all the comments! They cheered me right up! And I’ll post the May contest next week so stay tuned! The winner (by random number generator) is… Matt Safran!! Matt I’ll be sending you a Stasher bag! You’ll have to let me know how you like it!
Here’s the before shot:
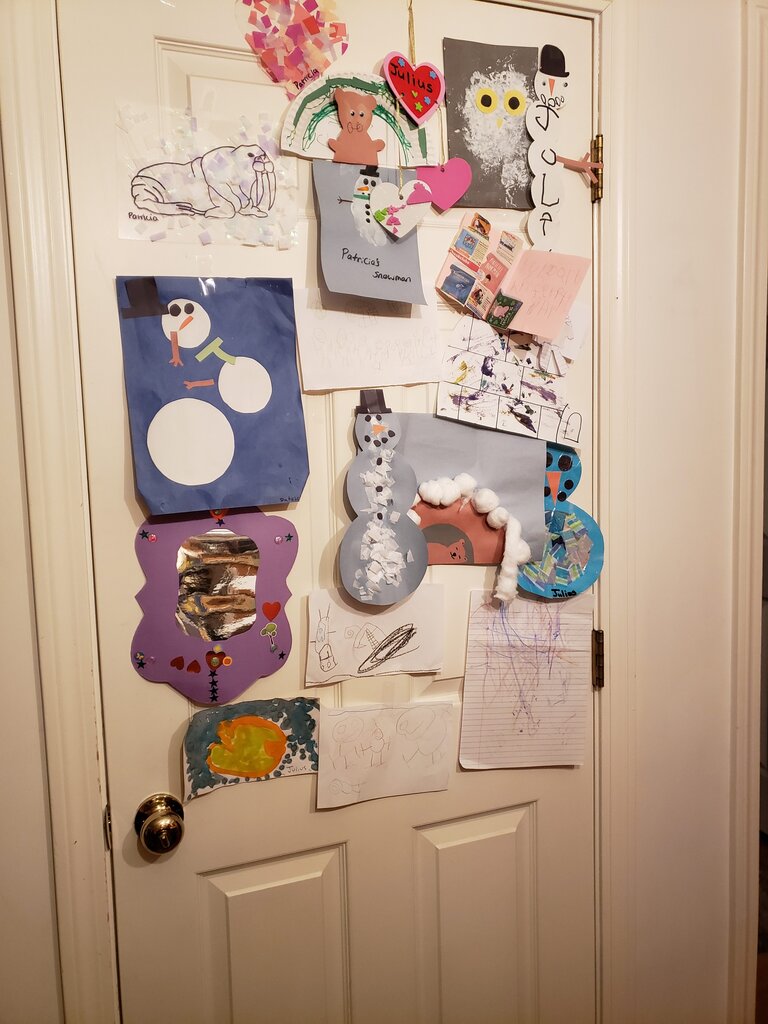
Art door (before)
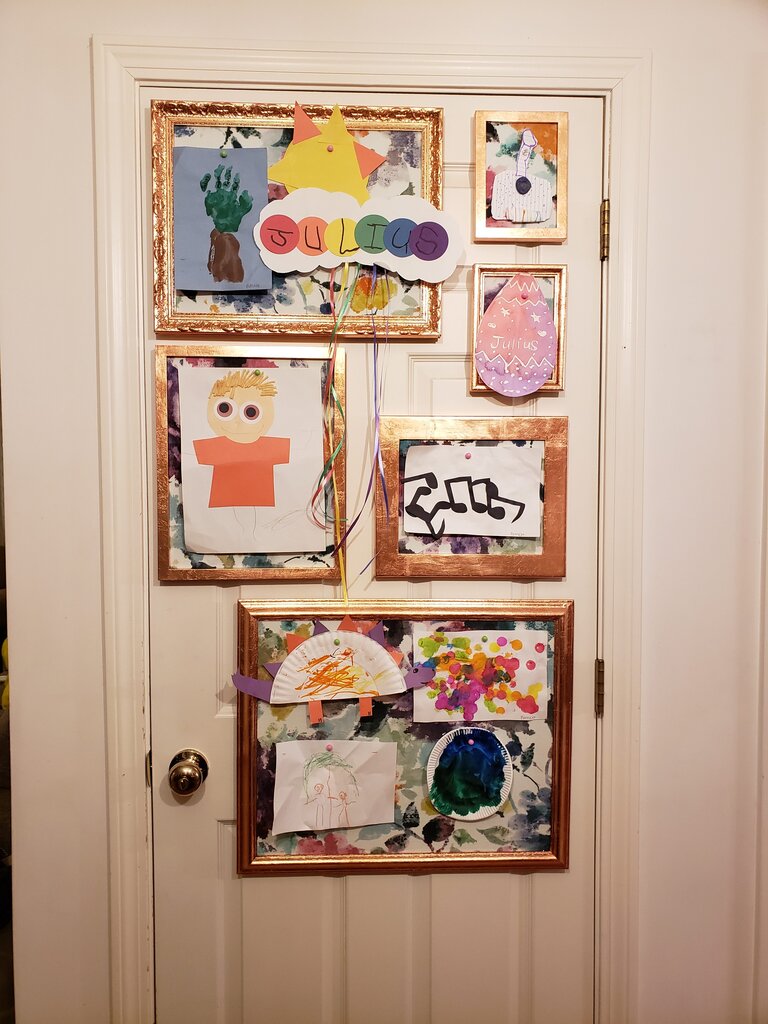
Art Gallery Door (After)
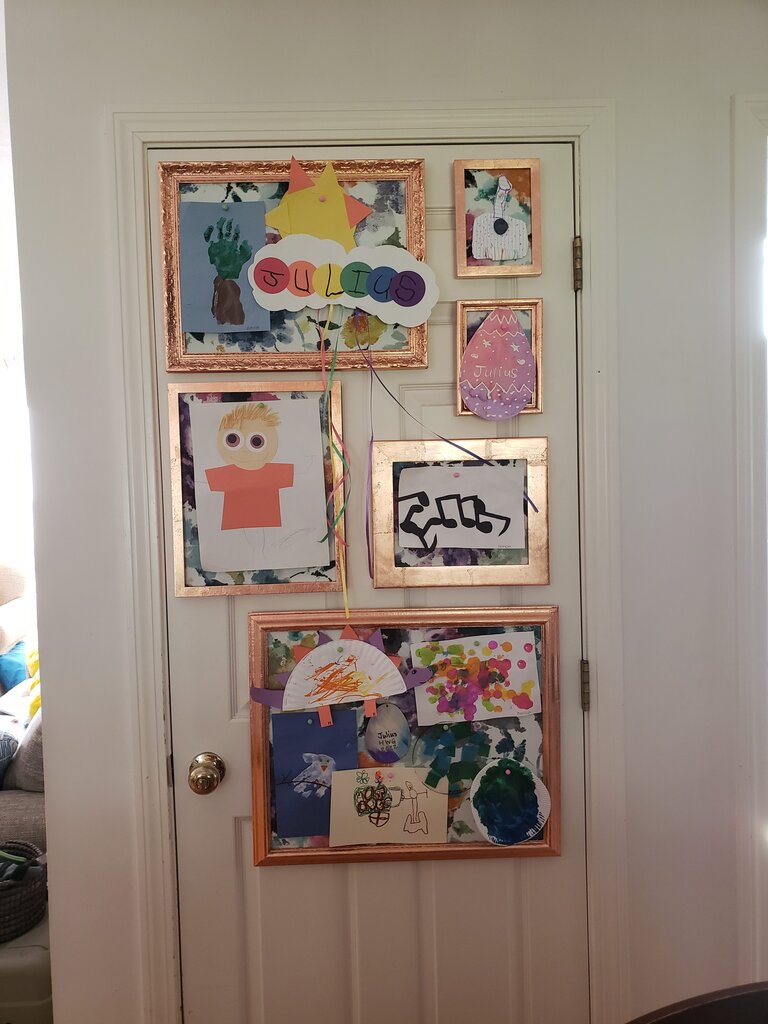
Kids Art Gallery
What you’ll need:
- lightweight frames (Amy found me a bunch of free ones and I bought the rest at thrift shops for cheap – I think the total cost of frames was $7)
- 1/2″ thick polystyrene board insulation
- fabric
- adhesive spray (make sure it is suitable for foam)
- duct tape
- masking tape or painters tape
- 3m command damage free hanging strips
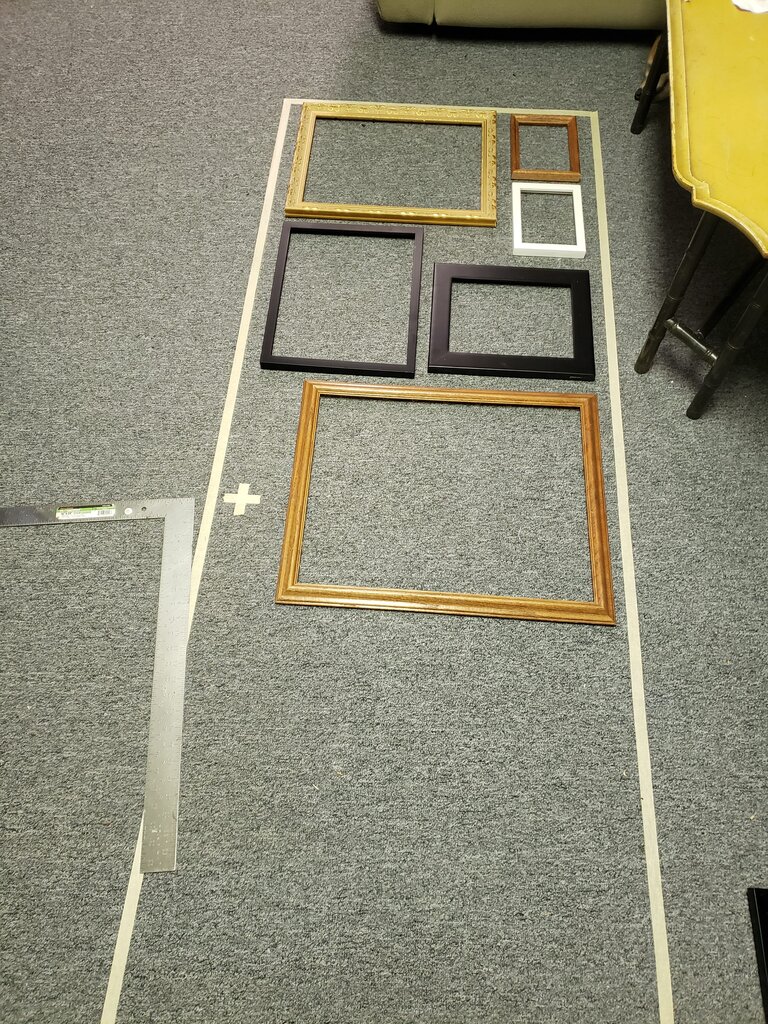
- Measure your door or the location of your choice for your gallery wall, and then using the masking tape, mask off the shape of the door/wall on the floor.
- Remove the glass and backings from the frames and arrange them in the space you taped out.

- Mine looked rather motley so I decided to copper leaf the frames to make them more cohesive in appearance (more on that in a future post).
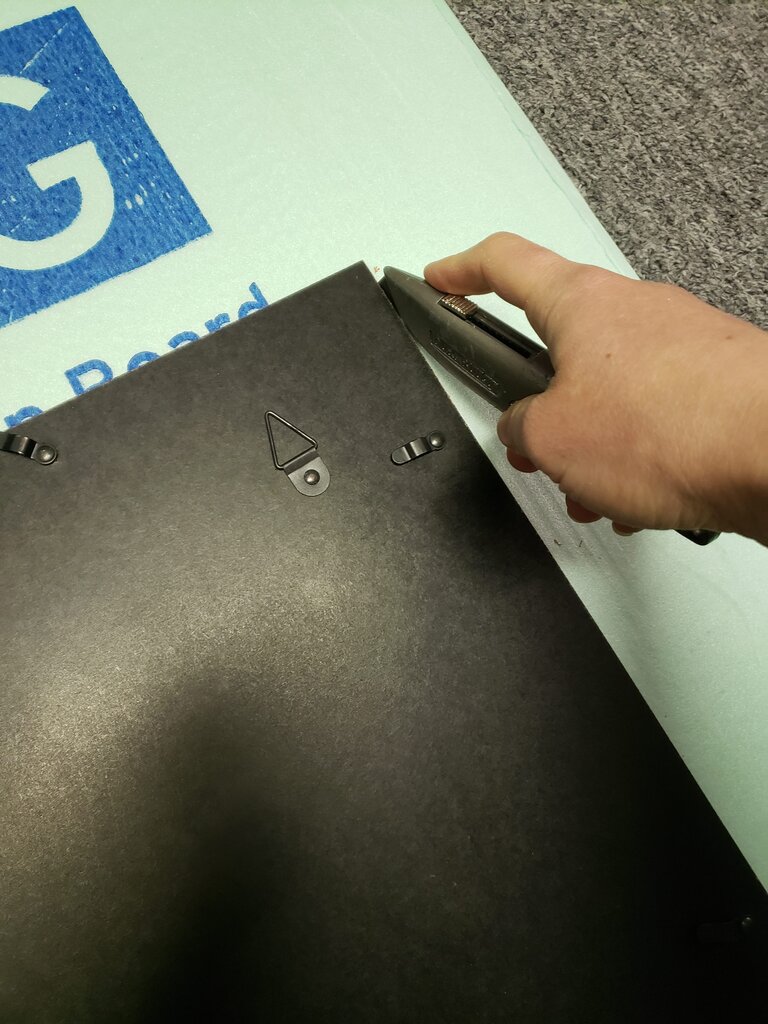
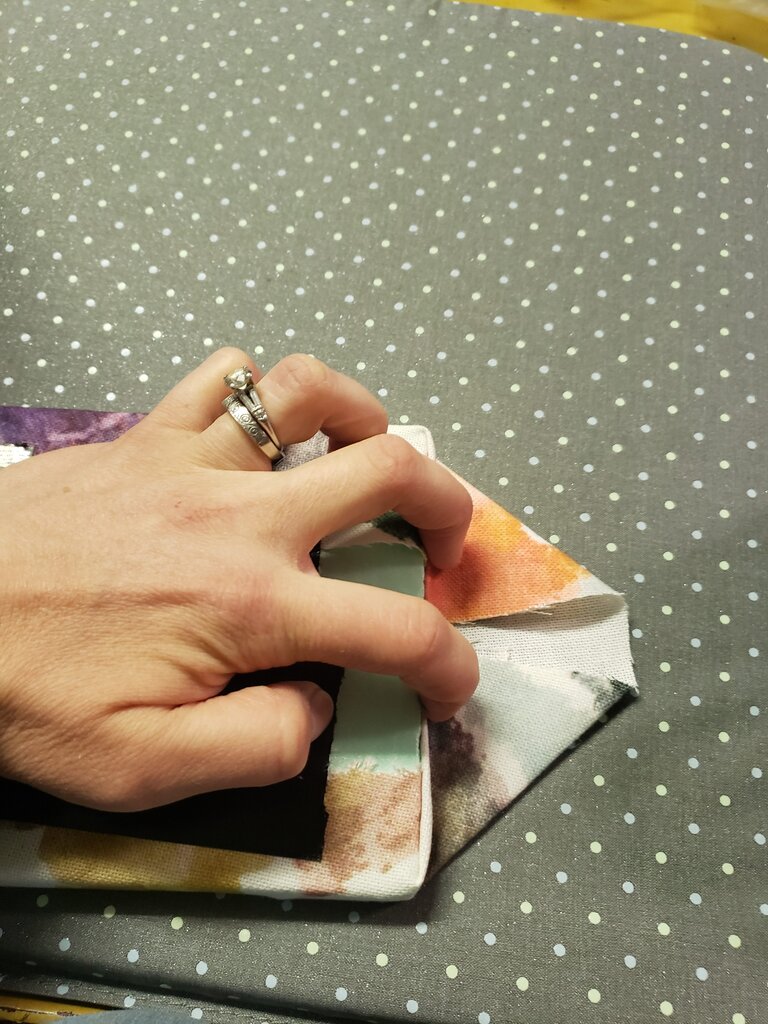
- Use an x-acto knife or razor blade to cut polystyrene to fit the frames (I used the frame back to do this). Make it a teeny bit (like 1mm) smaller than the frame on top and side to accomodate fabric.

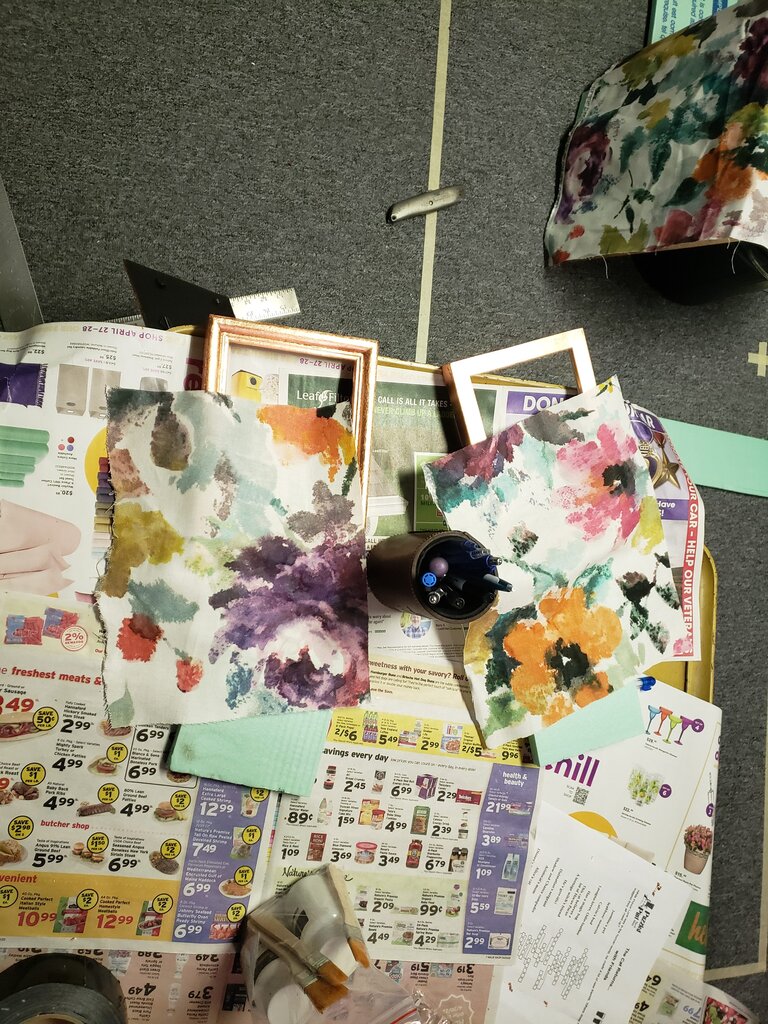
- Cut fabric to fit the polystyrene frame inserts.

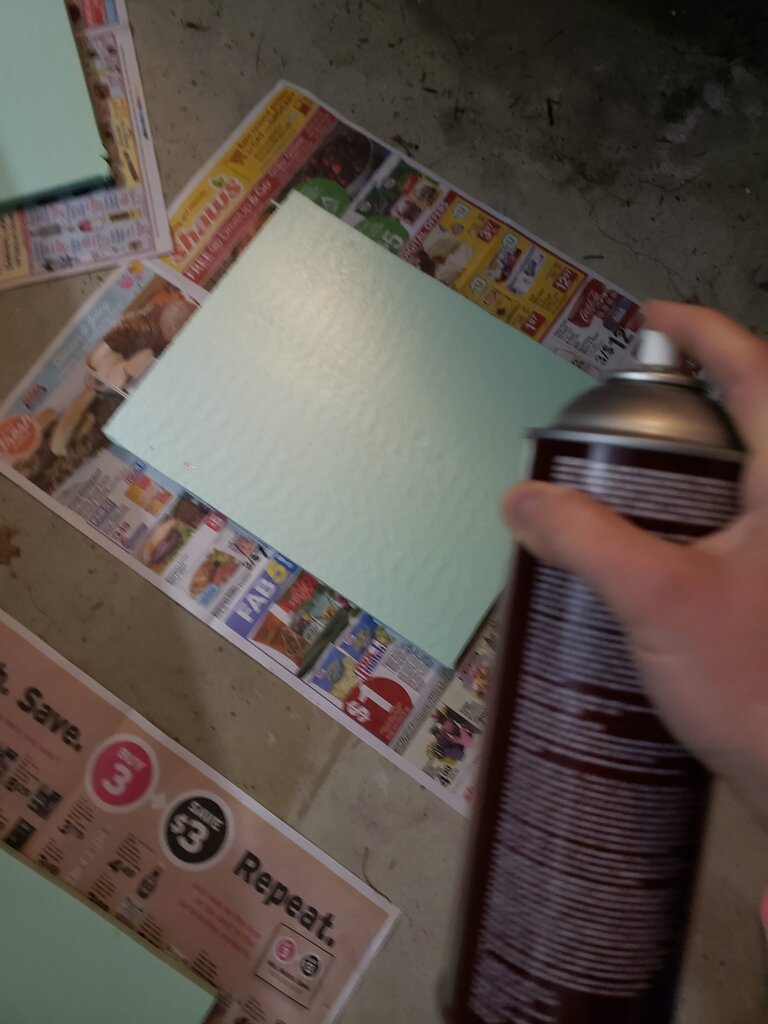
- Press fabric. Spray adhesive onto the front side of the polystyrene boards, and cover with fabric, pressing to adhere.

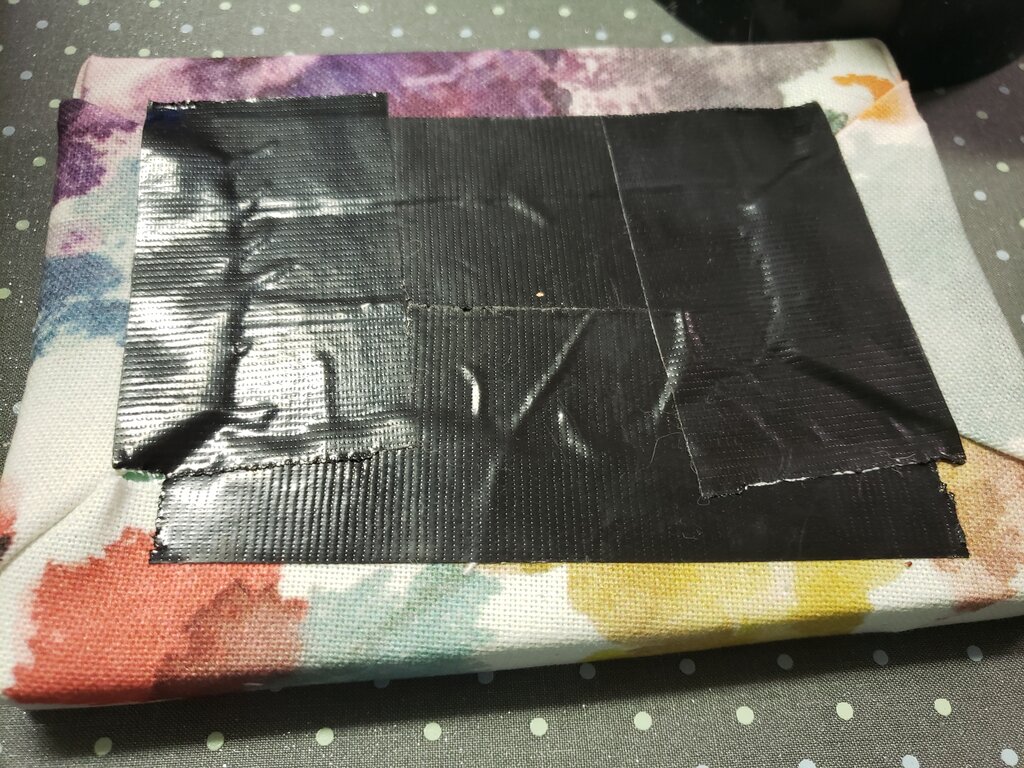
- Flip over, and use duct tape to pull the fabric taunt and tape it in place to the back of the polystyrene board.

- Repeat for each edge, pleating the corners as needed (like you are wrapping a gift).

- After your fabric is secured to the back, insert into each frame. If it does not fit very tightly, you will also want to secure the board to the frame with more duct tape.
- Place your command strips onto the frame or board, then secure to the door or wall as designed in your tape mock up.

- Hang art and enjoy!


This looks so good!
Thanks Amy!!! Thank you for the frames!
Love the art wall!
The girls share a bedroom – I need to correct myself, it’s not a bedroom, they call it “Spaceship Unicorn” – and I put up a ton of these adhesive spring clips. On the crib sides, the nightstand, the bed, the changing table, etc. And the girls can hang art there whenever they want, swap things in and out, etc.
https://m.media-amazon.com/images/I/71d0s7sfLPL._AC_SL1500_.jpg
OMG I love Spaceship Unicorn! I love the art clips. Such a good idea!
We have this problem!! Art on the windows, art on the fridge, art on the bookshelf, art on the door…. We should try this!
That was our exact problem! I needed to bound the art sprawl so I could see out my windows again!