
I just want to say thank you to everyone who comments on my blog (regularly or only once) it really makes my day! I’m a bit late tonight because I did a library craft tonight (a Korean lotus lantern). Okay I lied, that finished before I even put Julius to bed. The real reason I’m late is because I procrastinated for an hour and a half scrolling the internet. And as a bonus though I found out my neighbor has a local flower business and I’ve got some great local flowers coming my way for Valentine’s day (and several pairs of yoga pants but I won’t talk about that).
Since we got covid we’ve been starting to get out of our shell more. We even started inviting people to the house because Will is desperate to play games. I keep telling myself I’m going to host another ladies’ night, but I haven’t yet pulled the trigger! I don’t know why! I think I’m just exhausting myself by thinking of all the prep work I’ll need to do. I’m out of practice with entertaining! And it’s soooo much easier to be a hermit. I don’t even need to wear pants!
When I was a literal hermit living in the basement for 4 days with covid, trying to avoid giving it to anyone (spoilers I’d either already infected everyone or whoever infected me infected everyone else too) I kept thinking to myself “this is the perfect time to get some crafts done”. Except I had a fever of 103 and couldn’t sit upright for more than an hour without a nap in between. I did though end up accomplishing one craft and I don’t think you can tell that I had covid when I made it. Apologies though if the tutorial is muddled, because, well, covid and all that.
I could have watched TV I guess but instead I scrolled Pinterest for hours while sick. During that time I decided that I really wanted to make one of these adorable pottery barn Valentine’s chair backer mailboxes. They are so darn adorable. They don’t sell them anymore though and the only pictures I could find of them is a slightly blurry 400 x 400pixel resolution image that someone screenshotted and put on Pinterest 5 years ago.

Pottery barn mailboxes, that only exist on pinterest now.
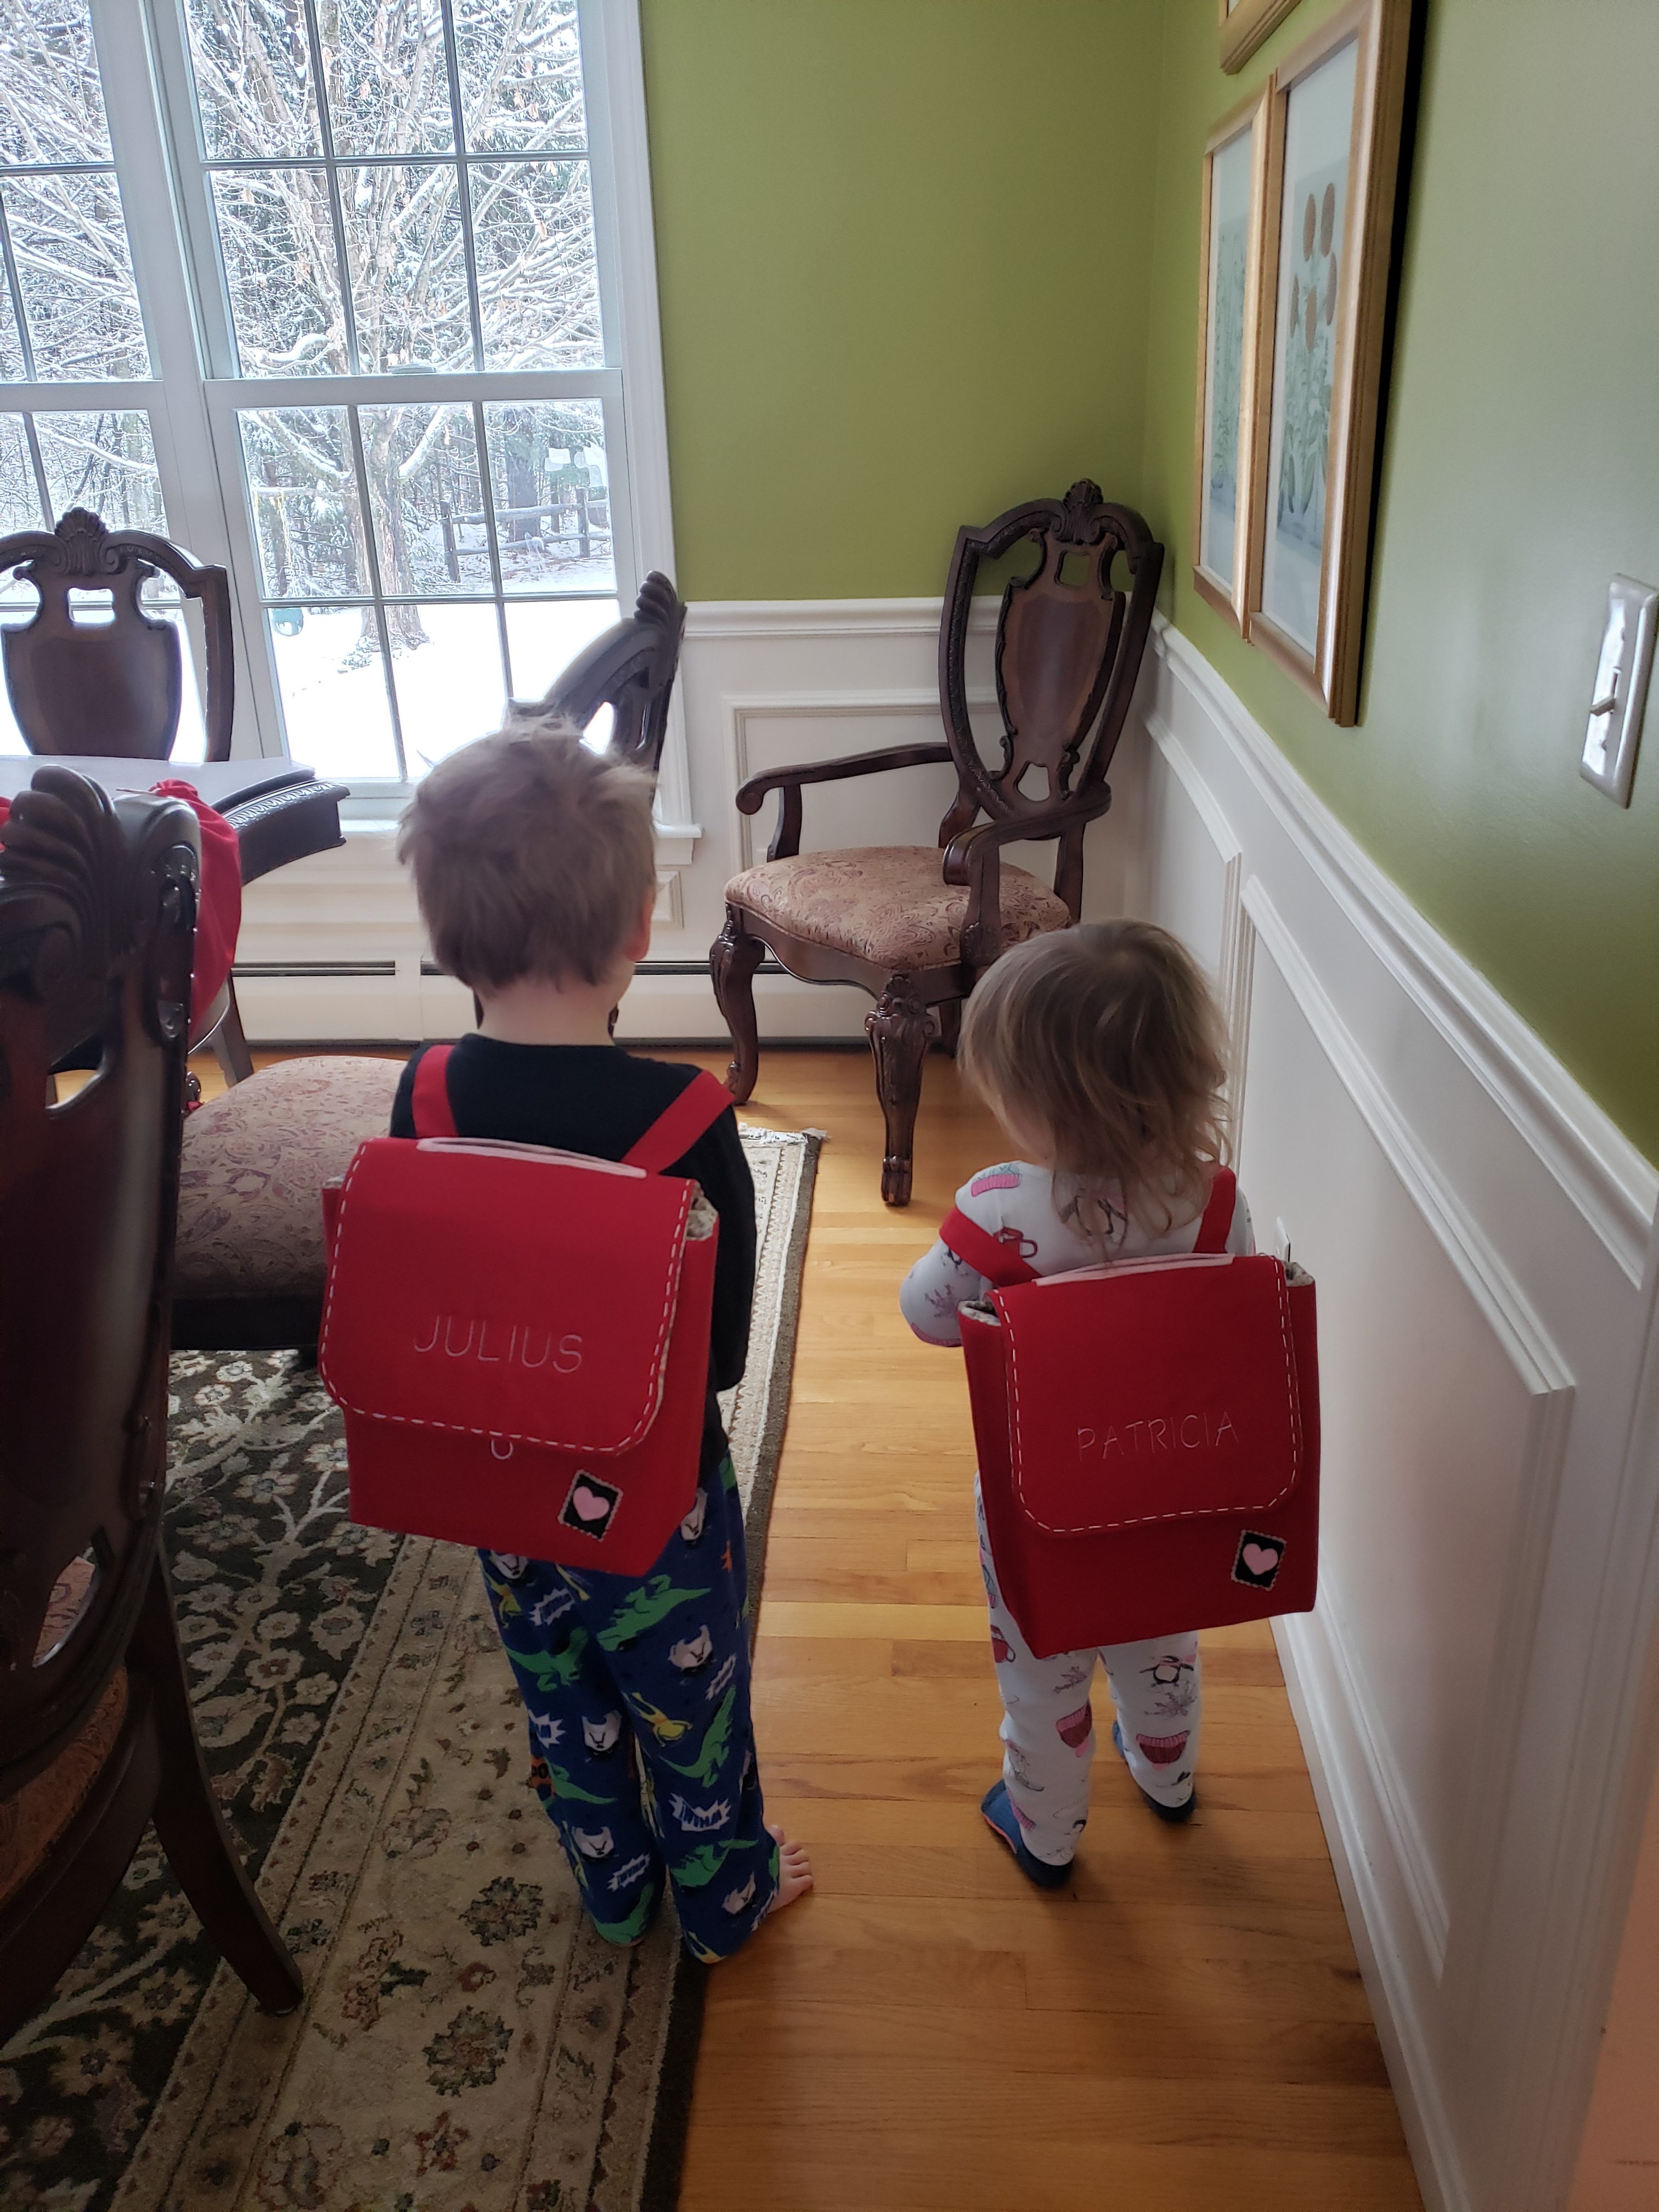
This is what I came up with, and I think it’s pretty cute. Also I think I should tell you that the kids LOVE the backpack. They have been checking it for notes every morning so I’ve been writing them little love notes (and once I made them little heart candies). Shoot that reminds me I have to finish this up so I can do their next little love note!


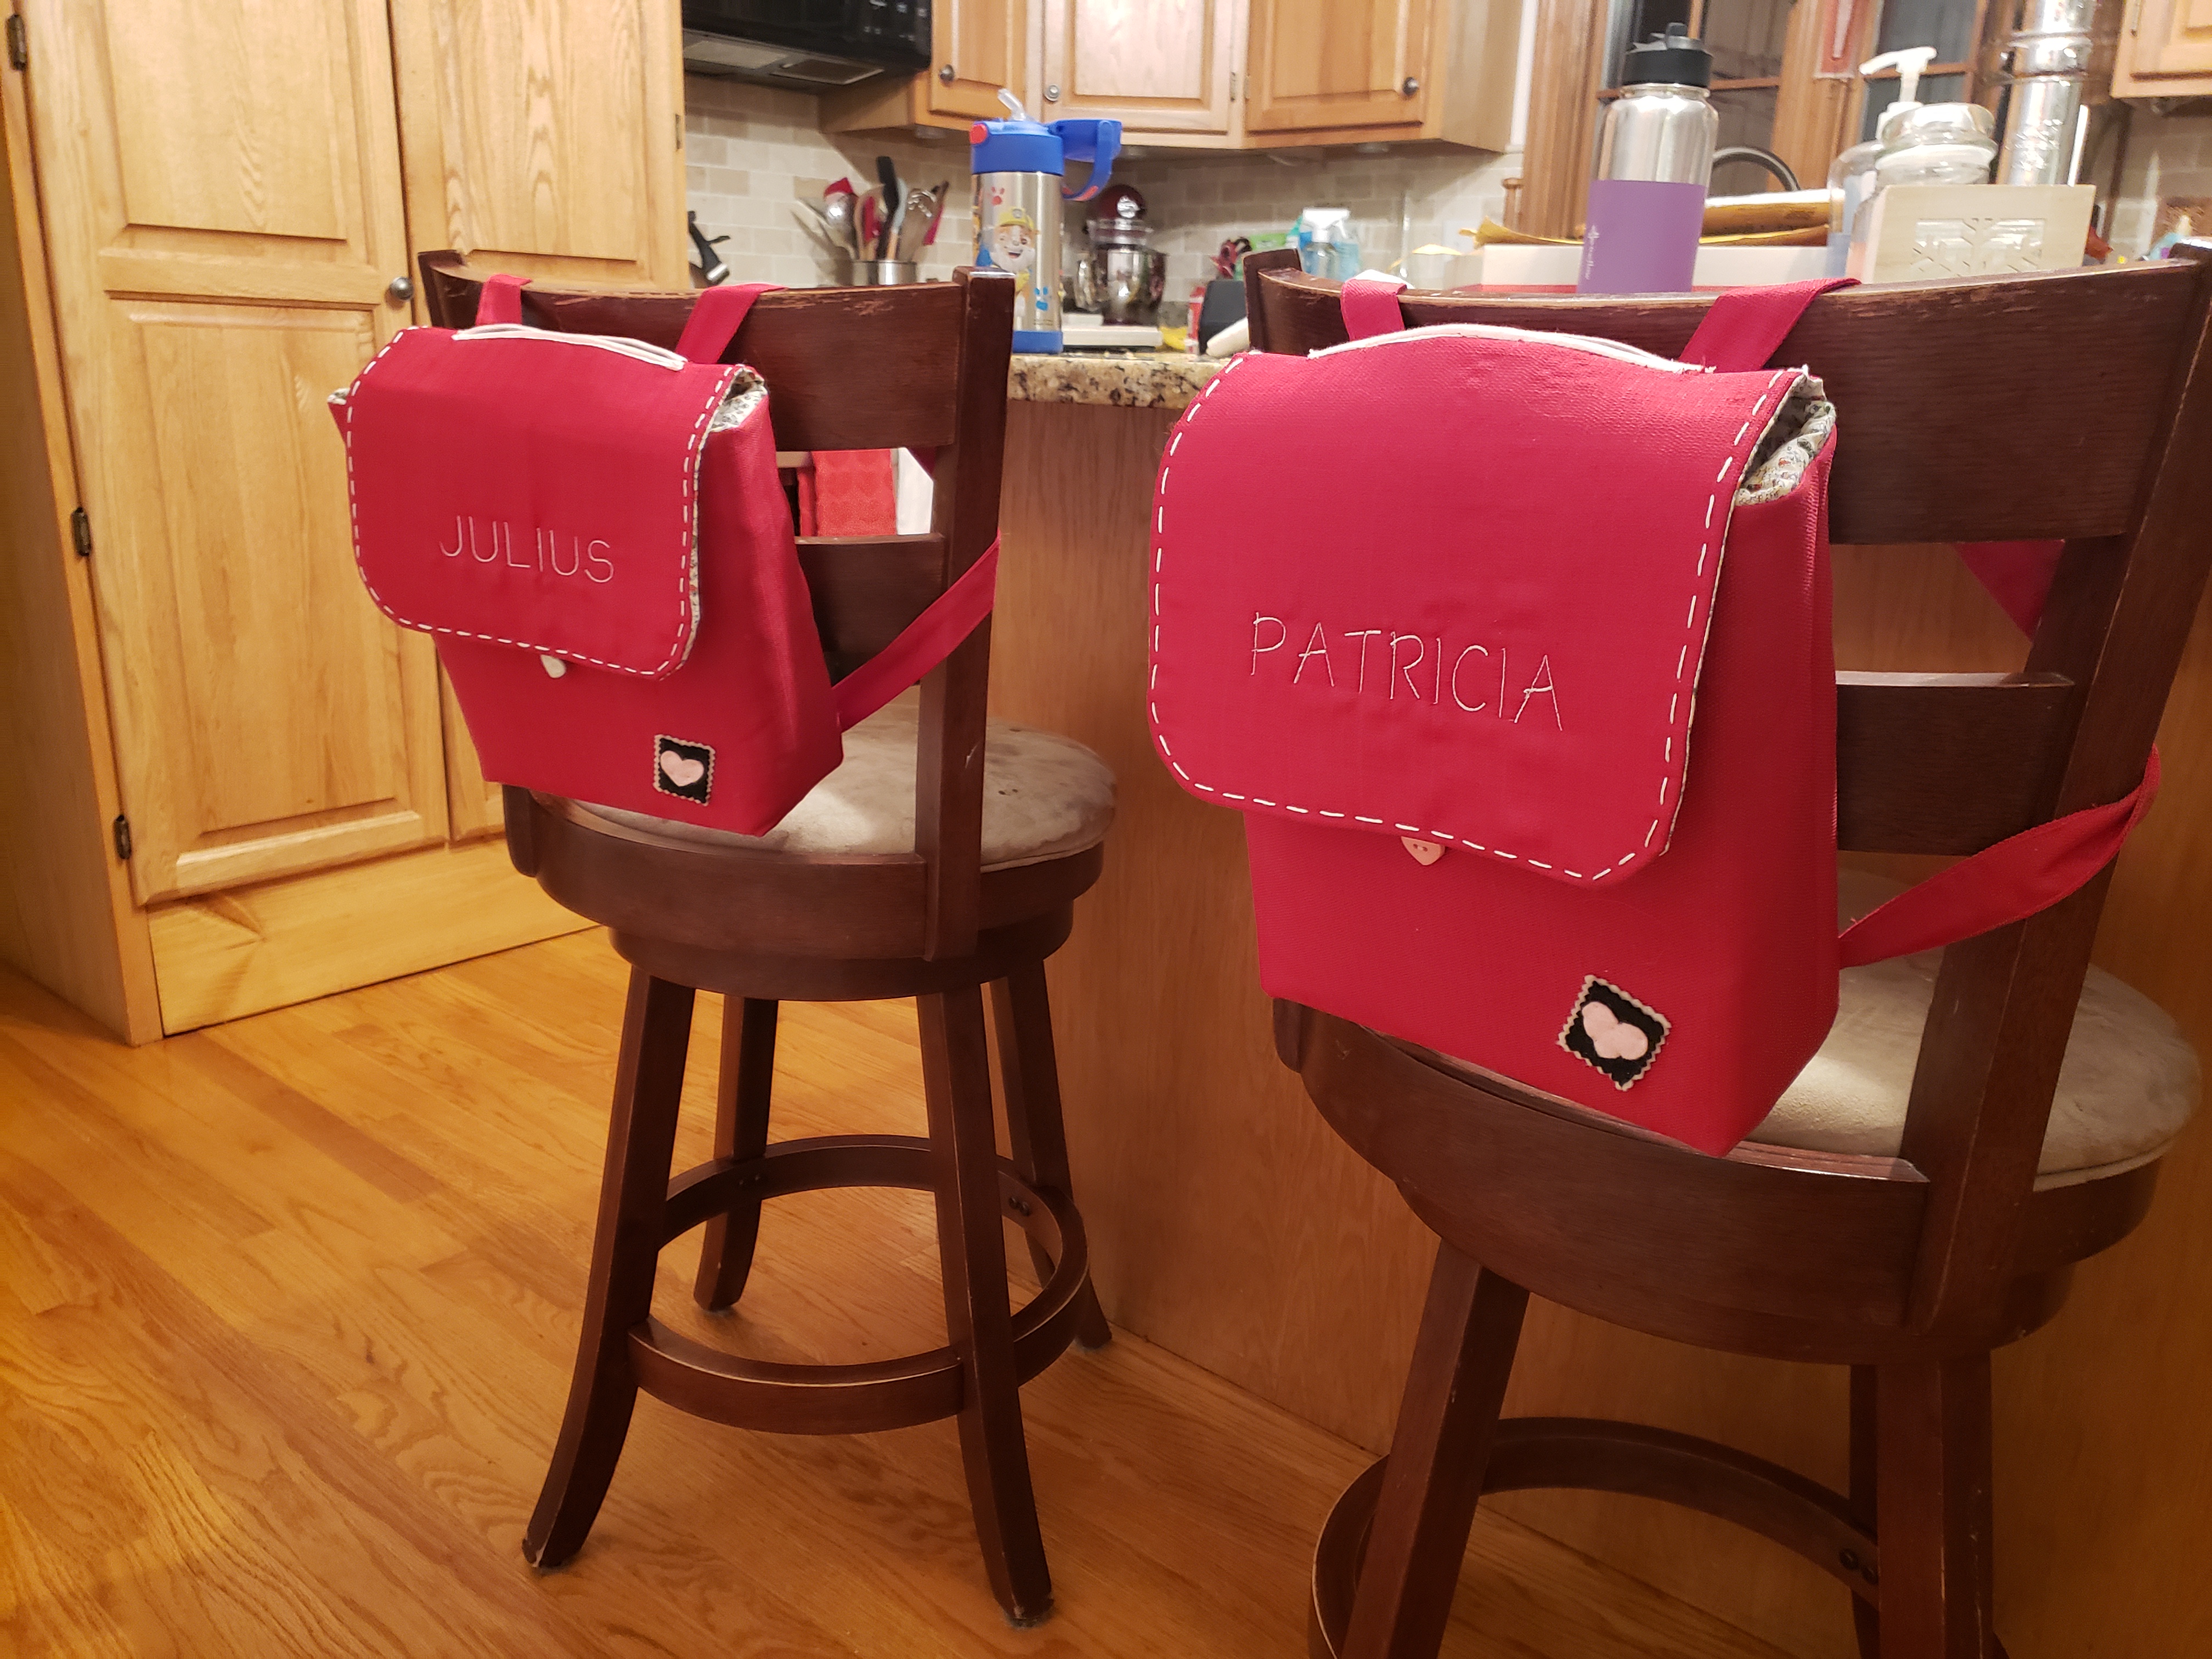
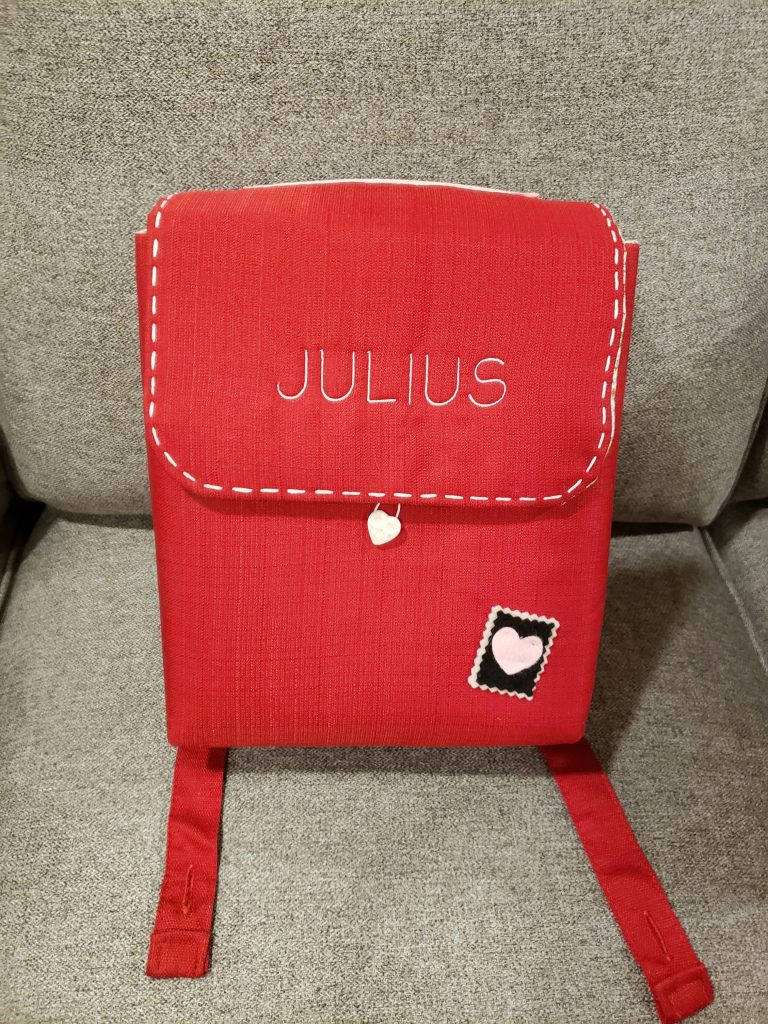 Valentine’s Backpack/Chair backer

What you’ll need:
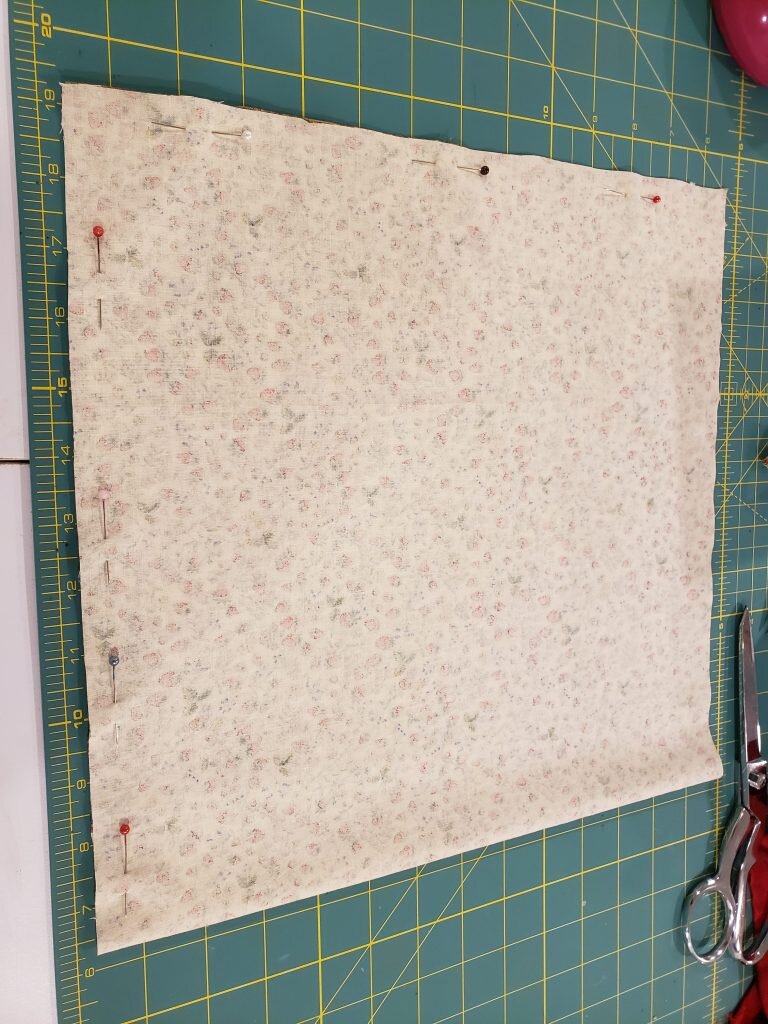
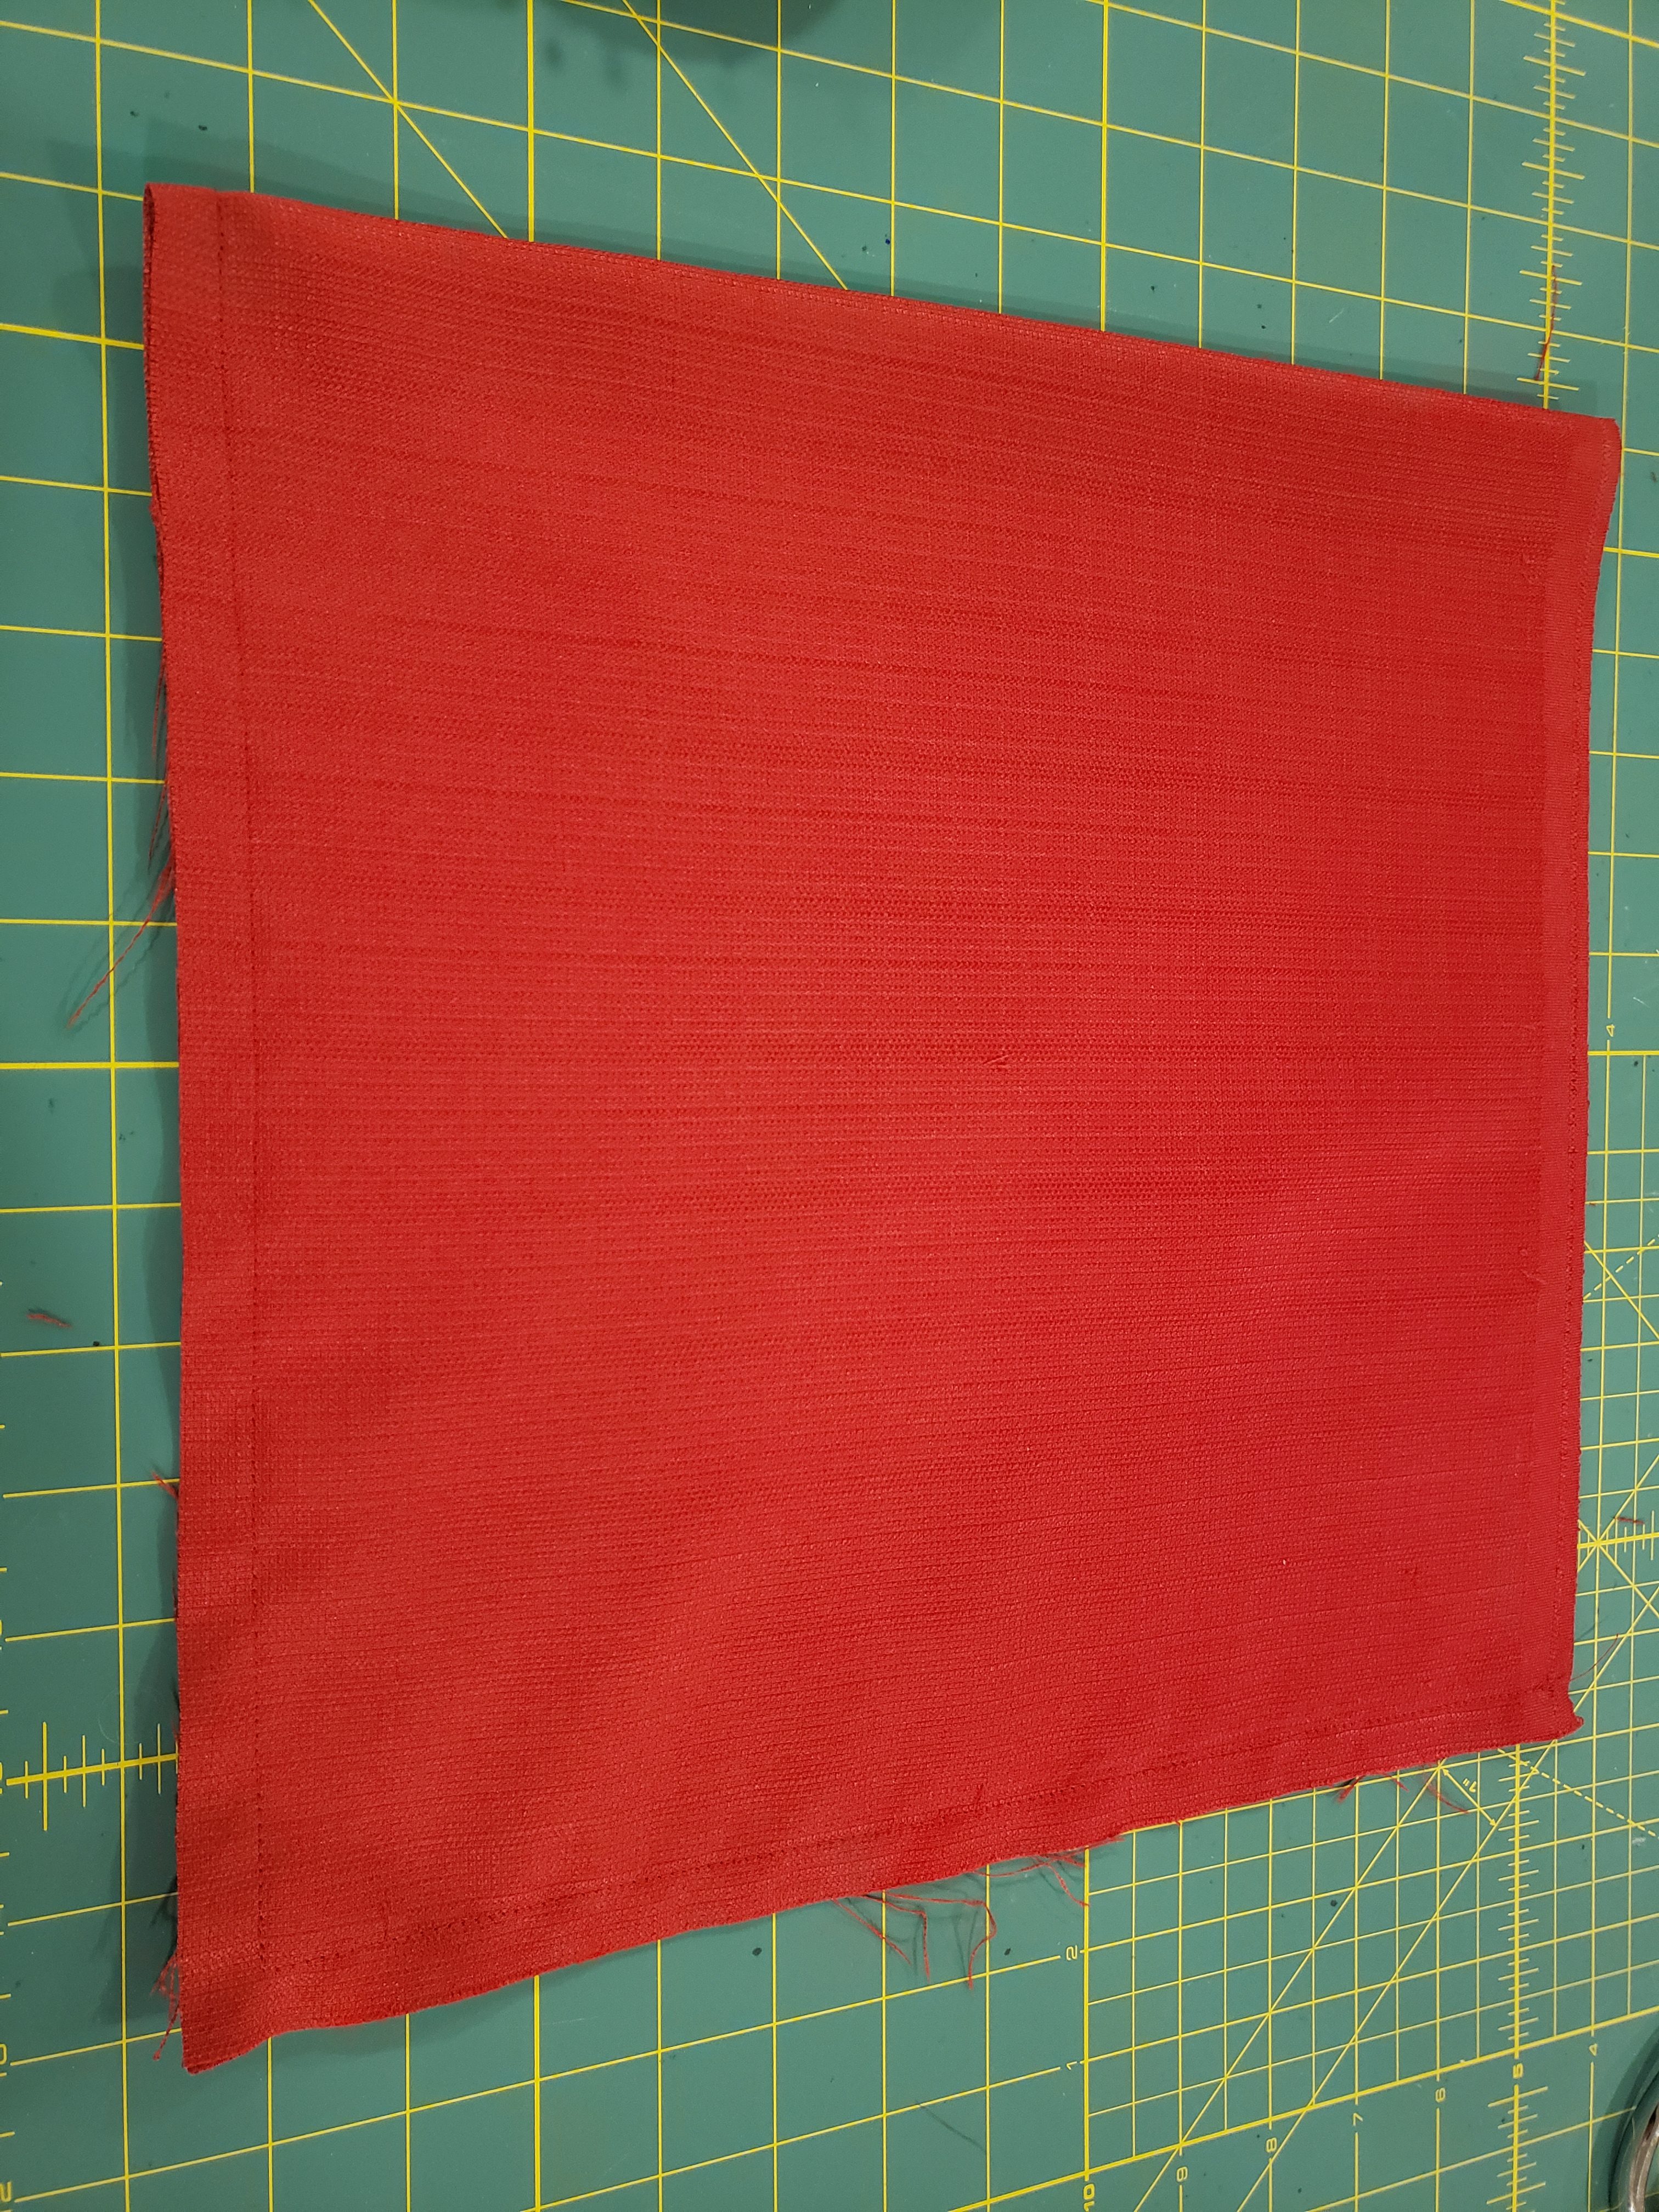
- ~1 yard of exterior material (mine is some red curtain material I bought at savers)
- ~1 yard of lining material (mine is hand me down from my grandmother – side note – how did I NOT have any hearts or valentine-y fabric in my stash?! Strawberries was the best I could get)
- ~1 yard of peltex 70 (some of it was scrap I sewed into a bigger sheet – you can do this it totally works!)
- bias tape in contrasting color
- Assorted felt for decorations, embroidery thread for details
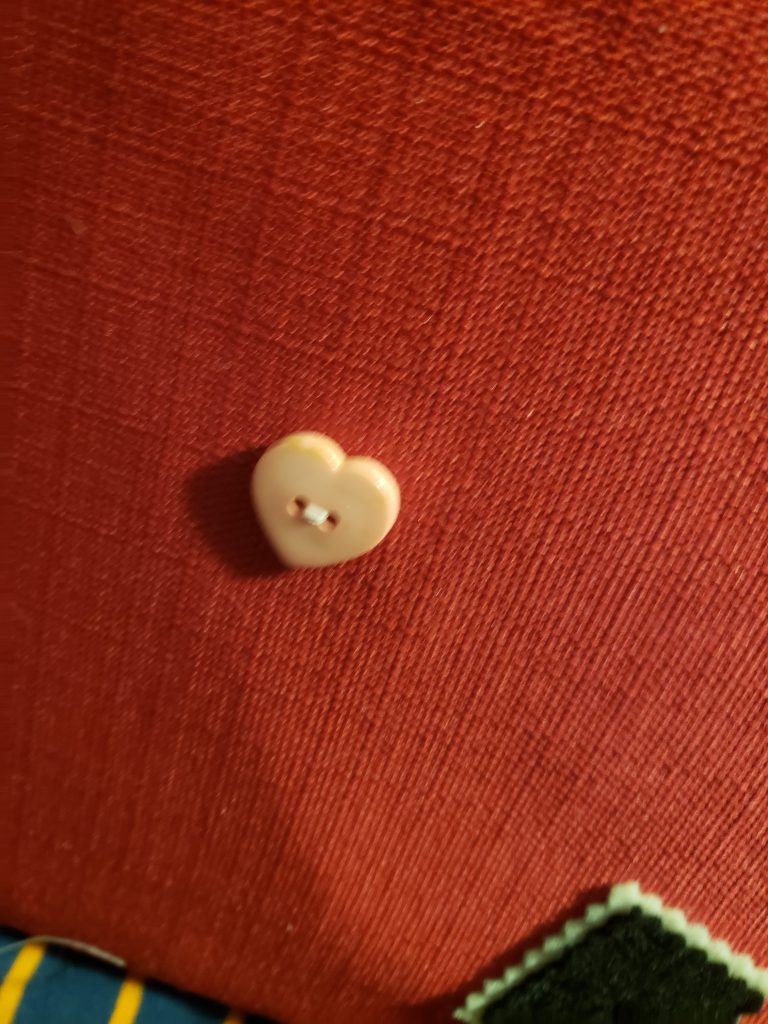
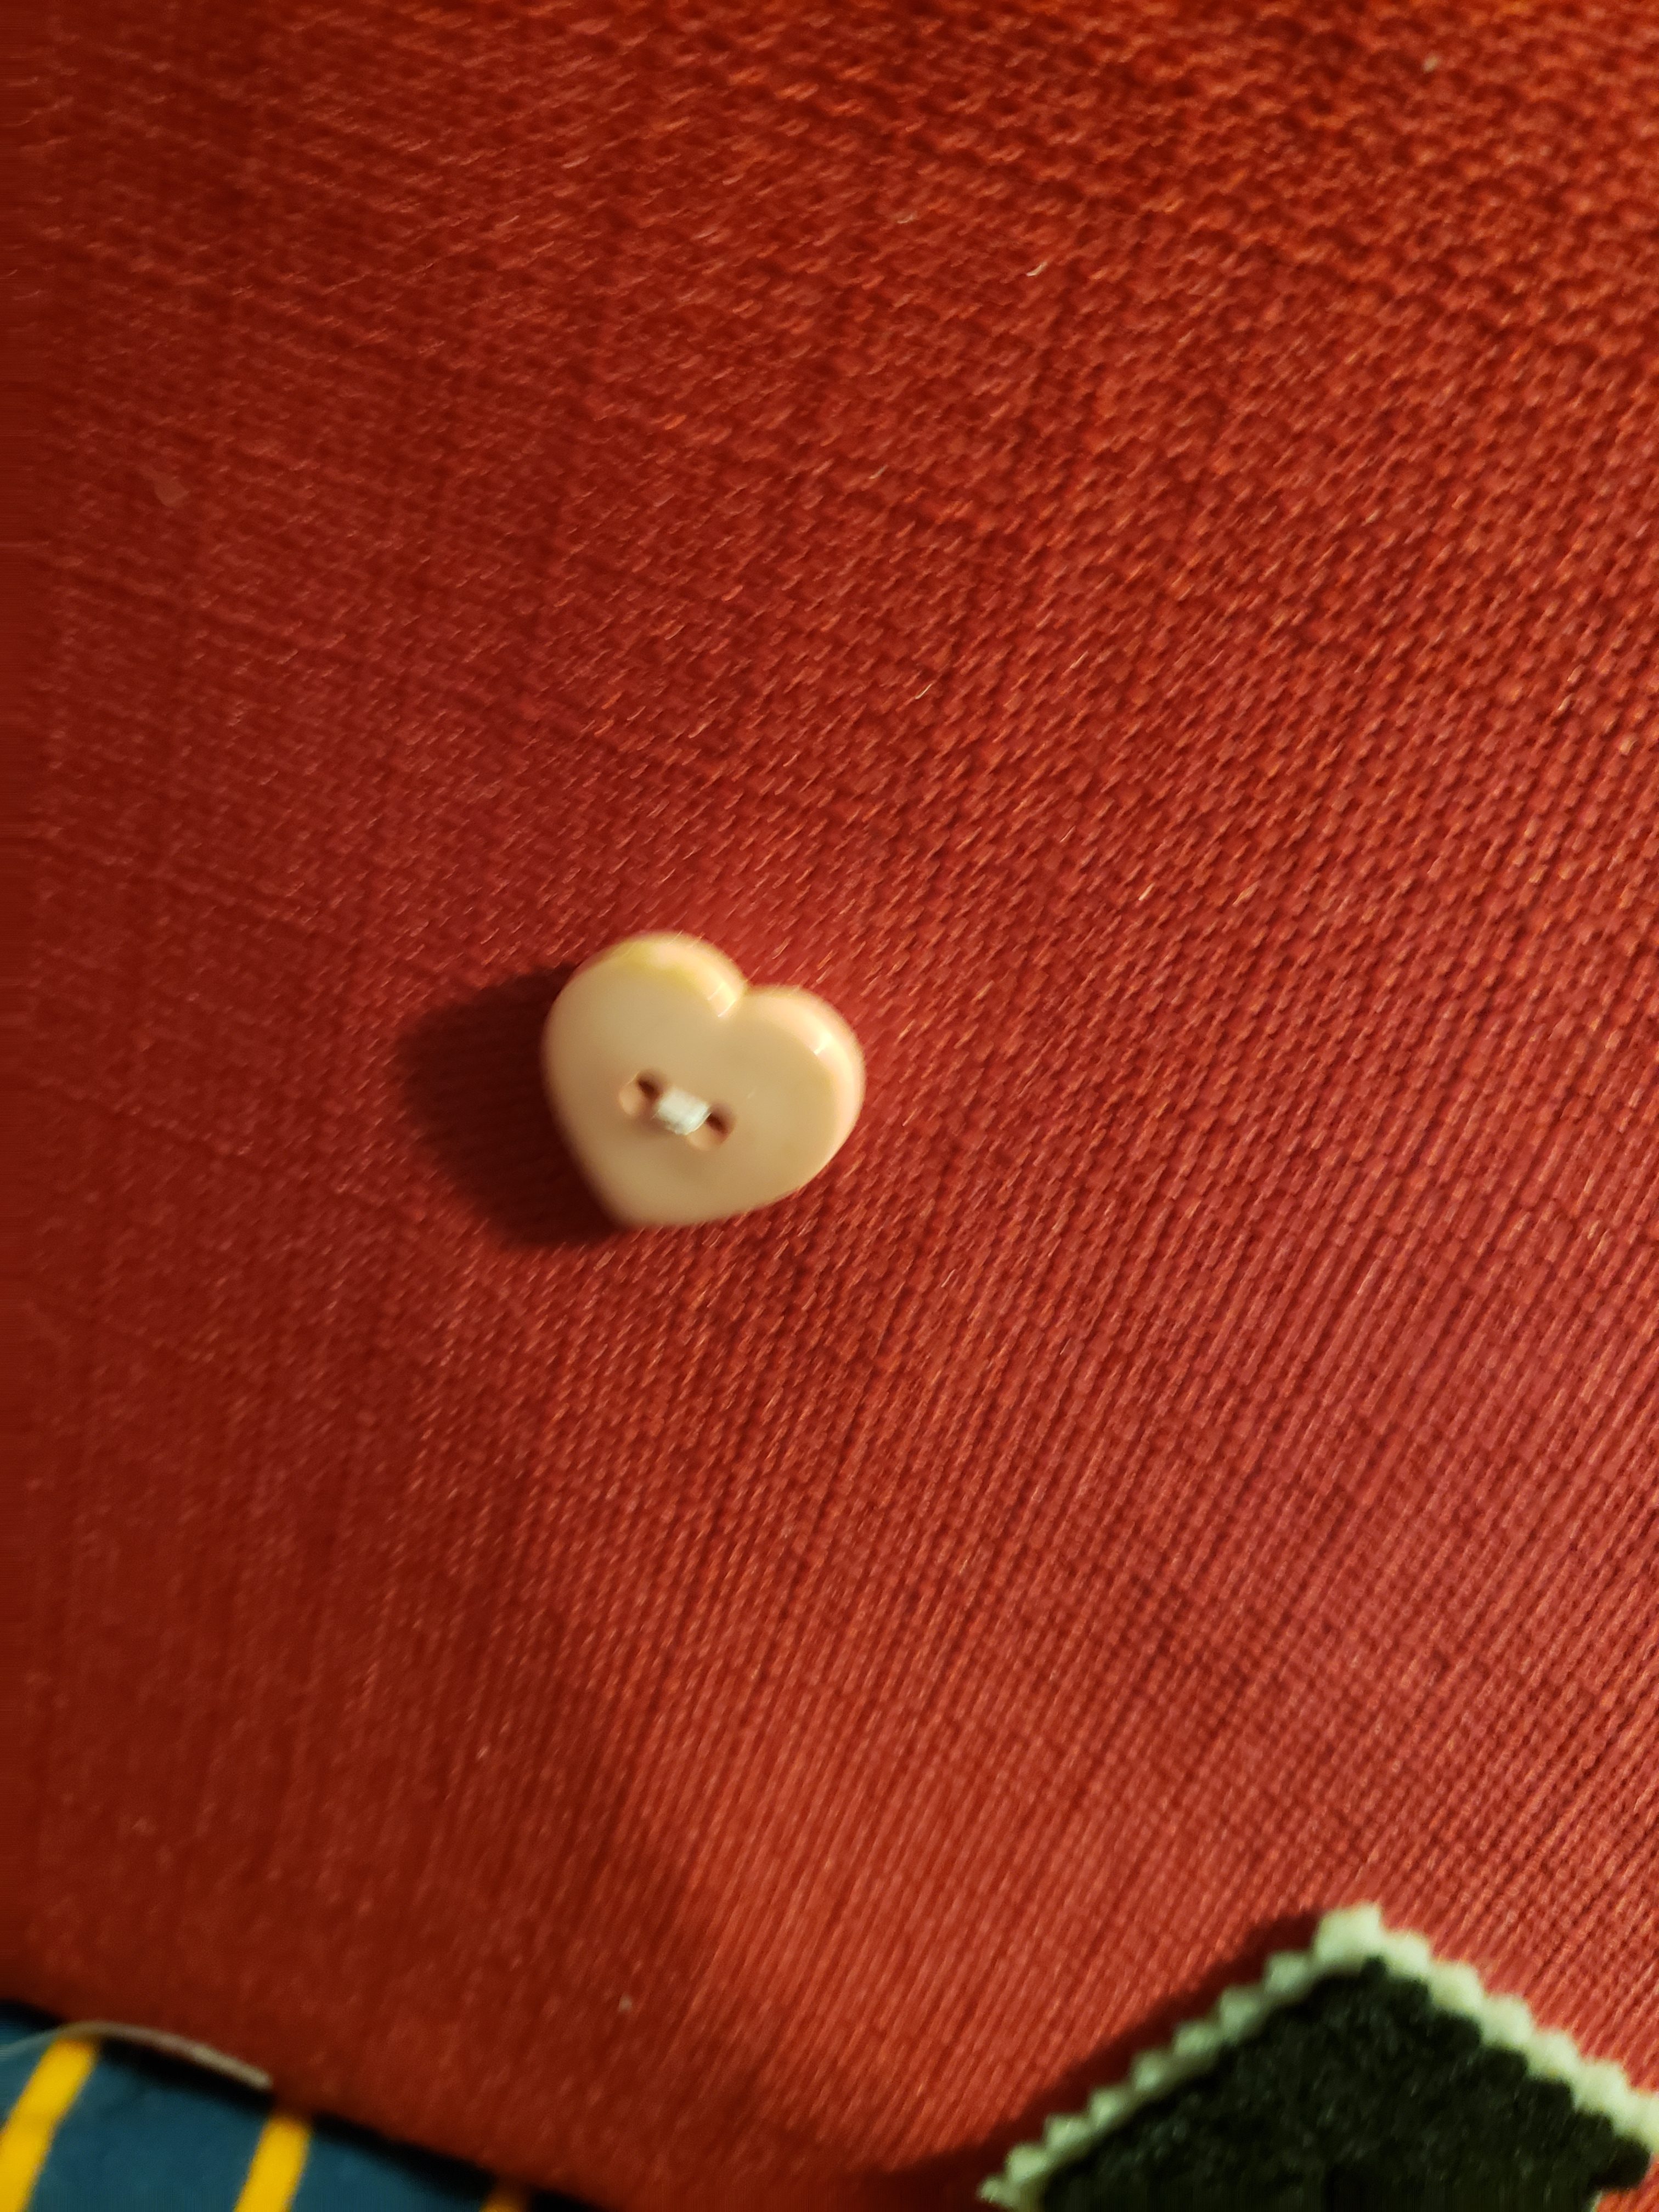
- 3 buttons
- elastic cord
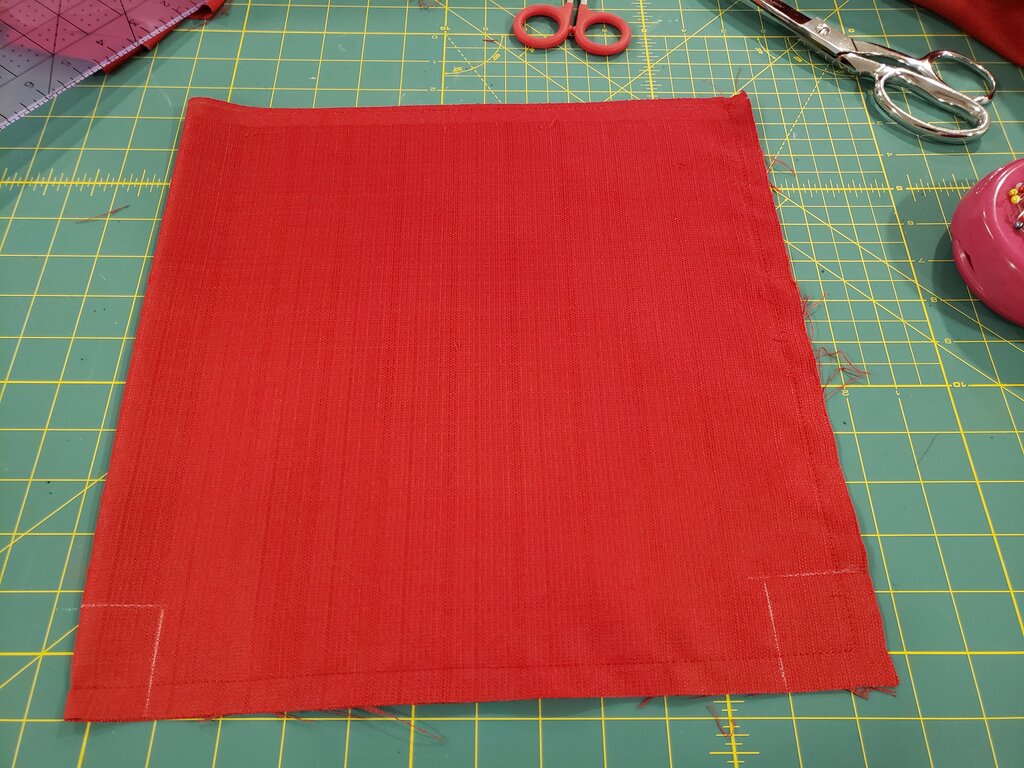
- Cut out 13.5″x26.5″ rectangles of outer material and lining material
- Cut out a 13.5″x25.5″ rectangle out of peltex.
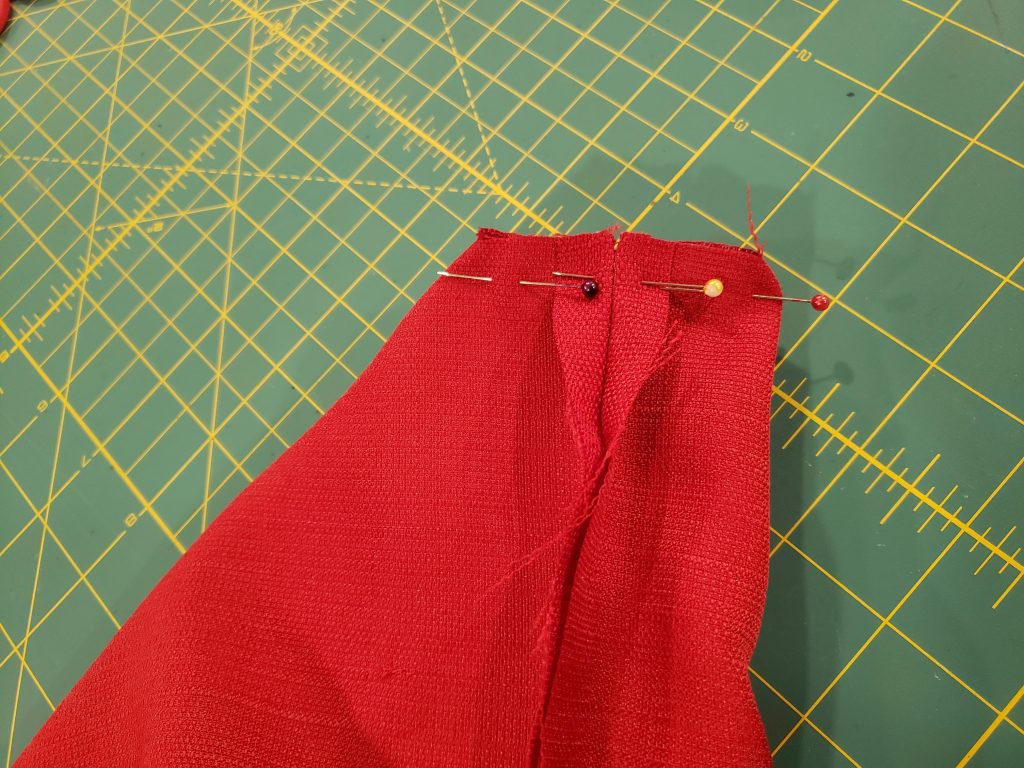
- Fold the rectangles in half (right side in) to form pieces 13.5″x13.25″. The fold will form the bottom of the bag, stitch along the two unfinished sides adjacent to the bottom.

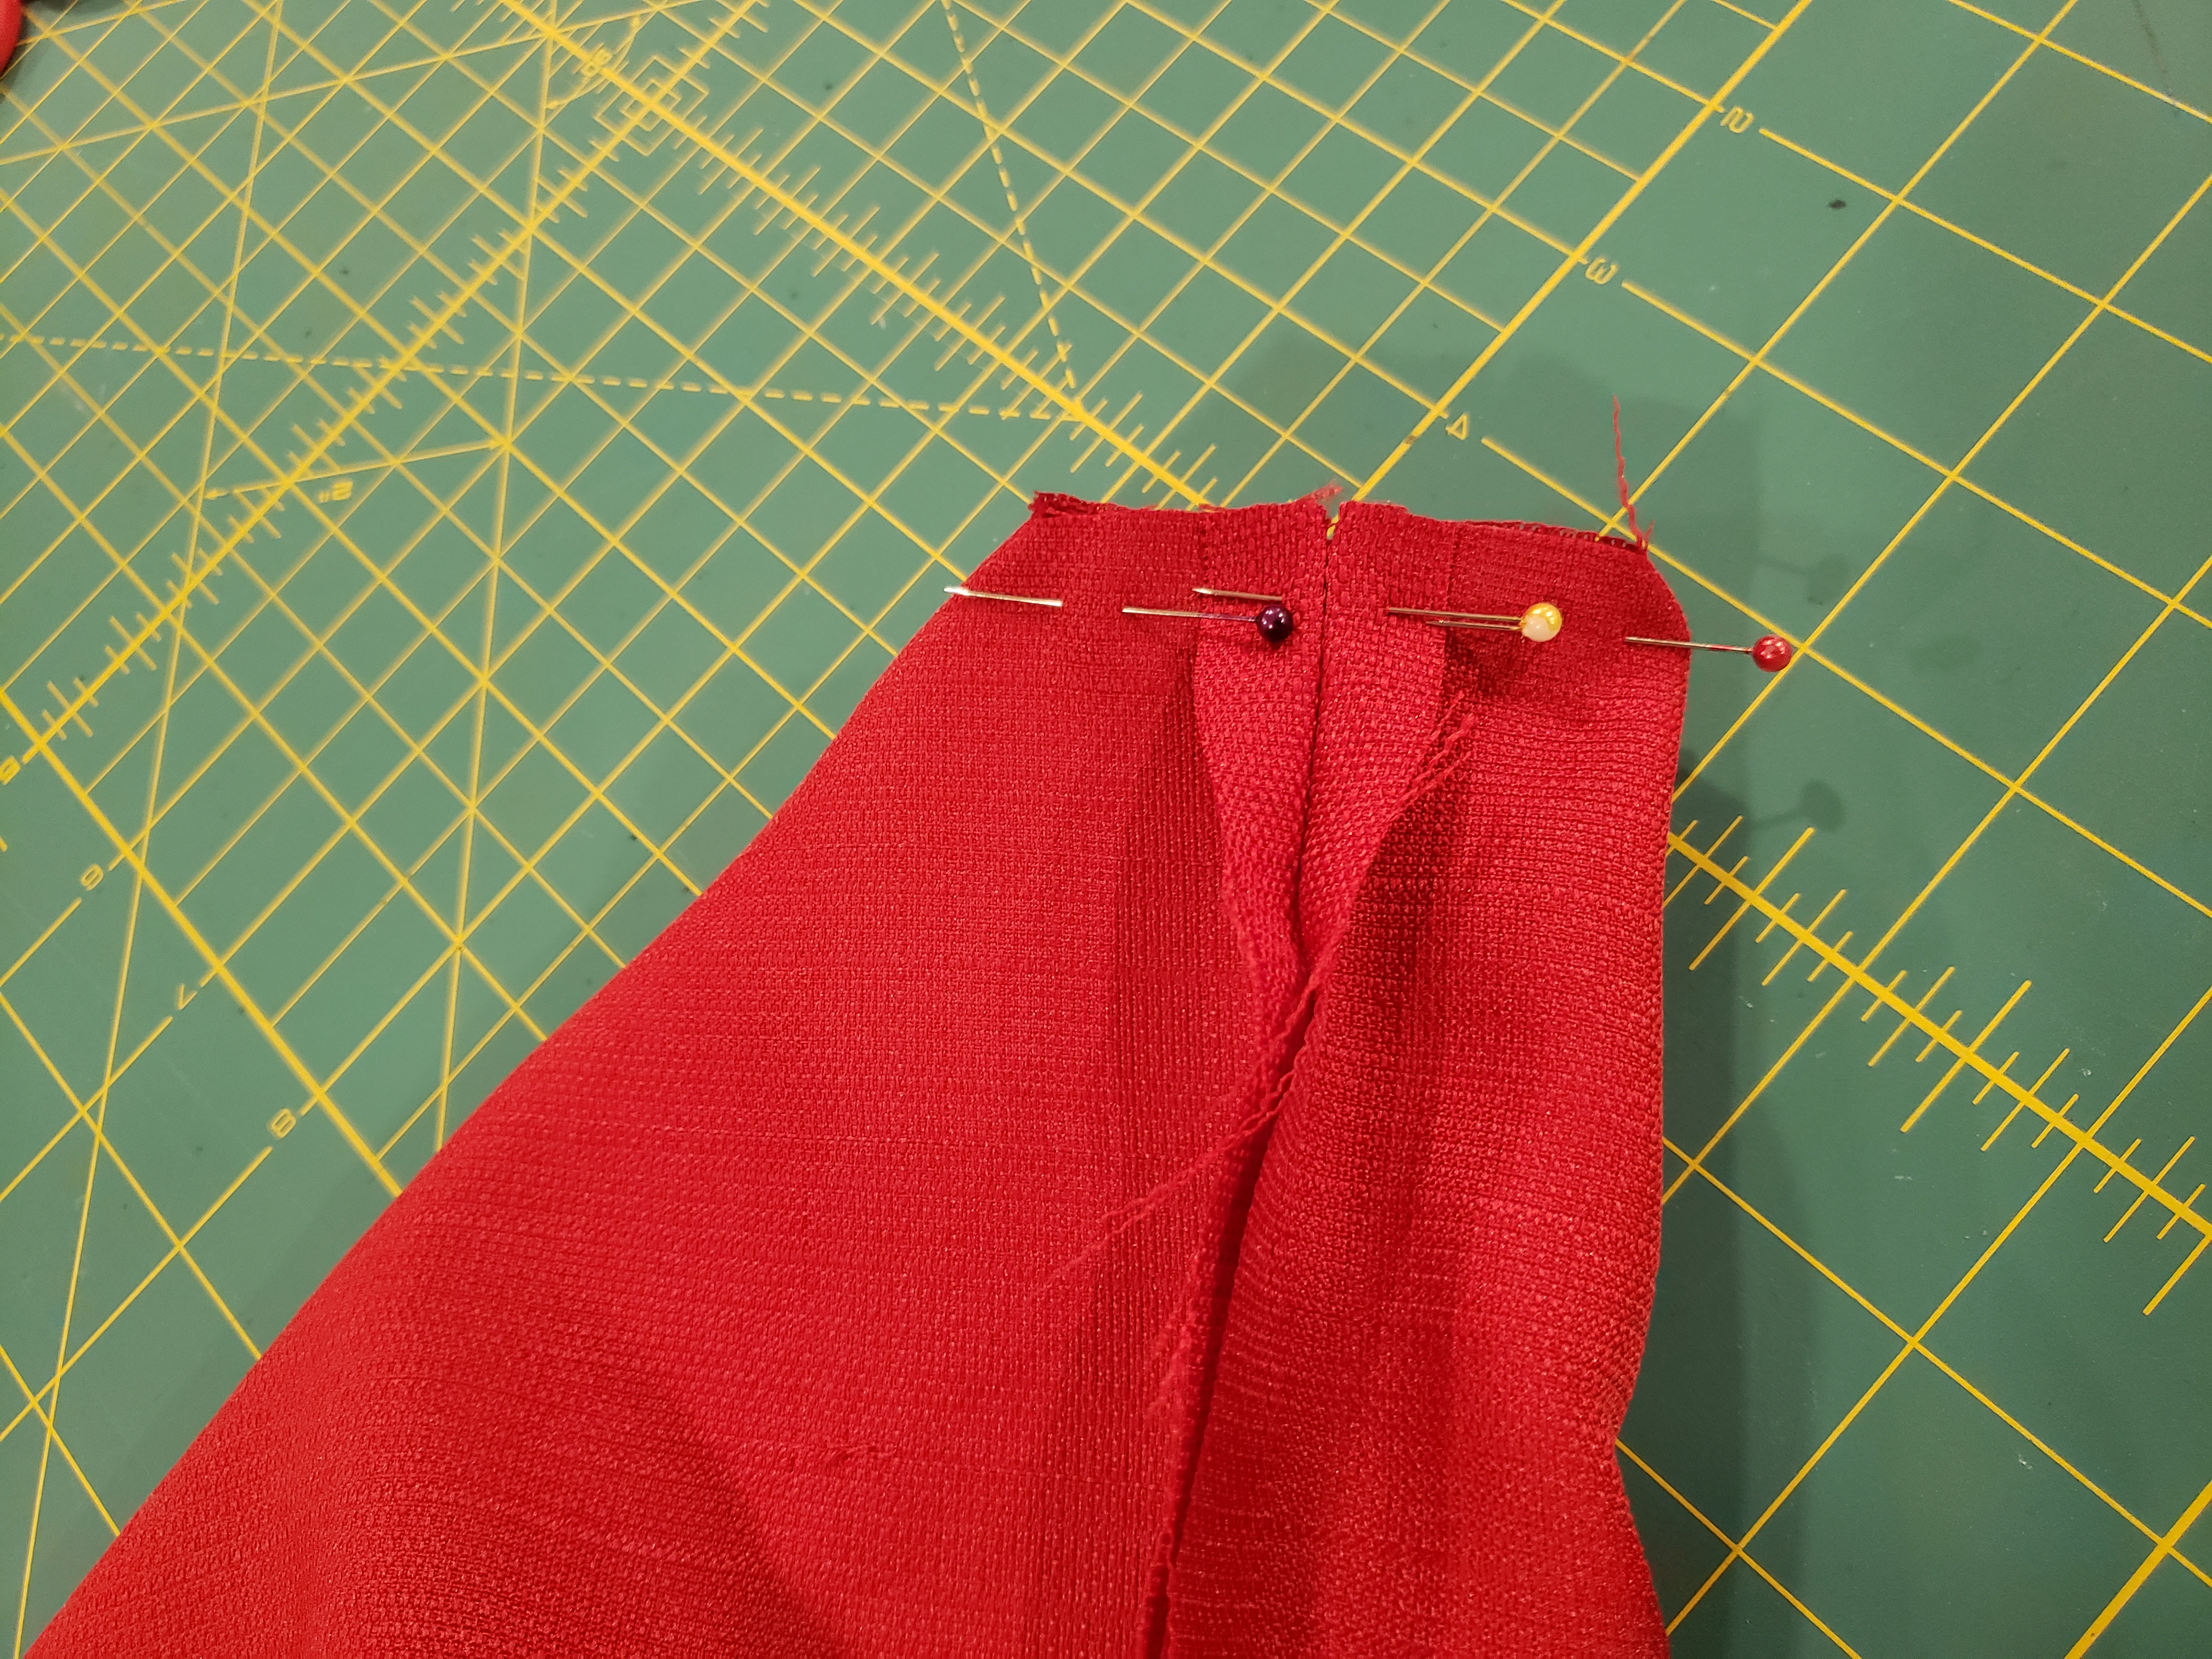
- Measure out a 1.25″x1.25″ square inside the stitching on either side of the bottom of the bag. Cut out square.

- With right side of fabric still facing in, pull one set of squares apart to form so the raw edges meet and the seams align. Stitch along the unfinished edge. Repeat for other side of bag.
- Repeat steps 3,4 and 5 for lining piece of fabric.
- Repeat steps 3,4 and 5 for peltex piece of fabric (except in step 3 your folded fabric will form a rectangle of size 13.5″x12.75″.
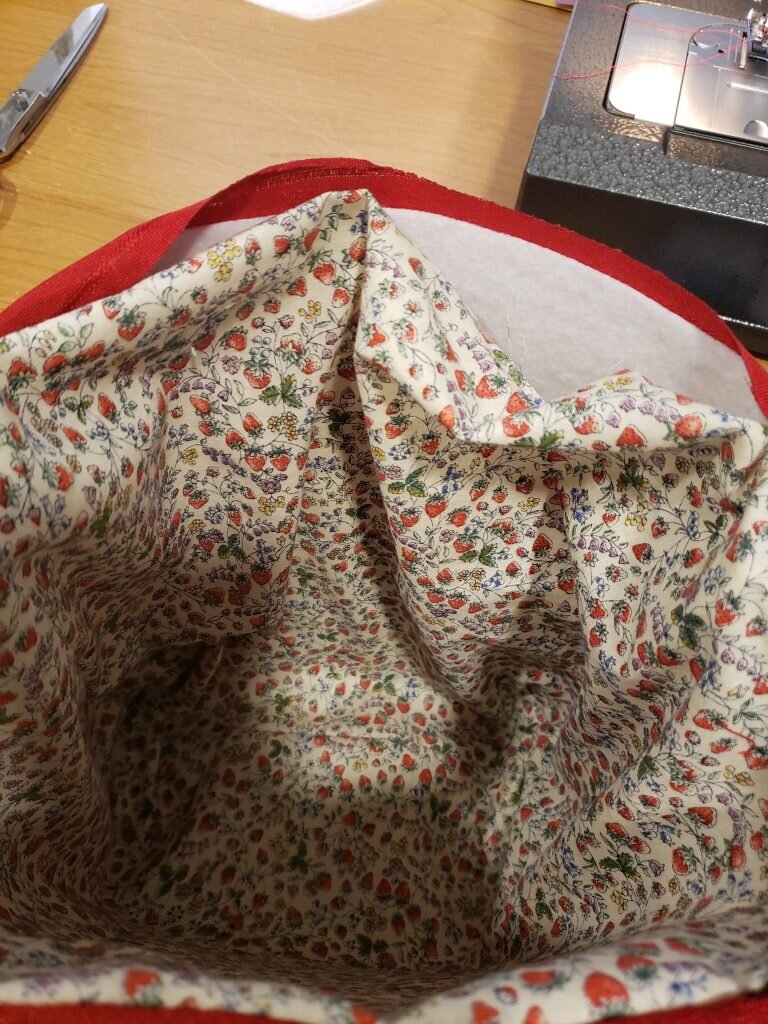
- Leave lining fabric right side in. Turn outer fabric right side out, and place inside lining fabric. Turn peltex right side out and place peltex inside outer fabric.
- Force all the layers into a box-y bag and put pins to mark two of the corners adjacent to one of the long sides.

- Stitch from pin to pin along the short sides and remaining long side, just above the peltex.
- Turn lining fabric around the rest of the bag and into the inside of the peltex.
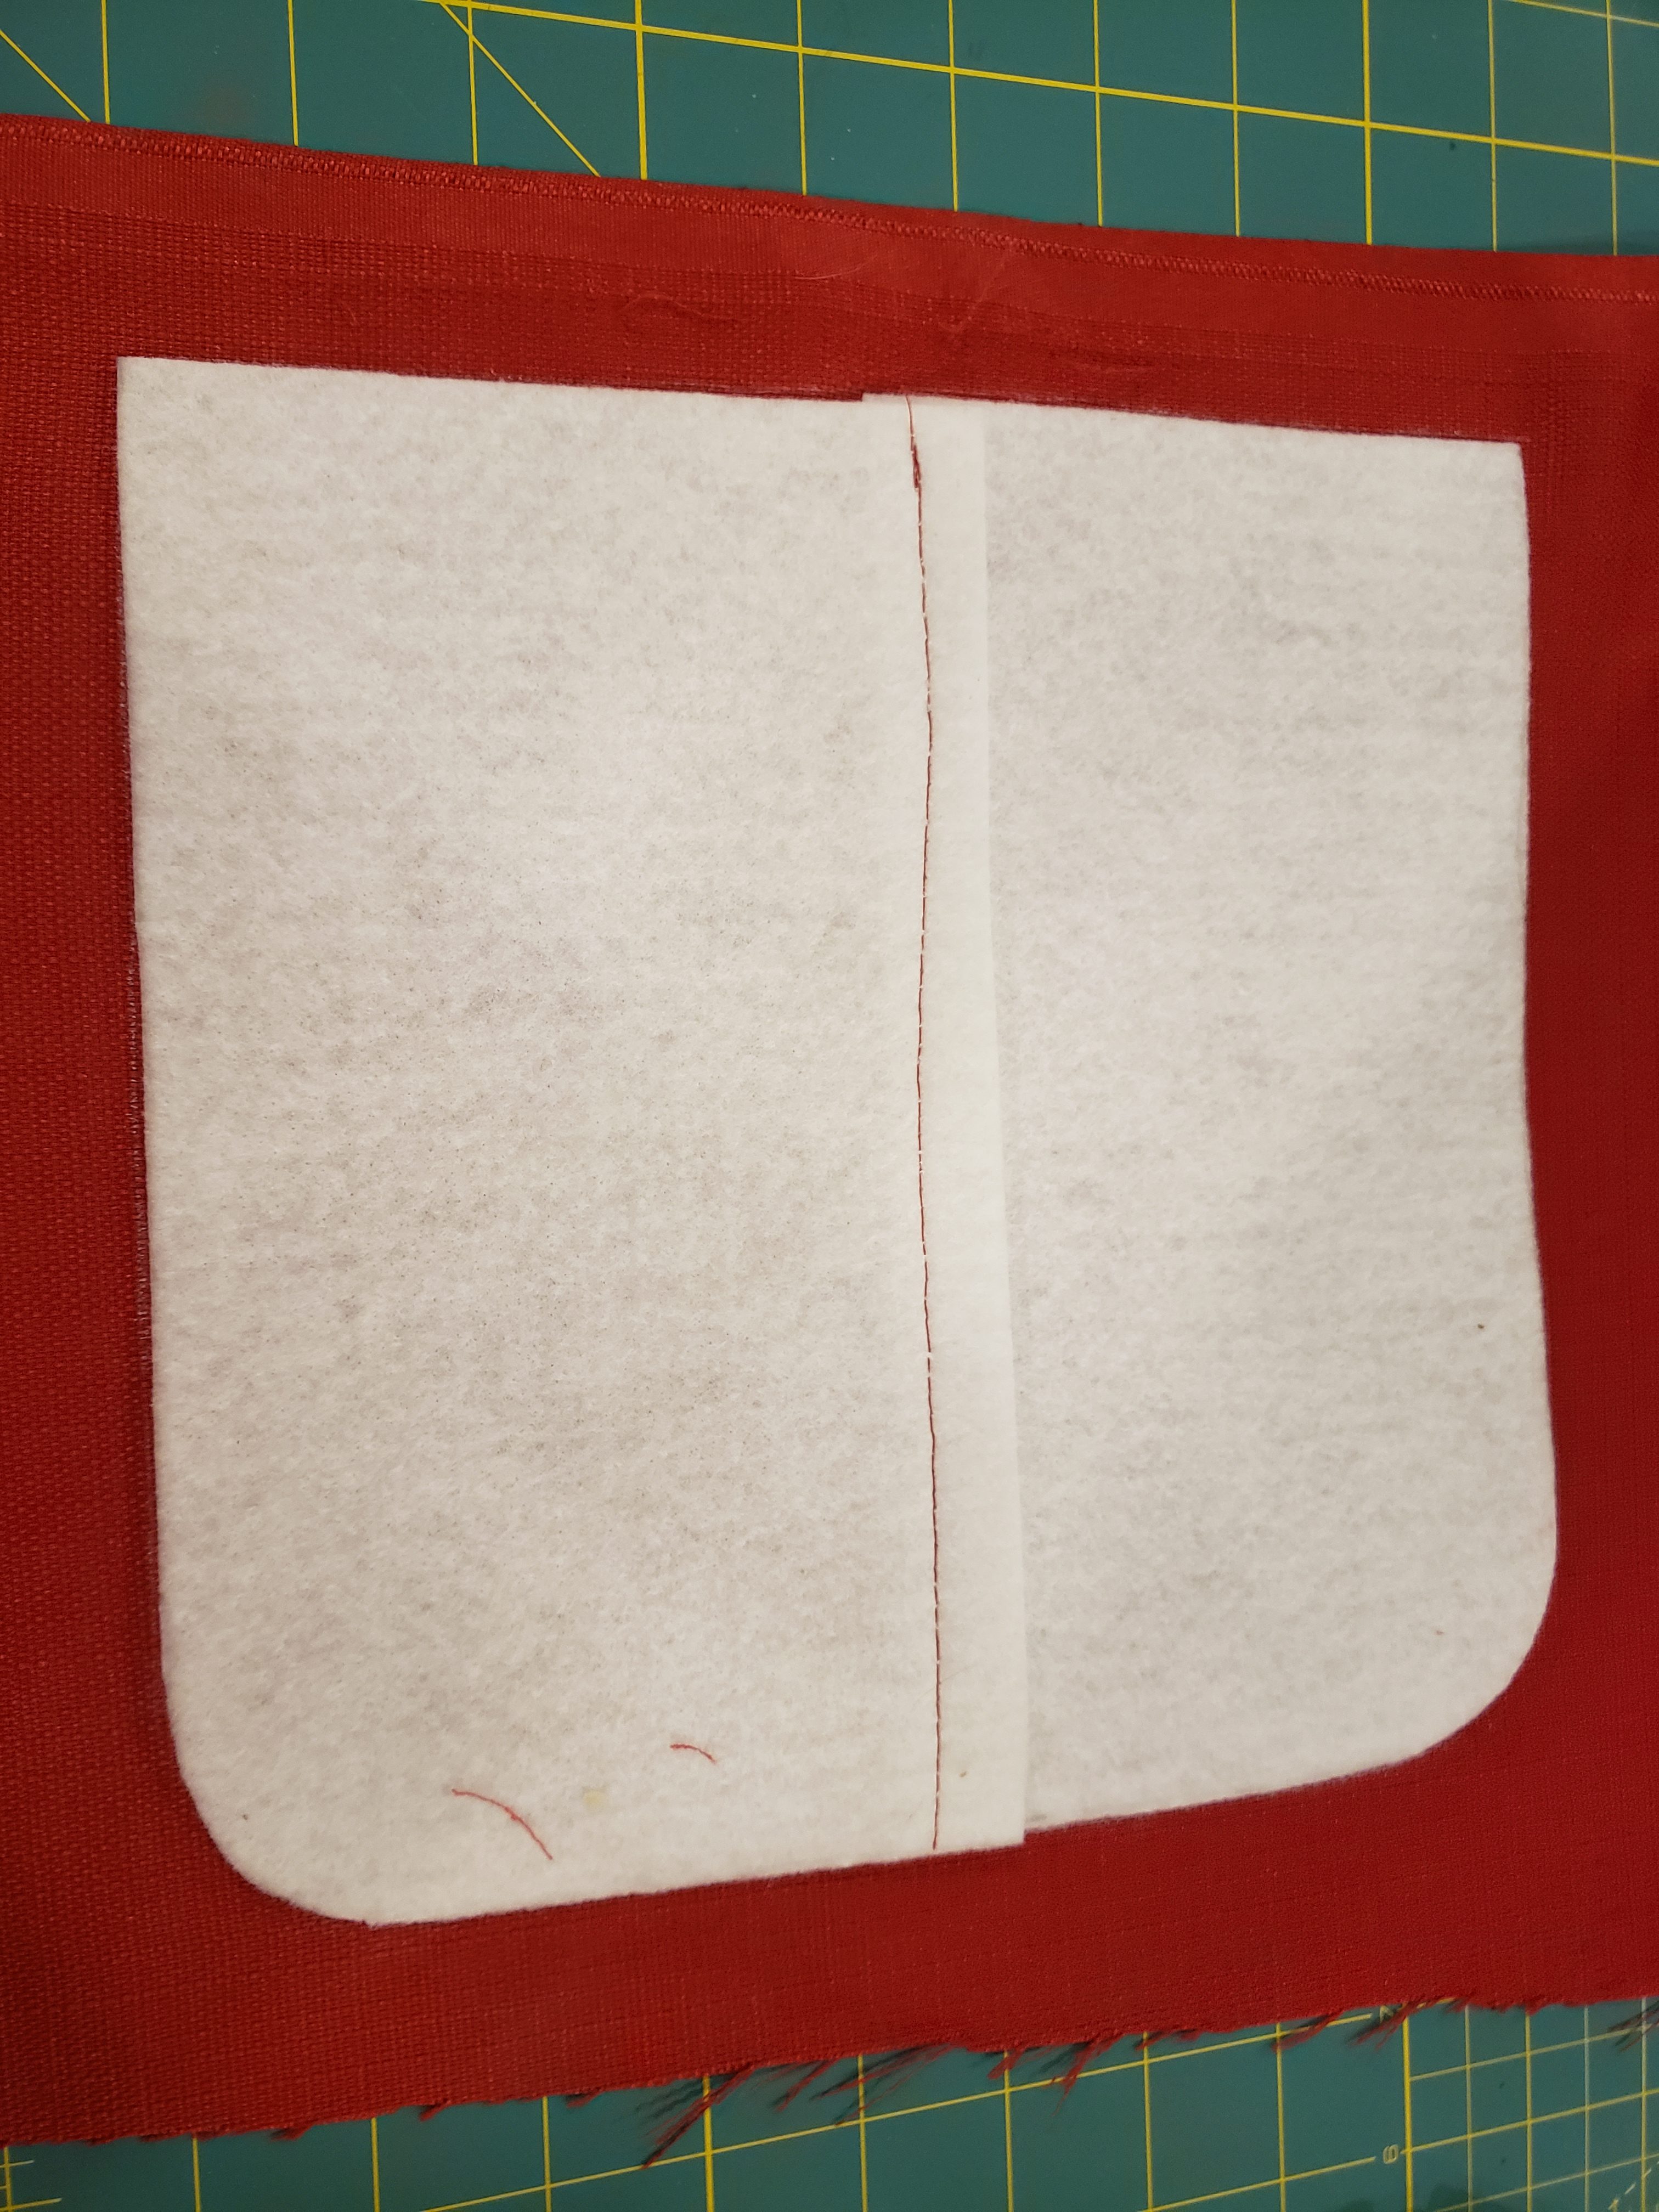
- Cut a piece of peltex 9.5″x9″ Along one of the shorter ends round the corners gently.
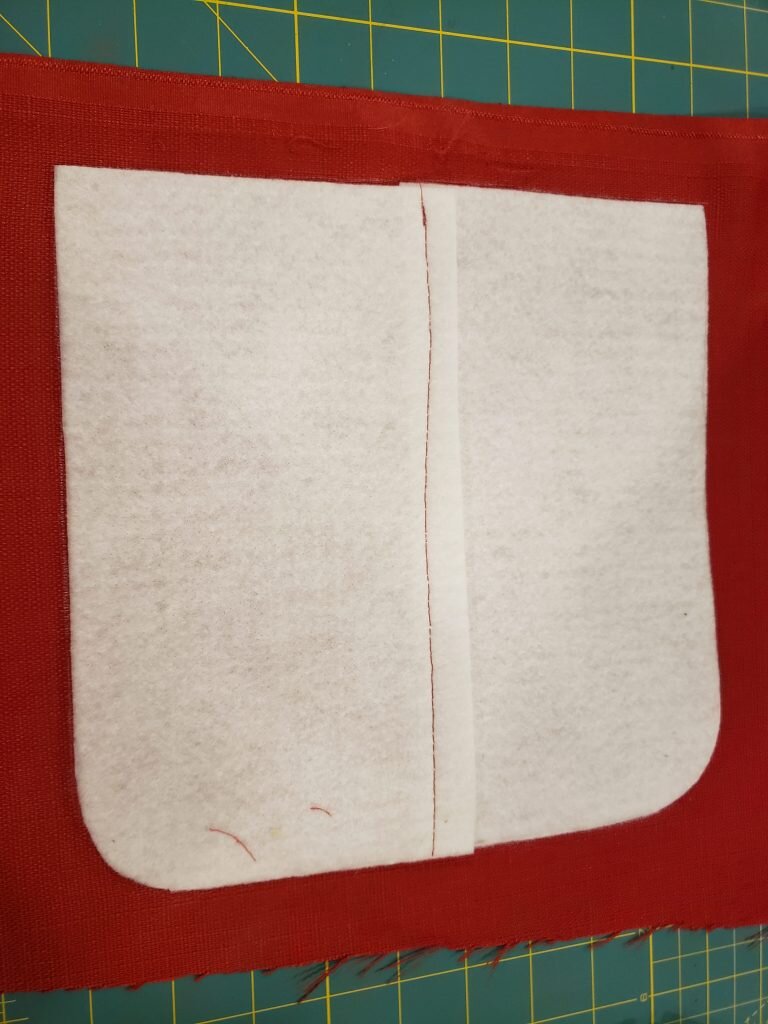
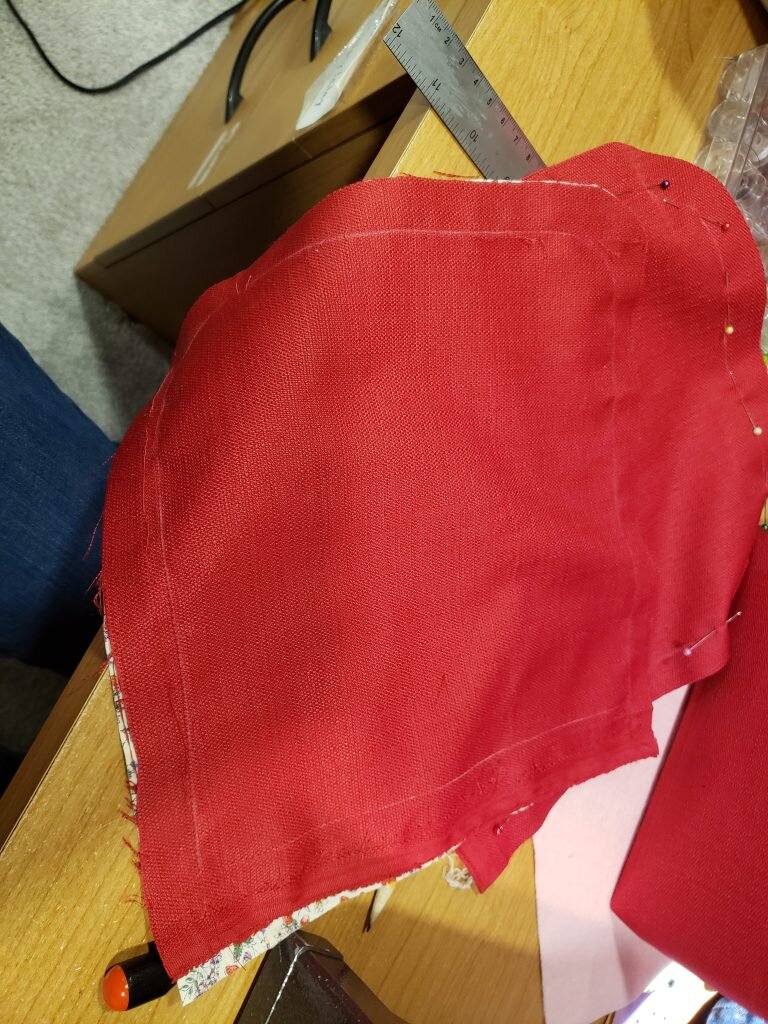
- Trace peltex on top of 1 piece of exterior fabric, and 1 piece of lining fabric, right sides in. Stitch around all corners except the side opposite the curved end.
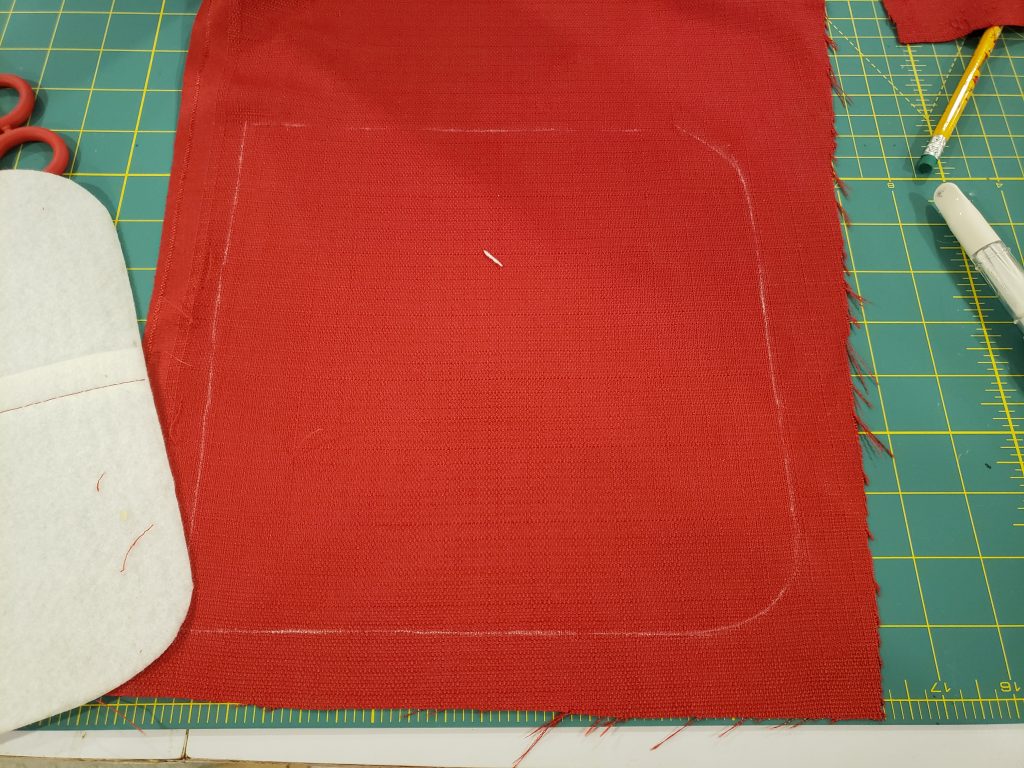
- Trim edges to 1/2″ then turn right side out and insert peltex inside.
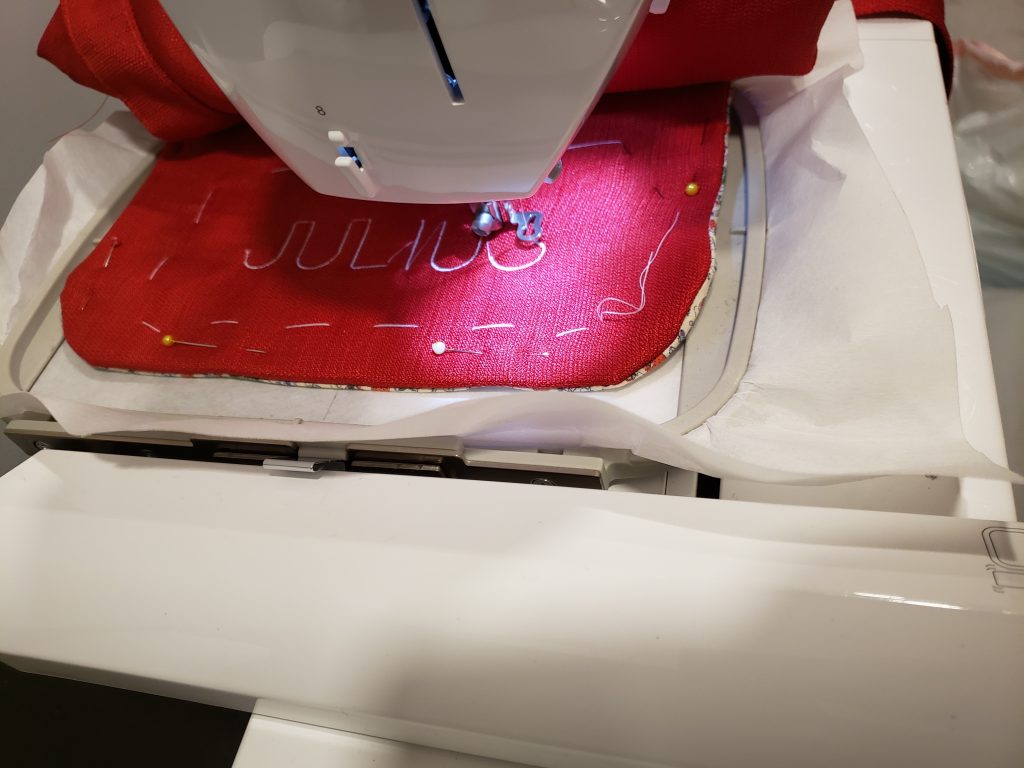
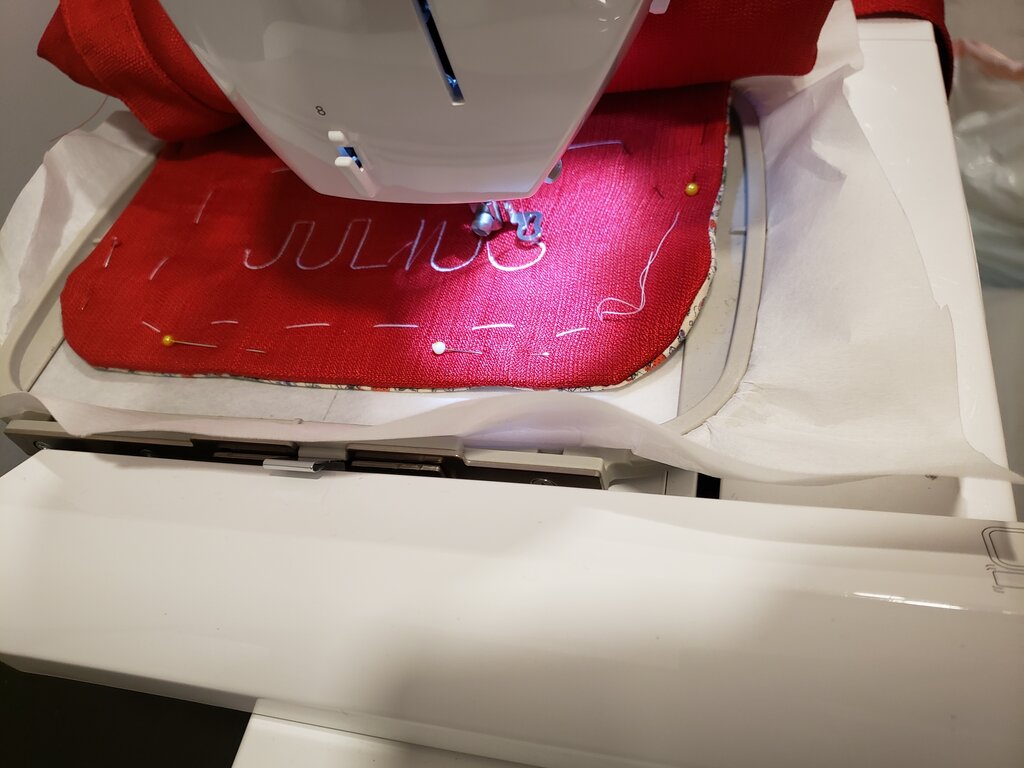
- Here is where I embroidered my kiddos names onto the flap. I used my machine, but you could of course do this by hand.
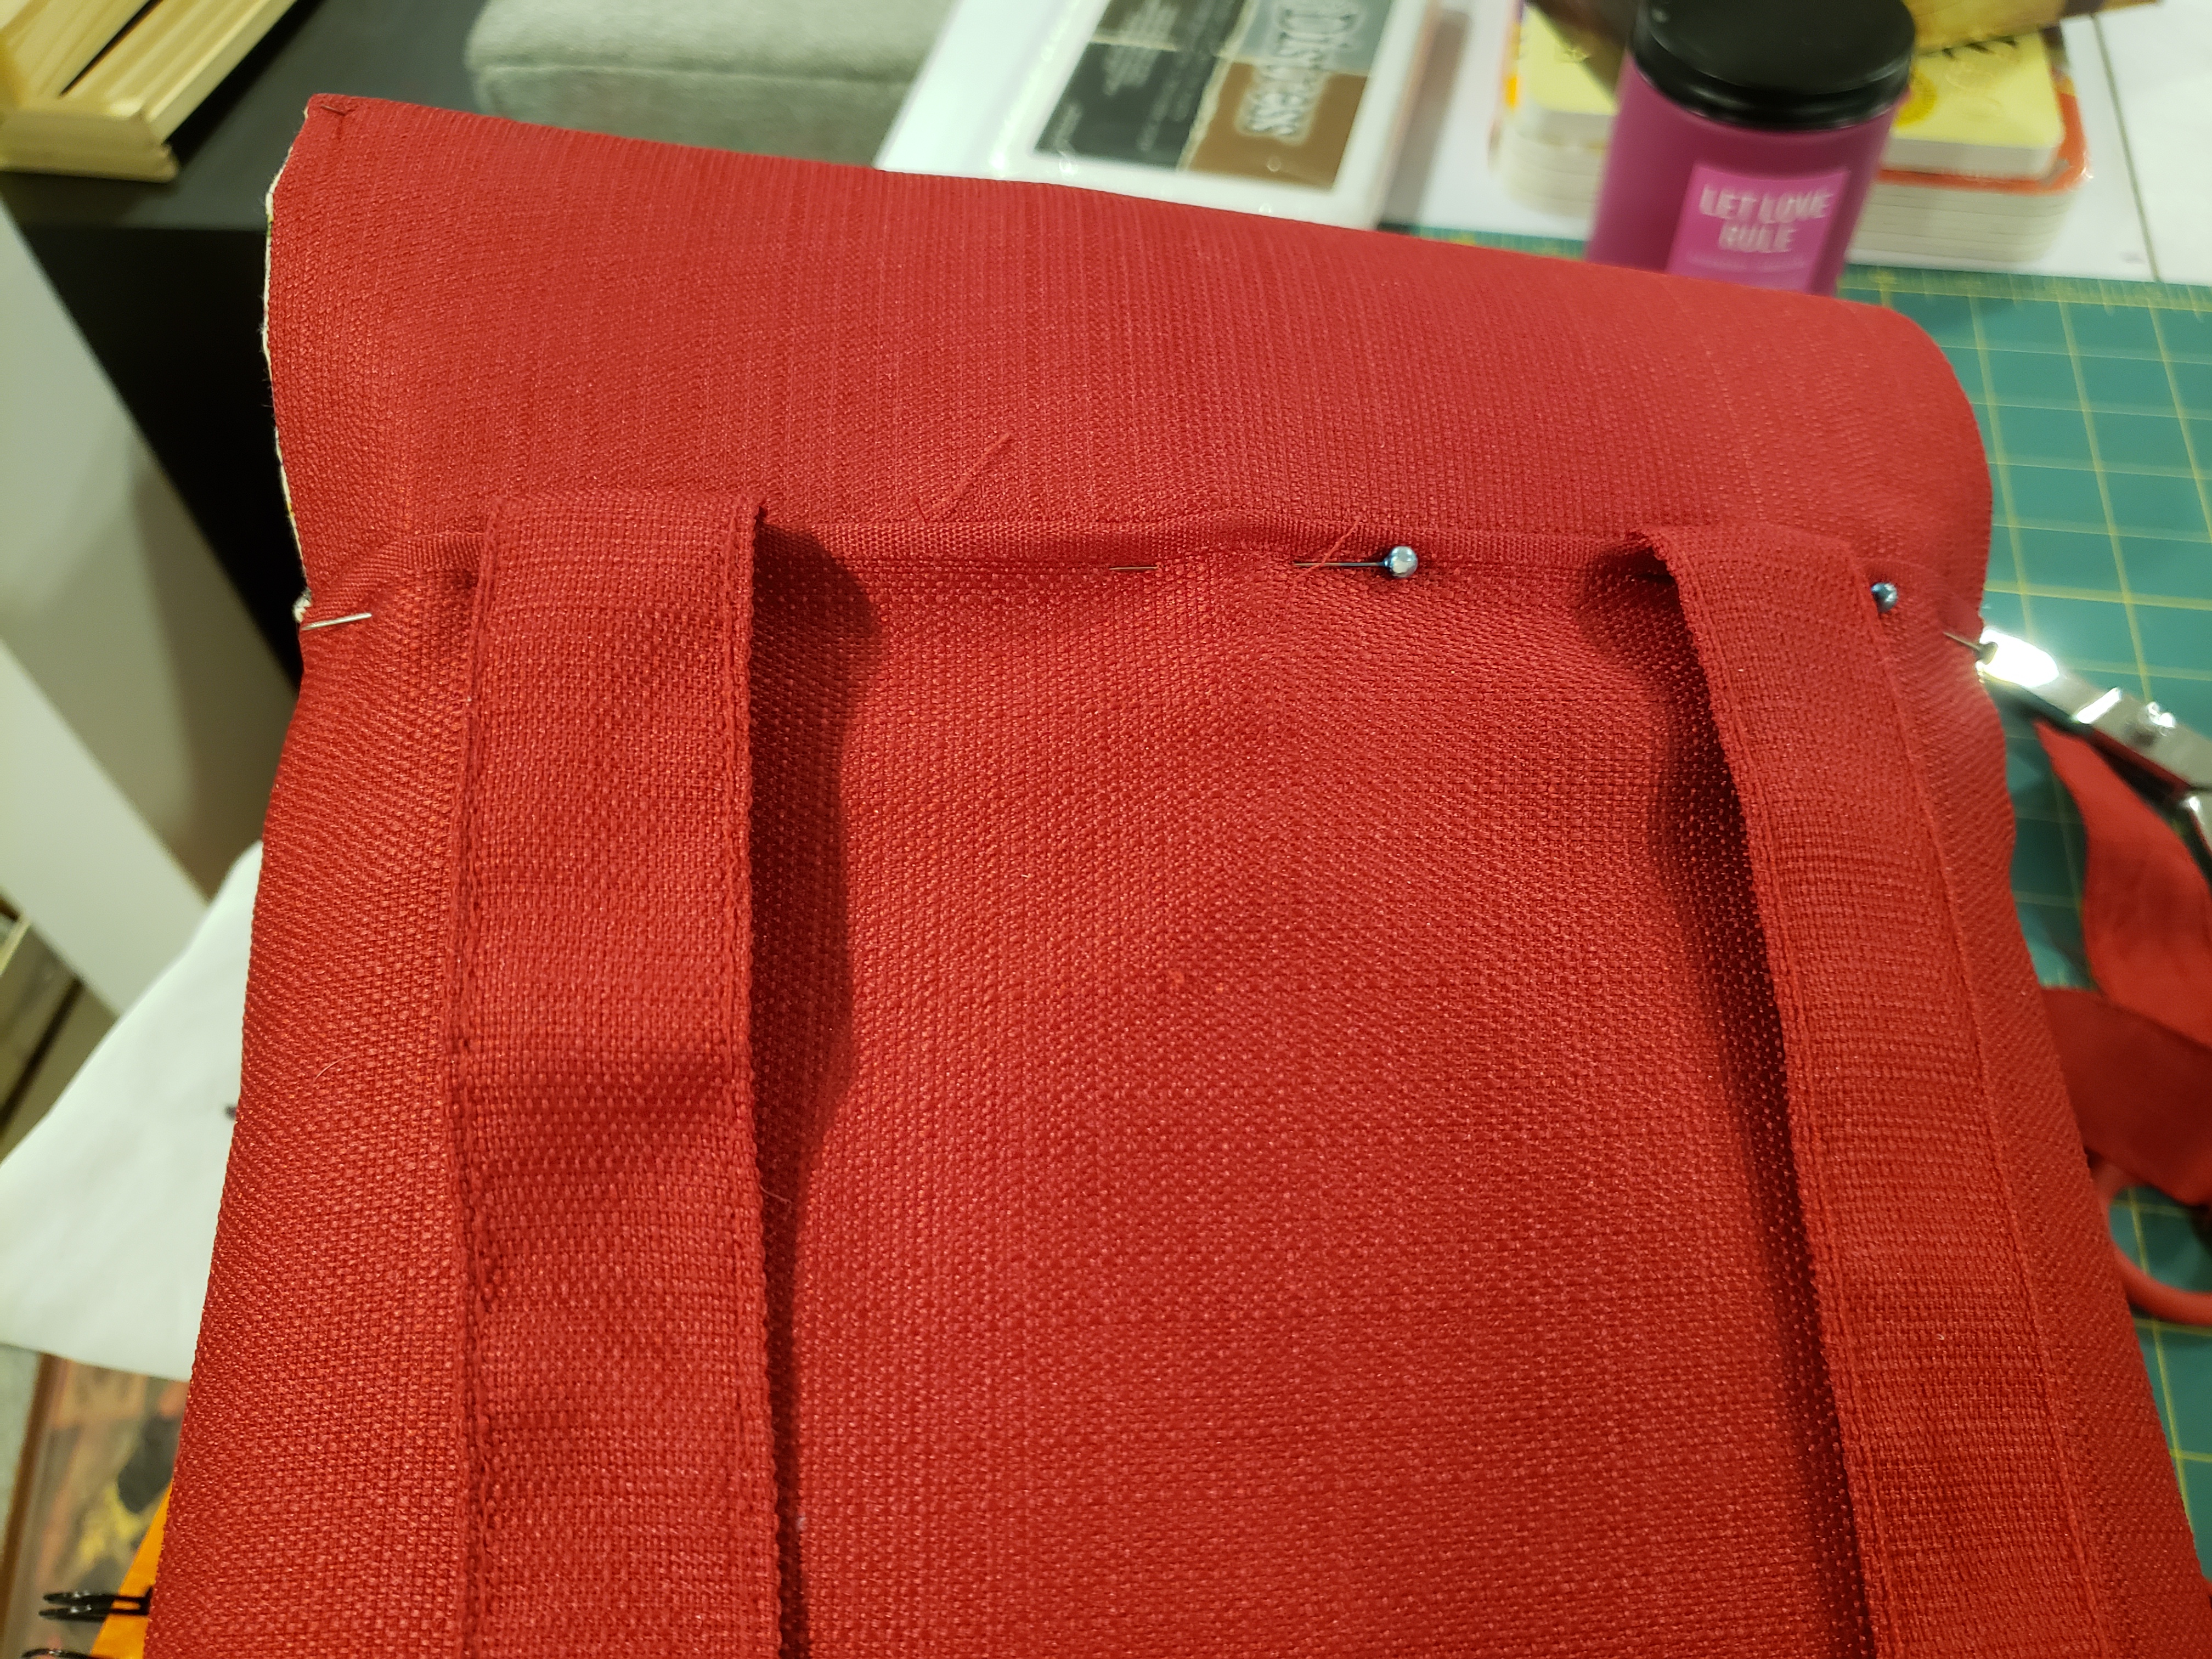
- Make straps (I will be honest, I stole some from the curtain fabric I reused for the exterior). I recommend cutting a 4″x19″ rectangle, folding it lengthwise (right sides in), stitching along the long side and turning it right side out. Fold one of the ends in, then stitch. Repeat for second strap.
- Insert unfinished portion of flap into the unfinished portion of the bag, in between the peltex and the lining. Fold the lining and exterior fabric edges in so the unfinished edges are tucked inside. Do not stitch yet.
- Insert unfinished end of each strap between exterior material and flap at the outer ends of the flap.

- Stitch along the entire back of the bag through the lining, peltex, flap, straps and outside.
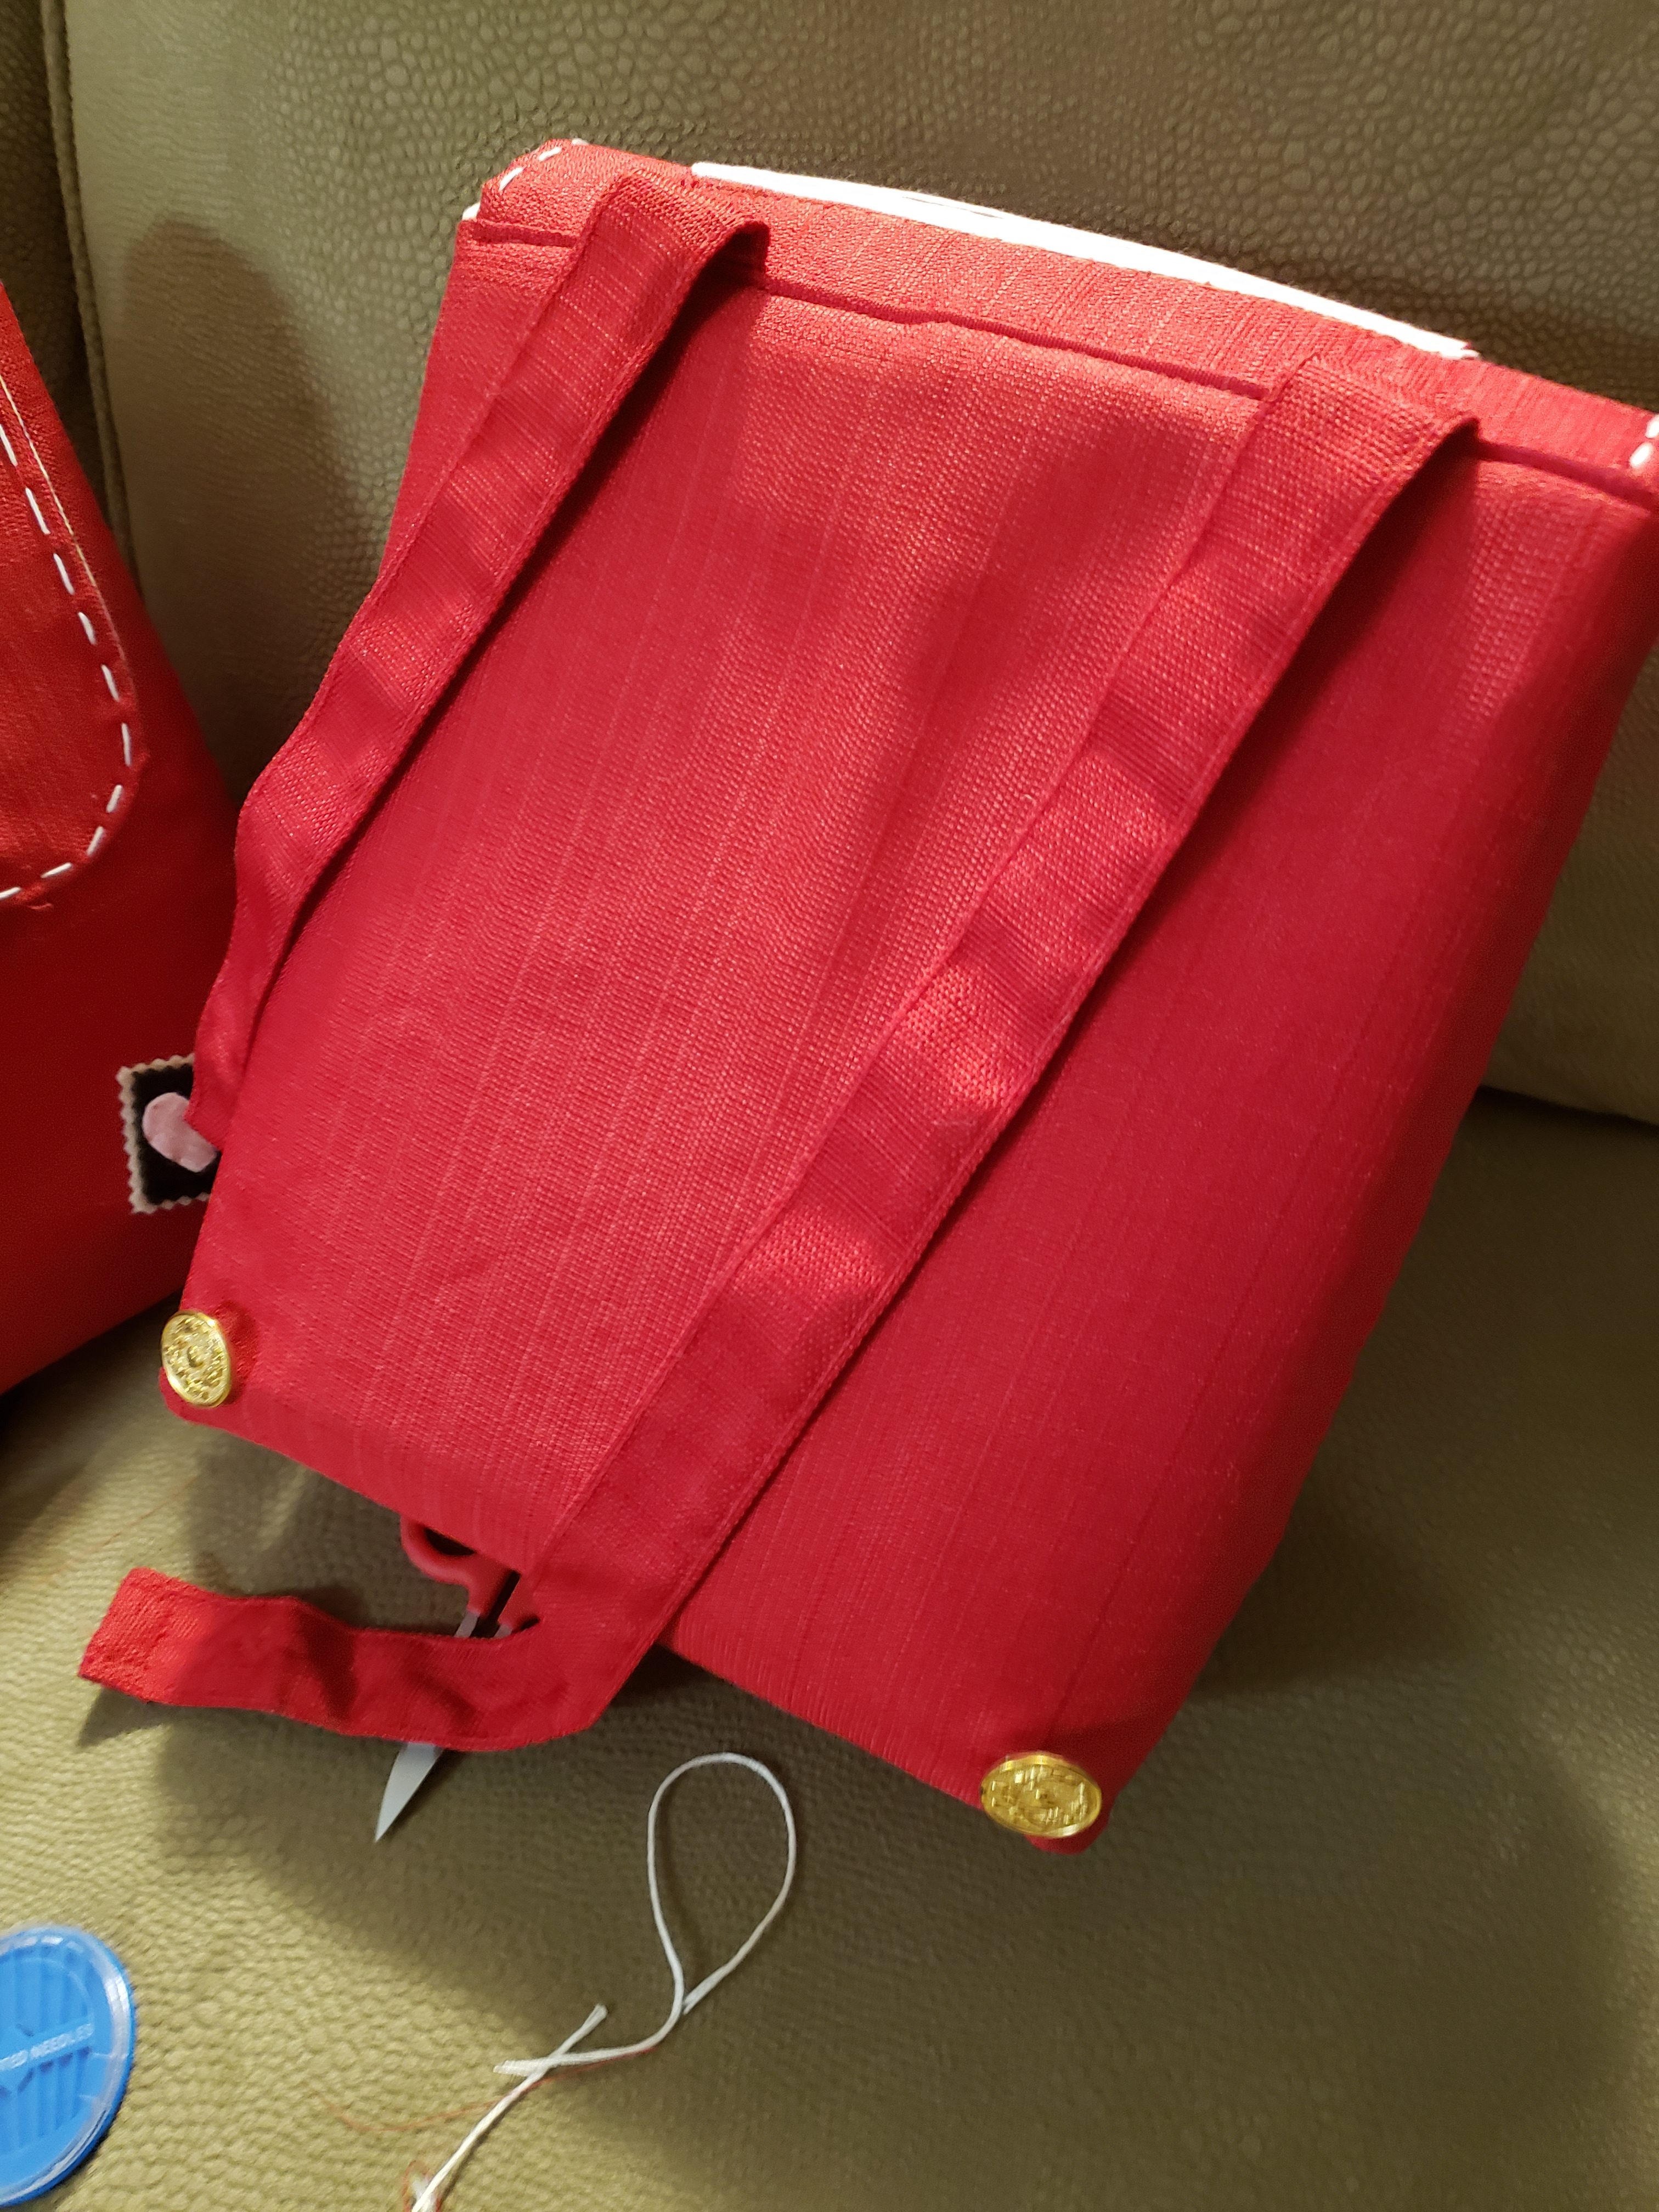
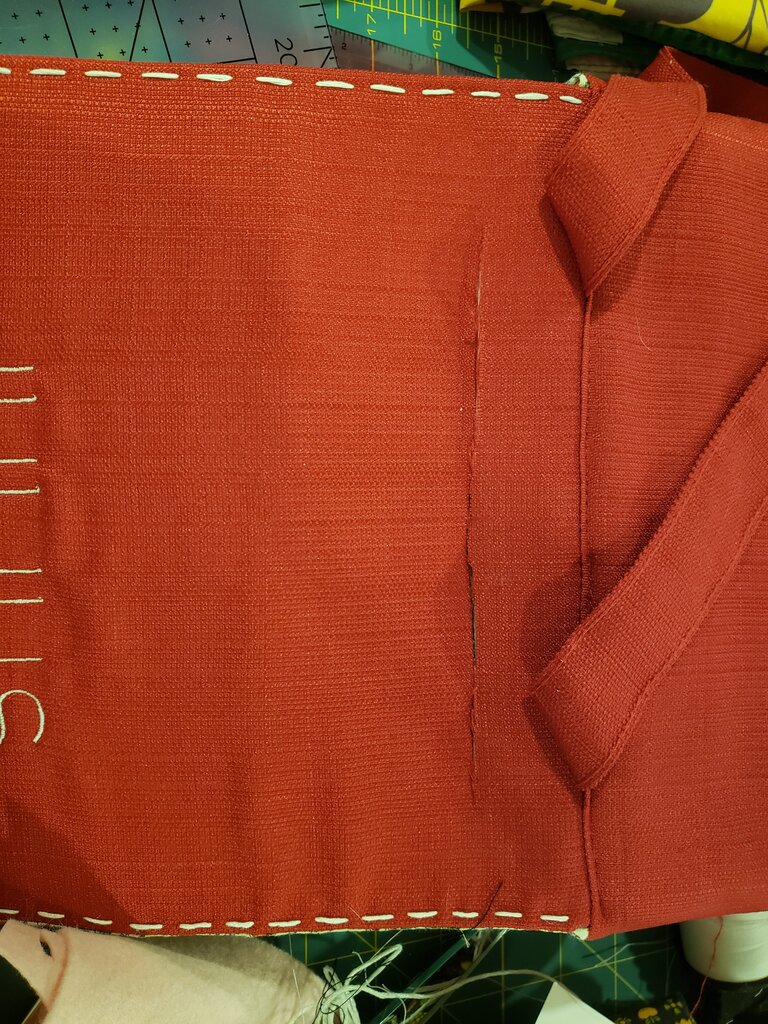
- Stitch buttons to just above the bottom back corners of the backpack.

- Make buttonholes 1″ above the bottom of the strap and 8″ above the bottom of the strap to accommodate your buttons.

- Stitch a button to the center front of the backpack about an inch below where the flap lands when closed.
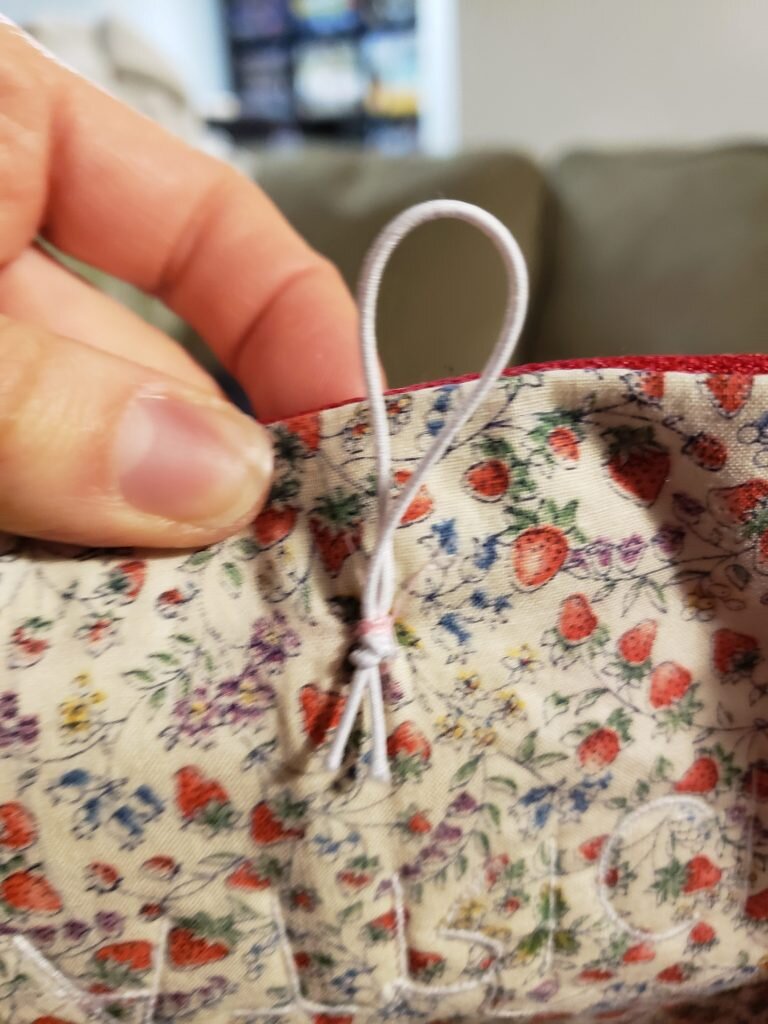
- Stitch a loop of elastic in the center of the flap just above where the button is. to serve as a closure.
- Add embroidery if desired (I did a running stitch along the flap edges), and felt details (like the stamp).
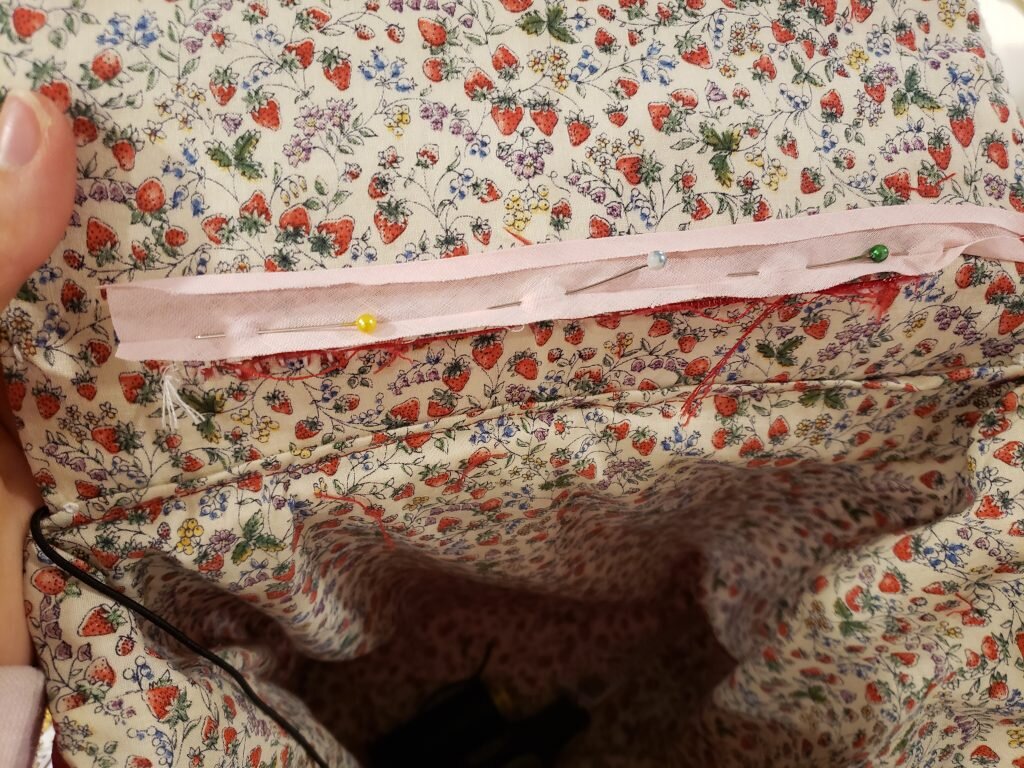
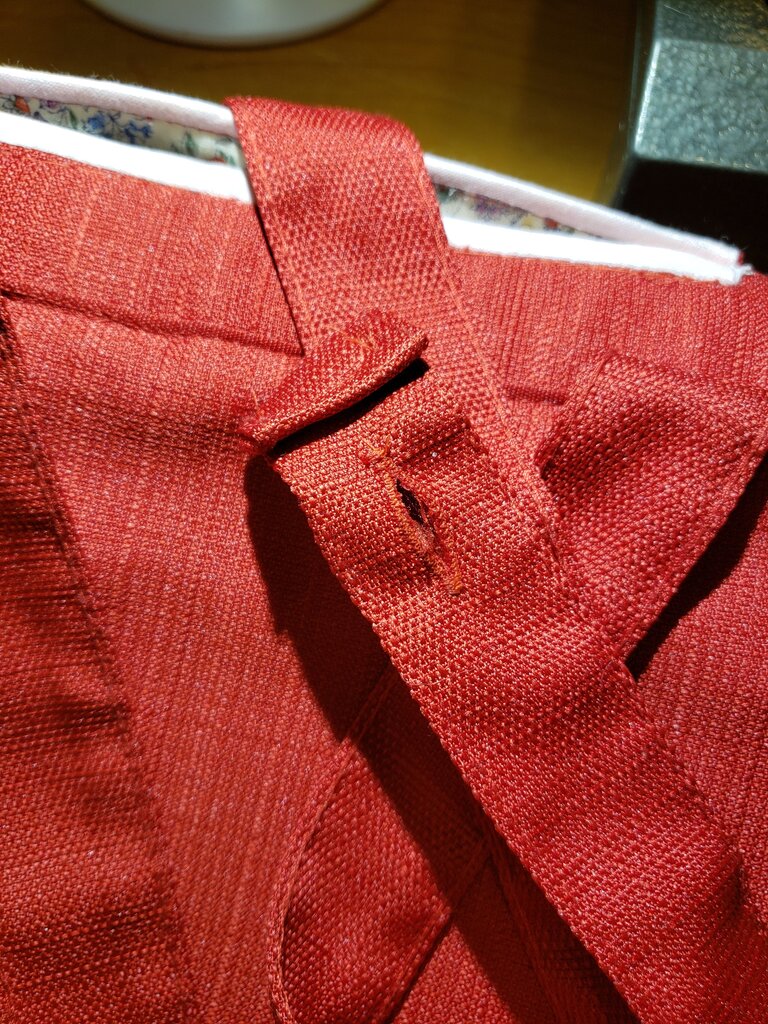
- Open the flap out and lay it flat on a cutting mat. Using a ruler and a rotary cutter, cut a 7″ line through all layers of the flap, an inch from where you stitched the flap to the backpack.

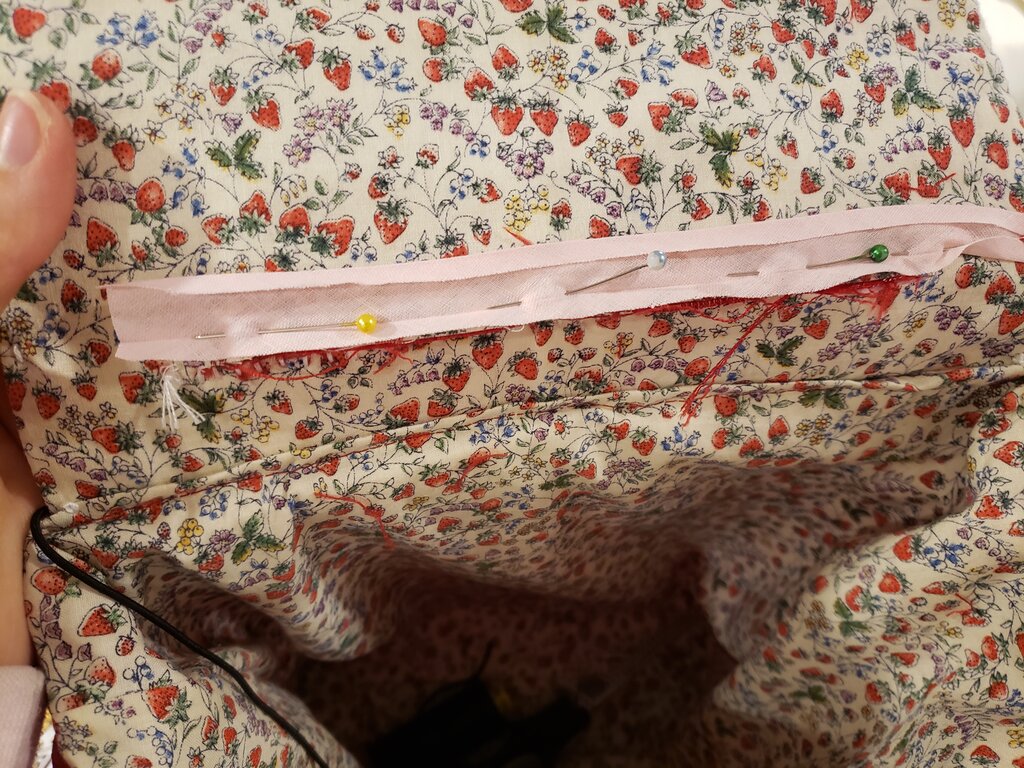
- Attach bias tape along unfinished ends of the flap on both sides. Open out the bias tape and lined of the unfinished edges up with one of the unfinished edges of the slot. Stitch along the fold. Fold around the unfinished edge so all the unfinished edges are inside and then stitch close to the fold. (In the pictures I start attaching it to the inside, and finish by stitching on the outside of the flap, but I actually removed it and did it the opposite way.)
- Hang from a chair and put Valentine’s inside!


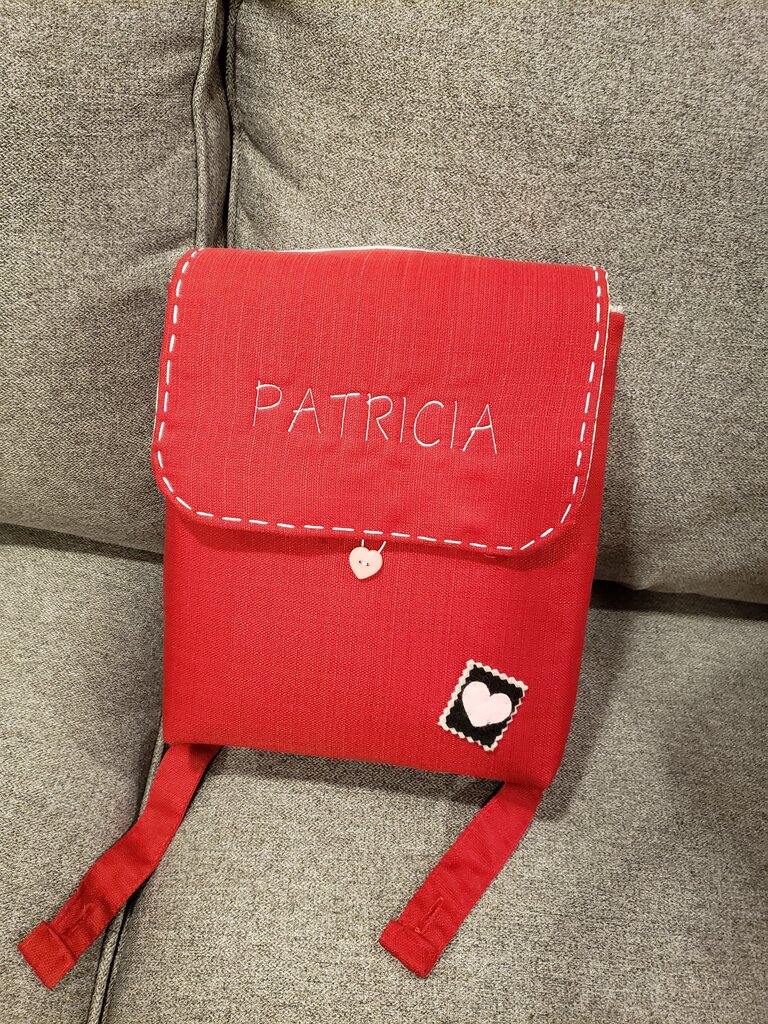
Front
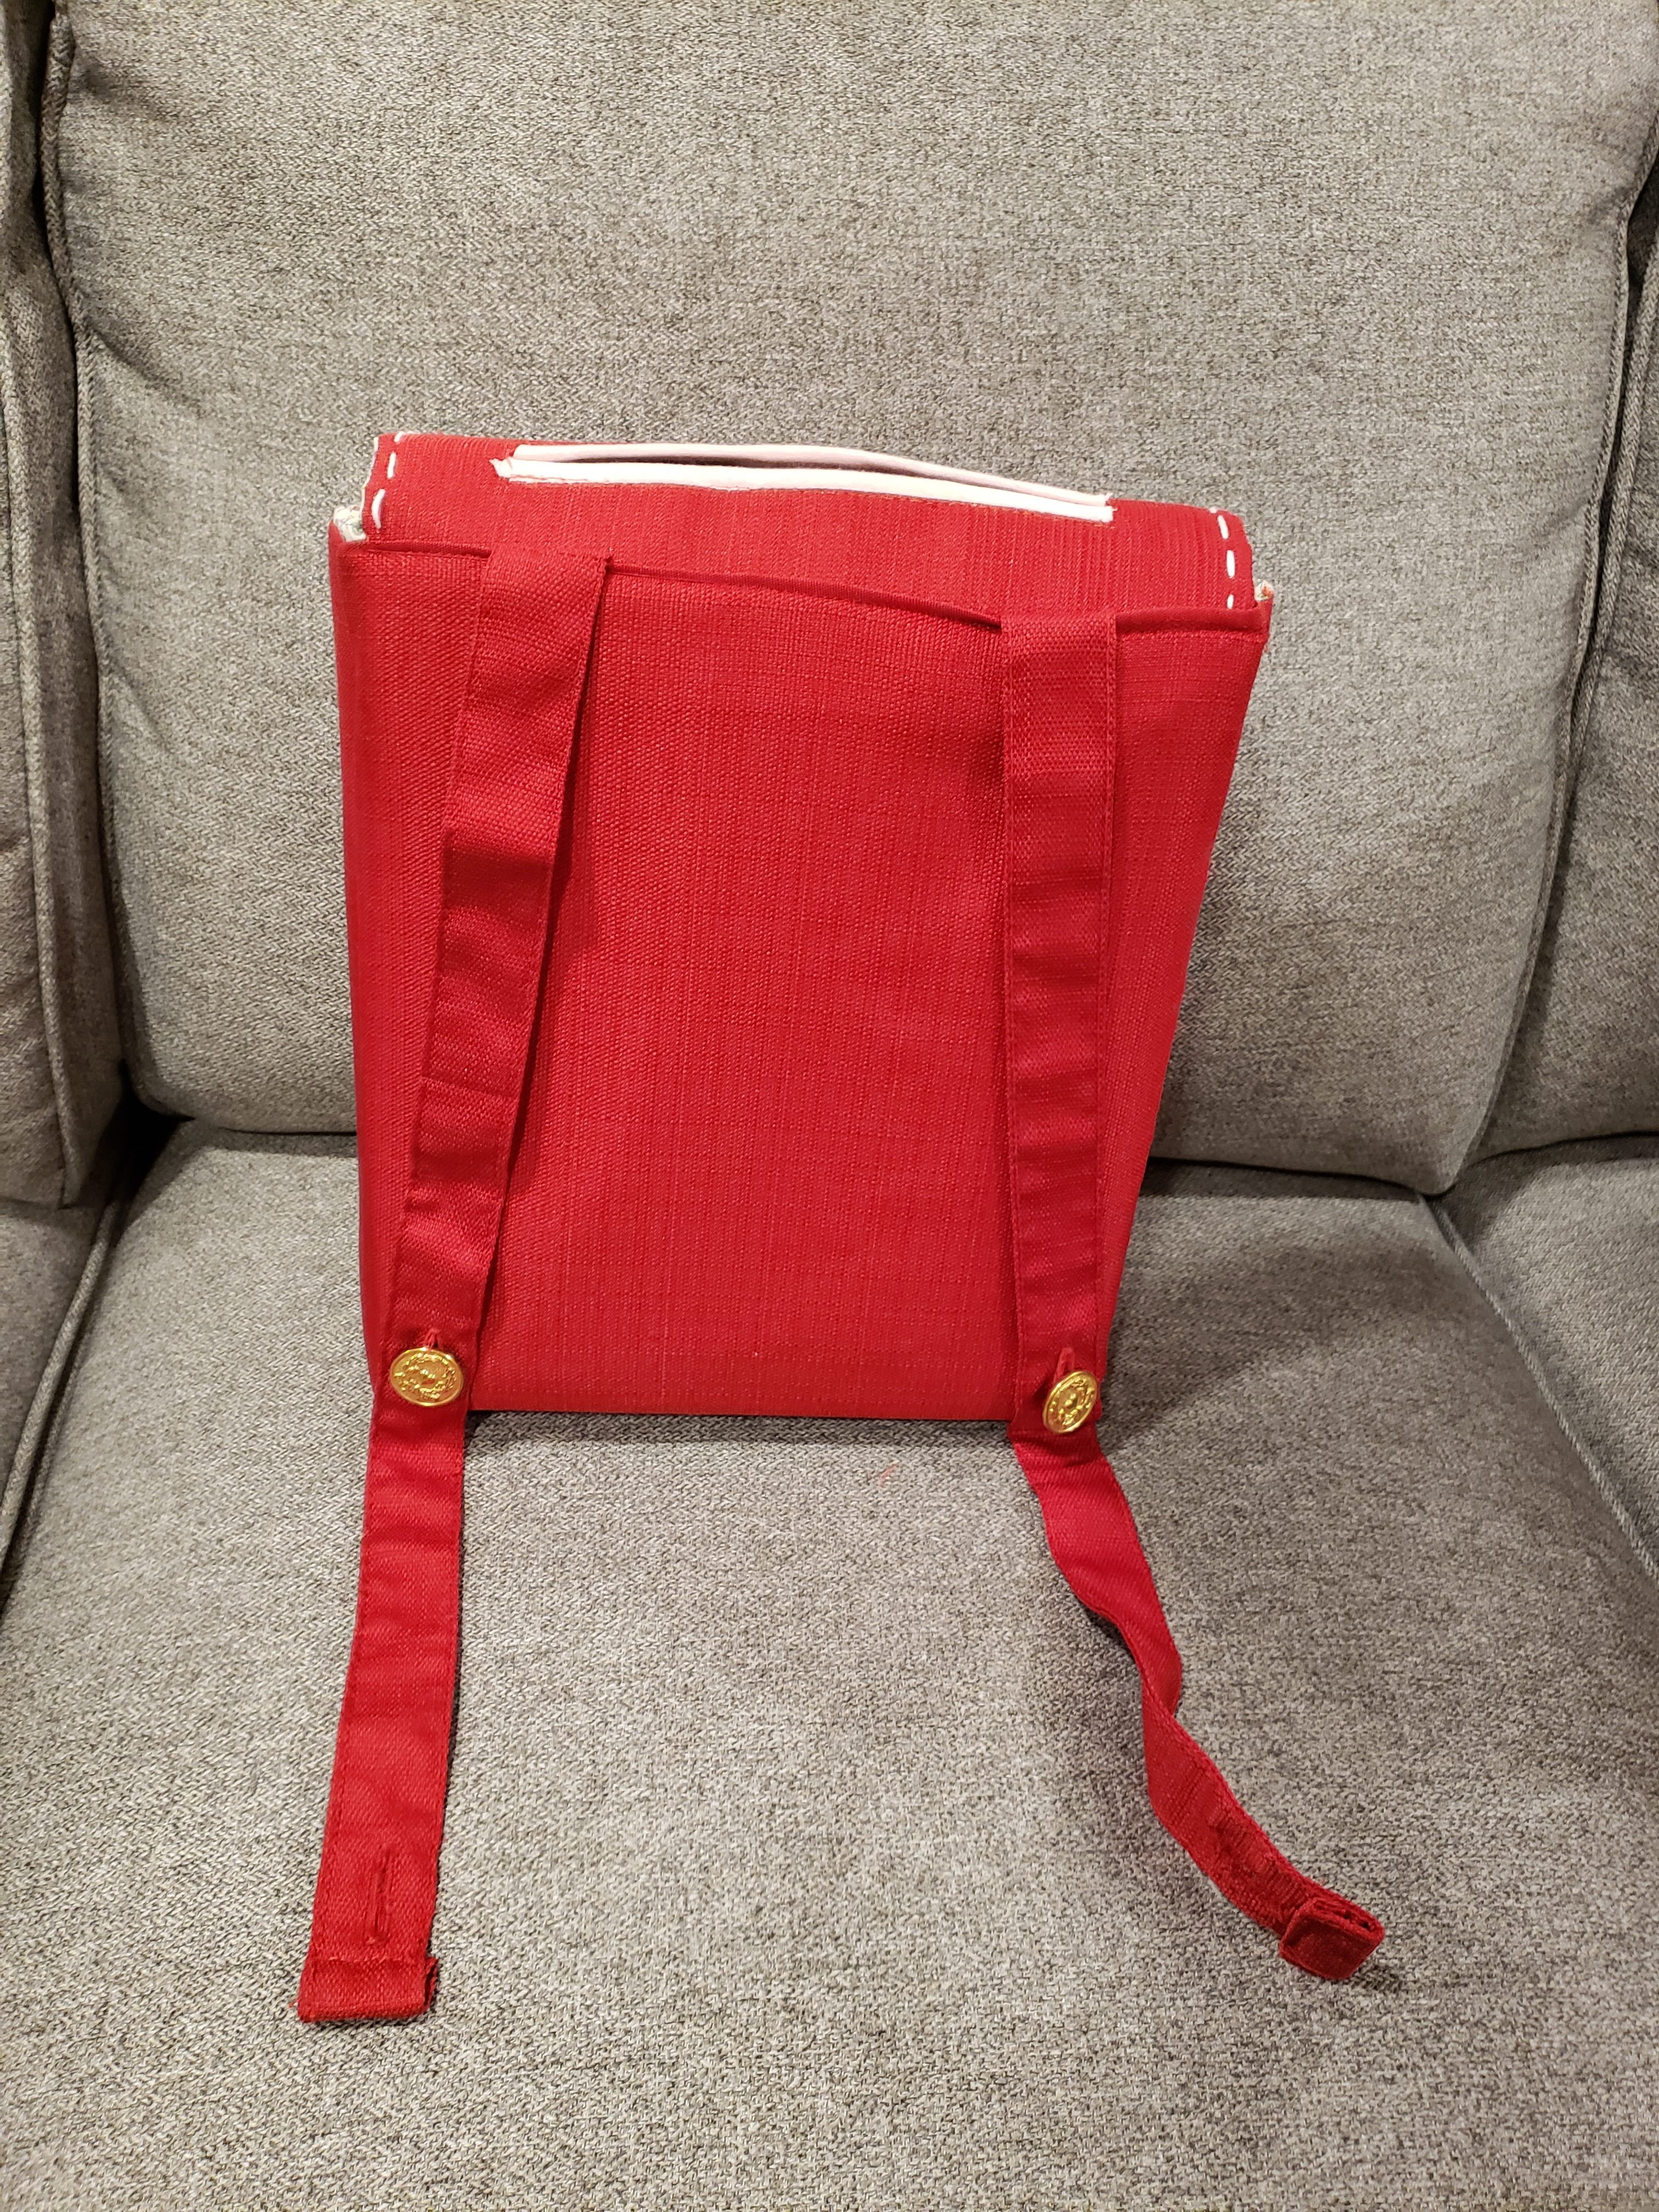
Back (in chair mode)
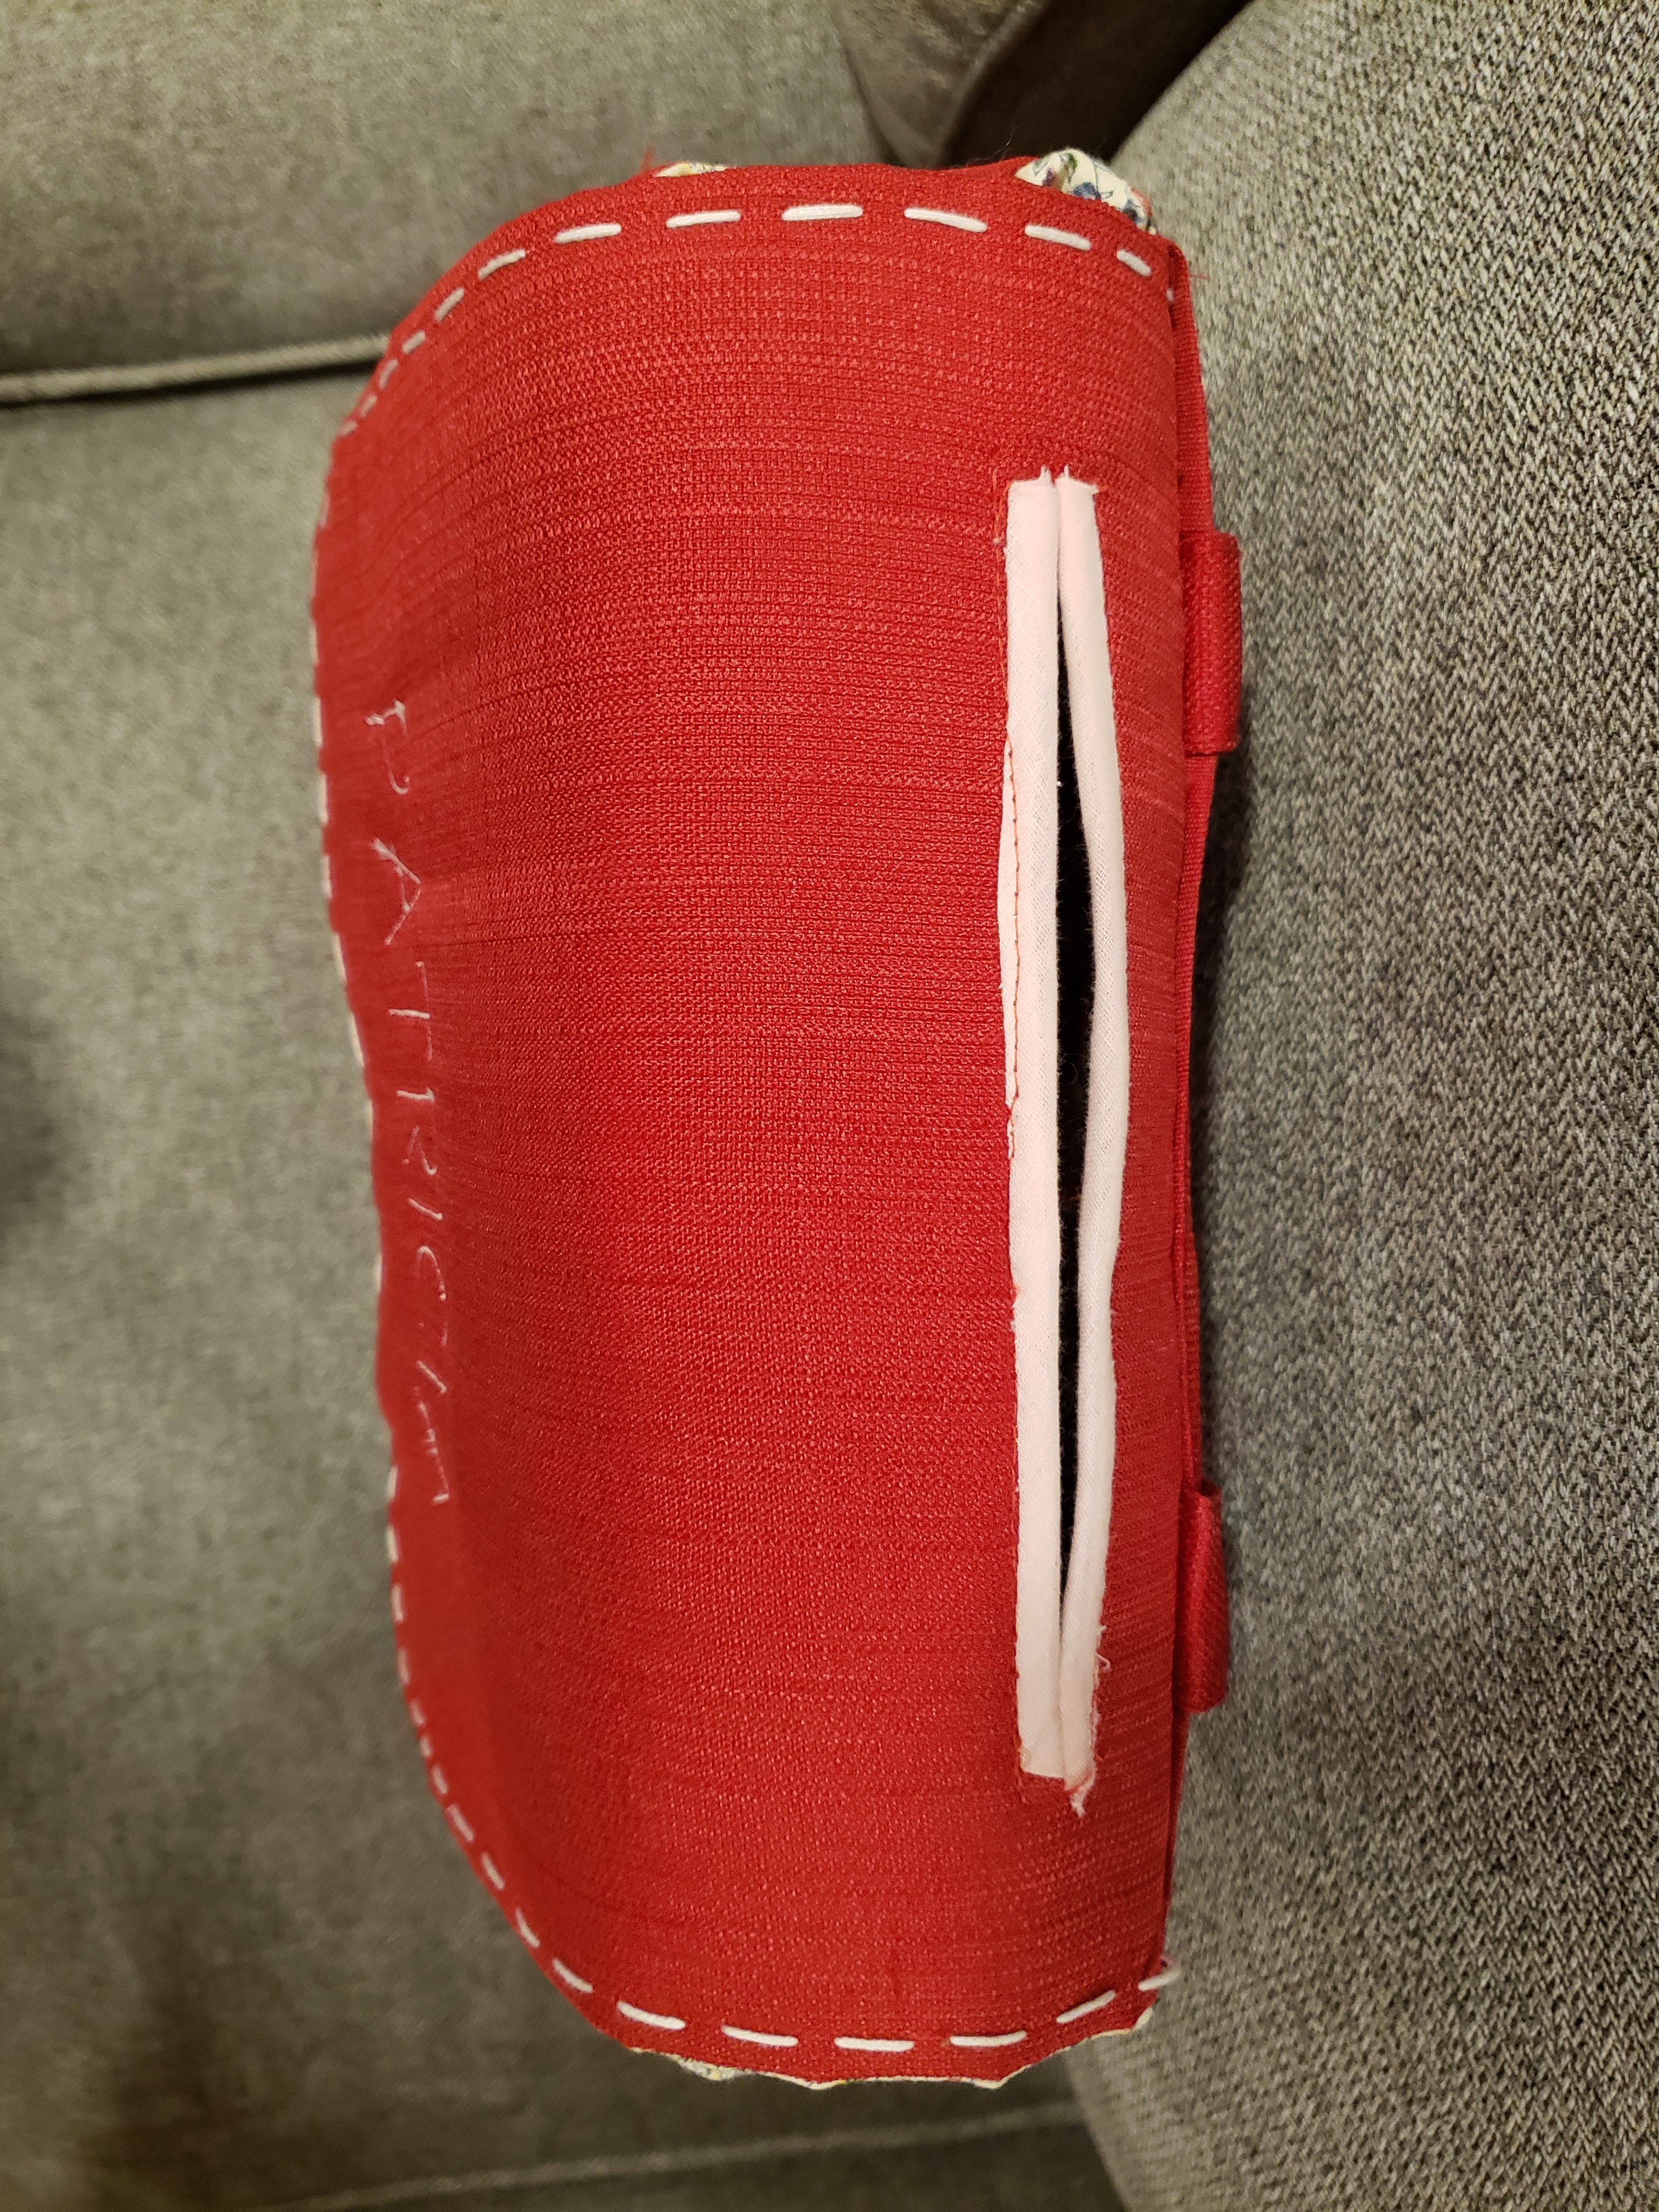
Slot for Valentine’s (top view)
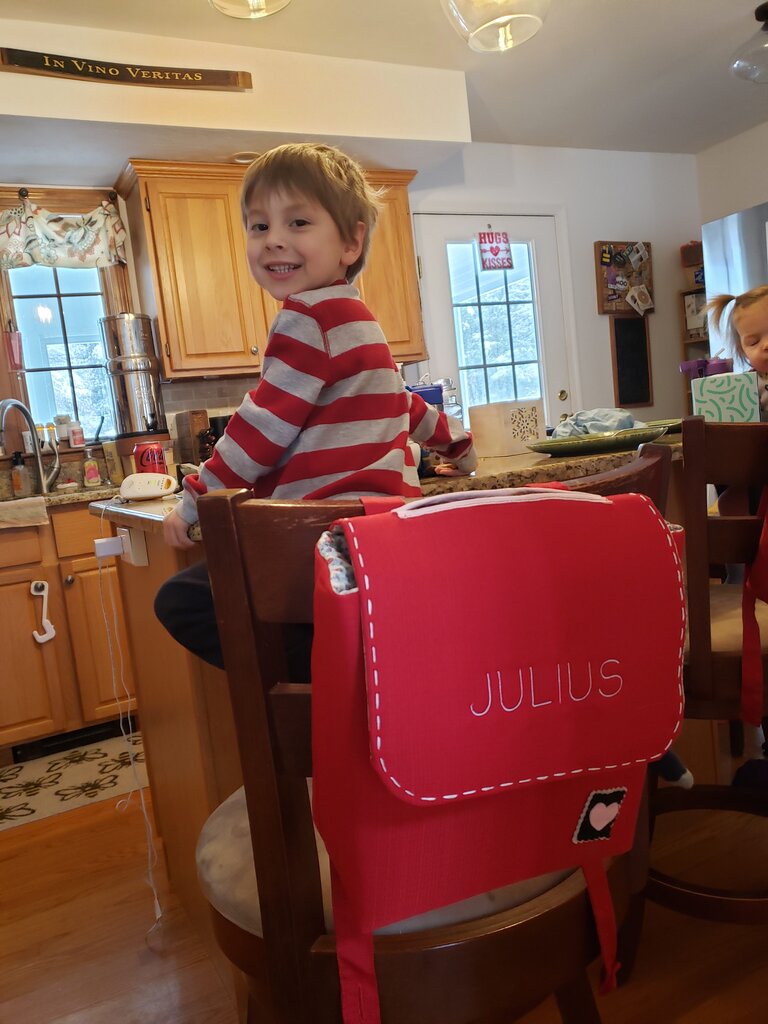
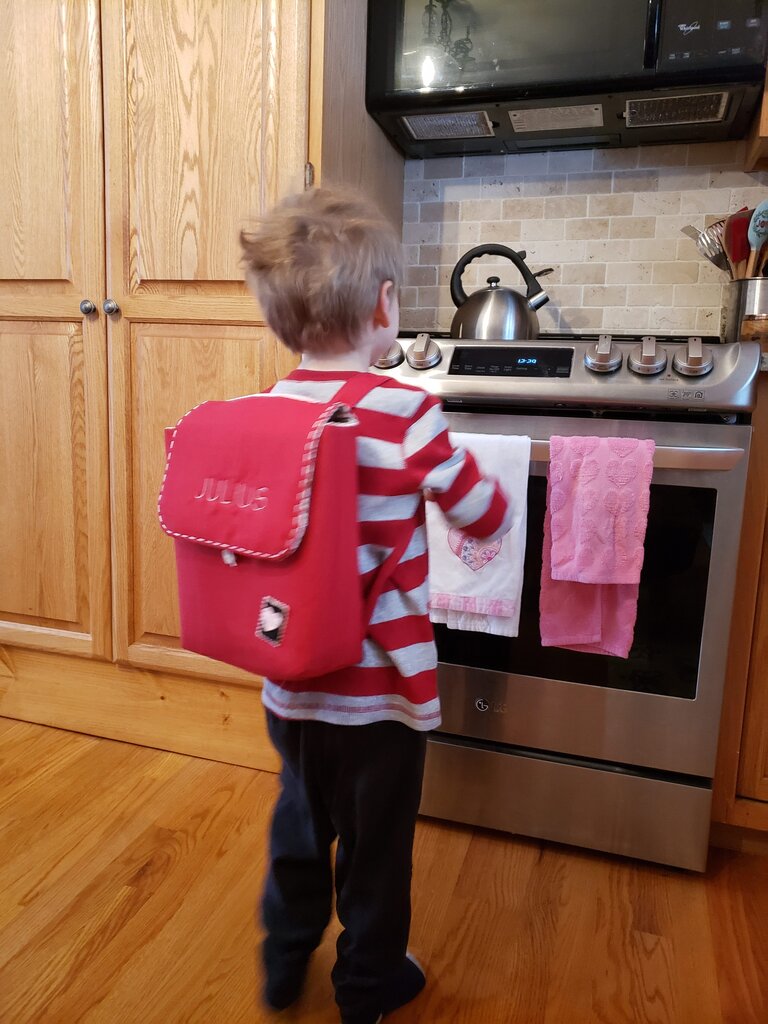
Julius and his backpack.

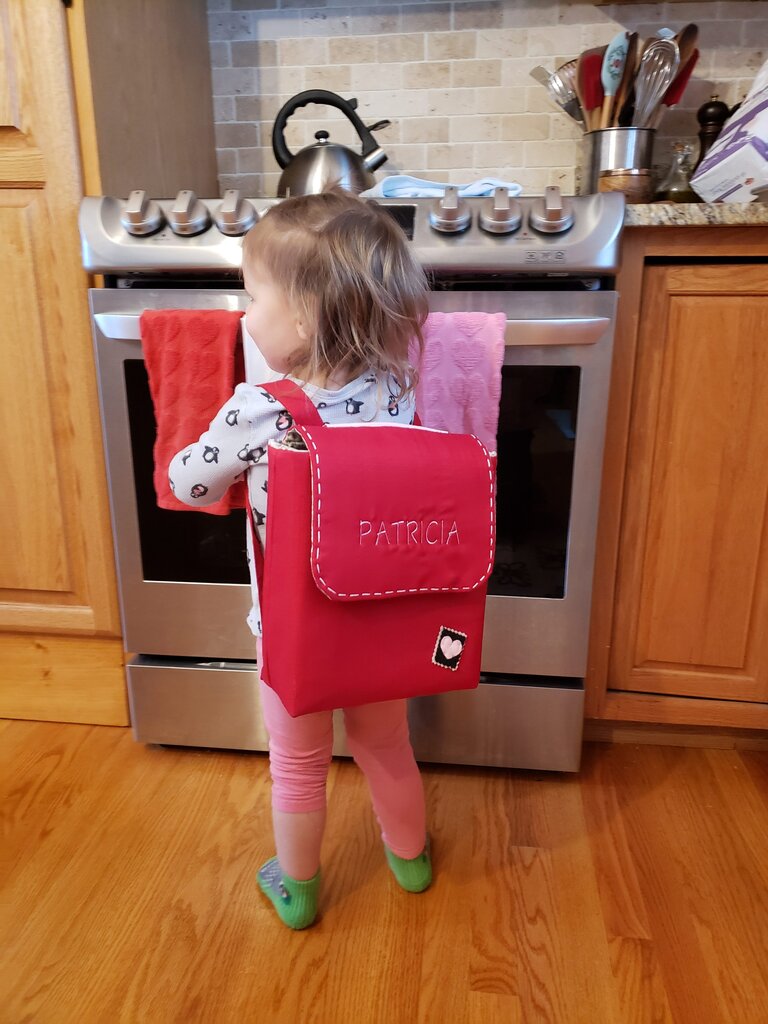
Patricia being a goose and her backpack.
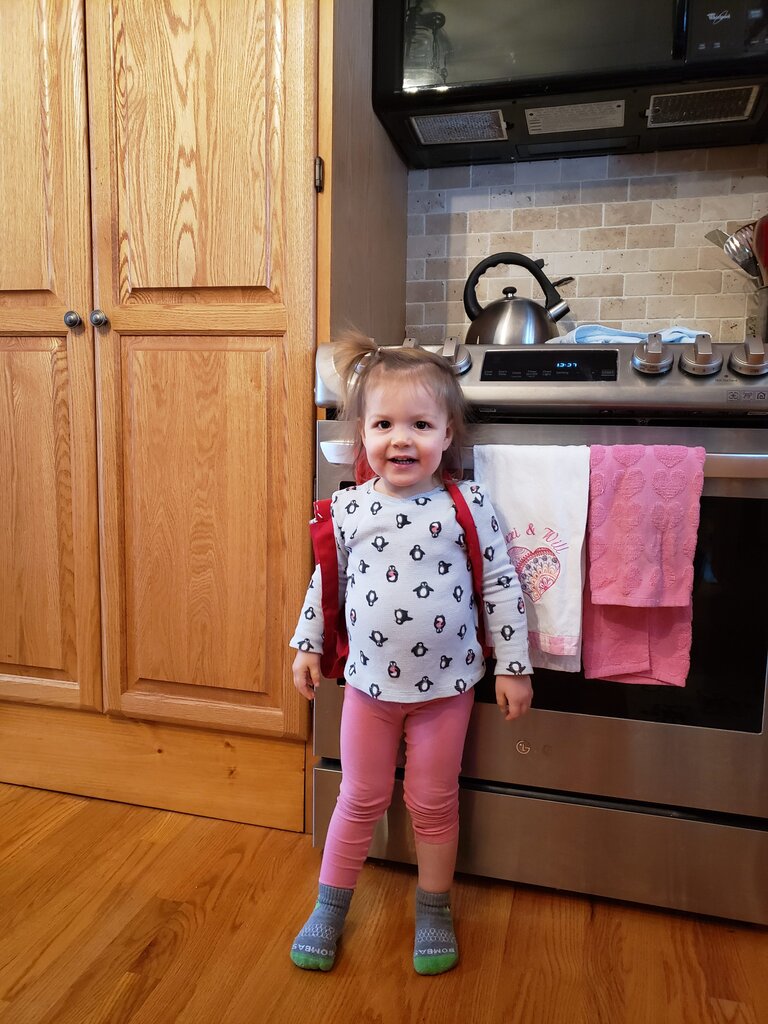
My child model
She wore this thing all over the house.
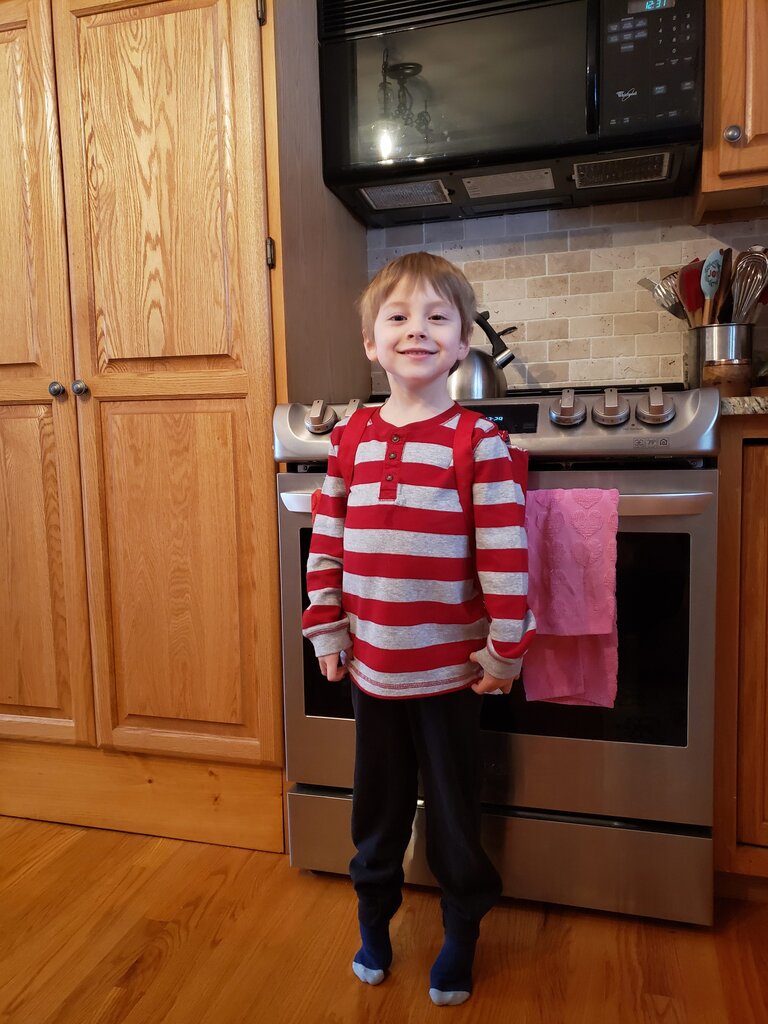
Child model #2
He also wore his all over the house.

Those are so cute!!!!!! And it’s sounds like such a sweet idea
Thanks Erin! They’ve been loving it.
I love the backlpacks for love notes. The kids look so cute
Thanks Mom! They definitely love them
These backpacks are adorable 🎒.. I like how you show your love for your family and friends by making super thoughtful gifts or by sharing your love of crafts.
<3<3<3 thanks best friend!