
Well just a reminder to check out the contest in my previous post if you’re looking for an activity for your kiddo! No one has entered yet so there are very good odds of winning! On another exciting note Julius tried skiing this weekend! He had to walk up many flights of stairs in his ski boots though and by the time he got to the slopes he declared he was too exhausted. He kept asking when we were going to go on the chair lift and take a break. So… we’ll have to work on that! I was so exhausted after teaching him for an hour that I didn’t ski the rest of the weekend… I might need to work on my stamina as well!
Right now I’m sitting in the basement while Julius plays with his brio trains. He loves these things. We got a TON of them from one of my co-workers and Julius has asked me all their names (many of them are characters from Thomas & Friends) and he makes them have conversations with one another. It’s really cute to listen to. Renews my faith in humanity type of cute.
Speaking of cute, a few days ago Julius and I got on the topic of “magic”. I’m not sure how. But we started naming things that were magical “Santa”, “unicorns” etc. Julius at one point said “popcorn” was magical. I asked why he thought that and his response was, “because it’s a bag, then it’s popcorn”. I had never considered the magic of popcorn! I did then destroy his interpretation of popcorn magic though by explaining how the bag turned into popcorn. Science really is magic. There’s probably a scientific explanation for Santa too but I won’t look for it.
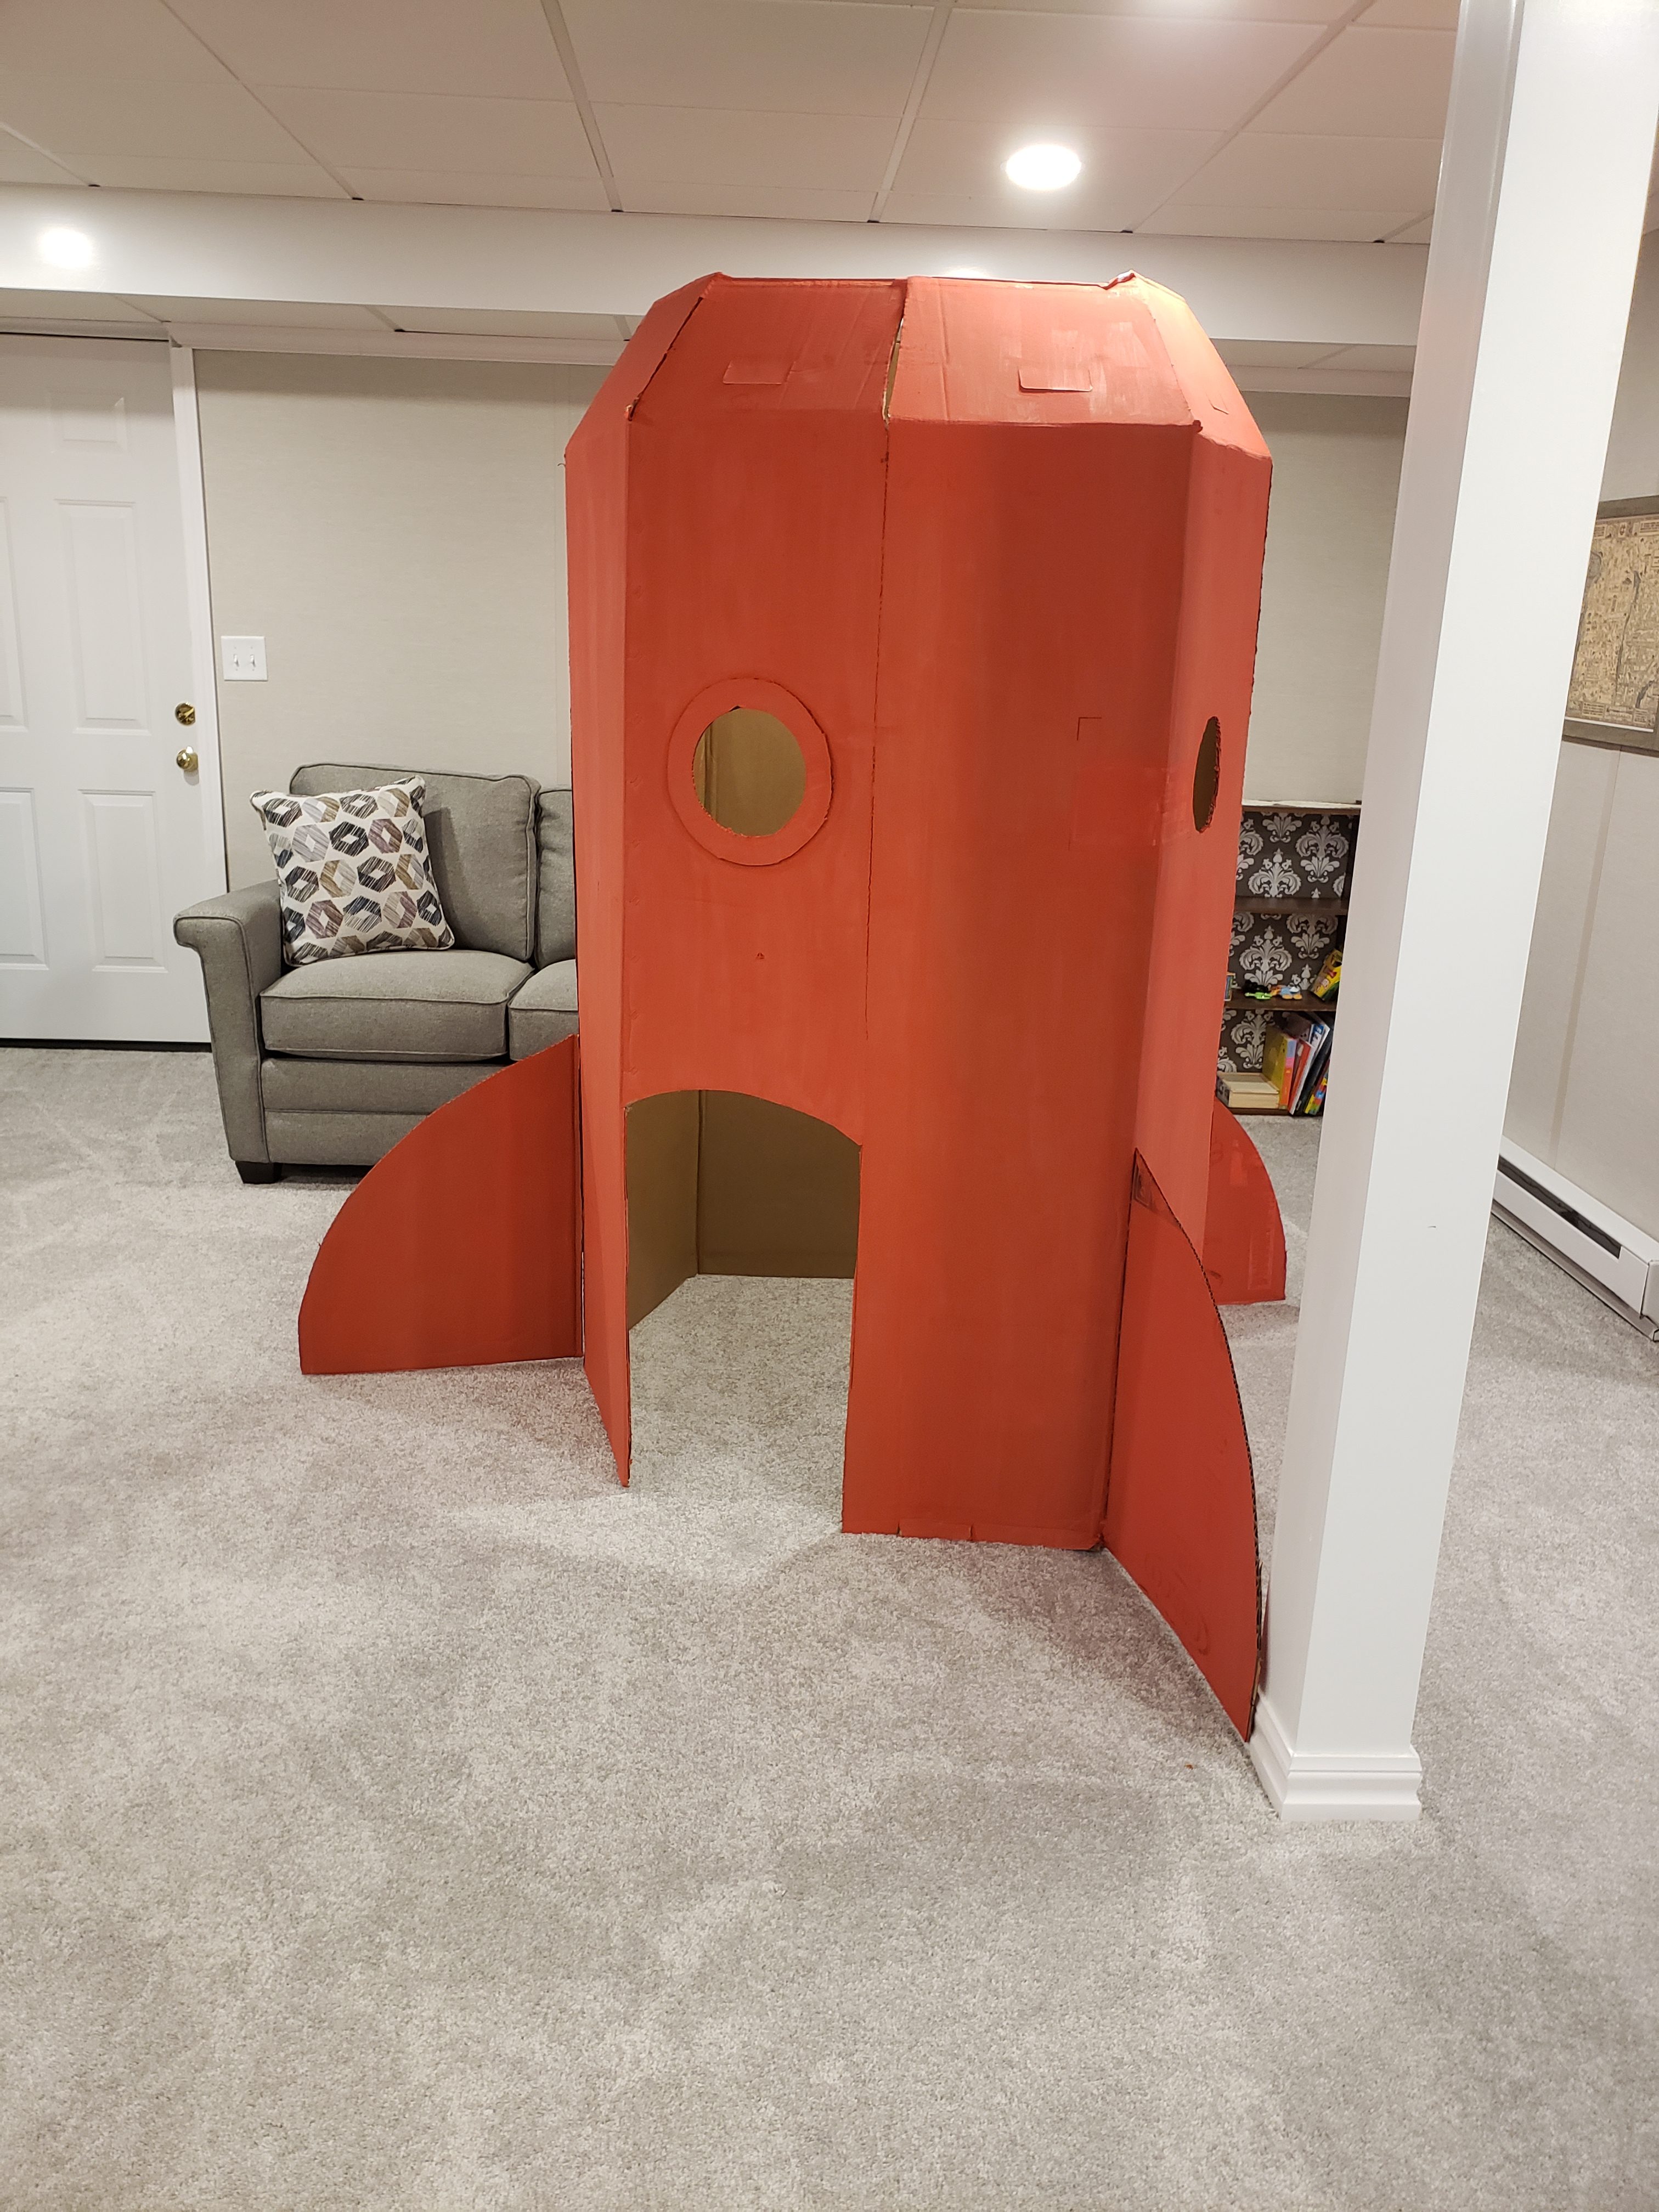
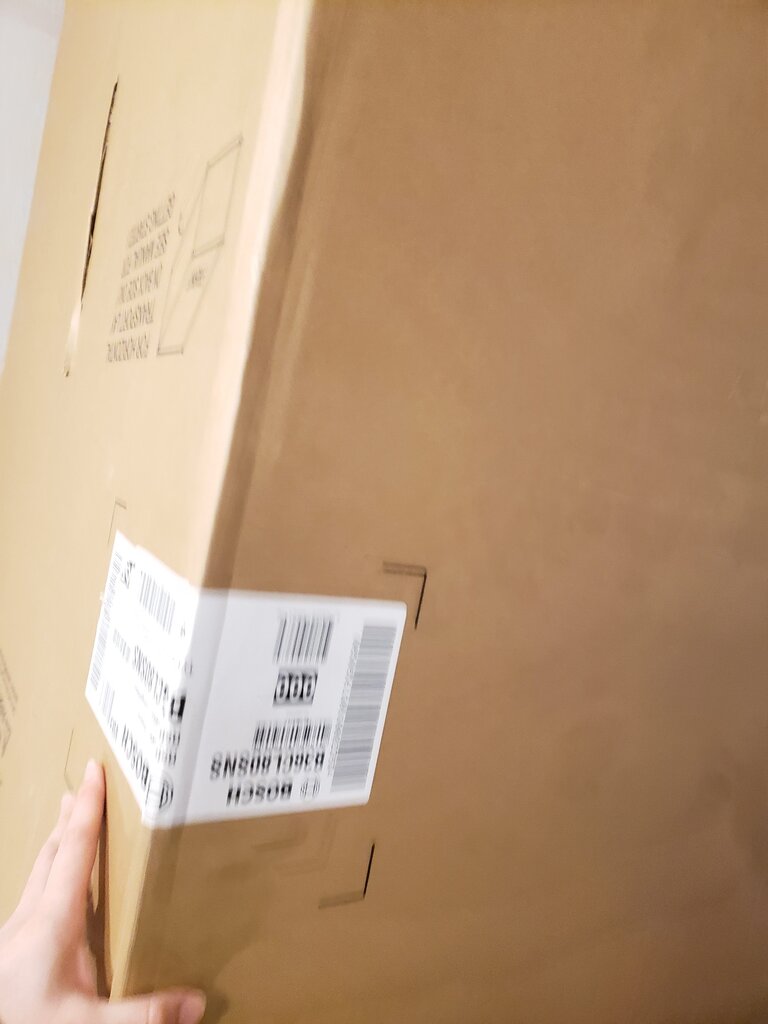
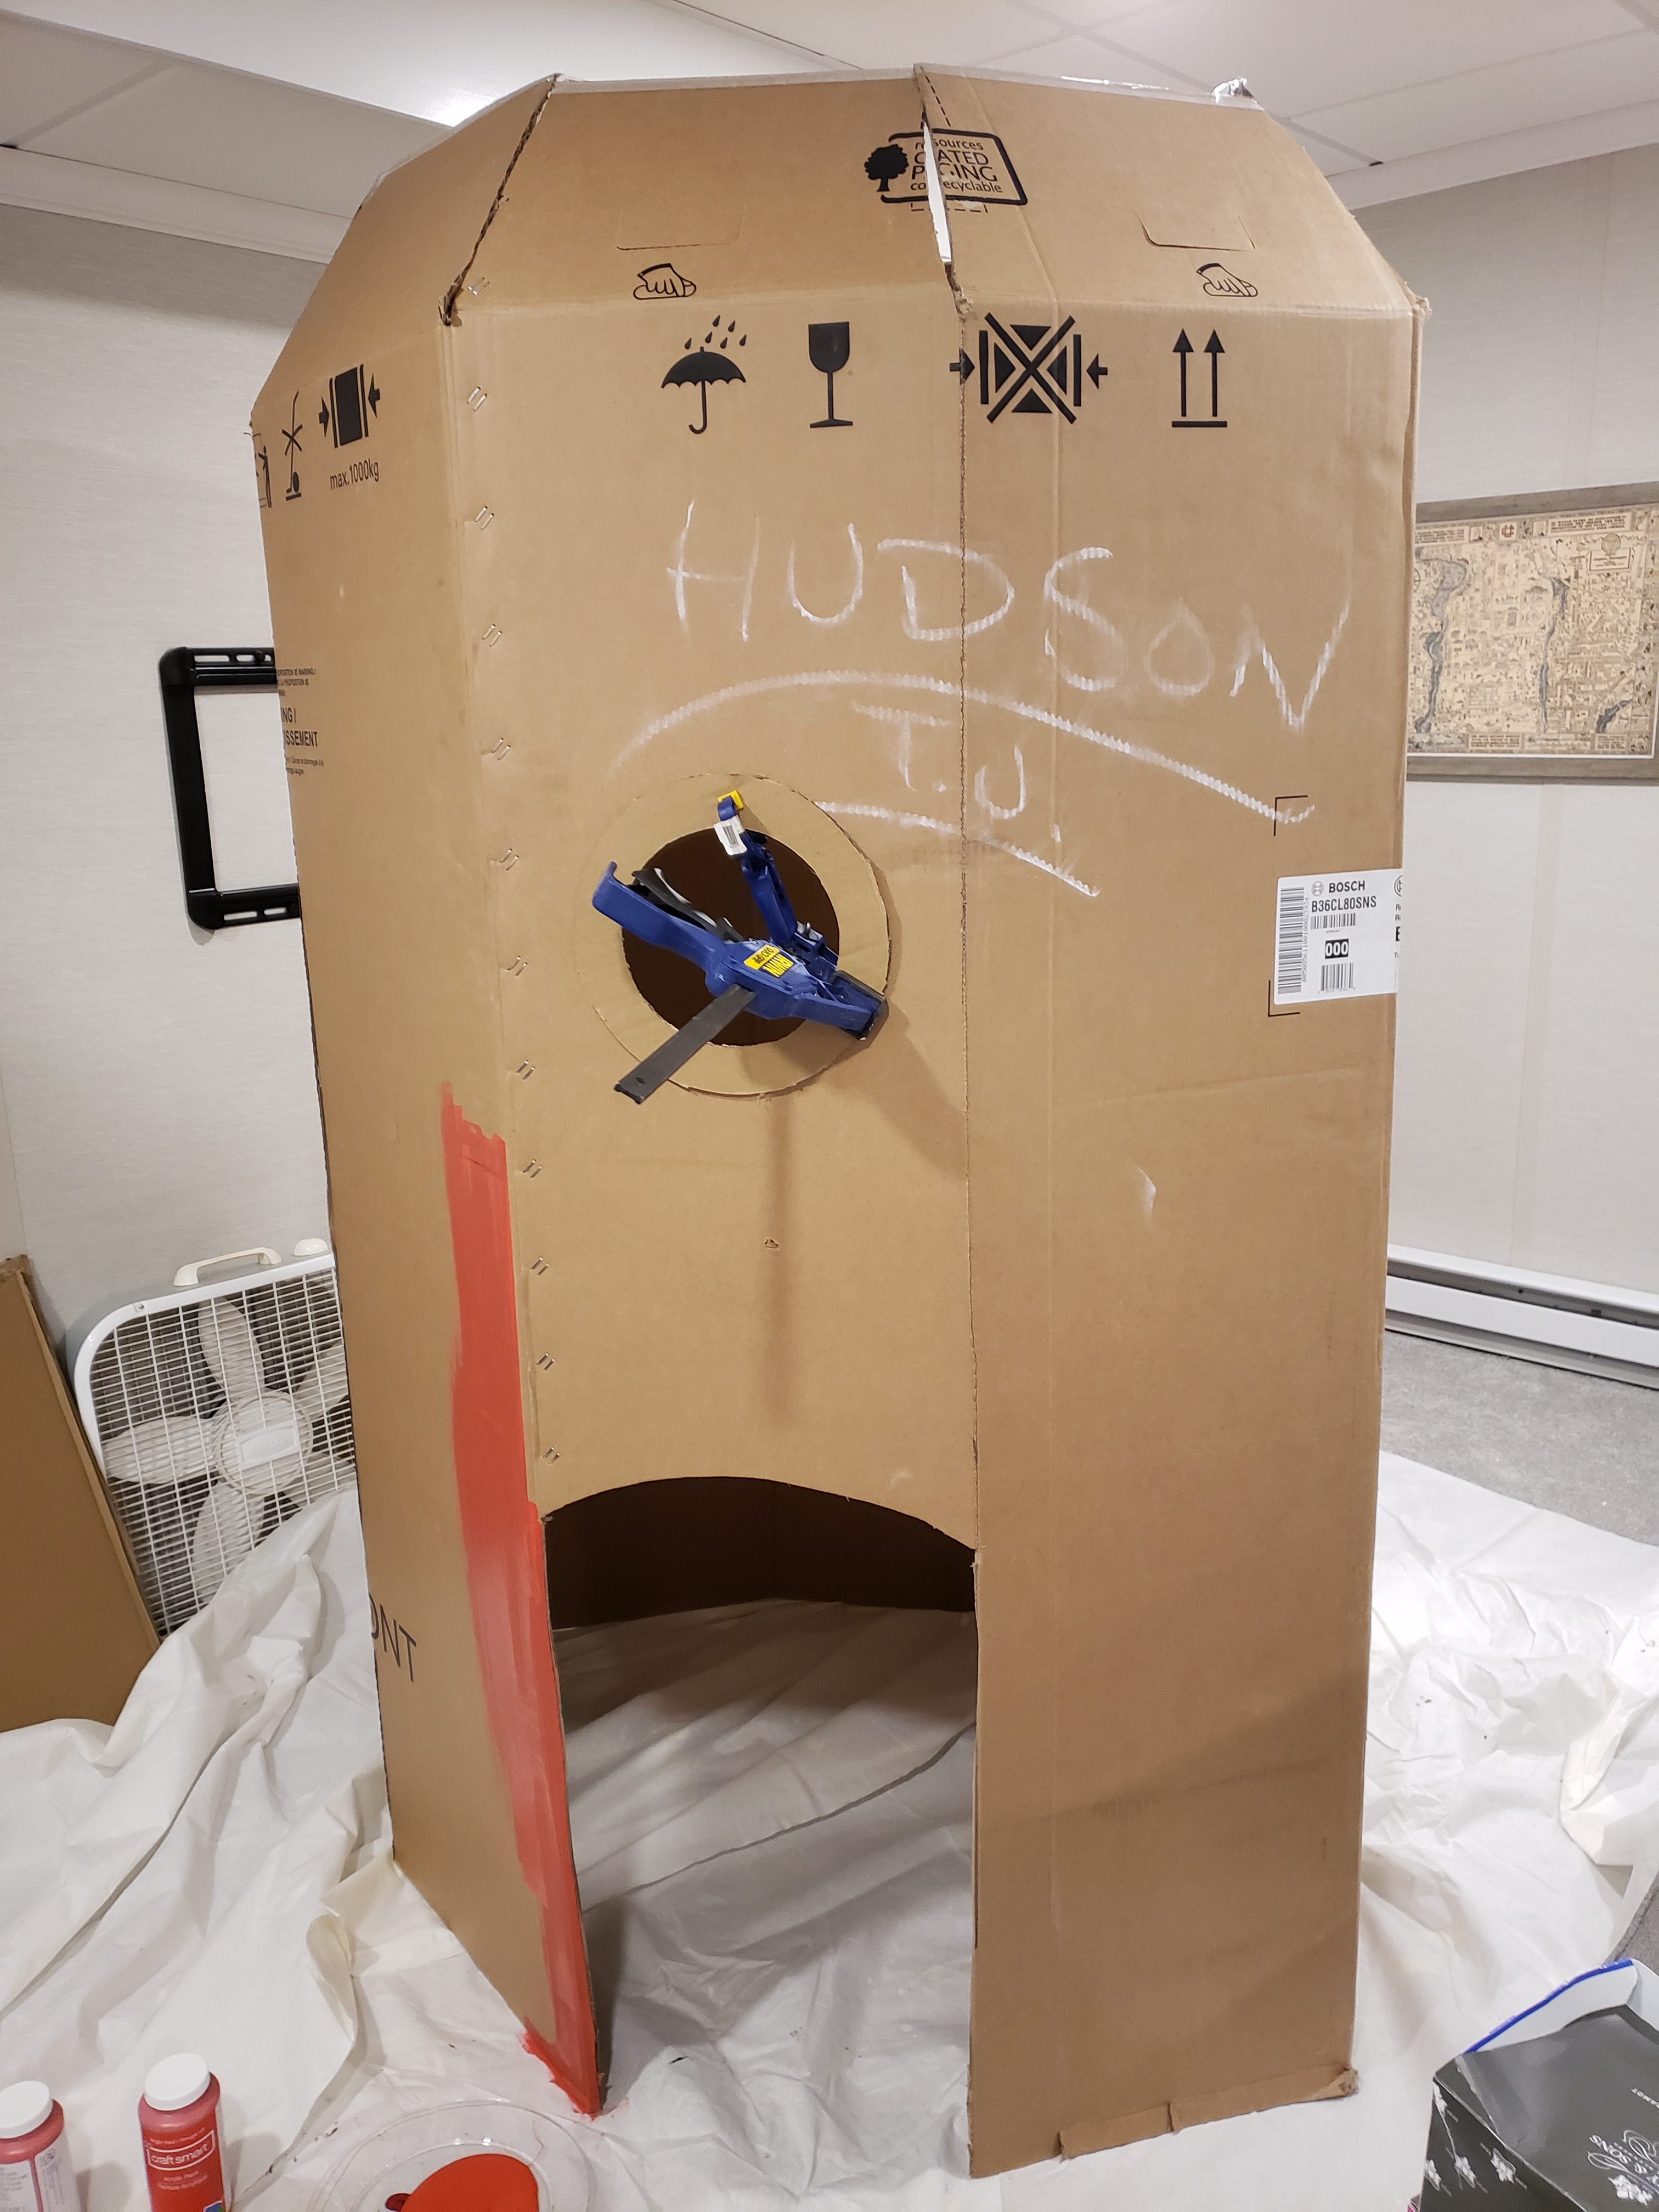
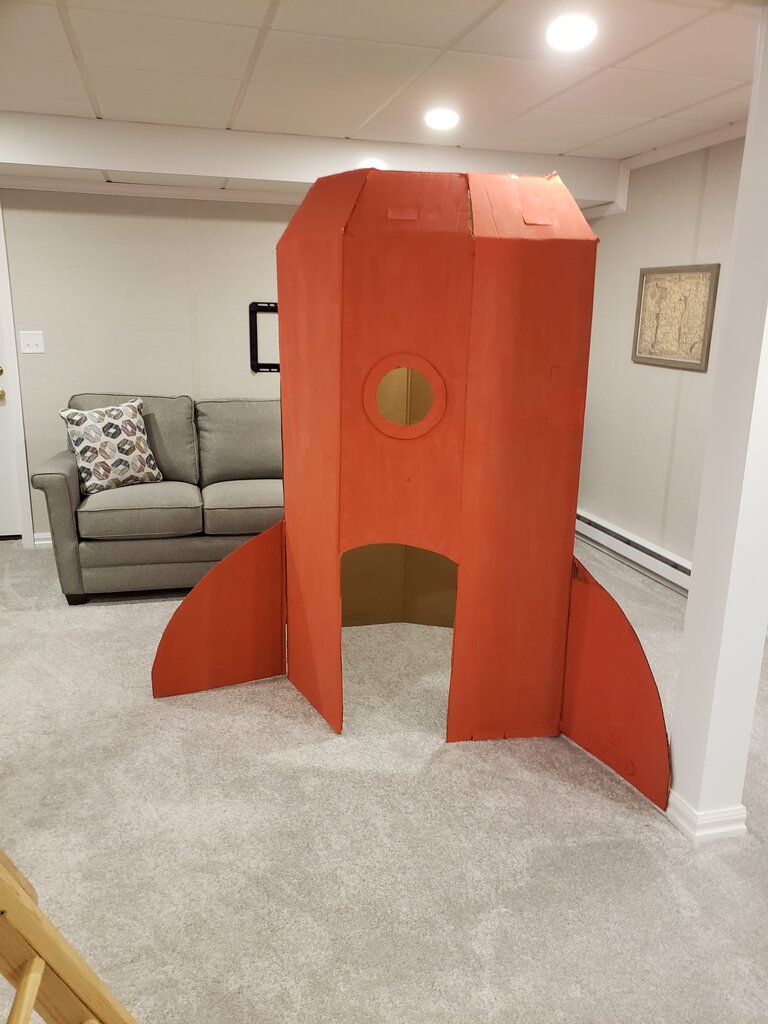
Well, since I’m getting ready to take down the rocket ship from Julius’ birthday, I thought this was the perfect time to finally give you an overview. I made the ship from a refrigerator box from our fridge saga. It only took me about a night to make, but the hardest part was getting the box into our basement… Talk about challenging! One other challenge – I thought using tempera paint would make the project recycleable… turns out our trash company won’t recycle painted cardboard even if it’s only been painted with water based paints. Something to consider for next time….
DIY Cardboard Rocket Ship
What you’ll need:
- 1 fridge box
- 1 other large box (mine was from a baby carriage)
- 1 bottle of red tempera paint (or color of your choice)
- box cutter
- packing tape
- wood glue
- markers (I use paint markers)
- optional – cabinet knob for steering wheel
- Make sure the top flaps on the box are opened up fully.
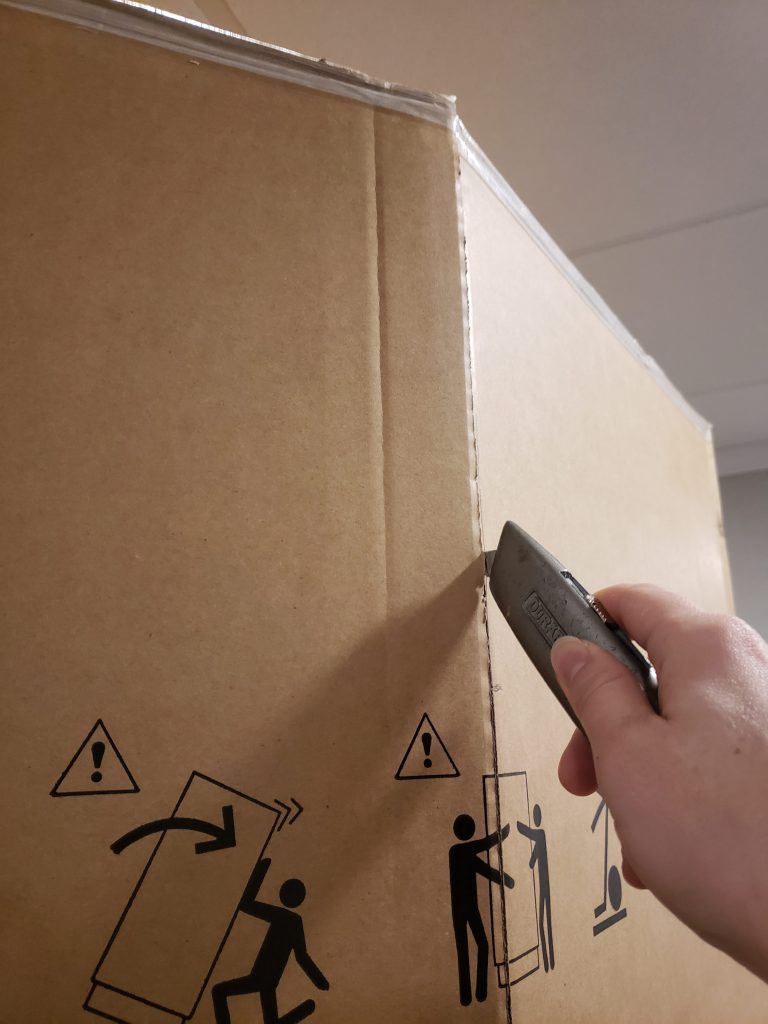
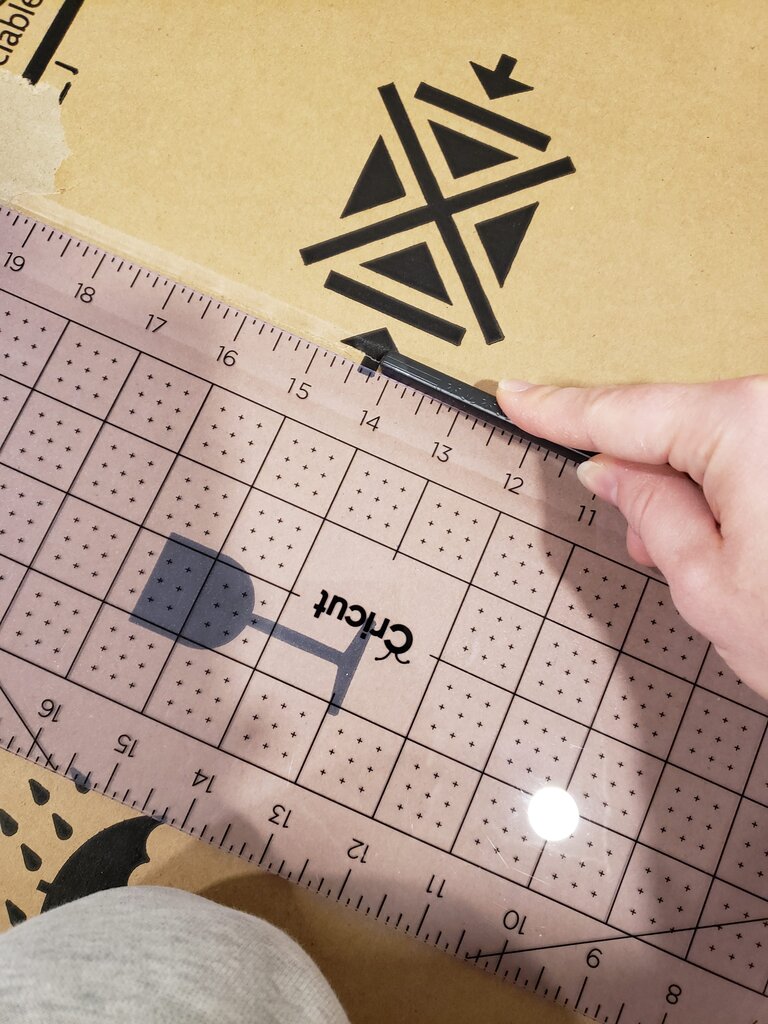
- Mark a vertical line down the center of each box face.
- Use a metal ruler and a blunt edge (I used the back end of a chop stick) to make a bend in the box face along the line you just drew.

- Open the box out and bend along the line you just made.

- Repeat step 3 and 4 for for all 4 faces, forming an octagonal prism shape (My box had slightly different widths for the sides, so my rocket wasn’t an equilateral octagonal prism)
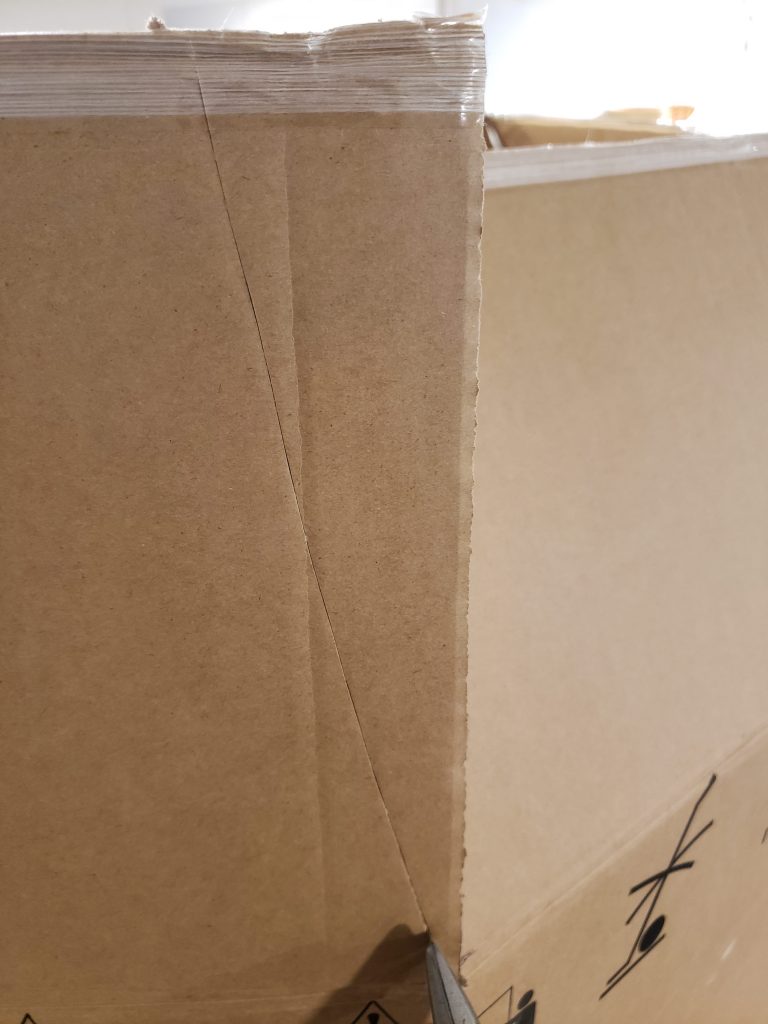
- Cut the box flaps down to the fold you just made, forming 8 flaps.
- Cut a small angle off the sides of each box flap to form a trapezoid.
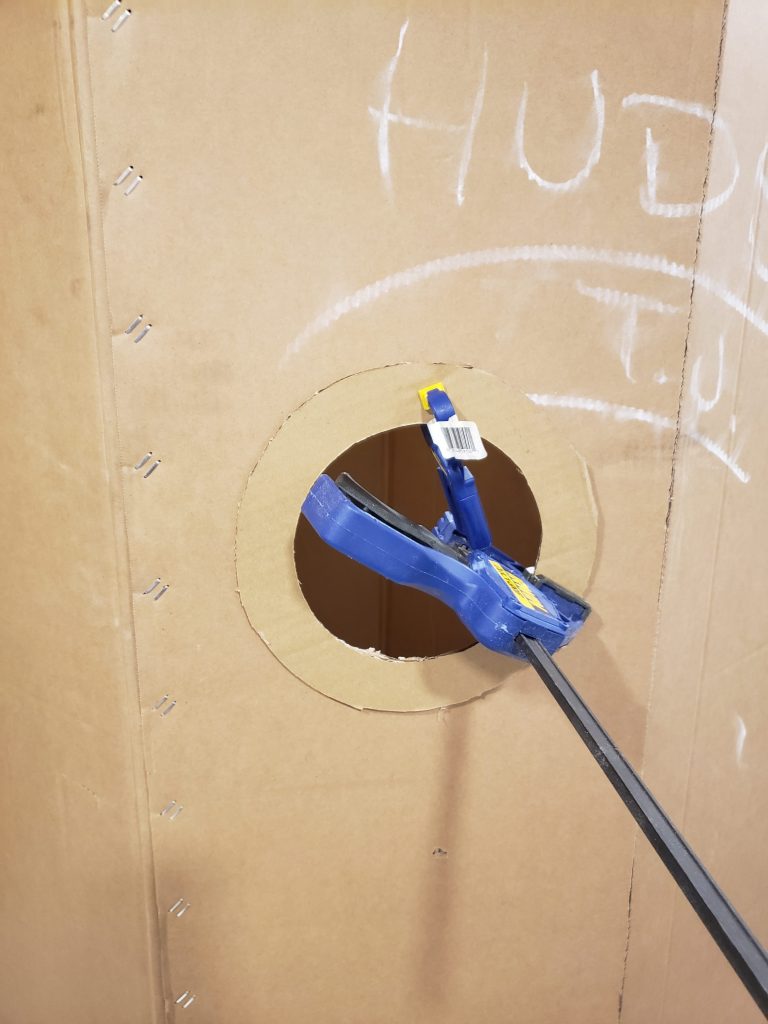
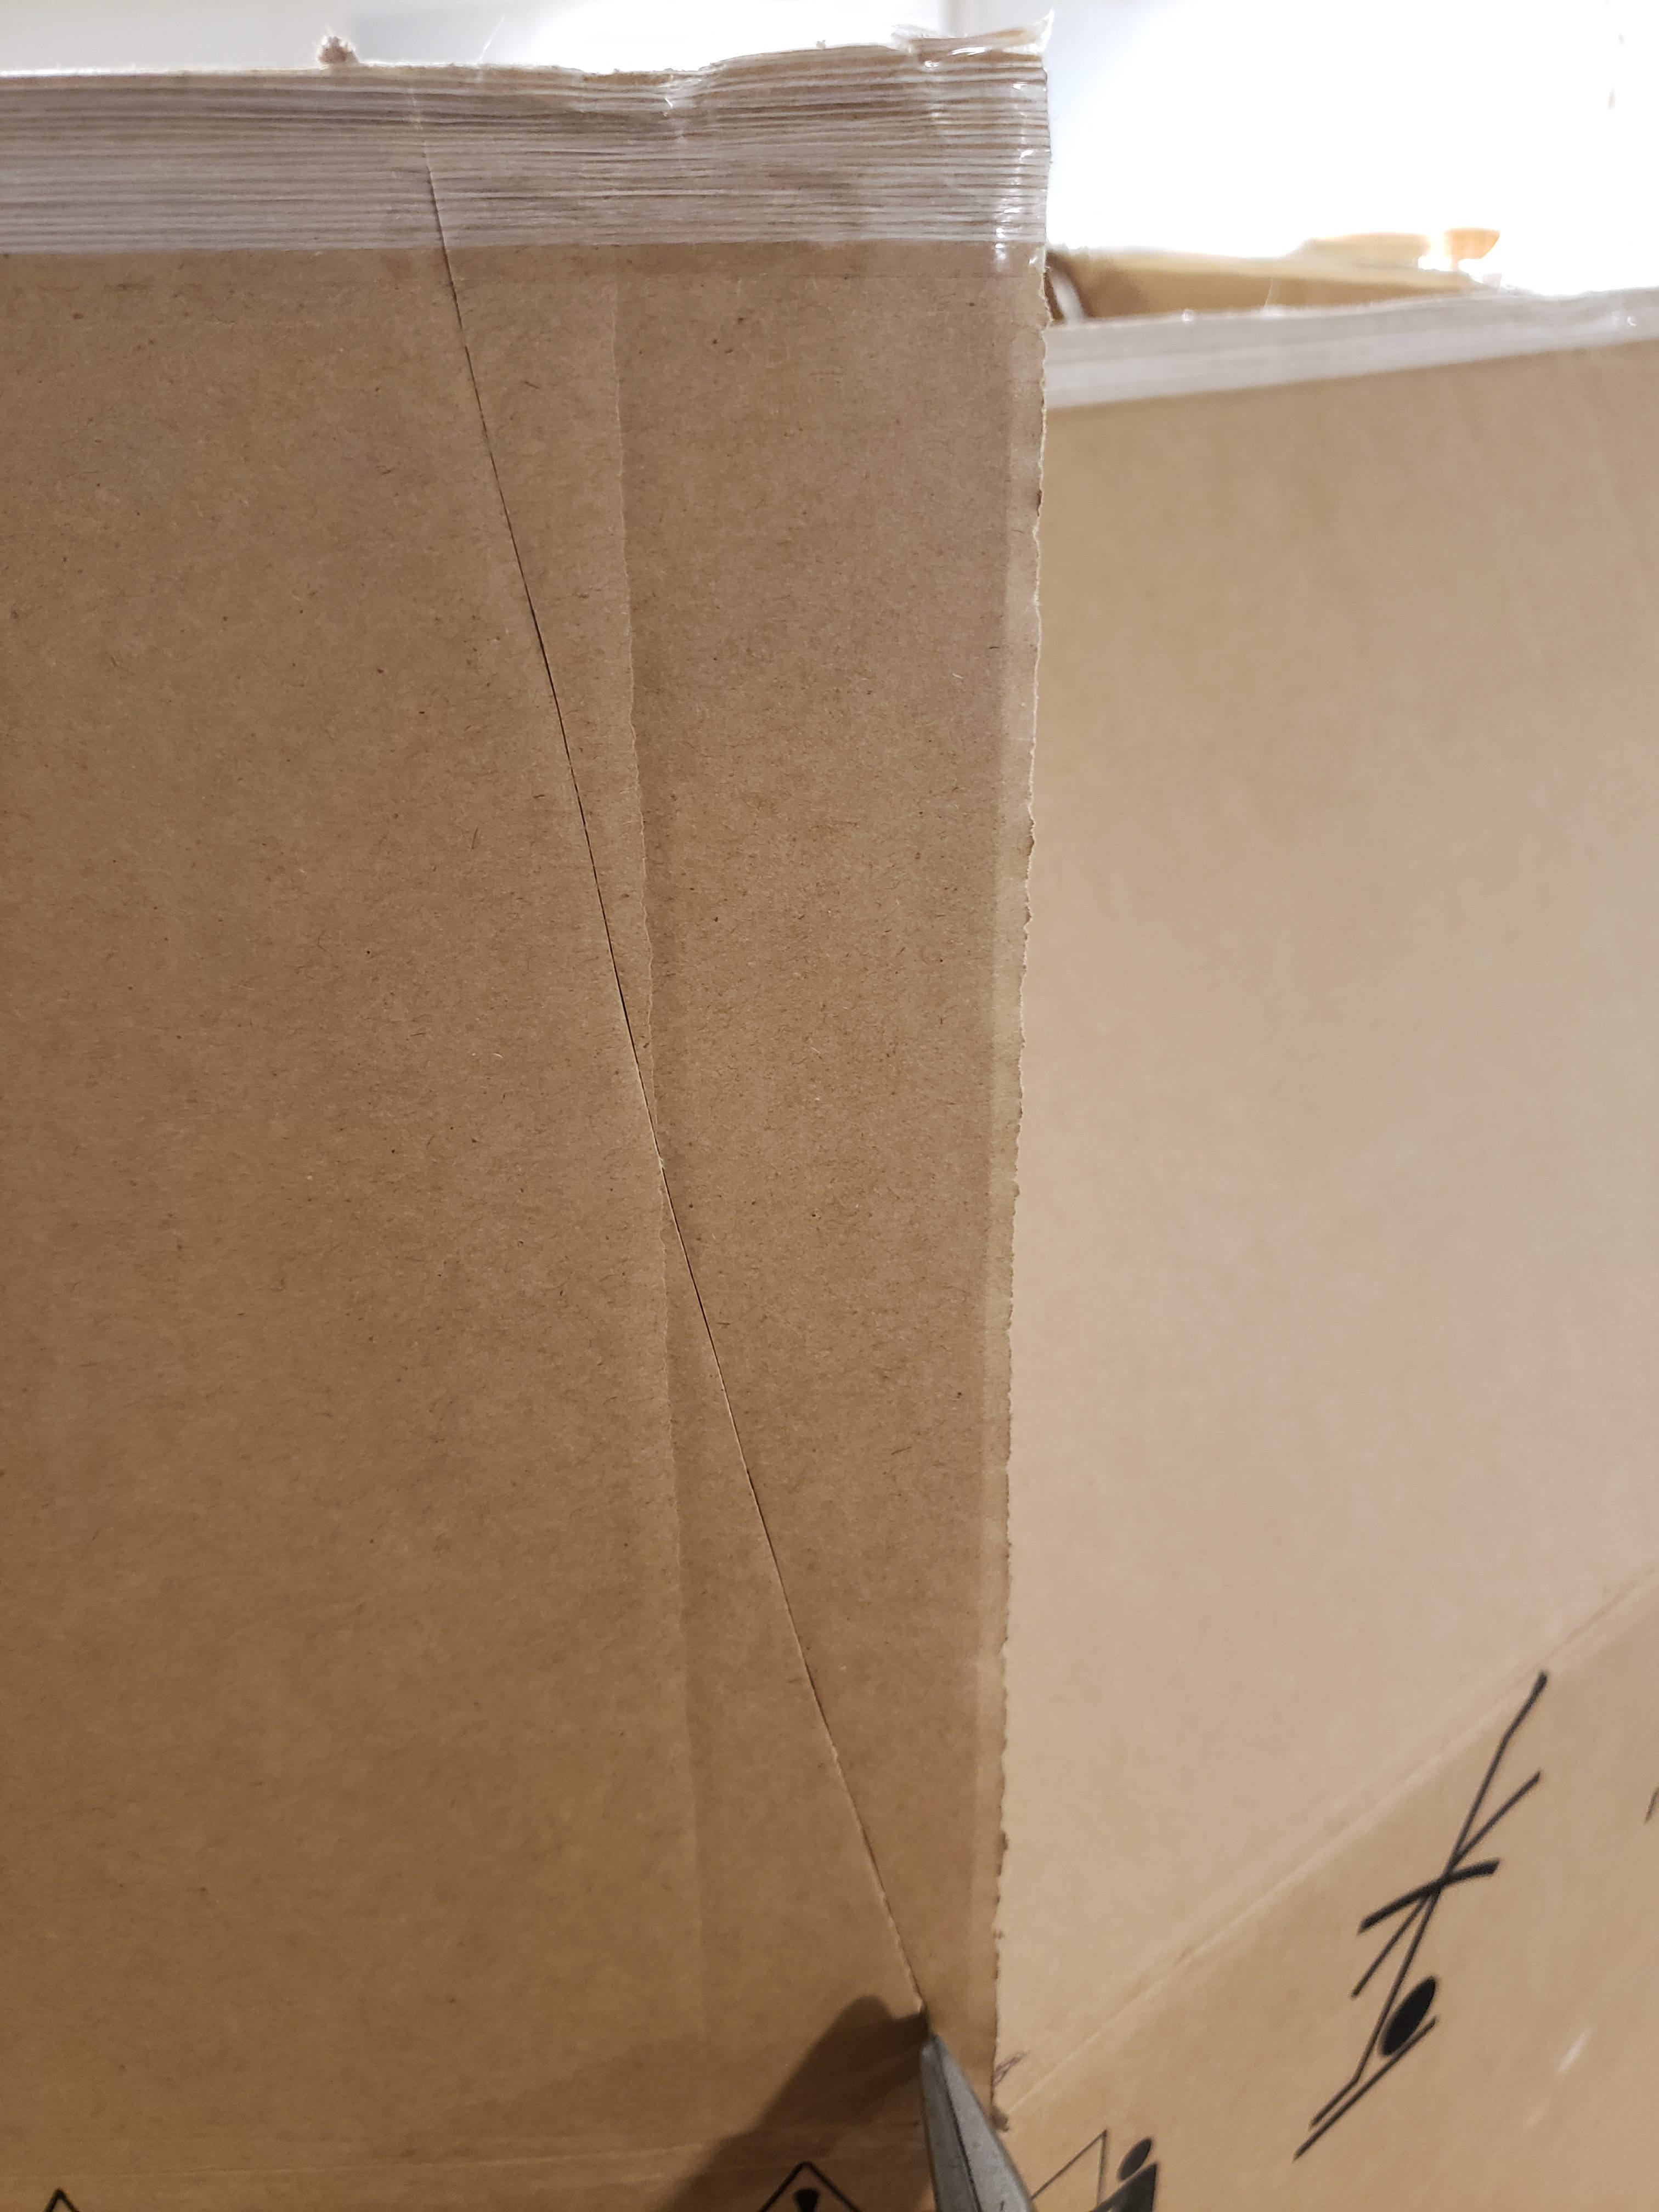
- Fold flaps in towards the center until they meet. Hold together with packing tape or wood glue to form the nose of the rocket. (There will still be hole in the center.) (The following picture shows the finished top.)

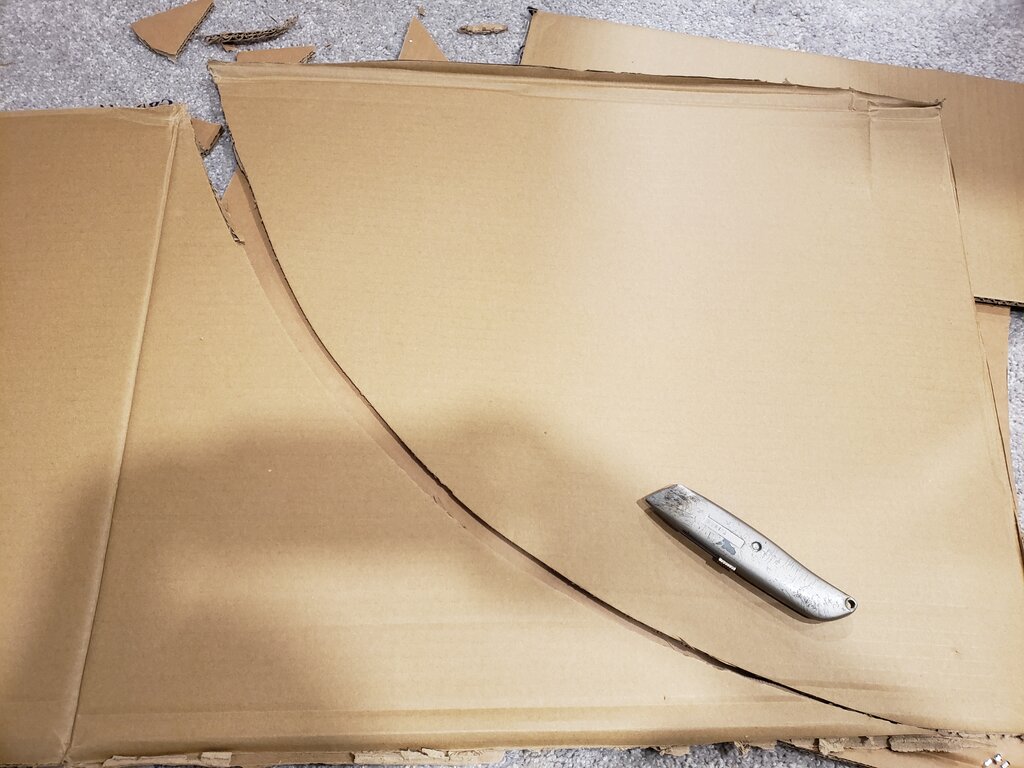
- Cut out fins of the rocket using the other large box. Simply cut off 4 box faces and form a curve from opposite points.

- Cut windows into the rocket ship and a door.
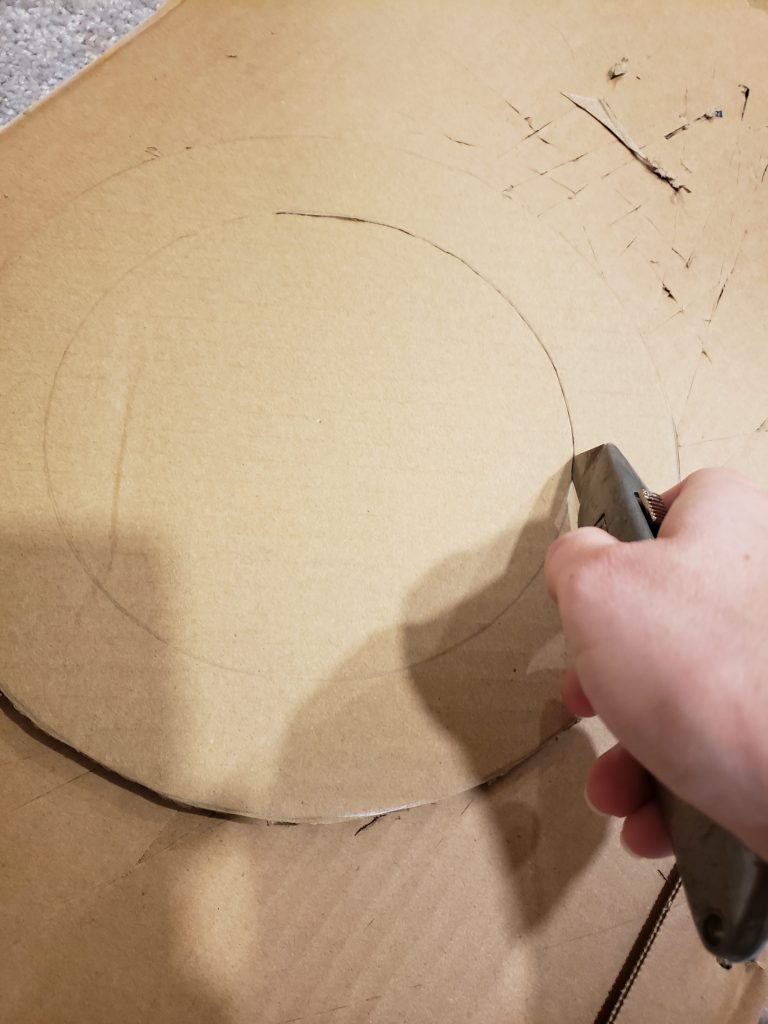
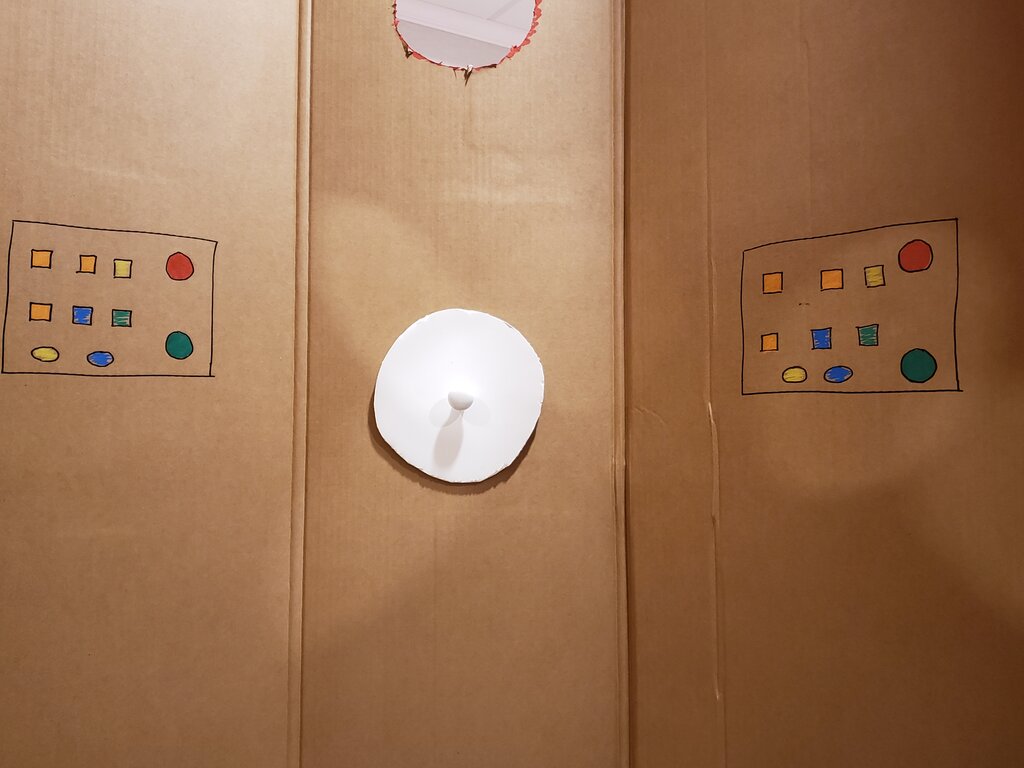
- Make a window frame (or window frames) by drawing two concentric circles on scrap cardboard from the box used to make the fins, then cutting them and removing the center circle. I then glued them over the holes I cut for windows using wood glue.
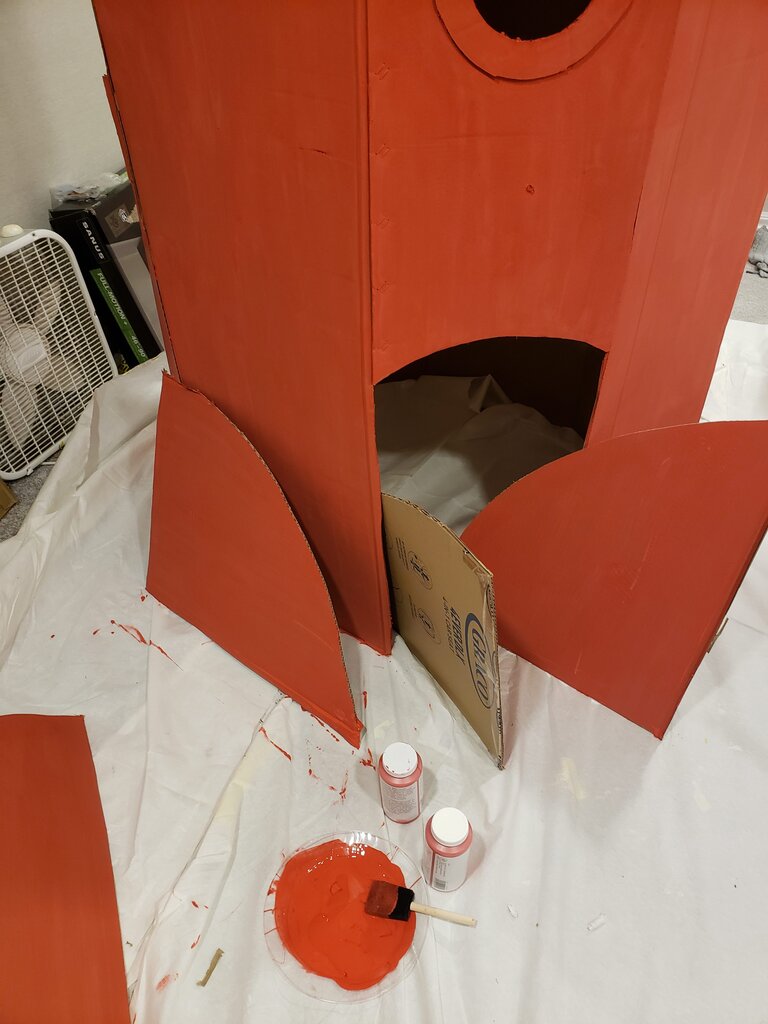
- Paint the entire rocket outside and fins (both sides).

- Tape or glue the fins to the sides of the rocket, equidistant from one another.

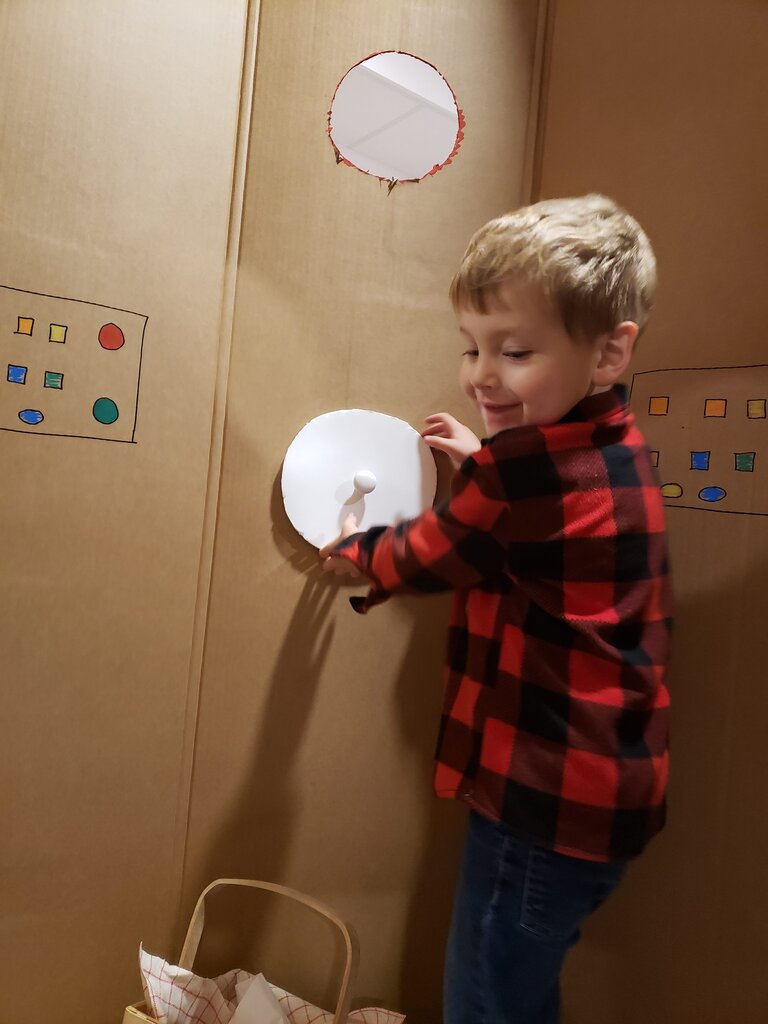
- Inside the rocket draw assorted control panel looking buttons.
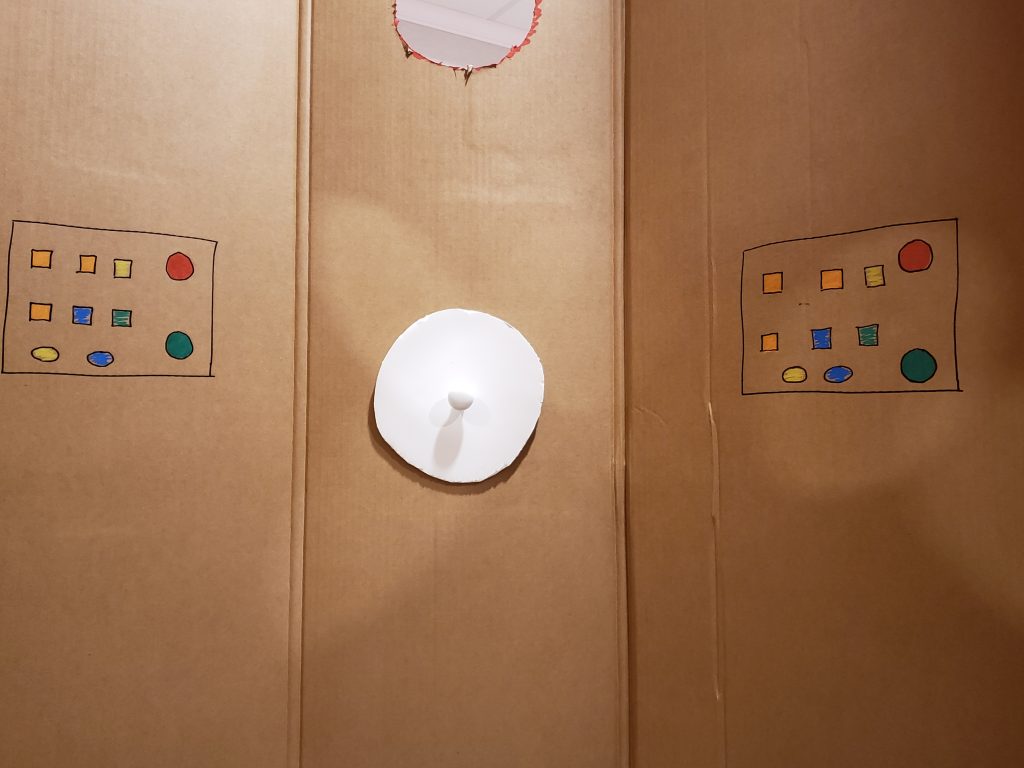
- Cut out a steering wheel from scrap cardboard. Poke a hole through the steering wheel and through the back of the rocket ship. Use a cabinet knob through the steering wheel to hold in place (make sure you use a large washer on the back side of the rocket to prevent the screw from pulling through the rocket. (I couldn’t find any washers and in a rush I used a random piece of some other project).
- Fly to the moon for a picnic.


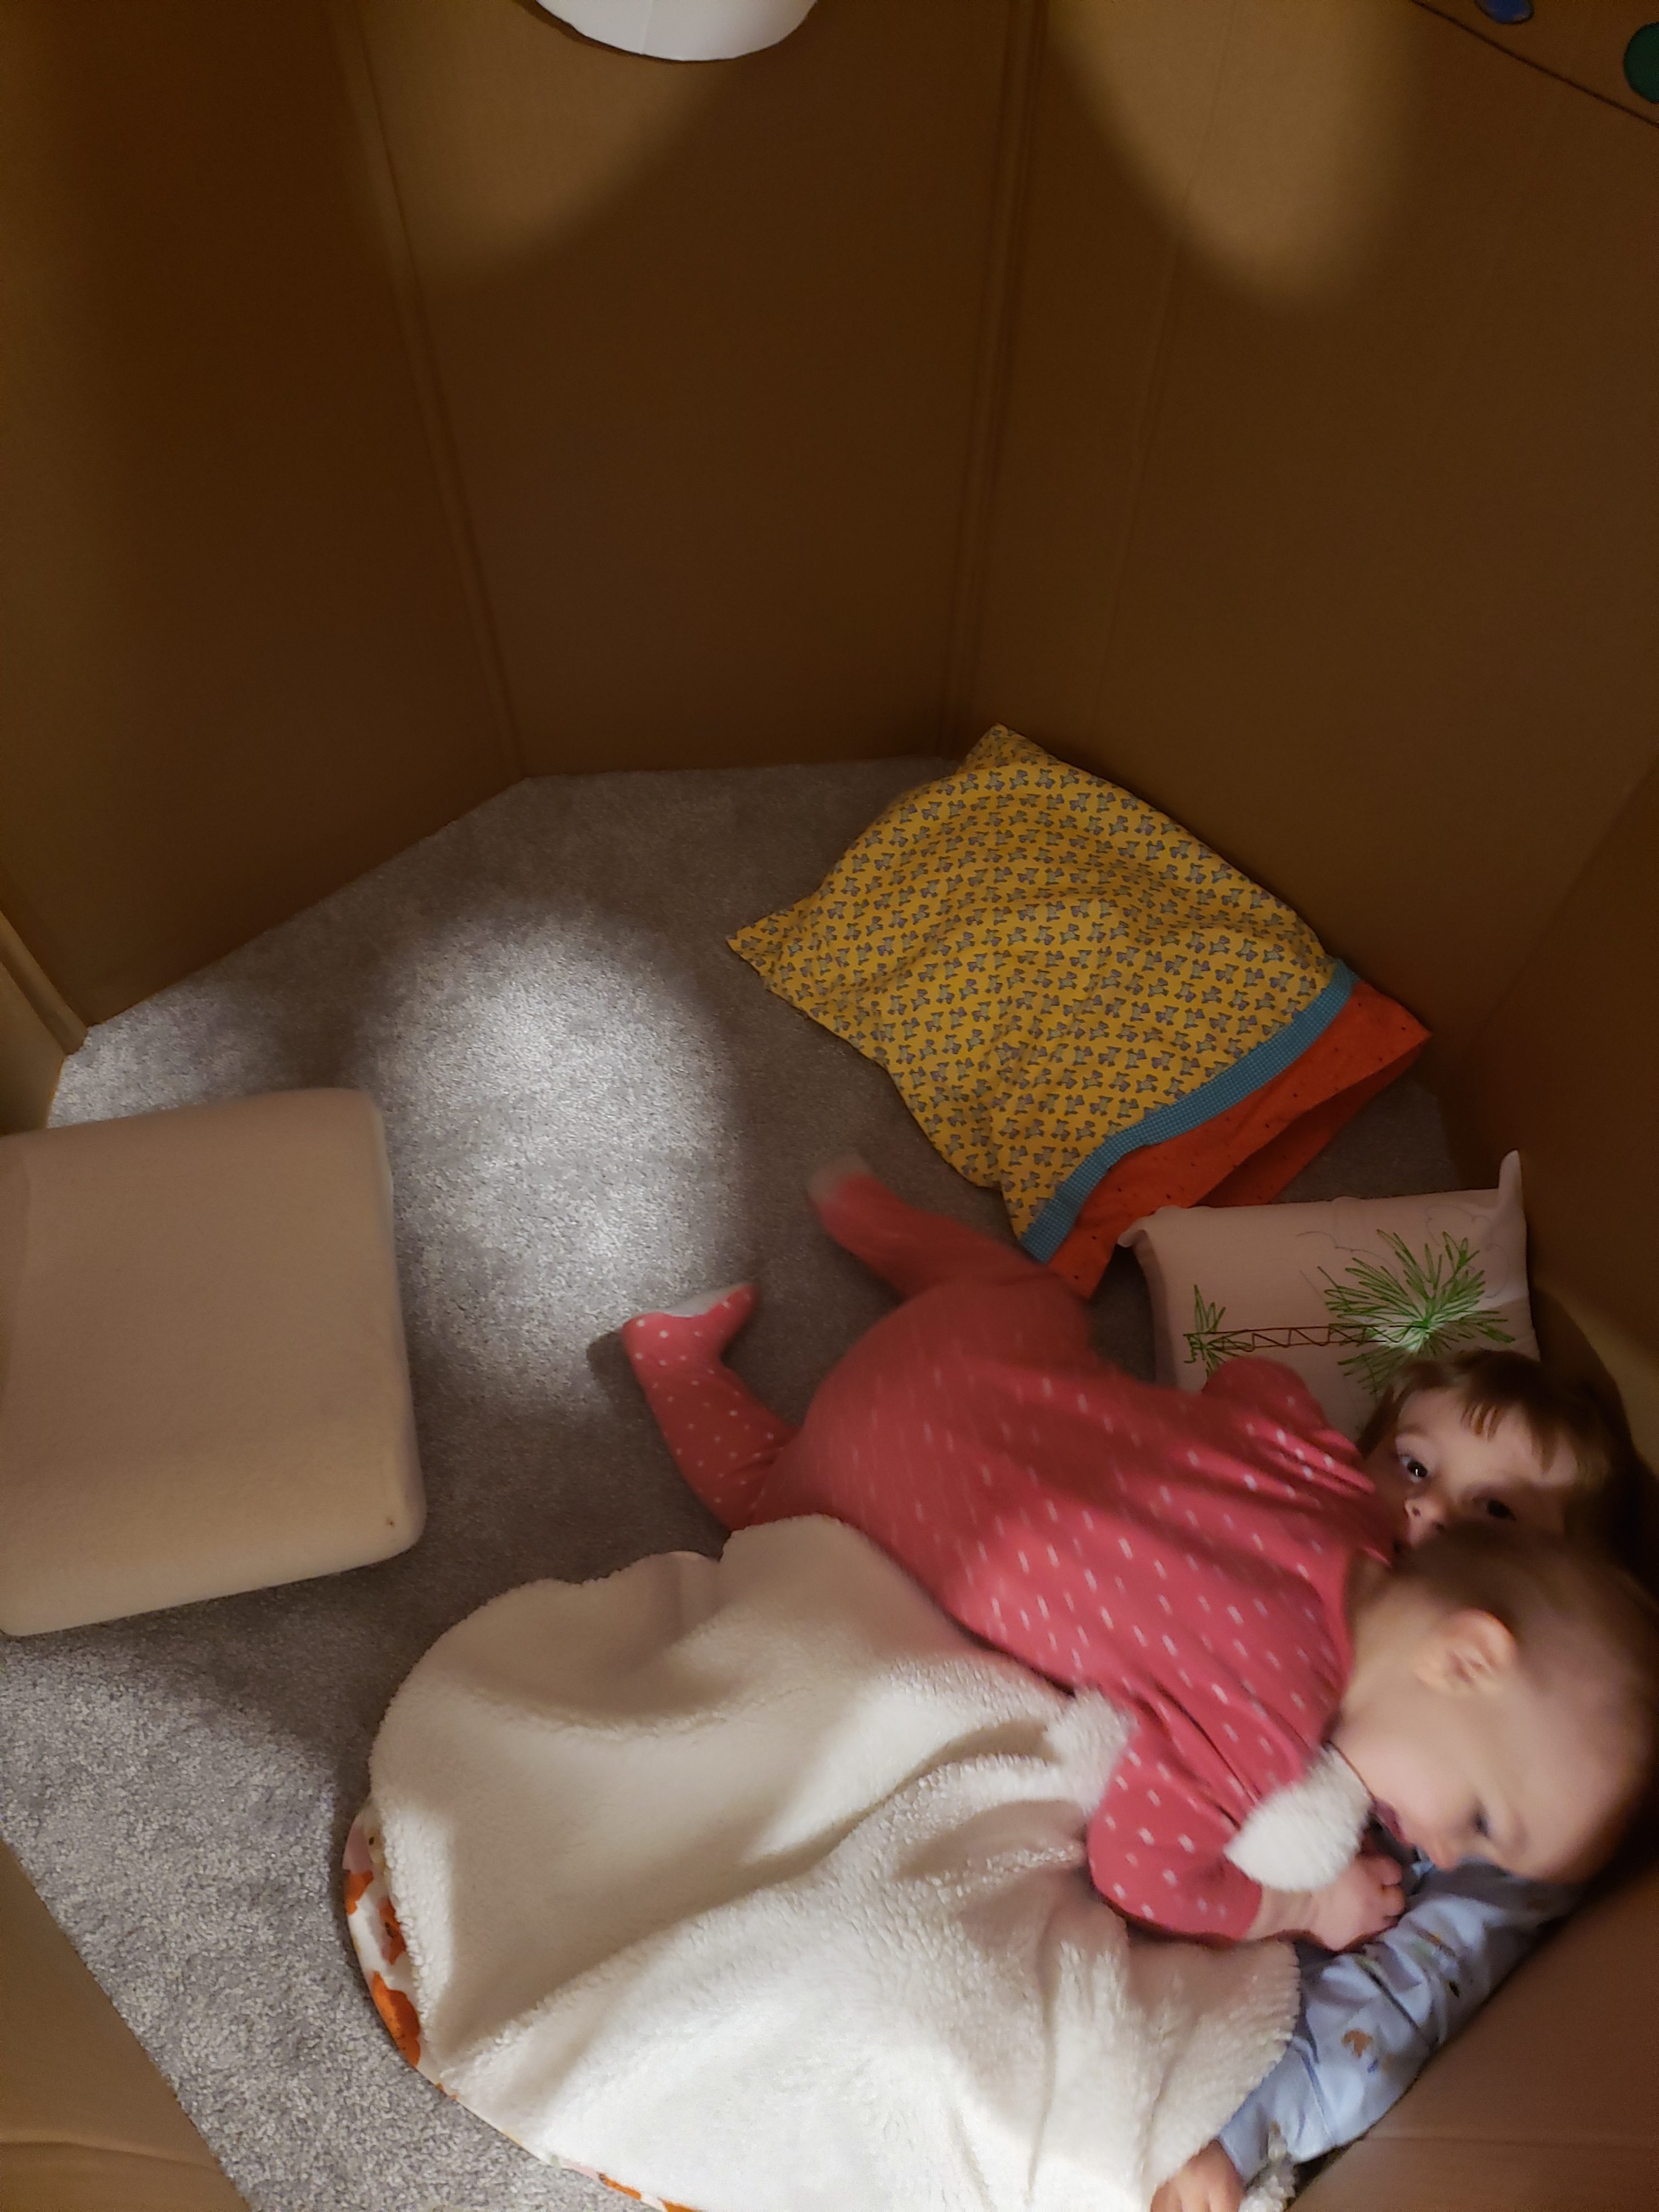
Snuggles in the rocket


Popcorn is definitely magic and you cannot convince me otherwise!
Wow, I wish I had read this before I recycled the giant cardboard box our bathtub came in. This looks very cool!