
I hope all my (American) readers had a fabulous Thanksgiving! This time my siblings and their families all came to visit us! It was awesome! Everyone has gone home now which is sad, but I’m hopeful we’ll get to see everyone again soon. Julius and Patricia both had a great time with their cousins. It was so cute watching the little guys all play together.
Have I mentioned recently that I love the little guys? Patricia has turned into quite the Chatty Cathy – she still doesn’t say any real recognizable words consistently yet, but she talks like we understand her… oh and she started nodding her head for “yes” this week. (She’s been shaking her head “no” for a while now.) It is really cute. Julius got a set of “Bob Books” for his birthday and has started learning to read. He has gotten very good at recognizing his name and writing it, and just today wrote Patricia as well. Also he earned some serious brownie points at Thanksgiving. We all went around the table saying what we were thankful for, and Julius was a bit bewildered and didn’t have an answer, so we skipped him and returned to him at the end and he said “I’m thankful for my mama”. Pretty much the cutest thing ever.
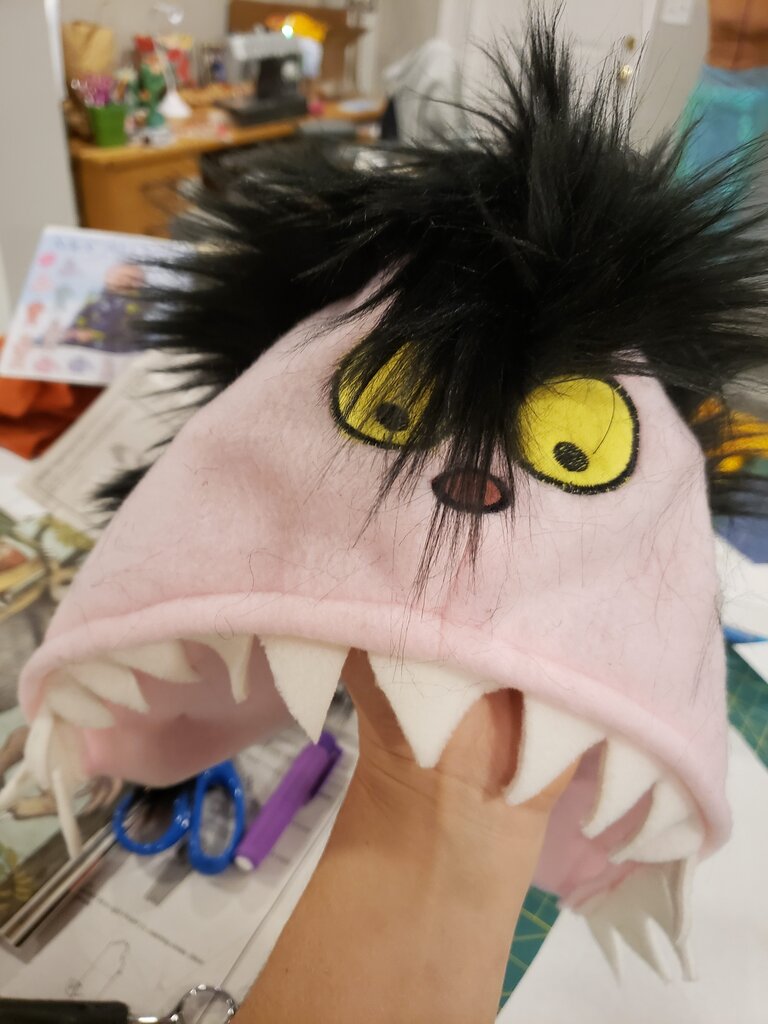
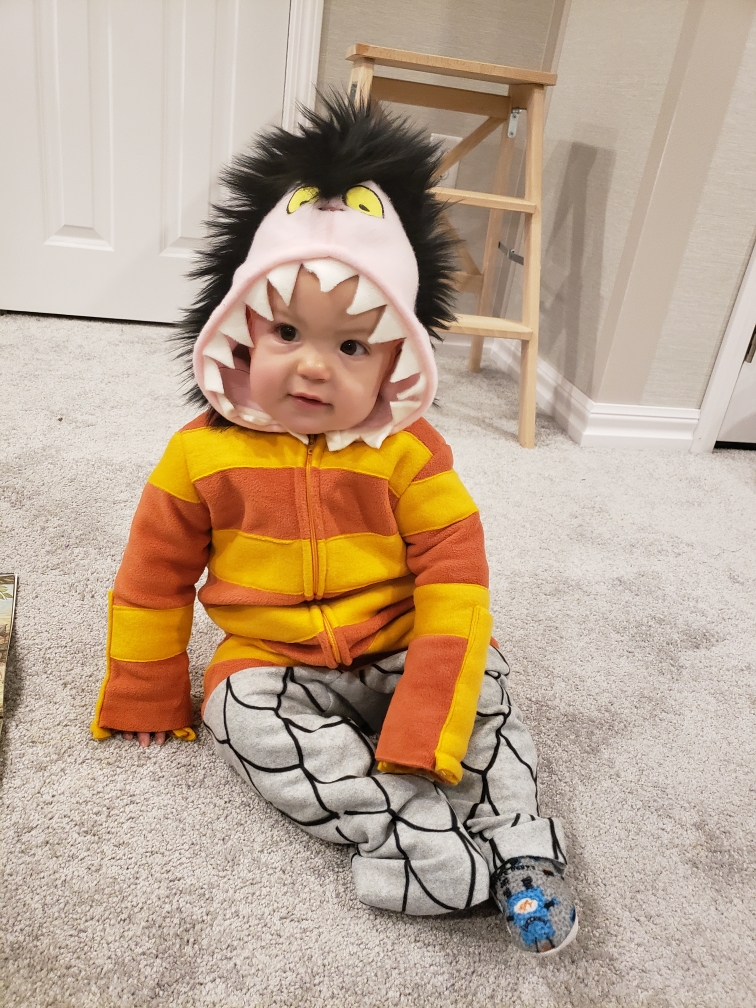
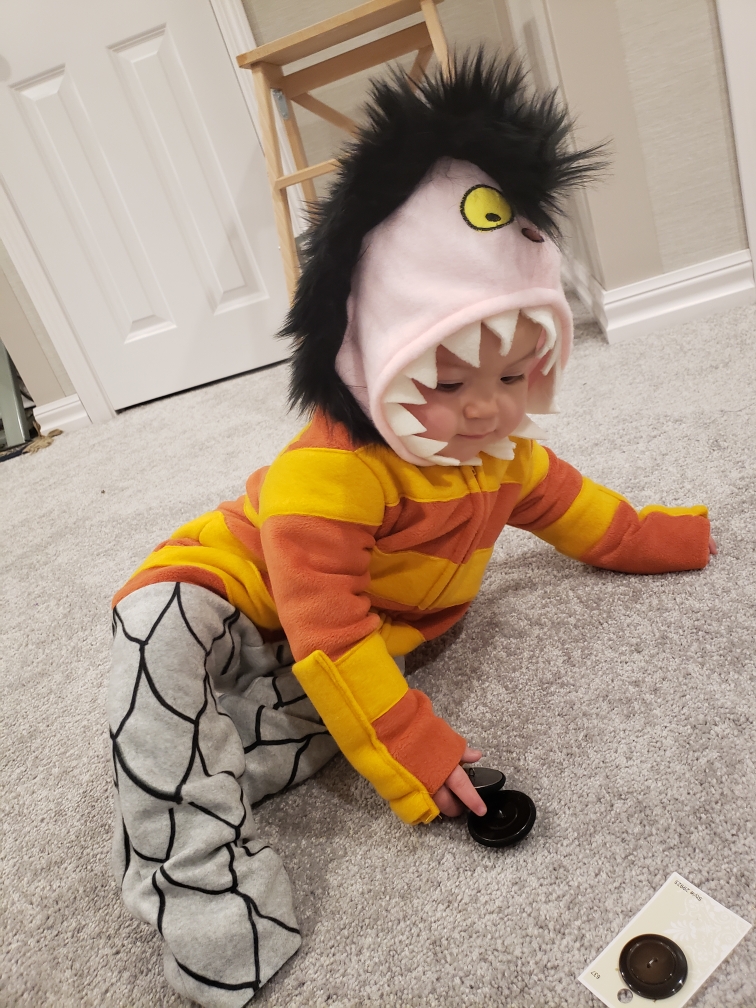
I’m thankful for my little wild things too. Speaking of wild things, Julius still wears his Halloween costume all the time. Unfortunately Patricia’s costume was far more work and she hasn’t worn it since. It’s too bad because it’s so cute! I used a baby pattern I had on hand and added my own features for the body. I wasn’t planning to put eyes and a nose on any of the wild things, until I saw this adorable rendition. I’m glad I did! This costume took me a few days to make but it was worth it!
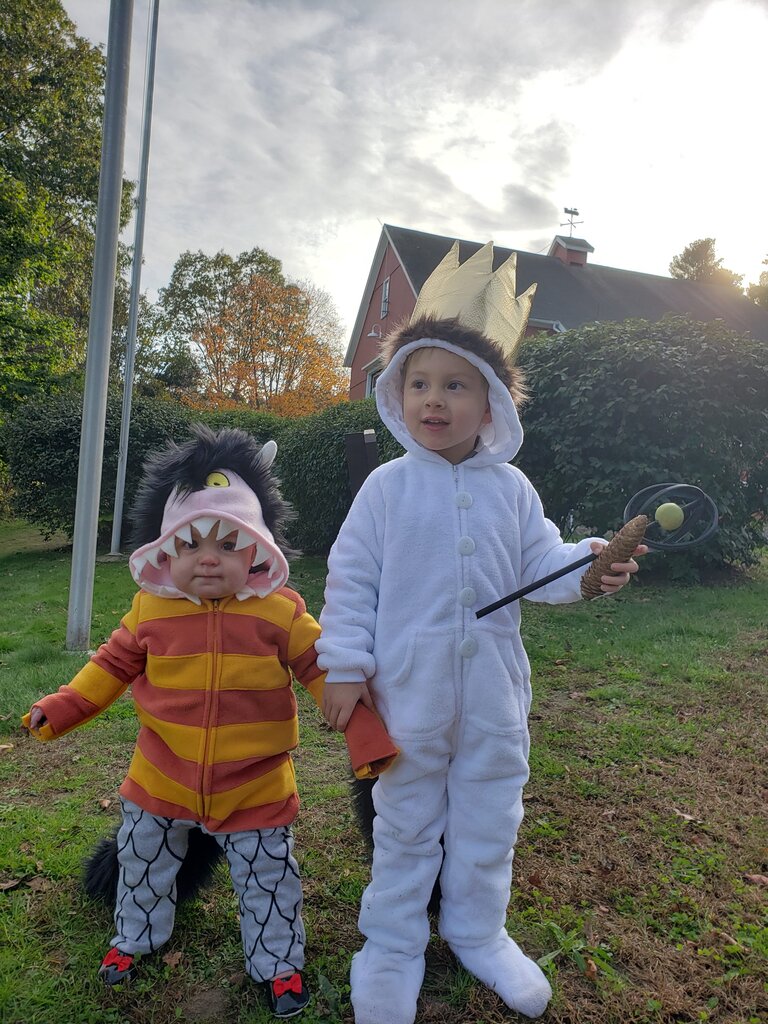
Wild Thing (striped feathered, hairy thing) Costume
- 1 yard orange fleece
- 1/2 yard yellow fleece
- 1/3 yard pink fleece
- 1/2 yard grey fleece
- 1/4 yard (or less… just scrap mostly) white fleece
- sublimation printer and pattern here
- scrap pink fabric for nose
- scrap yellow fabric for eyes
- black embroidery thread
- 1/2 yard plush fur
- zipper
- Eyes and nose embroidery pattern here
- fur/hair & horn pattern here
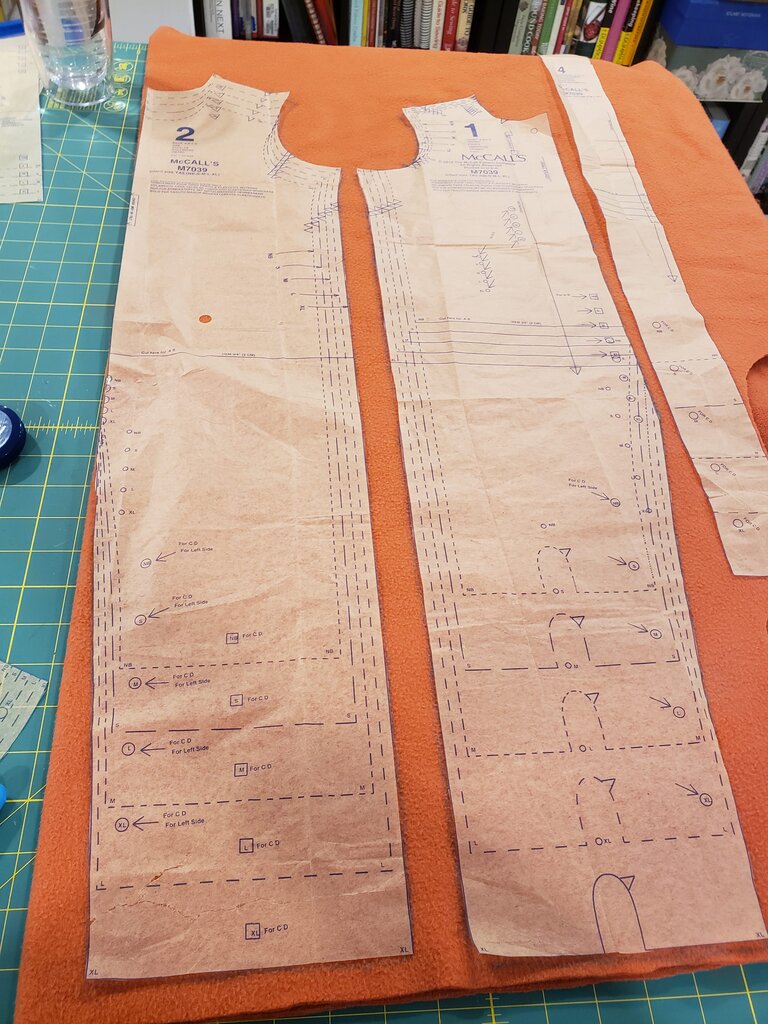
- Simplicity S9215 hooded zip up onesie pattern or equivalent
- Cut out pattern pieces from orange fleece as directed, with the exception of the hood, which you will cut from pink fleece and the hand pockets, which you will cut from yellow fleece. You should also omit the pockets.

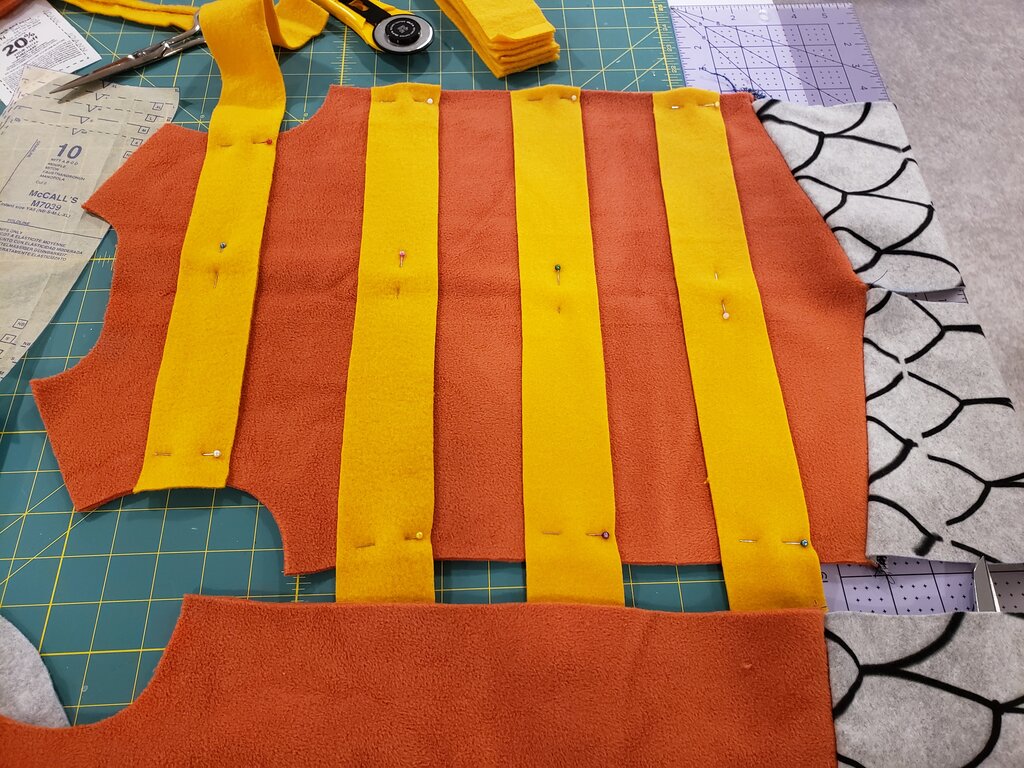
- Cut 10 x24″ pieces of yellow fleece
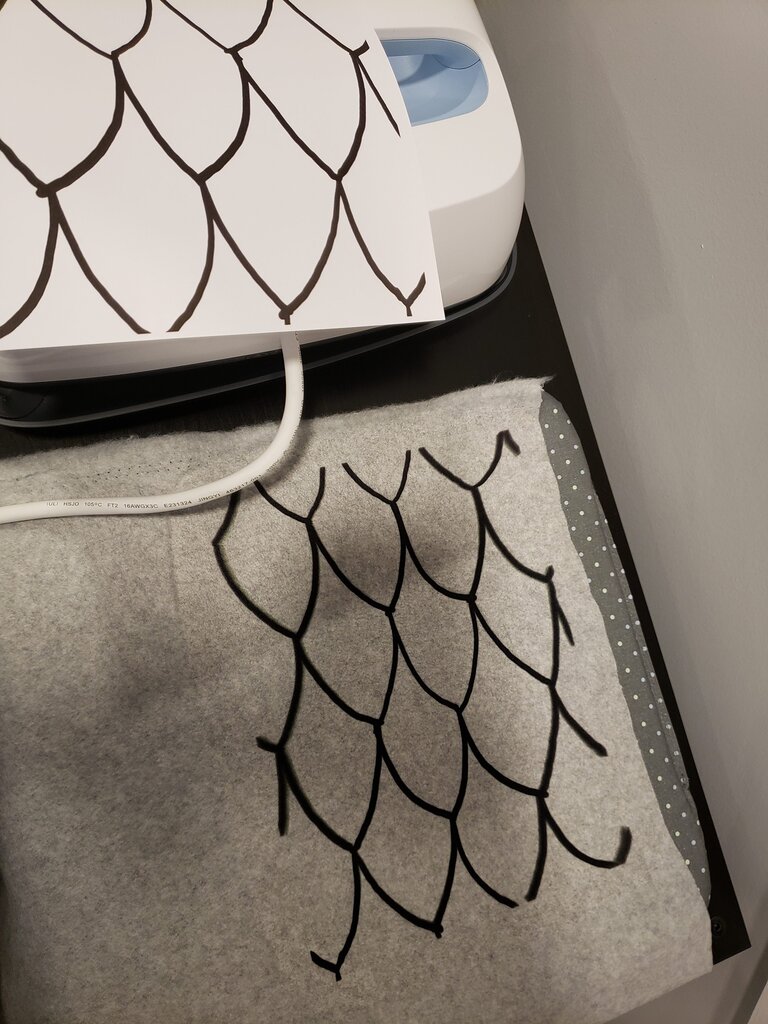
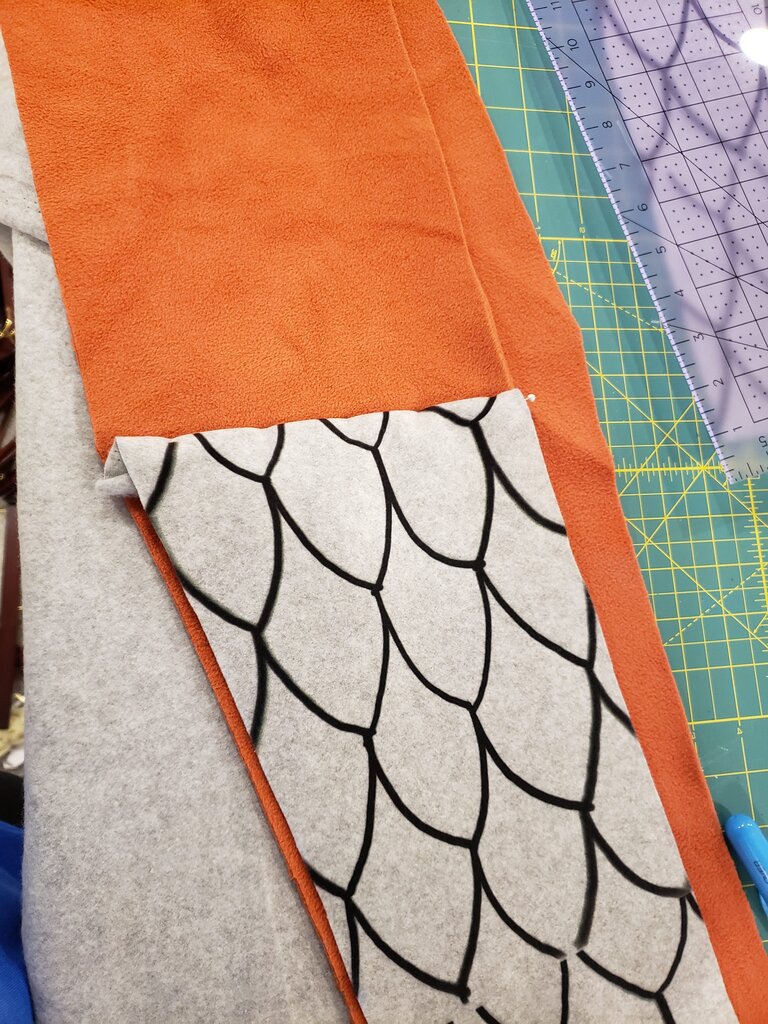
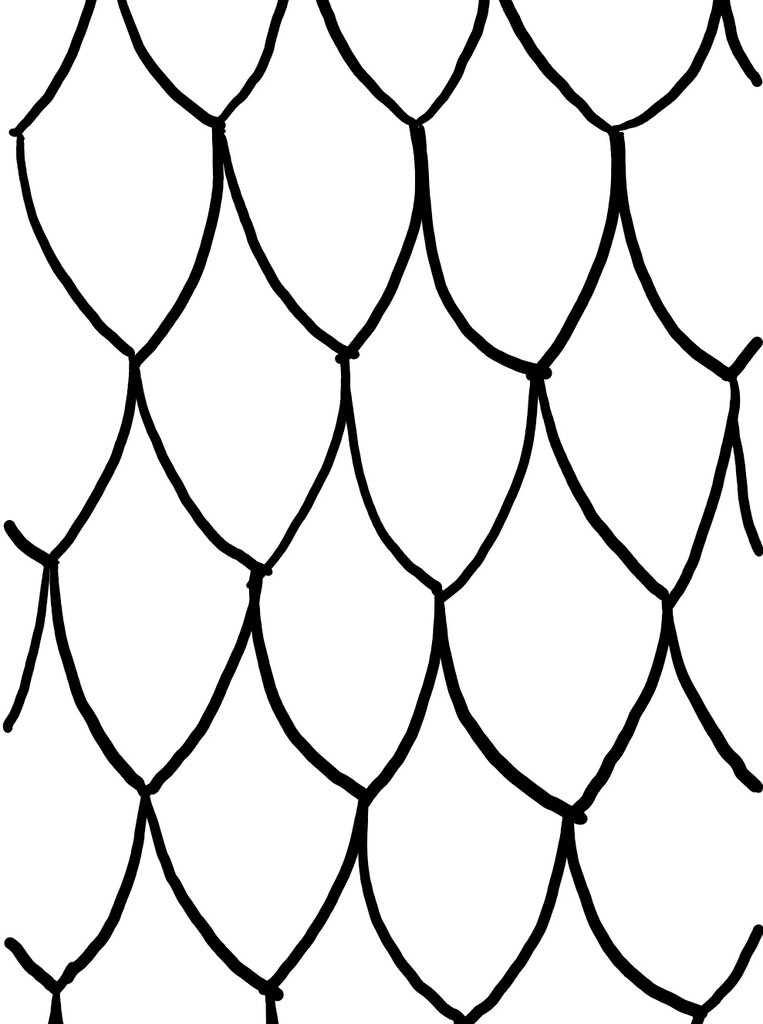
- Sublimate the scale pattern onto grey fleece, 2 8.5″x11″ sheets per leg half, overlapping the pattern so the scales roughly line up.

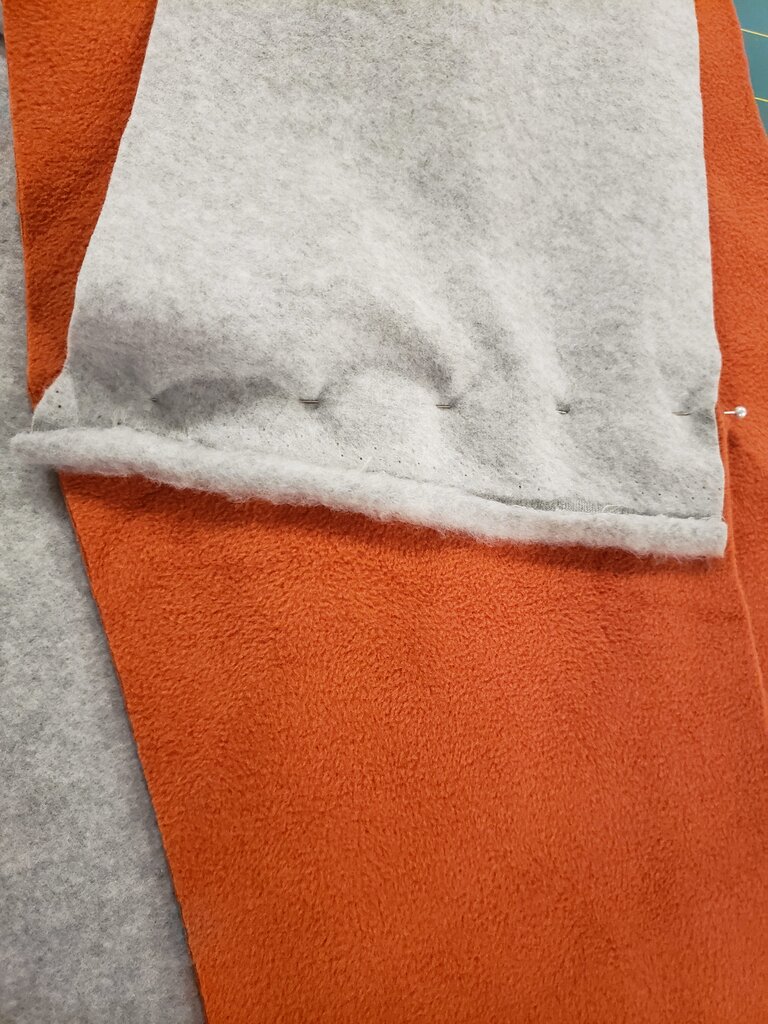
- Cut out scaley leg from the bottom of the pattern piece (2 and 1) drawing a line from hip to crotch.
- Pin scaley leg, right sides together, onto of your cut out orange fleece version of (2 and 1).

- Stitch.

- Repeat for all front and back leg sections.
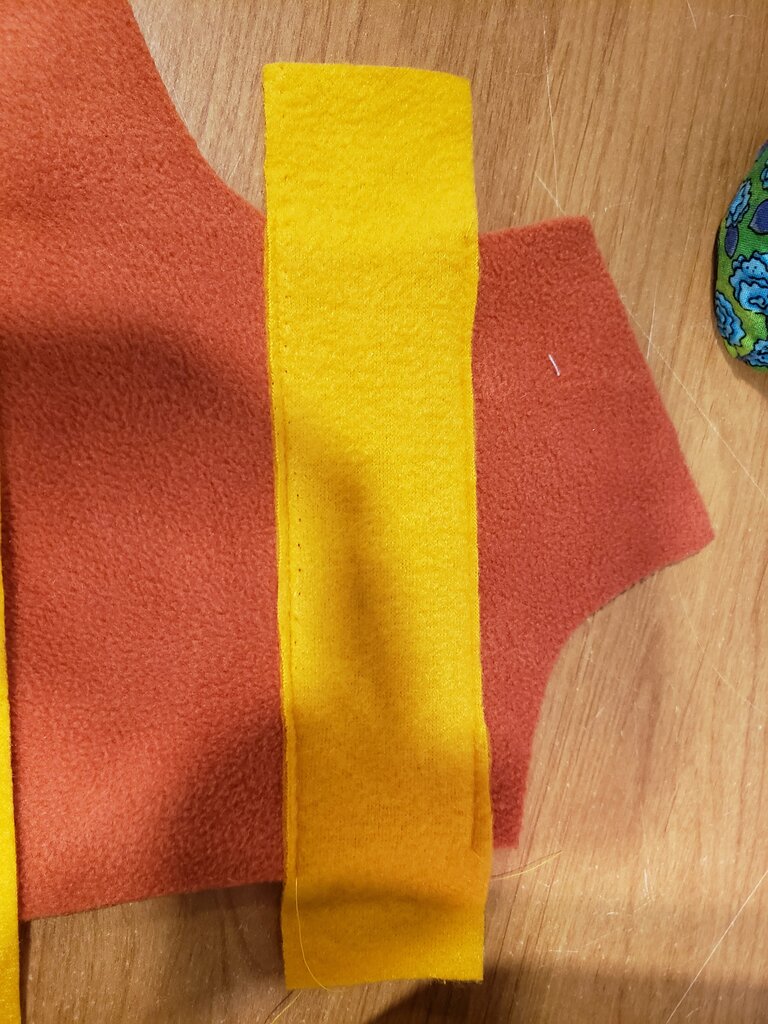
- Lay stripes across back on orange fleece, 2″ apart.

- Repeat with the front pieces, but make sure to line up the edges so they align with the lines on the back. Make sure to also make them line up in front.

- Stitch each stripe along top and bottom of strip.

- Repeat layout and stitching for arms.

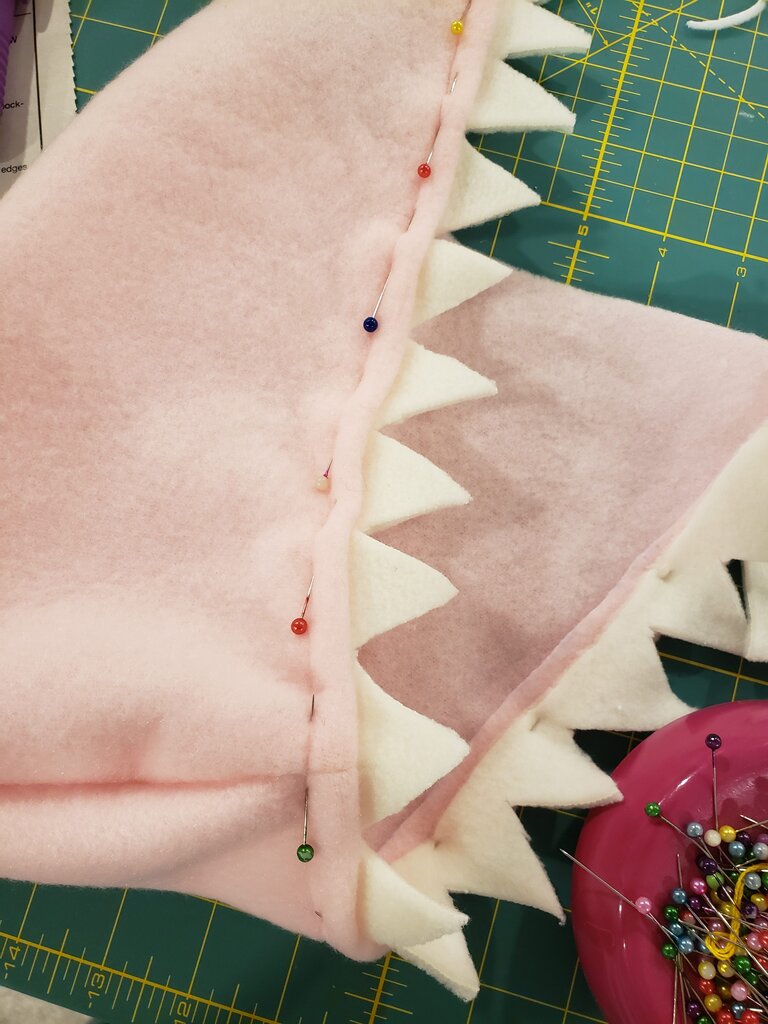
- Finish bodysuit as directed except when making the hood. When the pattern calls you to form an edge on the hood – cut out teeth, by cutting roughly 1″ triangles into a 2″ wide strip of fabric as long as the opening of the hood. Pin to the inside of the hood and stitch, forming the seam of the hood.

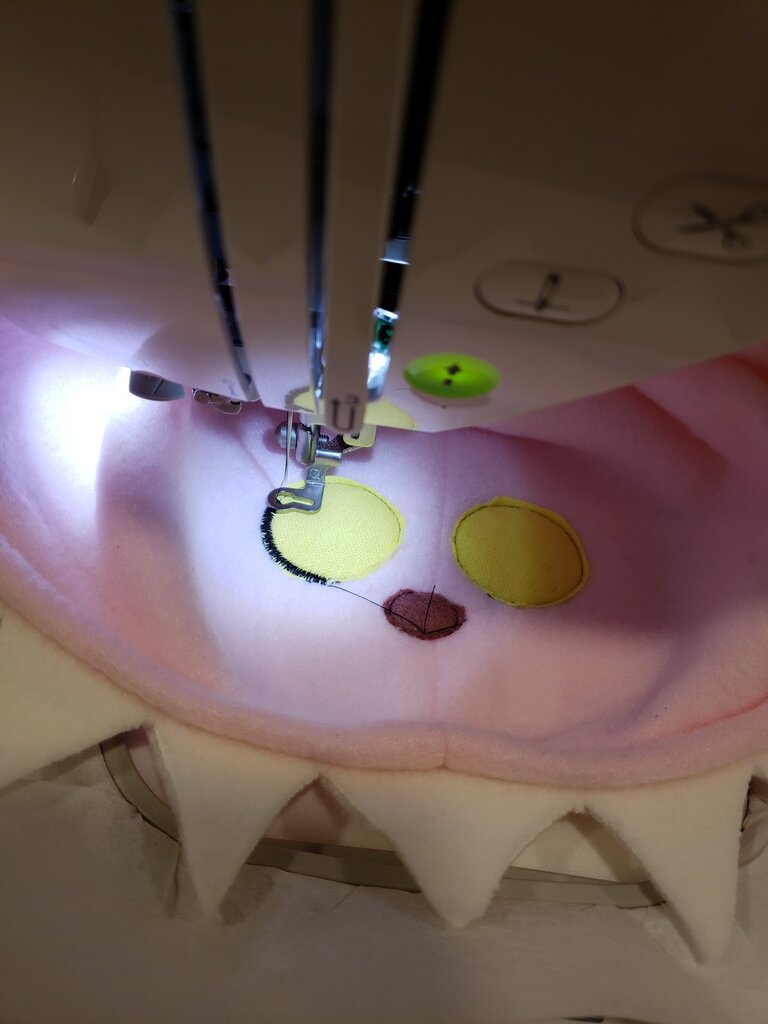
- Embroider eyes and nose following pattern above.

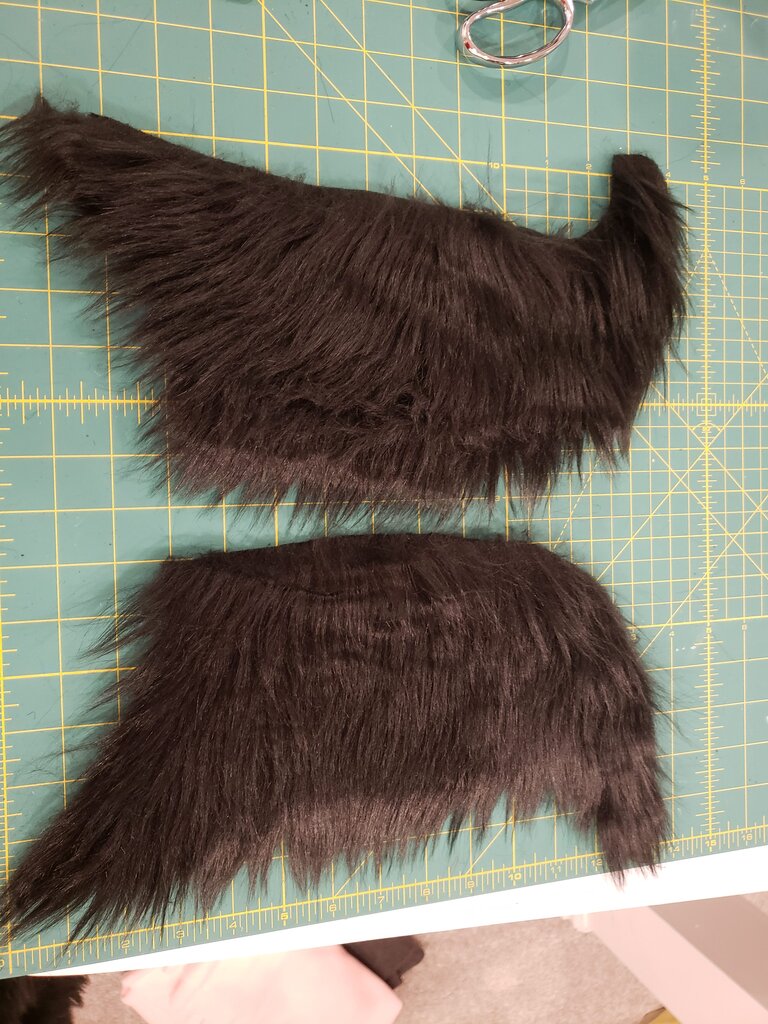
- Cut out two pieces of hair from the pattern above.

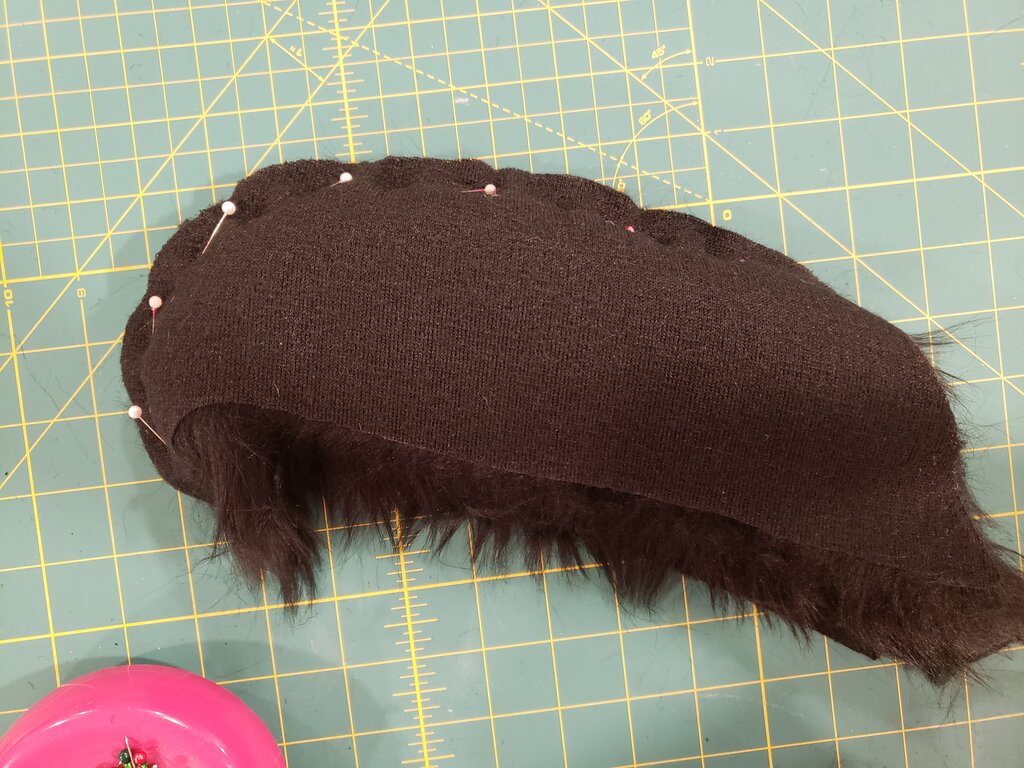
- Pin pieces of hair together and sew along curved outside edge.

- Turn right side out, and stitch to hood, so hair goes right between embroidered eyes. Continue attaching the hood as indicated in the pattern.

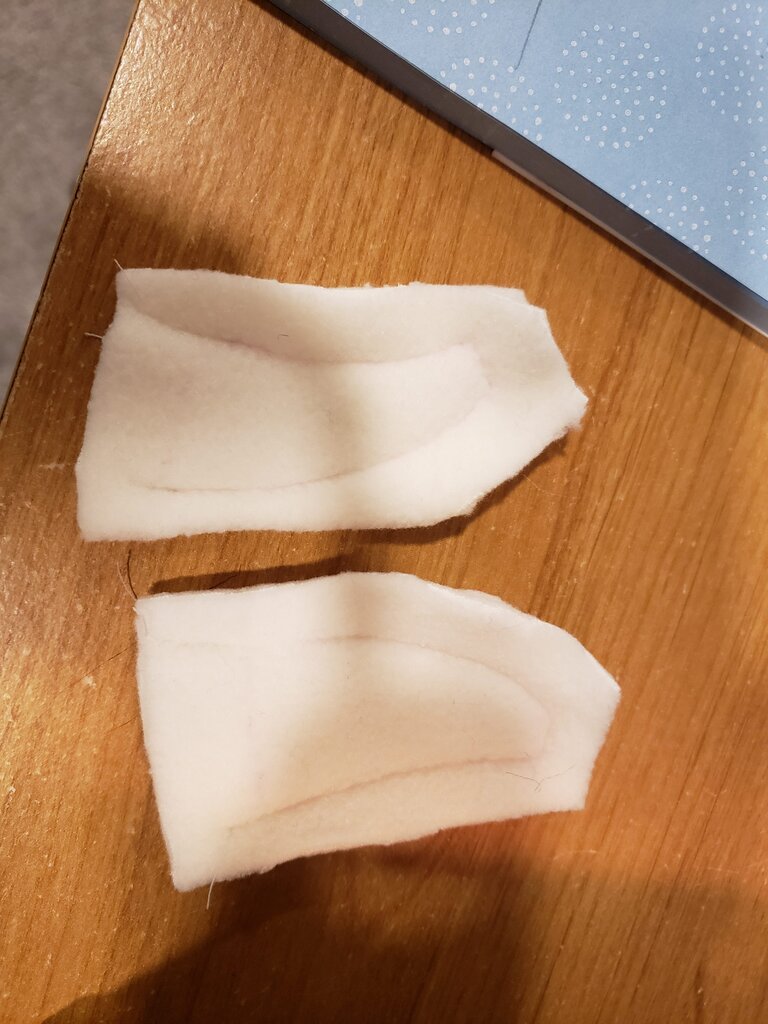
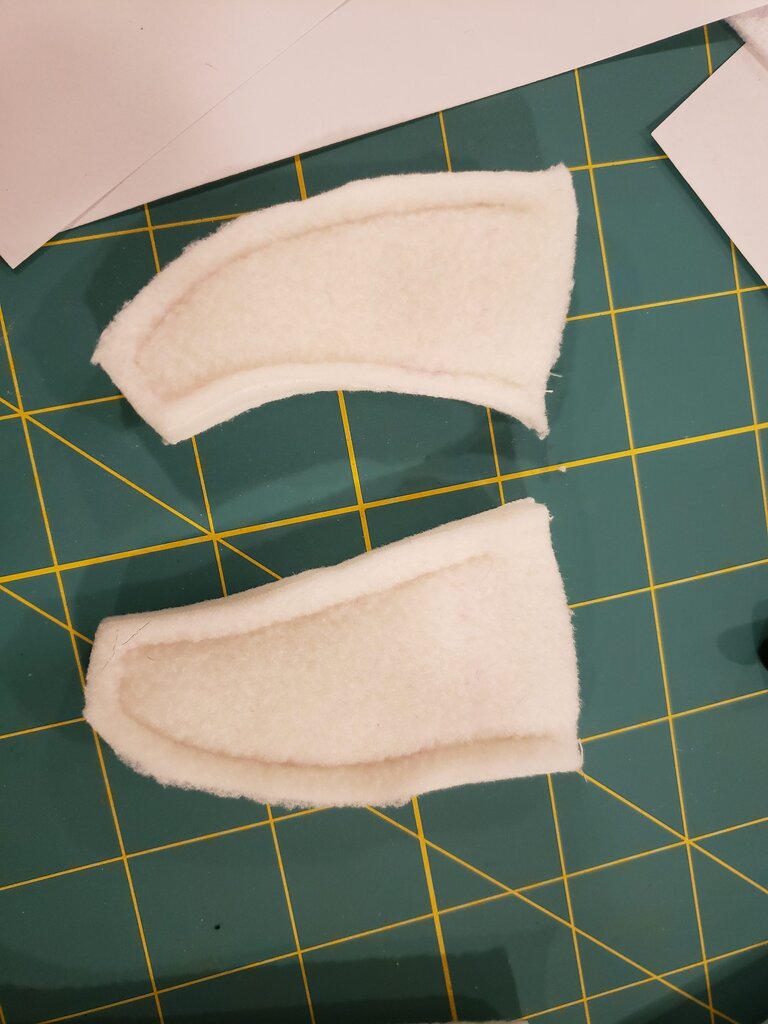
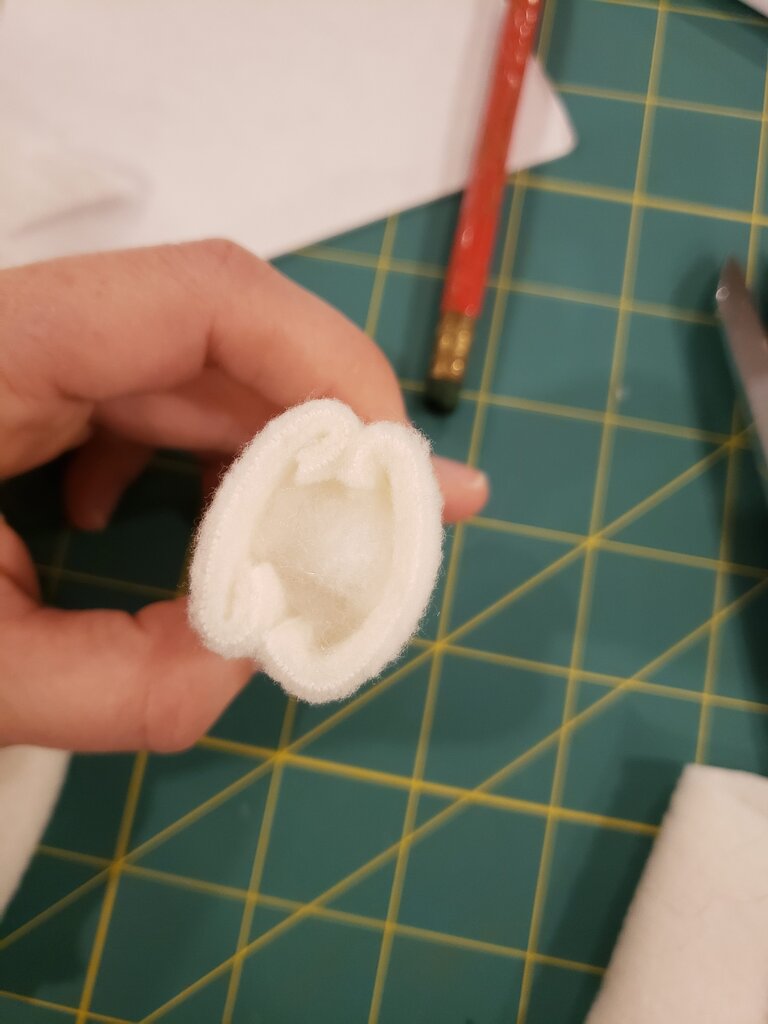
- Cut out 4 pieces for horns.

- Place two pieces together and stitch along all edges but the bottom.
- Trim.

- Turn inside out and stuff.

- Hand stitch the horns onto either side of the head in the black hair.
- Make and attach tail as in instructions here.


