
I’m so sad vacation is over. It’s back to the grind tomorrow and I am dreading it! It feels like so long since I’ve taken a real vacation. Now that the kids are fully vaccinated (finally!) we were less cautious with masks which made things seem a bit more normal too. The kids were very good kiddos on vacation (as usual). We had fun kayaking, clamming, “marsh mucking” and lounging at the beach. Overall it was very relaxing!
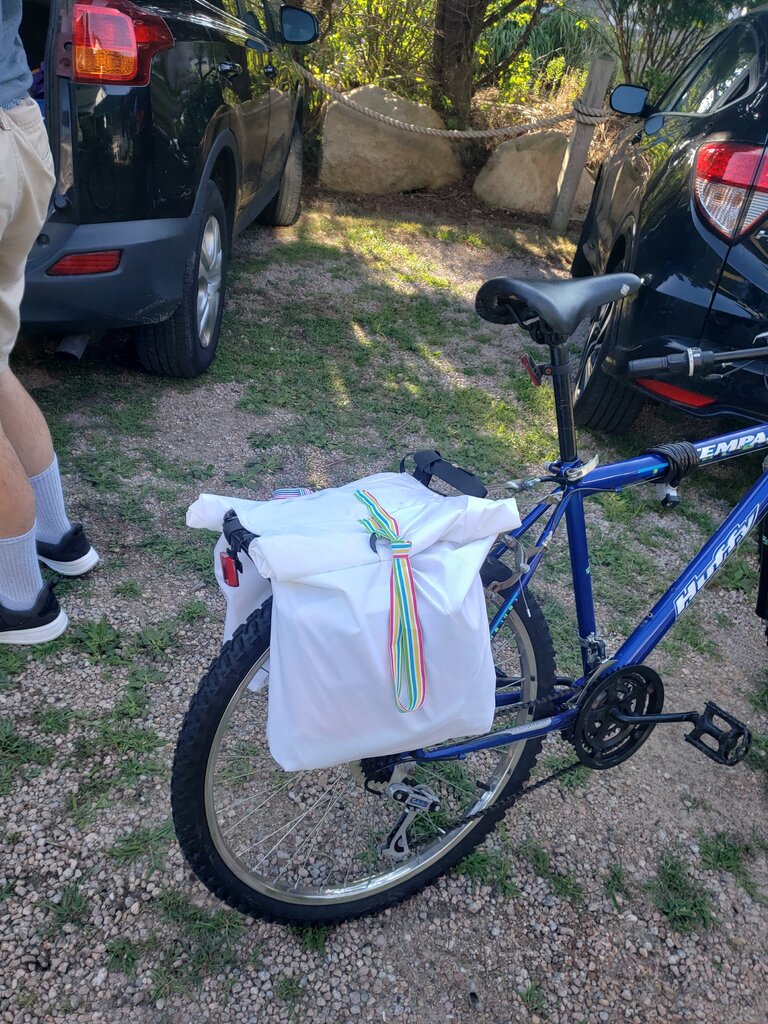
We biked everywhere a ton (with both kids in the updated carrier). With 2 kids in the carrier we don’t have room for all the accessories we need. So instead of saddling Will with a backpack, I made some quick saddle bags the night before our trip. I think they worked pretty great! Before I show you how I made those though, I promised you my favorite recent Patricia story.
Patricia has started saying “yeah!” to everything. With the emphasis on the “eah”. It’s funny I think Julius went through the opposite – he said yes to everything first and then when he got older everything was no. The other day Julius and Patricia were playing in the deck box we have on the screened porch to hold our patio furniture cushions. The box is currently empty so they like to hide in it and jump out. (Honestly, I’m happy when they play in the giant box because if they’re in a box they can’t be getting into too much trouble.) On this particular occasion Julius opened the box cover and stood up so we can see him and complained “Patricia is hitting and kicking me”. We couldn’t see Patricia so I asked, “Patricia is this true?” Up Patricia pops from the box with a huge grin on her face and shouts “YEAH!” Will and I could not help but crack up even when we were reprimanding her.
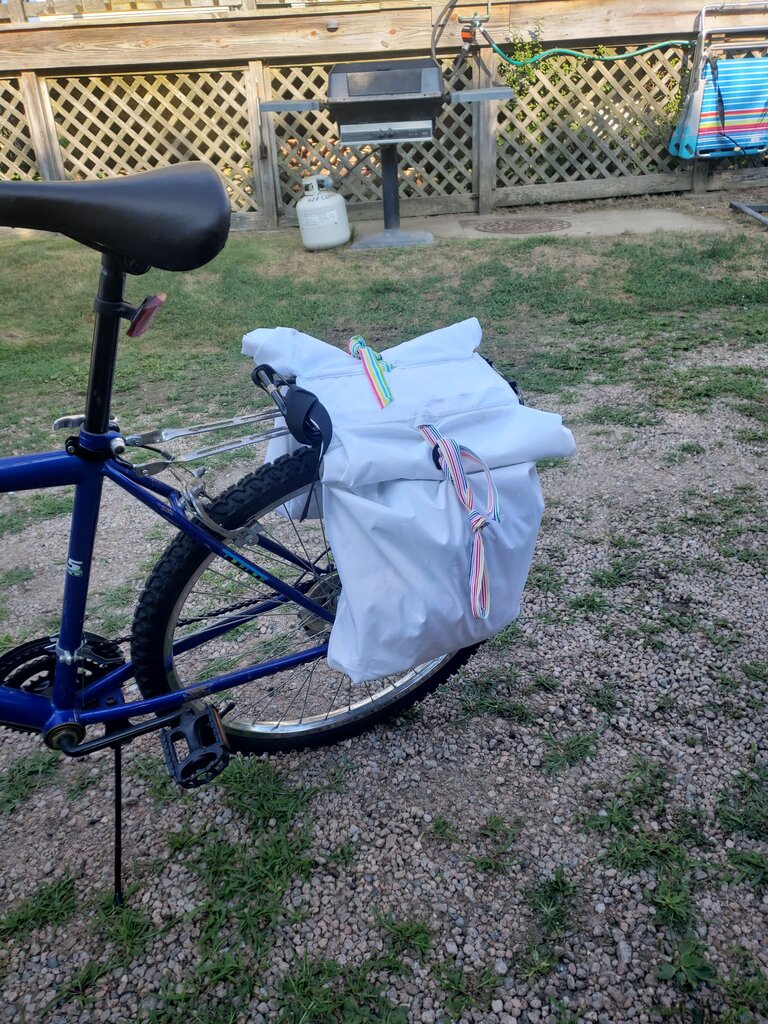
So on to these saddlebags. These were pretty simple to make. Mine are waterproof because I used some material I saved from an old pop up tent that got destroyed. They have the advantage of being carried over your shoulder using the center strap that holds them to the rack. And I left a 2″ gap where they attach, so you can mount a cooler (or something else) on top of the bike rack. (The Yeti hopper flip 12 fits pretty perfectly.) The one thing I would change if I were to make another set is I would make the seam on the side a zipper. This would make it easier to get things deep inside the bag out. I actually planned to do this, but was working on these bags so late at night that I forgot to add the zipper until I was past the point of no return. Oh well. Without further ado…
 Roll Top Bike Saddlebags
What you’ll need:
- 1.5 yards of heavy duty canvas fabric (I reused mine from the tent)
- 1 yard of 1/2″ bias tape (I reused mine from the tent)
- 1.5 yards of 1″ ribbon or webbing (mine was reused)
- 4 1″ D-rings (mine were reused from the tent)
- 60″ long 1″ strap with buckle (I bought these new because I couldn’t find the ones I had cut off something else)
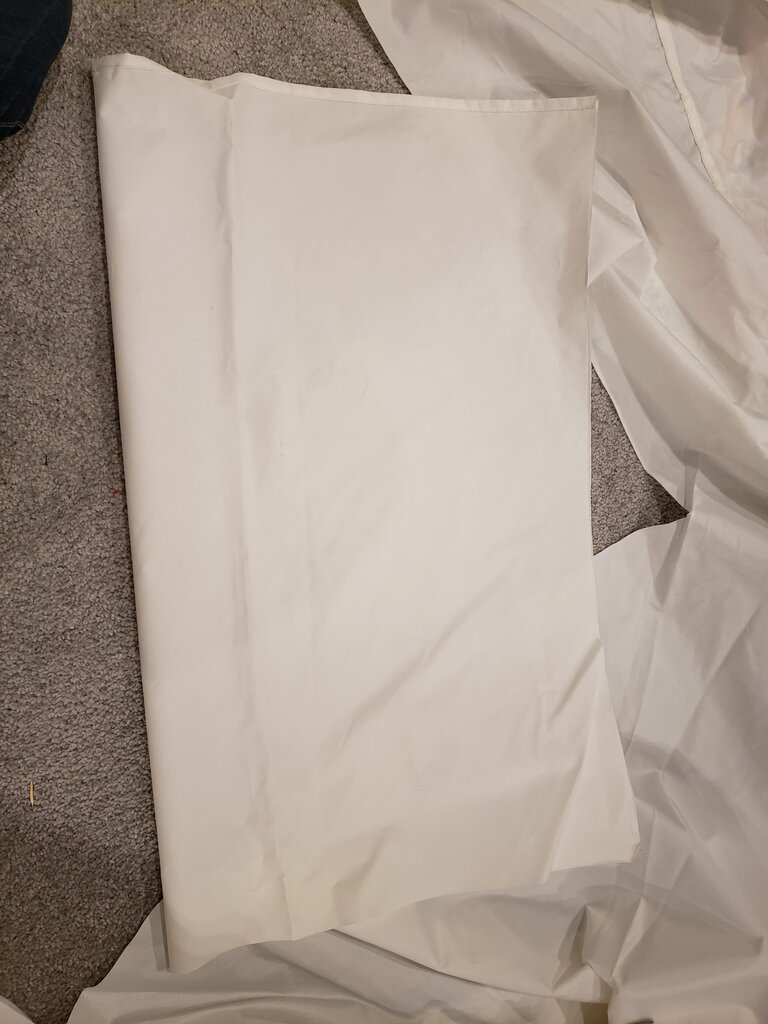
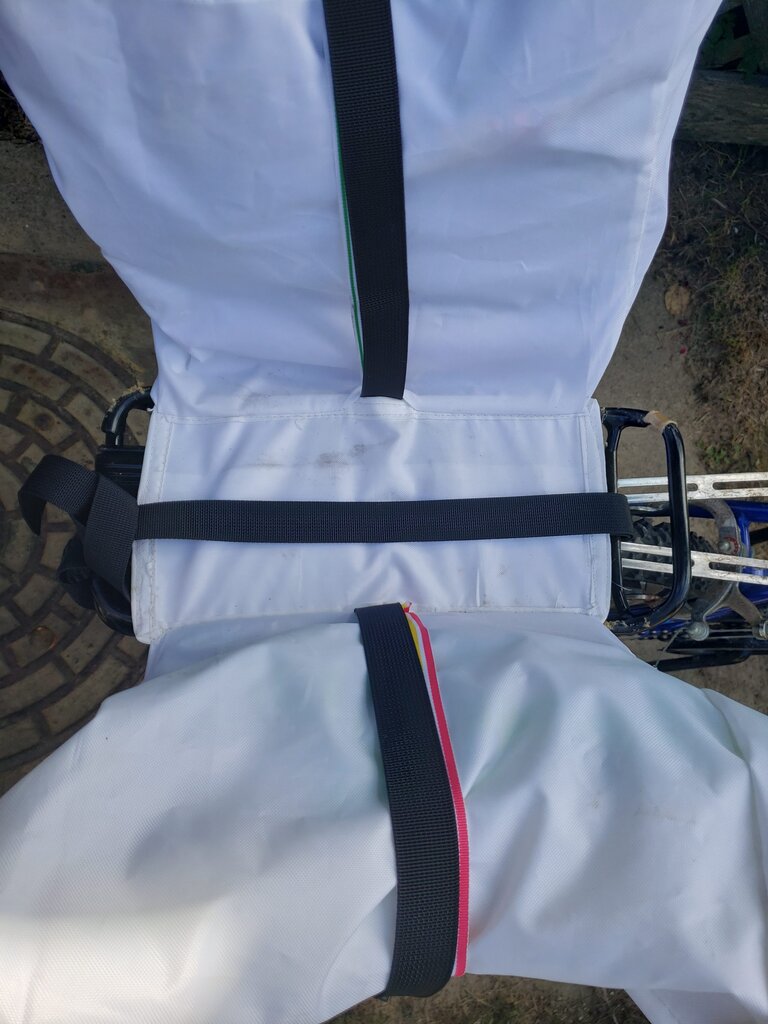
- Cut two 32″x25″ pieces of fabric for the bags. Cut two 11×4.5″ wide pieces for the bag bottoms. Cut 2 10.5″x5 5/8″ pieces for central placket.
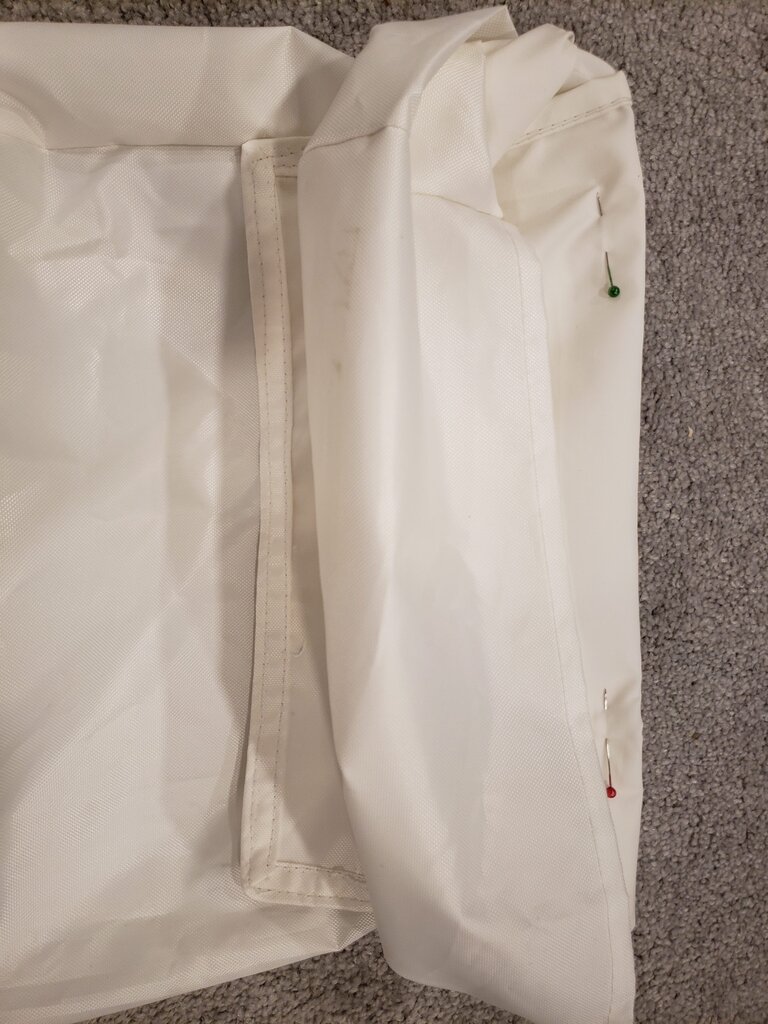
- Form a rolled seam on one 32″ side of bag fabric.
- Fold fabric for bag in half (right sides together) to form a 16″x25″ rectangle. Pin and then sew down the 25″ open end.

Fabric folded in half, with seam on top.
- Fold the unfinished edge of the seam you just sewed under and stitch again to reinforce the seam.

Folding under the seam you just stitched to reinforce it.
- Pin the bottom of the bag to the top of the bag you just created (right sides together), making sure to put one of the corners on the seam you just created.

- Stitch bottom of bag, roll seams as in step 4 and stitch to reinforce. Turn bag right side out.
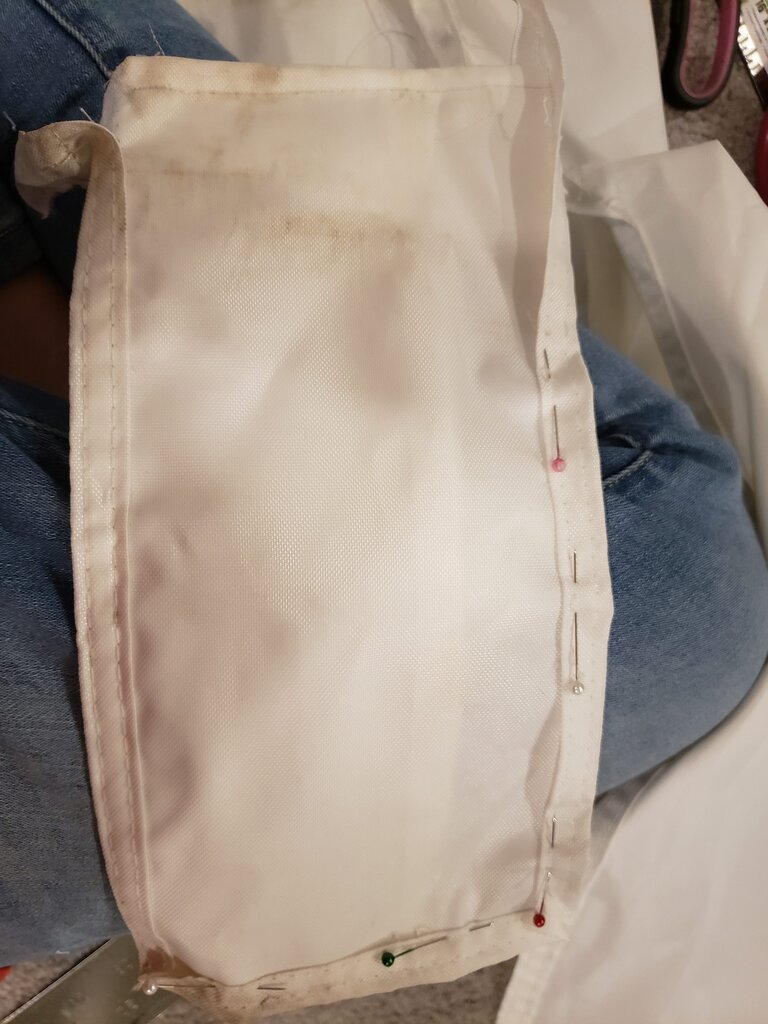
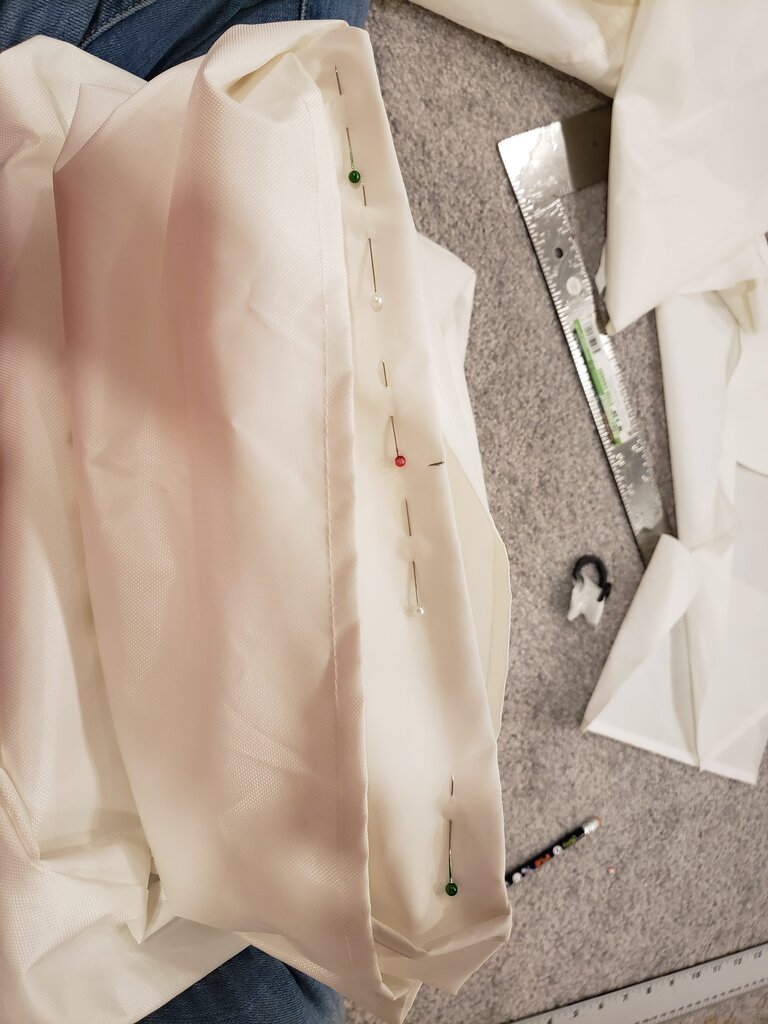
- Take 2 D-rings and thread a 3″ piece of ribbon or webbing through them. Place both ends of the ribbon/webbing together, then tuck under the unfinished seams. Lie bag flat and pin the ribbon holding the d-rings to the front of the bag, 11″ from the bottom, centered. Stitch.

- Repeat steps 2-7 for second bag.
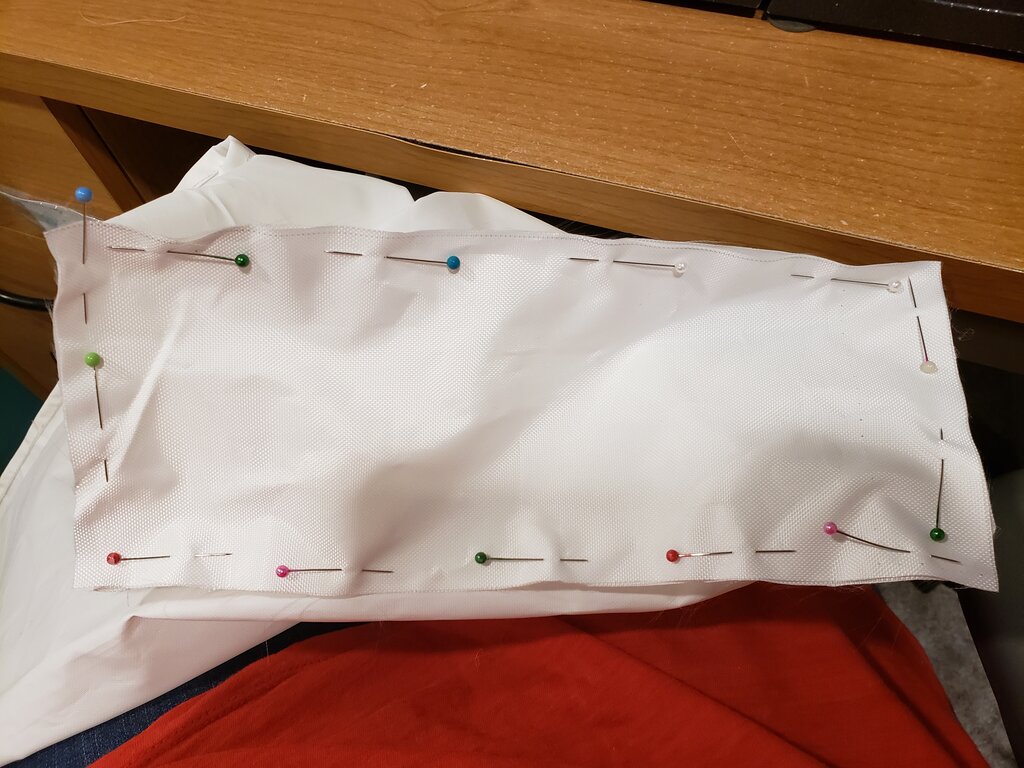
- Stitch two pieces of placket together along edges.
- Attach bias tape around the edges of the placket.

- Pin placket to back side of one of the bags, 11″ from the bottom, by sandwiching the placket between a fold in the side of the bag.

Placket sandwiched between folds of one of the bags.
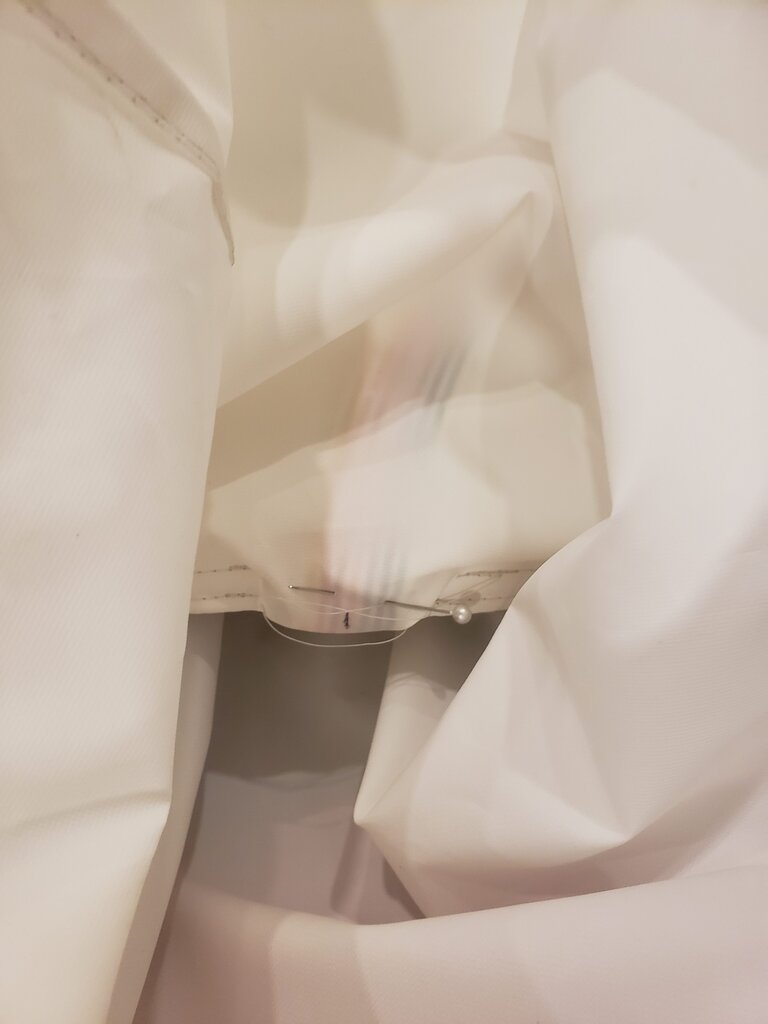
- Mark a 2″ gap in the center of where the placket is pinned to the bag.

- Stitch between all layers of fabric (bag, placket, bag) 1/2″ from the edge of the placket. Make sure to leave a 2″ gap in your stitching where you sewed. Stitch a second time, 1/4″ from the edge of the placket.
- Feed ribbon through the 2″ gap in stitching, and sew to the bag.

- Repeat step 11-14 with second bag on other side of the placket.
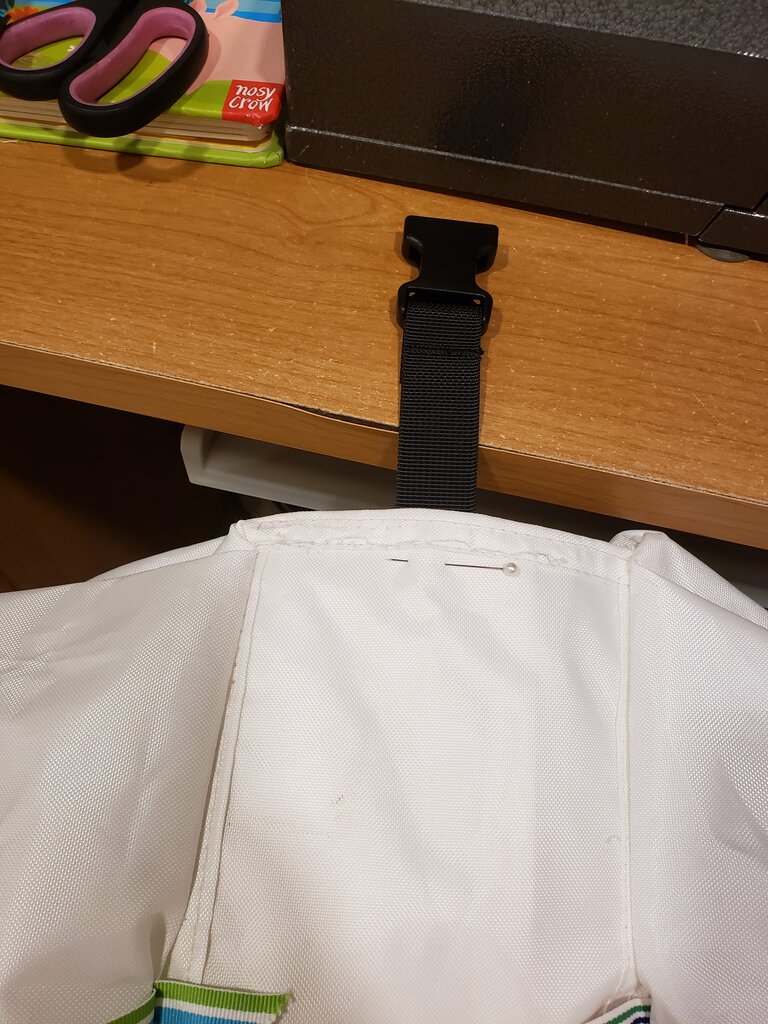
- Cut 4″ of strap from the female buckle end of the buckle strap. Melt the unfinished ends of the strap to prevent them from unraveling. Stitch the unfinished end of the female bucket end of the strap to the underside of the placket on one of the shorter ends of the placket.

- Stitch the portion of the strap holding the male end of the buckle to the opposite end of the placket, on the underside of the placket. Make sure that if you were to strap the buckles under the placket that the extra strap to be pulled is free. (So you can easily tighten the strap when on the bike.)
- To use, place the placket on top of your bike rack, clip the straps under the bike rack and tighten to secure. Tie the excess straps out of the way of the bike wheels. Fill bags with whatever you desire, then roll the top of the bags, insert ribbon through both d-rings, then push the ribbon up through the top d-ring again to secure. (I like to make this a loop so it is easy to open them again later – see my picture below.)

Bags strapped to bike, and second strap fed through the gap left between the bags to hold a cooler (or something else) on top.


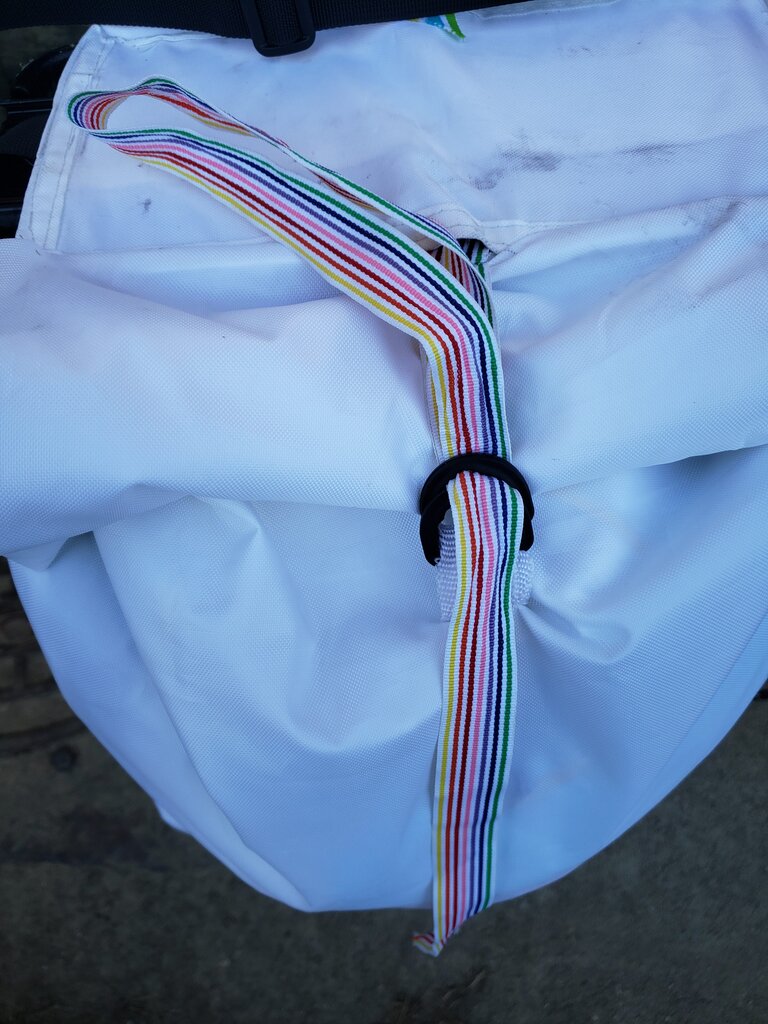
Here’s an example of how I push the ribbon back up through the first loop, but I don’t pull it all the way through. To open the bag, simply pull the bottom tail of ribbon.
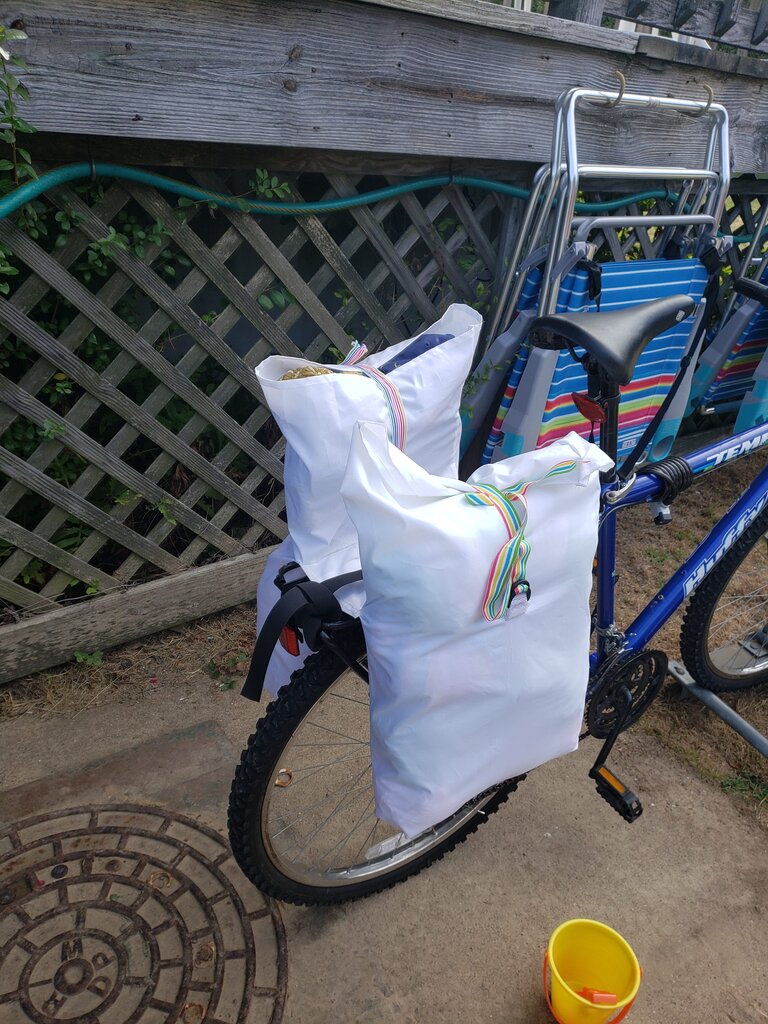
Bags at full capacity.
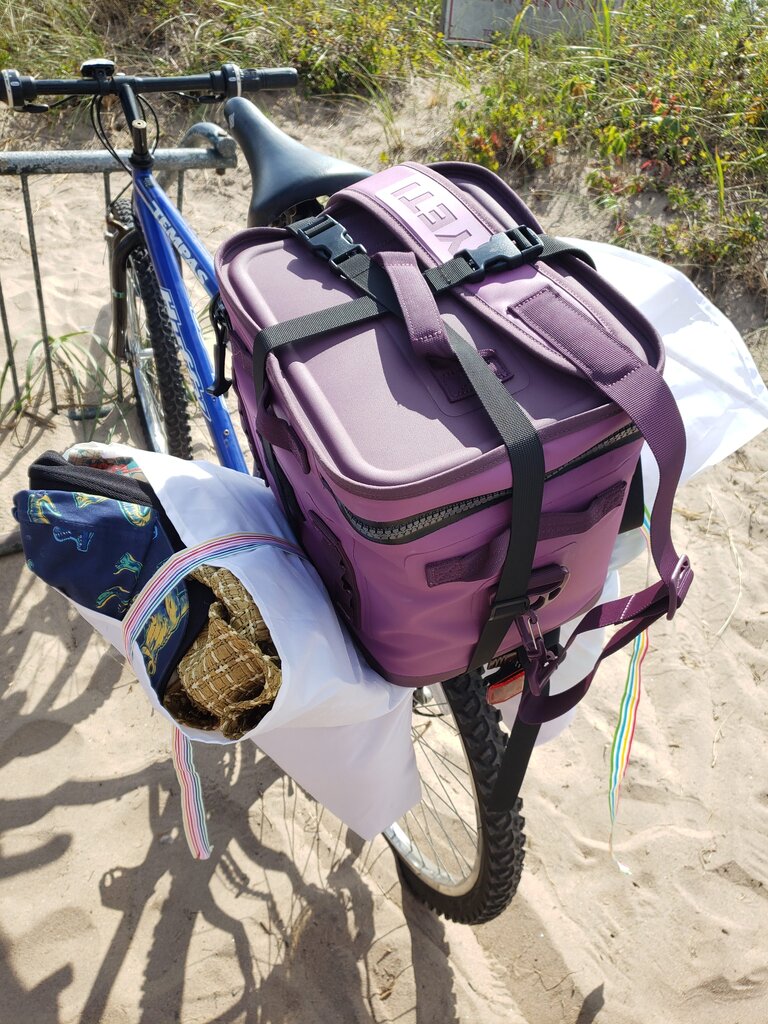
Bags full to the brim and cooler on top.
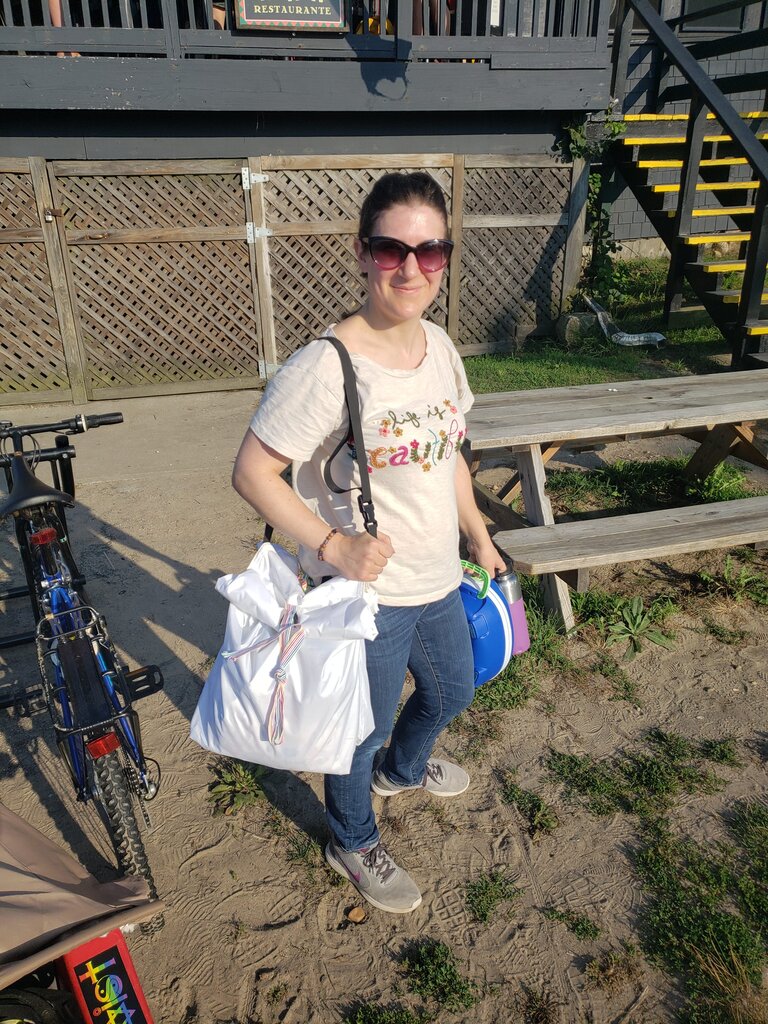
Here I have the central strap pulled out long to wear as a shoulder bag. This came in handy several times during our trip.
Bags at half capacity.
