Tingling Goblins

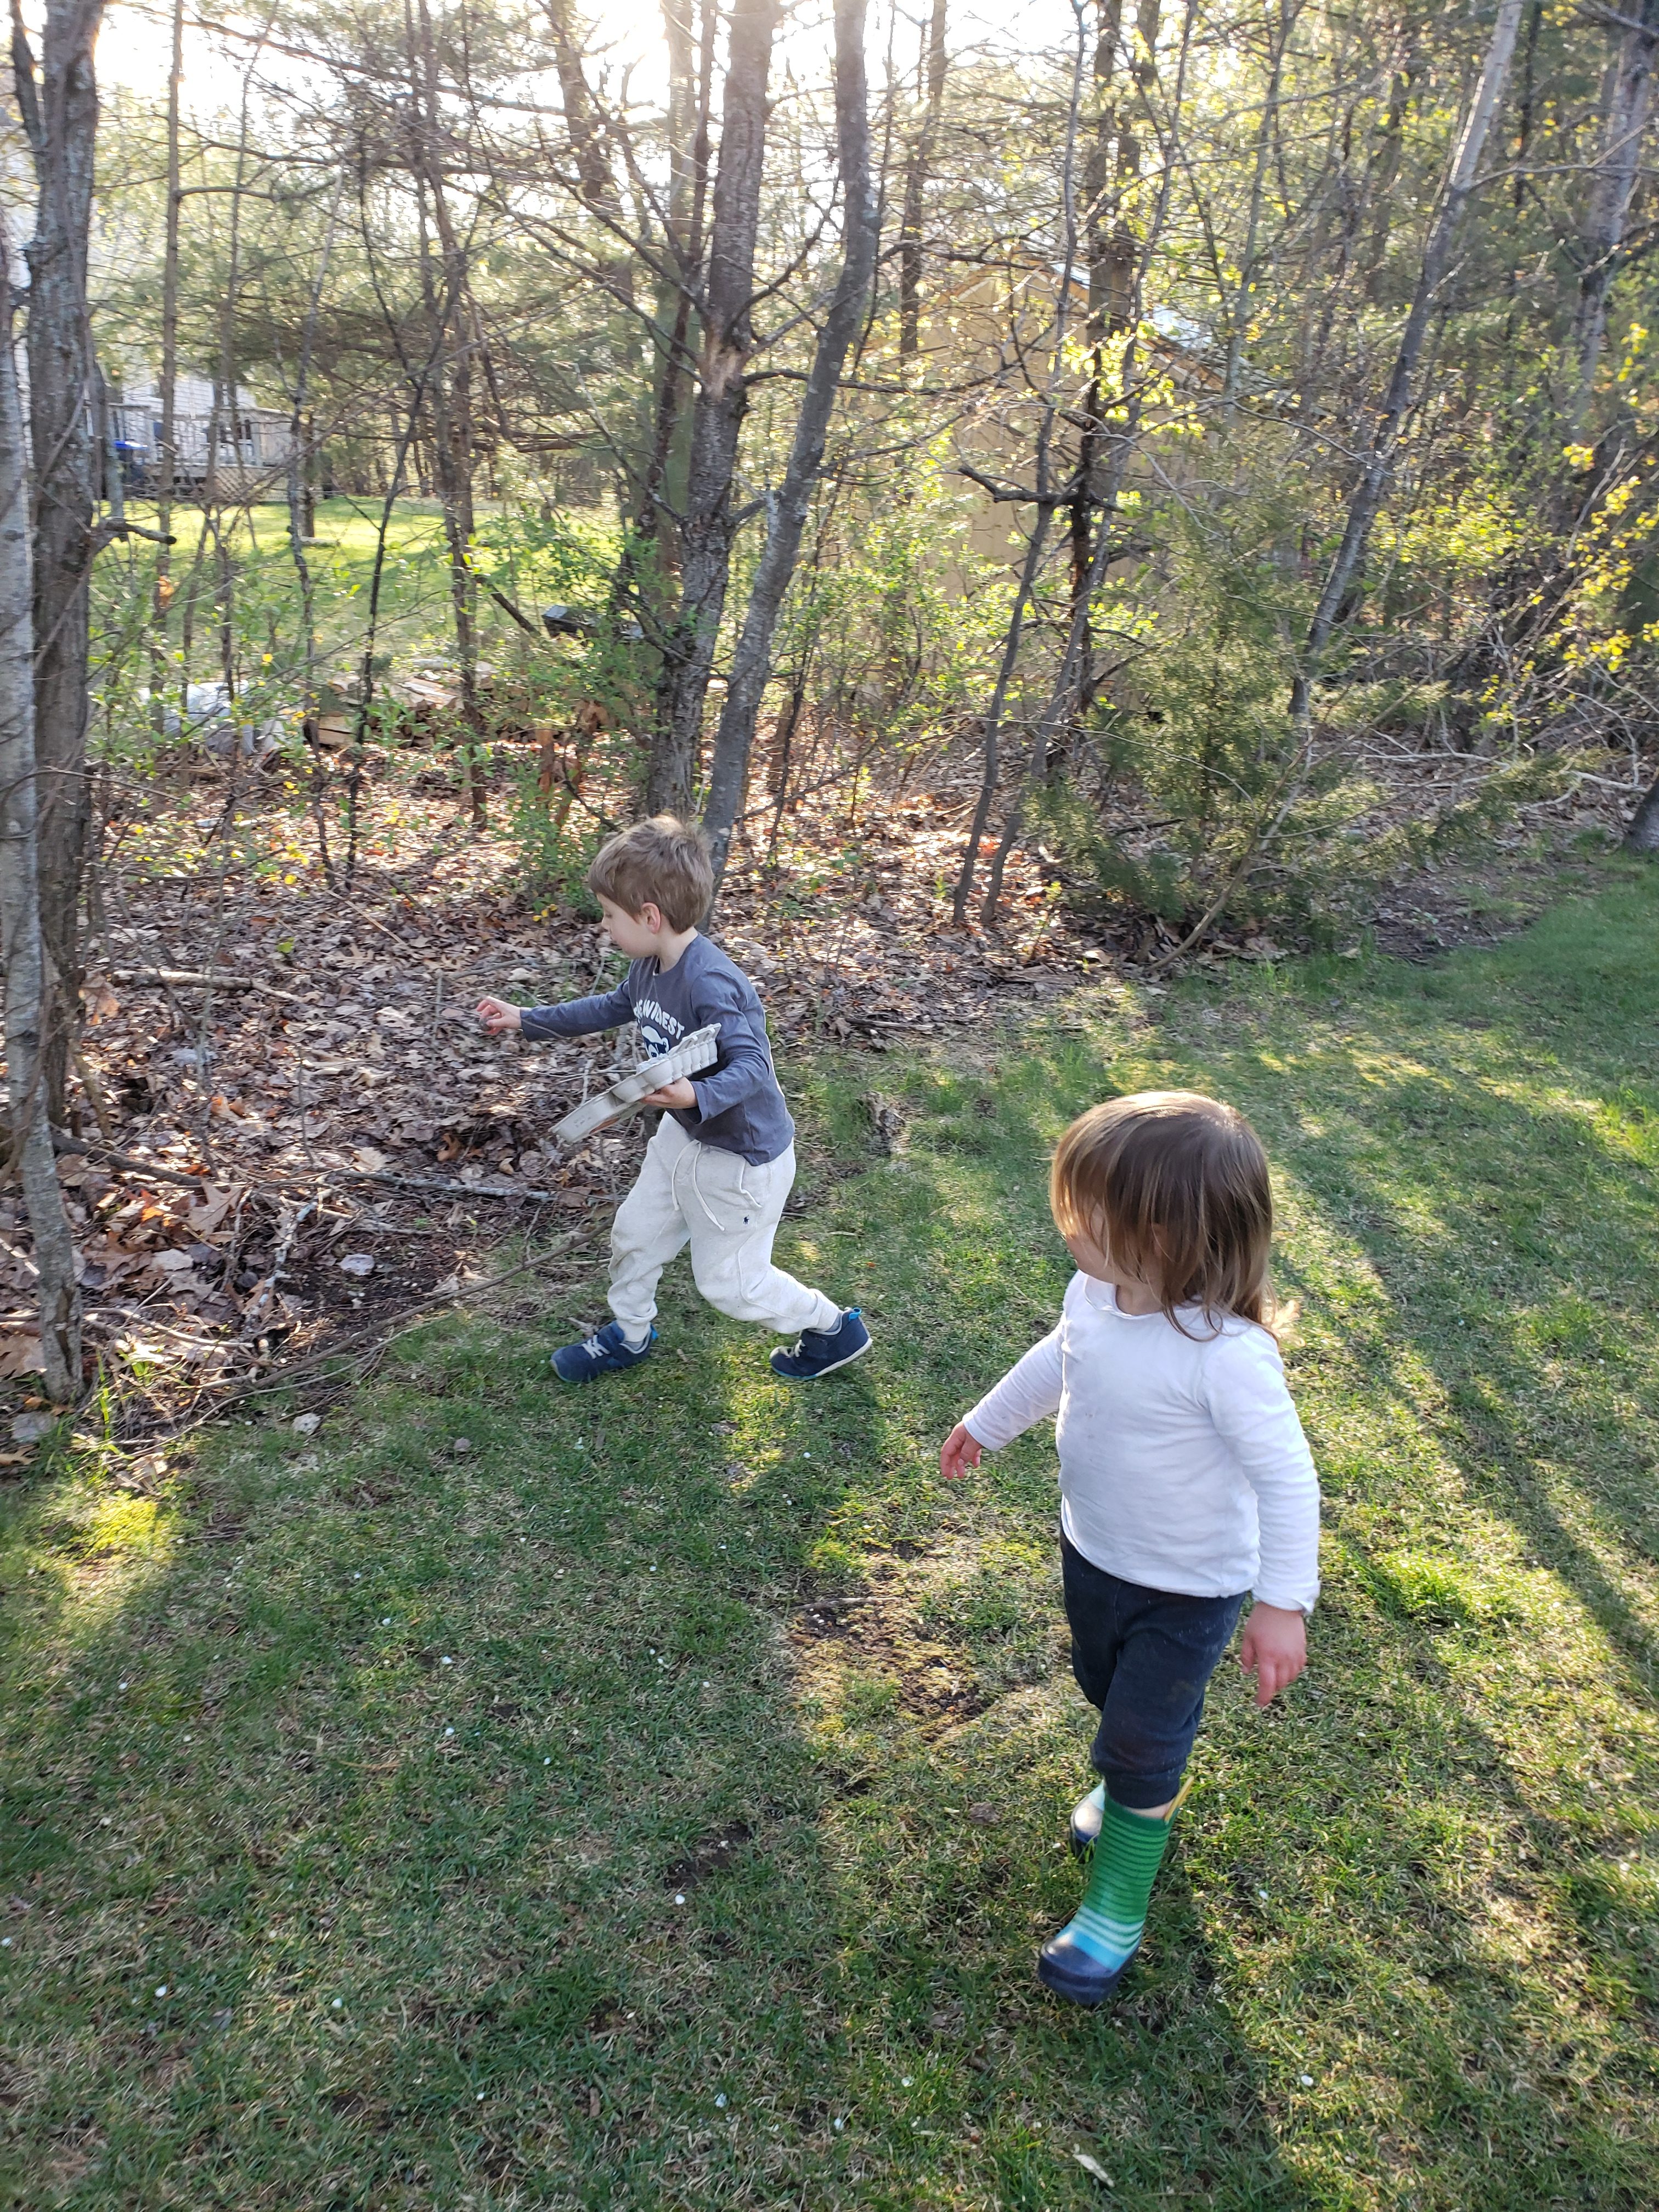
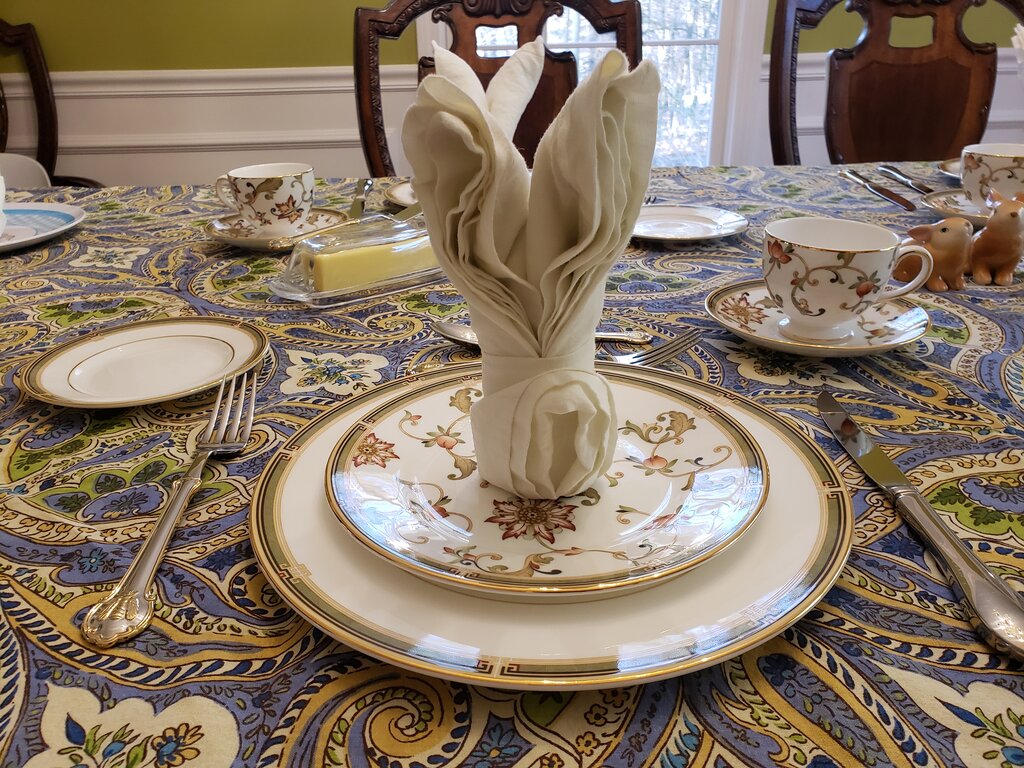
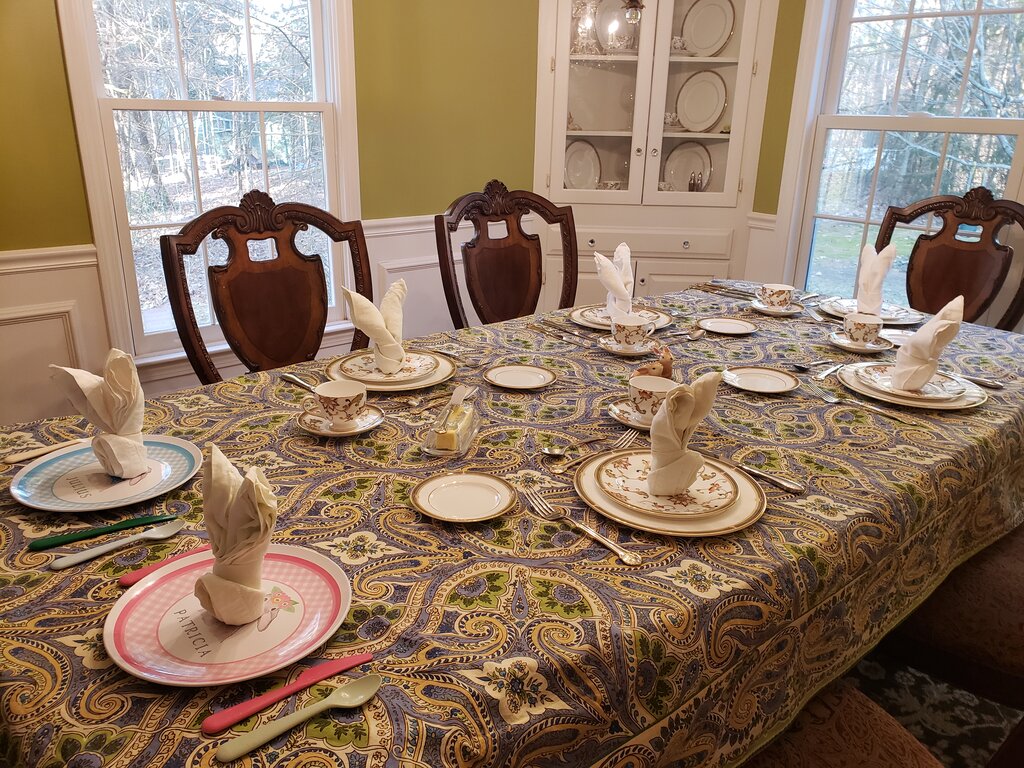
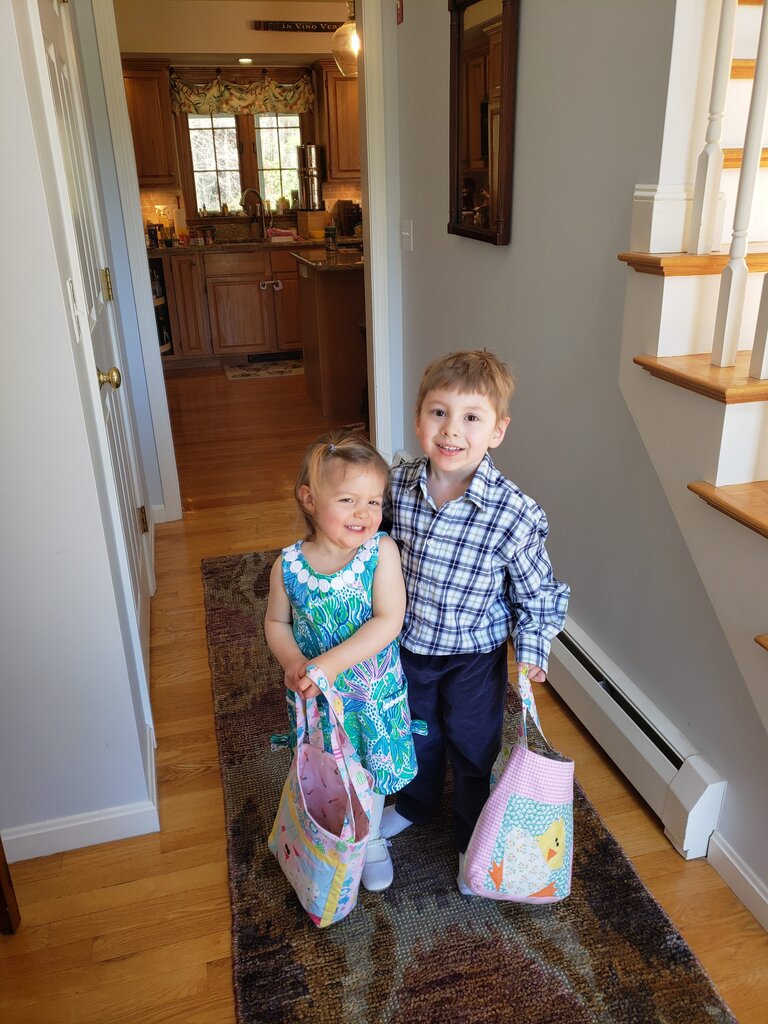
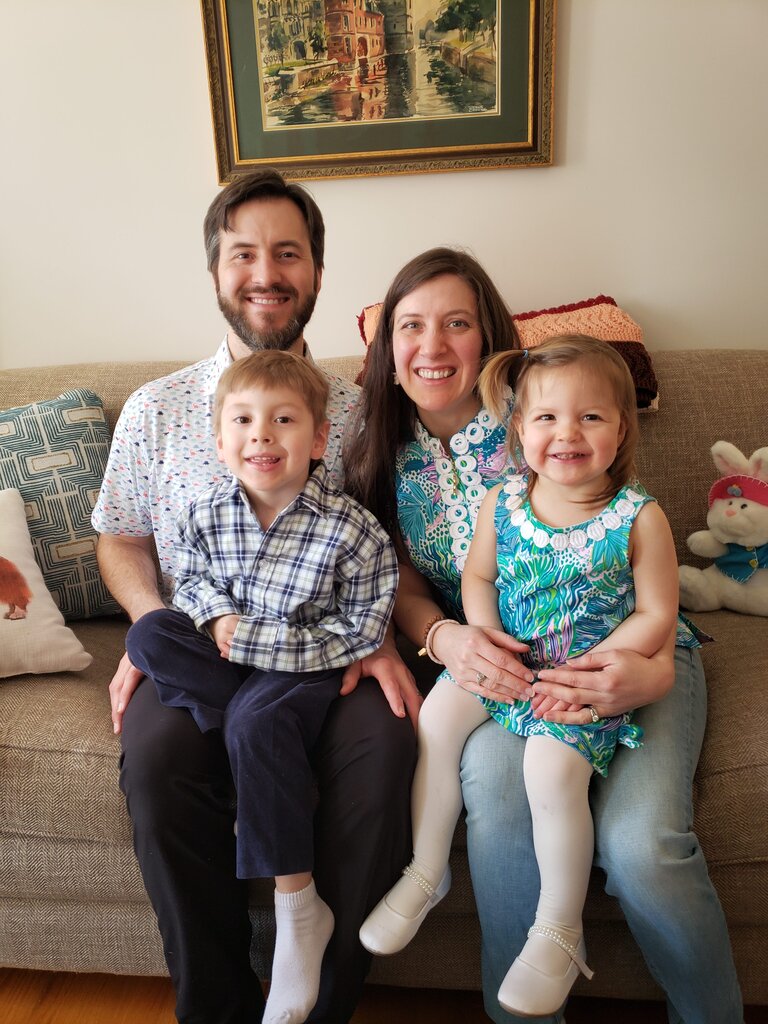
Patricia today walked out of the porch and said “I have shoes on!” Followed closely by “bye guys I’m going to Davis Farmland”.  And she trotted off.  We did intercept her before she got very far.  It was adorable.

We went to Julius’ preschool “graduation” last week.  It was very cute.  The sang a bunch of “sunshine” themed songs all while this giant thundercloud loomed ominously overhead.  My favorite part was seeing Julius looking all around for us in the crowd, then his big giant smile (and shout of “mommy!”) when he saw us.  It was so darn cute.  I can’t believe my big guy is going to school next year!  Childhood is definitely going by too fast.

Two more quick cute stories before I show you what I made Julius for his graduation present.  We showed Aladdin to Julius and Patricia this weekend but I had to explain a couple of concepts like stealing and poverty to them before they understood some of the songs.  Julius knew that poverty was when you had no money, but I somehow don’t think he connected not having money to not being able to eat.  Patricia still did not quite grasp why you’d need to steal because as she pointed out if Aladdin wanted some bread “he just has to say, ‘please could I have a piece of bread?'” Which is a nice thought, always helps to be polite.  Patricia still uses the baby sign language for please when she says “please” which is basically rubbing her hand in a circle on her torso.  This means whenever she asks for a napkin because her hands are covered in peanut butter or some other unmentionable goo (read: all the time) she conveniently smears the substance all over her shirt before obtaining the napkin.  Can’t fault her for politeness.

Yesterday I told Julius he could come with me to the store but he had to put his shoes on.  For some reason or another he only had one sock on (happens daily), so when I was asked, I told him he needed to wear socks with his sneakers and to go upstairs and get a new pair of socks.  I stopped paying attention and he got in the car and I realized he had on one boat shoe (on the foot with no sock) and one sneaker (on the foot with the sock).  I couldn’t help but applaud his innovative solution.  I wonder if anyone at the store noticed.

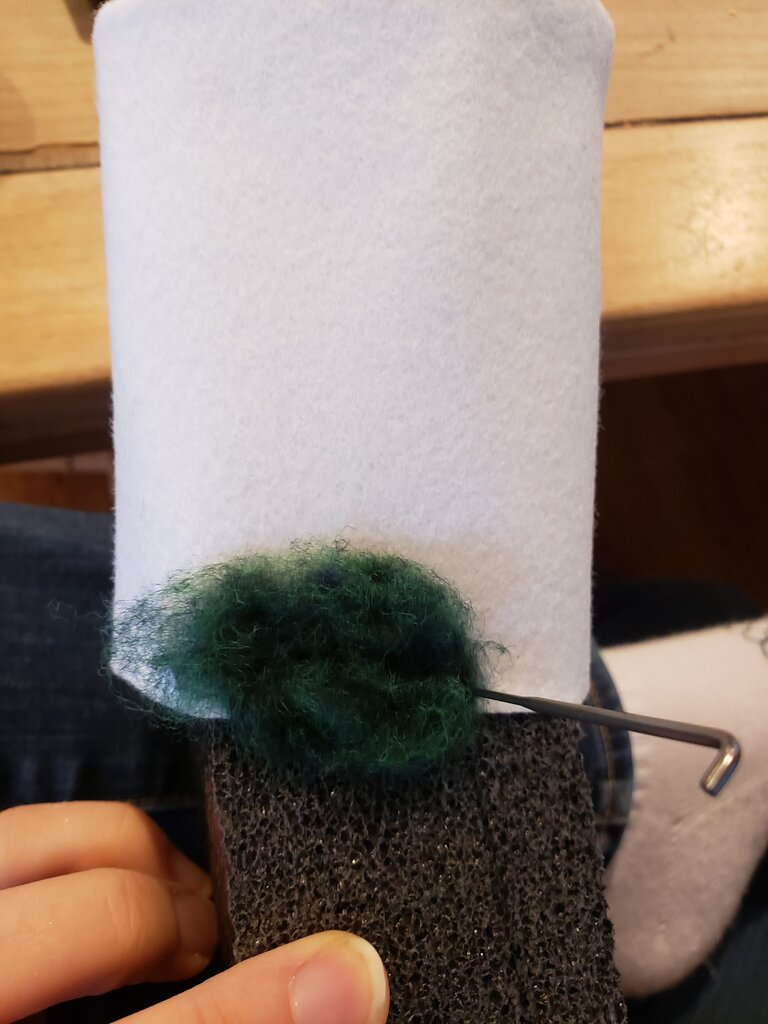
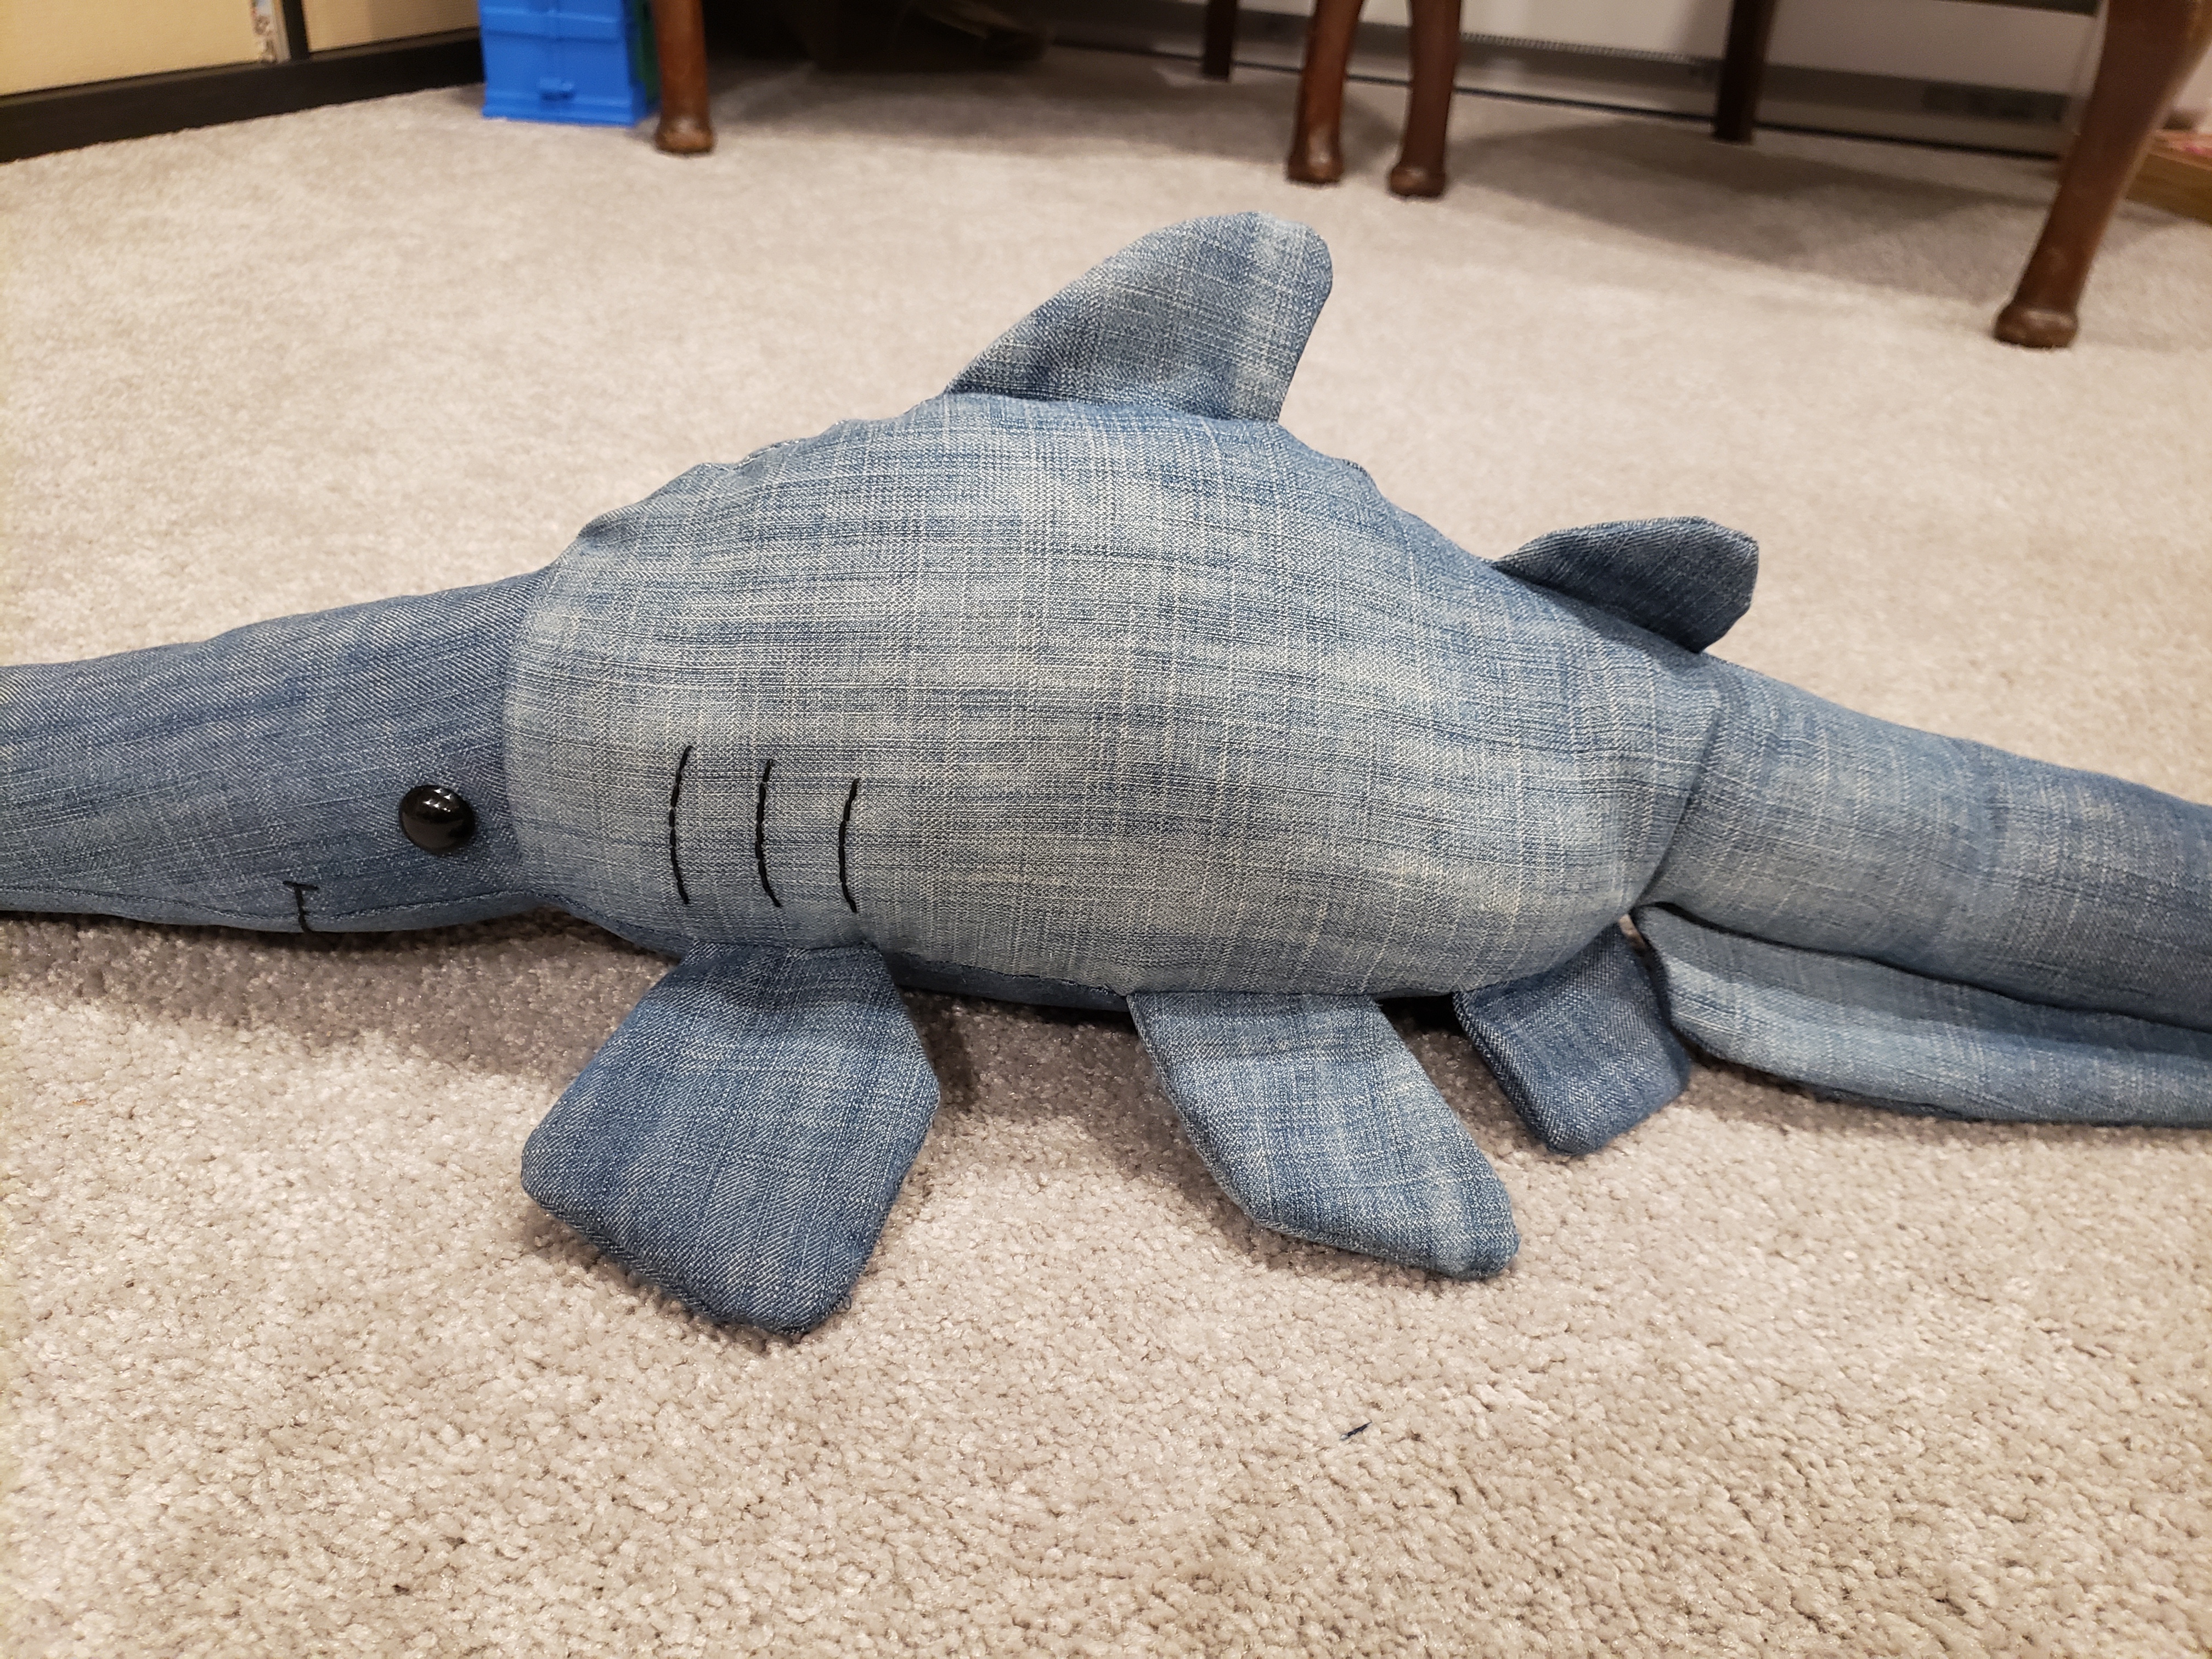
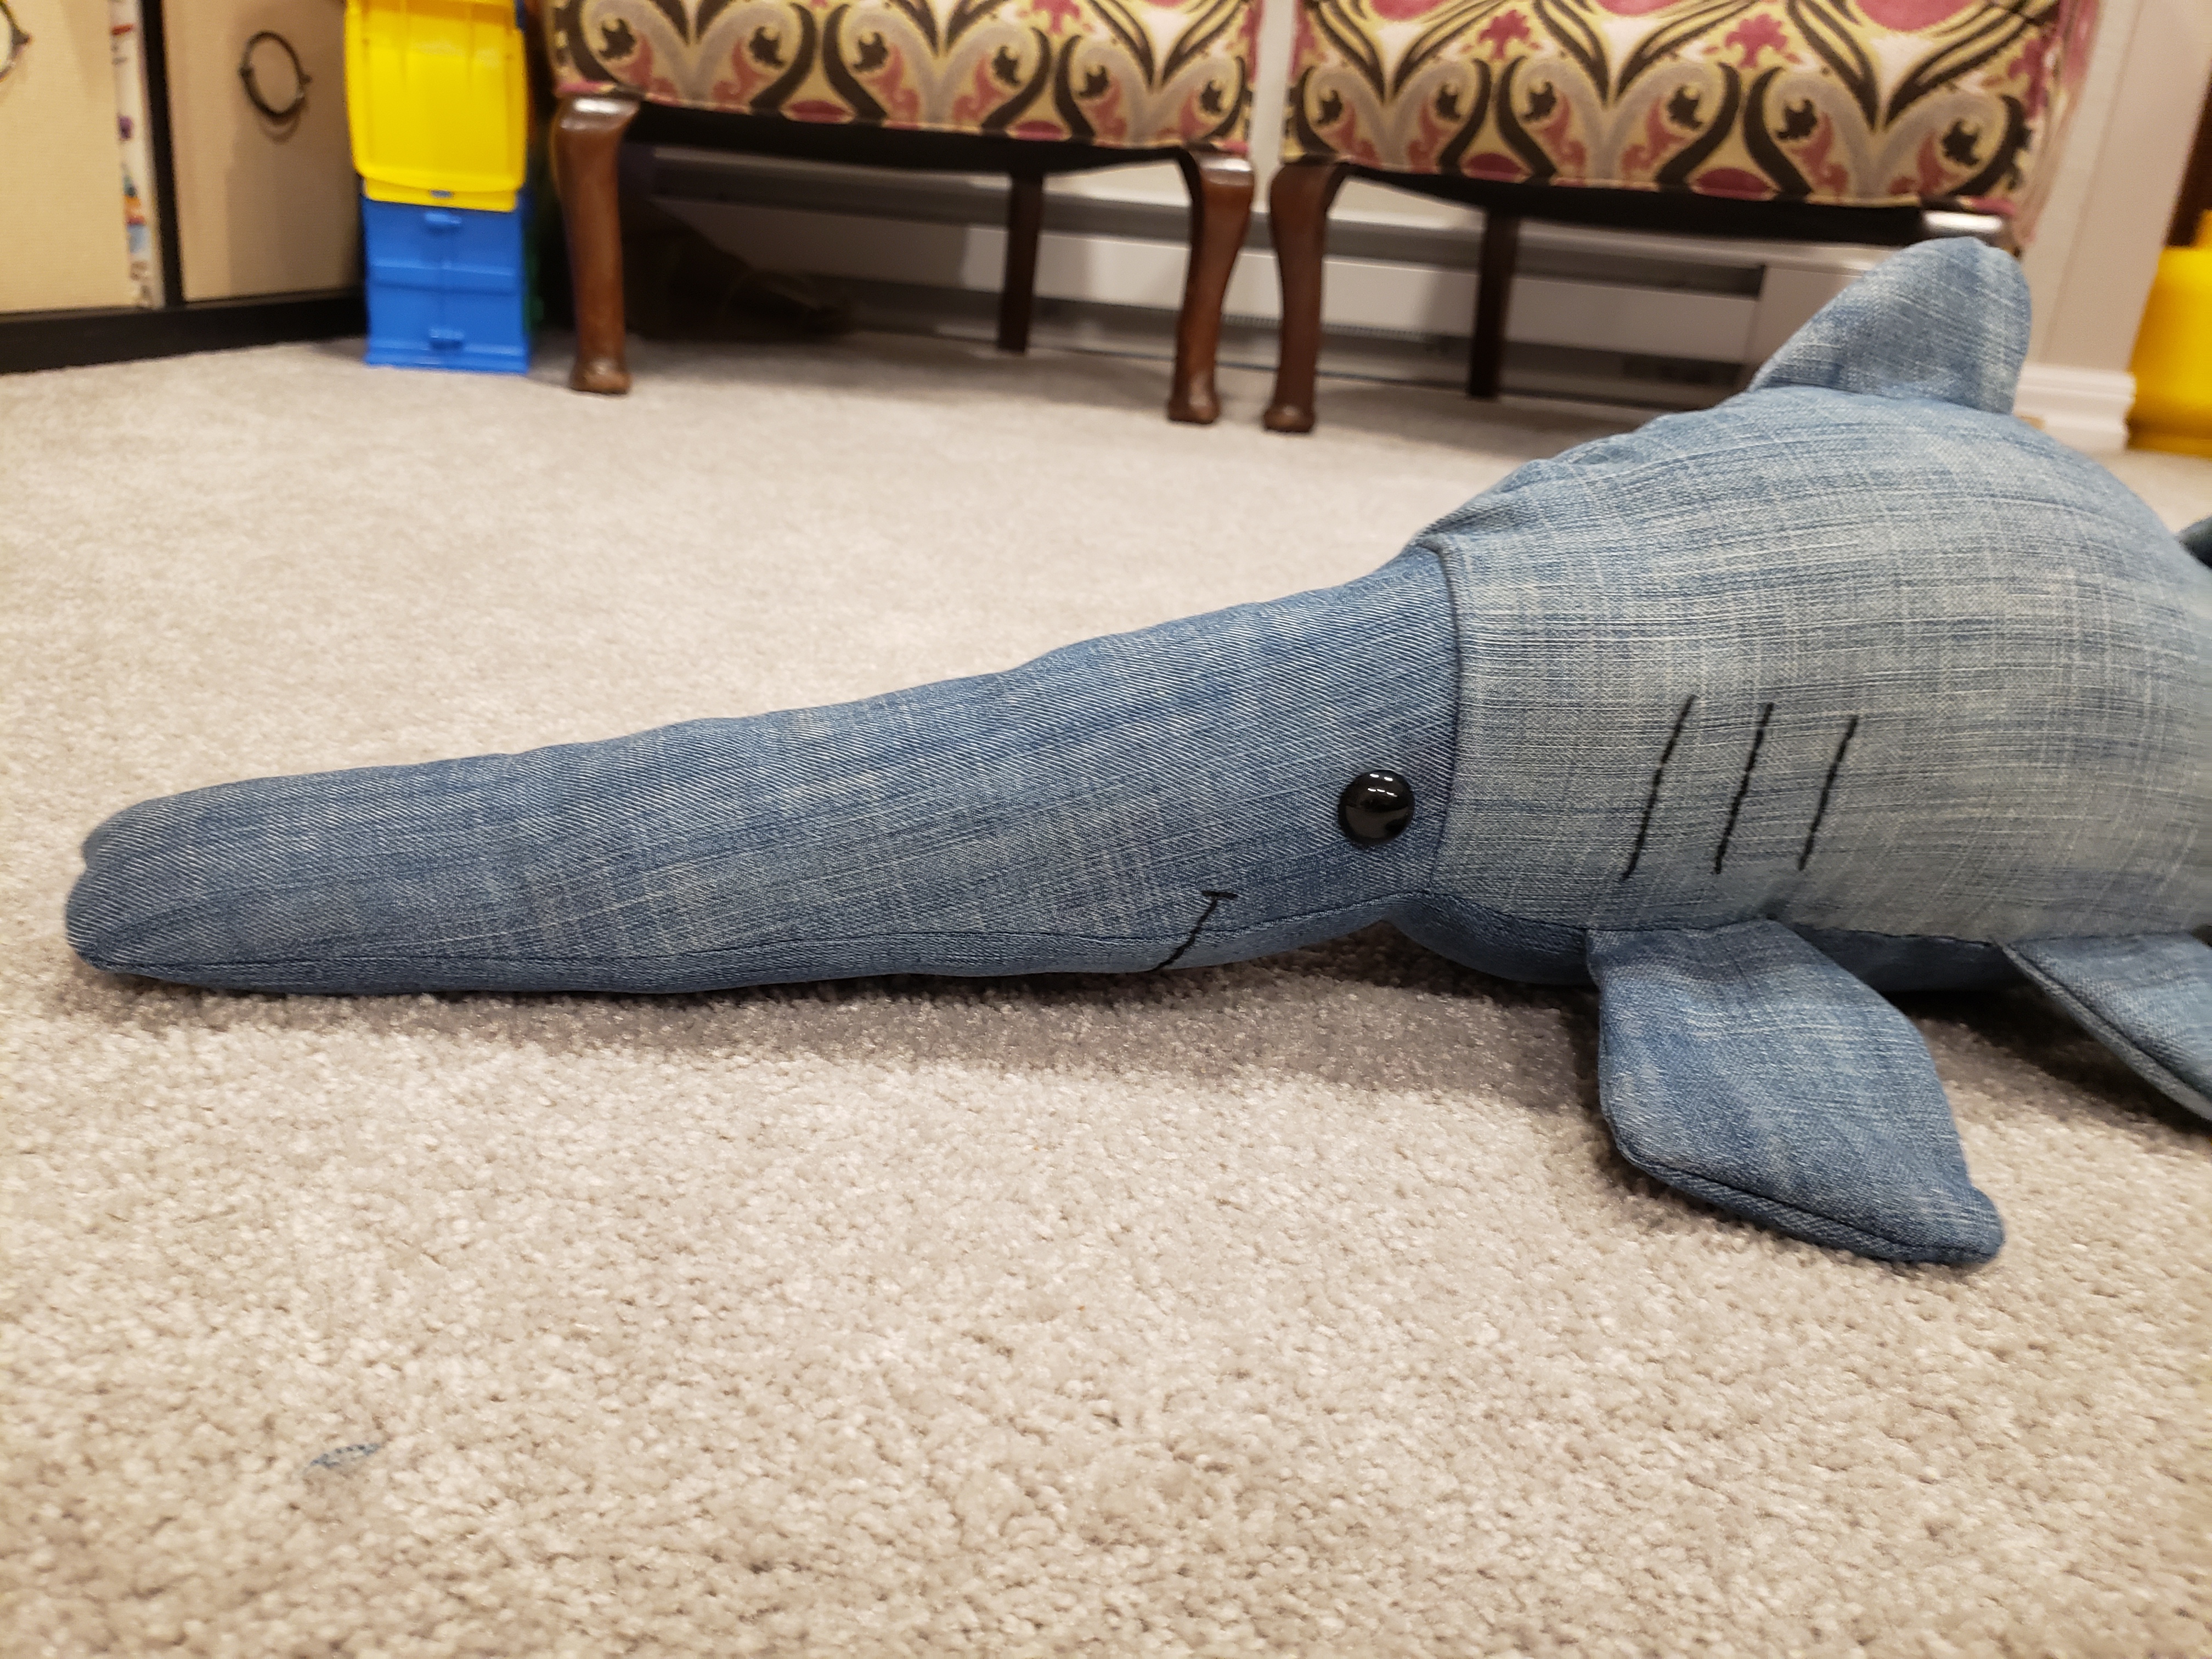
Julius, as you probably know by now if you’ve met Julius recently, is obsessed with sharks.  His favorite shark is a goblin shark.  Don’t look it up, you’ll regret it.  They are horrifying.  A thing of nightmares.  Julius thinks they are cute.  Which I guess they sort of are if you can find a picture of one with it’s mouth closed.  Anyway I was determined to make him a cute goblin shark stuffed animal.  I also really wanted to use old jeans to make it, of which I have a nearly infinite supply thanks to Will’s knife-knees that rip holes in jeans after a single wear.  Goblin sharks have a long, flat, pointed nose (reminder: don’t look it up) on a smallish body with a really neat looking long tail (you looked it up didn’t you?  I warned you.)  To make the nose flat on the horizontal I had to join the head of the shark to the rest of the shark (which was made on the vertical).  I don’t love how that part came out because it would have been better to make the shark one continuous piece, but overall I think she came out pretty cute. (It’s a female goblin shark – Julius named her Meringue.)  Oh one last thing.  I thought I was being really clever with the jeans because they are blueish grey with a bit of texture (maybe like a shark’s rough skin) but apparently goblin sharks are this sickly greyish pink like a naked mole rat (if you’ve gotten this far without googling, don’t do it now).  I guess that’s from not being exposed to light?

The great news though is that now you can make your very own upcycled goblin shark for nearly free.  For mine I just bought the eyes which were less than $1.50 thanks to the nice cashier who gave me some coupons. 

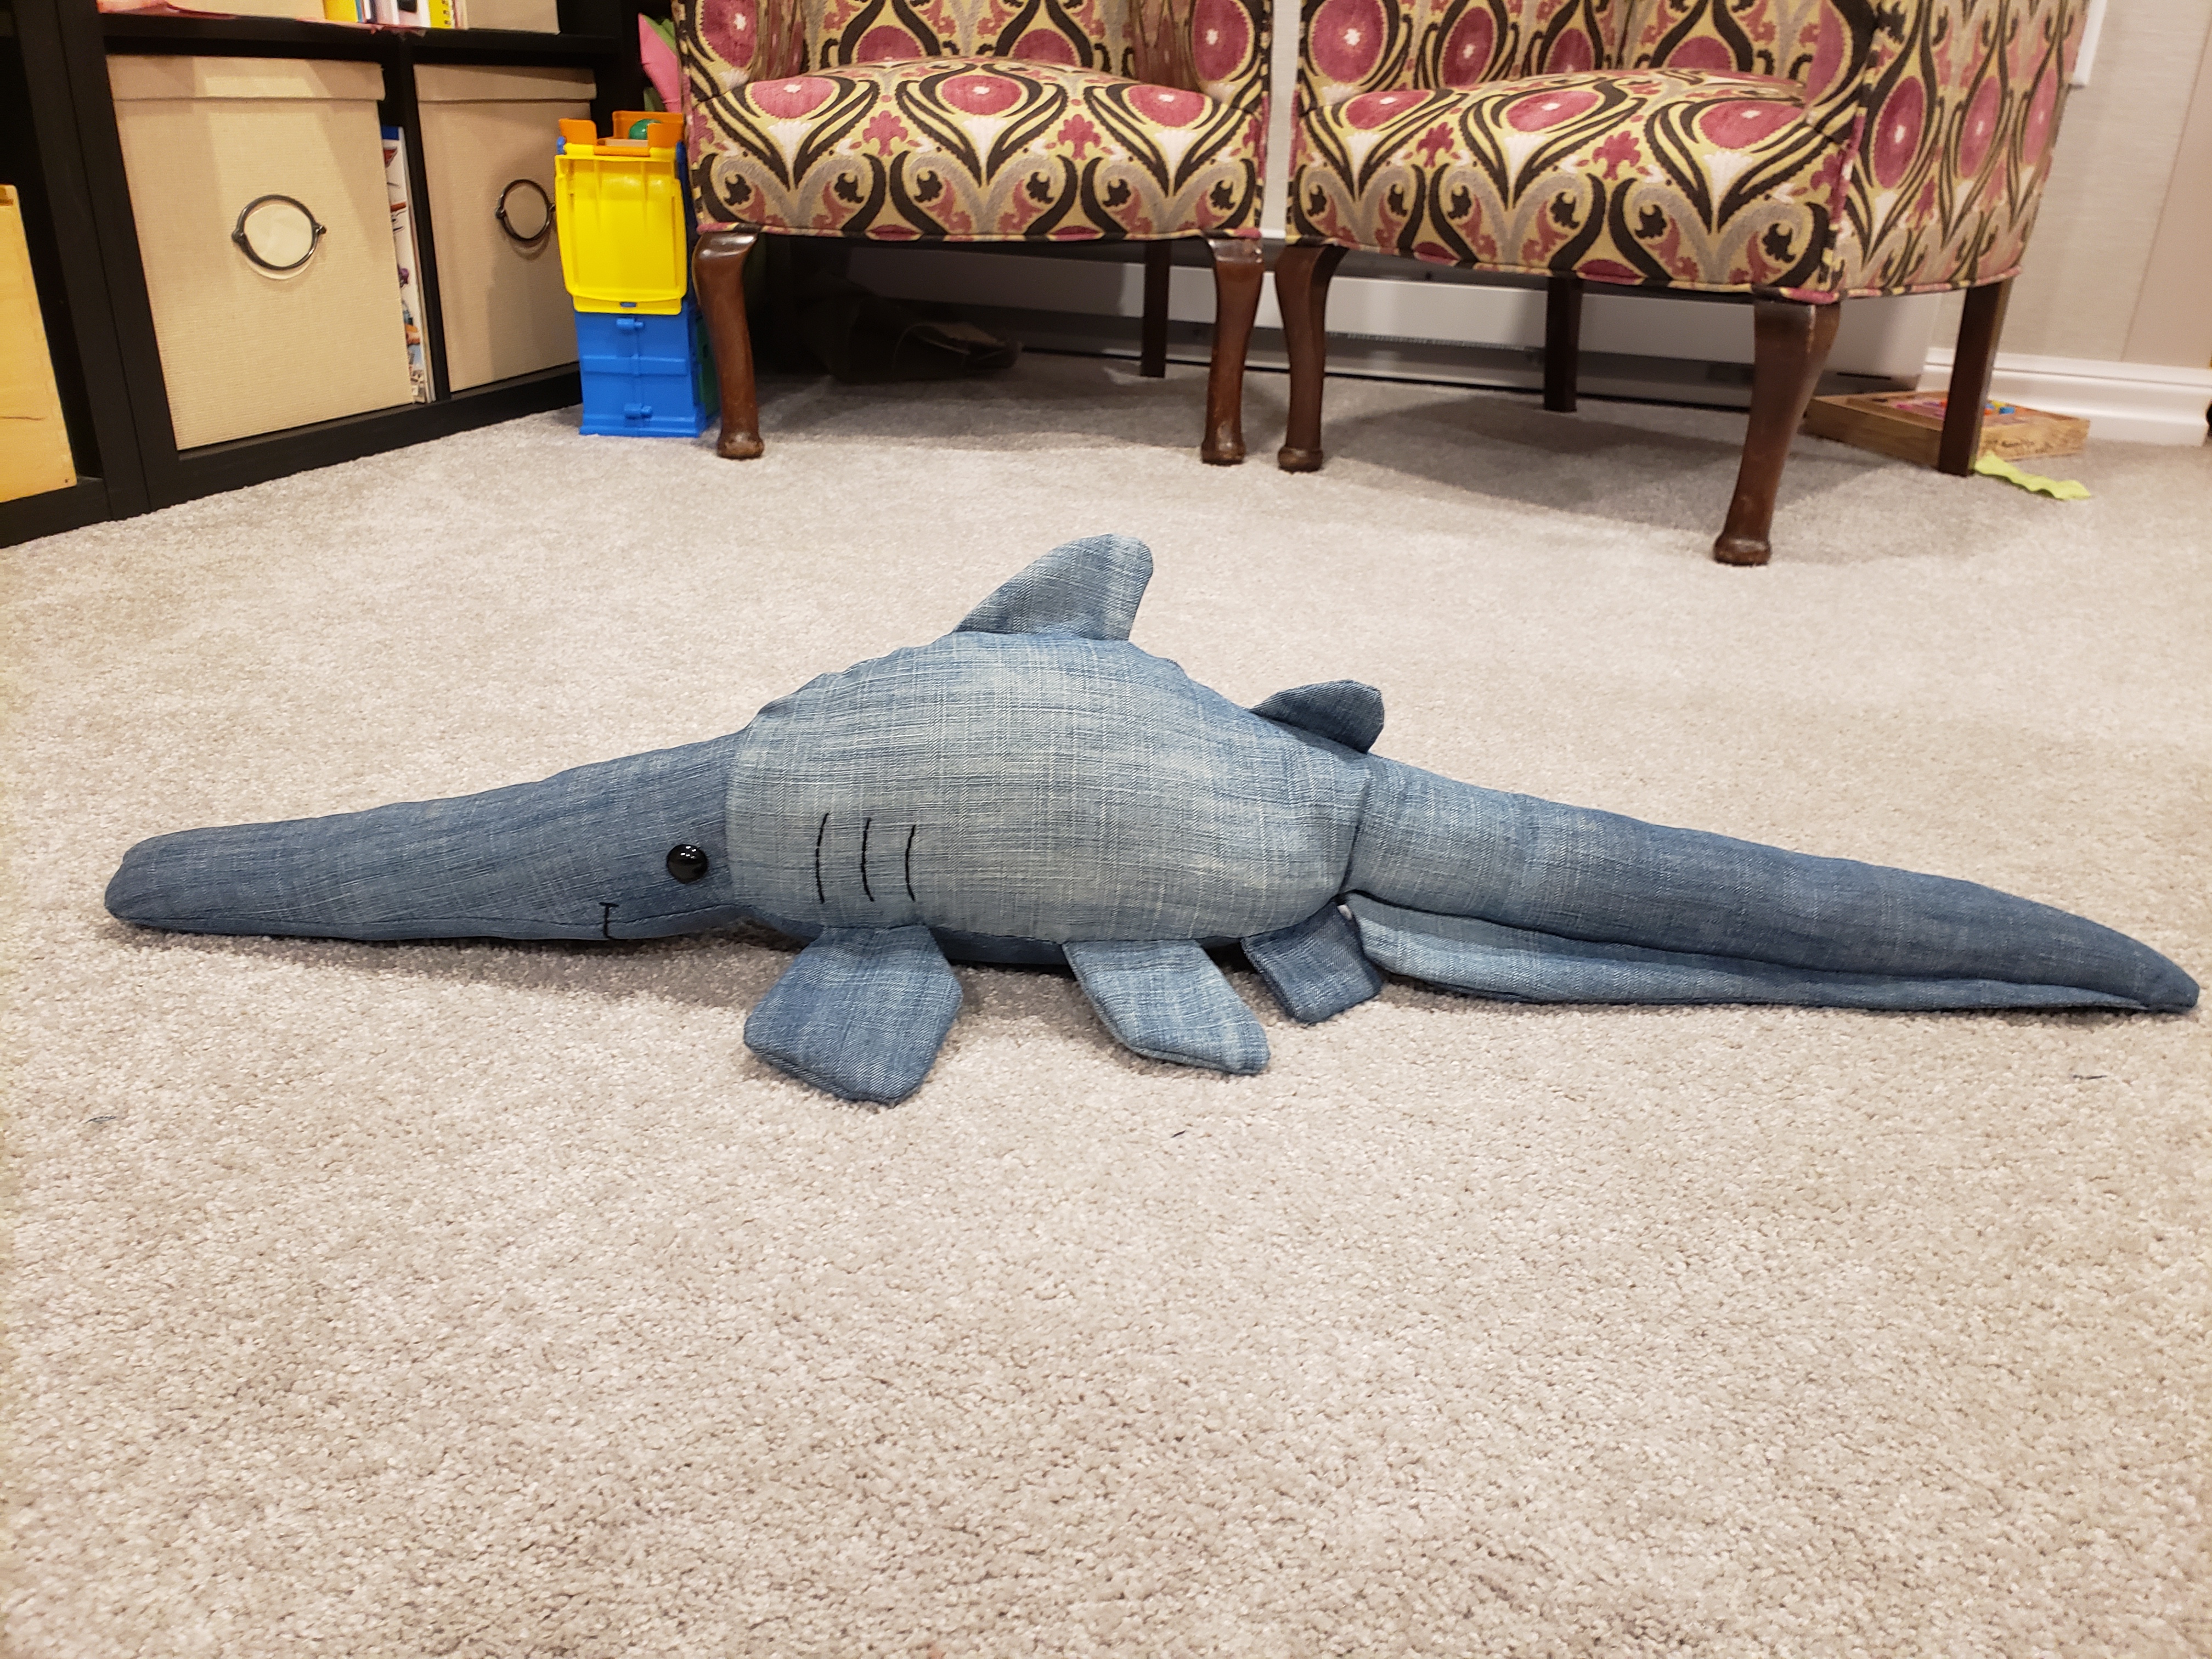
Stuffed Goblin Shark from Upcycled Jeans

What you’ll need:

  • 1 pair of ripped jeans (mine were from one of Will’s size 34×34)
  • stuffing material (I use recycled polyester polyfil)
  • pair of 18mm solid black eyes (I used these)
  • black embroidery thread and embroidery needle
  • My pattern here

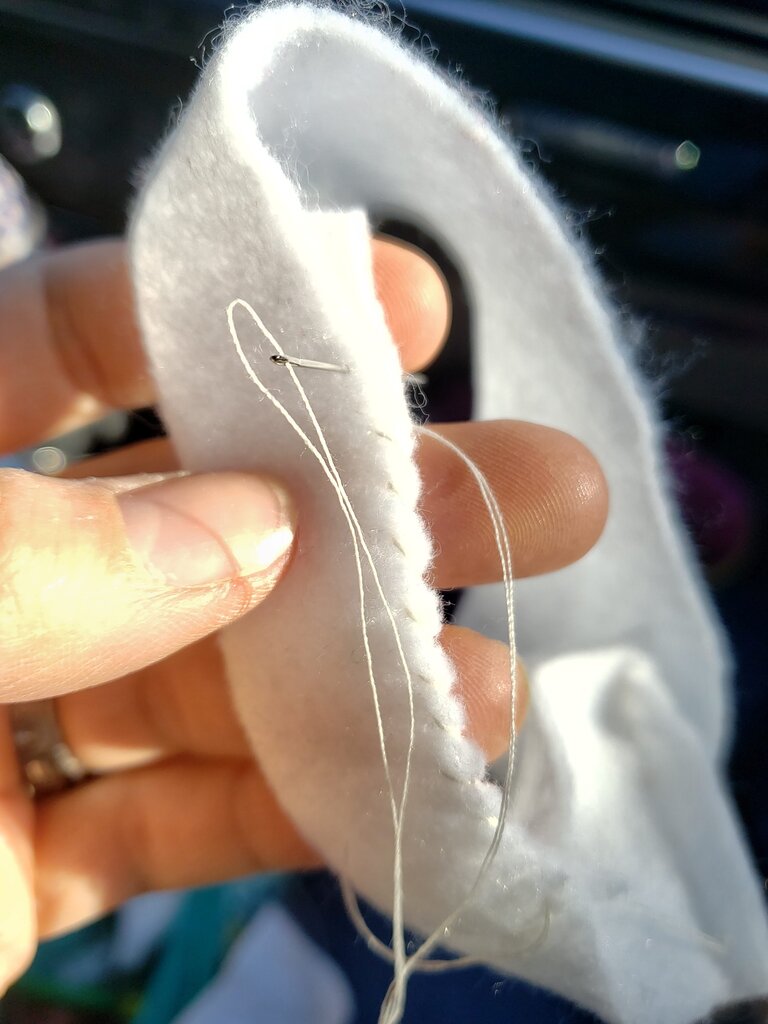
Cut out all pattern pieces from jeans, starting with the larger pieces, and squeezing in the smaller ones where able.  For the pieces with NSA (no seam allowance) add 1/2″ seam allowance to the pieces when cutting. 

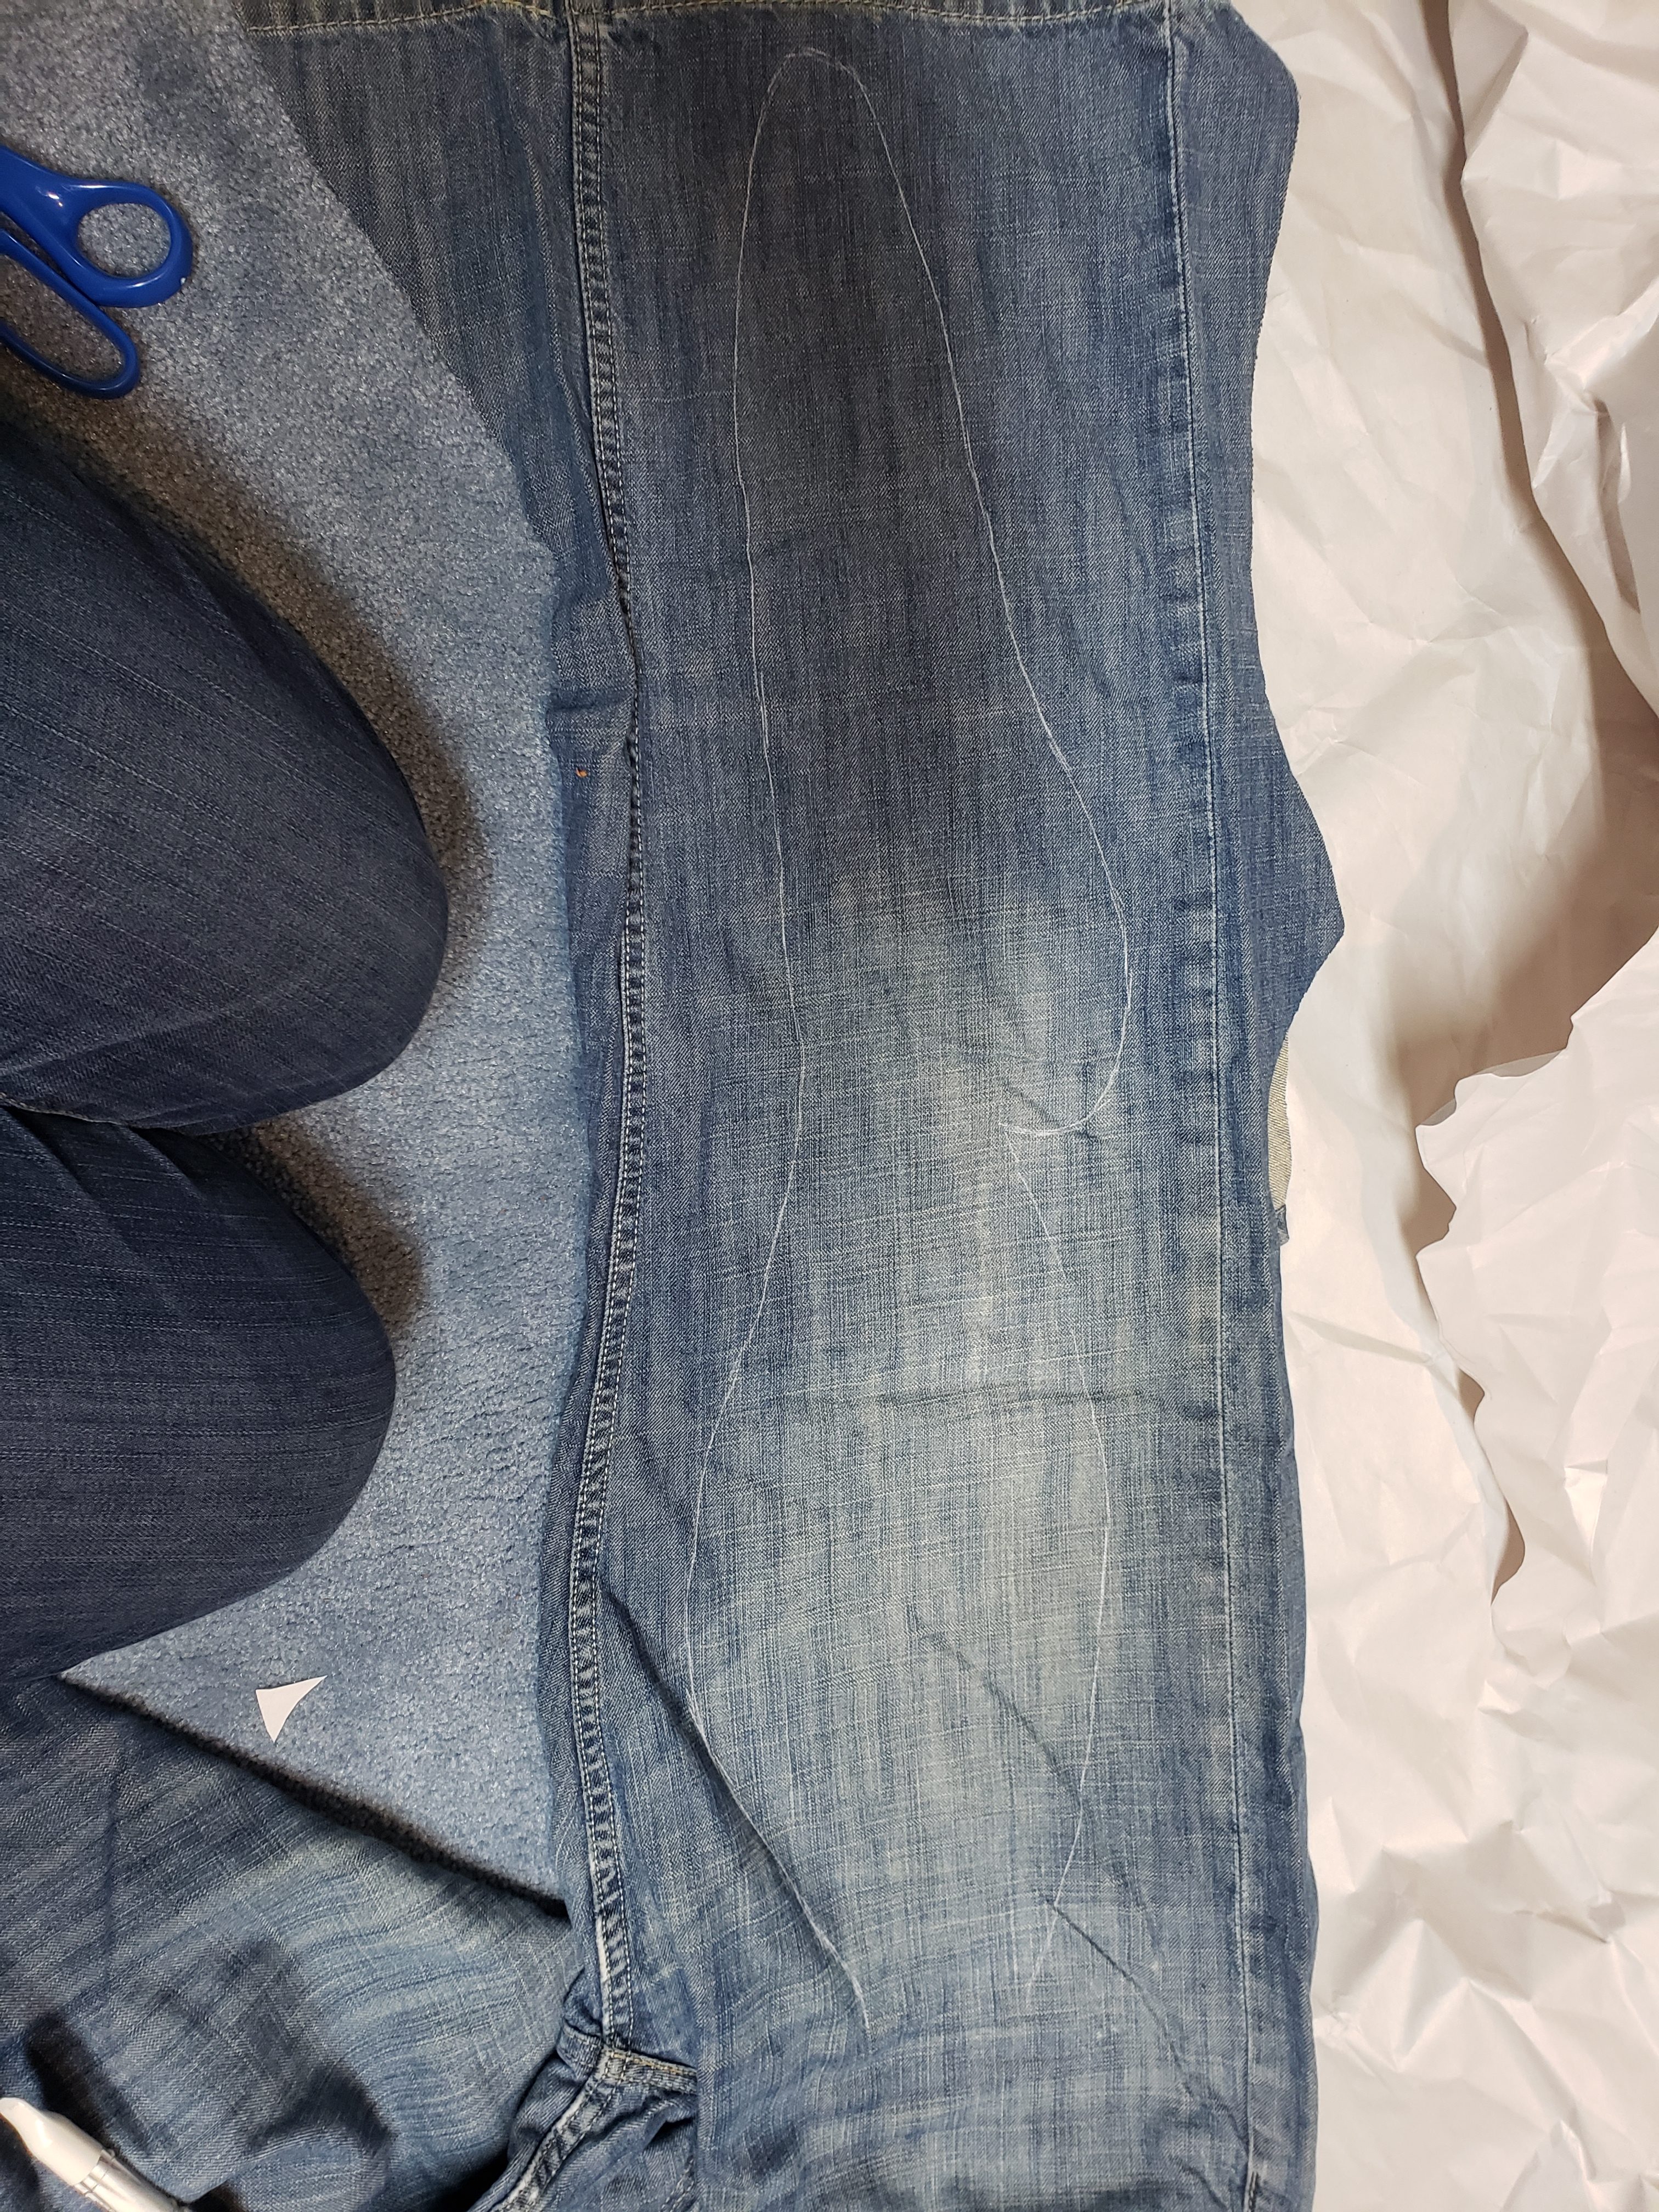
Stitch all fin pieces together to form a total of 8 fins.  

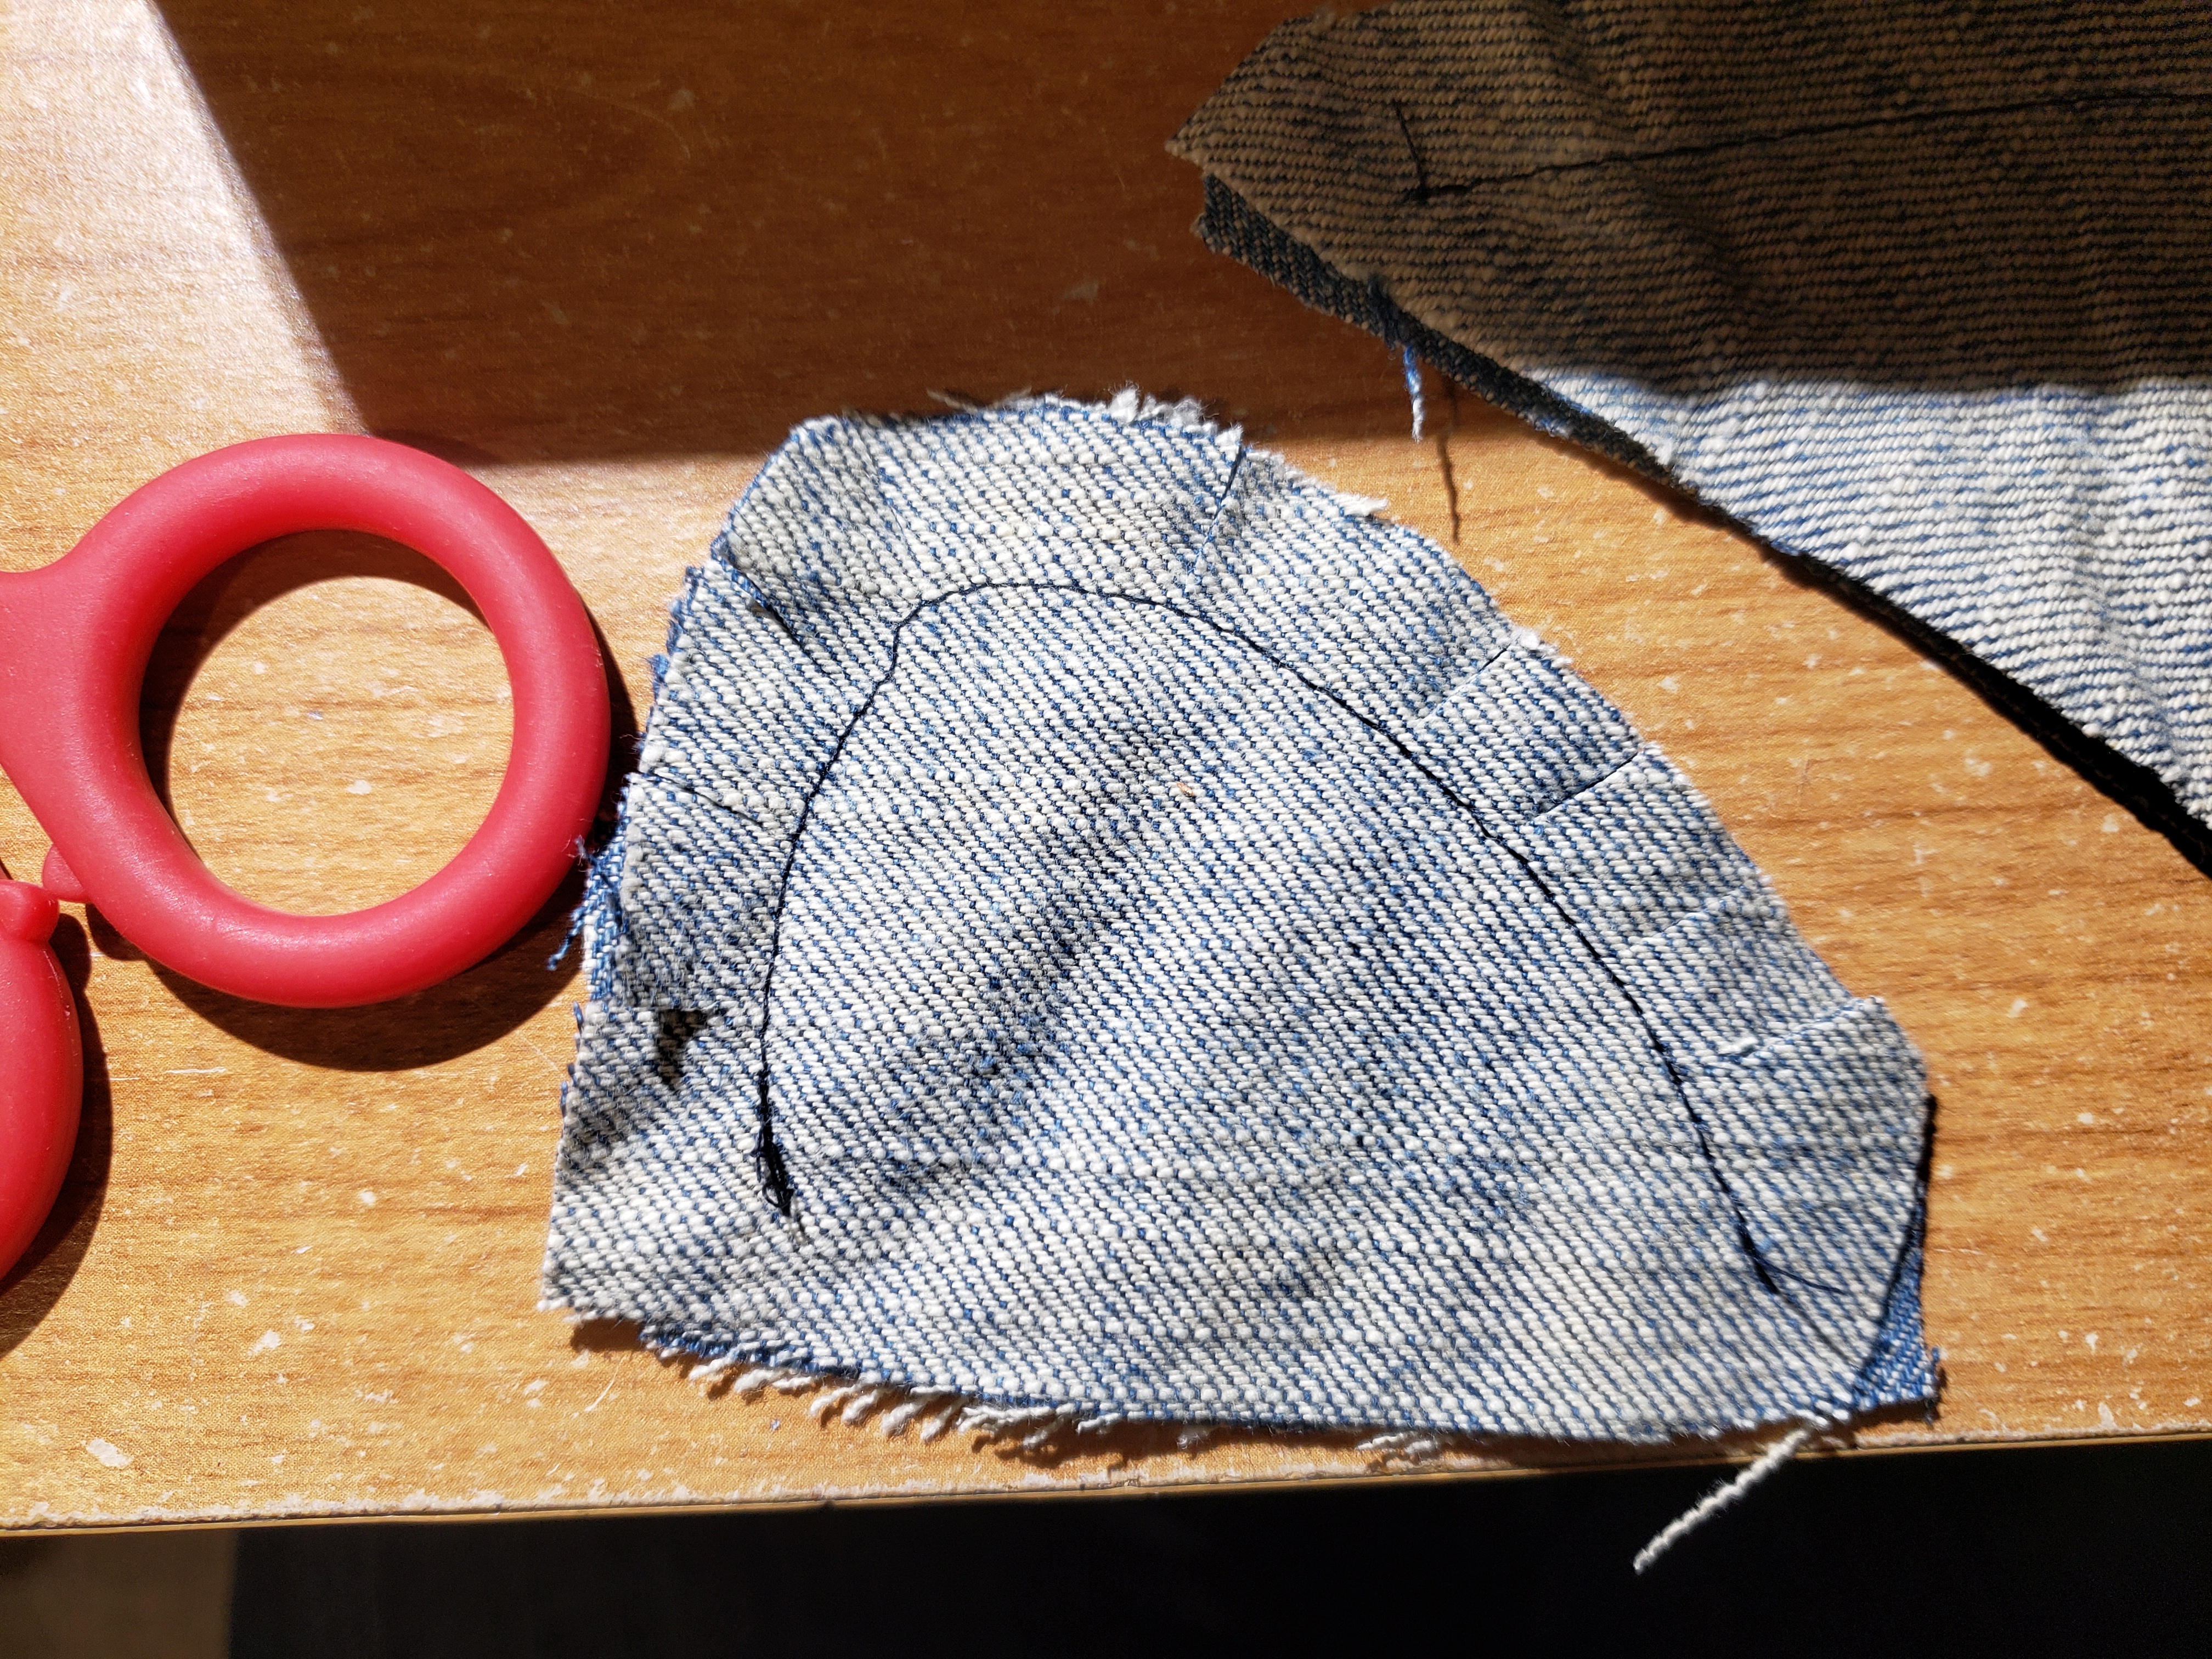
Clip curves on fins and turn right side out. 

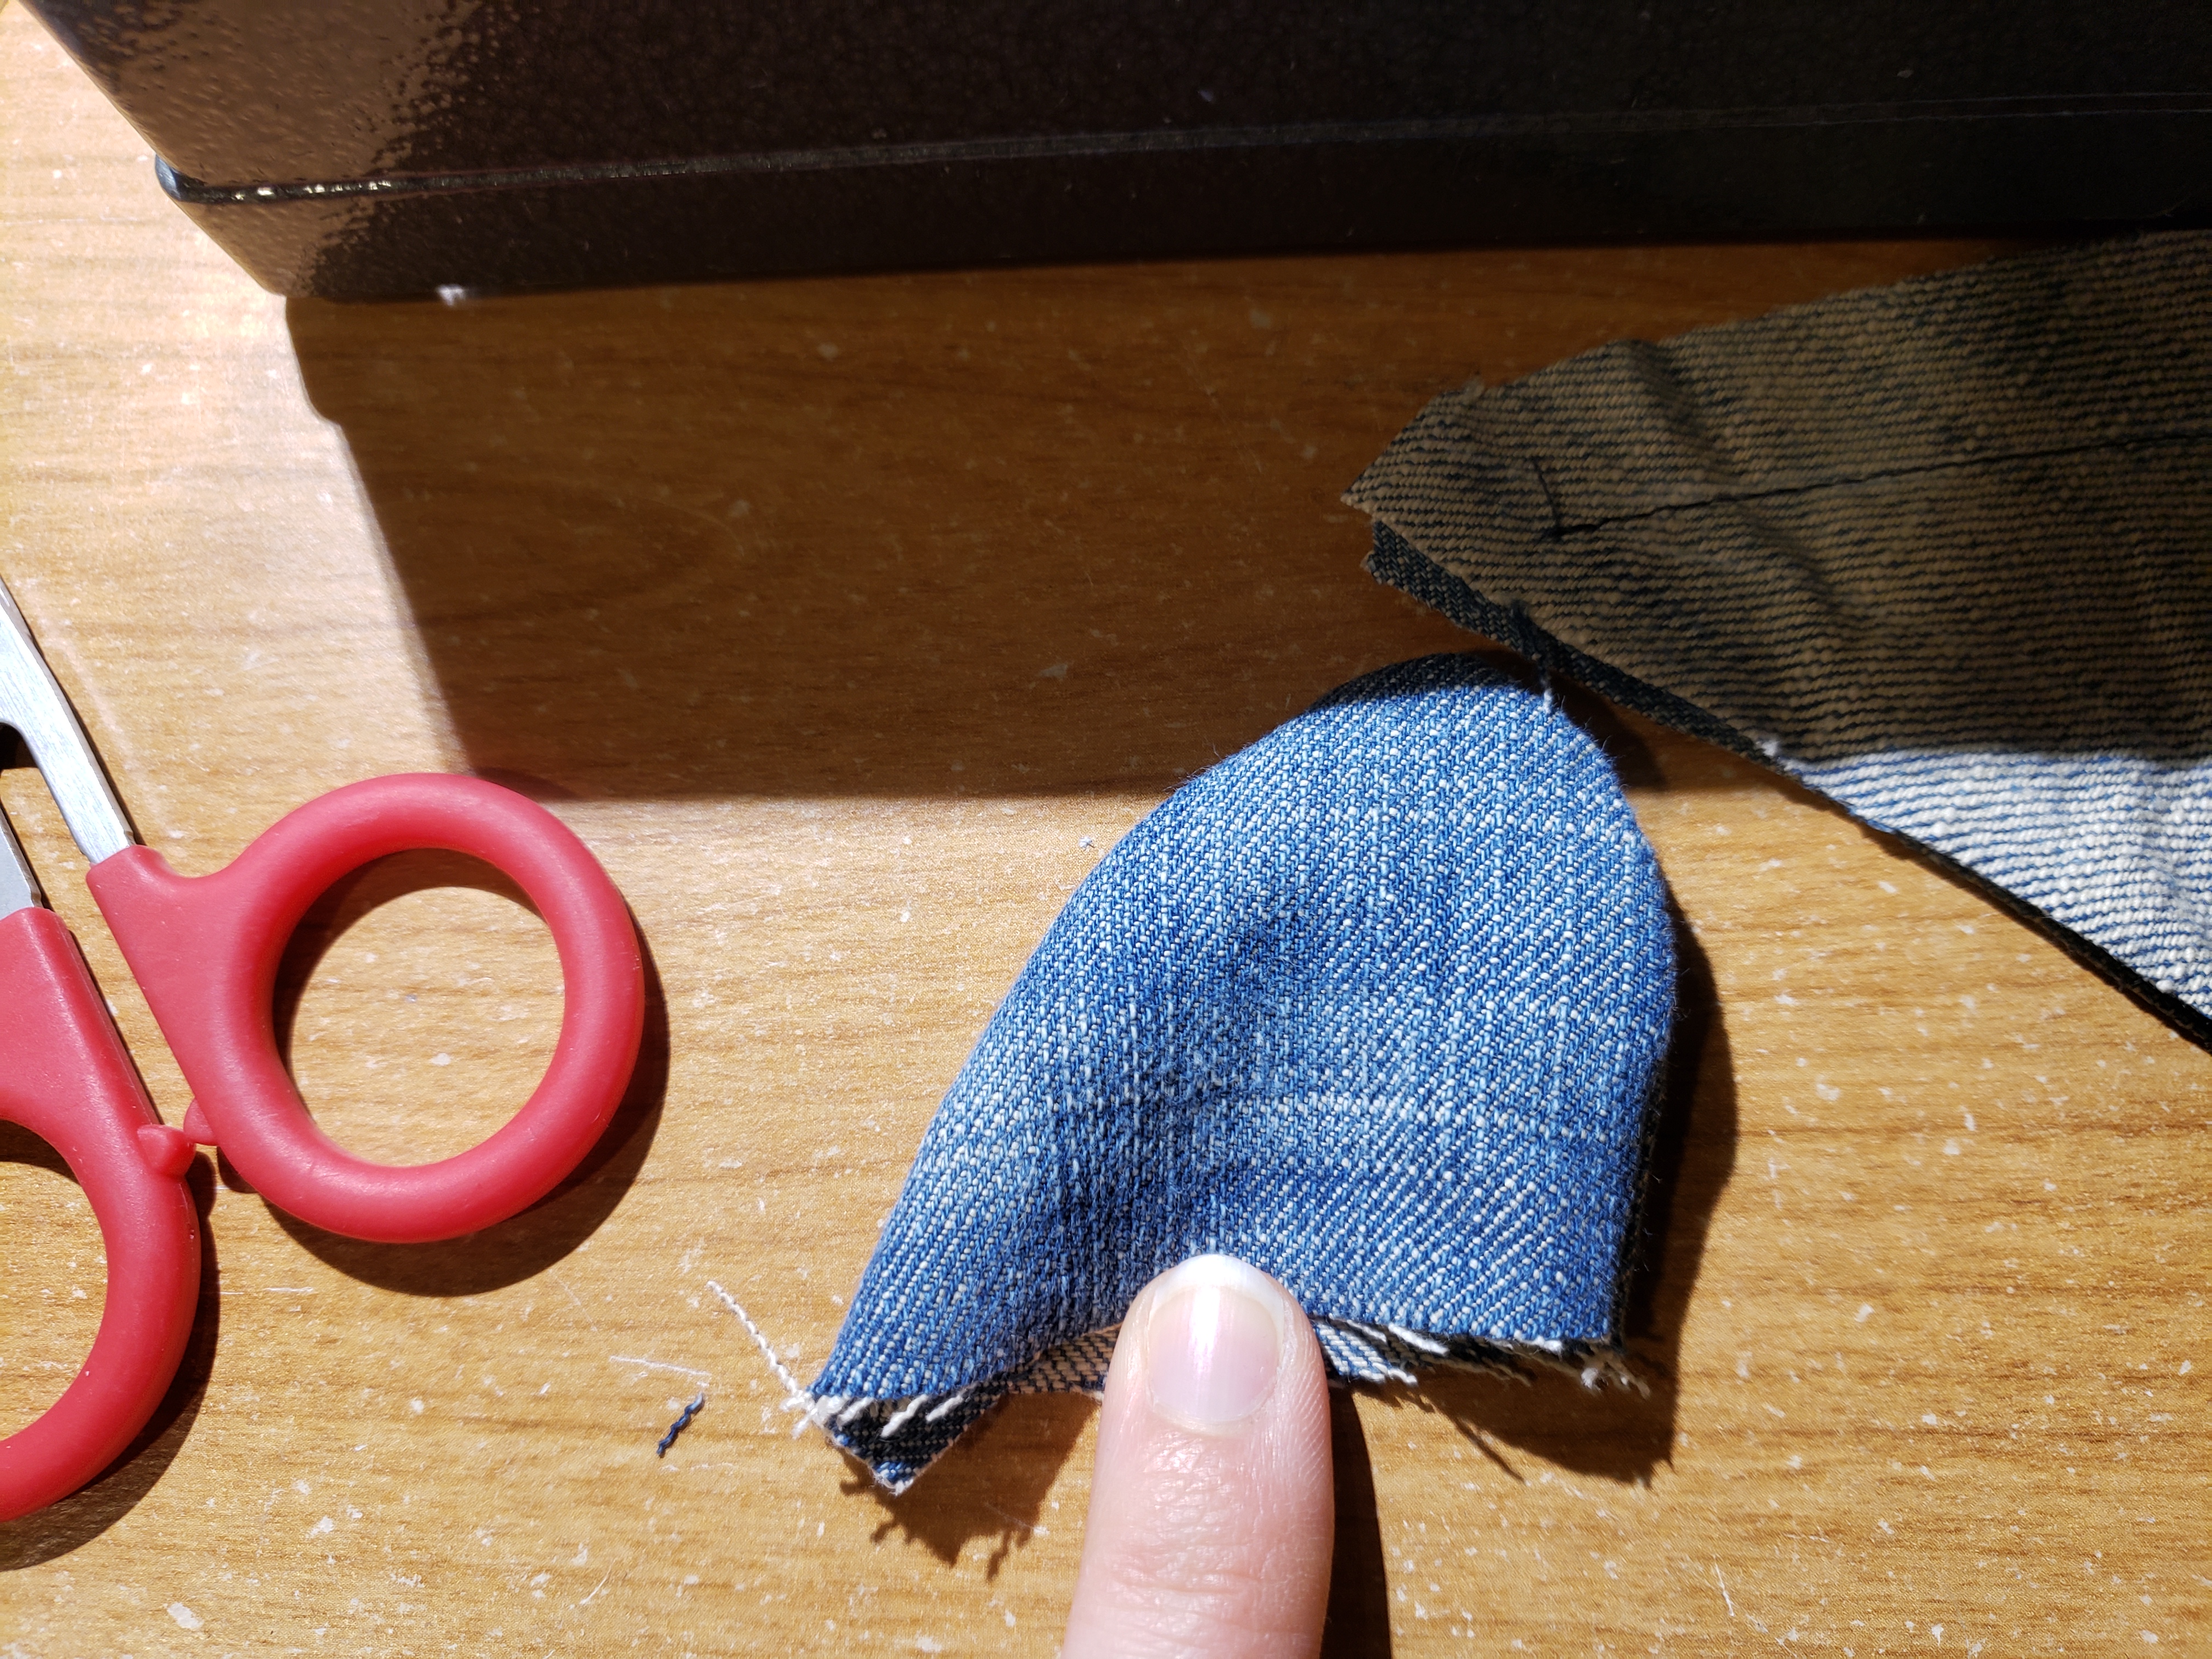
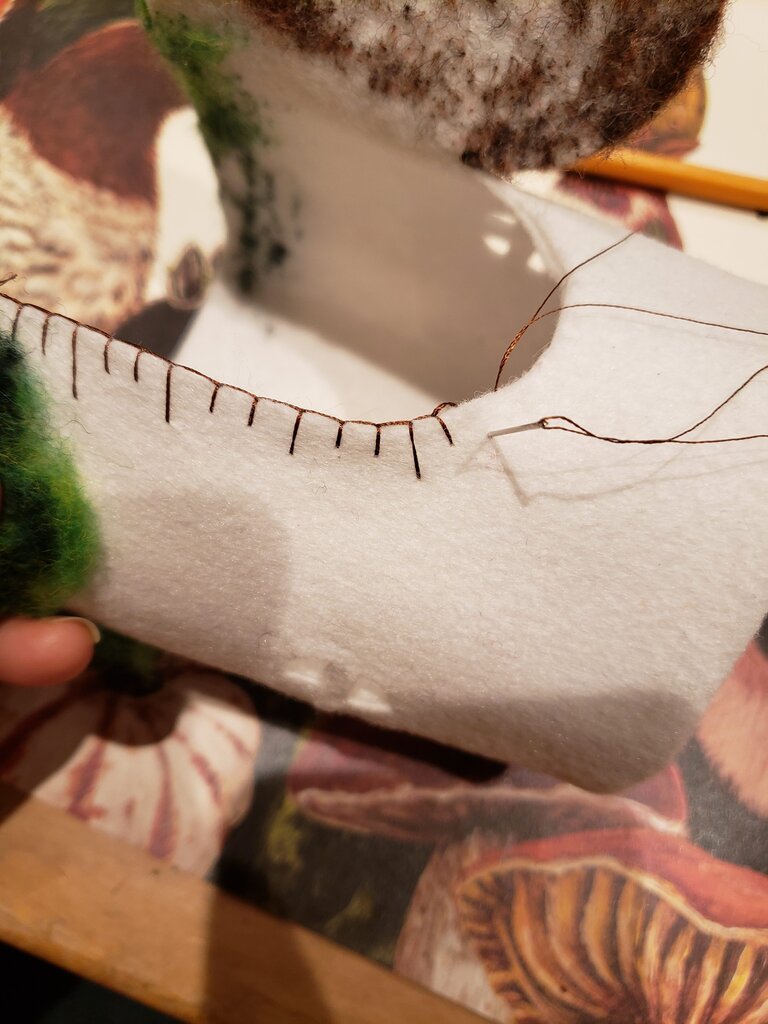
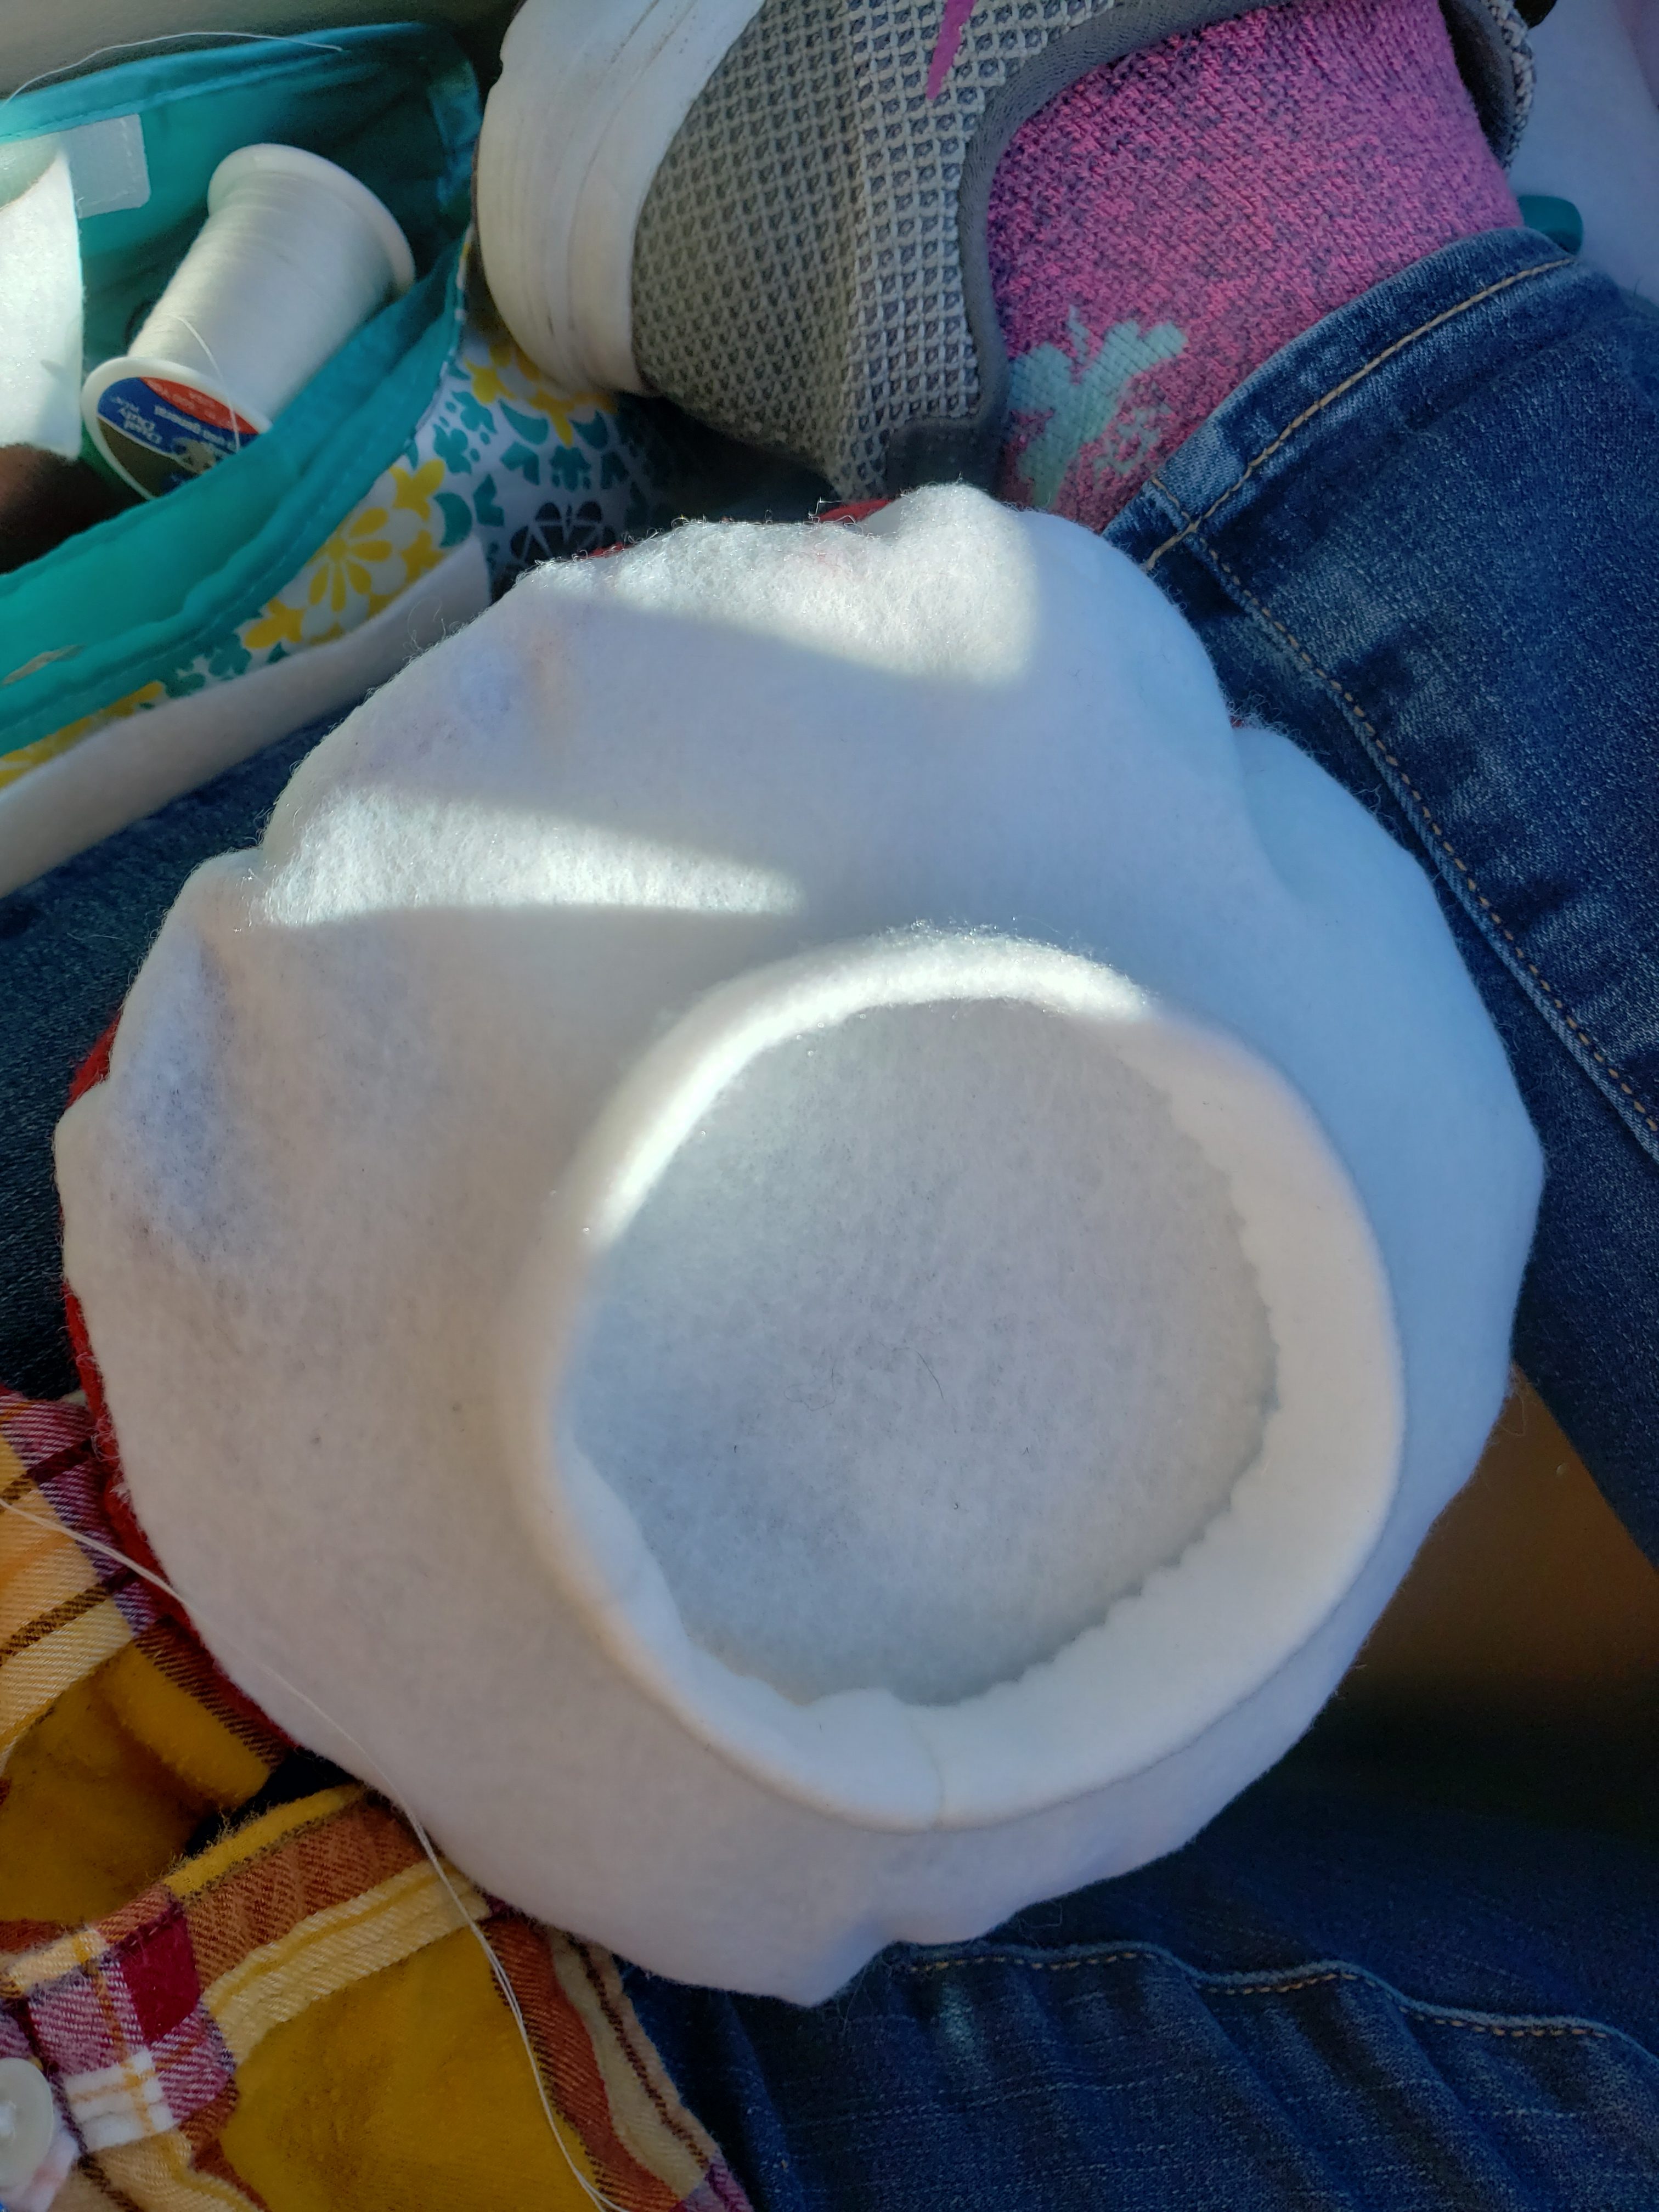
Pin the two body/tail portions of the shark together from front to the point where the tail meets the body on the underside of the shark.  

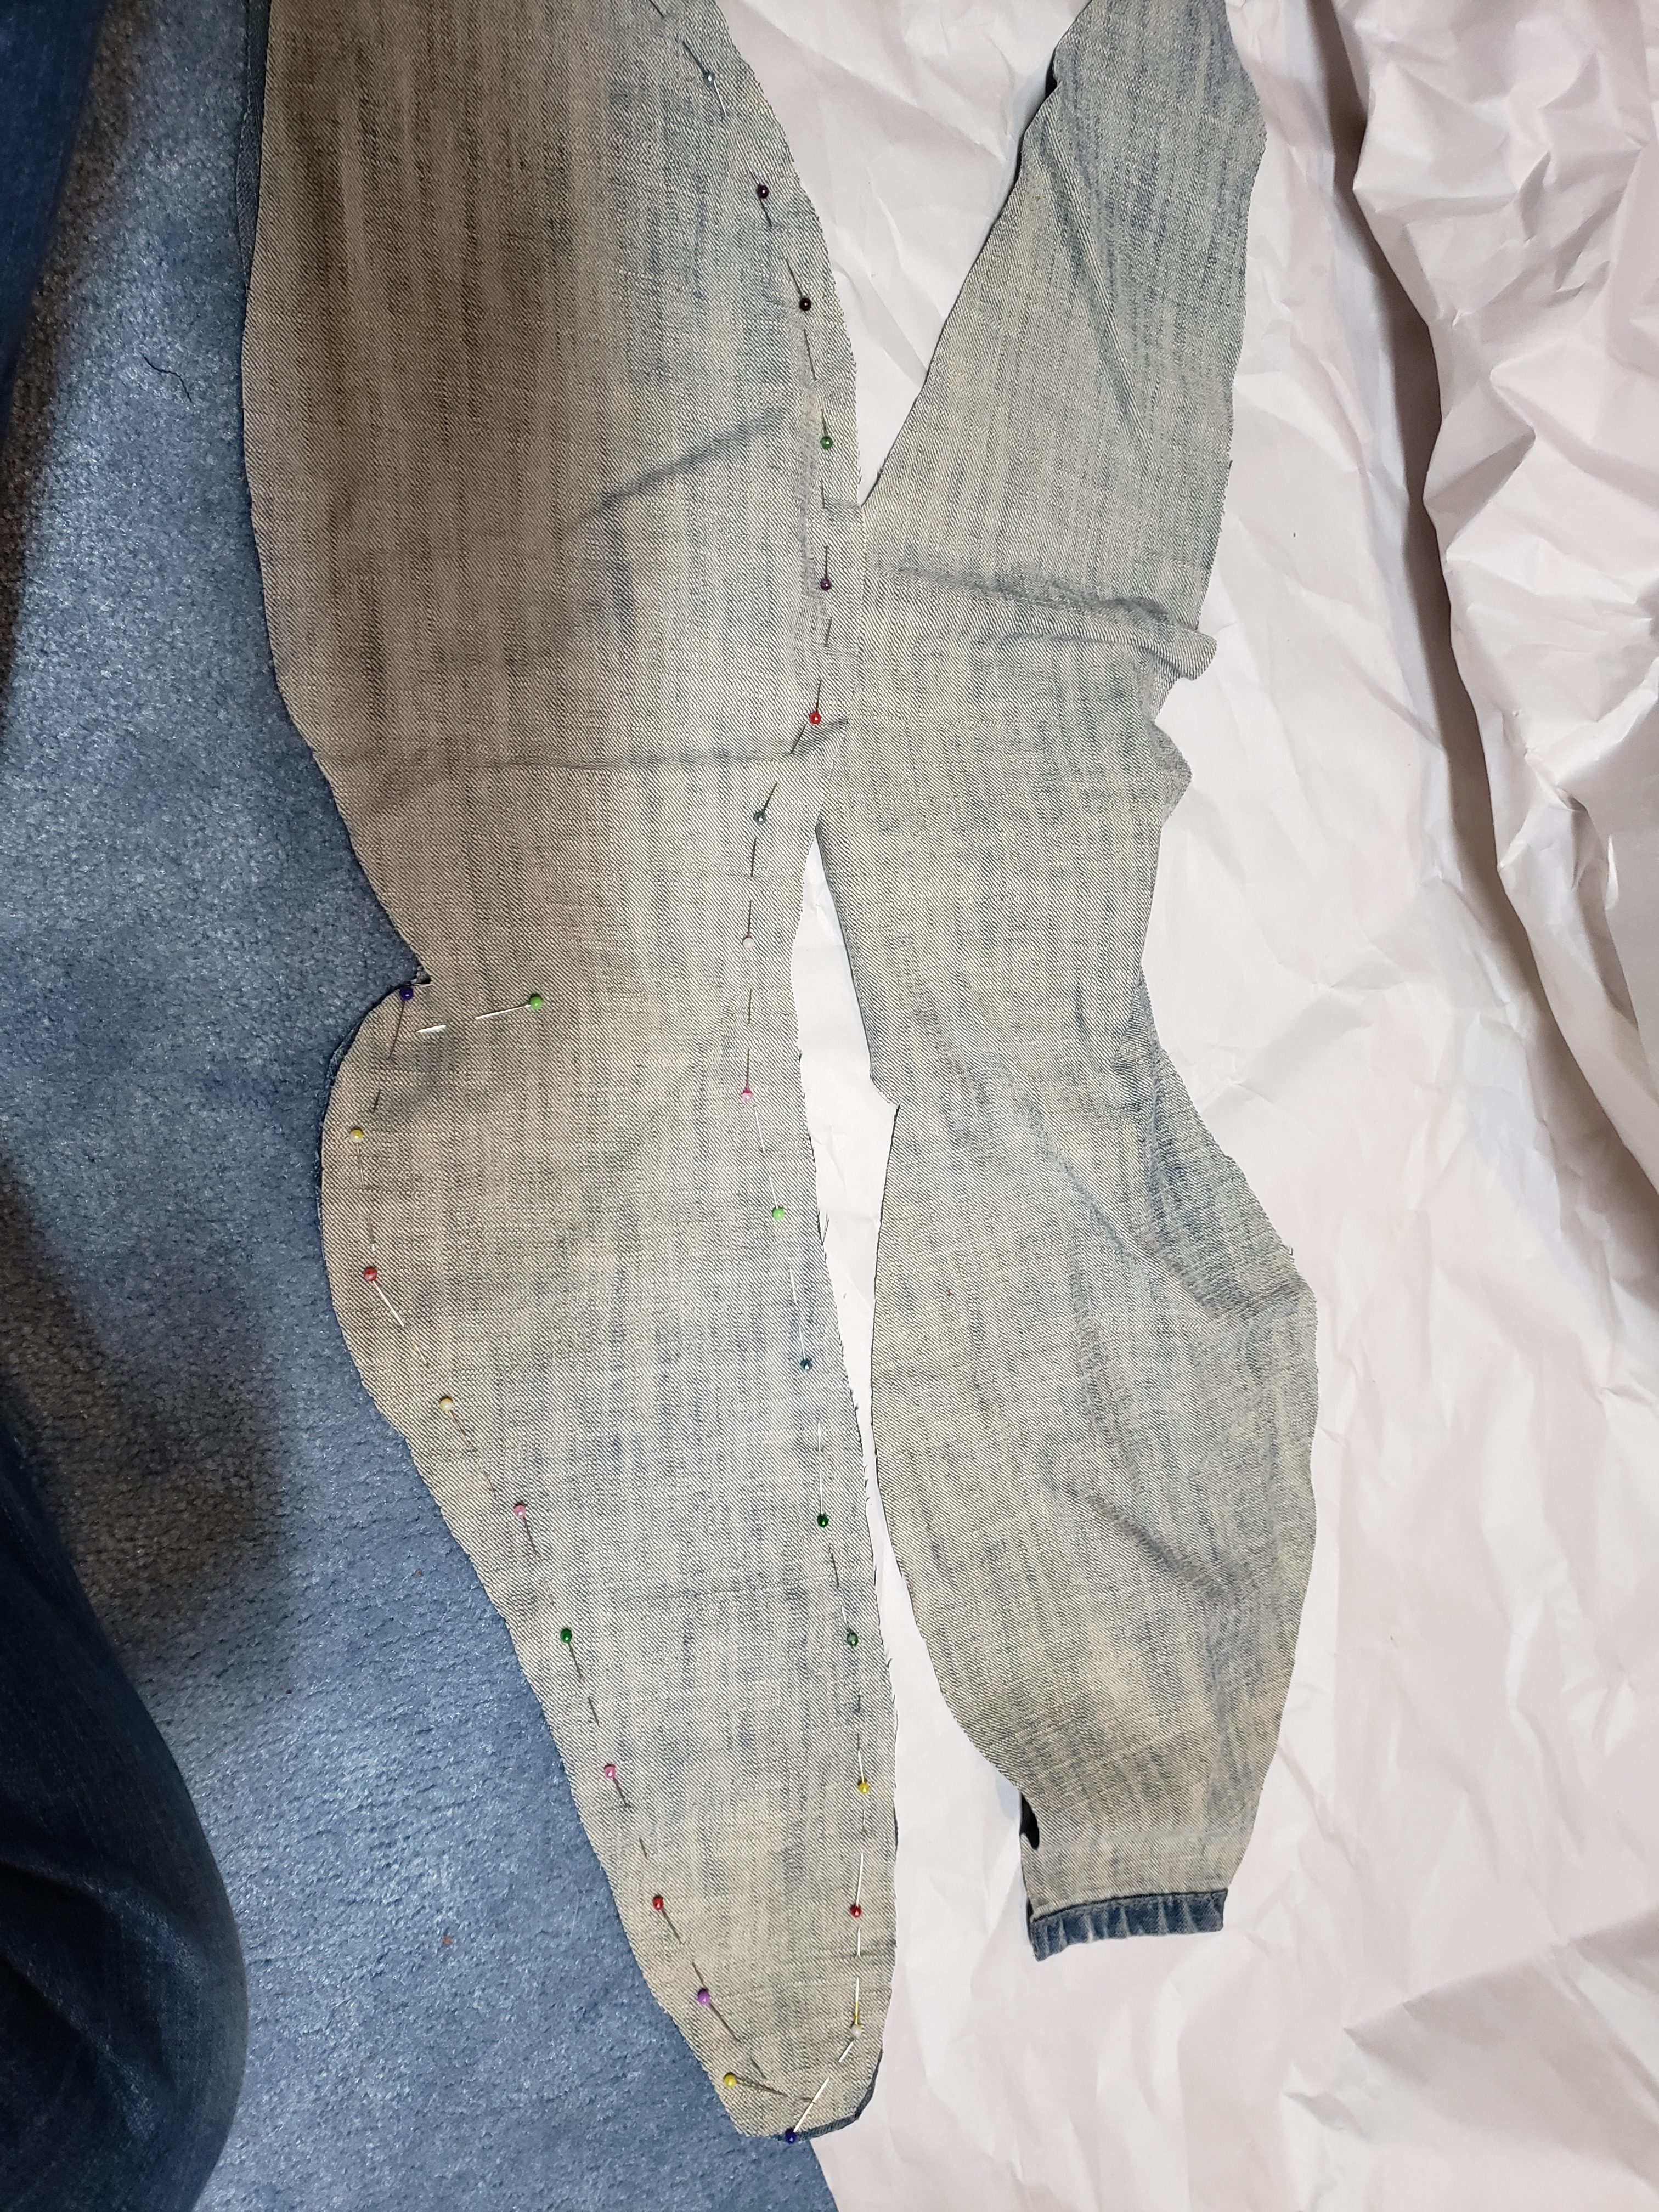
Remove pins and insert first dorsal fin and second dorsal fin inside the shark, then repin.  Stitch.

This is around where you should pin the dorsal fins, but note they should be stitched and turned by this point and they should be placed INSIDE the fish at this point.

Attach snout of shark to front of shark, centering along the spine of the shark, right sides of fabric together.  

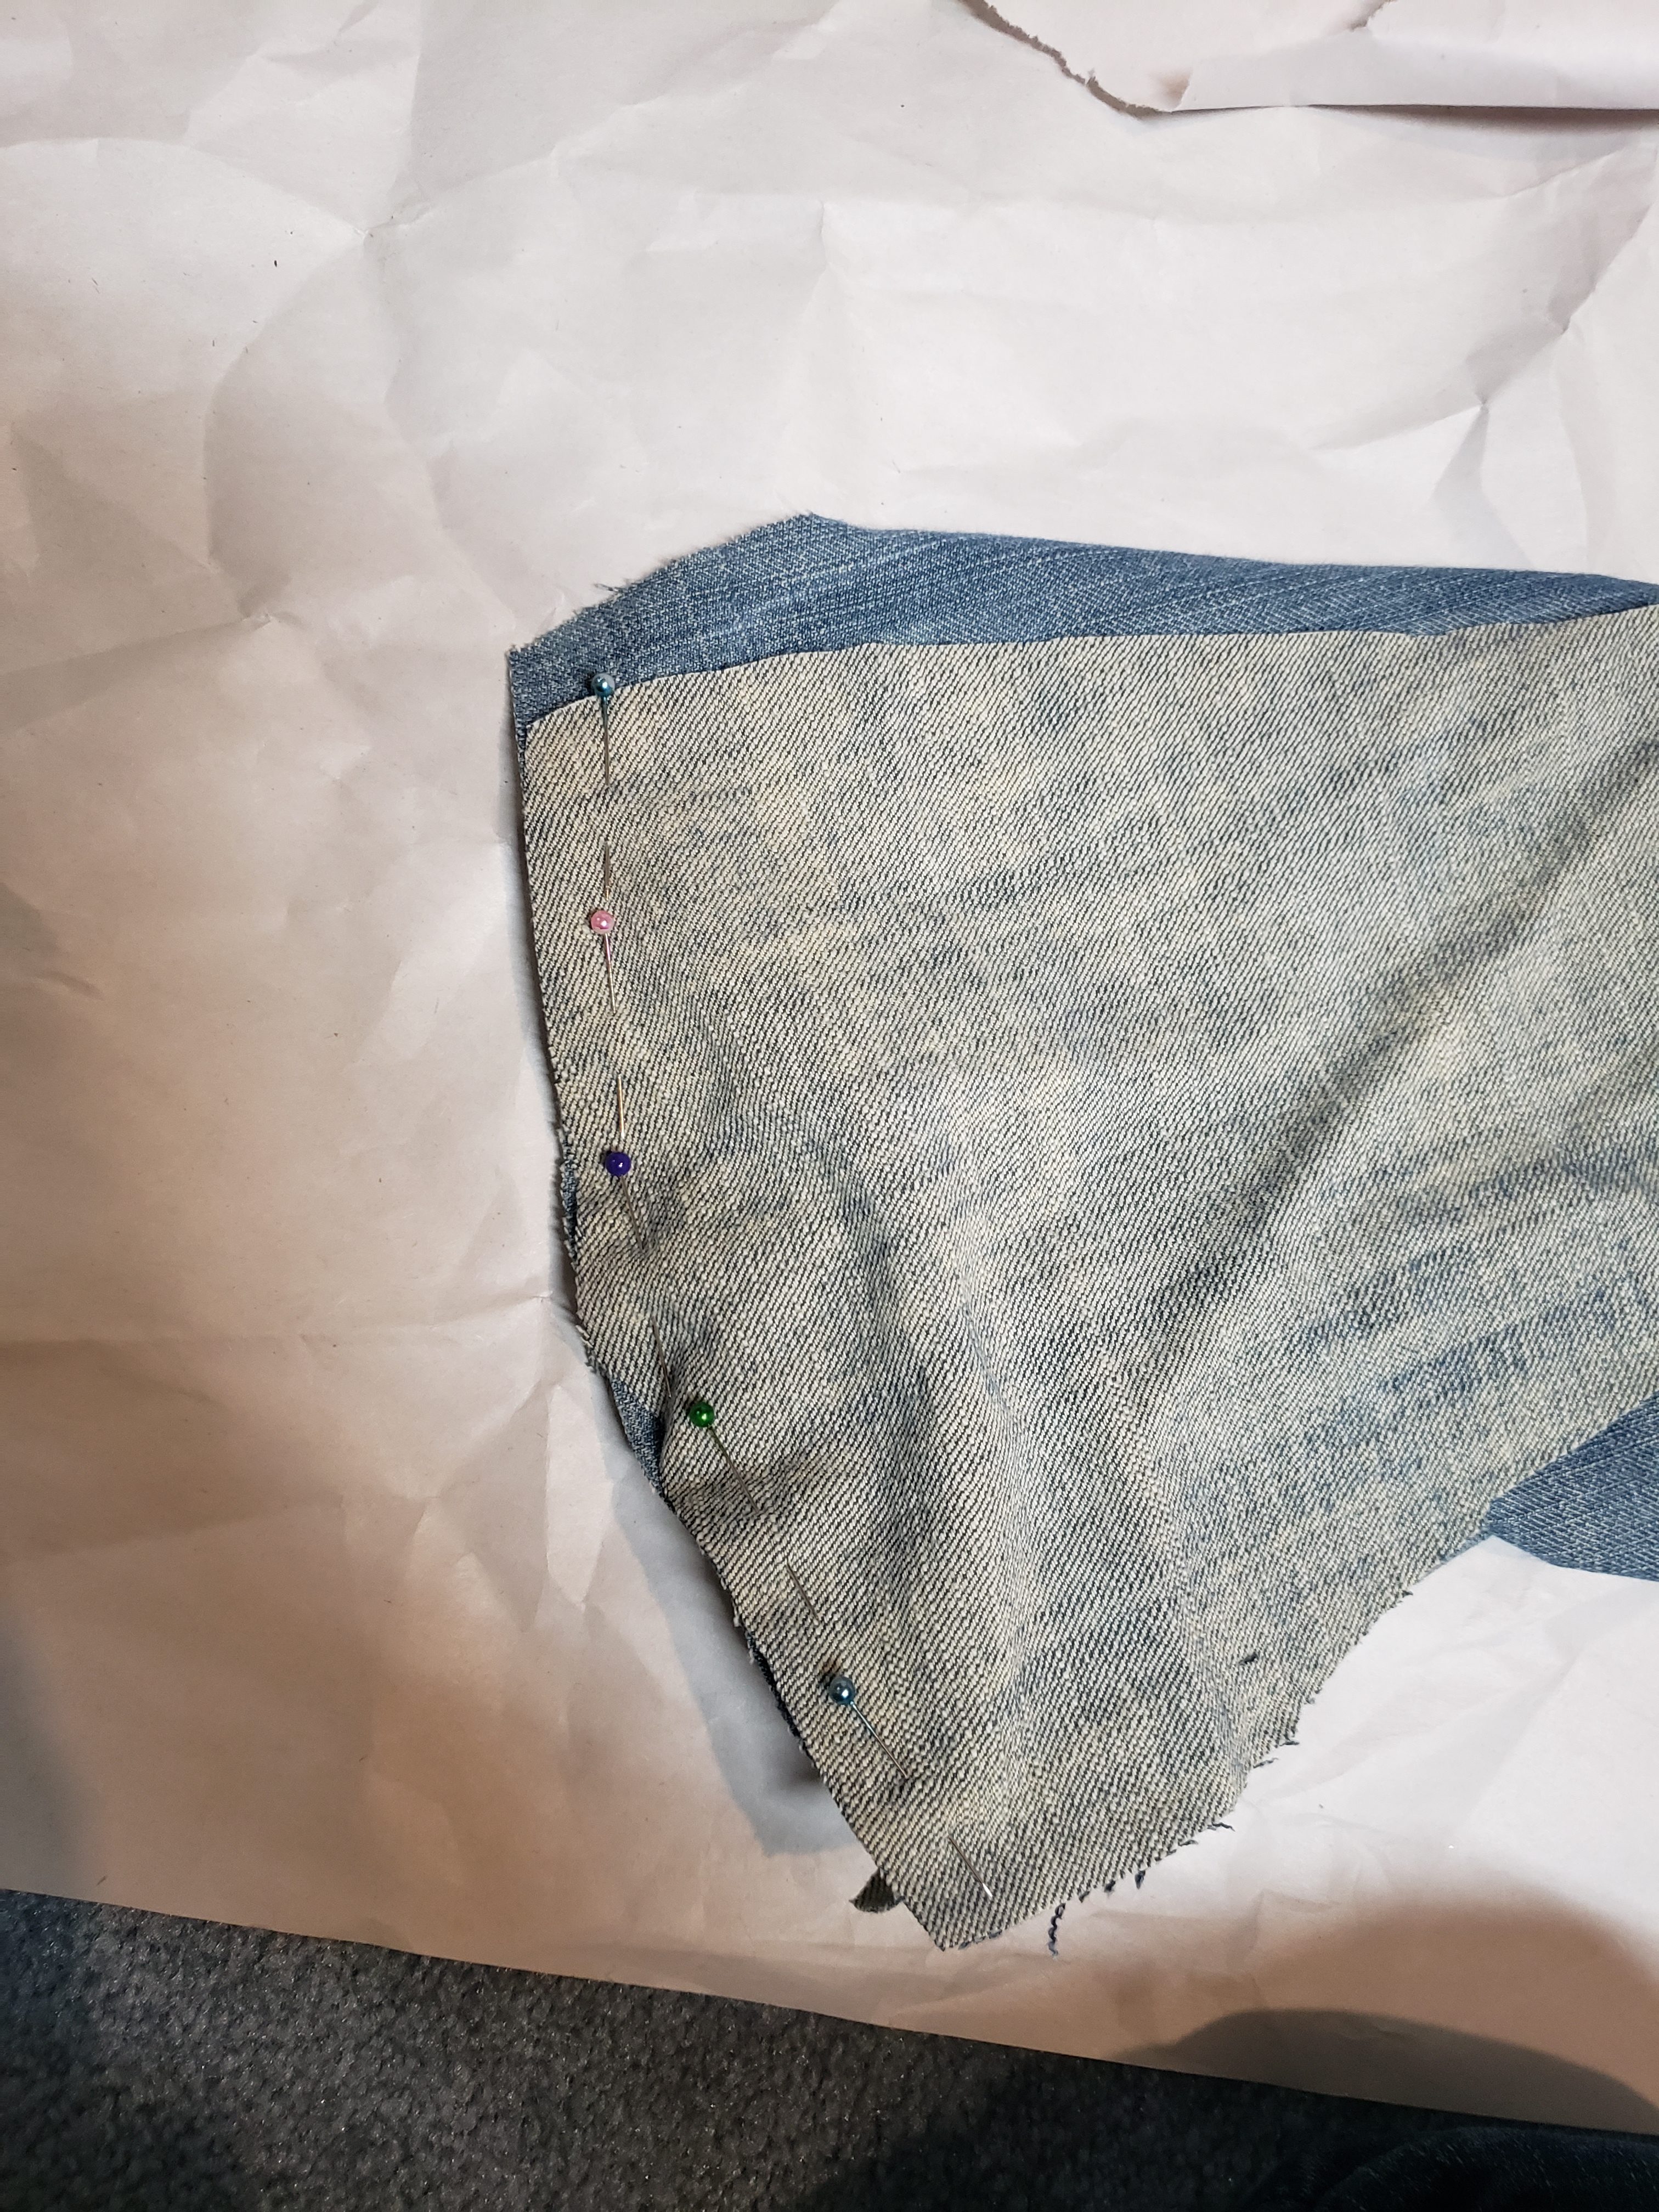
Pin belly of shark to snout of shark, and all along shark belly down to the tail area, ending in the point where the tail meets the body.  

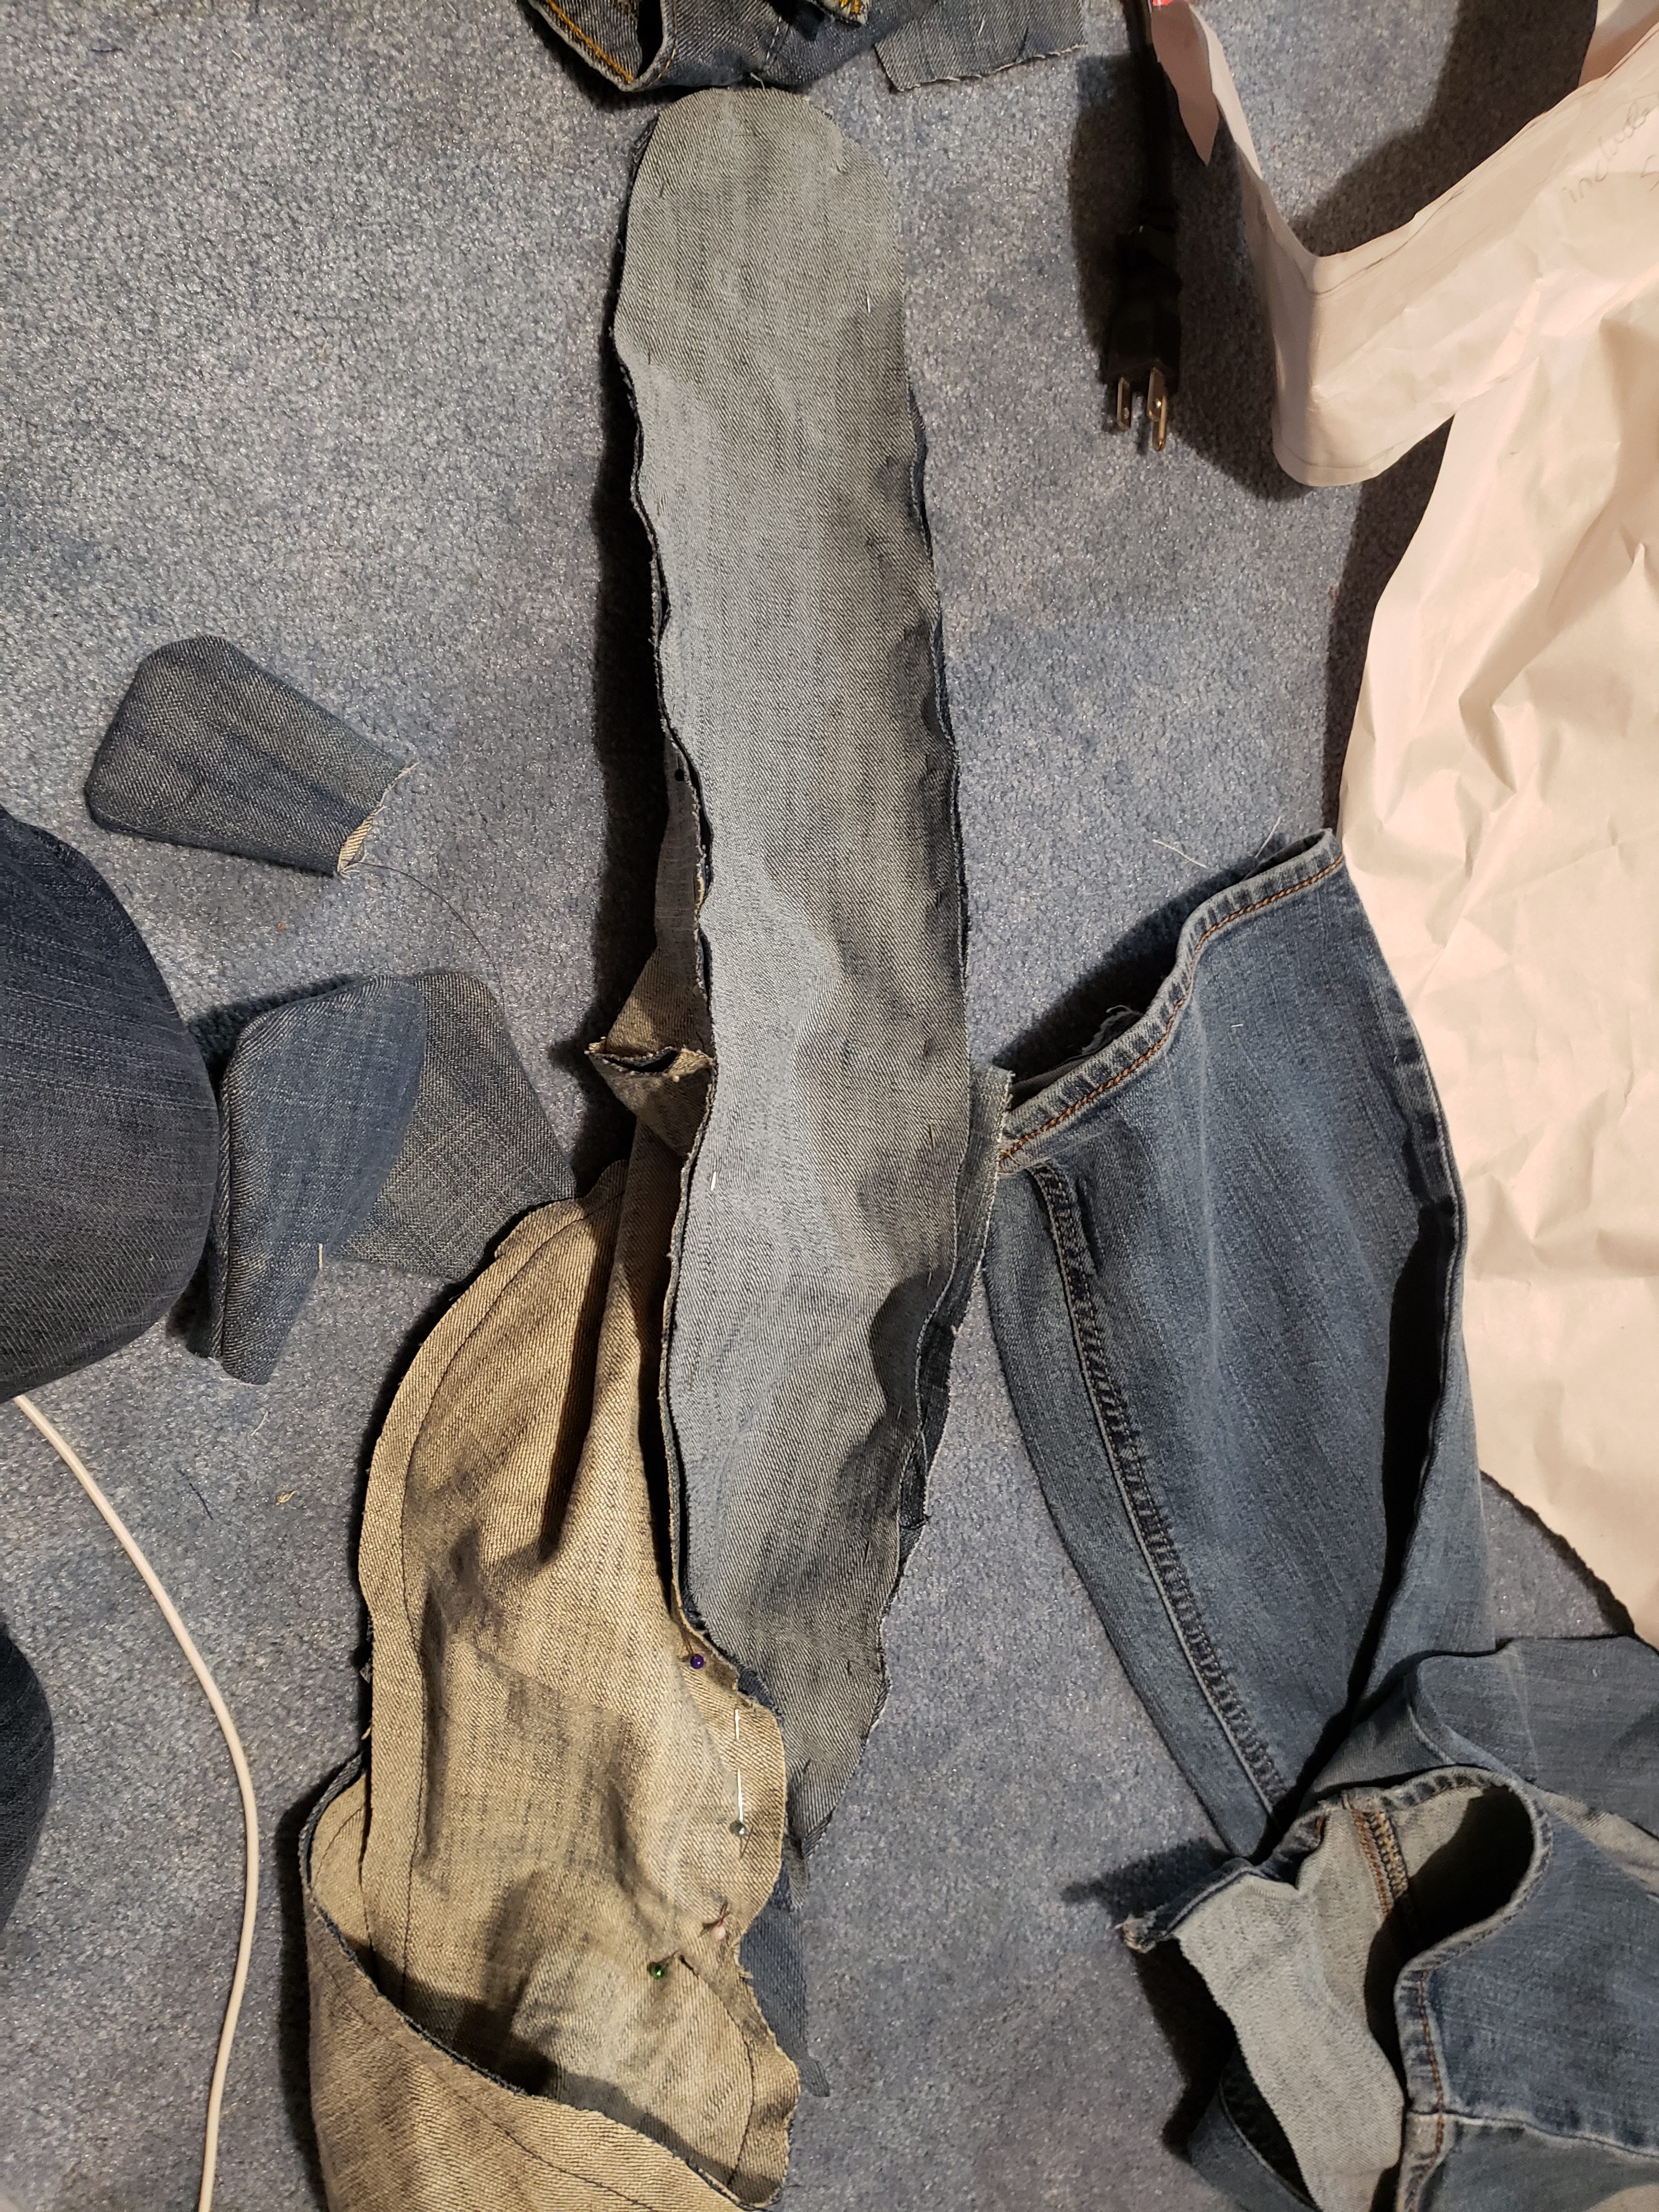
Insert fins in spots indicated on the pattern (in between the layers of fabric).

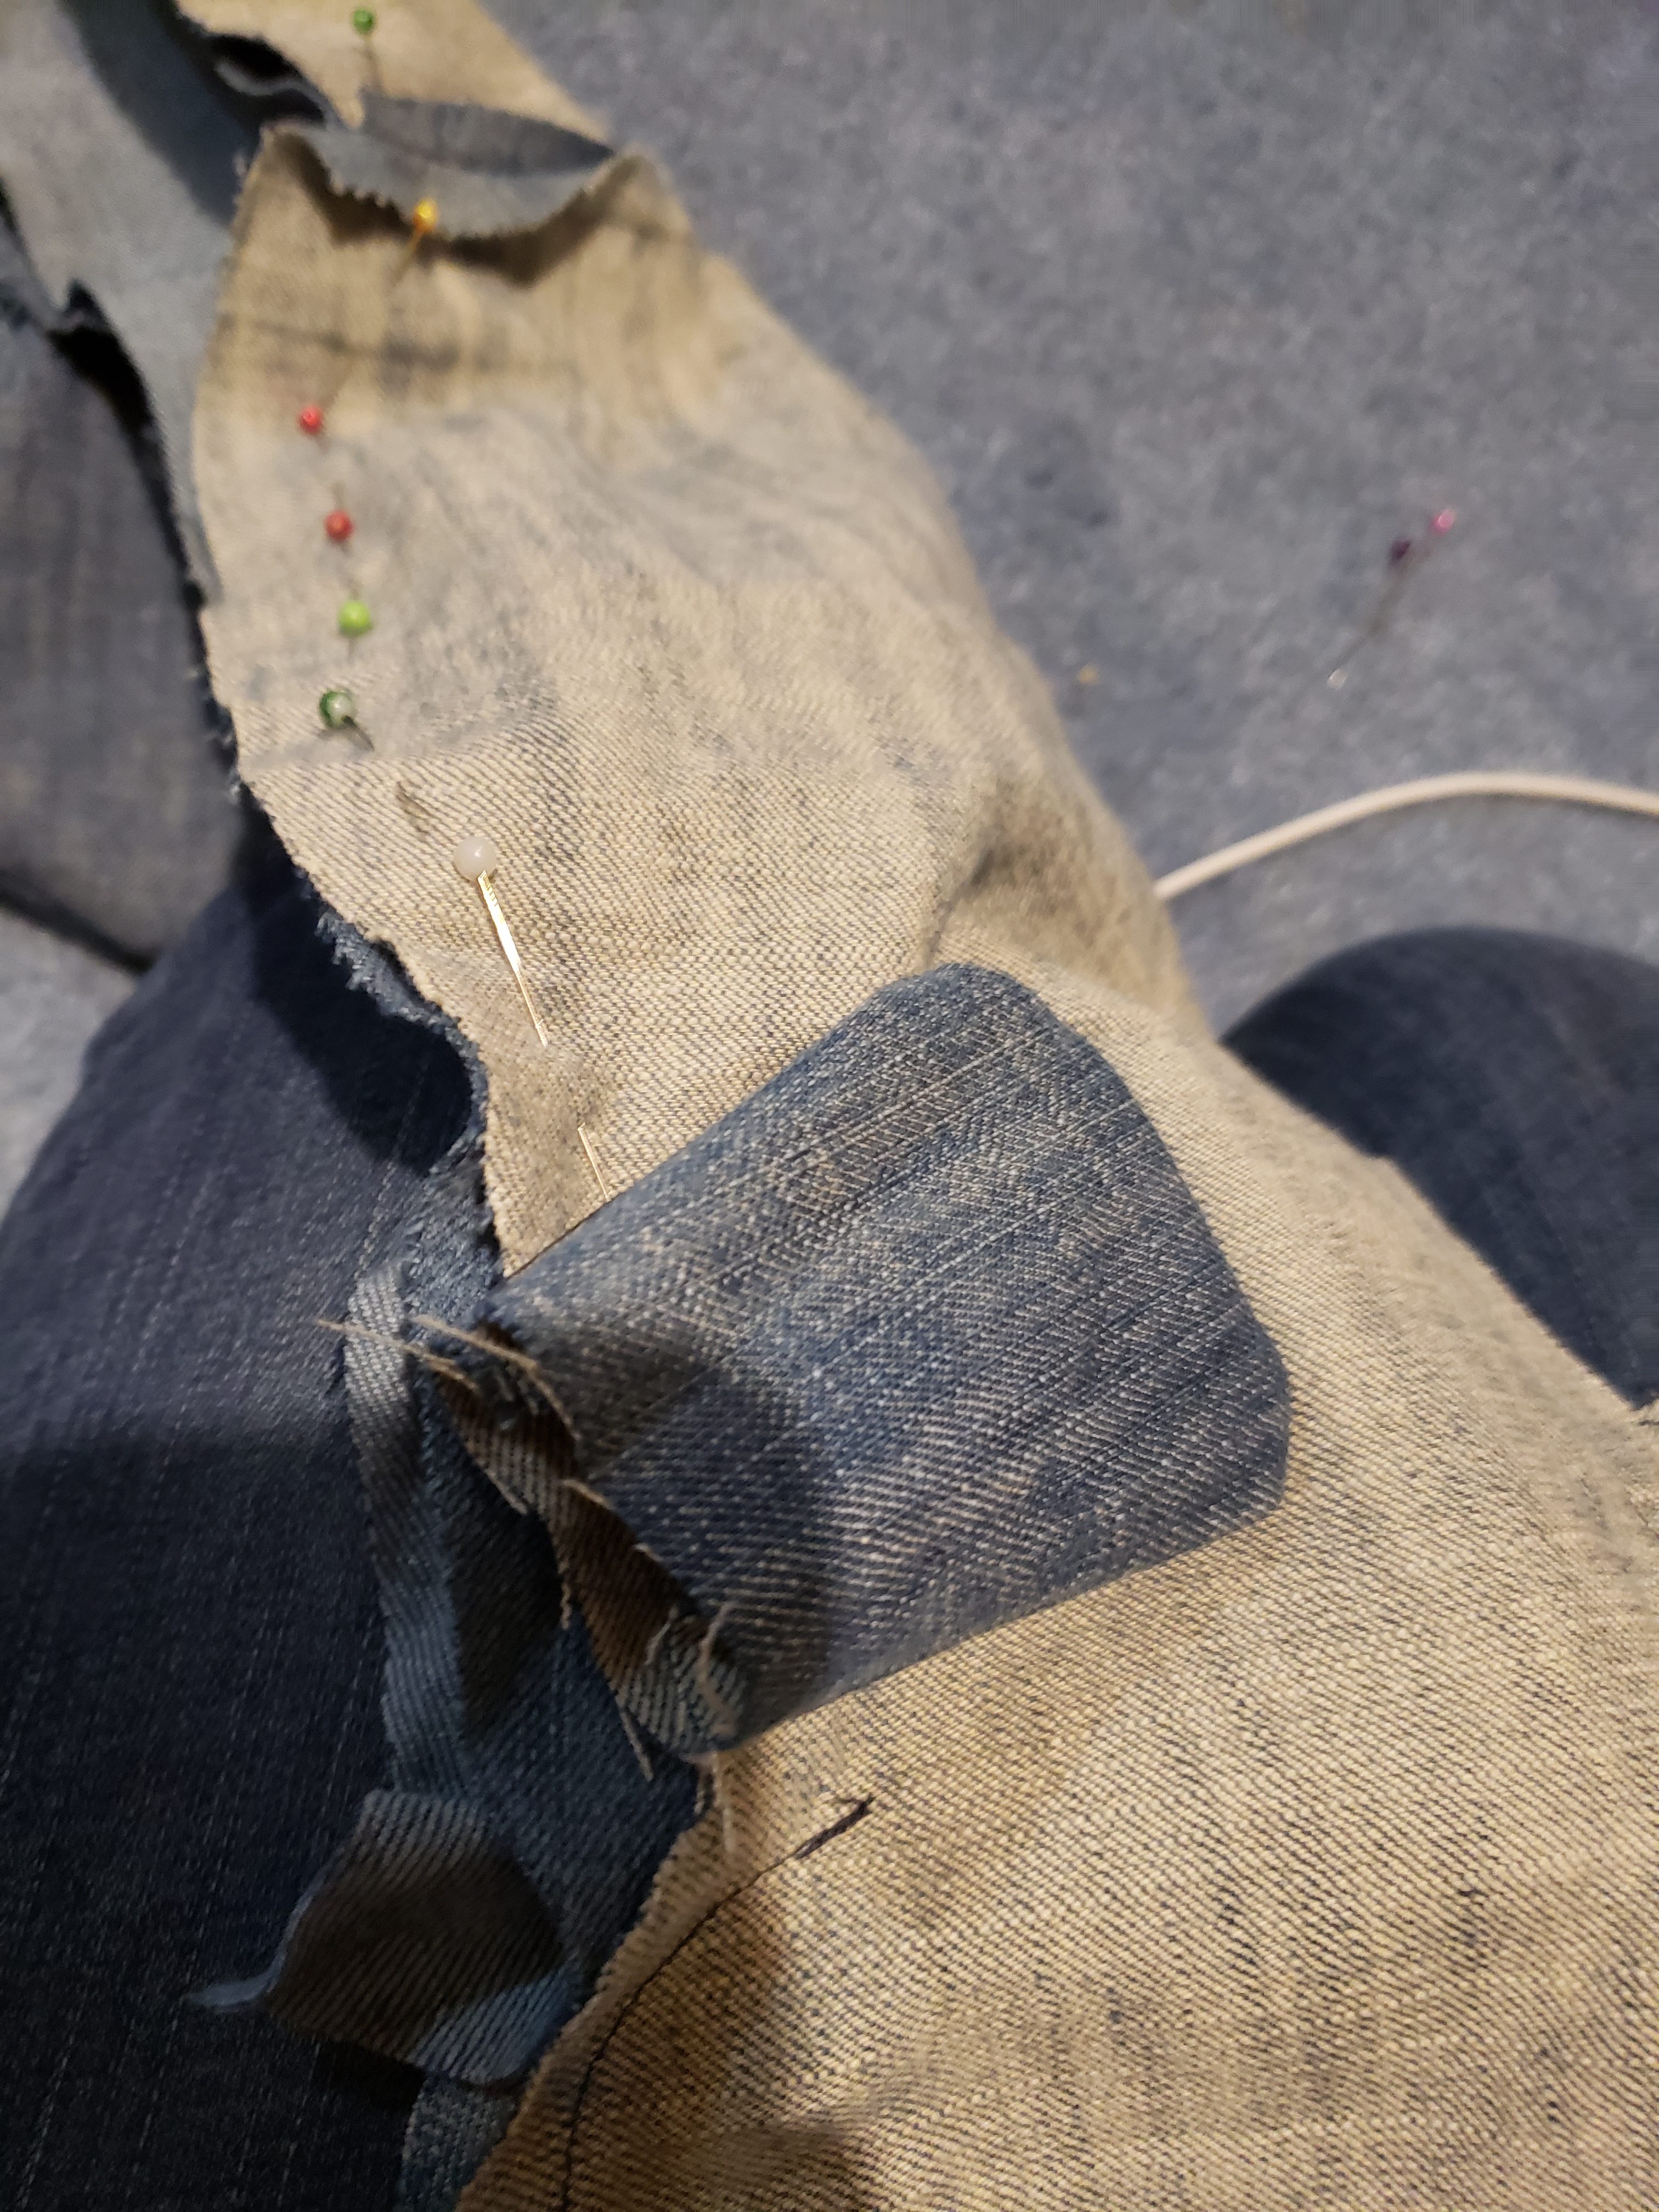
Again this is where one of the fins should go, but it should go INSIDE the two layers of fabric.

Stitch, leaving a gap between the front and second fin on one side.  Clip curves (especially where the tail meets the body.

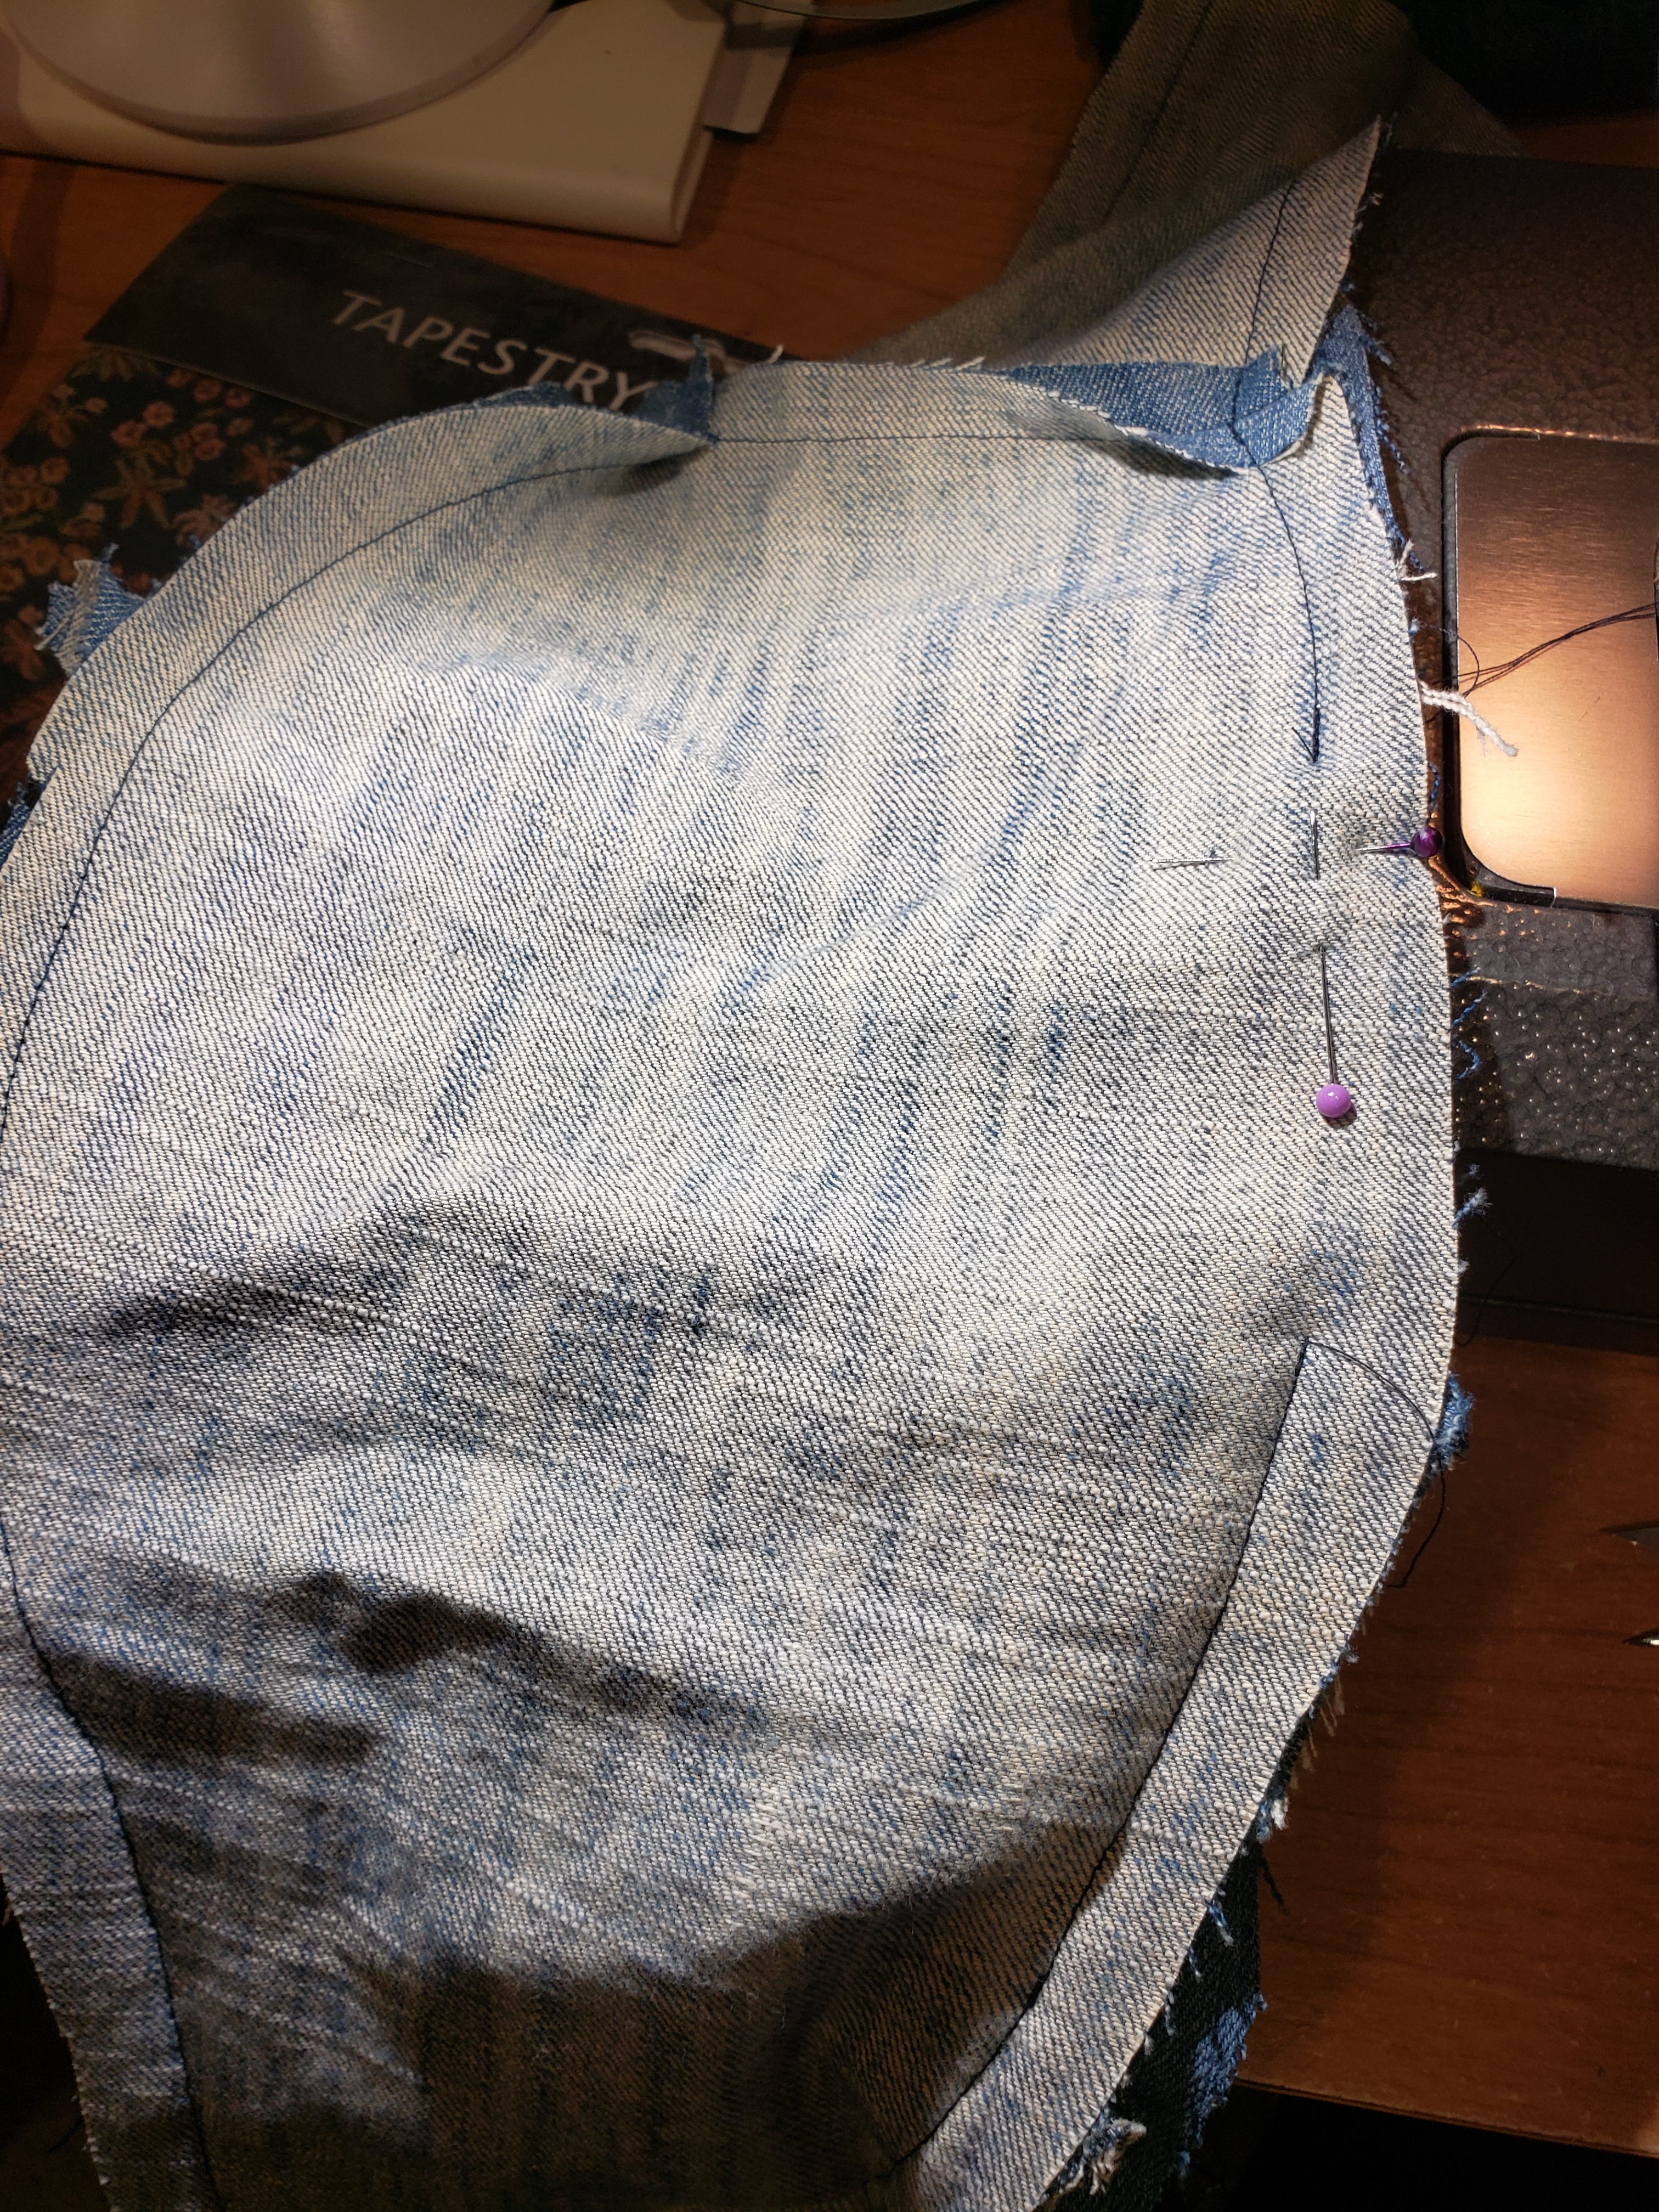
Turn right side out.

Stitch gills and smile using a backstitch. 

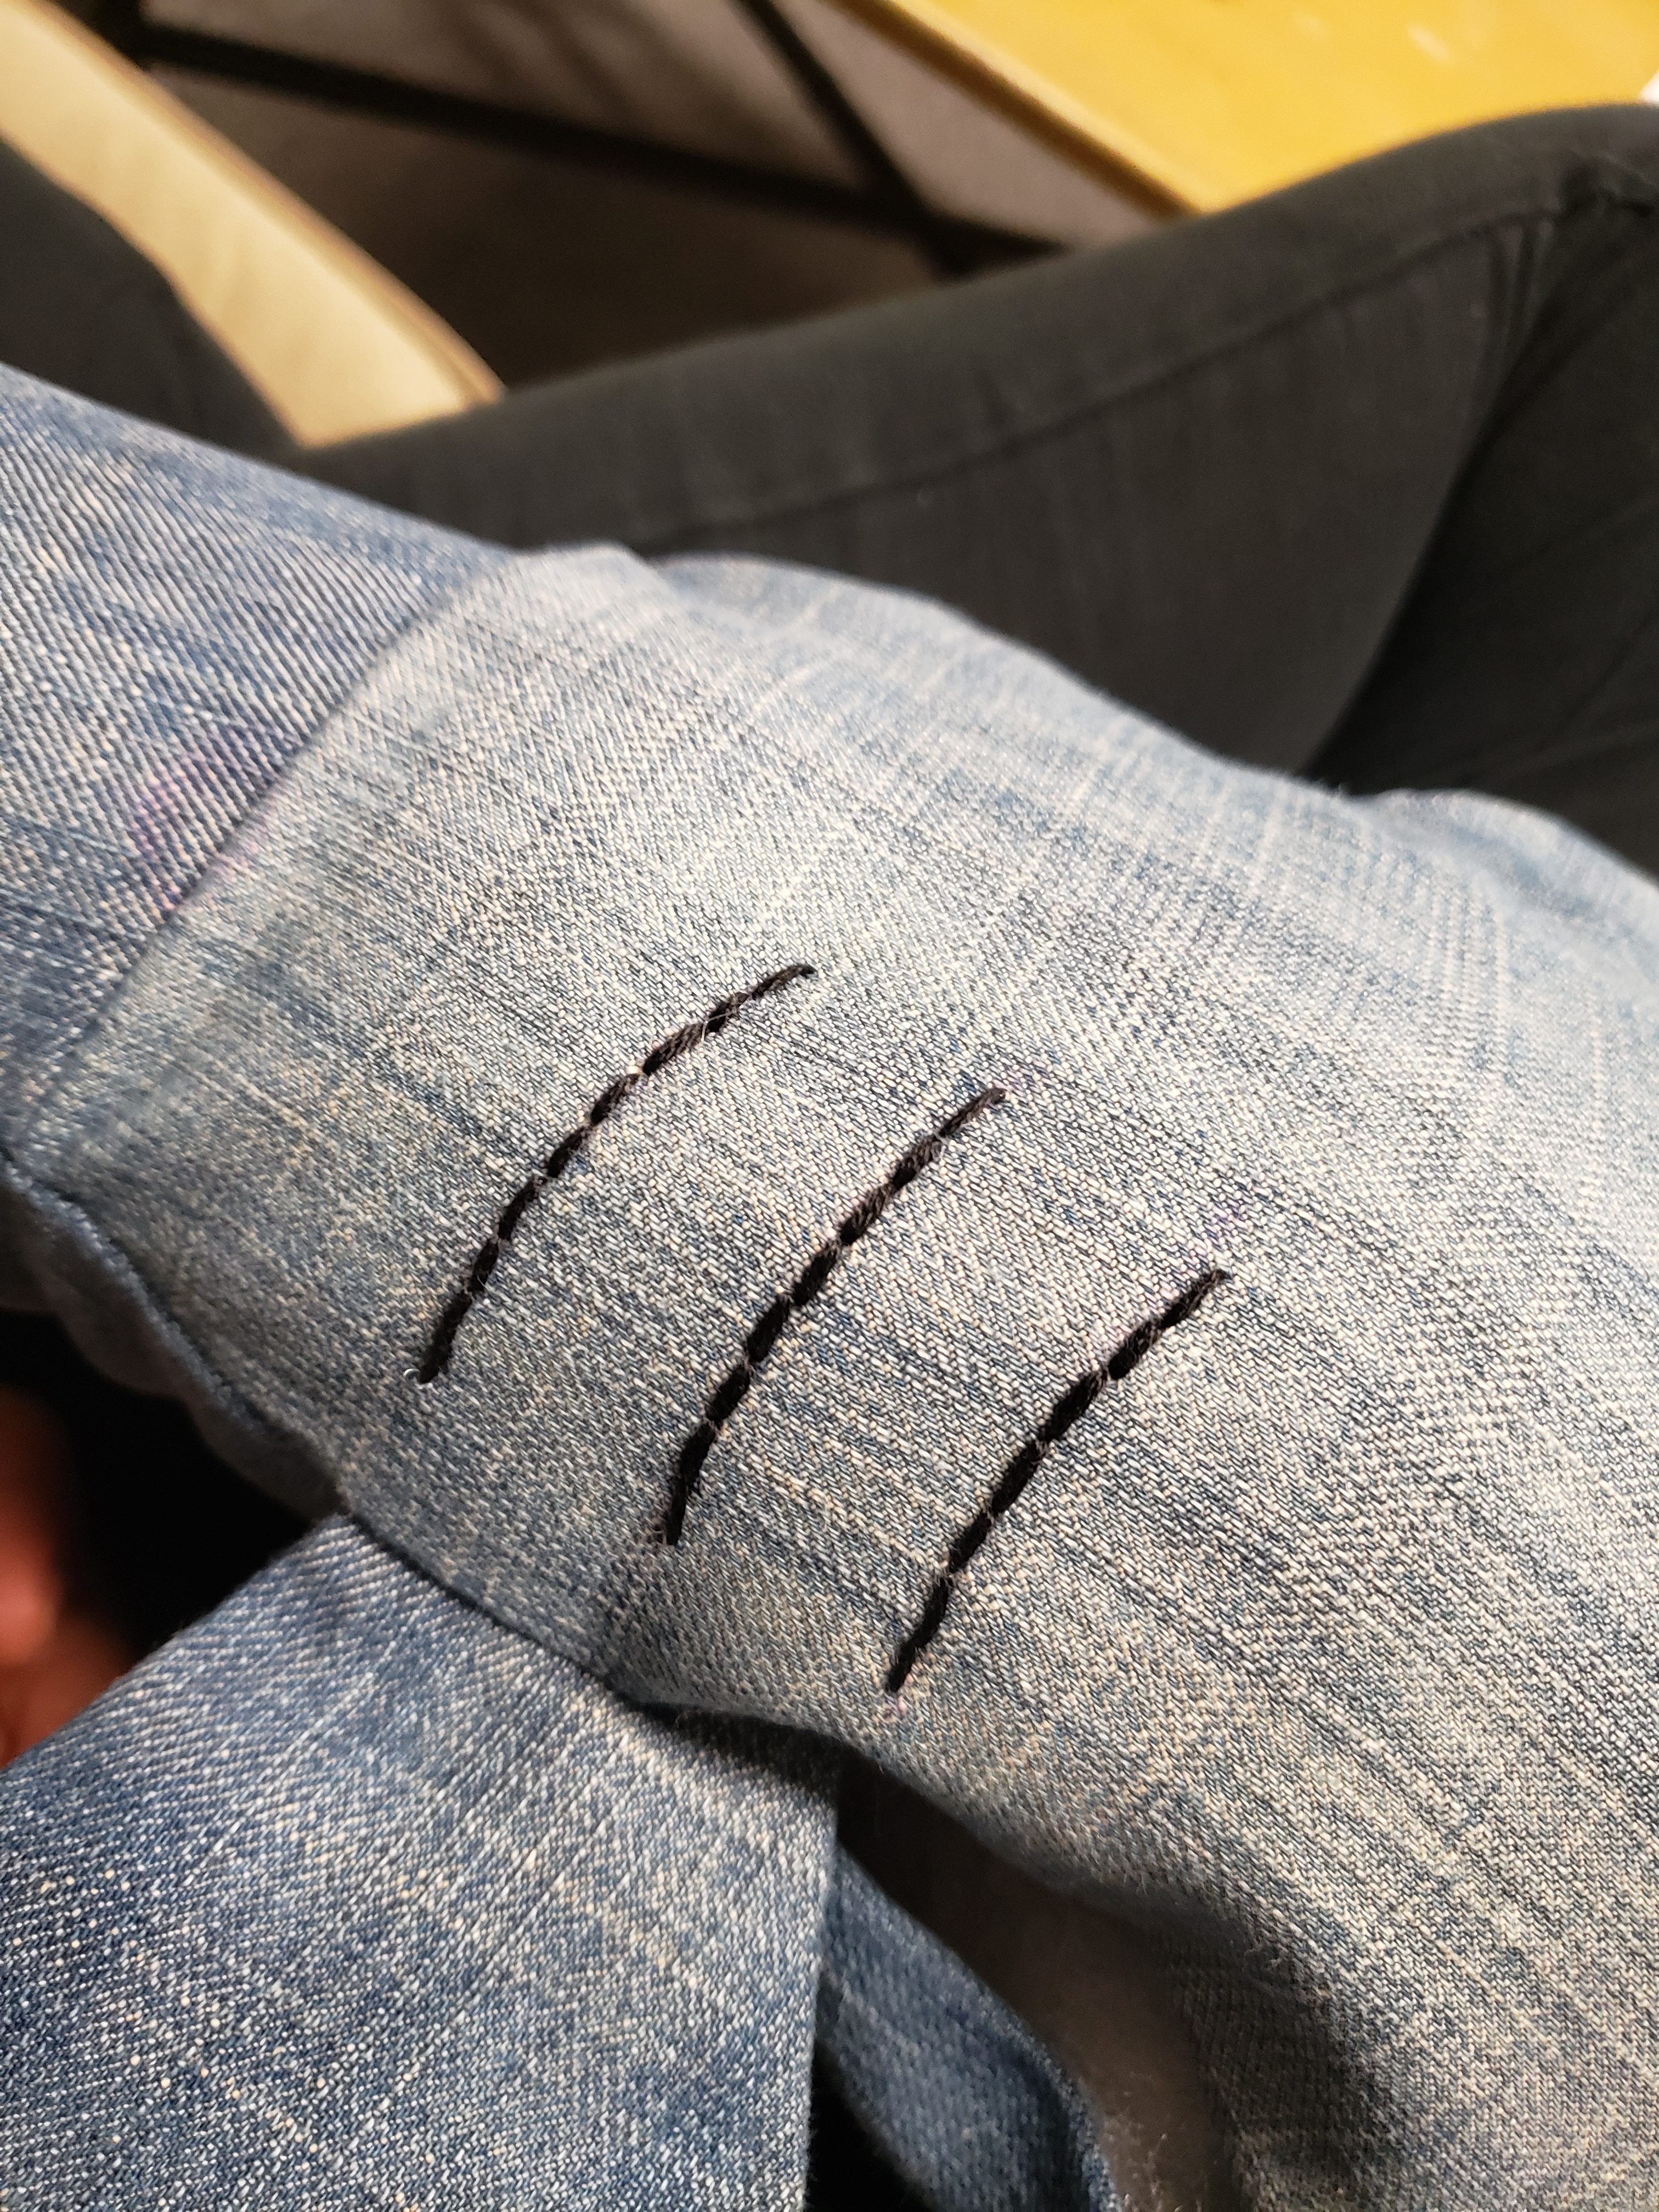
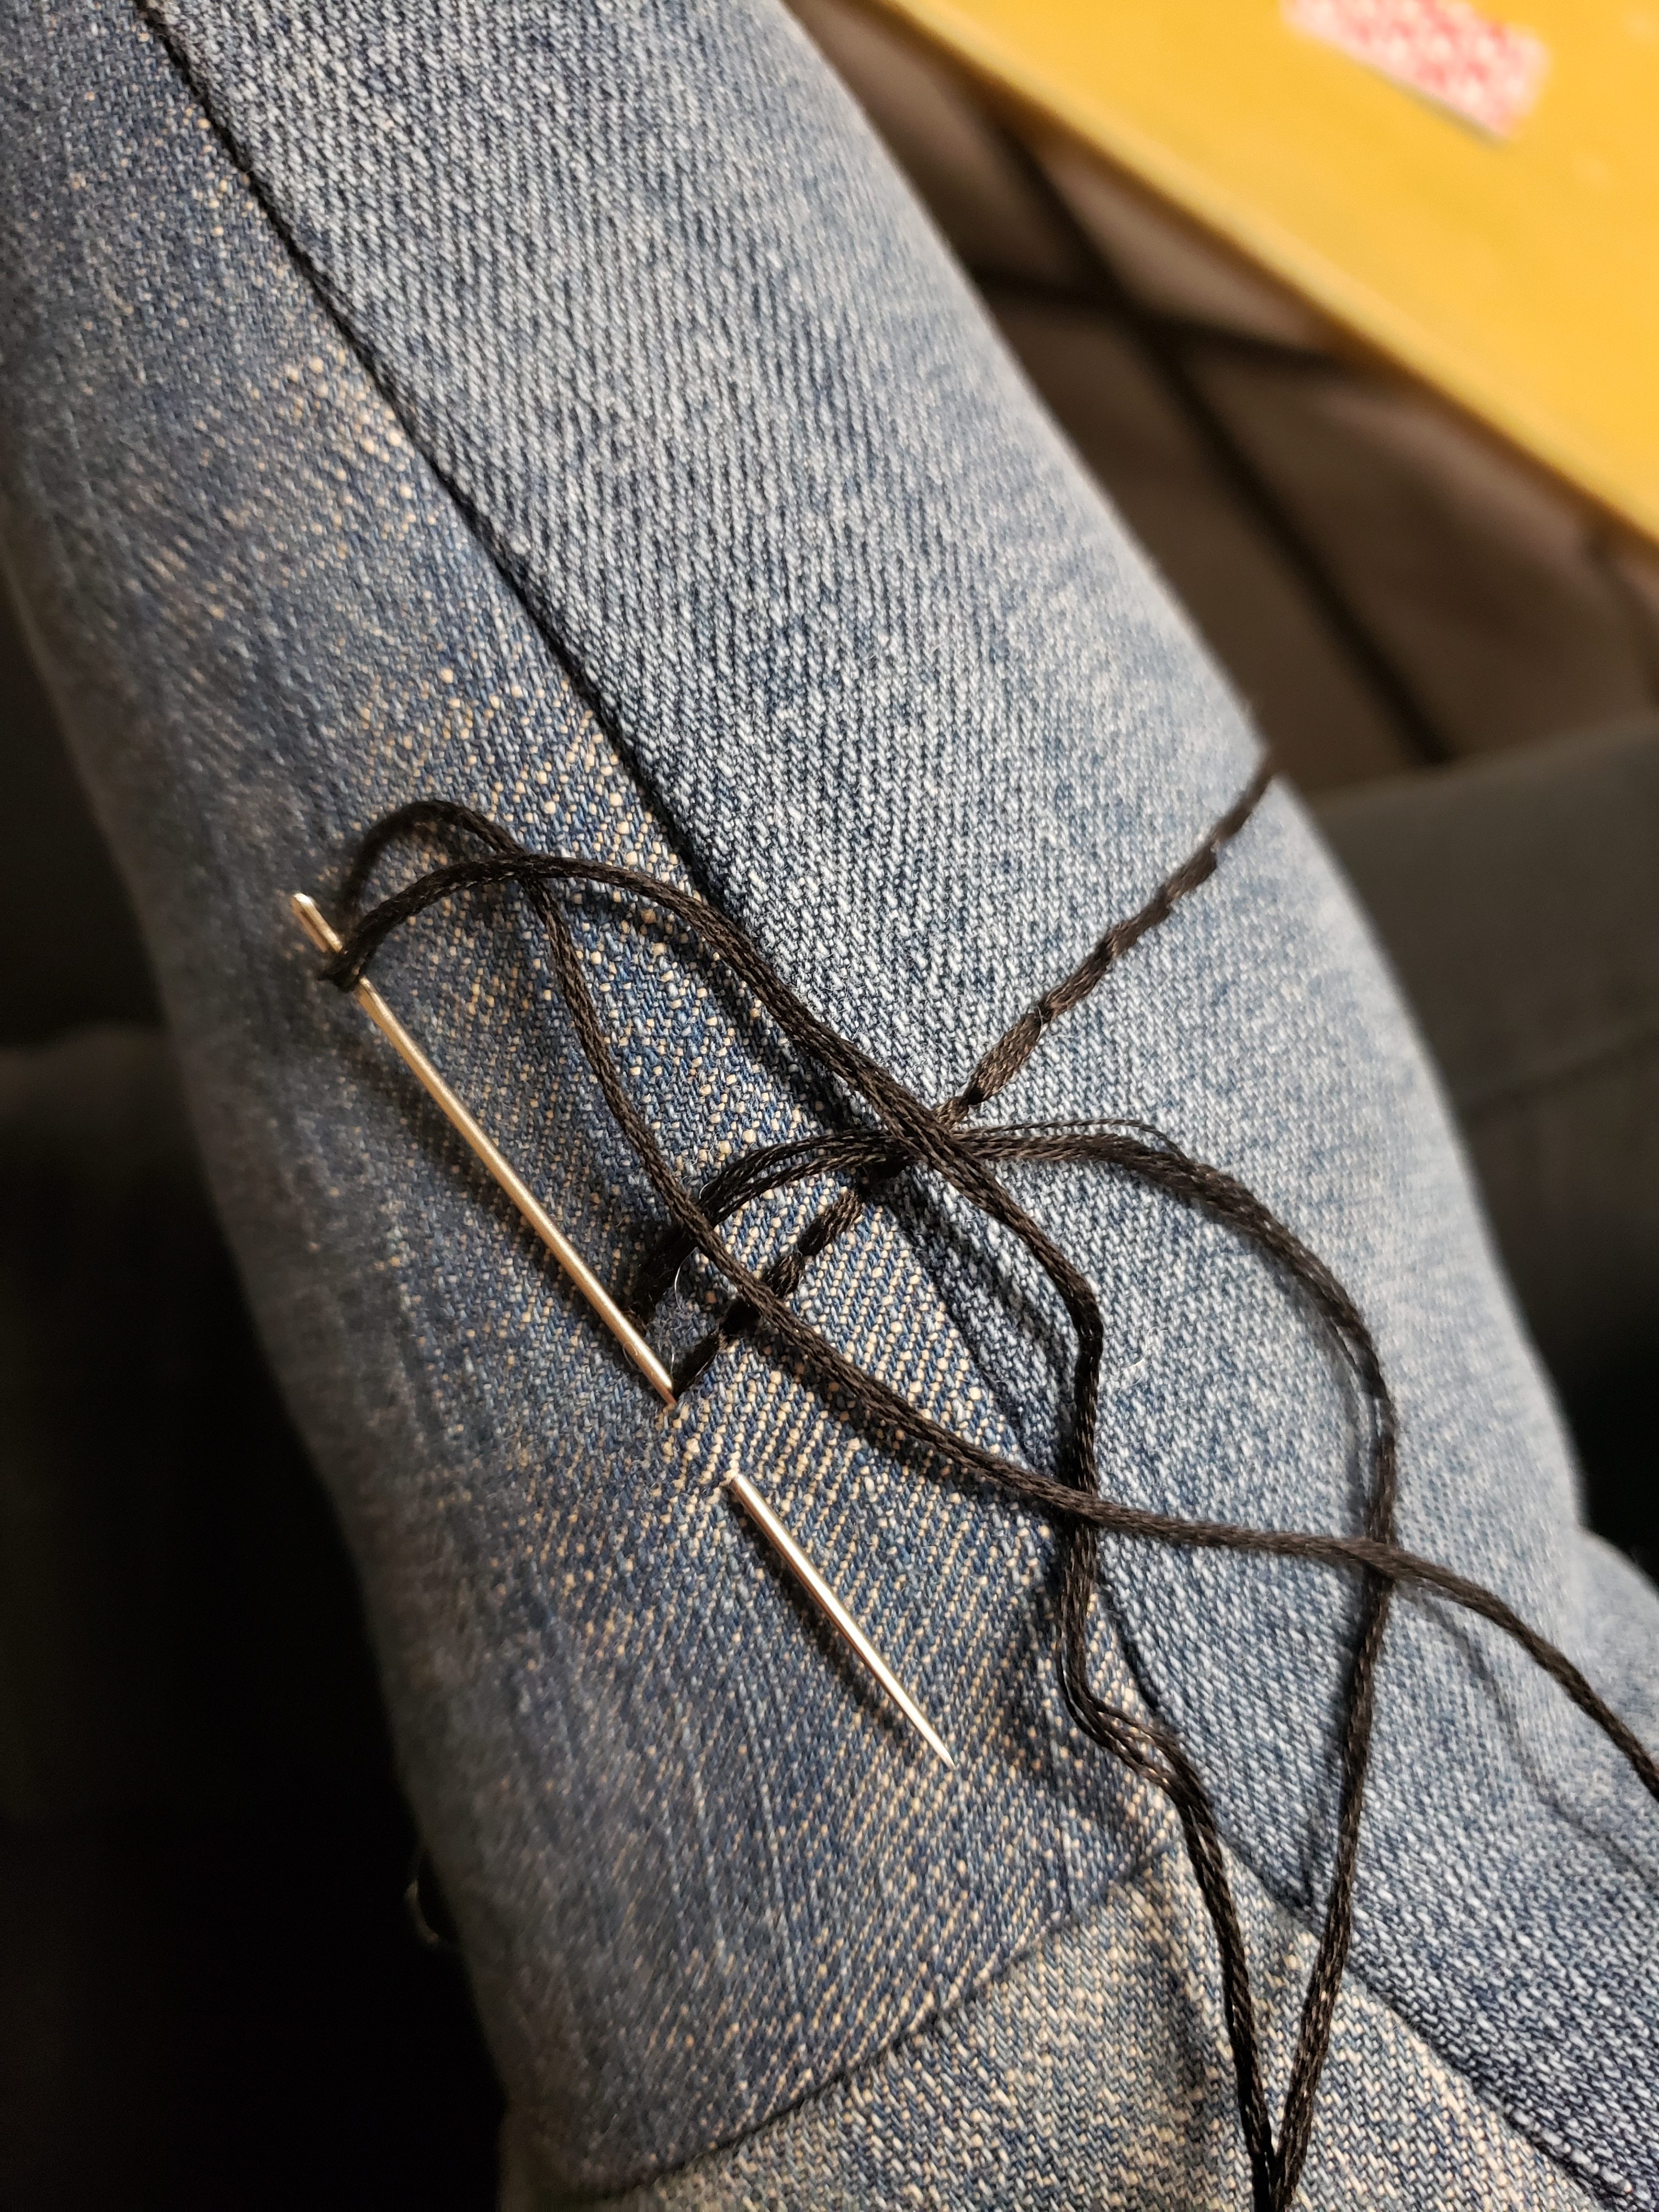
Apply eyes by poking a small hole using a seam ripper, inserting the eye, then closing it with the washer.

Stitch along the tail on the mark indicated.  

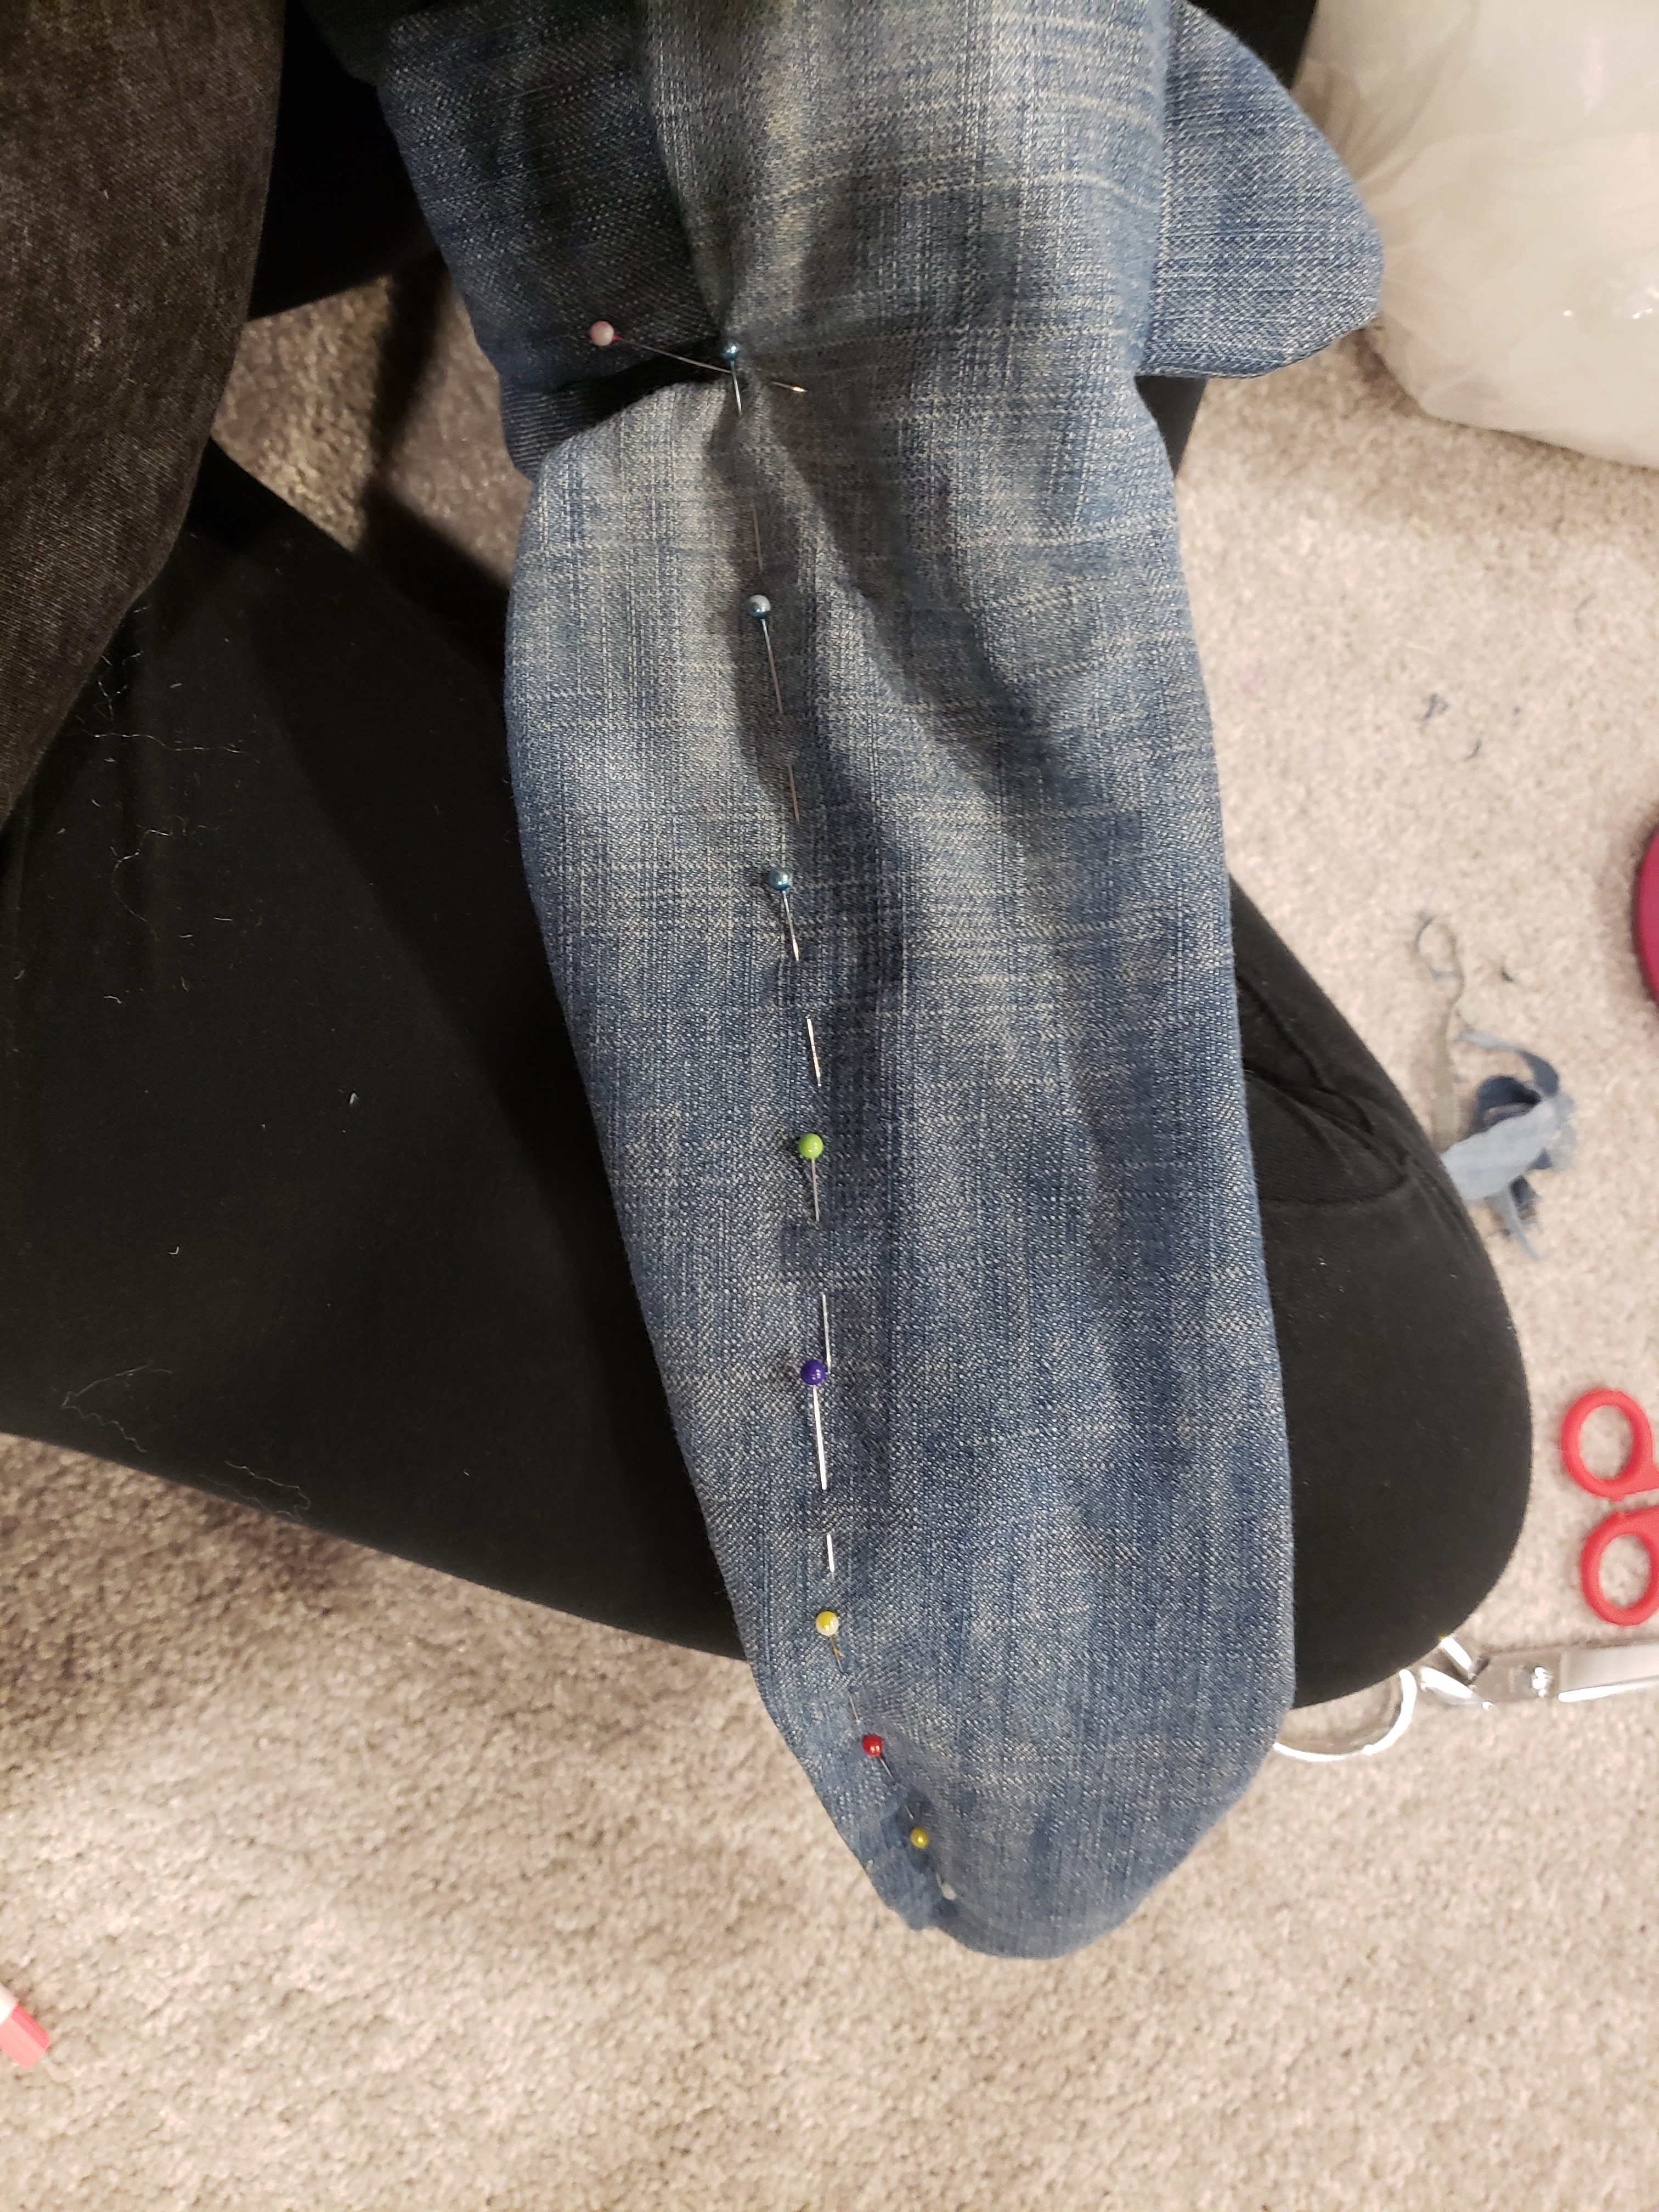
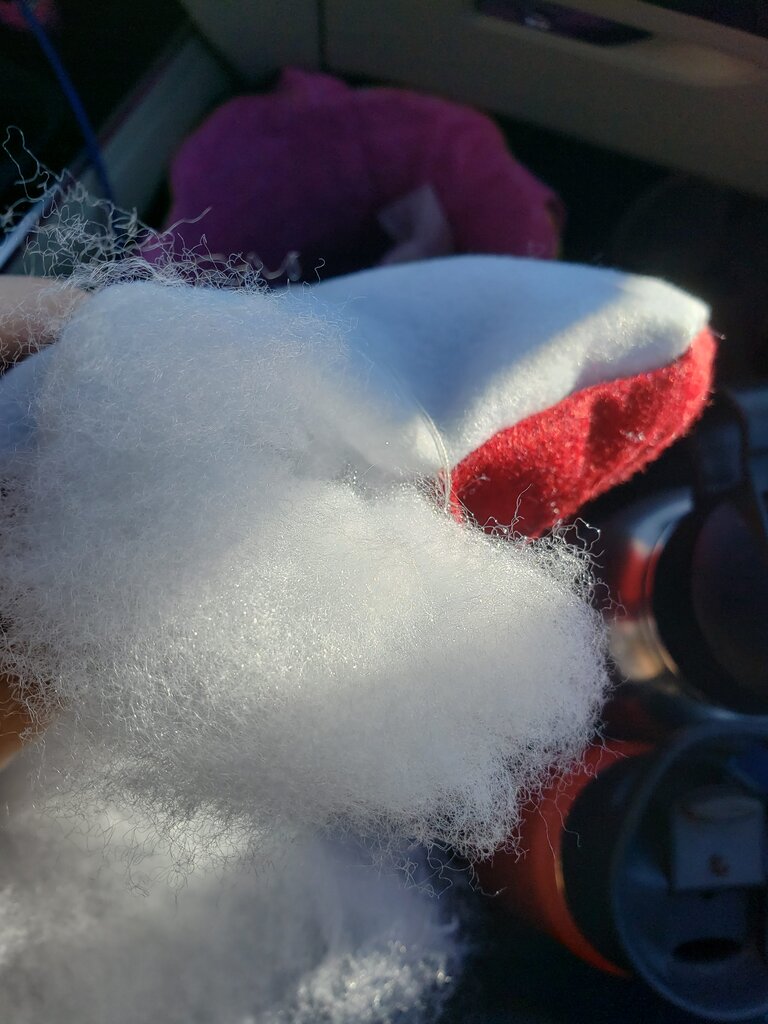
Stuff the top portion of the tail and the rest of the shark.

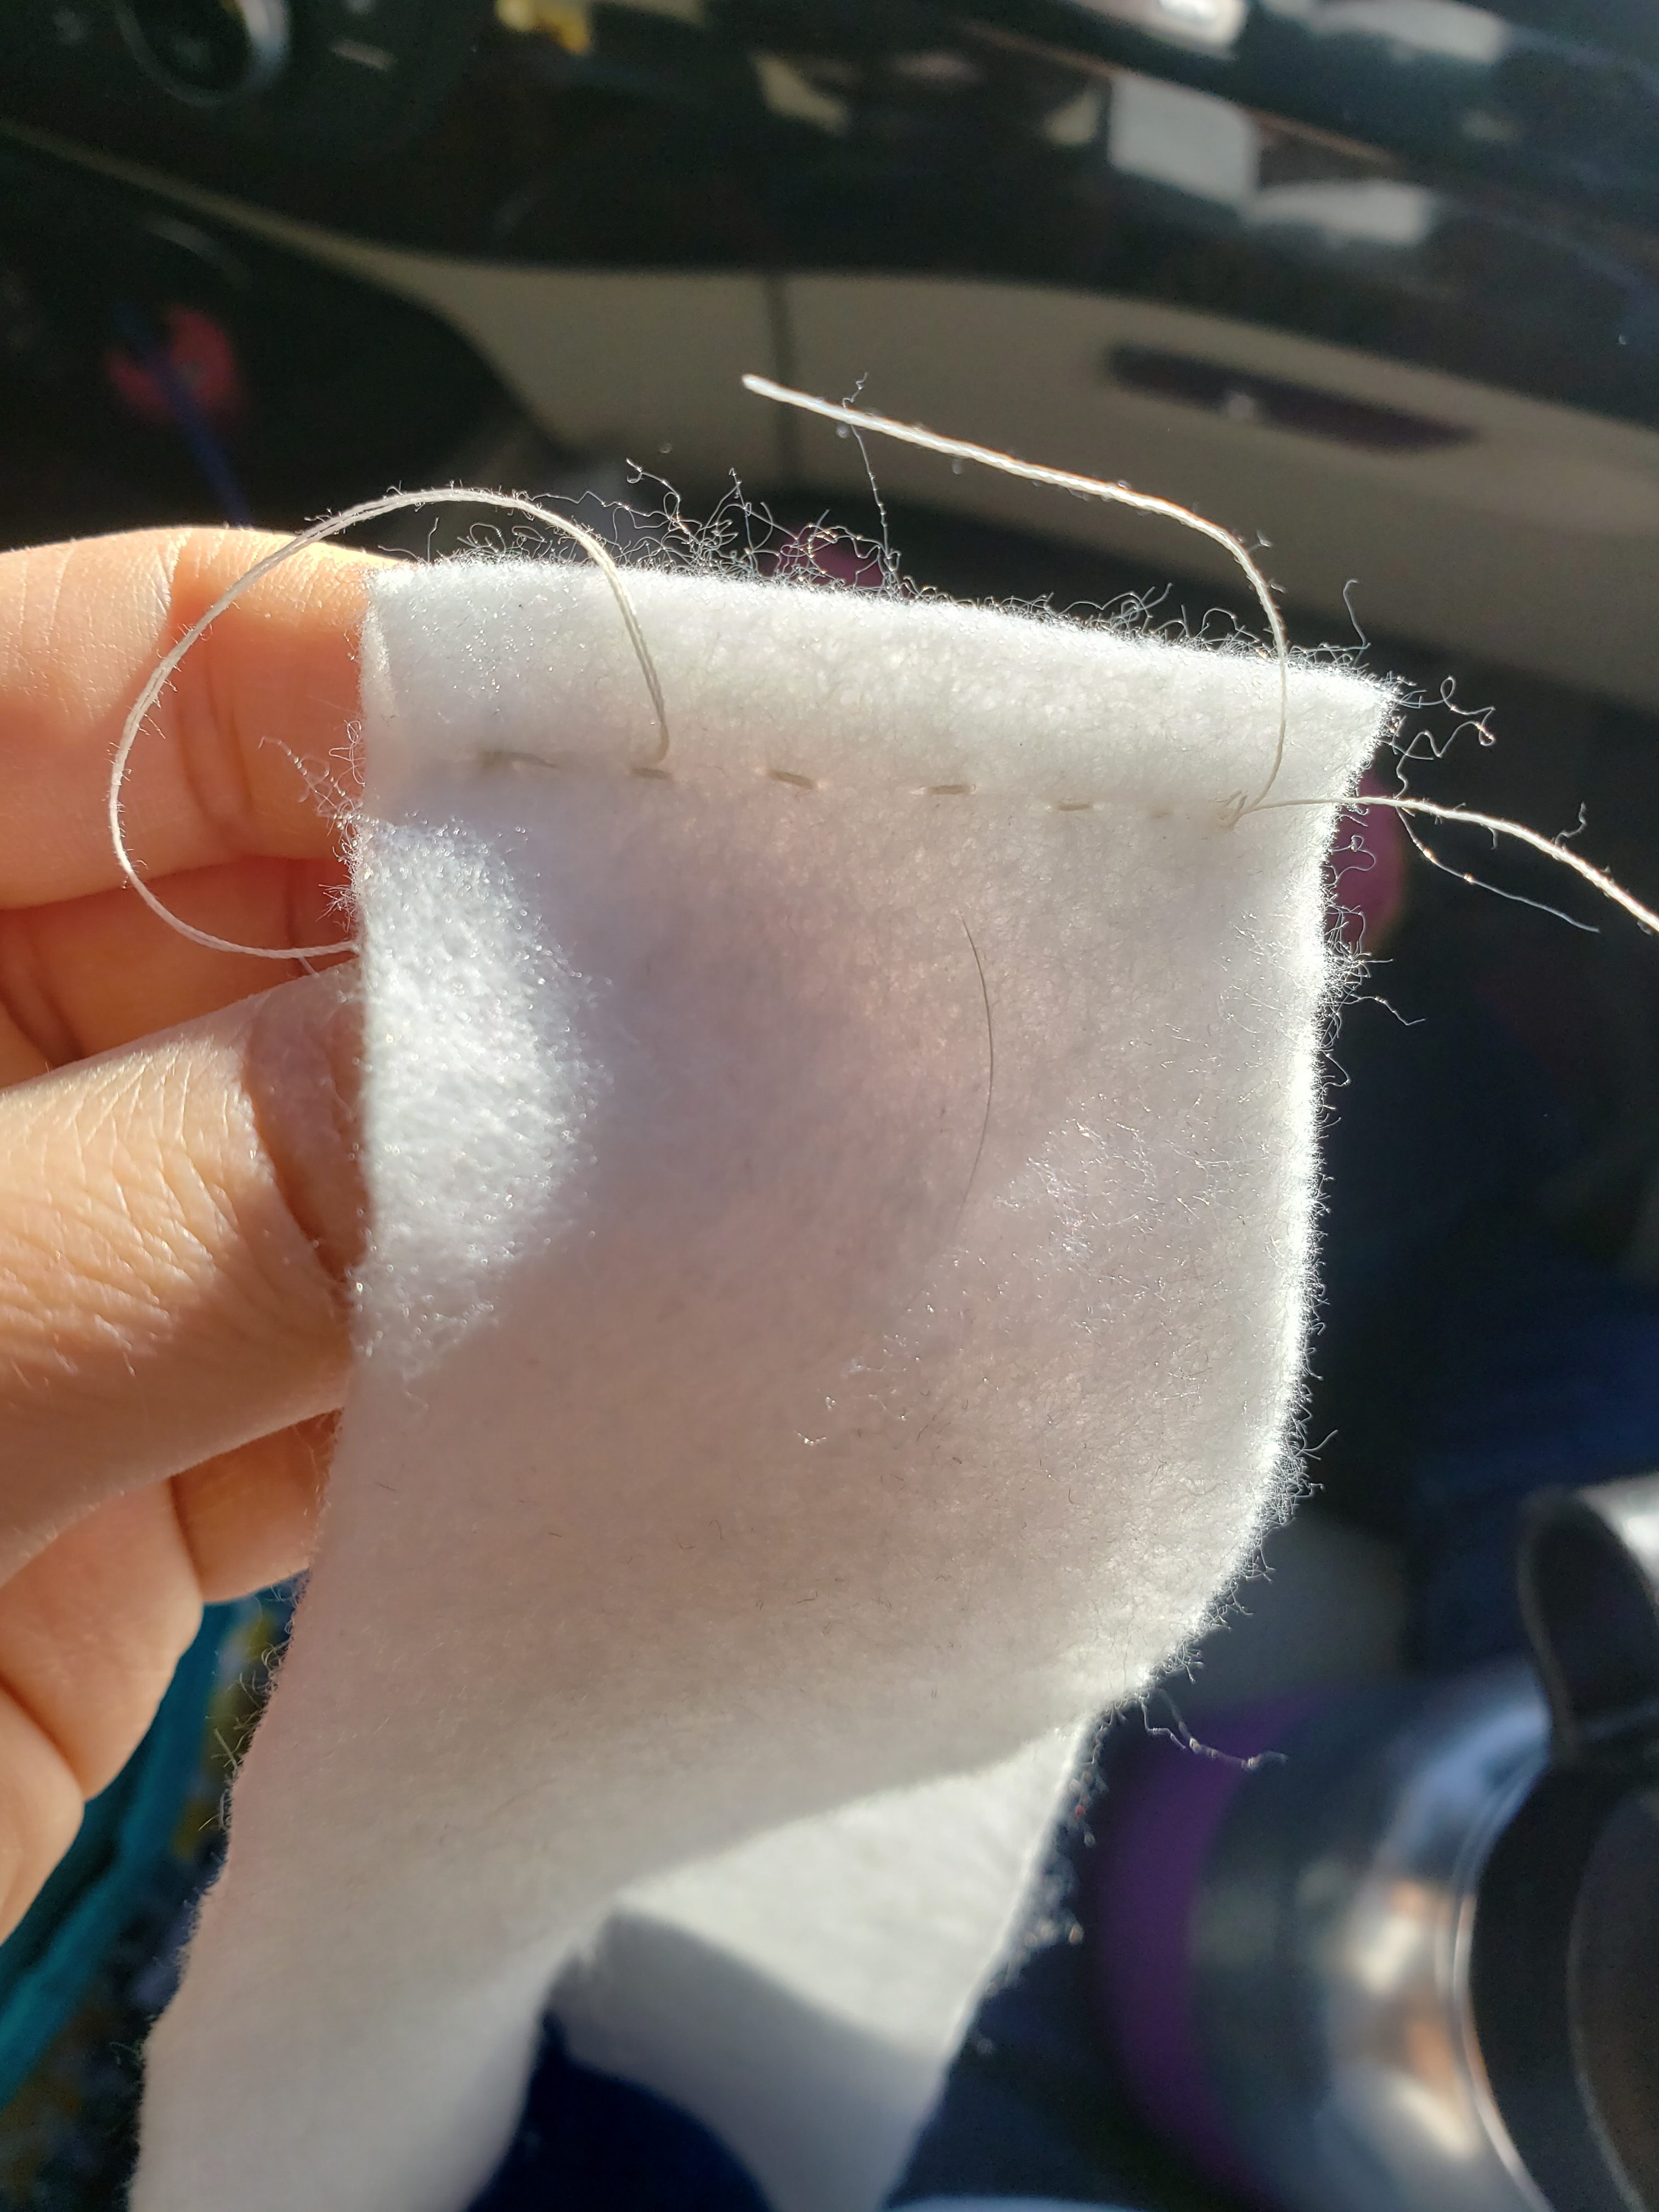
Ladder stitch the opening in the shark closed. 

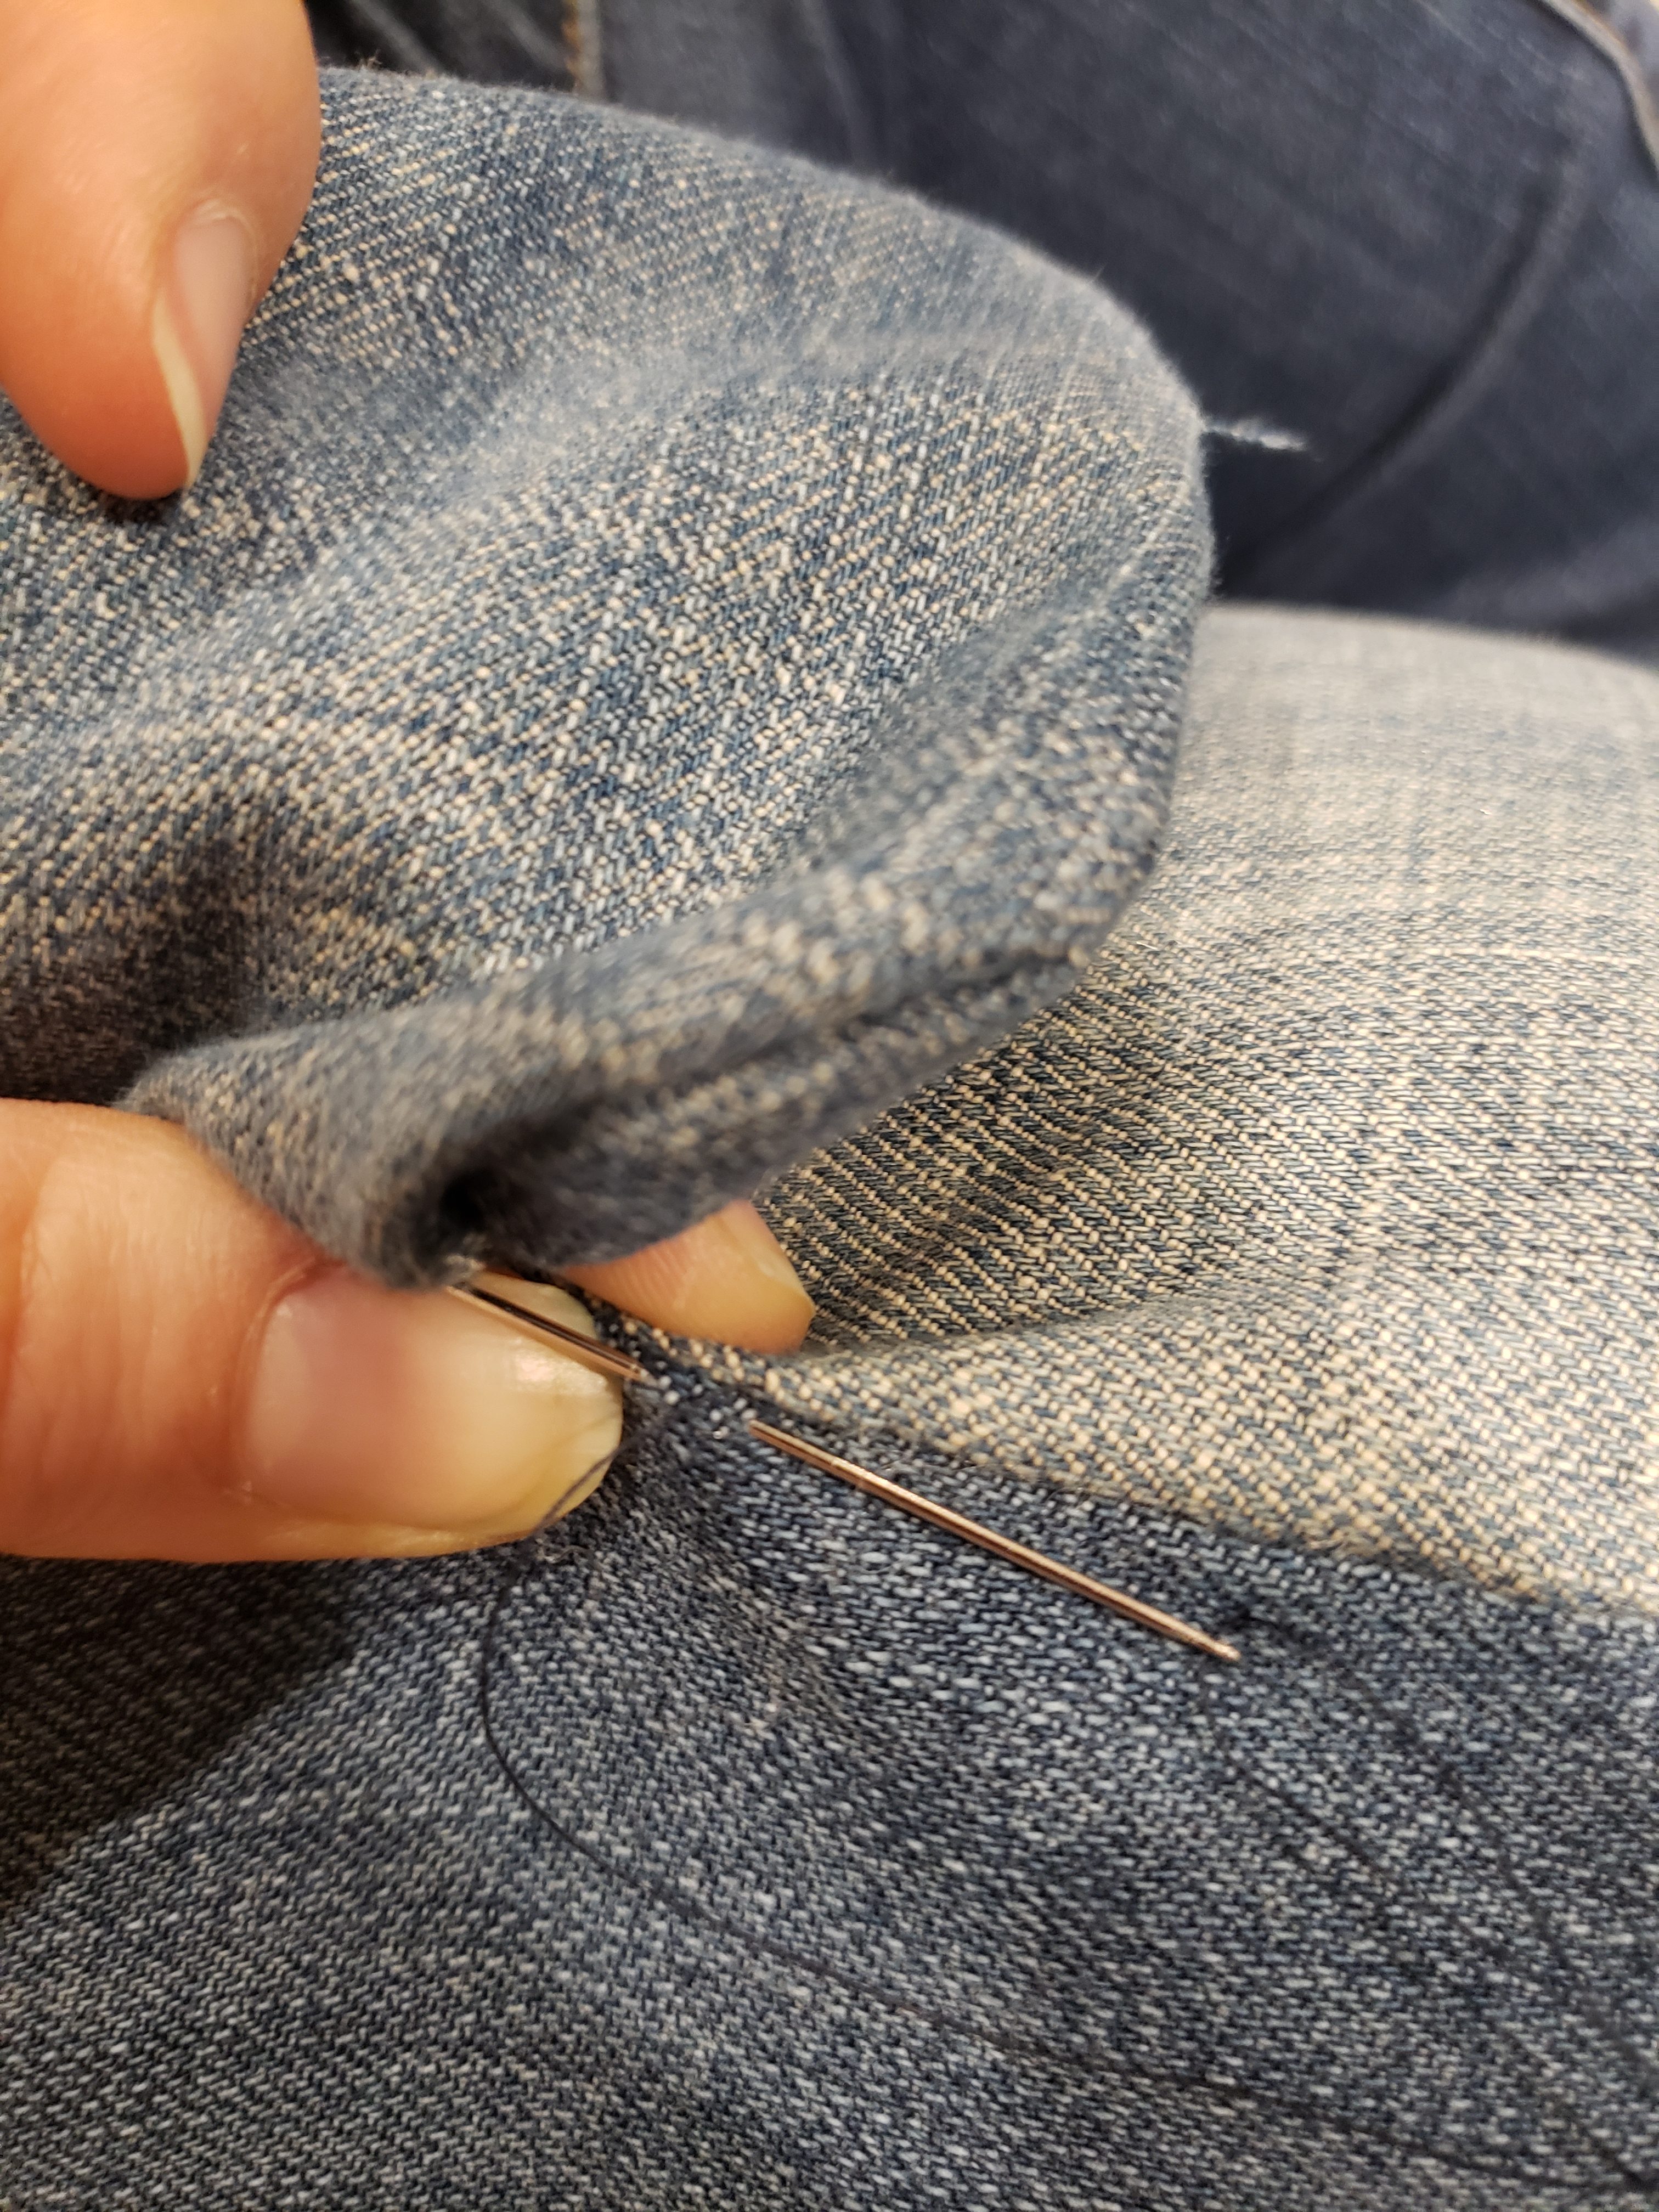
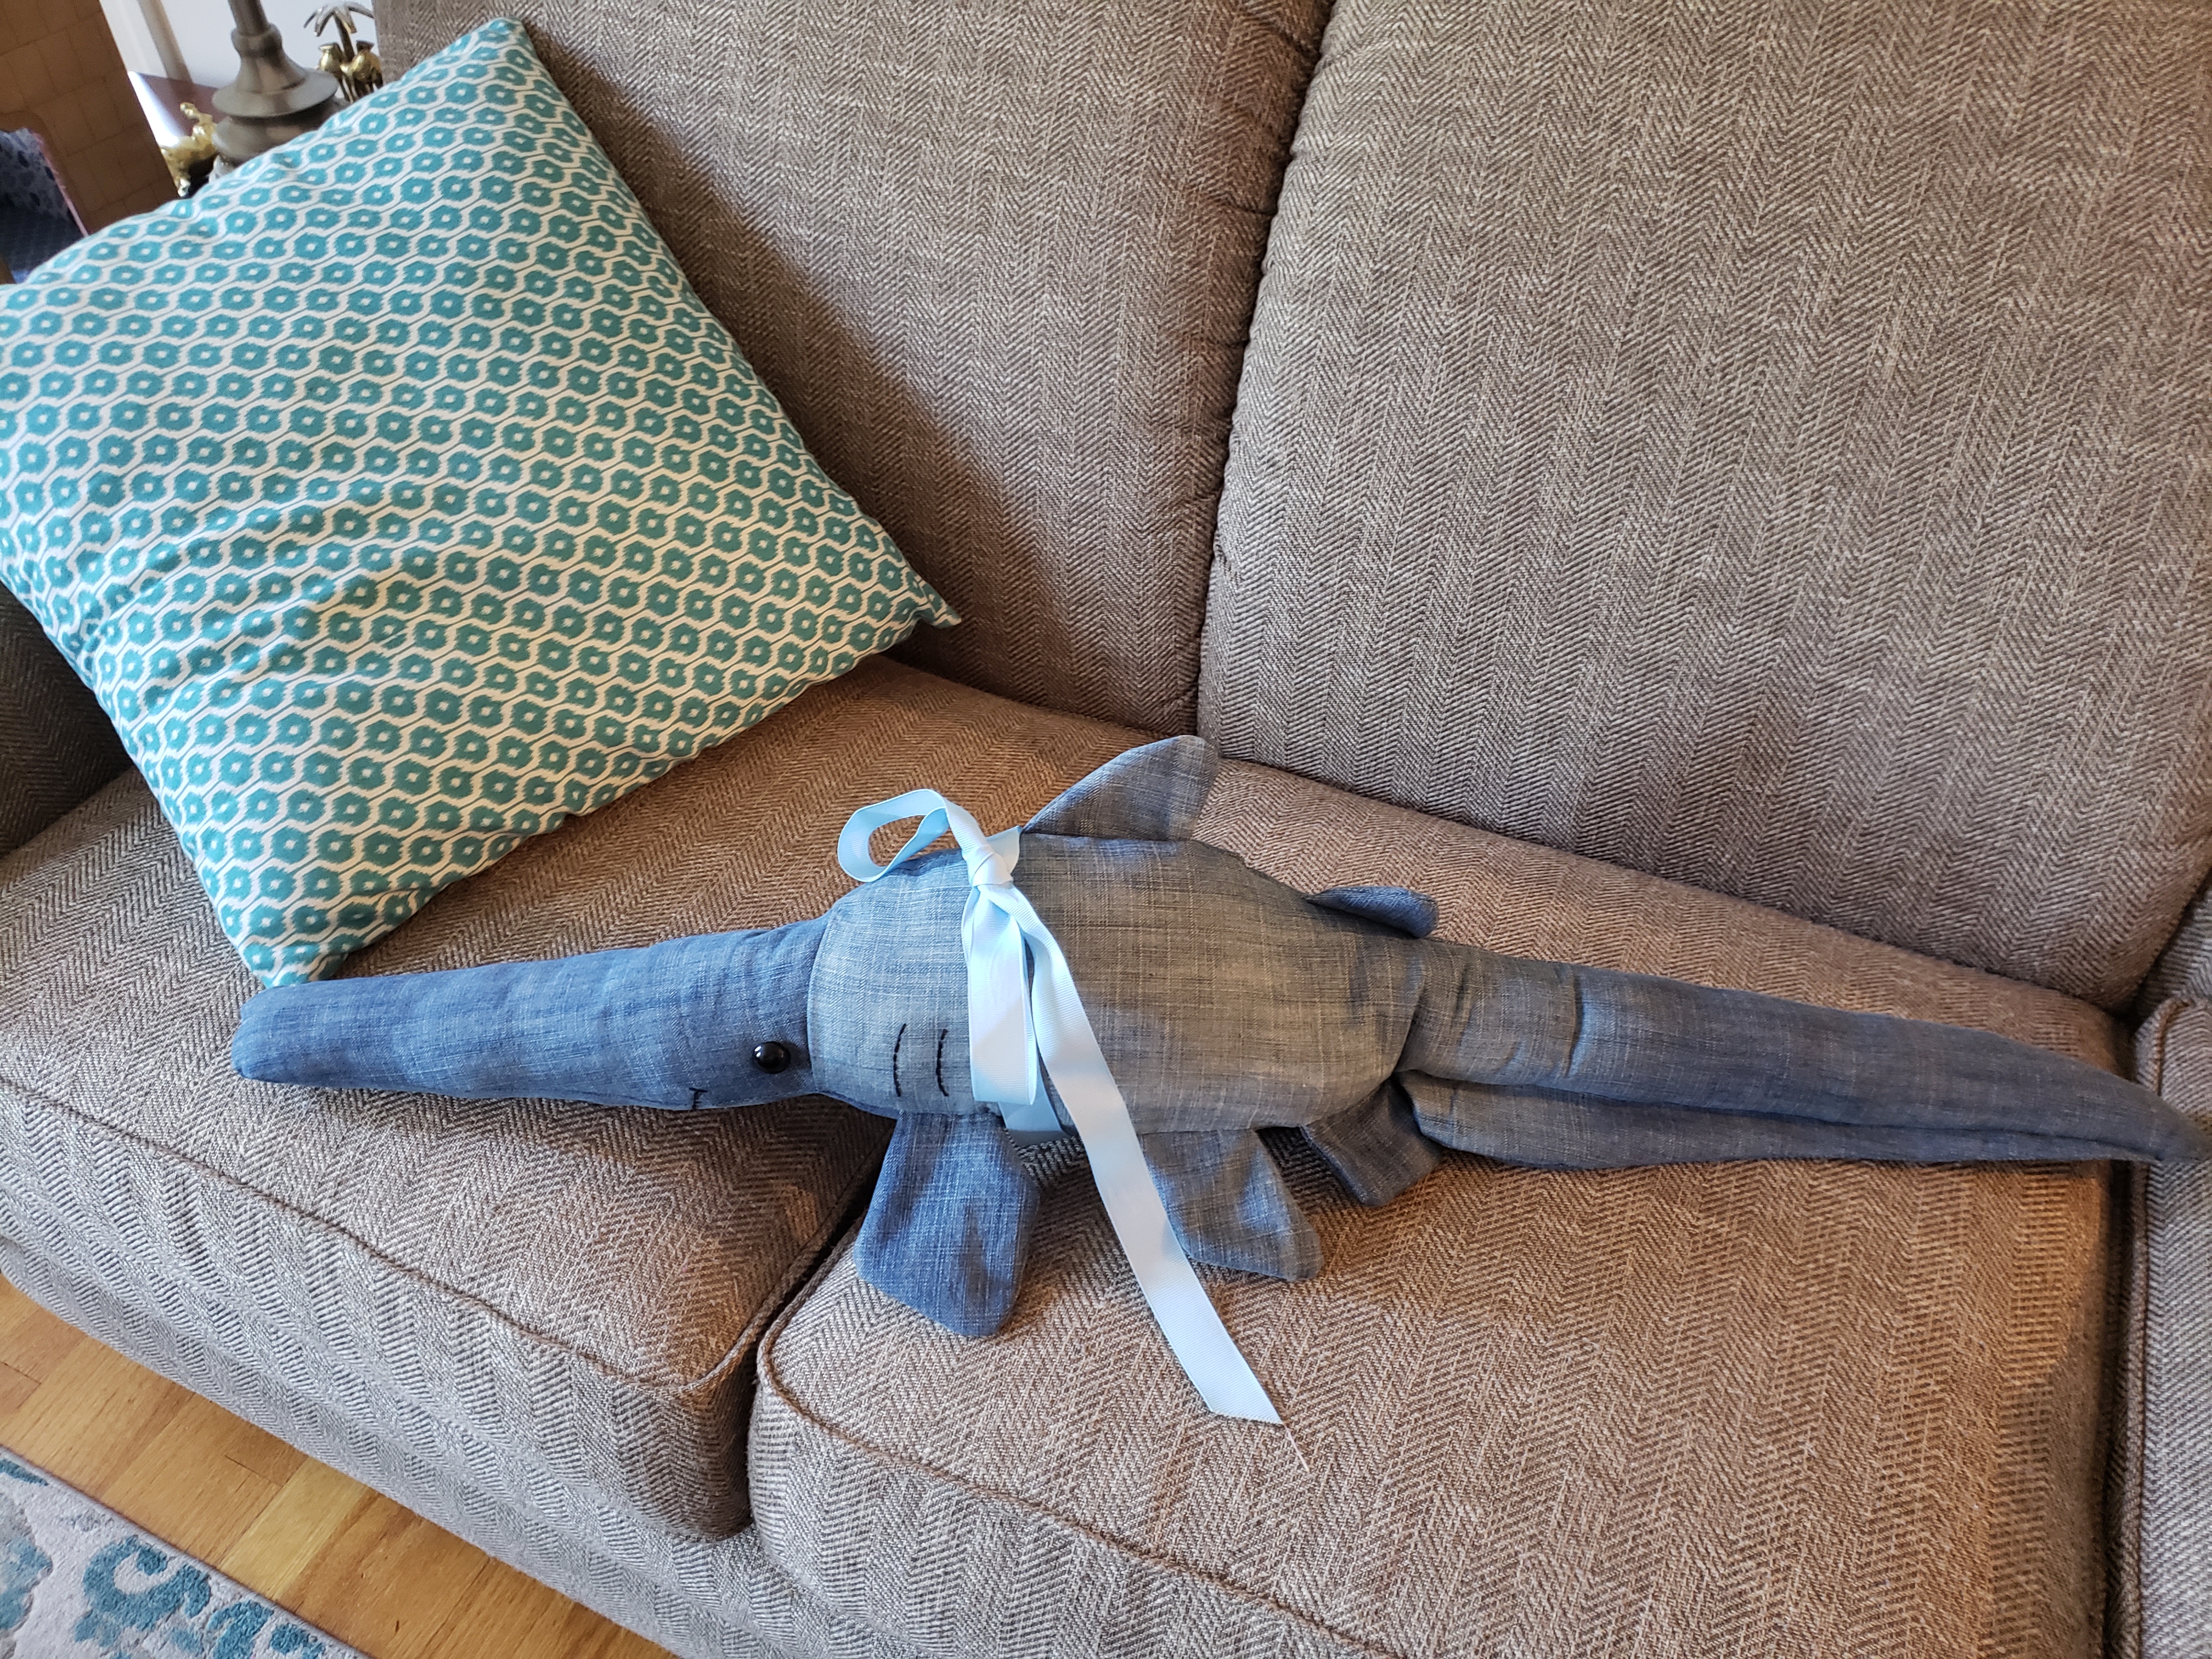
Julius brought Meringue to school today and I was really proud. :D

Posted in Crafts & Sewing | Leave a comment

Dirty Laundry

Julius and Patricia were so cute yesterday.  On the way to pick up our farmshare Julius was telling a story about one of his teachers.  Patricia wanted to participate in the conversation and told us that her friend went to <made up word that sounded like merfissle tree>.  Julius’s response was “I don’t know what that is”.  So to make Patricia feel better I asked her to repeat the word.  It was still totally non-intelligible.  I asked her one final time to repeat it and as I was deciding how to respond Julius chimed in, “oh yeah, I’ve heard of that, it’s the place where breadicorns live” and made up a whole silly backstory to go with it.  Patricia went along with it, pleased someone was listening.  It was adorable.

Well last week was the week from Hell and it just keeps on continuing.  I got sick Monday night with a horrible sore throat and fever, and Will got sick Tuesday with the same.  Julius had been complaining his tummy hurt the week before so when I went to go get tested for strep at the minute clinic on Wednesday, the NP said I should test Julius as well, since strep sometimes manifests only as stomach pain in young kids.  So I took Julius to the pediatrician to get him tested for strep and the pediatrician (not our normal one) starts asking him questions about his stomach and concludes he doesn’t have strep but needs to go to the ER for an xray.  (Which is weird because his stomach was no longer hurting.)

So I drag myself over to the ER with him to be on the safe side and they get xrays of his bowels (thankfully it was fast because I was still feeling absolutely terrible).  The doctor calls me back a couple hours later and tells me he most likely has chronic constipation and he should take Miralax for the rest of his life.  On top of that he should start Miralax and an enema tonight.  Um okay, makes zero sense to me but I acquiesce because I’m still feeling like crap and don’t feel like arguing.  So I drag myself to all the drug stores in town (now I really just want to sleep) and none of them have pediatric enemas.  The pharmacists tell me that’s something specialized that I need to order online.  We get home past Julius’ bedtime, so I don’t give him Miralax and obviously no enema.

Oh I forgot, also that day I get a call from Dany’s doctor that she has some tick borne disease and needs to come in for blood samples on Friday, and I need to capture a urine sample.  Thursday I am feeling a bit better so I collect and drop a sample off at the vet. I’m thinking this is going to be a better day.  Then I get a text from Patricia’s teachers in the morning warn us that she is complaining her tummy hurts and isn’t eating anything.  I think, “ah ha!  Maybe Julius does just have a stomach bug and now Patricia has it because she drank out of his water bottle earlier in the week”.  Patricia vomits all over her teacher and gets sent home.  She vomits all over me twice at home but then seems to be a bit better. (She tells Julius when she gets home, “Julius! I burped all over Ms. Sara then I burped all over my shoes and Ms. Sara had to wash my feeties”.  Julius who has heard the story with the word “vomit” instead of “burp” says “and I heard you burped all over your clothes too Patricia”.  And she giggles and says “oh yeah, I did.”)

Friday Patricia has to stay home on account of all the vomiting the day before.  She’s mega cranky and refuses to nap even though she is very unhappy, so I let her sleep on me in the afternoon and I take a nap too (I’m also not feeling great again, I think my sore throat turned into a sinus infection now).  Patricia and I both sleep thru my alarm to take Dany to the vet.  We pick Julius up from school and Julius’ doctor calls to see how he’s doing and how the miralax and enemas are going.  Oh right, forgot about that.  I had convinced myself she was completely over-reacting because I mentioned Will takes miralax daily.  (I’m still convinced of this.)  I explain I don’t want to give him miralax for the rest of his life without first tracking his bowels for at least a couple weeks.  I also tell him the details of his poop for the last 2 days (he pooped without an enema right after the doctor appointment on Wednesday so I’m not sure an enema would have helped).  She asks about the enema I explain that I’m waiting for it to come in because no stores carry them.  At this point she probably thinks I’m not listening to her recommendations at all and then tells me that “we don’t have the liberty of time” because “Julius’s bowels could explode”.  The xray report did not seem to indicate anything like the potential for bowel rupture, in fact the only thing it mentioned is that “in certain circumstances the presence of small amounts of gas in the bowel might be indicative of IBS”.  That doesn’t read like “imminent bowel explosion” to me, but what do I know, I’m not a doctor.  So I say okay I will give him the Miralax if it’s really that concerning.  I’m very annoyed now.  Wouldn’t my son have indicated some form of pain at present if his bowels were going to rupture?  But to stay off the bad parent list and prevent alleged bowel rupture I give him two tall glasses of microplastics for the next 2 days.

That’s when the horrible GI problems start.  Patricia hasn’t vomited since Wednesday, but she has all the other GI symptoms now.  And on Saturday so does Will.  I’ve somehow escaped.  Patricia is still unhappy, but by Sunday it seems she has turned a corner.  Will is still feeling awful. Julius and I have escaped it seems.  Monday Patricia again doesn’t eat any of her food at school and again asks for Mama and Dada at school (all very unusual occurrences).  I pick her up, nurse on call confirms that this vomit/GI thing is the exact symptoms and timing of what has been going around.

Which brings me to today!  Patricia is 100% back to normal.  Now Julius and I have GI problems.  Great.  Halfway thru the day I get a call that Patricia got a cut on her eyebrow that probably doesn’t need stitches, but might.  I show the picture to Patricia’s pediatrician and she suggests we go to the main Umass hospital since they have pediatric surgeons there if stitches are necessary.  Ugh.  Well the rest of my day is we waited for 4 hours, and when they finally saw us the bleeding had stopped completely and they determined it was just a scratch and didn’t need any stitches.  I’m afraid to think about tomorrow.

And on top of all that – the laundry is looking at me dirty again.  Really dirty.  haha. Okay that phrase just makes me chuckle.  If you want a sign that is guaranteed to make you chuckle, even when you’re washing vomit out of the family laundry, I highly recommend this next tutorial.

Dirty Laundry Sign

What you’ll need:

  • small canvas (mine was 8″x10″)
  • ocean blue acrylic paint
  • white acrylic paint
  • cricut adhesive vinyl sticker and pattern here

First I painted the entire canvas white and let dry.

Then I cut out my vinyl text – you can resize it to fit your needs!

Using transfer tape I adhered the vinyl letters to the canvas.  Here if I was smart I would cover the letters and around the edges with mod podge. It prevents the paint from bleeding.  But I wasn’t smart, so I didn’t do that.

Paint 2-3 coats of blue on top of the lettering.  Let dry.

Peel off the vinyl letters.

Use more white paint to touch up any bleeding.

Hang with pride.  Laugh everytime you step into your laundry room.


Posted in Crafts & Sewing, Home Improvement | 4 Comments

Holey Moley

Monday again?!  Boy does time fly.  I’m in a bit of a project slump the last few weeks because I’ve got a bunch of mending projects piling up.  I started mending socks last summer, did I mention that?  It’s kind of fun.  My grandma used to mend socks, and my mom and uncles used to tease her that she was the only person they knew who still did that.  At some point in my teenage years, my grandparents gave me a little sewing chest and in it (among other things) was one of my grandma’s old darning mushrooms and some darning thread.

Last summer when I started flying places again I took a bunch of Will’s holey socks on the plane and darned a few of them.  I felt pretty accomplished and the patches looked pretty cool.  Will even said they were very comfy!  Win!  Unfortunately though, after only another couple months all of them ended up threadbare or with even more holes.  On top of that, other socks in the collection also ended up with holes. So now I have a basket full of around 24 socks that needs darning (at least one hole each).  I don’t think I will ever have time to darn 24 socks in this lifetime so I’m going to get higher quality socks for Will and see if they last longer.  I really hope they do.

I’m pretty proud of the patches, but this is what I’m working with…

Well I always save holey socks and I’ve made sock puppets, sock unicorns and other sock creations.  Unfortunately with the rate Will demolishes socks, and my slowness at sock darning, I have a plethora of holey socks just waiting for reuse.  Well…  when I was picking wool dryer balls (I love them) out of my sheets the other day I had a great idea… I would turn my socks into dryer balls!  I found with Will’s calf length ankle tube socks (he’s like a men’s large sock) I could use 3 socks to make a very dense and firm dryer ball!  (Some of my cheaper wool dryer balls started out thick, but disintegrated and turned into dryer puffs rather than balls….

DIY Sock Dryer Balls

What you’ll need:

  • Old holey socks (cotton or wool, whatever you have will work great) – The equivalent of 3 Men’s L ankle socks per ball
  • Needle and thread
  1. Take first sock, and fold in half lengthwise from toe to heel. 
  2. Start rolling from toe up towards the heel, pulling as you go to make a firm roll. 
  3. Once you reach the heel start rolling ankle and calf portion around the roll you made. 
  4. Take a second sock, and continue wrapping in the same direction, starting at the toe (but do not fold in half this time).
  5. When you reach the heel, move the ankle 45 degrees towards the direction around the roll and start wrapping. 
  6. Shift slowly 45 degrees again, so you shape the sock into a ball shape.   Pull very firmly throughout the process. 
  7. Place your ball shape inside another sock, pushing it all the way down to the toe, and pulling and shaping to form a very firm ball. 
  8. Twist the open end of the sock a quarter turn, then turn inside out and fold the ankle of the sock back over the twist (which should be holding the sock’s ball shape). 
  9. Pull the middle part of the sock down over the sock ball, and again twist a quarter turn at the opposite side, turn inside out and fold the ankle of the sock back over the twist.  During this process reshape sock. Repeat one more time depending on sock side. 

    This is what the quarter twisted end looks like, once you have turned it inside out.

  10. Using a ladder stitch, stitch the ends of the sock closed.  

Toss in the dryer with any clothes to reduce dry time!  Note – I personally don’t put essential oils in mine because essential oils are flammable.

Posted in Crafts & Sewing | 4 Comments

The laundry is looking at me dirty again

Wow what a weekend!  We spent the last weekend give or take a day on either end having our annual DanyCon Convention!  It was a blast.  I’m so exhausted though that the last two nights I fell asleep on the couch after dinner and slept for 2 hours.  Not exactly ideal.

Because I’m so tired I’m going to just cut to the chase and show you the latest thing I’ve been working on.  It’s my washing machine closet!  When we redid the basement they basically walled off the area with my washing machine, dryer and sink and added some double doors so I could have full access.  It’s worked out okay, but because there is no insulation behind the doors the cold basically oozes out of there.  The first thing I did when I moved my desk downstairs was to add weather stripping to the base of the doors and between the doors and just that little change it made it so much warmer.

I also immediately installed a retractable arm to hang clothing from.  I used to have a clothesline hanging across my basement so I could dry my clothes easily, but it felt odd to add that back to the nice finished space.  So I used some 2″x4″s to attach a retractable laundry rod above the washer and dryer.  Instead of using a line and clothespins,  I used the rod and pants hangers with clips to hang all the diaper covers and other clothes that I don’t put in the dryer.  It works great!

My next problem was that I had this shiny new basement and the area for my laundry was just so ugly!  It was functional, but it was messy with all the bare pipes and unfinished floor showing.  So I spent a lot of time envisioning ways I could add shelving and cover up the pipes.  The other thing that I was annoyed with is because they didn’t finish the area with the washer and dryer, they left all the insulation exposed on the inside of the closet.  Since I was going in there all the time I didn’t want insulation brushing off on my skin or clothes.  This lead me to realize that the ceiling in the closet (and the unfinished back area) is also totally exposed insulation!  So, if there was any insulation shards getting lose with day to day wear I’ve been breathing that in for years.

So my next step was to tackle the exposed insulation.  I used black sheeting to cover up both the insulation on the inside of the walls as well as the insulation on the ceiling.  I used a staple gun on the ceiling, but on the walls (which are steel braces) I had to use duct tape.  Seems to be holding up okay so far.

After that was done, I finally could get to work on adding shelves.  I had a couple goals for the shelves.  I wanted to get all the junk on top of the dryer out of the way and onto a shelf so I could fold, and I needed a place to store my laundry baskets when they weren’t in use.  This meant I was slightly size constrained.  Again, my walls were unfinished concrete with pipes sticking out everywhere so the only place to mount shelves was from the ceiling.  I found these super cool ones off Amazon that look like industrial pipes.  They also happened to be the right measurements to hold my laundry baskets.  I cut down some scrap plywood I had leftover from my kitchen shelving project to the right size to use as shelves (it seems they don’t sell them without the planks which is too bad because it was half the price).

Since I used rather long plywood for the shelving I needed 3 braces to support the shelves.  This left me with one extra brace to use somewhere else.  I chose to use it as an additional laundry hanging space over the utility sink (a requirement I found I needed when hanging tie dye shirts to dry).  I was able to reconfigure the pipes to make the bar longer in width.

Next I wanted to hide the pipes.  For this I bought 4 matching polyester curtains from Savers and straight up staple gunned them to the ceiling.  I hemmed the curtain over the dryer to make sure it comes no where near the back.  (This was another reason to use polyester.)  This makes the whole closet feel much cozier, and infinitely less ugly!

The last step was to add a silly laundry canvas I made (sidenote: there are so many good laundry puns, it was hard to choose).  I staple gunned this to the fabric as well, in case you’re wondering.  I also threw a basket under the sink for dirty laundry that isn’t immediately bound for the wash, and hung up two hooks on the inside of the door.

I’m in love with the mini-renovation.  I keep opening up the closet to admire it while I’m working.  And it makes me so much happier to do laundry when everything is so tidy and organized.  (Plus it motivates me to fold the laundry immediately to keep things tidy.)  The total cost for everything I needed to purchase for the reno (which was the plastic sheeting, curtains, shelf mounts, and the retractable hanging arm) was less than $250.

Next I guess I have to tackle the ceiling in the unfinished area… I’m dreading that!

Julius can read now, luckily he is still too young to understand my humor.

You can barely see the black sheeting on the left side because it blends in so well. This picture shows the hook on one of the doors as well as the bar over the sink for wet clothes. Oh and I forgot to mention I put a hand towel on a magnet hanging from the washing machine, and a bottle of soap on the shelf so I can wash my hands here when they are really messy. (Read: frequently)

Here’s a better view of the shelves which perfectly fit laundry baskets stacked 3 high.  In the foreground you can see the retractable clothes hanger.

Full view of the closet. No more pipes seen!

Posted in Home Improvement, Thrift Finds | Leave a comment

Currying Favor

Happy Belated Mother’s Day to all the mamas out there!  I hope you had a wonderful day!  Julius was so cute for Mother’s day this year.  He was counting down the days to Mother’s day because he made me lots of gifts.  I got to sleep in on Mother’s Day so when Will was in the bathroom in the morning Julius snuck this on our little chalkboard…

This made me the happiest of all somehow. (Used to say Earth day :D)

Isn’t he the sweetest?  Oh and as for all the gifts he made me… in addition to the usual magnet from his school, he also made me a paper airplane, a shark puzzle and a “make your own flower” kit.  Very thoughtful.

He’s definitely my son….

Patricia made me a cute picture and a flower at school.  She tried to open it for me, but I was impressed that she did eventually realize she should let me open it (good thing too because there were a lot of tiny rocks involved).  After presents they then helped me plant 100 bulbs (I know I’m like 2 seasons behind on bulbs, but better late than never?!)  On top of all that this was the first weekend in a long time that I haven’t logged into work and it was great.  Hopefully I’m starting a trend because this weekend is DanyCon and we should have lots of board game fun!

After planting!

So I have been delaying sharing this one for a while, I’m not sure why!   I originally made the recipe around Erin’s birthday in the fall, so it’s been around for a while.  This is another spin on a family classic.  Will’s mom makes a great curry chicken salad that’s really refreshing.  Normally it’s made with shredded chicken and bacon, but I wanted to make a vegetarian version.  After thinking thru how I was going to get the satisfying salty smokey pop from the bacon I realized I could use smoked almonds.  I am pretty sure I nailed it.  I tried every type of smokey almonds in the grocery store in a taste test and the hands down winner was Blue Almond “Smokehouse”.  I think they taste the smokiest and are the best bacon substitute for this recipe.  Some day maybe I’ll try and make my own.

Curried Chickpea Salad

Ingredients

  • 1 lb dried chickpeas or 3 cans (drained and rinsed)
  • 1/2 cup mayo
  • 2 Tbsp major grey chutney (I like Patak’s)
  • 3 tsp curry powder
  • 1/4 tsp salt
  • 1/2 tsp lemon juice
  • 3 cups grapes, halved
  • 6 oz smokehouse almonds, chopped (about a cup)

If using dried chickpeas, rinse and drain, then place in instant pot.  Cover with water by 1 inch, let cook on high pressure for 45 minutes then naturally release for 10 minutes. (Wait 10 minutes, then move valve to opened).  Set in the fridge to cool.  Mash lightly if desired (we think it’s better less mashed.)

Stir together all ingredients except grapes, almonds and chickpeas.  Add in chickpeas and grapes.  Leave in fridge until chilled.  Just before serving, add in almonds.


Posted in Culinary Delights | 6 Comments

As the Earth turns

We had a busy weekend!  Davis Farmland, a birthday party, family photos, and a quick visit to my parents’ house and all that was just on Sunday!  I also got some new chairs for my kitchen island.  I bought these off of facebook marketplace and I was really excited because since we’ve moved in we’ve only had 3 chairs had the island, so I’ve been using the Inglesina booster chair attached to the counter for Patricia.  She’s getting closer to the age/weight limit, and lately has been wanting to sit in the big kid chairs, leaving Will or I to stand.  (Or let’s be honest, me to work while everyone else is eating.  I’m working on it I promise.)  On top of that, she usually climbs into her booster chair by climbing on one of the other chairs and stepping over, which is super dangerous, especially since the chairs swivel.

So anyway, I brought these new chairs home, and set them all up and Will showed Patricia how she now has a big girl chair, thinking she’d be very excited.  Instead she very firmly stated “I don’t want a big chair, I want my little chair”.  Julius took one look at his new chair and started sobbing.  Will did tell me that he thought they were awesome, so I guess it’s 50/50.

I have to tell you a cute story about Julius.  He went to his friend’s birthday party this weekend.   We went to the toy store and picked out a present for his friend, and then before the party I had him write a card.  I thought he was just going to sign his name, but he wrote an entire letter with no help from me.  When I walked over to read it it said, “Dear Emma, You make me smile. Love Julius.  Shark List: Mako, Ghost”.  I asked him about the shark list and he said “I just thought maybe she’d like to know some sharks.”  Which, well, you never know I guess.  He’s been more than a little obsessed with sharks the past month…

Well speaking of obsessed, I’m obsessed with this project I just finished, but I am going to wait to show you next week!  It is something that has been on my to-do list for ages now, and it feels so good to tackle it.  Enough about that for now, I’ll show you next week.  Another obsession?? Snickerdoodles.  Those things are over the top delicious.  For Earth Day the kid’s helped me make snickerdoodles that I’m calling “Dirty Earth” cookies.  (Slightly depressing I guess, but yeah there’s a lot of s**t in space. Check this out if you don’t believe me.)   Patricia and Julius both helped me make these bad boys.  They were super helpful.

Dirty Earth Cookies (aka snickerdoodles)

What you’ll need:

  • a batch of your favorite snickerdoodle dough (I like this version though I find the cookies need the upper end of the baking time or they’ll be raw in the middle AND I must make them smaller than she does because the recipe yields almost double what it claims)
  • blue and green food coloring
  • cinnamon and sugar mix for rolling (the version I use recommends 1/4 c sugar to 1.5 Tbsp cinnamon)

After you dough is mixed, divide in half, and add green food coloring to one half, blue to the other. I used 10 drops for each half.  Mix well until the color is distributed then let dough chill for at least an hour (I usually do overnight).

Add food coloring to half the dough then mix (tip: I remove half the dough, add blue food coloring, mix, remove blue dough, then add in the plain dough and green food coloring)

After dough has chilled, scoop out 2 small chunks of blue and two small chunks of green, stick them together and roll into a ball to form an Earth looking ball.

Earths ready for the kids to roll in cinnamon sugar.

Repeat for like 40 more cookies.  Balls should be about 1″ in diameter.

Let your children roll the balls in the cinnamon sugar mixture and then place on a lined cookie sheet (don’t flatten, then they will puff up and look more like the planet Earth).

Diligently rolling balls in cinnamon sugar mixture.

Don’t press flat after covering in sugar/cinnamon mix.

Cook for 11 minutes at 350 F then transfer to wire rack to cool.

Are these not awesome?!

I can see my house on that cookie!

Posted in Culinary Delights | Leave a comment

Crappy Post

Thank you all for the nice comments!!  It really made my week.  I want to show off our tie dye masterpieces today, but first, I’m long overdue to share some more Patricia and Julius stories.  My favorite thing in the whole world is watching Julius and Patricia have conversations.  Patricia, in her toddler speak will ask him questions and he’ll answer whatever it is in earnest.  He’s also started speaking up for her – for instance sometimes I cannot understand some of the words Patricia is saying.  Julius, by who knows how, understands exactly what she is saying at all times and will indignantly shout it at me.  For example, “She said raisins, mommy!  Not crazy!”  As if, obviously, she said raisins clear as day, and Will and I are the confused ones.  It makes her feel more confident though so I love it.

Patricia is amazing at remembering names.  She will hear someone’s name one time and then ask about that person a day later and we’ll have no idea who she is talking about.  For instance at Davis Farmland the other day she was playing “with” (aka near) a little girl and she introduced herself.  The little girl introduced herself as Charlotte and later Patricia said “I want to go back to play with Charlotte”.  I had no idea who she was talking about but luckily Will did.

She’s been eager to use “real names” lately and sometimes reminds Will and I that our real names are “Will” and “Lexi”.  Also this happened the other day:

  • Patricia is facing away from me into the chair mumbling something.  I can’t hear her.
  • Me: what did you say Patricia?
  • Patricia: (turns to me) oh I’m talking to the chair.
  • Patricia: (turns back to chair) Hi chair my real name is Patricia Naomi.

She also is obsessed with… poop.  She loves to ask me to play her clips of animals on my phone and I usually give in.  The other day she asked me this, “I see doggies?  I see doggies in garden?  I see doggies pooping in garden?”  Umm, what?!  I have no idea how she came up with that one.  I did not oblige.  They say a lot of toddlers are obsessed with poop so maybe this is totally normal, but this was NOT at all the case with Julius.  When Patricia was around 1 year old she would mumble poopies to herself and crack up laughing.  She’d do this for half an hour before getting bored.  Now Patricia inserts “poopies” into conversation for comedic effect anytime she wants to get a laugh.  (At least I assume to her toddler friends she is basically a toddler comedian.)

The other day we were at a sushi restaurant.  This was more upscale than our usual dining and one of the first indoor dining options we’ve really done that wasn’t Davis BBQ.  Patricia and Julius were waiting for their food and there was a lull in the coversation.  All of a sudden Patricia (quietly) outburst something.  I couldn’t hear her so I asked, “what did you say Patricia?”  And she giggled and said “I say poopies really loud.”  Of course after that Julius chimed in and I had to stop them before anyone could actually hear my children shouting poopies.  Julius is inherently more compliant than Patricia but he feeds off her silliness.  When she is doing something naughty he absolutely wants to be a part of it.  While it’s adorable to see them playing together, it’s more than a bit frustrating getting Patricia to stop while Julius is doing the action as well.

I don’t know if this will last but both my kids seem to like crafts.  (Much to my great joy.)  The other day when Patricia was home sick a couple weeks ago I was leading a meeting and Patricia sat next to me and opened one of the envelopes of animal crafts that Julius got for Christmas.  She looked at the picture and put together almost the whole face by herself just by asking me things like “where are the eyes”?  “Are these the eyes?”  It was adorable and she persevered on her own for quite awhile before eventually giving up.  I felt bad that I couldn’t help her more while I was leading the meeting.  This is becoming a trend with my life.  I think I have to try and reclaim the balance part of the work/life balance.  It’s just the kids have been home so often this year that it is very hard to get things done while they are here and I end up working odd hours so I don’t feel guilty about it.

“Stretch the Giraffe” -Patricia (age 2, without assistance)
My favorite part, hands down, is the unibrow.

Julius is very creative and he makes these mobiles out of trash and scrap paper that are actually quite beautiful.  His teachers at daycare had to tell him not to go in the recycling bin anymore, but he still frequently comes home with scrap paper from school that he has repurposed into masterpieces.  I definitely don’t remember doing mixed media art when I was his age, or really ever.  He might be on another level than me.  And he’s great at drawing.  Sometimes his teachers draw pictures for him during nap time that he brings home.  So I’ll sneakily throw them into the recycling bin (sorry teachers, I’m not framing your art on my art wall.)  At some point though, I realized I had been recycling pictures Julius was making because I thought they were sketches from the teachers… Oh and most of his pictures still have very emotional animals.  A lot of them have tears.  I hope this isn’t a cry for help, but he has told me on several occasions that he thinks sad animals look cuter.

“Two ghost sharks who are going to be married, but a wrecking ball comes between them and pushes them away and now they are sad.” -Julius (age 5)

Patricia still loves beans.  You may remember when she was younger Will would give her an entire can of beans for her lunch and she’d eat them all.  We eat a lot of beans as vegetarians (or mostly vegetarians for Julius, Patricia and Will) so it is convenient she likes them.  The other day we had this conversation when choosing what she wanted for left-overs night:

  • Me:  What do you want for dinner, Patricia?
  • Patricia: Beans!
  • Me: What kind of beans?  3 bean salad, refried beans, or white bean soup?
  • Patricia: All the beans!!

Last poop story I promise.  I don’t want to become the parent who talks and laughs about poop but I’m sorry this is my life now.

  • A toot noise emanates from the brown chair in the living room where Julius is sitting.
  • Will and me (at the same time): Julius do you have to poop?  Go poop.
  • Julius:  I guess so.  (waddles to bathroom)
  • Patricia: (pops out from behind the brown chair) I toot!
  • Me: Do you have to poop too?
  • Patricia: No.
  • Me:  You need to go potty if you have to poop.  Julius, did you toot or did Patricia toot?
  • Julius: (walks out of the bathroom with his pants around his ankles and says indignantly) I have no idea!

Will and I laughed for days about that one.

More Patricia-isms:

  • Emooses (emus)
  • No away!  (No way!)
  • I need has ta potty (I need to use the bathroom.)
  • unbutter (unbutton)
  • bandy (band-aid)
  • He’s my bestie (I like him a lot)

Okay now that you sat thru all the poop stories I want to show off this tie dye! (Also, I’m really sorry that I rewarded all the nice comments from last week with an entire blog post about poop.)

I LOVE tie dye.  It is always so fun to see how it comes out.  Julius’ came out amazing!

Look at these 2 cuties. Julius made his shirt himself.  And yes, I did say “poopies” to get Patricia to smile.
I used 3 tsp dye:3 tsp sodium carbonate 2 cups of chemical solution and applied to dry fabric. Dyes used were Procion bubble gum pink, citrus yellow, and aqua from Pro Chemical

Everytime I finish a tie dye shirt I think to myself “why can’t all my clothes be tie dye?!”
I used 3 tsp dye:3 tsp sodium carbonate 2 cups of chemical solution and applied to dry fabric. Dyes used were Procion bubble gum pink and citrus yellow from Pro Chemical

I mean, don’t you just love tie dye?! t doesn’t get any better than this!
I used 3 tsp dye:3 tsp sodium carbonate 2 cups of chemical solution and applied to dry fabric. Dyes used were Procion bubble gum pink, citrus yellow, and aqua from Pro Chemical

I still have Will’s shirt that I haven’t photographed yet…  I’ll add that shortly.

Posted in Crafts & Sewing | 6 Comments

Love your Mother

Well I hope everyone had a happy Earth Day!  Didn’t know it was Earth Day?  Well that’s okay, there’s always time to make the Earth a more beautiful place.  This year Earth Day was on a Saturday so I decided I had to throw a party.  It was the first friend party I’ve thrown since lock down (okay, if we’re counting we had a couple small kiddo birthdays in there) and it was great to see everyone.  Patricia and Julius had a blast as well getting to play with some new and old friends and do some crafts.  And now we get to watch their creations grow so the fun keeps on giving!

As I mentioned I went a bit overboard hoarding trash for this party.  For each item below I’ll let you know how I made it Earthy friendly, and how you could do the same!

Earth Day Celebration

Invites

Look at these amazing invites for Earth Day from evite!

Food

Everything at the party was vegan or vegetarian.  As usual I made way too much food, but the great news is that means we haven’t had to think very hard about dinner or lunch the last few days.  I also planned to make a vegan dessert (vegan bliss bites are seriously the best thing ever) but I completely ran out of time.  Luckily Nina brought a delicious vegan dessert.  I also planned to make home made lemonade, but ran out of time on that as well, and instead brewed up some quick iced tea from Harney and Sons – which Julius thought was the best thing ever.

Oh and I used napkins made from recycled paper and plates made from fallen palm leaves!  The cups I used for the beverages were reusable (I bought them for Julius’ party and plan to continue re-using them.)  And we did buy an assortment of beers and sodas, all of which were in aluminum cans (which is the most recyclable option).

The vegan sandwiches were vegan wraps, humus, lettuce, bell peppers, onions, sprouts and cucumbers.  The vegetarian sandwiches were tomato basil wraps with cabot cheddar cheese, cream cheese, everything bagel seasoning, lettuce, cucumber, onion, radishes and sprouts.  I thought they were both quite good, but next time I’d probably get some kind of herbed cream cheese for the vegetarian wraps.

Here’s the blood orange iced (herbal) tea that Julius loved and of course my Berkey for water. Behind are the reusable cups I use (some with lids and straws for kiddos)

Here’s the table, on the left are the palm leaf plates, compostable napkins and compostable utensils.

Food from top left going clockwise: chips, veggie platter, fruit salad, pb&js, 3 bean salad, egg salad, vegetarian wraps and vegan wraps.

Brownies and Earth cookies for dessert

Patricia enjoys her picnic lunch. (I bought a bunch of cute picnic blankets from the thrift store, but most people just sat on chairs.)

Games

I told everyone we’d have games and prizes, so I had to have at least one game.  So I collected trash and recycling for “the recycling game”.  It was really windy though so we had it have it in the garage so the trash wouldn’t blow away so we only had a few people play.  Julius played and had a great time (according to Will).  The purpose of the game was simple, sort trash, paper/cardboard and recyclable metals, glass and plastics into three areas.  I had a few tricks in there too.  I expected more families to want to do the game, so I put A LOT of items in the basket.  The times ranged from 4 minutes to 14 minutes.  Overall it started some good discussions about what is recyclable or not so I consider it to have been worthwhile!  (Did you know pizza boxes are recyclable, despite the grease?!)

Keaton and Chandler rocked the recycling game!

Activities

Make your own terrarium

Terrarium Instructions

This one was a hit with the kiddos, several kiddos even made two (Julius included)!  I collected glass and plastic jars that kids could fit their hands into for weeks, and even got some from folks on my buy nothing group because I was worried I wouldn’t have enough (spoilers, I had way more than enough).  I scoured the thrift stores for plastic dinos or animals for weeks, but after about 4 trips I gave up and just purchased some unicorn erasers that looked cute in the jars.  I also bought stickers that didn’t come in plastic packaging.  The sand and rocks came from a local Home Depot (so I wouldn’t have to have them shipped to me) as did the peat pellets.  I have way too much leftover so I’m debating what to do with everything.

Here are the terrarium making supplies!  Note Patricia has already disassembled half the unicorns.

Here’s Patricia’s terrarium getting ready to sprout

Microgreen Garden

Microgreen Instructions

I got all the bowls for these at the thrift store.  Again, I bought way too many even though I thought I wouldn’t have enough.  I put it on the same table as the Terrariums since they used the same basic ingredients.  I do have a funny story about this one… on the instructions I said to use .5 tsp of seeds.  My friend’s son diligently read and followed the instructions but missed the ‘.’ so he is going to have a forest of chia microgreens!  Yum!

Microgreen containers ready for people to plant!

My microgreens are lush and almost ready for harvest!!

Butterfly Picture

I have been collecting toilet paper wrappers for a while now (Who Gives a Crap is plastic free, but switched from paper to tissue paper wrappers recently, which is really not recyclable.  So instead I have been collecting it for craft projects since I’m a crazy person.  For the party I cut all the tissue I collected into tiny squares, and cut out ovals from some colored envelopes from kids’ crafts I saved from the recycling.   Then I gave the kiddos a template, a marker, a glue stick and an example and let them go wild.  Patricia decided to make “a flower” instead of a butterfly which I thought was quite artistic.

Look at these great butterflies Caleb and Mia are making!

Recycled craft table.

Pet Rocks

Pet Rock Instructions

I already had most of the equipment for this one considering I’ve had several paint nites before.  So I put out some water based acrylic paint, paint brushes, palettes, rocks, glue and googly eyes and an example.  Patricia painted about 17 rocks.  Most of them blue (no eyes that I saw) and Julius made a very adorable bumble bee.  As for recycling I used recycled paper from shipping packages as a cover for the table, and used the laundry measuring cups I collected from way back when I used liquid detergent, as water cups.   As a bonus I’m happy to report that the half gallon of paint on Patricia’s coat came off with a scrub brush. 

Julius and Patricia diligently working on rocks while Alex and Amy look on

Tie Dye

Tie Dye Instructions

I did the tie dye a bit differently this year.  In the past I have had everyone presoak their shirts in a mixture of sodium carbonate (soda ash) and water.  This is time consuming and kids are impatient, so I decided to instead put the sodium carbonate in the bottles with the dye.  This time around I did 1 Tbsp dye and 1 Tbsp soda ash and added 2 cups of chemical water solution as guests arrived (and followed the other instructions from prior).  We’ll see how they come out.  I will say it was actually messier to do it this way, and a bit trickier.  The dye doesn’t disperse as quickly through a dry shirt, so you have to hold the nozzle onto fabric for a while or the dye mixture will just roll right off instead of soaking in.  I didn’t have to buy much for this activity since I had everything on hand from past parties.  If you are doing this from scratch you could save bottles from liquid dish soap to use as your dye bottles.  They would work perfectly.  I only provided a small set of gloves, and most people just chose to go gloveless (fiber reactive dye is not toxic once pasted out in water).  I did buy a ton of cotton shirts from the thrift store for this activity, and to batch the shirts, instead of providing zip lock bags, I provided plastic bags I had cleaned from food items (chik’n nuggets, bread bags, frozen veggies etc).  Since some of these couldn’t be recycled it got a second life.

Tie Dye Station. All the shirts were thrifted, and the plastic bags were washed bags that were not recyclable.

Tie dye being batched in reused plastic bags.

Seed Bombs

Seed Bomb Instructions

This idea I got from my sister in law.  She got the recipe from her library!  I thought this was rather fun, and the kids’ had a great time making them and then throwing them around the edges of the yard today.  For this I purchased everything, but the cups I used to mix them in were all recycled food containers and the spoons were compostable (and a few were used plastic spoons I had washed).  The perfect container to let them dry and transport them in is paper egg cartons!  Luckily I had a few and Amy had even more for me that she’d been saving! 

Ready for some guerilla gardening…

Action shot of “planting” the seed bombs!

Prizes

Oh and of course I couldn’t have a party without prizes!  Will asked me if I was having the party just so I could buy prizes, and I can only confirm that I did buy prizes before I decided to host the party.  On the invite I told people they would get bonus points if they did things like drove in an EV, road a bike to the party, carpooled, collected trash, wore thrifted clothing or were otherwise Earth friendly.  We decided to give everyone who showed up a ticket for a prize, and extra tickets were given away for doing the items above.  And anyone who did the recycling game also got an extra ticket!  The prizes were a great way to show off some of the products I use that are plastic free or more environmentally friendly.  (I don’t get paid by any of the companies below I just really like their products.)


Posted in Crafts & Sewing, Culinary Delights, Parties, Thrift Finds | 8 Comments

No Room for Mush

Well I was in charge of the kiddos the past 4 days while will was at a board game convention (I was supposed to go too, but there were several reasons I ended up staying home instead).  I had all these great plans to do with the kids, starting with logging off work at an actual reasonable hour on Friday.  Those plans didn’t happen and I ended up barely getting home in time to make them dinner while on a work call then putting the kids to bed (late) and working until 1am on Saturday, and much of the day on Saturday.  I noticed Patricia does bad things to get my (negative) attention while I am working.  For instance she colored on the couch, hit or pinched her brother (out of the blue) and did various other mean things anytime I was on a work call.  Normally she only does things like that when she is cranky so that scared me.

Despite the horrible work schedule I did get the day off on Sunday and decided to take today off to take them to the New England Aquarium.  (It’s a state holiday today for the marathon, so Patricia was already out of school.)  I figured Julius would love the aquarium because he’s been super into sharks lately and told us he wants to be a marine biologist.  And I told Patricia there were penguins, so that convinced her.  I don’t know if I’ve ever been to this aquarium, but it was super cool.  They have two different species of penguins, sea lions, a tank where you can pet rays and sharks, a humongous coral reef 3 stories high and numerous other tanks on the sides.

Patricia stared at the penguins for at least 20 minutes, and then I had to drag her away from each penguin area anytime we passed by.  Julius was extremely excited by the sharks in the shark tank but was slightly disappointed that I made him leave after like 20 minutes of hanging around there.  He did work up the courage to touch one of them, so I was proud of him for that.  I think he might have been disappointed I didn’t give him longer to work up the courage to touch more… but Patricia was also there and I had to try to keep them both interested which was challenging with just one adult.  Overall I considered the day a success!

This is as good as it gets, both kids looking the same (wrong) direction.

Another success was this little mushroom house I made for the fairy peg dolls at Patricia’s “party”.   For this guy I combined felt sheets with felted details.  I want to start doing that more often because felting opens up a whole new avenue for realism on felted projects.  I only touched on that briefly with the little bushes around the base of the mushroom and the door, but next time I’ll try to up my game.  Oh and this tutorial is a bit loosey-goosey.  I will provide my measurements as guidelines, but I don’t have a pattern.

Felt Mushroom House

What you’ll need:

  • white felt
  • red felt
  • stuffing
  • roving for decorations (I used shades of brown and green)
  • brown embroidery thread for details
  1. Cut a 9.5″x 11″ strip of felt for mushroom base.  I folded this in half to form a 4.75″x11″ strip of felt, then overlapped the unfinished two ends so the part near the folded side had more overlap than the part near the bottom (causing it to flare out a bit).  I then trimmed where they met, and trimmed the bottom (the larger side) so it would sit flat.
  2. Finally I stitched together at the unfinished ends.
  3. Next I drew and cut out an arched door and circular window panes.
  4. At this point I felted the door and bushes onto the side of the mushroom house.
  5. Then I embroidered the trim around the door and windows.
  6. Next I cut a piece of circle of white felt and a circle of red felt with 9″ diameter.
  7. I hand stitched them together, leaving a 3″ gap, turned them right side out and then stuffed them very lightly with recycled poly stuffing and closed the gap with a ladder stitch. 
  8. Cut a 2″x12.5″ strip of white felt.  Stitch the two ends together
  9. Fold in half the long ways so the unfinished edges are on the inside.  Stitch
  10. Stitch circle (unfinished side) to bottom of the mushroom cap.
Posted in Crafts & Sewing | 1 Comment

Peep de Resistance

Well it’s 10pm again, a day after I was supposed to post and I’m only just starting this post!  I have no one but myself to blame (and maybe work – I need to figure out how to not feel guilty about logging off).  (No thanks to work) we had a great Easter!  The Easter bunny hid lots of eggs for the kiddos, and even found out how to get inside and hide some surprises in their easter baskets.  Patricia and Julius were both very excited about the egg hunt this year except Patricia wanted to open the eggs as she went, and we had to dissuade that.  This year the Easter bunny decided to put money in the eggs because Julius has been very interested in filling his piggy bank with coins lately.  The bunny hid just a handful of quarters and a single dollar.  Patricia won the dollar and shouted “I got money!” when she opened it.

Patricia was very excited about all the easter themed “peeps” decorations.  You probably know I have a giant bunny peep that the kids love to lay on.  (Patricia calls peepa which is pretty cute.)   In addition to the giant peep I have some little peeps that I keep in a basket on the dining room table.  Well they started out on the dining room table but Patricia immediately claimed them as her own and started carrying them around everywhere.  There is a larger one that she calls the “mama” peep and she calls two of the smaller ones Patricia and Julius peeps and she has told me there is no dada peep.

Ka just so happened to have sent me a giant peep 3d cake pan set that we were looking at online.  It was incredibly hard to find and I don’t know why because it WORKS SO WELL.  They tell you to use some kind of pound-cake like cake using boxed cake mix, but I said screw it I’m making a carrot cake, just to make the maiden voyage of this thing a real challenge.  That said the cake part was the easiest part!  Frosting was more of a challenge (especially since I was trying to convince the kids not to touch it while I was making it.)  If you find one of these pans I’ve got the instructions written down below (plus Ka told me I’ll need to make 10 more of these cakes to make the pan worth it so I will have to remember how I did it).  Patricia was very excited about the Peep cake and asked if “it has babies?”  Which I guess, yes, those little peeps ARE babies!

Check out these adorable bunny napkins!

Table settings for Easter

Look at these two cuties.

Julius insists on never doing a proper smile in family photos anymore.

Mother of all peeps

Mother of all Peeps Carrot Cake

What you’ll need:

  • 1 recipe of carrot cake batter from here
  • baker’s twine
  • 1 recipe of cream cheese frosting also from here
  • sanding sugar in color desired (they only had pink)
  • 2 chocolate chips
  • 350 for an hour and 10 minutes.
  • Giant Peeps Pan

Butter and flour the inside of both halves of the cake pan. Place bottom cake pan on top of a small sheet pan.

Follow recipe above to make carrot cake batter and pour into bottom peep pan.  (Or you can try 5 cups of pound cake batter).  Pour it all the way to the lip of the pan (even just above) and then carefully put the lid on top.  (Now you can make cupcakes with the remaining batter.)

Use baker’s twine to tie the peep together as best you can so the batter won’t cause the top to push off while baking.

Bake at 350 F for 50 to 70 minutes (it took me 1 hour 10 minutes I believe for a finished cake, but I checked it with a skewer every 10 minutes starting at 50 minutes. I also gently removed the top and checked it with a skewer then returned the top back on.

When cake is done and the skewer comes out clean, remove from the oven.  Then they have a complicated method of cooling it but I followed it exactly…  Let it cool for 5 minutes in the pan. Then remove the lid and let it cool for another 5 minutes with the lid off.  Replace the lid and flip the pan over.  Let it cool again for 5 minutes.  Gently remove the lid (this is the bottom now) and let it cool again for 5 minutes.  Finally release the peep from the pan and place it on a serving tray and let it cool for 4 hours (I let it cool overnight, uncovered on the counter).

Mix the cream cheese frosting recipe above (I used the lower number for sugar and I already thought it was ridiculously sweet.)  Make sure everything is at room temperature (despite what the instructions in the recipe say) because I found it easier to frost this way.

Frost the cake with a layer of cream cheese using an offset spatula.  Get it as smooth as you can.

Sprinkle the sanding sugar all over the peep.  In this step it was helpful for someone (Will) to rotate the plate around so we could get more sugar on the body of the peep.  I also used my hand the gently grab scoops of sugar and press them into the frosting to fill it in better.

When you’re finally satisfied with the sanding sugar, add chocolate chips as eyes.

Cake with the cake pan lid removed.

Cake standing upright on the serving plate.

Frosting the cake.

After I’ve covered it in sanding sugar and added chocolate chip eyes!

Yum it was really tasty. Too tasty!

Posted in Culinary Delights, Parties | 1 Comment