
About a month before I started this whole hat making business, my mom asked me to make her some new curtains to match her new pottery barn comforter. She purchased an extra duvet cover and wanted some valances to go over the panel curtains she already had. Unfortunately my hat venture meant these had to be on hold for a bit.
If you haven’t read my other post about curtains, you should know that curtains are one of the things I seriously procrastinate in making. I’ve personally made curtains for 3 rooms in my house, but I have plans to make curtains for at least 3 more. We’ve lived in the house 5 years now. You can do the math on my laziness. So given my aversion to curtain making, it won’t surprise you that I was a bit slow to get to my mom’s even after the faire. To be fair, I wasn’t exactly procrastinating. I had a backorder of hats to complete after the faire ended, I traveled to Orlando, and kept myself busy with stained glass classes and beer making. All that aside I finally got to the curtains last week.
My mom had found an example curtain at a thrift store to use as the basis for the pattern. My first step was to draft a pattern and start cutting. The curtains came together rather easily after all was said and done, and I’d like to share the pattern and instructions below if you’d like to try your hand at them yourselves. The pattern is very easy and I may do my kitchen curtains using the same pattern if I can ever get around to them.
Scalloped Valance
What you need (per curtain):
- 2 yards of curtain material (more if you want to match patterns)
- 1 yard of contrasting material for pleats
- 2 yards of white curtain lining
- scallop curtain pattern
Assume seam allowance of 1/2″ is included everywhere except where specified.
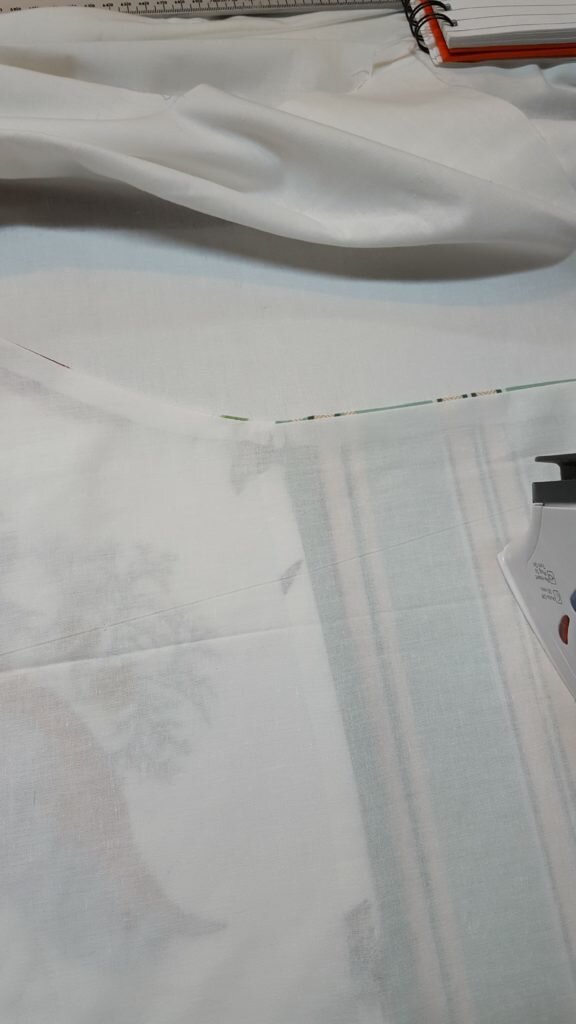
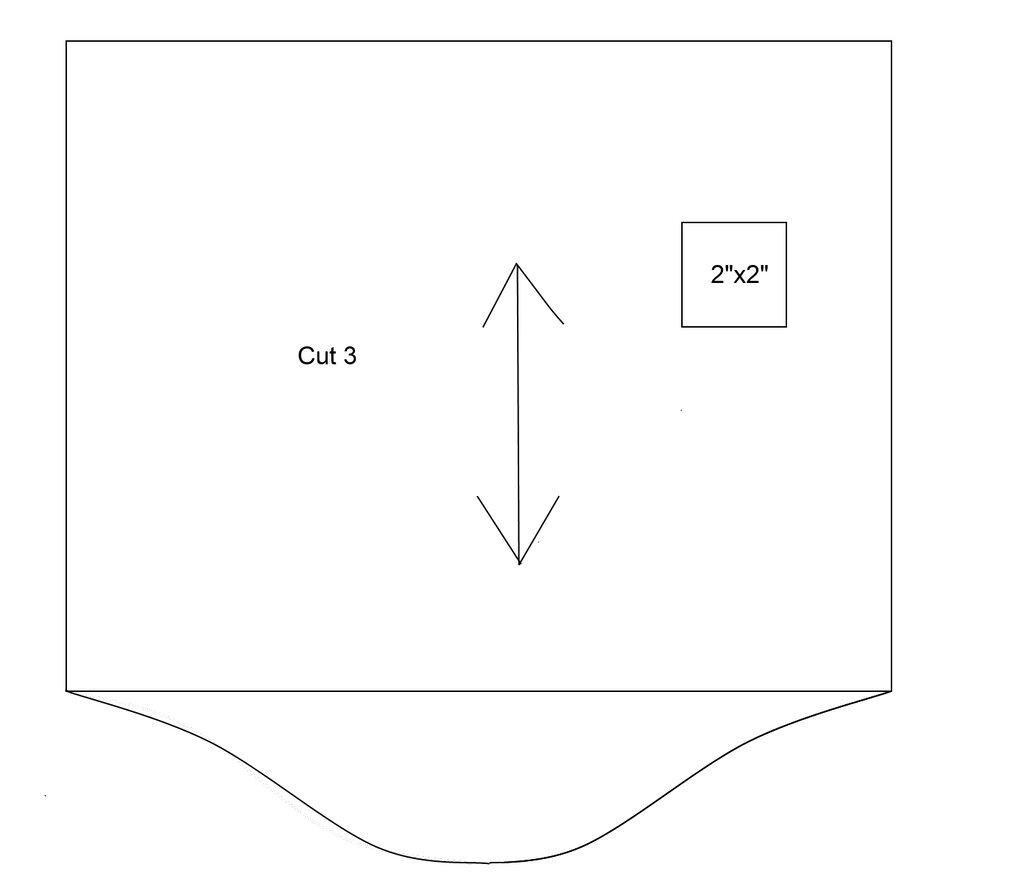
- Cut out 3 scallops from your main material and one 13×48″ size rectangle. My mom’s windows were slightly smaller than 45.5″ across so I adjusted the size of the rectangle and the ends of the outside scallops to compensate later. I made the rectangle 2.5″ larger than the final desired size to account for seam allowance.
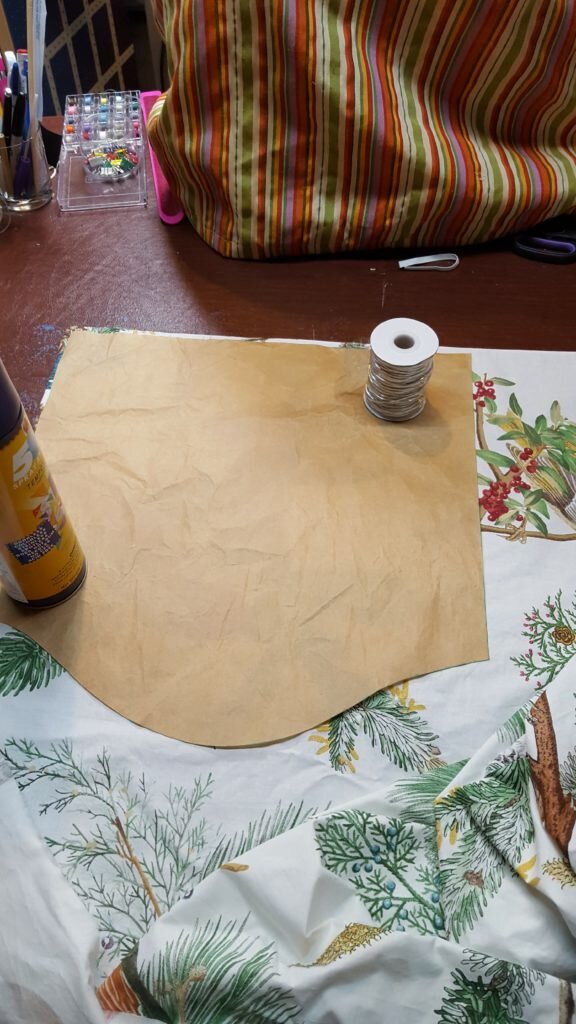
Cut scallops.
- Fold your large rectangle in half along the length, if you can see the pattern through the other side cut another 13″x48″ sized rectangle of curtain lining. If your material is thick enough that you can’t see through it, you can omit this step and jump to step 4.
- Pin the wrong side of the 13″x48″ rectangular curtain lining to the wrong side of the 13″x48″ rectangle. Baste 1/2″ from edges.

Pin lining to curtain header.
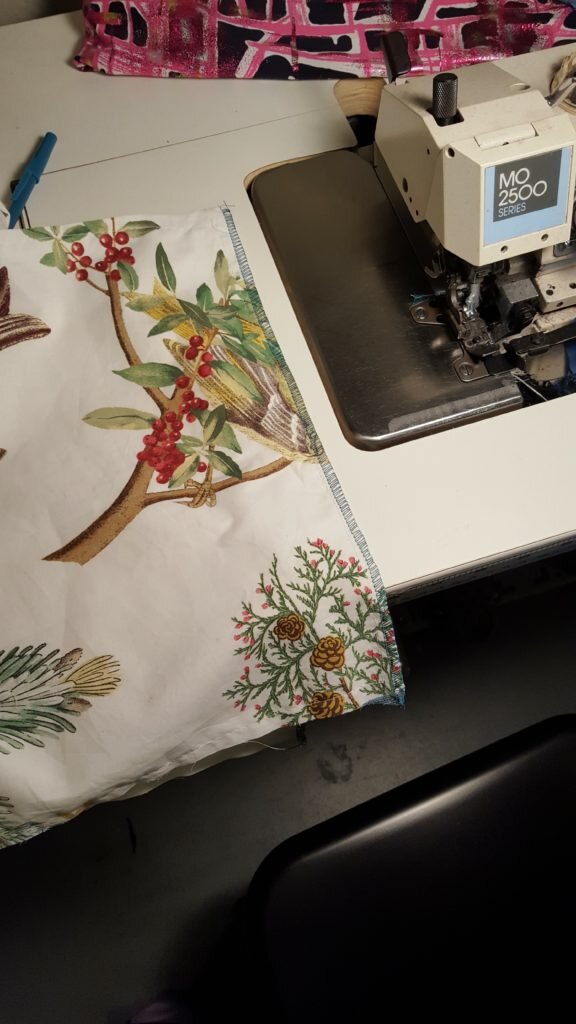
- Cut out two 13″x17″ rectangles from contrasting material for the pleats.
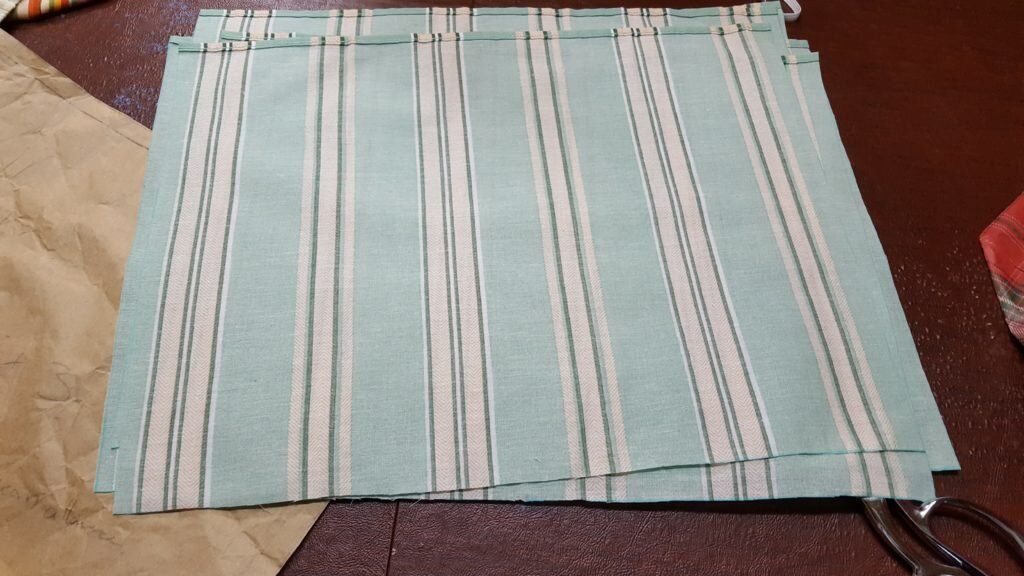
Cut contrasting material for pleats.
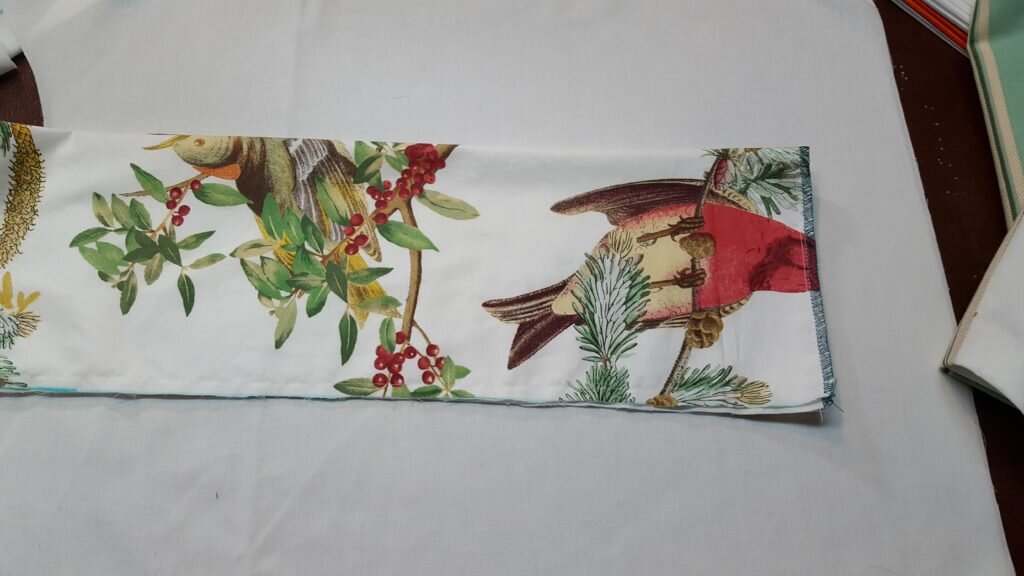
- Lay out your scallops and contrasting material as follows:
- scallop-contrast-scallop-contrast-scallop
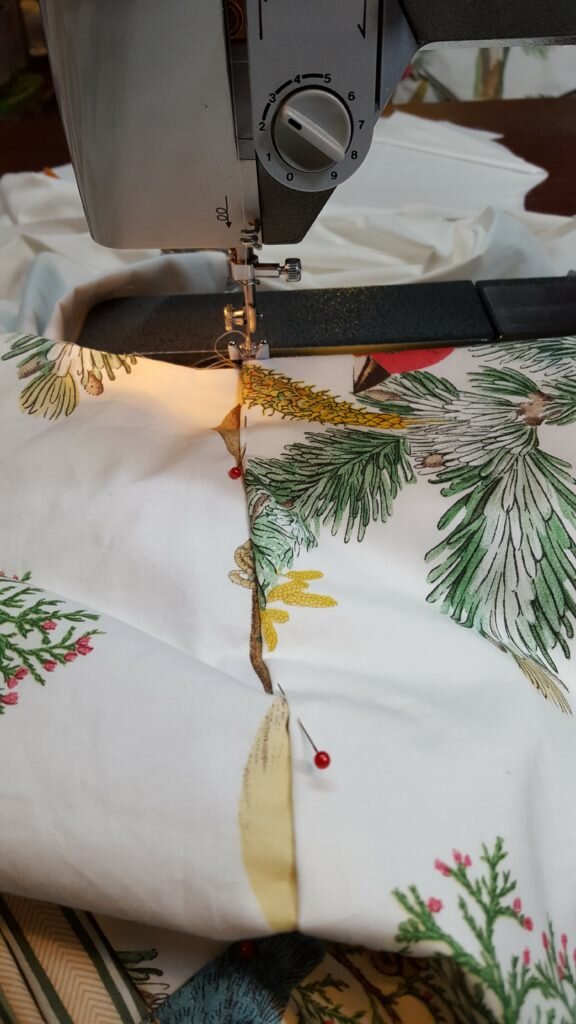
- Pin contrasting rectangles to scallops, right sides facing. Stitch.
Pin pleats to scallops and stitch.
- Press seams flat.
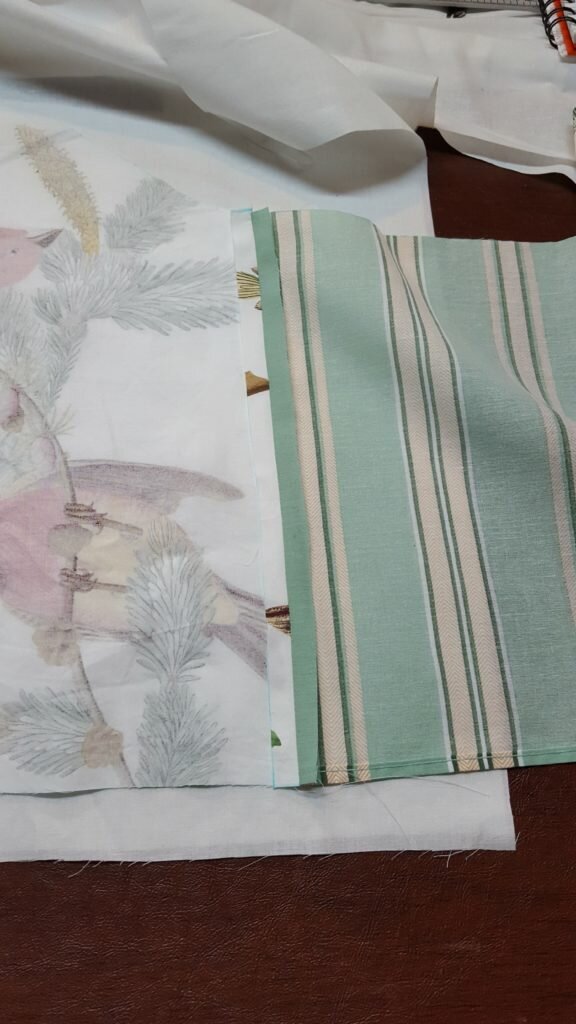
- Lay the entire curtain on the curtain lining, trace and cut out.
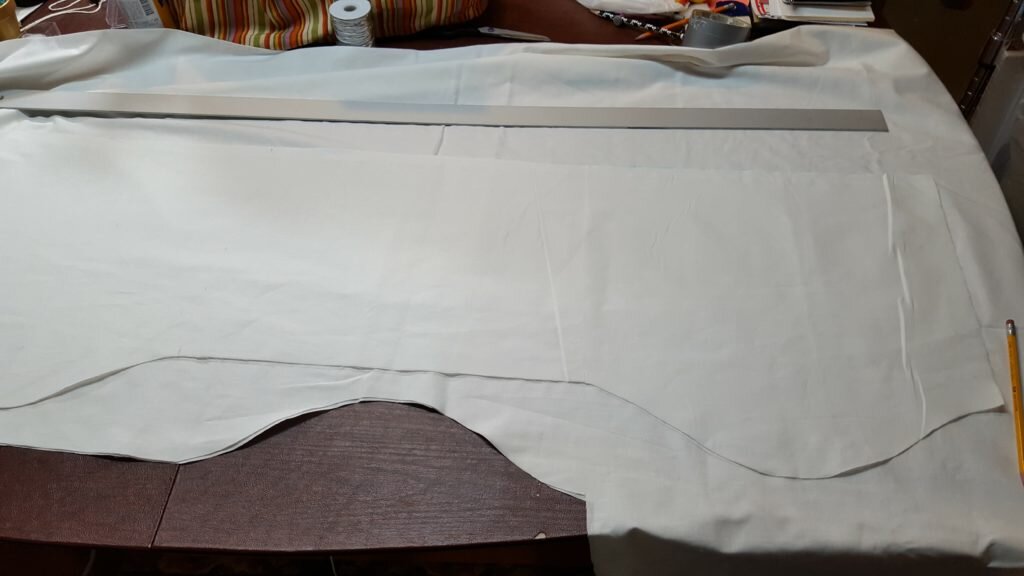
Trace and cut out lining.
- Pin curtain back to curtain lining, right sides facing. Stitch all sides but the top.
- Turn right side out and press seams.
Turn right side out and press.
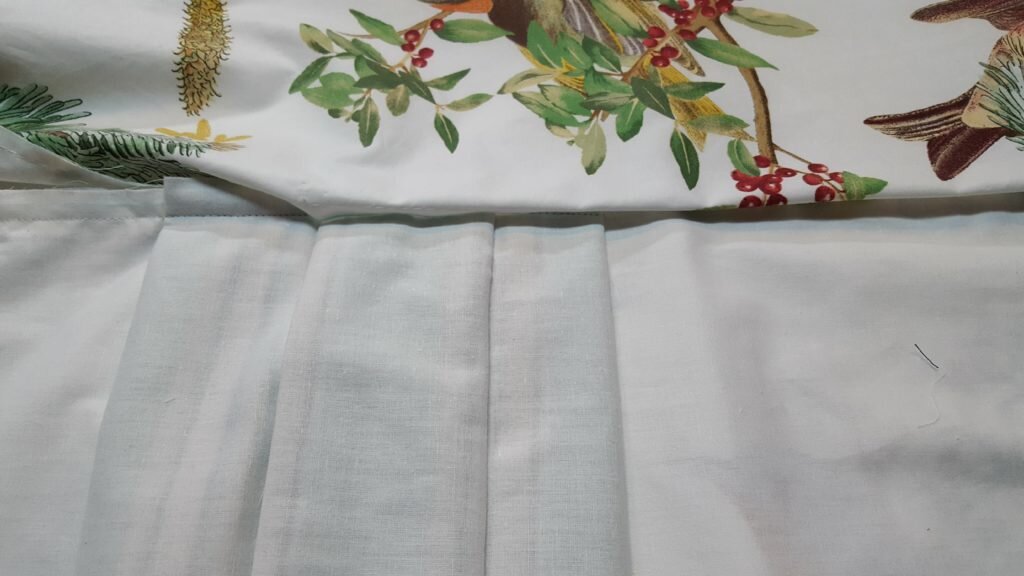
- For each pleat: Flip curtain to backside. Press a 1.5″ pleat into contrasting material over each seam. Press another 1.5″ pleat to the edge of the first pleat on each seam. On the right side the final result should leave a 2 inch gap between scallops and the final two pleats should meet in the center.

Pleat as described above.
- Take your 13″x48″ rectangle (and backing if it was required in step 2) and finish the short ends.
Finish edges
- Fold in 1.25″ on each end. Press.

Press ends under 1.5″
- Fold in half lengthwise. Press.
Fold top panel in half, press.
- Pin the folded rectangle to the rest of the valance, right sides facing. Move the pins so that the back-most piece of material is no longer pinned, except for the 1.25″ folded under in step 12. Stitch everything that you pinned, make sure that you don’t catch the back most piece of material in your stitching.
Pin rectangle to scallops
- Open flat and press.
- Fold the back side under .5″. Press. Pin along the fold from the front side. If your pins don’t catch the back side, adjust the .5″ hem until it does. Stitch in the ditch along the front to finish.
Stitch in the ditch to finish.
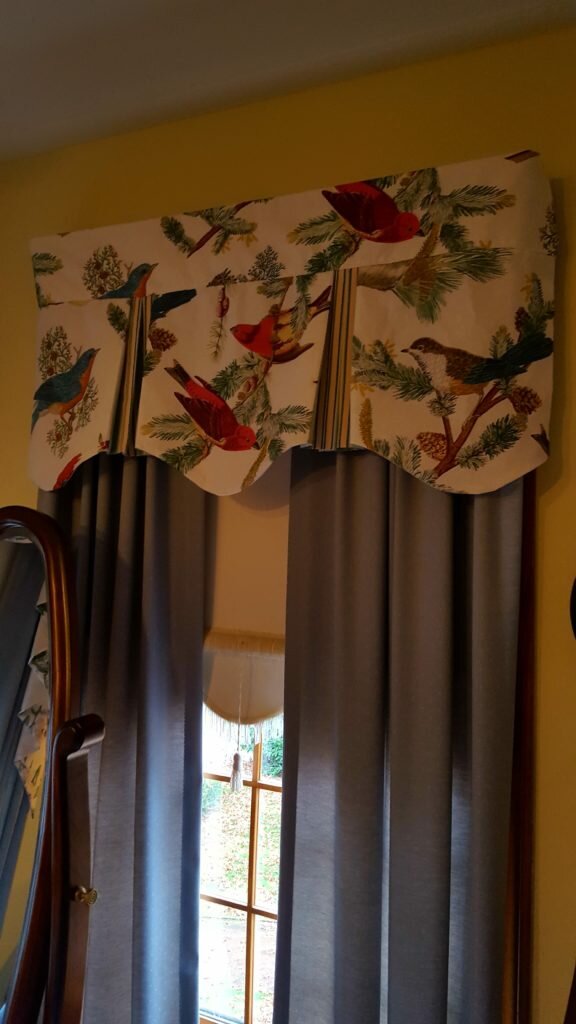
Finished scalloped valances
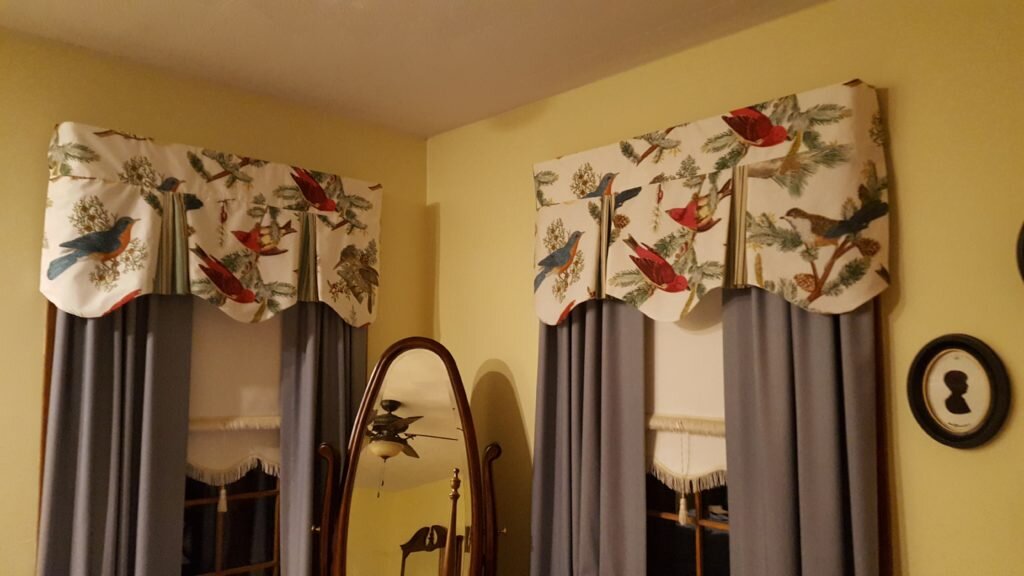
Scalloped valances

Pingback: Pillows Upon Which to Dream of Sugar Plums (or Chocolate) | The Lady Beekeeper