Well, the plant based shepherd’s pie got rave reviews! Vegetarians and non-vegetarians alike were excited to try the infamous “Impossible Meat” so it went pretty quick. Several people didn’t read the sign and had no idea it was meatless until I told them. A couple people even tried to correct me when I called it “vegetarian shepherd’s pie”. I would call that a win!
In other wining news, I’m (possibly) ahead of the Christmas game! I’ve purchased all the presents I intend to purchase, and have wrapped and shipped presents to 3 destinations already. I have even sent out Christmas cards! I actually had ordered them well before Thanksgiving because I have had issues with Christmas card printing and shipping for the last few years. (S o the fact that I only recently sent them out could be viewed as slightly embarrassing.) Now I only have about 10 projects that I want to complete before the big day… classic me.
I’ll show you our Christmas cards next week, but first a craft that will have you wondering “what on Earth does this have to do with Christmas cards?” How to make a Mario hat and mustache!

Will sporting his Mario hat and Mustache
Mario Hat
What you’ll need:
- 1 yard of red cotton fabric
- a small piece of peltex sew in interfacing
- embroidery pattern here (note the file is zipped so you will need to unzip it after you download it)
- tear away stabilizer
- a small piece of white cotton
- red machine embroidery thread
- Follow the instructions here through step 19 to make the Mario hat using the red cotton. Note I have updated these instructions with a brim pattern so you don’t even have to have a baseball cap handy to create the hat.
- Use the embroidery pattern above to create the “M” patch for the hat.
- Hoop the white cotton on top of the peltex on top of the tear away stabilizer in a 100mmx100mm hoop. Note, I did not actually put the peltex in the hoop, I just sort of left it floating between the stabilizer and the cotton.
- Thread your machine with red thread. Insert hoop on your machine and stitch the first set of stitches which will be a red “M”.
- Stitch the second and third set of stitches (an oval around the “M”).
- Remove the hoop from the machine and very carefully cut through the cotton and peltex very close to the stitches forming the oval, without cutting the stitches themselves. Be sure not to damage the stabilizer in the process. I have been using a duckbill or applique scissor to do this.
- Return hoop to the machine and stitch the final set of stitches which will be a red zigzag pattern around the border of the patch.
- Remove the hoop from the machine and punch out the patch from the stabilizer.
- Hand sew the patch to the hat.
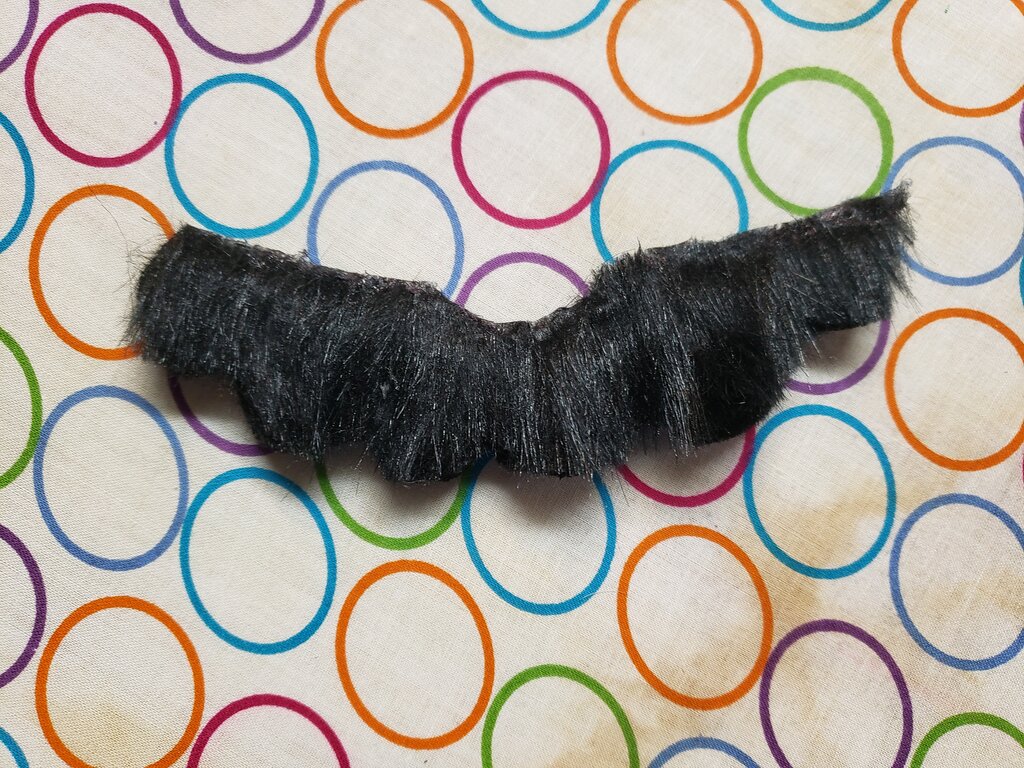
Mario Mustache
What you’ll need:
- a scrap piece of black faux fur
- Fake mustaches from the dollar store or spirit gum
- a low temp hot glue gun
- mustache pattern here
- Cut the faux fur to match the pattern above. Do not remove any hairs that are not connected to the fur backing.
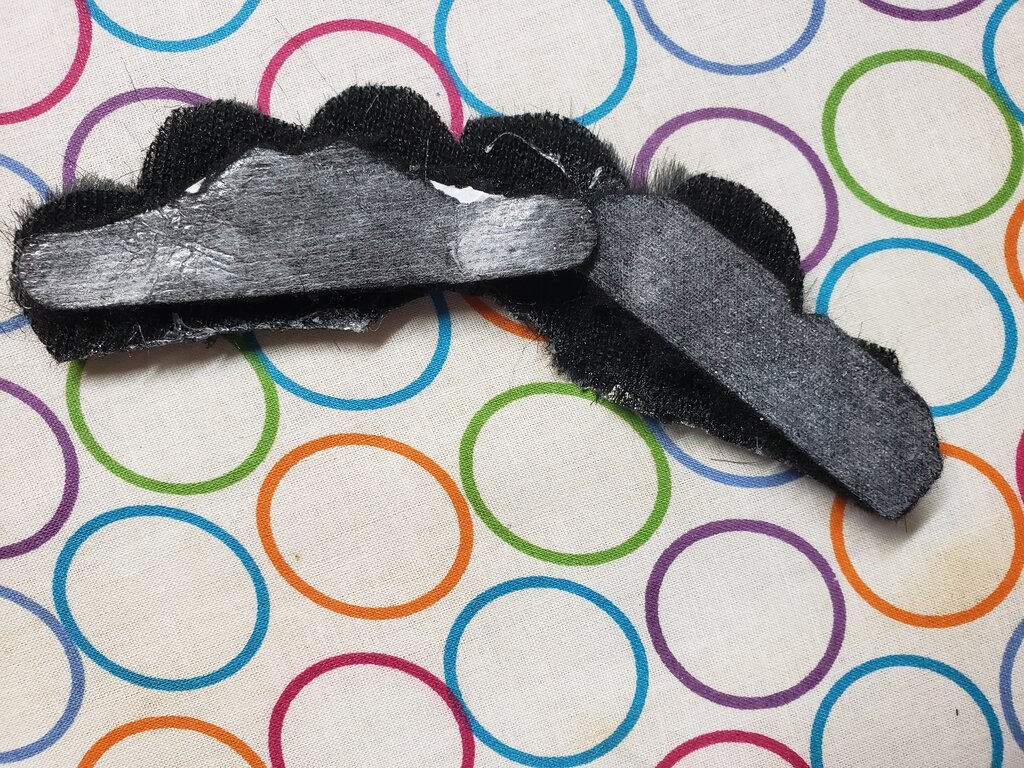
- Using the low temp hot glue gun, apply a thin layer of glue between the topmost hairs and the fur’s fabric backing.
- Using a dowel (or your fingers if you’re feeling masochistic) gently push the fur into the thin layer of glue so it will stick permanently.
- When glue has dried, trim off the excess glue at the top of mustache
- Glue two mustaches from the dollar store to the back of your mustache (fuzzy side of dollar store mustache to fabric side of fur).
- When ready to use, remove the adhesive backing and stick to your face. Alternatively you can skip step 5 and apply the mustache to your face using spirit gum.