
So I’ve gone all in on fantasy novels again. I started two series at once. The first is Wheel of Time, a classic high fantasy which I have never even attempted. It looks like it is going to be a slow burn so I started it on audiobook. The second is the Witcher series, because I just can’t seem to get enough of Geralt… So far I’m enjoying both of them. Apparently I don’t enjoy Totoro though.
Since I returned from my work trip Julius has been a bit grumpy with me. Yesterday Julius saw the Totoro sticker I have on my laptop (it looks like this). I commented that I love Totoro and he told me that I don’t like Totoro and that only “Dada and Julius like Totoro”. Who knew?! I’m not sure if it’s because he’s being contrarian or if he truly believes I don’t like Totoro because Will lets him watch movies more than I do…
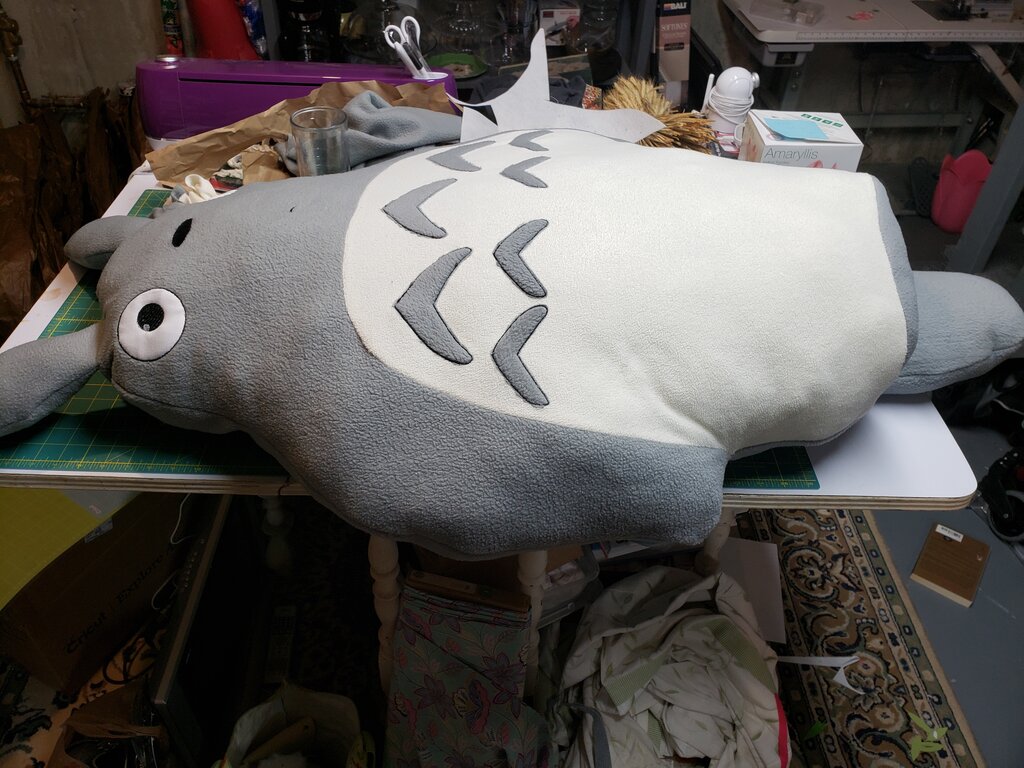
Either way I’m Totoro committed – and you can be too! The Giant Totoro I made for Julius’ birthday party is bigger than Julius and only took me three nights of sewing/embroidering. For the fabric I bought grey and off white fleece blankets at the thrift store for only $2 a piece. I intended to stuff him with recycled packing peanuts to save them from the landfill but I wasn’t able to acquire any over the course of 2 months! (I suppose that might be a good thing?) Instead I used the polyfill I already had at home. I know, I know, polyfill is made of plastic. It already killed me a little bit inside. Apparently they sell a recycled version so I will be buying that next time – it’s even cheaper than polyfill! Even including the cost of the polyfill, Totoro cost me less than $30 to make!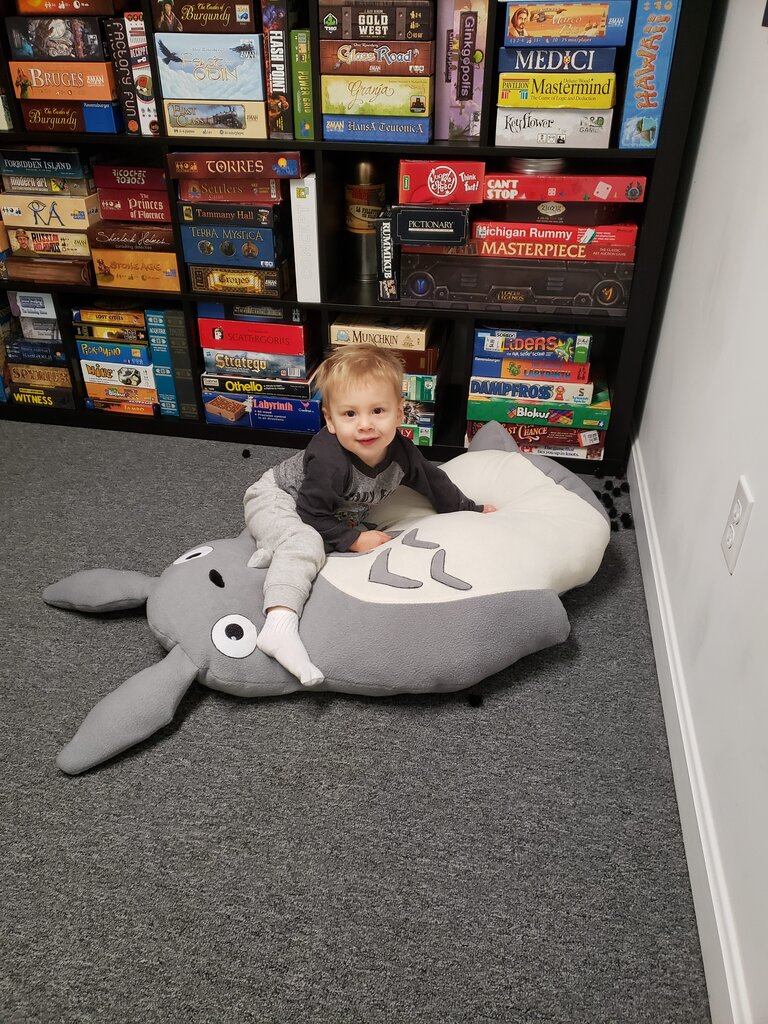
Giant Totoro Stuffed Animal
- 1 5lb bag of stuffing (recycled is best!)
- 1 grey fleece throw blanket
- 1 white fleece throw blanket
- scrap white cotton fabric
- scrap black fabric
- scrap lightweight interfacing
- black machine embroidery thread
- white machine embroidery thread
- (note the embroidery files below are zipped so you will need to unzip them after you download them)
- the embroidery pattern here for left eye
- the embroidery pattern here for right eye
- the embroidery pattern here for nose
- the embroidery pattern here for mouth
- the embroidery pattern here for large fluff
- the embroidery pattern here for small fluff
- the template here
- Using the template as a guide for shape, fold your grey throw blanket in half and trace the outline of Totoro’s body.
- Cut, adding an inch for seam allowance all around.
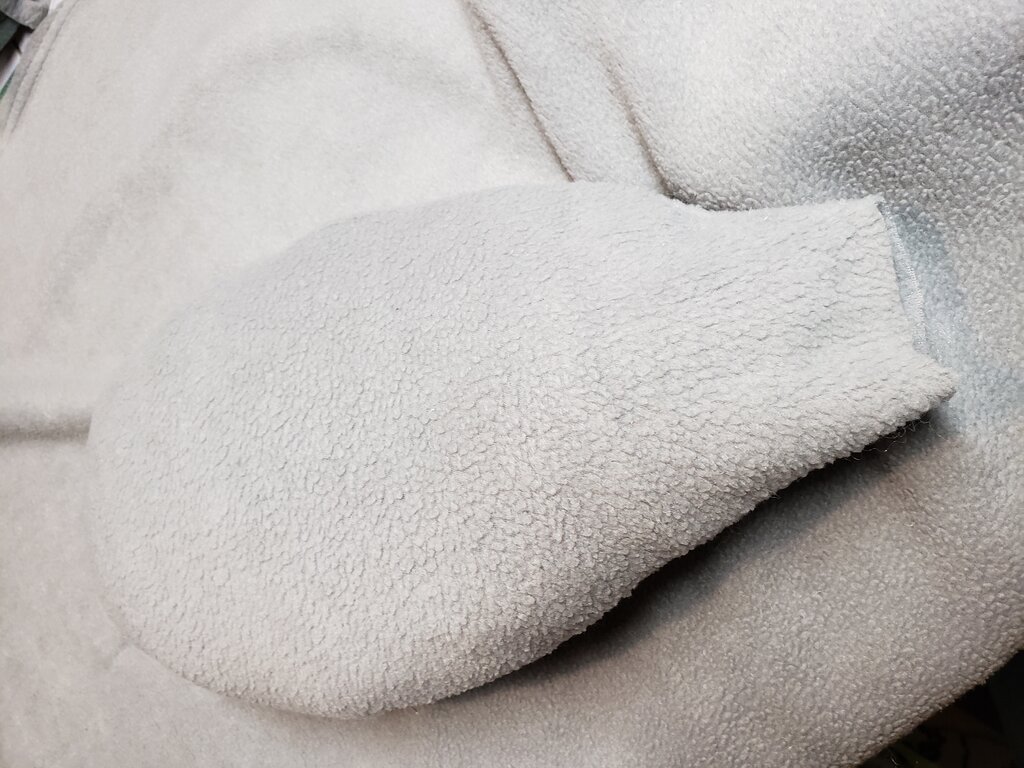
- Cut 4 pieces of grey fabric for Totoro’s ears and 2 pieces of interfacing, to scale with the body you cut out.
- Cut 2 pieces of grey fabric for Totoro’s tail, to scale with the body you cut out.
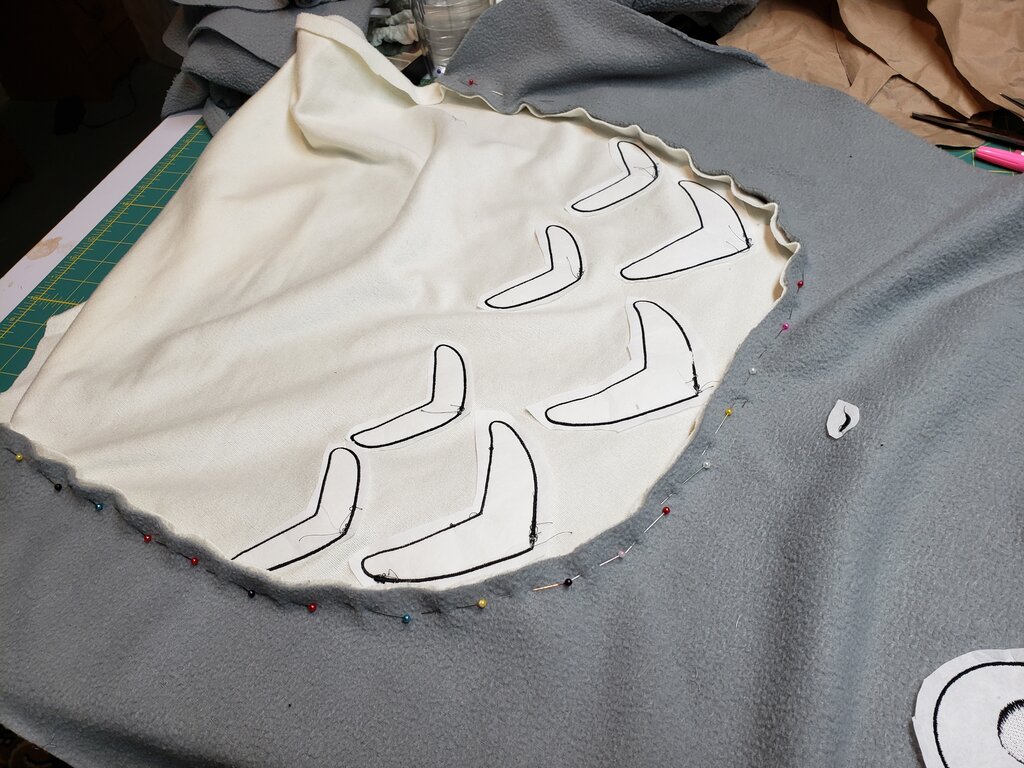
- Draw an oval for Totoro’s belly on one of the Totoro body pieces
- Cut inside the oval for Totoro’s belly by an inch.

- Use the oval you just cut out in grey as a template for Totoro’s belly in white. Add 2″ all around to account for the seam allowance you removed and additional seam allowance for the belly.
- Mark the locations for Totoro’s eyes on the body piece with Totoro’s belly removed. (Use template as a guide.)
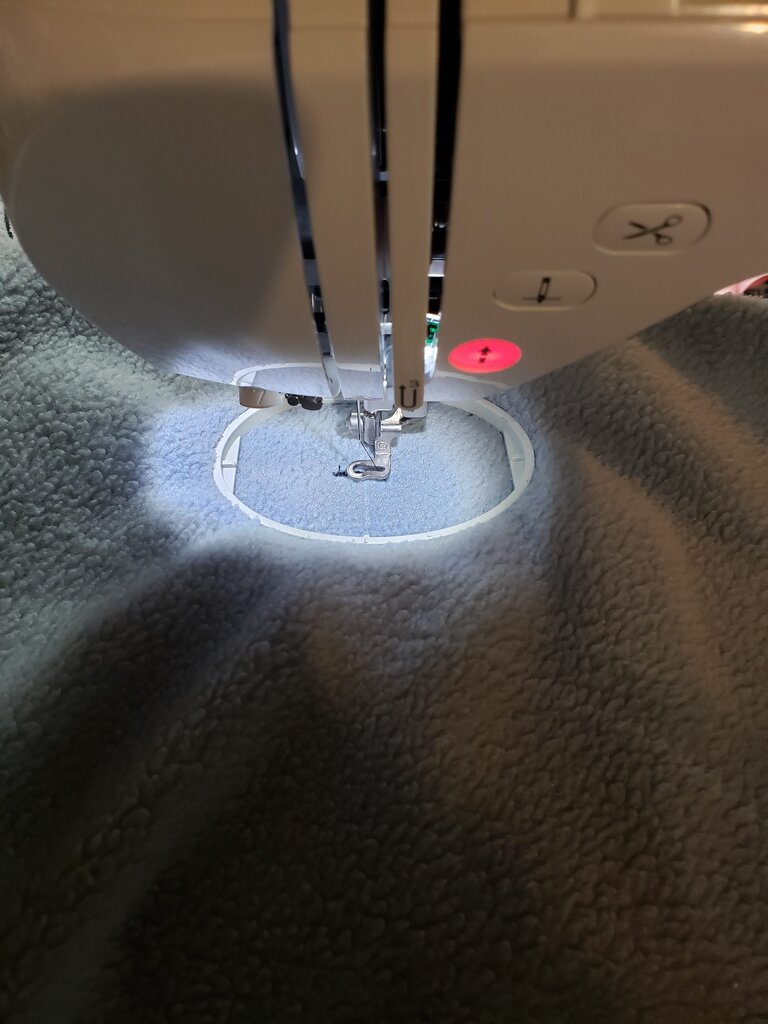
- Embroidery first eye onto Totoro. (Hoop fabric with medium weight stabilizer, put black embroidery thread in machine. Sew first set of stitches. Apply white cotton fabric with light adhesive to cover the first set of stitches. Sew second set of stitches. Trim around second set of stitches, very close to stitching. Sew next set of stitches. When stitching stops, swap in white embroidery thread. Embroider last round of stitches, then trim.)
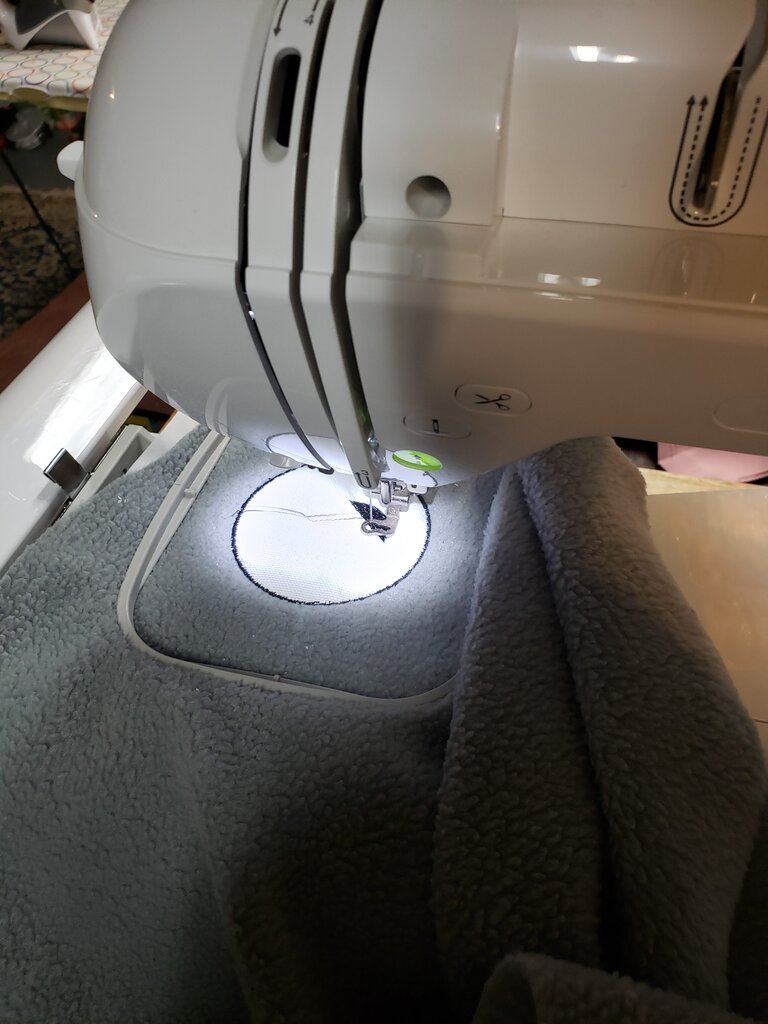
- Repeat for second eye.
- Embroider nose onto Totoro. (Hoop fabric with medium weight stabilizer, put black embroidery thread in machine. Sew first set of stitches. Apply black fabric with light adhesive to cover the first set of stitches. Sew second set of stitches. Trim around second set of stitches, very close to stitching. Sew final sets of stitches. )
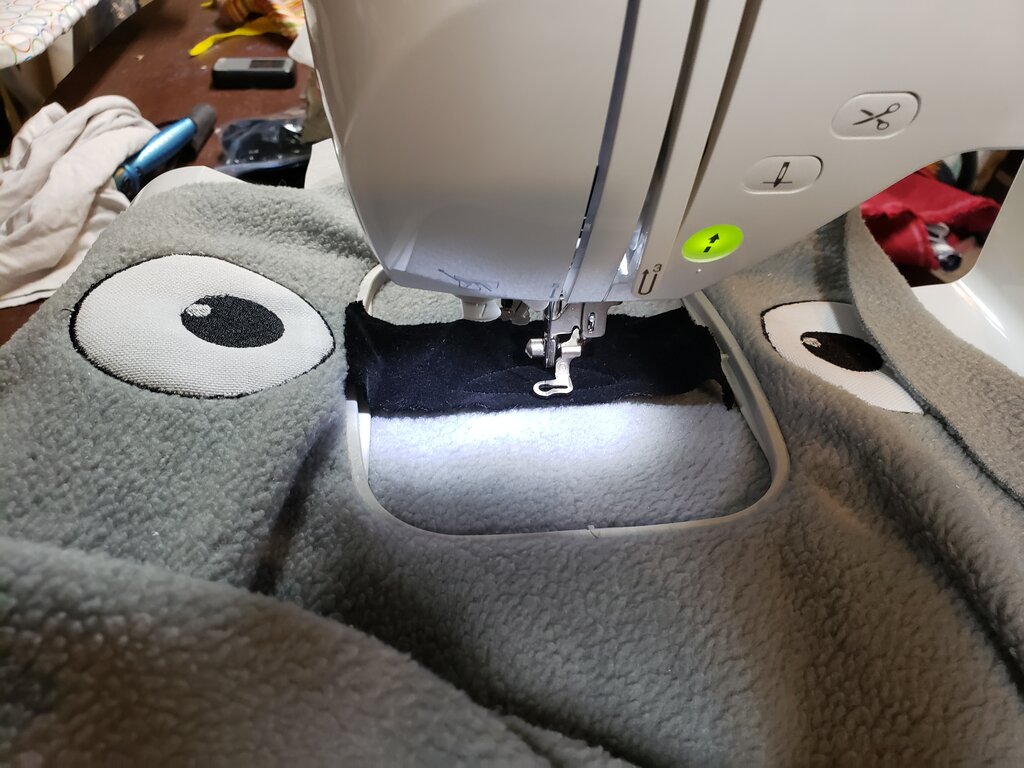
- Embroider mouth onto Totoro using black thread.
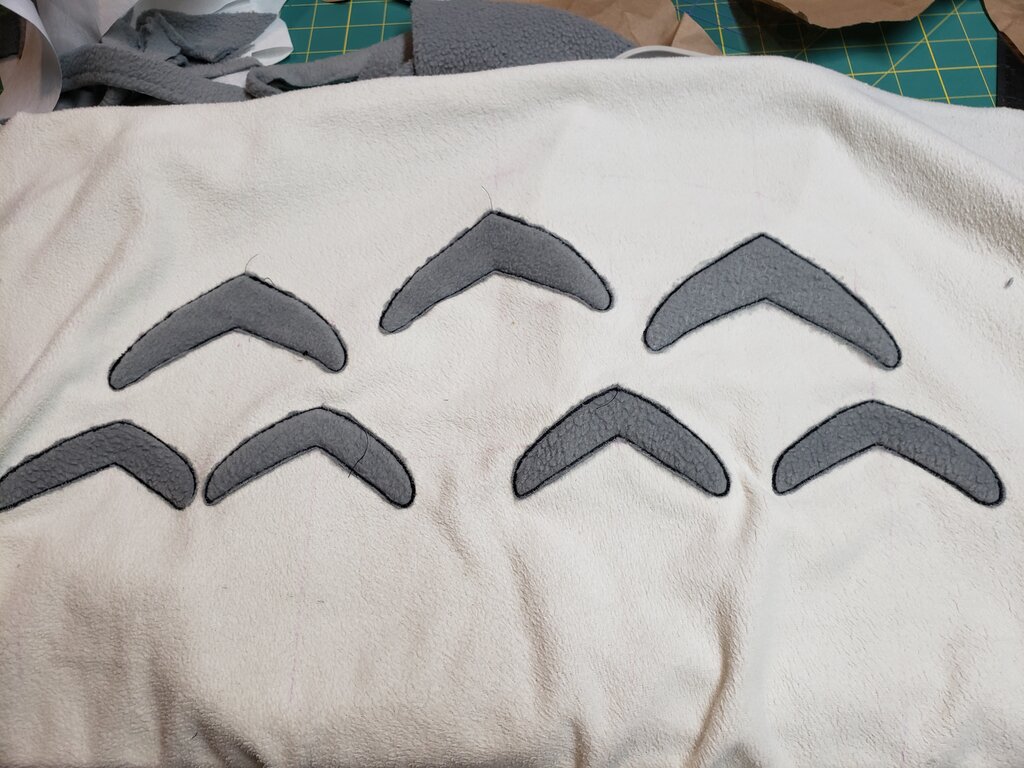
- Mark locations for three large fluff marks onto top of white Totoro belly. Make sure they start a couple inches below the seam allowance. Mark 4 smaller fluff marks below those.
- Embroider large and small fluff marks. (Hoop fabric with medium weight stabilizer, put black embroidery thread in machine. Sew first set of stitches. Apply grey fabric with light adhesive to cover the first set of stitches. Sew second set of stitches. Trim around second set of stitches, very close to stitching. Sew final sets of stitches. )
- When all the embroidery is done, stitch belly to rest of Totoro’s front, right sides together.
- Stitch two pieces of tail together, leaving opening at the bottom. Turn right side out then stuff.
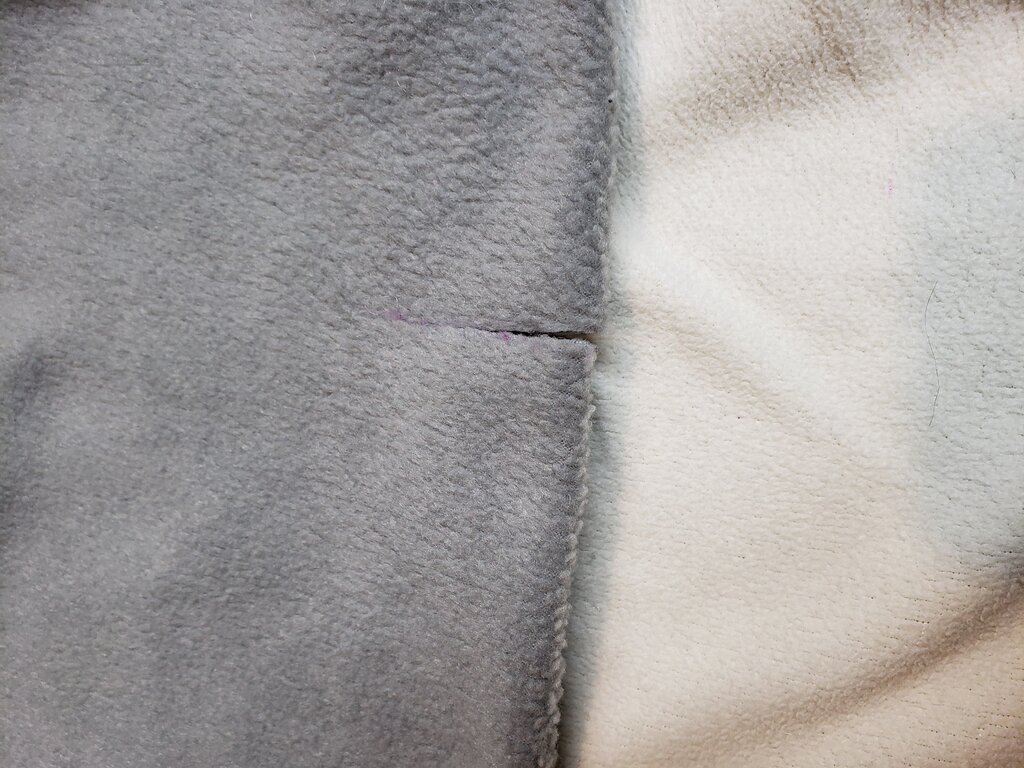
- On the back piece of Totoro make a horizontal tail sized slit on the lower 1/5th of Totoro. Insert tail into the slot then stitch tail between both edges of the slit.
- Place two ear pieces on top of one another with ear piece of interfacing on top. Stitch together leaving an opening at the bottom. Repeat for second ear. Turn right side out then stuff.
- Place front of Totoro on surface, face side up then place ears on top with unfinished ends near unfinished edge of Totoro, and finished points pointing slightly inwards towards Totoro’s mouth. Pin.
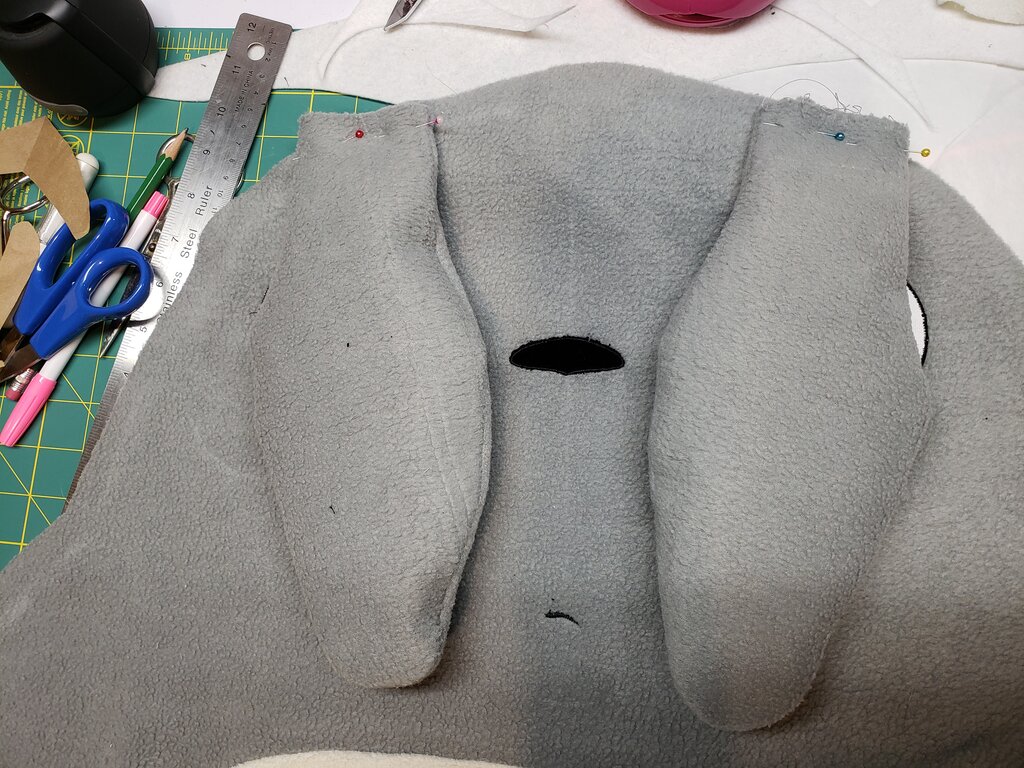
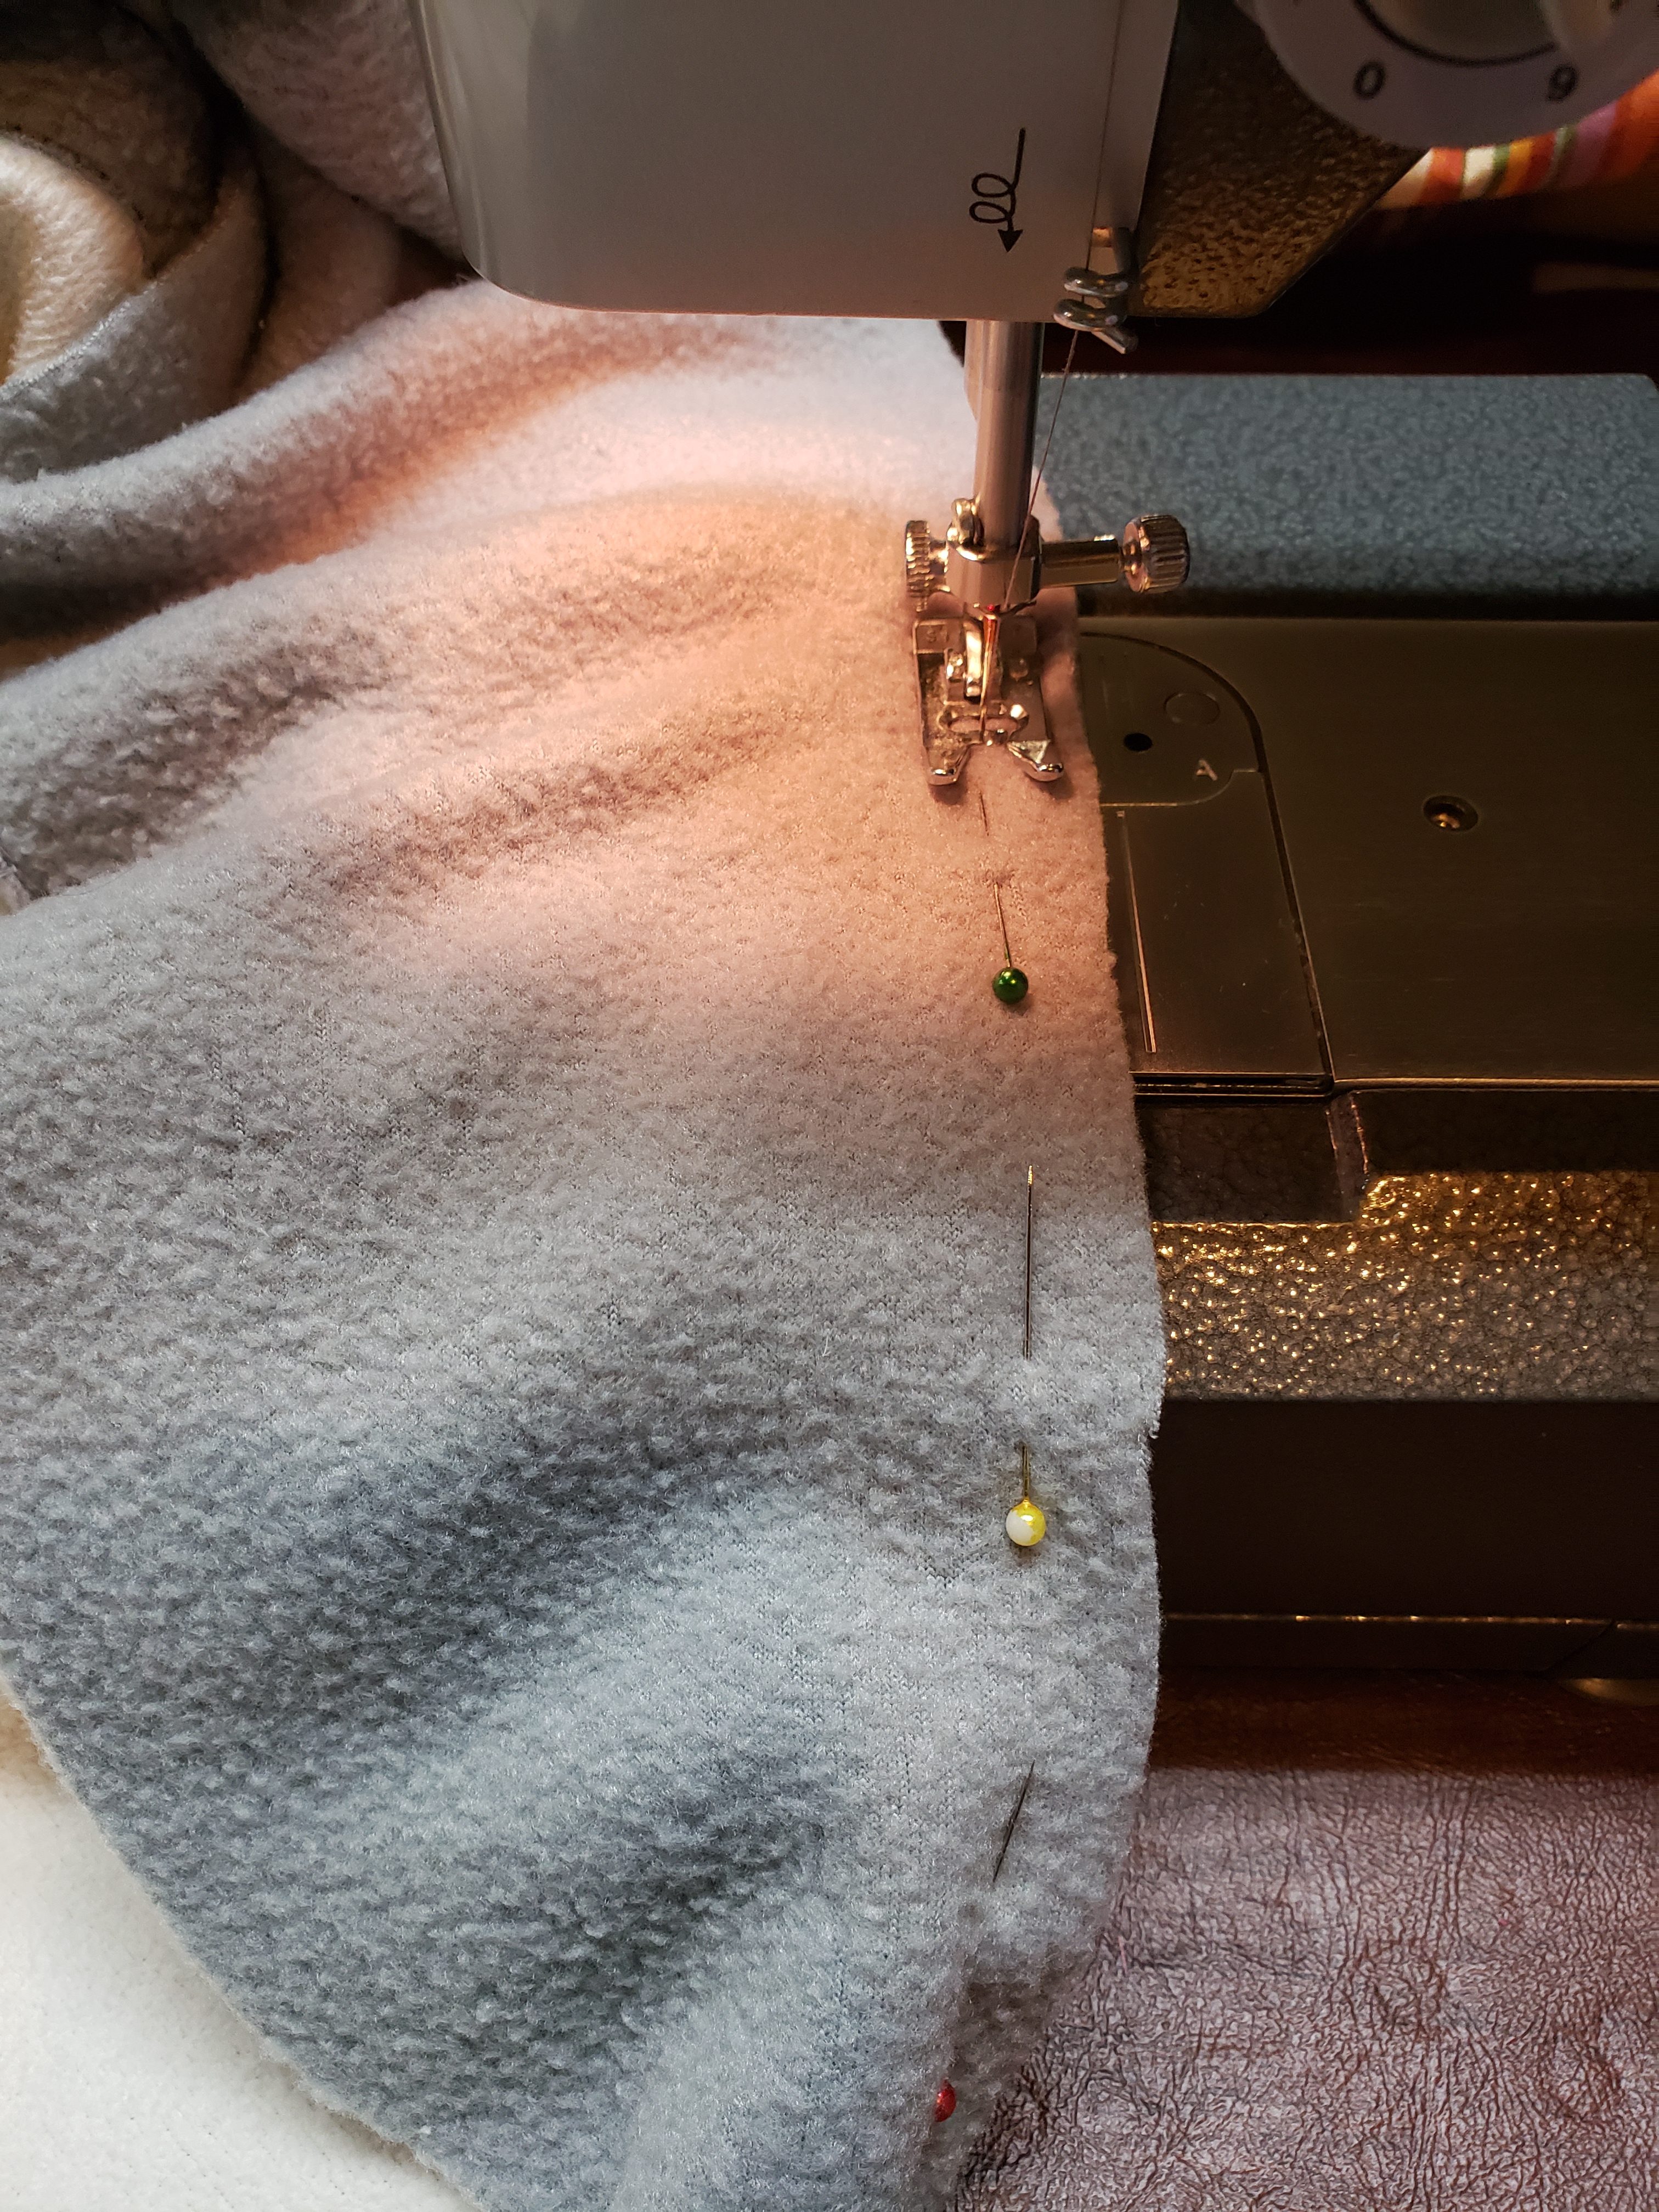
- Place back of Totoro, tail side in on top of Totoro front an ears. Pin all around. Stitch, leaving gap at the bottom.
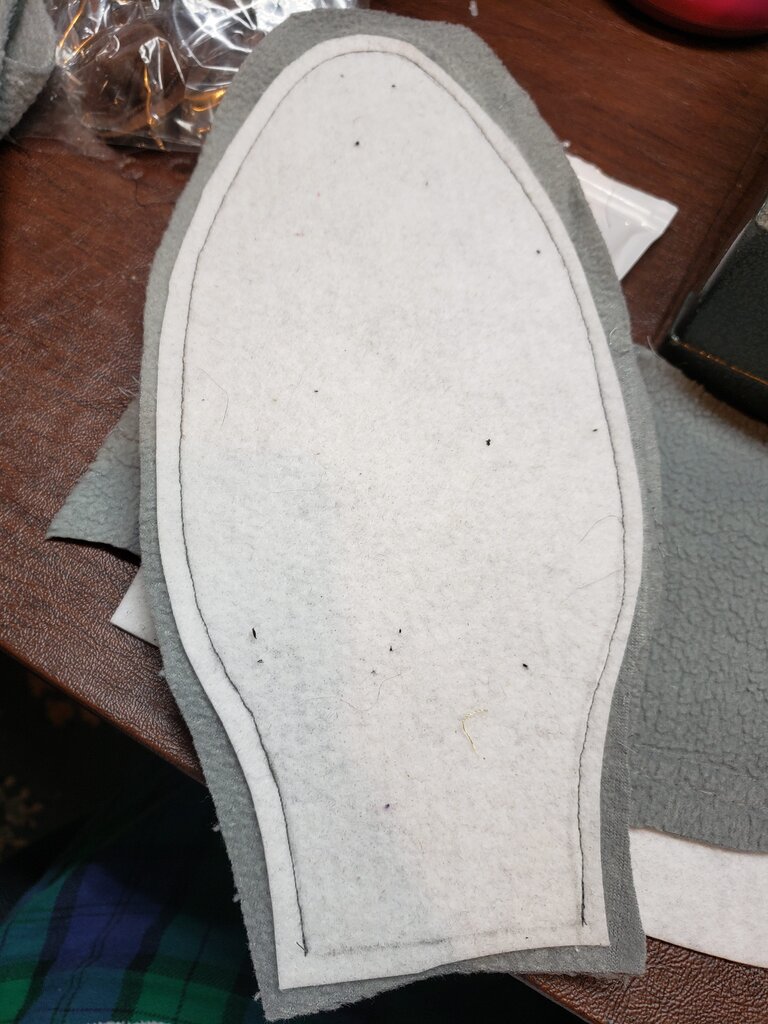
- Cut one last scrap piece of grey fabric the width of your Totoro bottom in an “eye” shape.
- Pin eye shape to bottom of Totoro, right sides still in. Stitch closed leaving a 5″ gap.
- Turn Totoro right side out through the gap then stuff.
- Hand stitch gap closed using an invisible/ladder stitch.
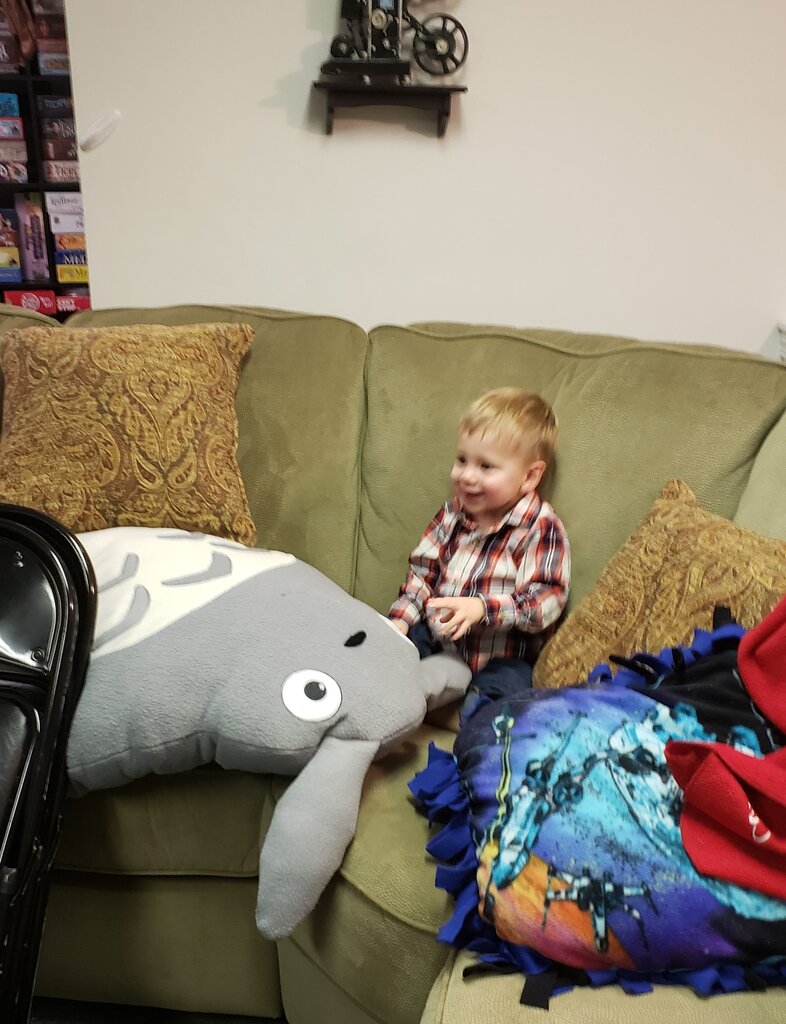
Julius loves to watch Totoro while sitting with Totoro

The embroidery instructions were not in readable form. They were all symbol and mixed letter.
Hi Ila! Thanks for reading!! Sorry for the confusion! The embroidery patterns are actually for an embroidery machine so they are not human readable. I have a brother embroidery machine myself so I’ve uploaded PES extension versions. I believe my software will allow me to output another format if there is another format you need! Just let me know!