
For the last few years people at my work have been asking the gym for a yoga instructor. This year they’ve finally started to give in and have been scheduling weekly trial sessions with different instructors to find the right fit for our workplace. I have really been enjoying the sessions. I’ve described my yoga experiences as a workout where “I don’t really feel like I’m doing much of a work out during it, but the next day I am sore all over”. I consider that a good work out. Like when I run I feel awesome after I am done with yoga. It’s not that endorphin induced runner’s high but more of a sense of inner calm – similar to when I’ve just finished meditating. Yoga may be my new favorite thing.
The one awkward thing about yoga is that you have to wear the right clothing or you end up flashing people or showing them a little too much rump. Luckily my mother in law bought me an awesome lululemon work out outfit a few years back that is absolutely perfect for yoga. The pants are similar to these:

Lululemon Groove Pant III
And let me tell you they are fabulously comfortable and they have this VERY HIGH waistline that prevents any accidental mooning mishaps. AND they are so clever that they have this built in little pocket in the waistband so you can tuck in a key or ID in case you need it.
Well guess how much this well-designed pair of pants costs? Drum roll please… $98. Yikes. $98 of pants I’m going to roll around on the floor in and get sweaty in! My normal pants don’t cost half that!
Alright I’m just being frugal. They really are very nice pants. If you have the dough definitely invest in some; they will be your new favorite pair of pants. I don’t want to cough up the money to invest in another pair but I am greedy and want another pair. With Christmas so far away I decided to attempt my own. Below I give you my copycat version of the lululemon Groove Short II. Note that sewing stretch knits is tricky so unless you’re like me and are just doing this for some practice you won’t want to conquer this as your first sewing attempt.
Here’s how I made them:
Copycat Lululemon Groove Short II
You will need:
- 1/2 yard “performance quick dry fabric”** I bought a yard just in case – you can make a second pair with the other half later.
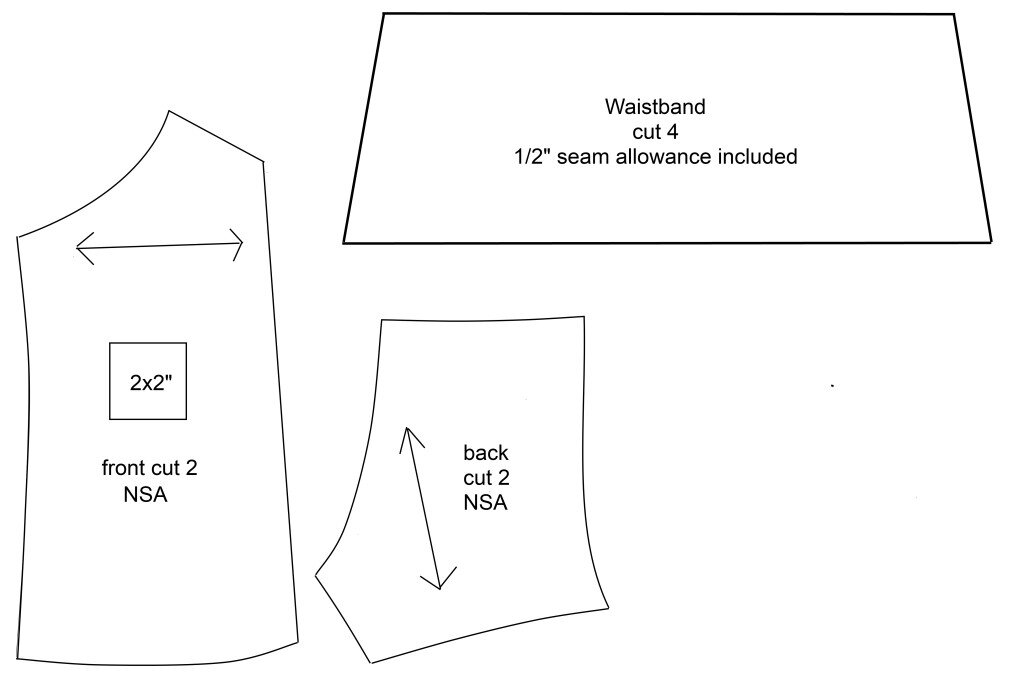
- Pattern below – I am around a size 6 and these fit comfortably. You’ll also need to cut 2 pieces of 4×6 fabric for the pocket. See the bottom of this article to understand how to print the pattern! **
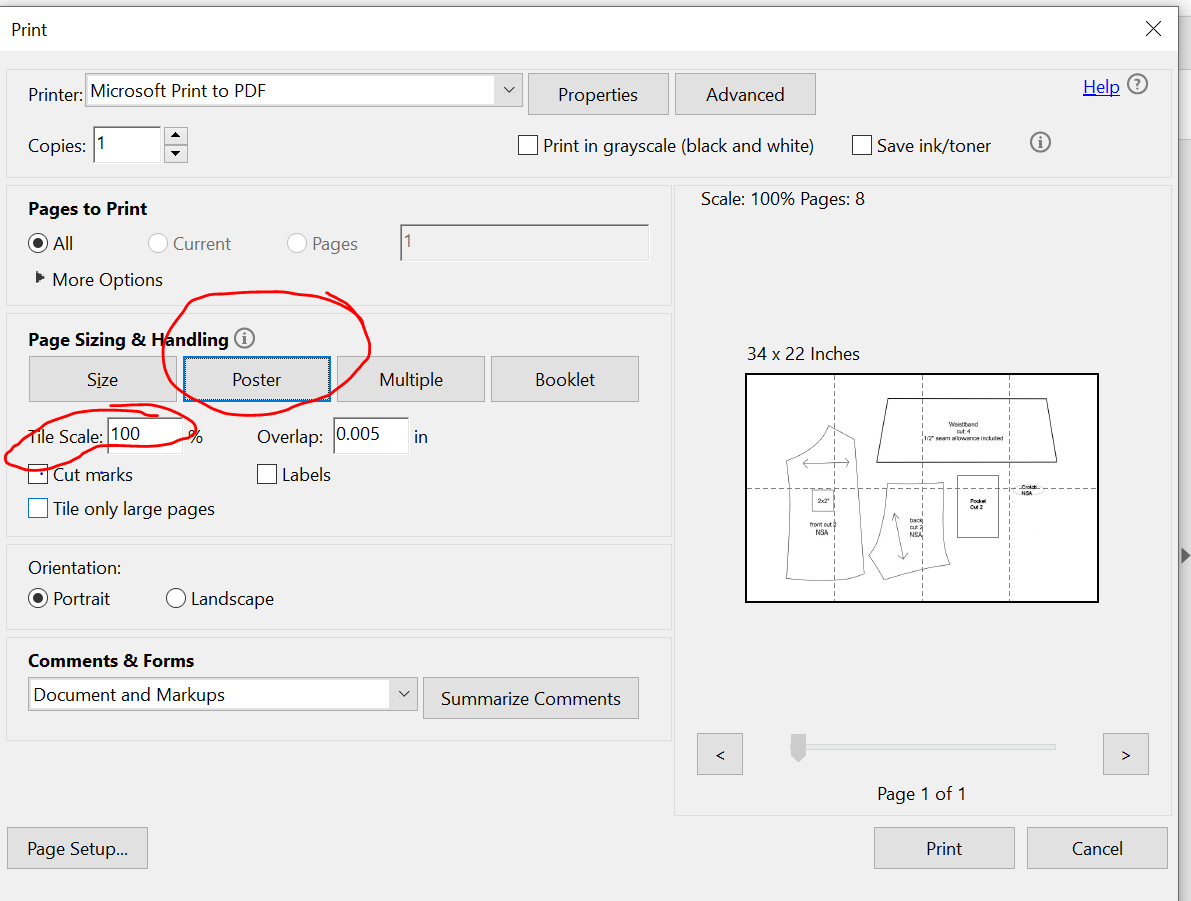
- Priscilla of cillastitches.wordpress.com was kind enough to send me her version of the above pattern in PDF form! It is here. She says to make sure it is at 100% size when printing, and use the poster option. Thanks Priscilla!!!
**The lululemon pants use a proprietary blend they call “Luon” which I assume is a play on the words “lululemon & nylon”. It claims to be: 87% Nylon 13% Lycra Spandex & 40% Nylon 42% Polyester and 12% Lycra spandex. The stuff I bought is 100% polyester but it feels very similar to the other pair of pants I have. Basically just get something that is stretchy and breathable.
- Cut out your pattern pieces – be sure to pay attention to the marks I made on the pattern for the grainline. Though the fabric will stretch in both directions you’ll have the most give in the crossgrain direction. In case you don’t know – the grainline I have marked should be aligned parallel to the selvage. I did not include seam allowance in the pattern. I recommend adding 1 inch seam allowance so you have some wiggle room on the length.
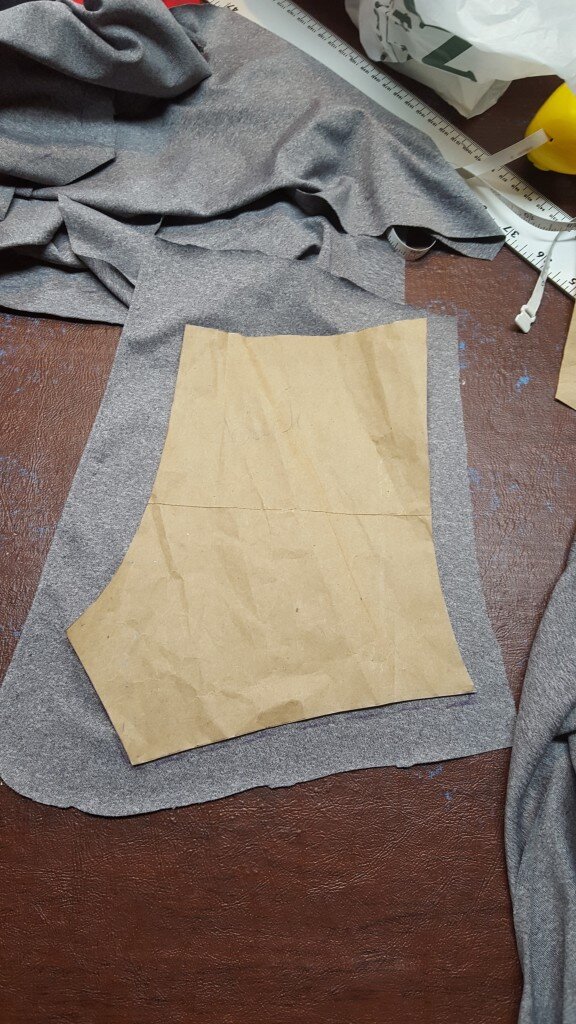
Add one inch seam allowance to pattern pieces
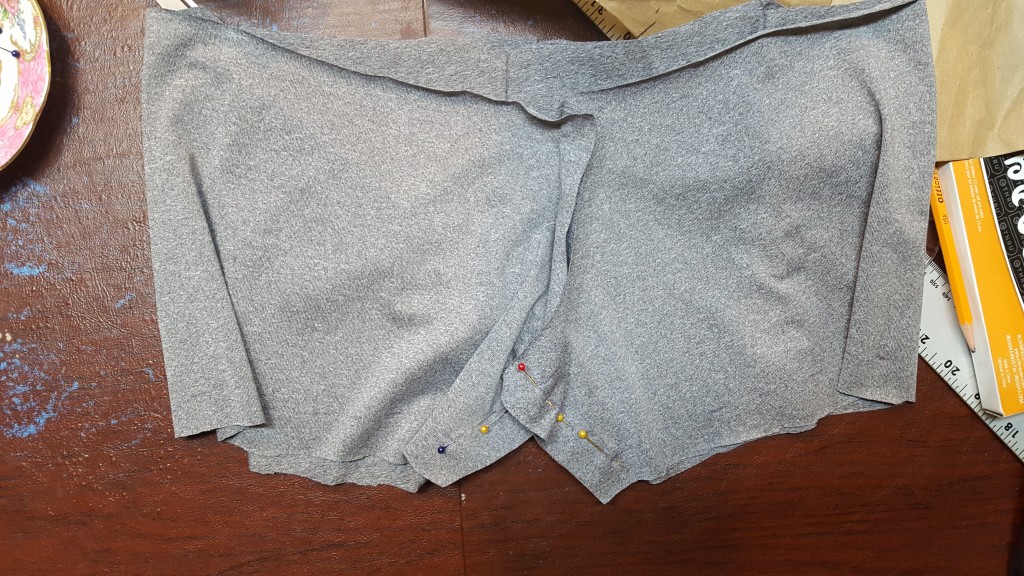
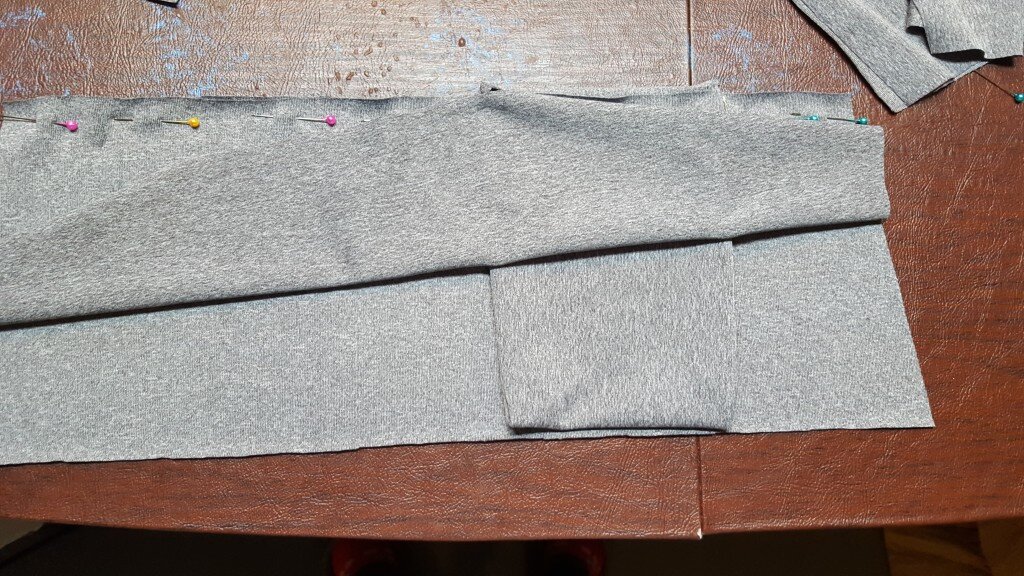
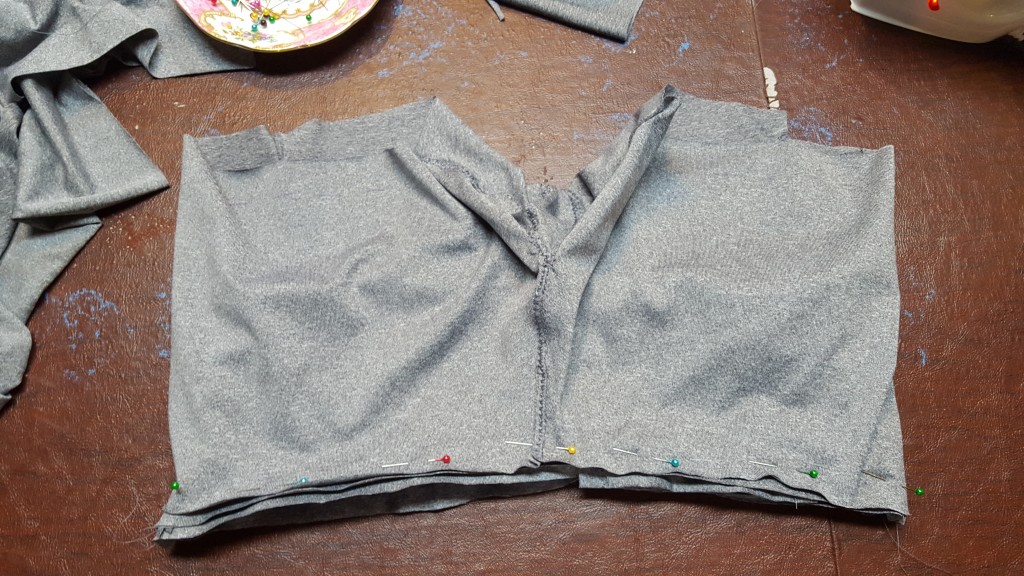
- Pin front pieces together at center front. Pin backs together. Pin backs to side fronts.
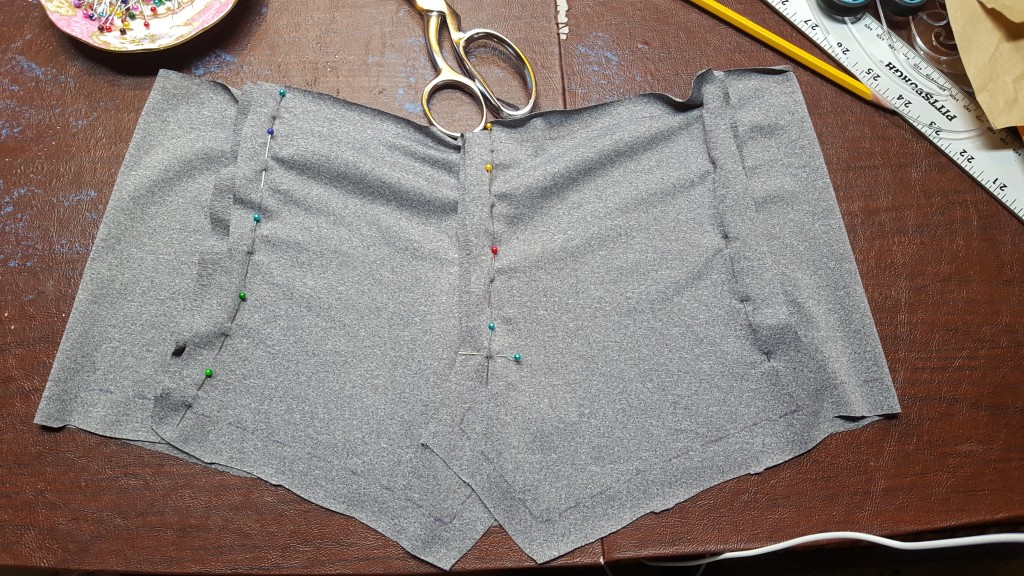
Pin back pieces together up to marking on pattern. Pin back pieces to side fronts.
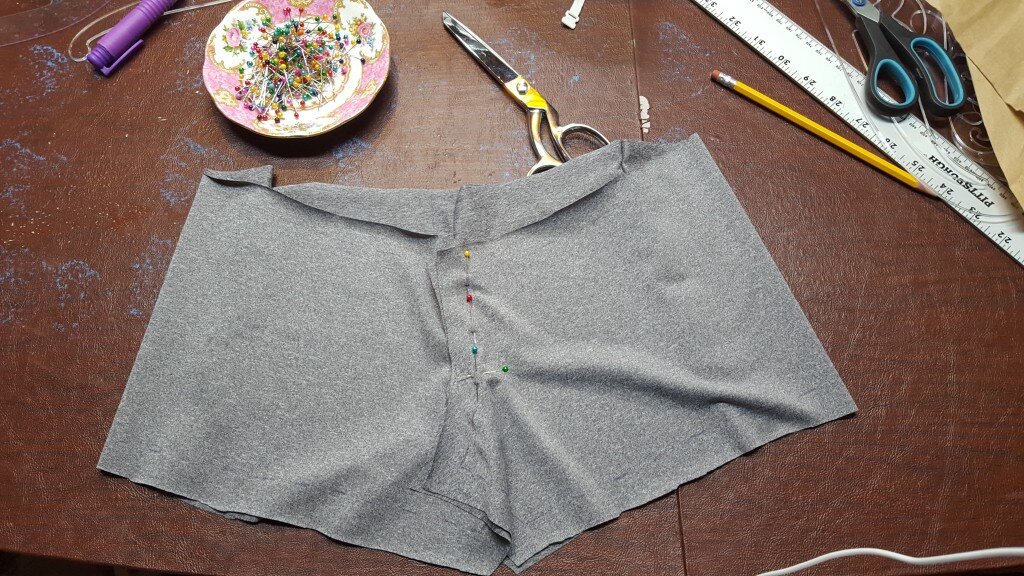
Pin front sections together on center front up to marking on pattern
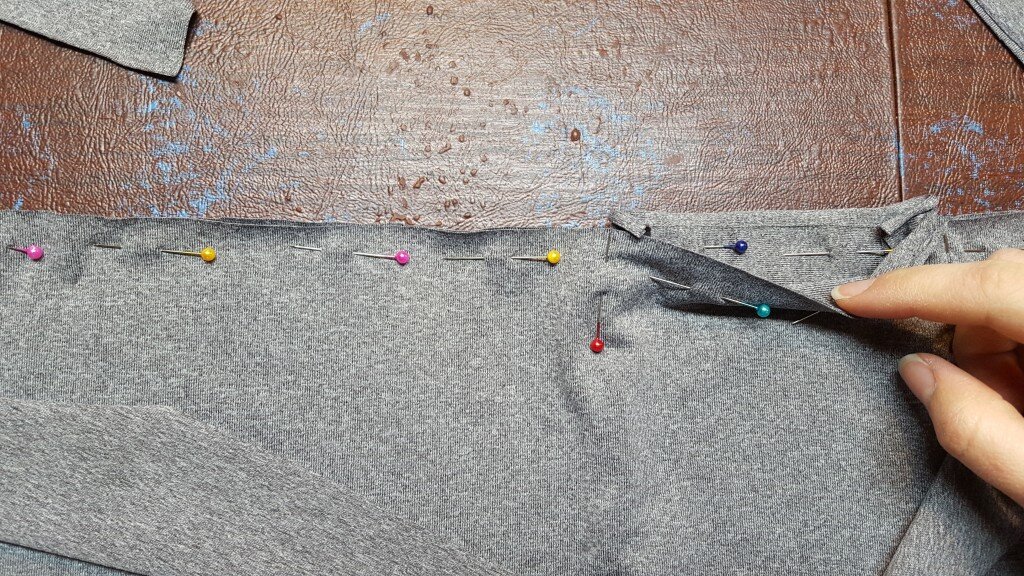
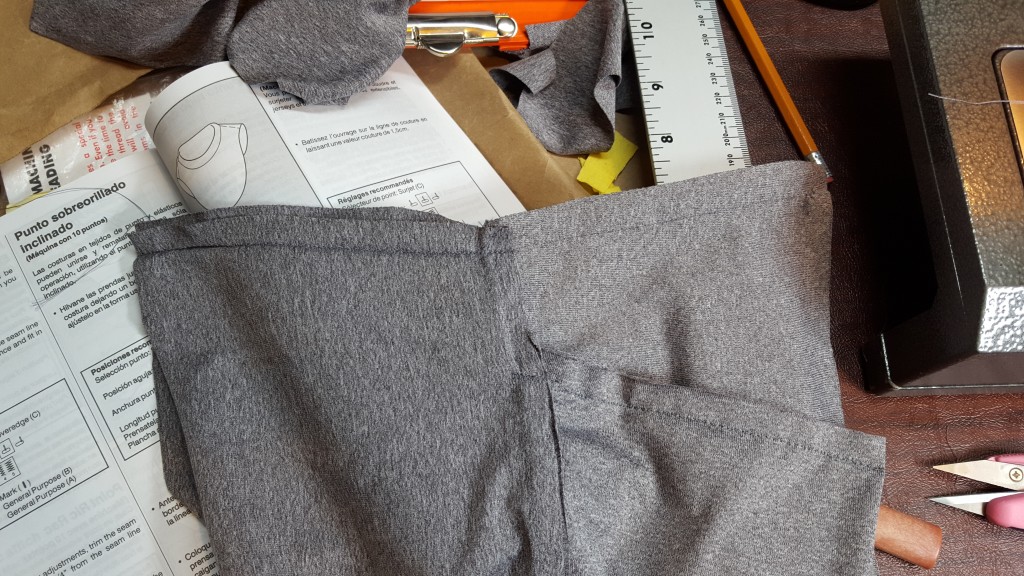
- Sew each seam together using a straight stretch stitch being sure to stop at the marks I made on the pattern. You’ll insert the crotch piece here later. I’m debating if instead of doing a straight stretch stitch I should have done a plain old running stitch baste but I’ll let you know next time. Make sure when you sew knits (like you are here) you use a ballpoint needle.
- After straight stretch stitching the seams together trim the seams down to 1/4 inch. Fold the fabric to one side of the seam and slant overedge stitched over each seam.
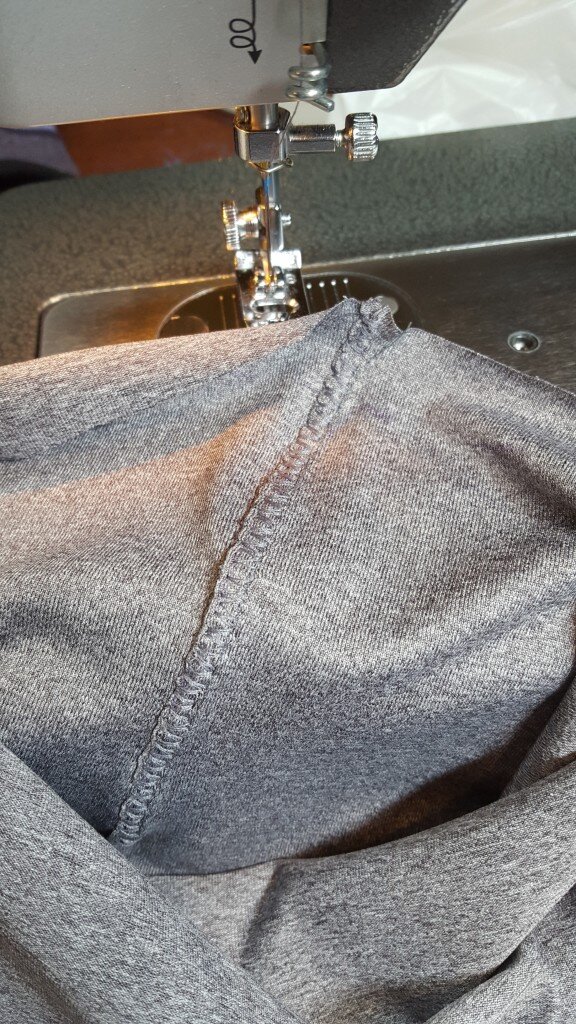
Stitch over trimmed seam allowance.
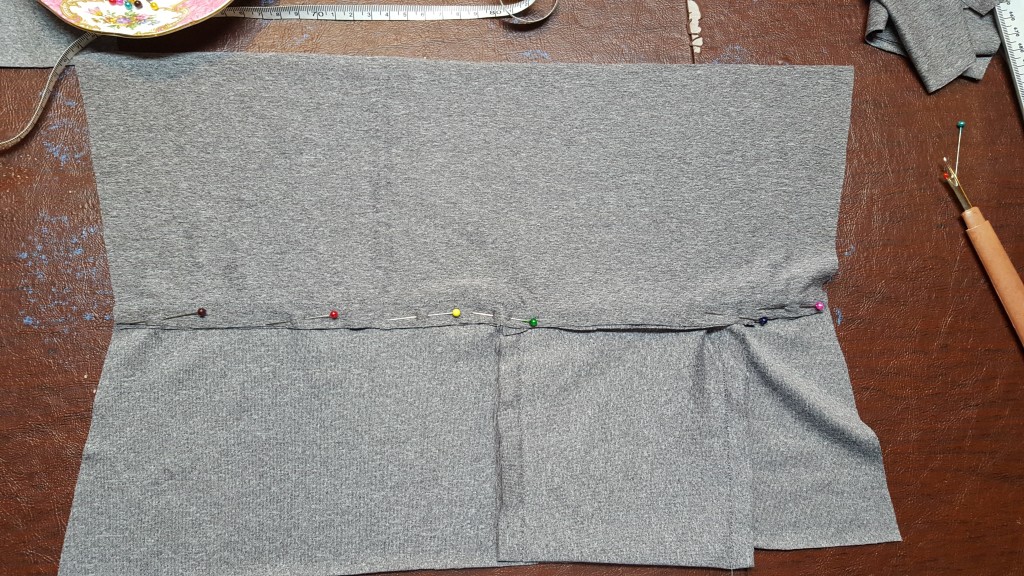
- Sew the inner seam of thighs using a straight stretch stitch.
- Insert a 3×1″ eye shape (plus 5/8″ seam allowance) into crotch area using straight stretch stitch.
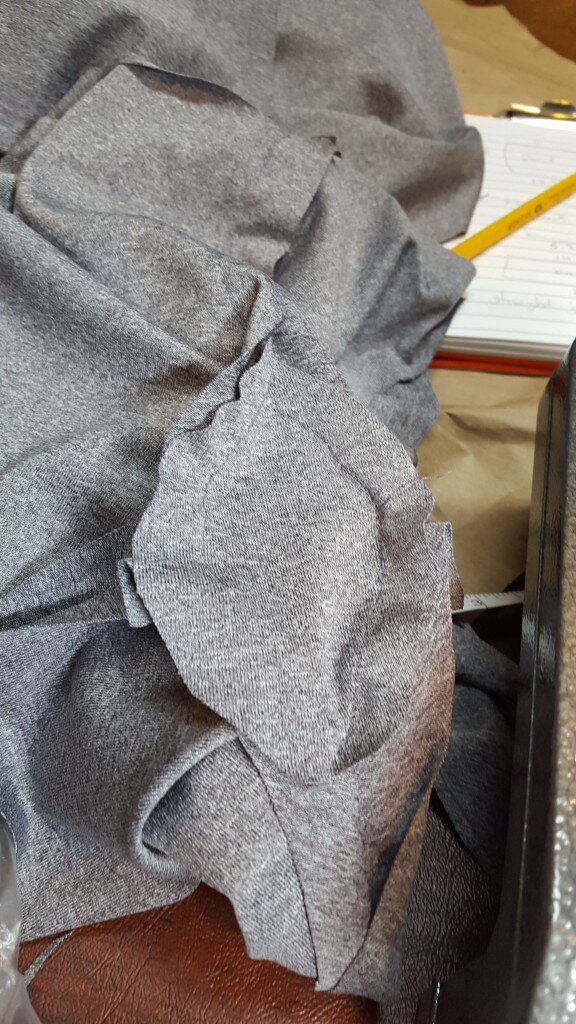
- Trim seams in 5&6 down to 1/4 inch and again stitch over each seam as in step 4.
- Take pocket rectangle and sew along the two 6″ sides in a straight stretch stitch.
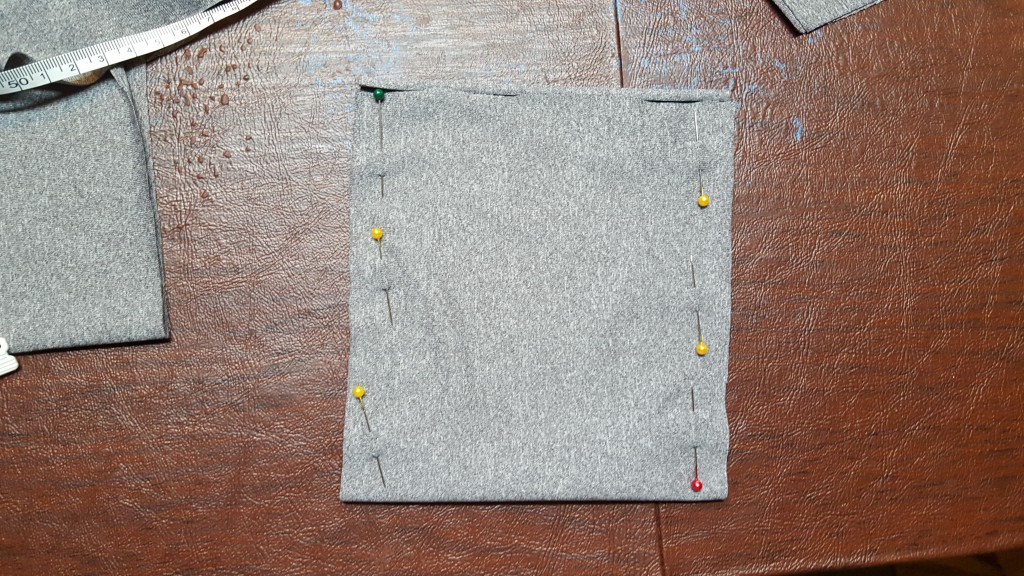
Sew sides of pocket.
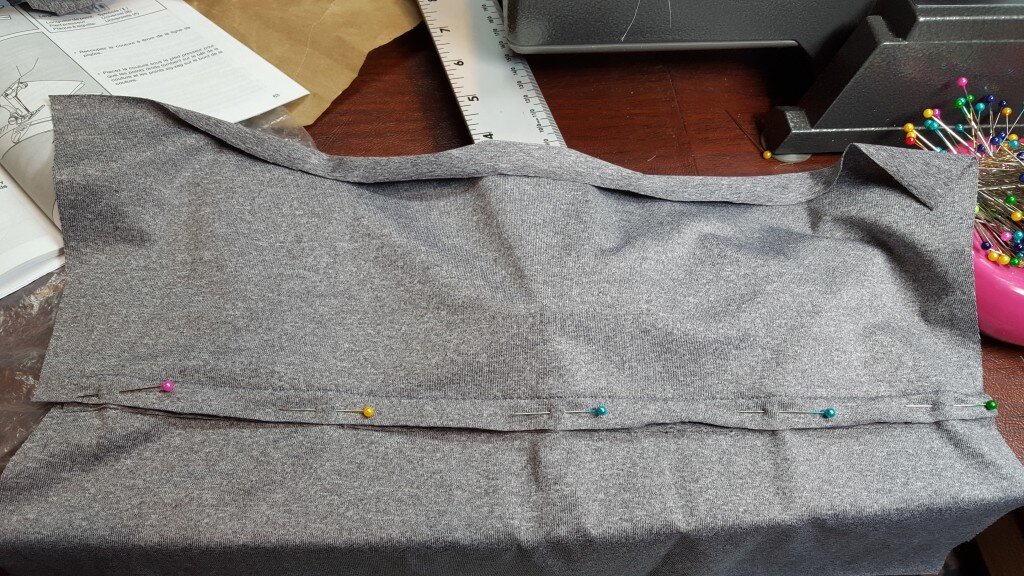
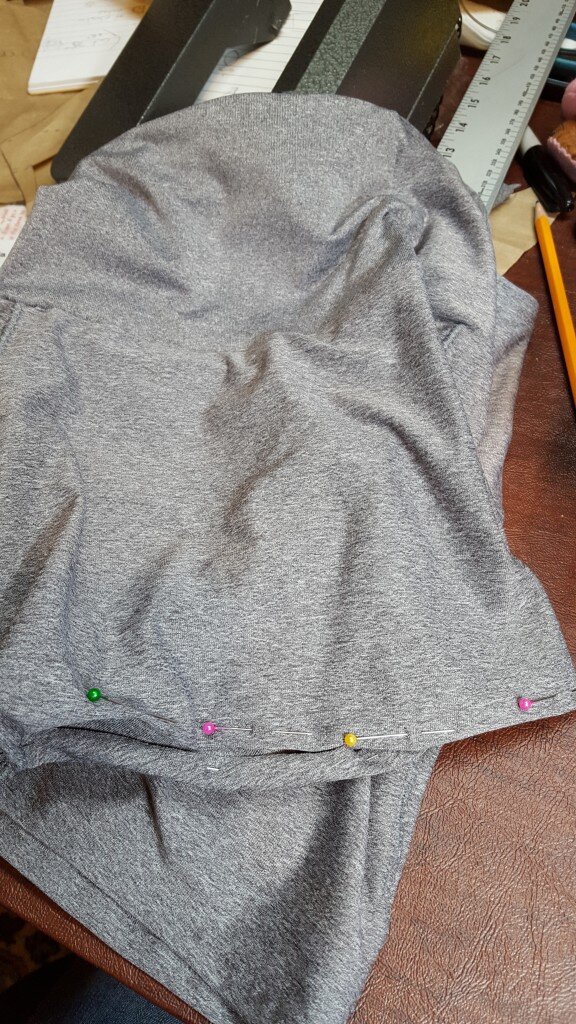
- Turn the pocket inside out and sandwich it between two pieces of waistband as shown. Pin along top of waistband until you come to the pocket then pin one piece of waistband on each side forming a pocket.
Insert pocket in front waistband.
Make sure to pin the pocket opened.
- Stitch as pinned with a straight stretch stitch. Open out, pin seam allowance to one side of pants (this will now be the inside) stitch close to the fold, leaving the pocket open. Reinforce the pocket at either side. Trim seam allowance.
- Repeat steps 9 & 10 on the other half of the waistband omitting the pocket.
- Open out both waistbands again and pin them at side seams. stitch. Make sure inside matches inside.
- Fold band in half and pin to waist of pants. Stitch.
- Put the pants on and decide where you want the length to hit. Fold under the appropriate amount of fabric and stitch.
- Finally I trimmed where the waistband meets the pants and slant overedge stitched along this line to hold the fabric in place.
That’s it!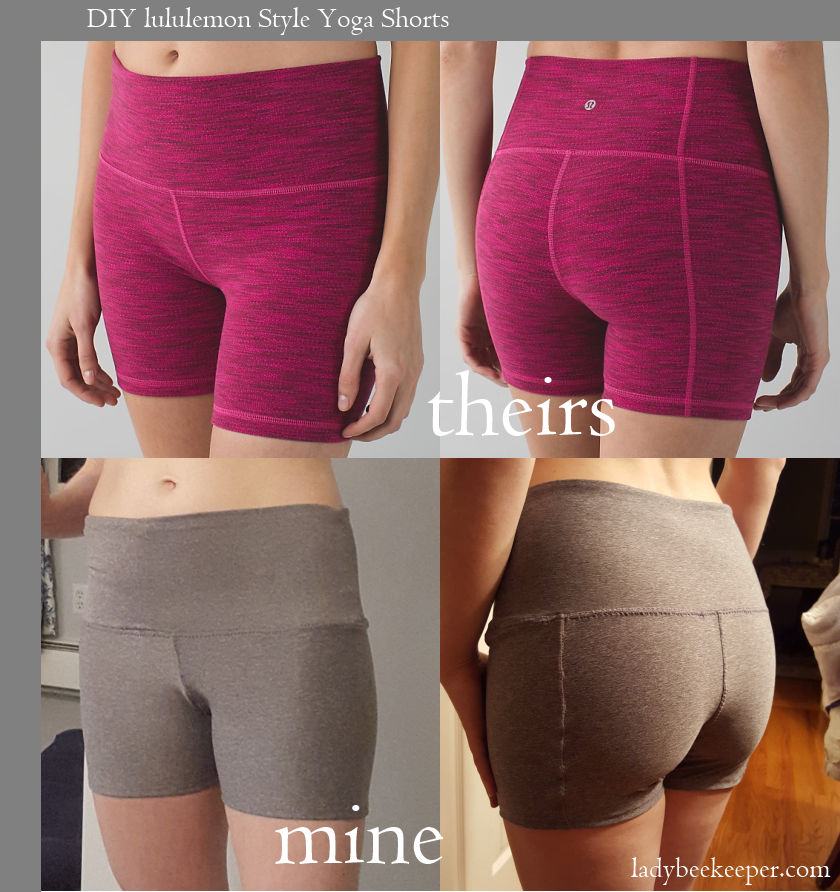
One yard of fabric cost me $10 and I only used half of that! Grand total… $5. That’s 10% the cost of the shorts on their website! Not too shabby. Next time I want to make a fun colored waistband or something but Joann’s selection was limited to grey and black.
**A Note on printing the pattern:

I loved the post but I am unable to print out the pattern. Is there another link? I tried clicking on the link above for the Grove II Shorts but it takes me to the Lululemon website. Thanks!
Hi Kimberly:
Thanks for your comment! I don’t have a very fancy program to create my patterns at the moment. I will have to work on that, so I’ll let you know when I have something easier. Here’s what to do for now…
Save the below link and open it on your computer with paint.net:
http://www.ladybeekeeper.com/wp-content/uploads/2016/03/yoga_shorts-1024×675.jpg
The trick is that you want that little 2×2 square to print out 2inx2in. Resize the pattern until you get that square printing out 2×2. Here is a great tutorial on another blog with pictures (they use MS Powerpoint, which unlike paint.net is not freeware):
http://www.costumingdiary.com/2013/01/how-to-enlarge-sewing-pattern-with.html
Let me know if you have other questions!
How did the straight stitch hold up after doing yoga? I’ve always been taught not to straight stitch on knit because it won’t stretch, so I’m curious how these perform under the pressure :-)
Thanks for commenting!! So far so good! It isn’t an ordinary straight stitch though. (Believe me I’ve made the mistake of using that on knits before!!!) My singer calls it a “straight stretch stitch”:
http://www.singerco.com/sewing-resources/stitch-detail/145
Seems to work pretty well on knits. I did top-stitch over the critical seams with a zigzag stitch so that may have helped as well. I’m curious what you usually use yourself on knits? Zig zag or something else?
Triple stitch (#6 on 550QE) on Bernina Sewing machines is a stretch stitch which you can use for sewing/ top stitching knits, jeans etc. #11 (550QE) is the stretch stitch, looks kike a lightning bolt on stitch indicator.
https://www.bernina.com/assetgen/2/de/Resources/bernina-products/machines/5-series/550/overview/products_machines_550_overview_row2_right_stiche.jpg
Thanks Michelle! That is helpful info as I do not own a Bernina! Though I love my Singer, sometimes I secretly browse the internet and look at Berninas… don’t tell my Singer.
This is wonderful! I’m just beginning yoga and drooled over the Lululemon outfits, but can’t seem to be able to justify spending that much money on something I’m just going to sweat in!
My question – what size is this pattern? I will have to resize it to fit my big butt, and having an idea of what size I’m starting with will help me to reconfigure to my size.
thank you for sharing this pattern!!
Hi Mary:
Thanks for commenting! My bum is about a size 4/6! As a side note, I recommend making the length a bit longer. I’m making a second pair because I wish I had made the first pair just a teensy bit longer. Happy sewing!!
Lexi
Pingback: Yoga Pants Pattern FREE - My Handmade Space
Pingback: Running Belt to Hold All the Things Tutorial | The Lady Beekeeper
Question regarding the stitching at the crotch?
Hi there – I can’t tell from the pattern but is the stiching all the way from front to back on the crotch or is there a triangle shape..(camel-toe free)
Thanks!
j
Thanks for looking at the pattern! There is a 1″x3″ diamond (or eye) shaped piece! See step 6 and the picture there! Hope that helps.
These look great. With 2 sporty girls the practically live in these style pants. Guess I will be making some. Thanks for sharing.
Thanks Janine! I hope they come out great!
Hi.
I love your pants but I can’t get it in right size pattern. 🙁
How to do?Det
Hi Lone!
These are around a size 6. If you need a larger or smaller size I recommend taking a look at this tutorial on upsizing/downsizing patterns! Grading patterns is a bit tricky, but a great skill to have!
http://mellysews.com/2014/09/make-sewing-pattern-bigger-smaller.html
Thanks,
Lexi
Hi.
I can*t make my size without knowing some messurement. When I print it is not bigger than a A4 paper. I am a size EU 40.
Hi Lone:
Sorry for the confusion – the pattern is a size 6 US which is approx. a size 36-37 EU according to the interwebs. As for printing – it is sometimes a bit tricky. The trick is that I include a 2″x2″ square on every pattern for you to size by. In a world where I had lots of time and money I’d make all my patterns into PDFs, but it is actually really difficult and time consuming! Try the following:
Save the below link and open it on your computer with paint.net:
http://www.ladybeekeeper.com/wp-content/uploads/2016/03/yoga_shorts-1024×675.jpg
The trick is that you want that little 2×2 square to print out 2inx2in. Resize the pattern until you get that square printing out 2×2. Here is a great tutorial on another blog with pictures (they use MS Powerpoint, which unlike paint.net is not freeware):
http://www.costumingdiary.com/2013/01/how-to-enlarge-sewing-pattern-with.html
After you get it printing properly follow the instructions from mellysews.com to increase the pattern size! Note that the spandex is pretty stretchy, so you may be able to get away with just increasing the length and leaving the waist the same.
Thanks,
Lexi
Hi! I have resized your picture to scale and have it saved in a pdf file I can send to you if you’d like?
Really?! You are amazing Priscilla!! I would love to put it up on the website (with credit to you of course)! I love your website! I will have to try out some of your patterns soon!
Thanks,
Lexi
Hi I’m
New by chance did this pattern ever get put on a site with different sizes?
Hi! Unfortunately I have not had time to make graded versions of this pattern. You can find some great info on doing so yourself on this great blog here: https://mellysews.com/make-sewing-pattern-bigger-smaller/ If you do end up trying this, please do send pictures!
Hi this is a nice pattern! I was able to right click your picture of these shorts and load it into PowerPoint using instructions I found here
http://www.costumingdiary.com/how-to-enlarge-a-sewing-pattern-with-powerpoint.html
Then I printed everything out as described on that link and will start making them tonight. I hope to post a pic and info on my blog as soon as I’m finished making them. Thank you for making this tutorial free!
I forgot to tell you I sized it up to 200% exactly and it came out perfectly to 2″.
Thanks for stopping by Tammie!!! I hope they come out great! I can tell you that they have served me well in yoga for the past year! My only regret is that I wish I had made them a teensy bit longer, so if you think you’ll prefer longer yoga shorts, make sure you add some length to the bottom hem! Send me a link when you make them I’d love to see them!
Thank you very much for the instructions. Is there a chance that you could send me the pdf as well please? Thank you!
Hi Sandra!
Thanks for stopping by, I updated the post and added the pdf from Priscilla a few days ago! Happy sewing!
Thanks,
Lexi
Hi Lexi
I have printed the pdf and it fits on an A4 page, how do I now expand it to a human size?
Sorry if I am being stupid. I understand the gauge is 2X2″, but I am not sure how to implement it.
Thanks for an awesome site.
Nadia
Hi Nadia:
I’m so sorry it took me so long to respond! I totally missed your comment somehow!
Priscilla was nice enough to create a pdf version of the pattern (here: http://www.ladybeekeeper.com/wp-content/uploads/2016/03/lulu-shorts.pdf), which then can be printed using Adobe Reader (available here for free: https://get.adobe.com/reader/).
You need to make sure when you print it to select “Poster” and Tile Scale “100%” so it will print correctly. Then you can reassemble the pages into the pattern after you print them!
Thank you so much for your comment, I am updating the page to add the information for others as well. Happy sewing!
Thanks,
Lexi