
Well I finished quite a few Valentine’s crafts just under the wire, so be prepared because blog entries for the month of love are going to go on for a while. That’s all well and good for me because it means I can keep hearts as a theme until I think of some toddler craft projects for Saint Patrick’s Day. Julius made another Valentine this week for the child services librarian at our town library. She does these adorable programs twice a week for the kids and it is Julius’ only interaction with kids his age at this point. Sad I know.
Anyway, Julius “wrote” out all the cards himself and then I intended to translate what he “wrote” into the roman alphabet. This in principle seemed easier than it was. After he’d finish his mad scribbling on each card and shout “DONE!” I’d ask him what the letter said so I could write it down myself. In which case he’d ramble off a paragraph of nonsense that started with “Dear Julius” and ended with “Love <insert name here>”. Example: “dear Julius, the table is brown and has twenty seven dogs on it. Not real dogs, but dogs like my friend who doesn’t like dogs, but he does like them. love Nora”. I didn’t want to burst his bubble by telling him the entire card wouldn’t even fit half that (partially due to his huge tornado of black “writing”) so I just wrote “To <insert name here> From Julius” on every card.
On our town librarian’s Valentine card though, I wrote exactly what Julius said to her because it was short and relatively coherent. Of course right after I wrote it all out (one handed, in orange marker, while feeding Patricia) he decided the card didn’t have enough stickers and he put stickers on top of every single piece of text. So I had to have him re-dictate his message to me and this time he chose “Dear Julius, I love you so much, Love Miss Maren”. And by that point I figured he was just going to sticker over it anyway so I just wrote it out verbatim. But nope that is what ended up in the mailbox. Hopefully it makes her day.
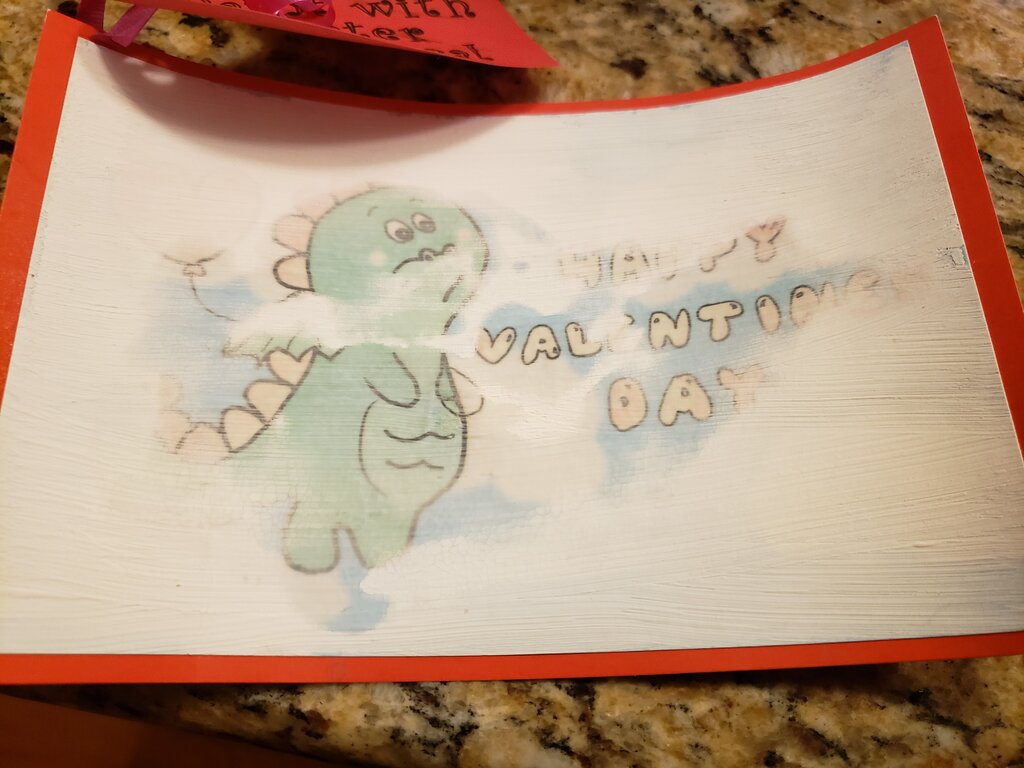
Anyway, to those whose kids received Valentines from Julius, thank you for the kind words. It sounded like the kids enjoyed them. Since several of you have asked, I’ll tell you the Water Reveal Saga. The idea for these came from a couple nights of mad internet searches and failed experiments. Have you guys ever seen these? I love Melissa and Doug and these reveal pads and pens are super awesome. You paint with water on the pad and what’s underneath is revealed. I had seen these Buddha boards before and though the concept is similar it seems they are created by two different methods.
I originally thought the Melissa and Doug boards were created by a layer of fabric over a colored picture. I thought that like in a wet t-shirt contest the fabric would bare the secrets of the colored picture underneath to the world. I tried several different fabrics, all with mediocre results. Then I tried paper on top of a picture with no success. I DO think this is how they do it with the Buddha boards or the Japanese caligraphy magic water paper but I have yet to get that working. (Future project.) Scrutinizing the Water Reveal pads more I realized that what I thought was fabric because of the texture was actually screen printing! Screen printing forces ink through a fabric screen, which leaves a texture similar to the fabric it was forced through! That is when I was finally able to figure out how they do it. No one on the interweb seems to know, so I guess I may be revealing their big secret.
Anyway it turns out there are a couple chemical manufacturers in the world that manufacture what they call hydrochromic ink. It is total magic. The ink is opaque white when dry, but when it comes in contact with water it becomes translucent. If you apply it in a thin enough layer it will dry after only a minute or so of contact with water. This makes it completely reusable until the ink eventually wears off the page over time. So cool. At this point I tried to buy hydrochromic ink online because now I was hooked. Most of these chemical companies aren’t really trying to sell to some little crafter like me, but there was one US company that sold hydrochromic ink in small amounts on Amazon. It had only a single one star review but I am frivolous with my craft budget and as I said I was now mentally invested.
The ink came and I tried out a test of it on top of our extra Christmas cards using an old screen printing board. I also tried painting the ink on. IT WORKED GREAT! (Except Julius really aggressively didn’t like it because I painted over his face in the Christmas card as my test. I thought he would think it was cool but he was very hurt and offended. Poor guy.) The screen printing method worked the best, and it dried super fast just like the Melissa and Doug Water Reveal pads. Unfortunately sometime between when I did the test and the next time I went to use the ink, something changed. I think the ink may have dried slightly during my initial experimentation and I could not get the ink to permeate the screen! I even made a new screen from the same size screen material. Frustrated, and with the need to send out my Valentines in days I decided to paint on the ink. I watered it down slightly because the consistency was very thick and thus I ended up requiring a couple layers to get the underlying picture mostly hidden. In short it worked way worse than the first day I got it. My recommendation, if you are going to try to make reveal pictures with my method, use the ink as close to the purchase day as possible, do not water it down and do not leave it open while you are working.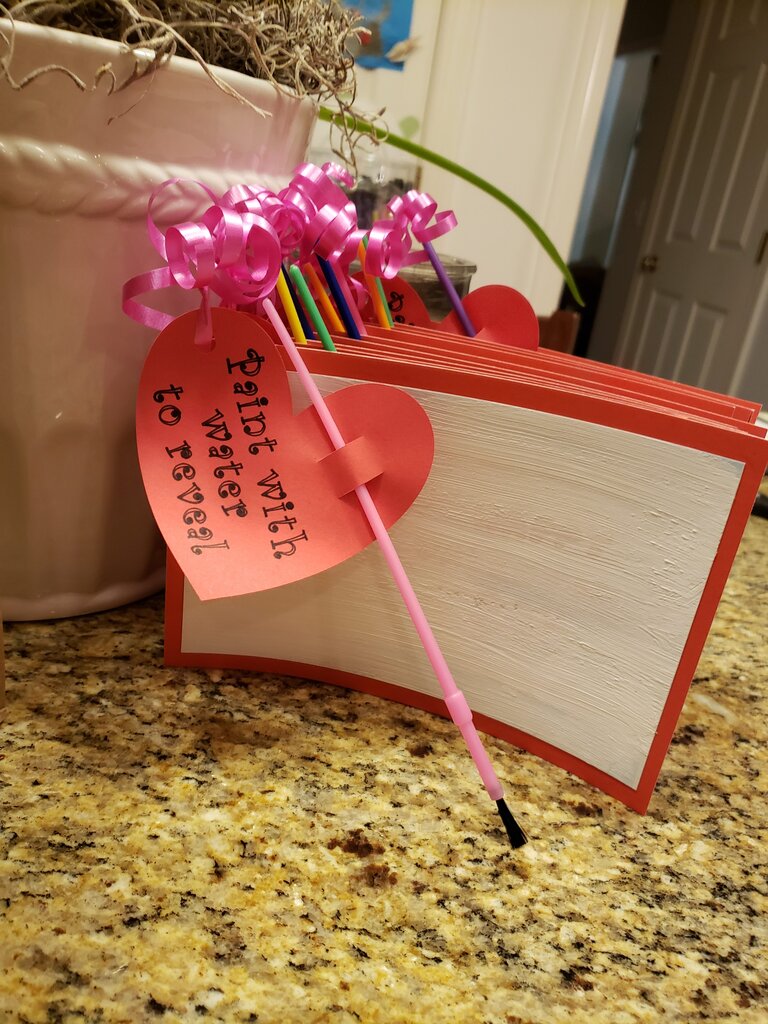
Hidden Picture Water Reveal Valentines
What you’ll need:
- a color printer
- my card design here (or one of your own)
- 65 lb white cardstock (or heavier)
- 2 oz of Hydrochromic Ink
- a foam brush
- a paper cutter or scissors
- red poster board
- elmer’s glue
- a pack of value paint brushes
- a cricut or silhouette
- my cricut template here
- red paper
- black fine point cricut pen
- curling ribbon
- X-acto knife
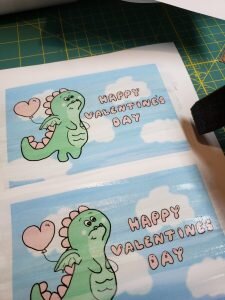
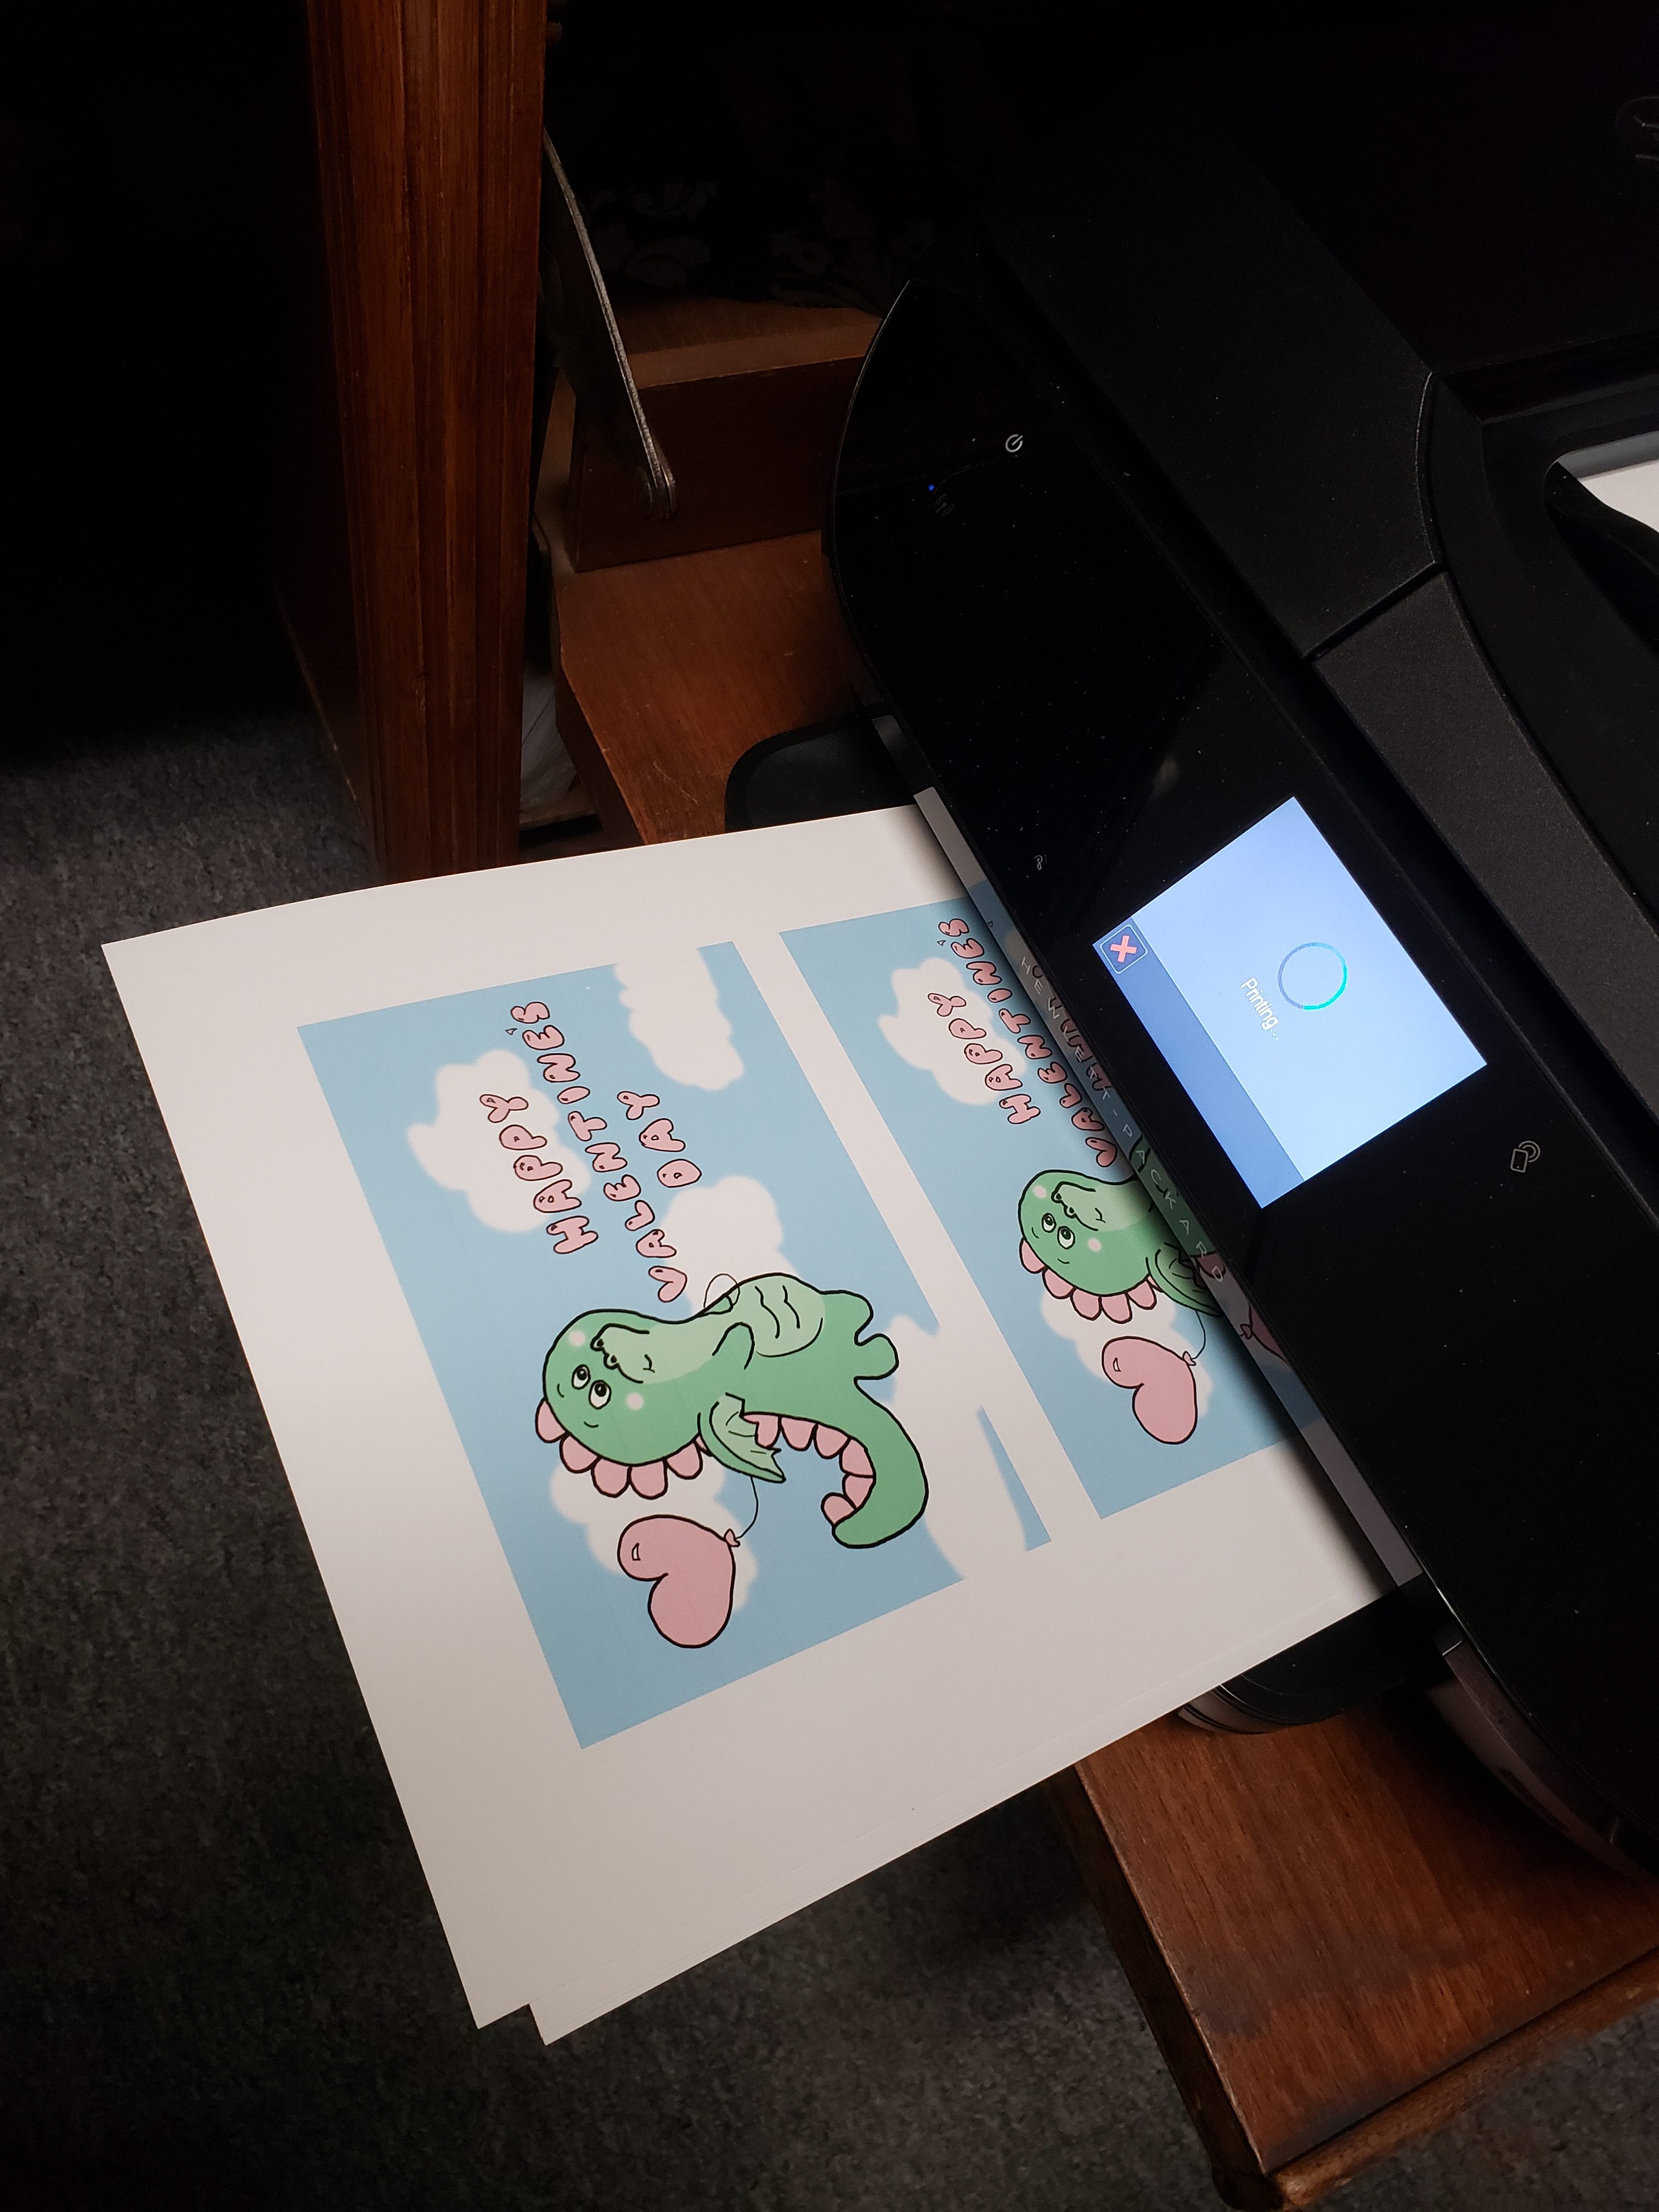
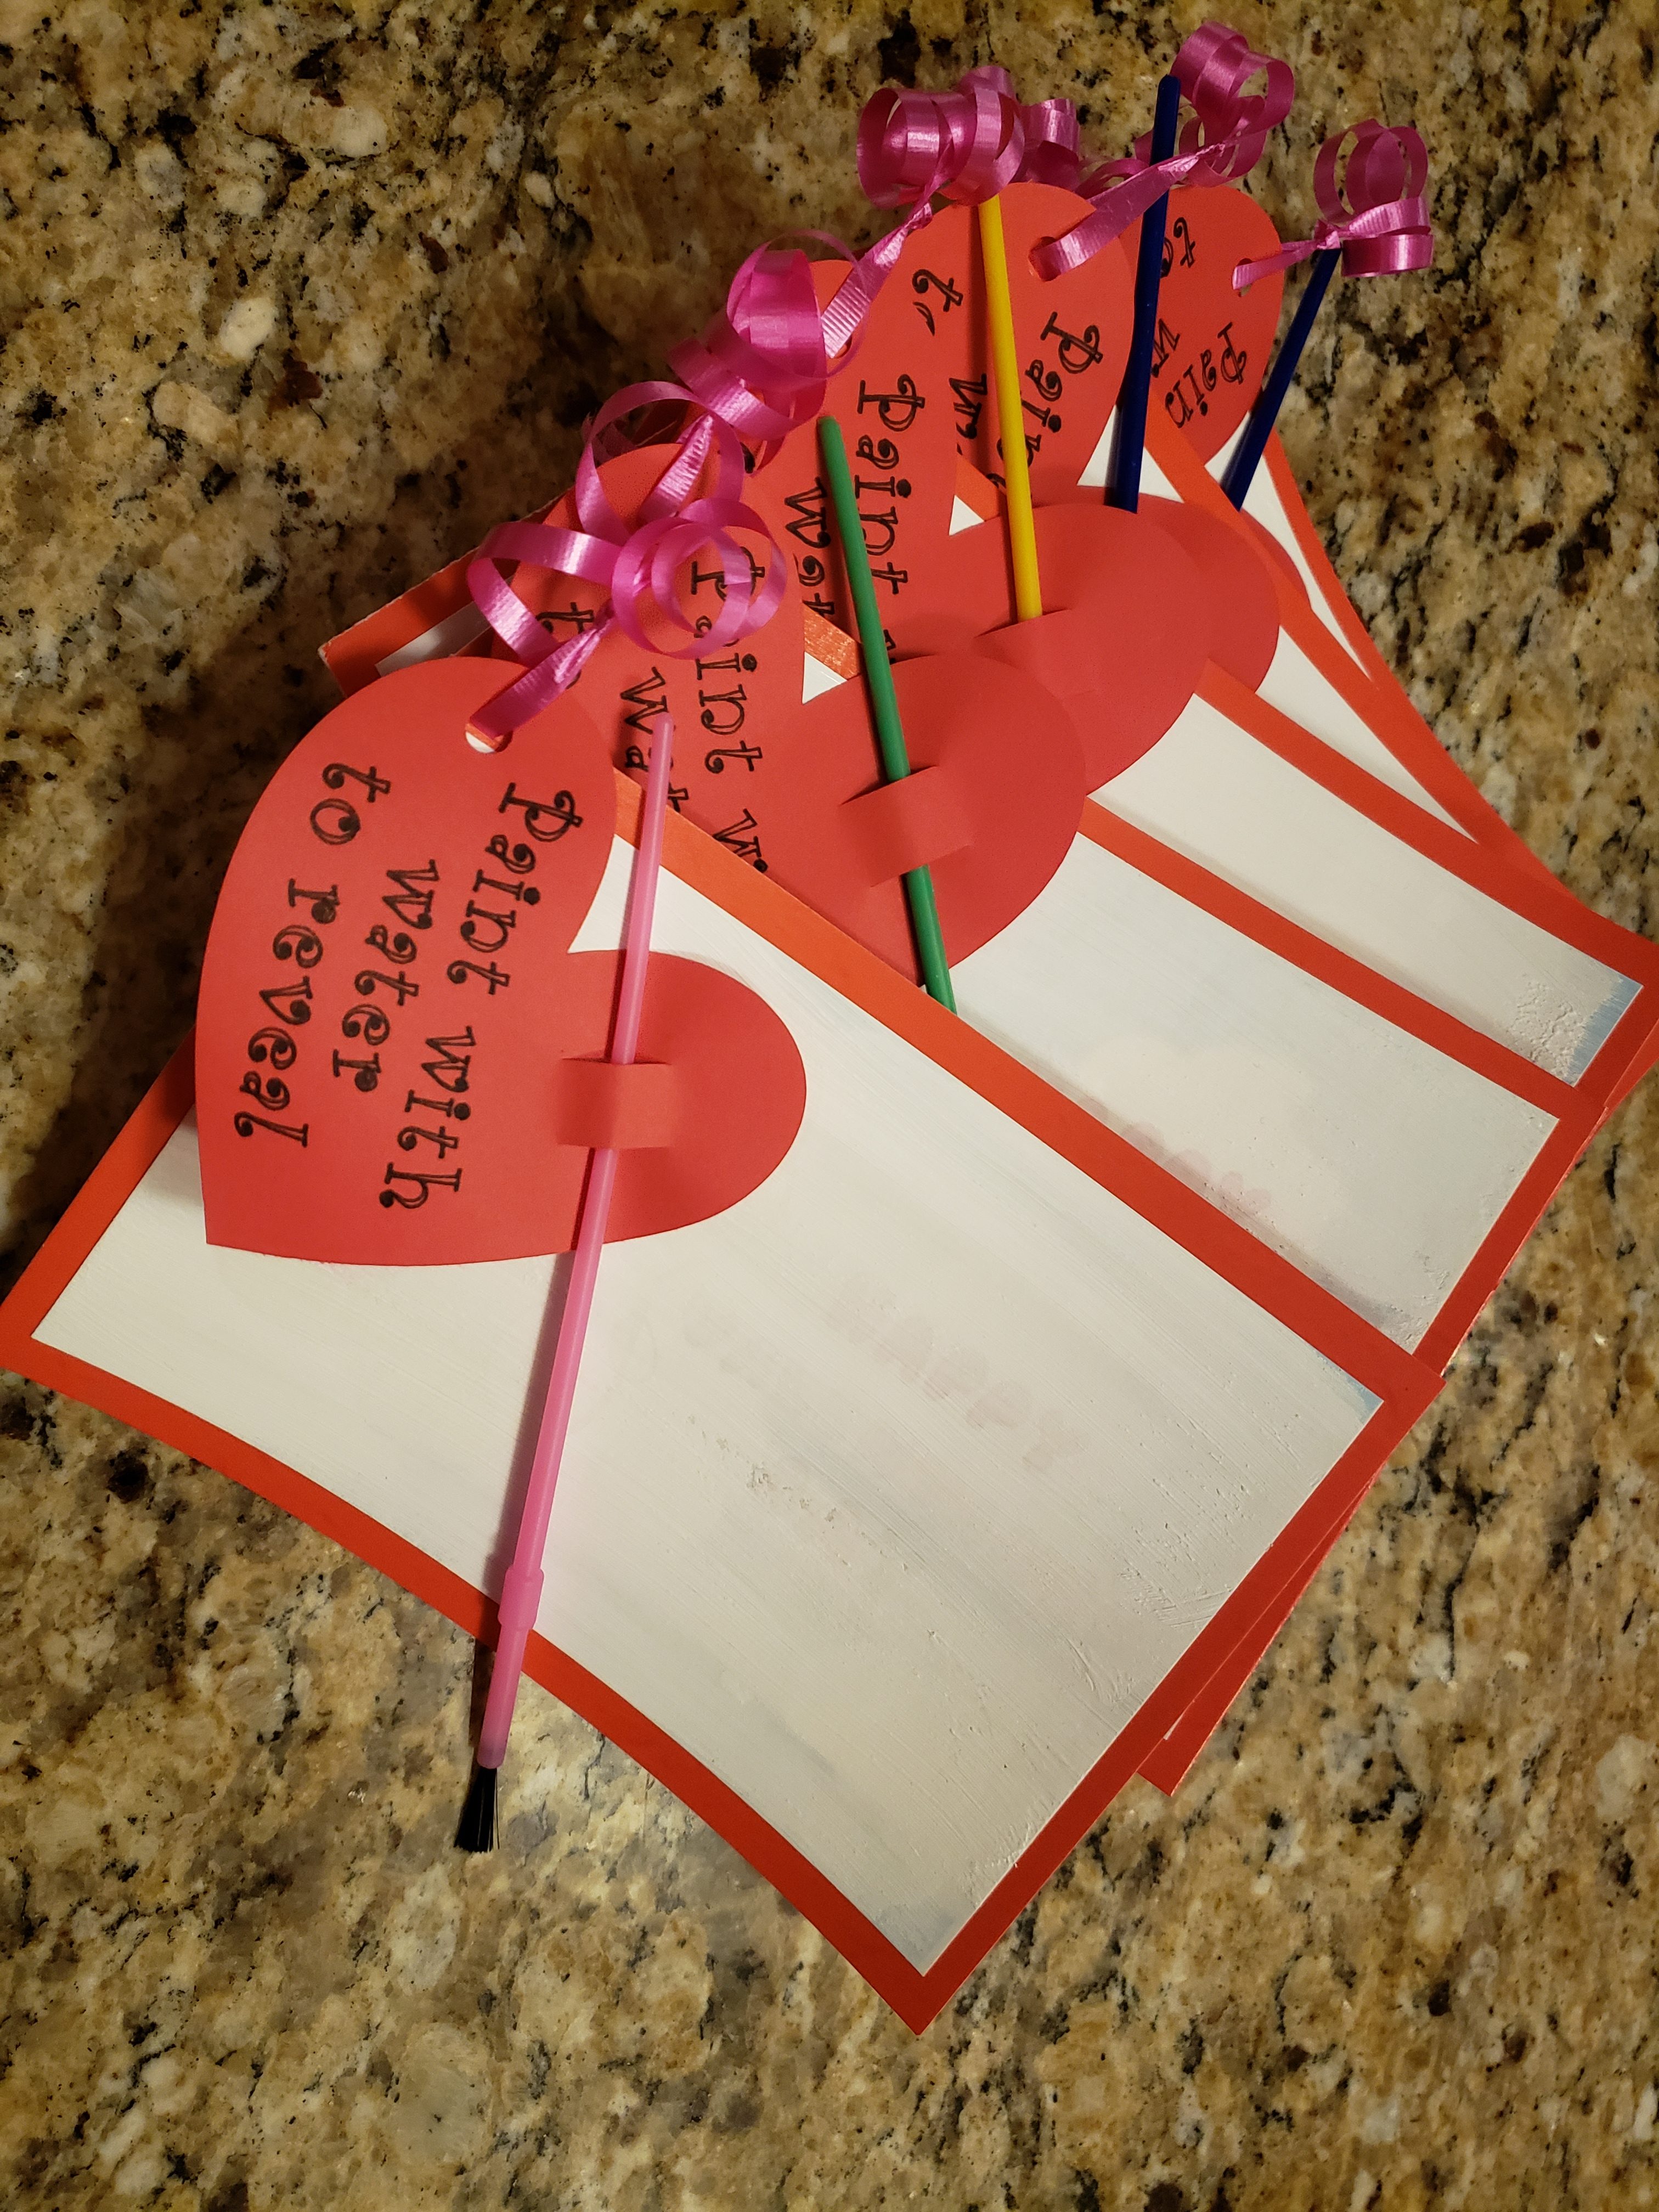
- Print my Valentine design (or your own) in color on white cardstock.

- Using a dry foam brush, paint a thin layer of hydrochromic ink over each picture, being sure to saturate each picture.
- Let dry completely as per the instructions on your ink. If needed apply another thin coat. It is best to try this on one set of cards first to see how well it works for you.
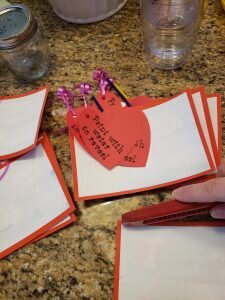
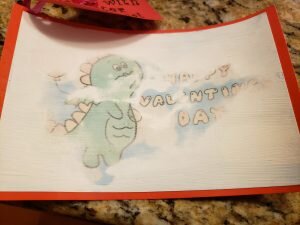
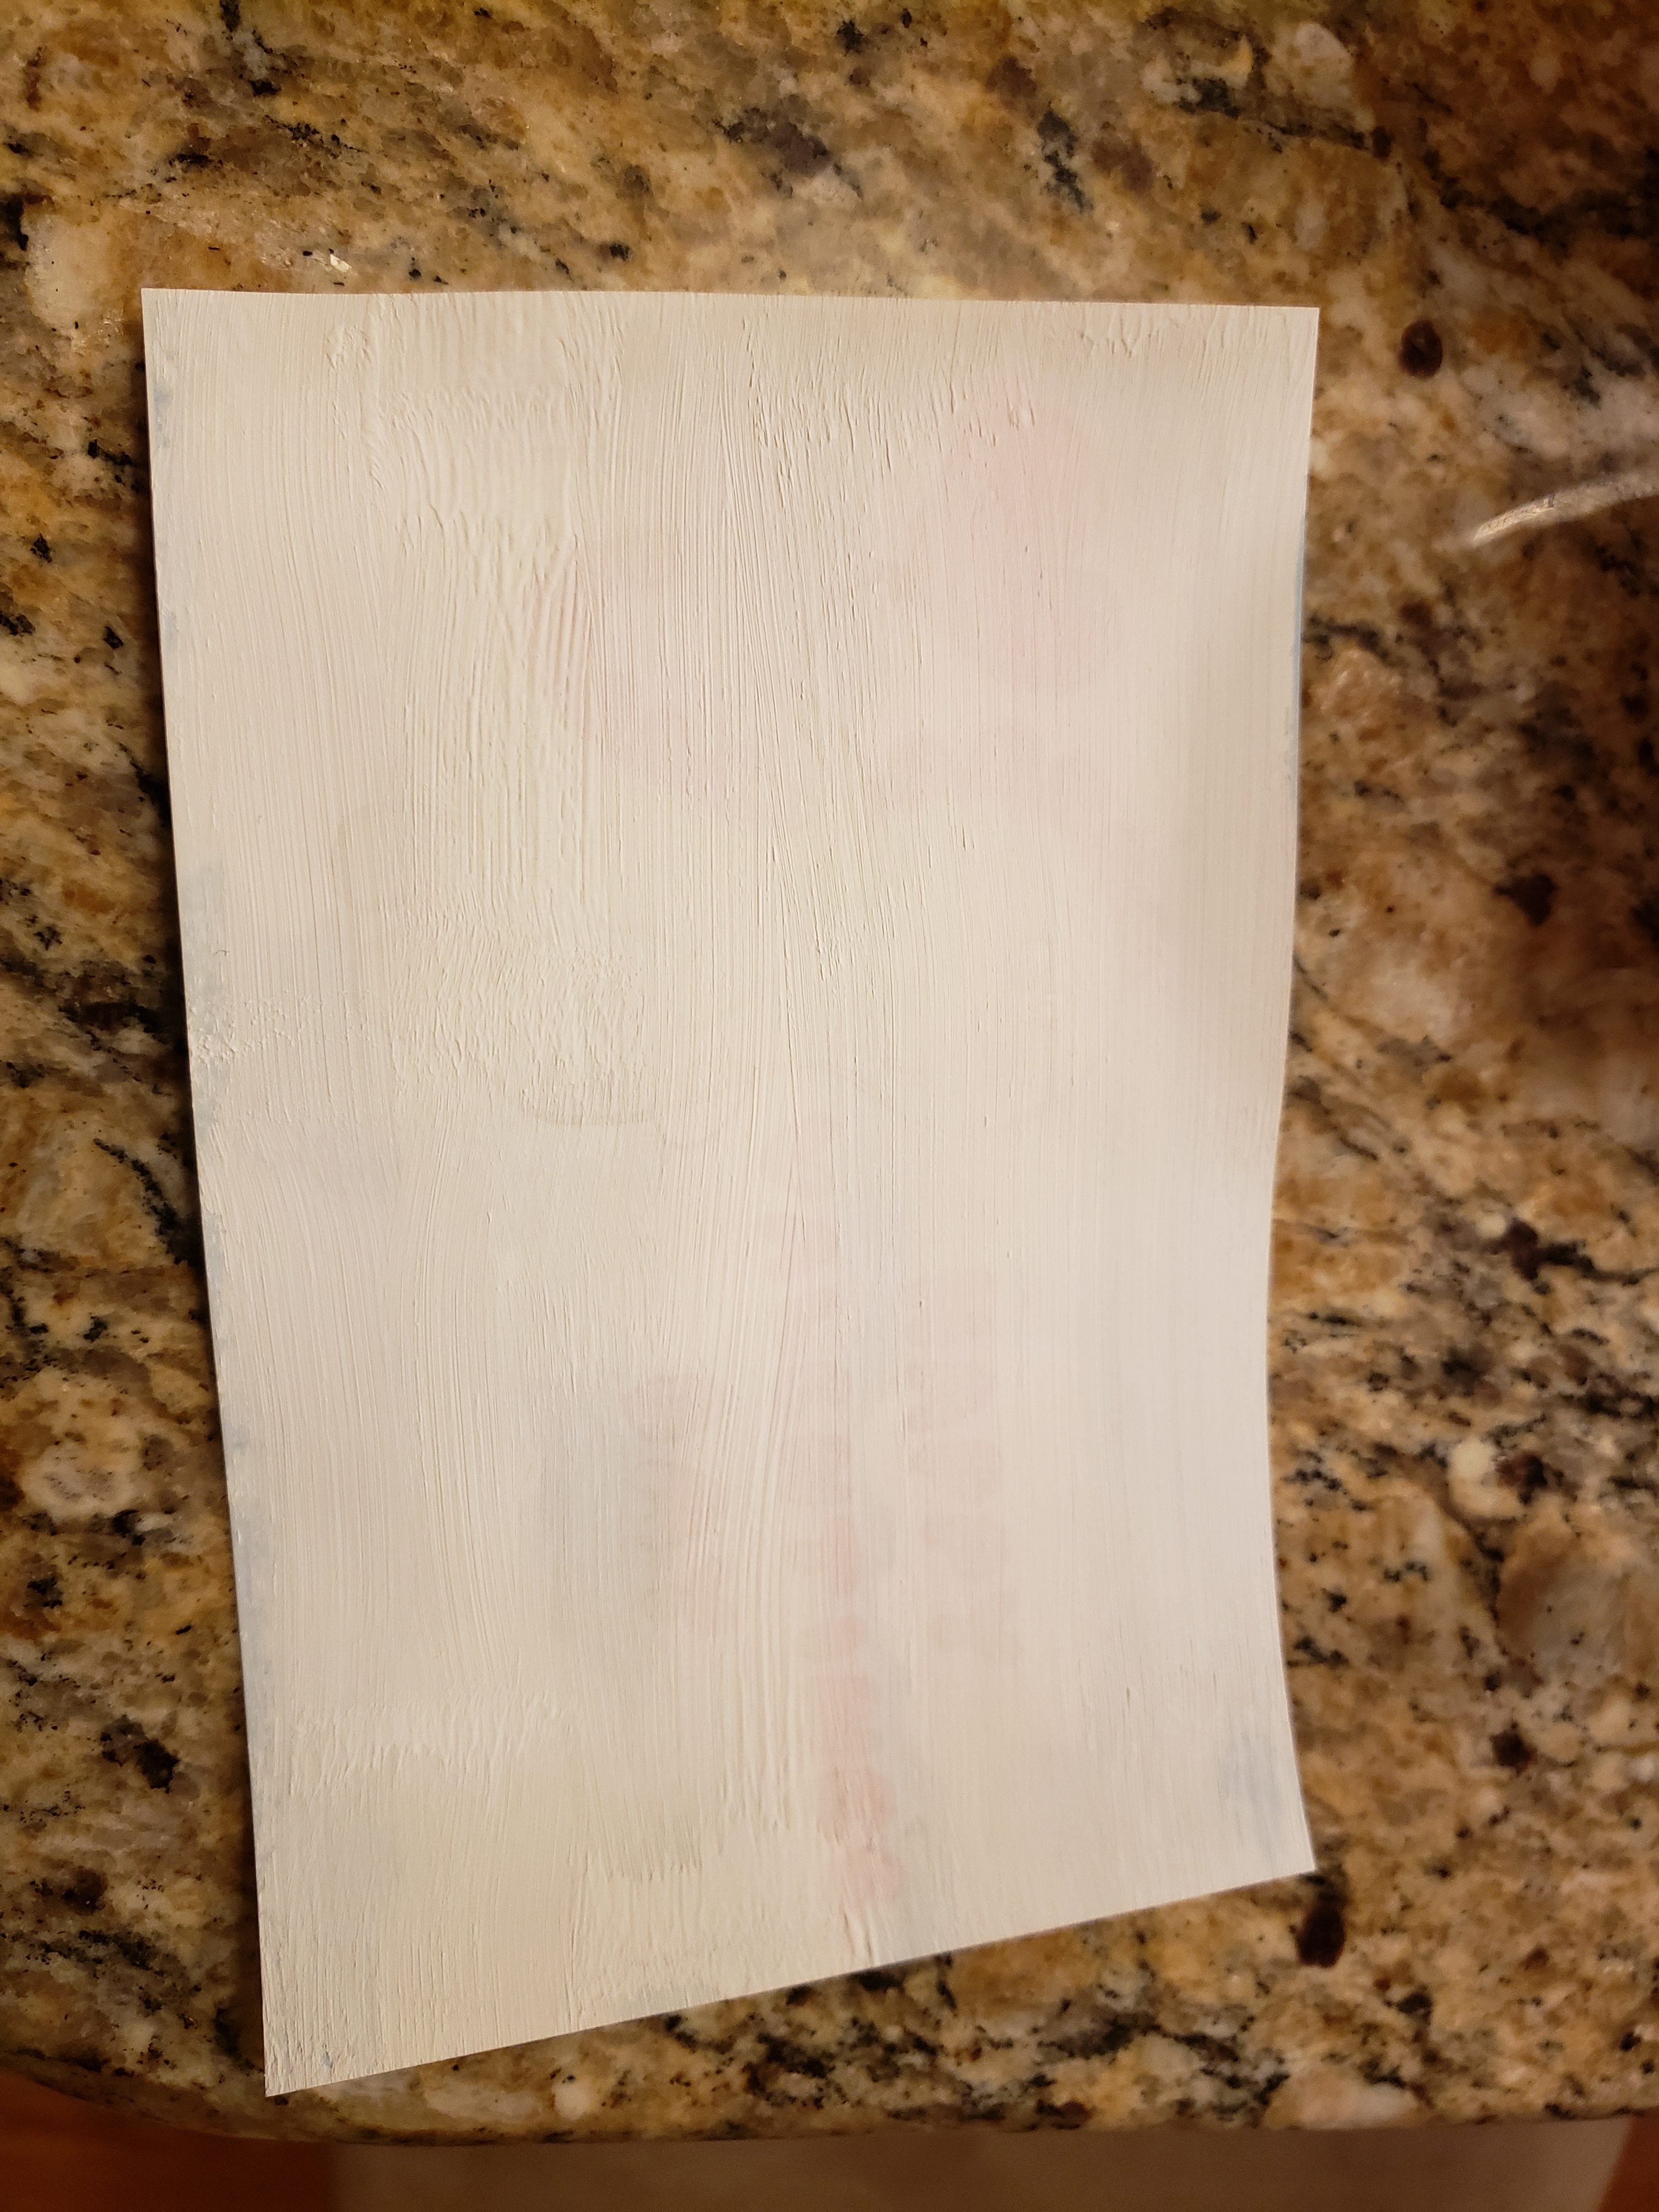
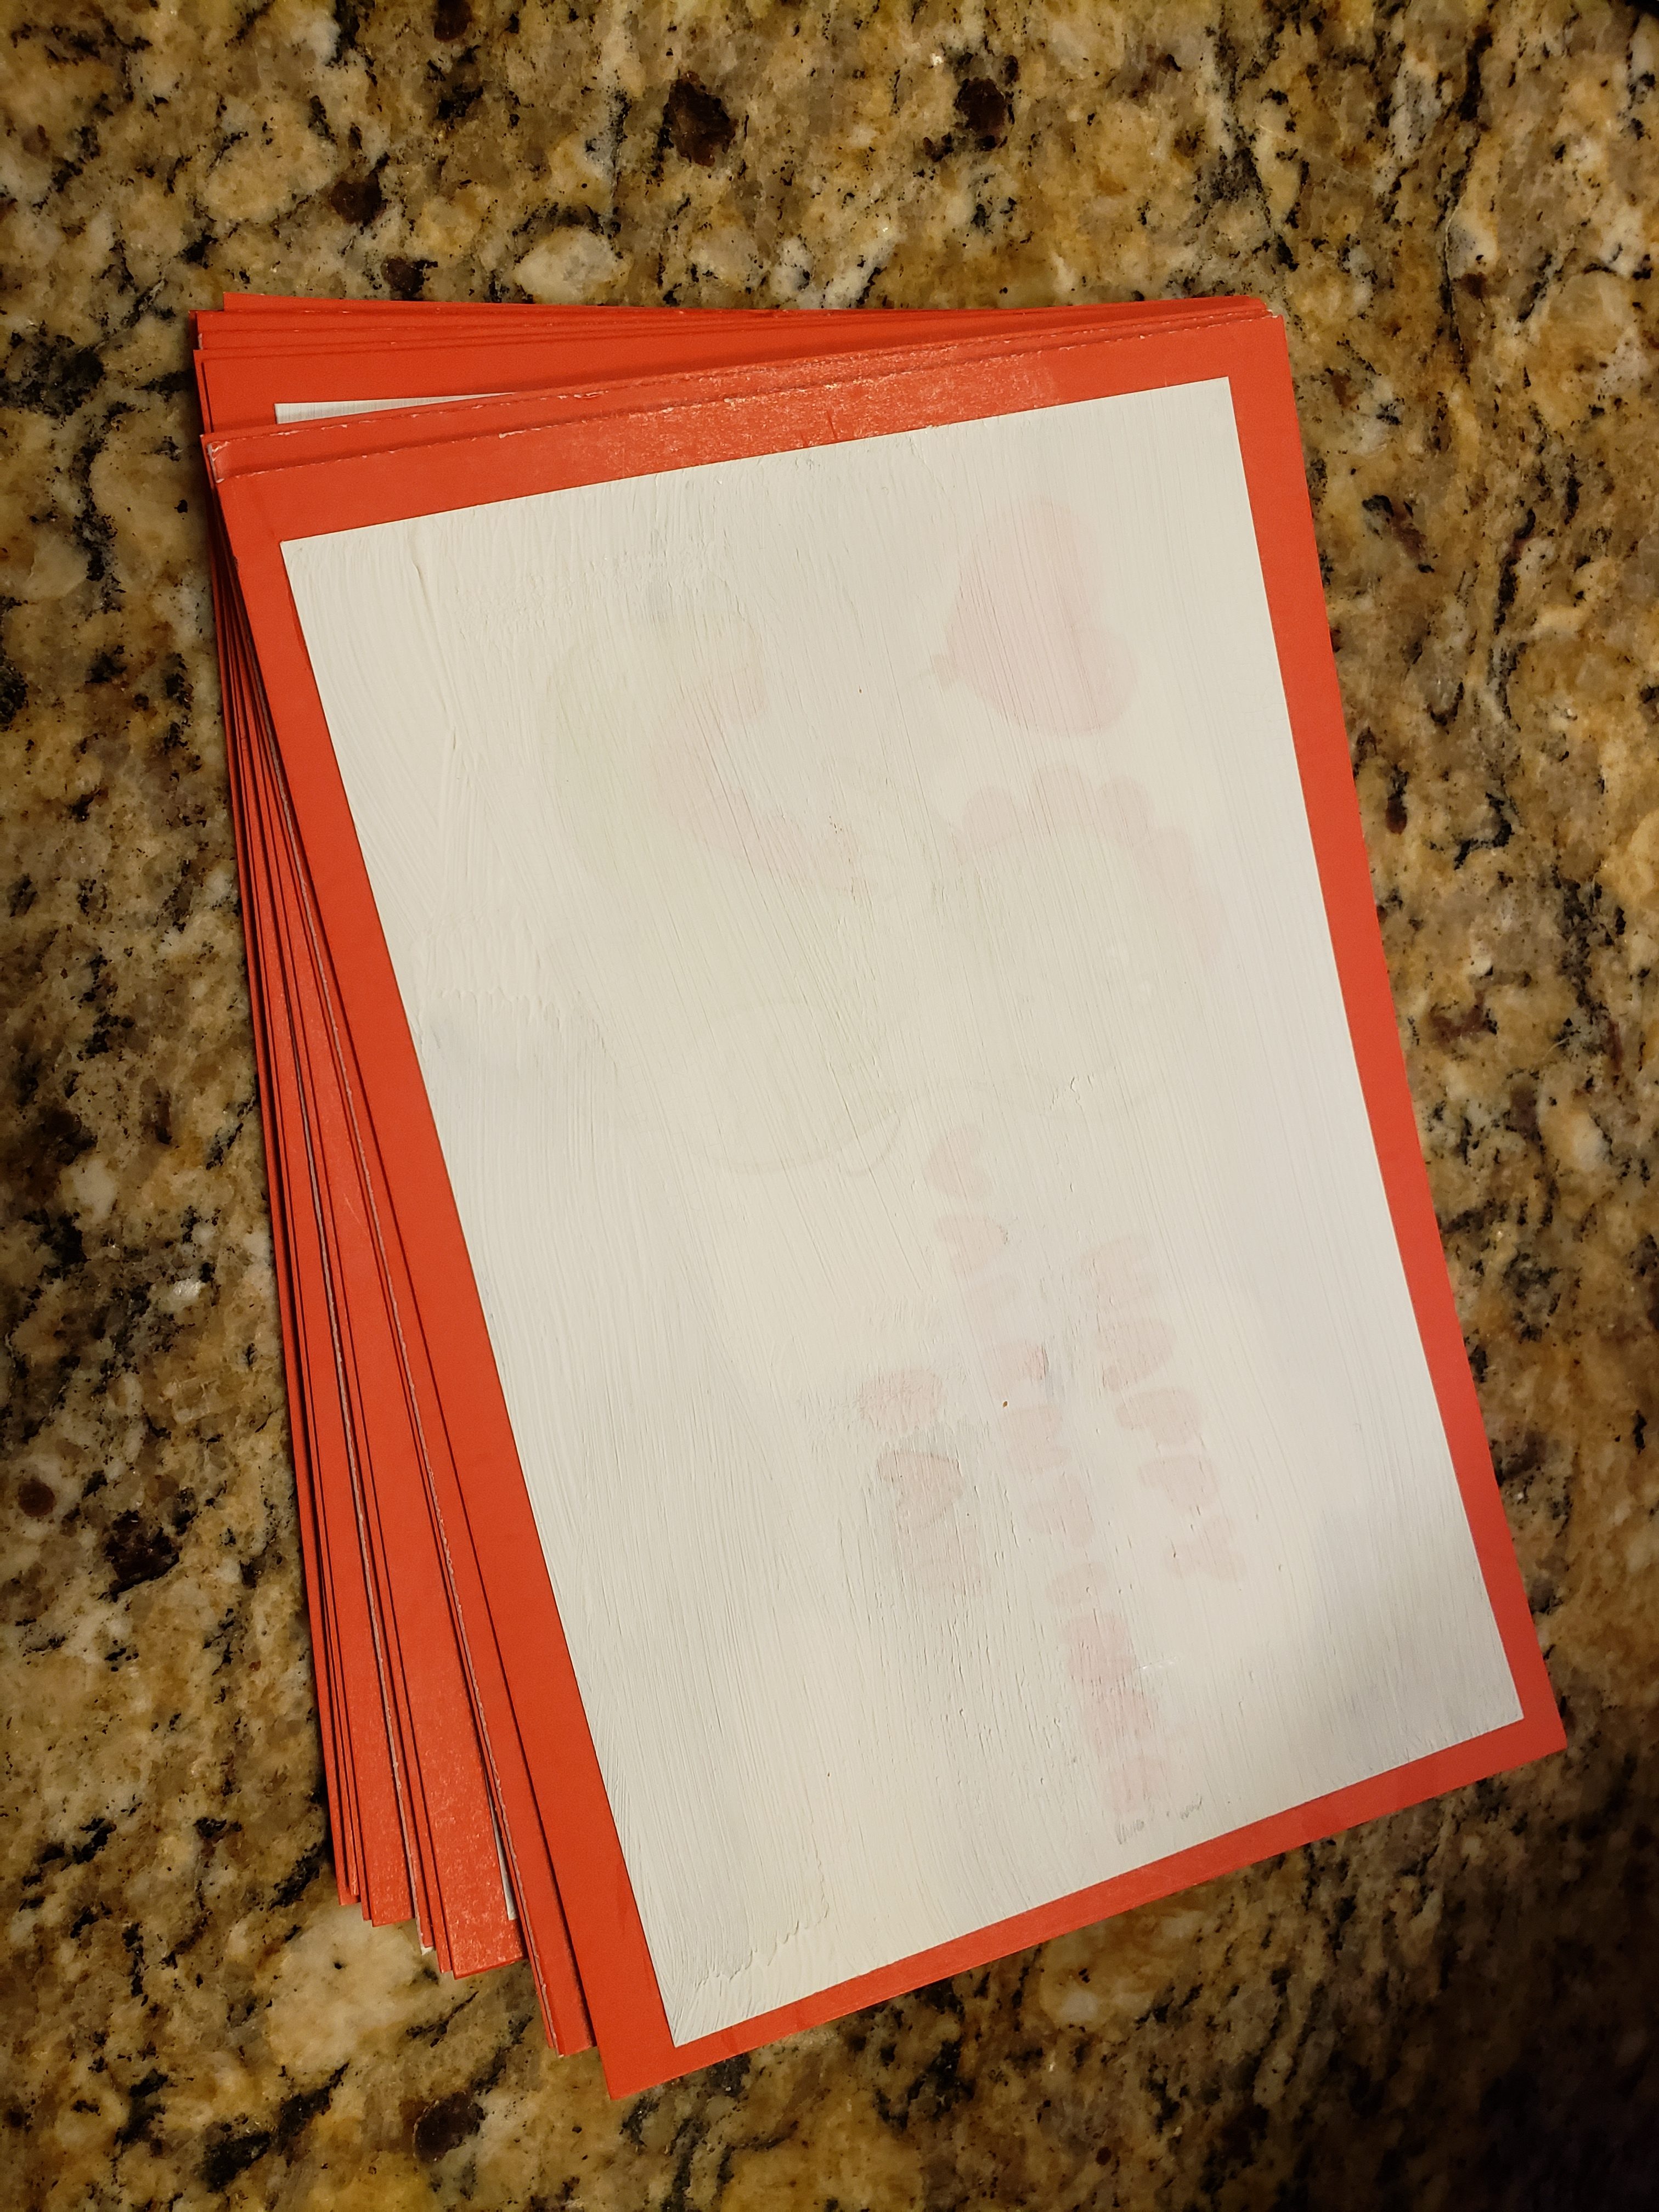
- Cut out the 4″x6″ reveal valentines which should now look mostly white.

Dried reveal card
- Cut out a red 4.5″x6.5″ posterboard rectangle for each reveal valentine.
- Apply Elmer’s glue to the back of reveal valentine with a foam brush and press it onto the red posterboard rectangle, centered. Let dry under a stack of books.

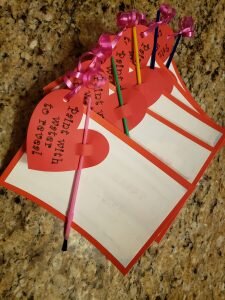
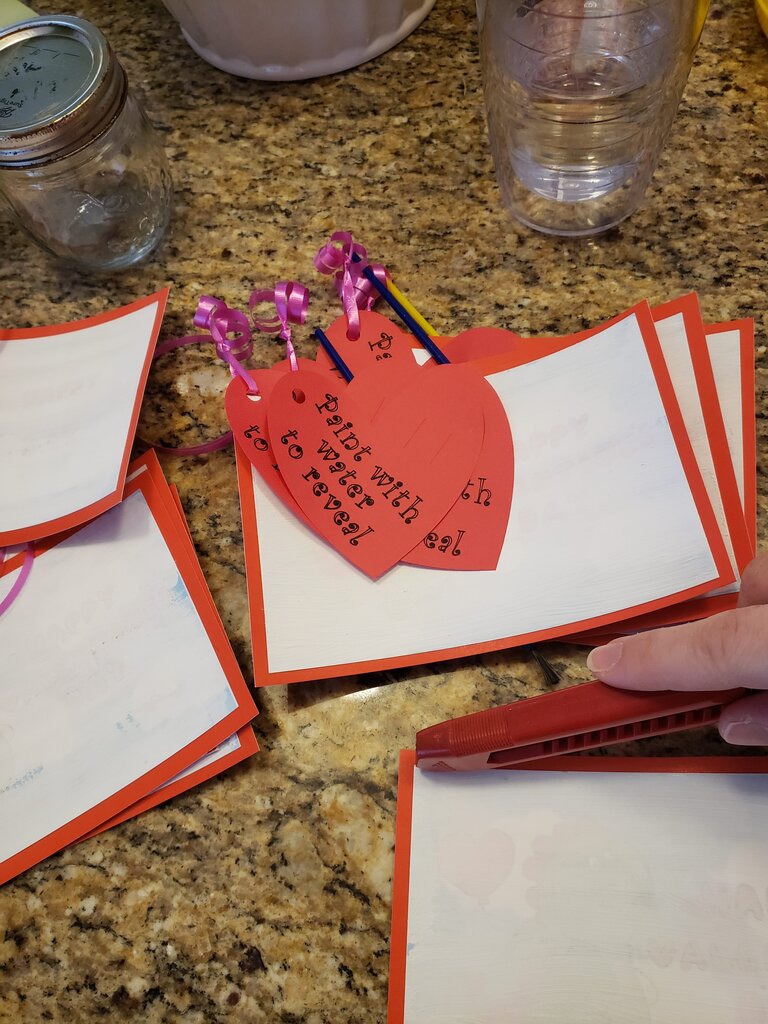
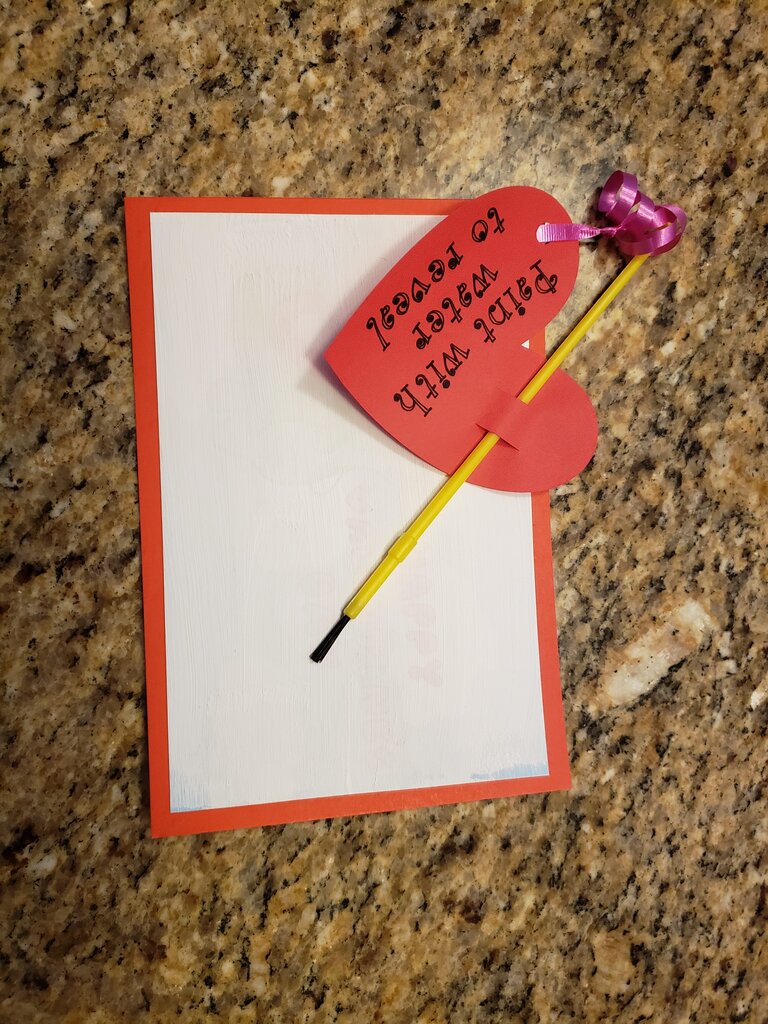
- Use my cricut template to draw and cut hearts out.
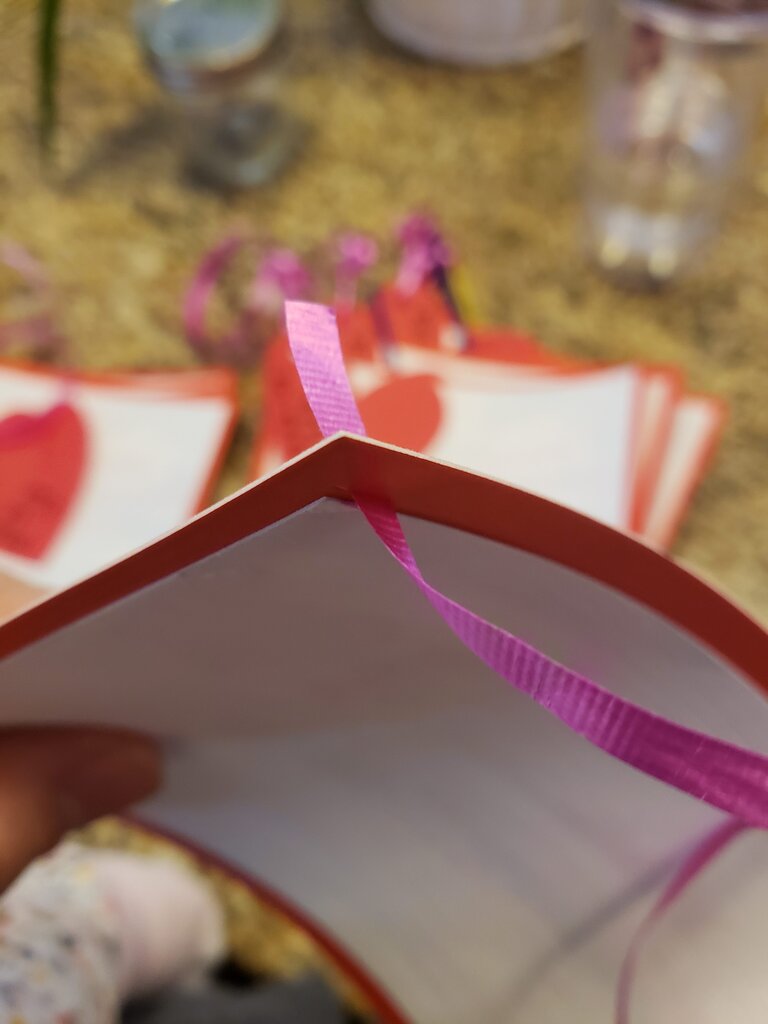
- When Valentine is dry, use the X-acto knife to cut a tiny 1 cm long slit in the top left corner of each valentine.
- Feed a 6″ length of curling ribbon through the slit, then through the hole in the die cut heart, and knot. Curl ends.

- Place paintbrush into the slits in the heart.
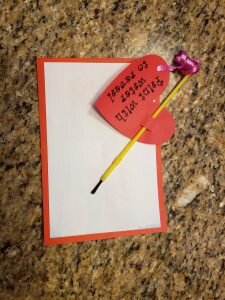
- Have your child write their note on the back of the red paper heart or the back of the red posterboard.
Partially revealed Valentine
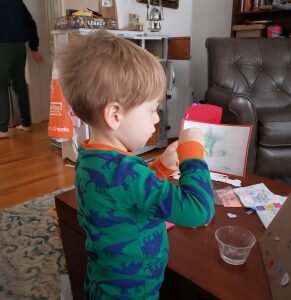
Julius demonstrating the water reveal
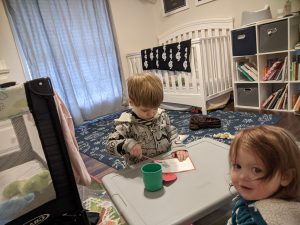
My niece and nephew revealing their valentine!


I like the idea of Julius spitting out incoherent word tornadoes! Also, thank you for being the first to share the secret to the picture reveals. I spent sometime a few months back going down a Pinterest “Rabbit Hole” in hopes of finding directions, but I had no luck and clearly lack your dedication- well done!
Haha yes that is the perfect way to put it!! And I was a bit type a obsessed over this one. I hope you get to try it!