
We took out the Valentine’s decorations this weekend. This was after cleaning the entire house top to bottom (okay middle out). I am ashamed to divulge the last time I’ve really cleaned the house. Luckily I couldn’t even tell you if I wanted to because I honestly cannot remember how long it’s been! After we finished the cleaning, the house was immediately overrun with toys and crumbs and paper scraps and other flotsam from young children. But it is okay because I now also have hearts hanging all over the place. And who could be disgruntled about their chaotic house situation while they have hearts staring them in the face?! No one. If you need convincing, just let me know and I’ll send you some decor.
Valentine’s day, or Lupercalia, (if you’re into Rome, ritual goat sacrifice and random coupling – don’t look at me, I’m not one to kink shame) is only a couple weeks away. For us that means I’ve pulled out the Valentine’s backpacks for the kids again and started leaving them little love notes for the mornings I sleep in. Julius loves it but Patricia told me several times that she wrote last night’s note for me. I don’t know why she was trying to convince me of this, but I can tell you that she did not succeed.
One quick tangent before I show you the craft I’m desperate to show you this week. Silly Julius quotes are so rare these days since he’s such a learned kindergartener, so I have to share this one. He was telling us how they settled a playground dispute earlier in the day, “they did rocks, paper, scissors, shoes.” We then asked him the rules of the game, which he had completely down pat. We then played a game, during which he chanted “rocks, paper, scissors, shoes”. I am ashamed to say I did not correct him. It was too cute. Much like I quickly stopped correcting Patricia’s word “cupcapes”.
Okay, speaking of cute, I really hope you think my latest project is cute. But if you don’t, it’s okay, because I think it is SUPER CUTE. And I’ve still got the hearts to cheer me up. First, some backstory because everything on my blog has backstory. During the pandemic I took a free needle felting class that was remote and lead by our local library. I got hooked! (I’m sure you realized this if you’ve seen any of my silly creations over the years – examples here, here ,here and here.) Since the inaugural class, I’ve taken several other wool fiber classes including wet felting. Last year I couldn’t help myself and went to Walmart after Christmas to see if they had any ornaments for the kids that I could put away for the following Christmas. In the pile of cast offs I found a 5 foot garland of ~1″ white wool balls that was 75% off. I showed it to my mom and soon I had 7 garlands at 75% off (thanks Mom). I swear I had a plan for them all. So I went to the thrift shop and bought a couple of wreath forms for $4 each. Fast forward to 2 weeks ago when I finally decided I was executing my amazing plan.
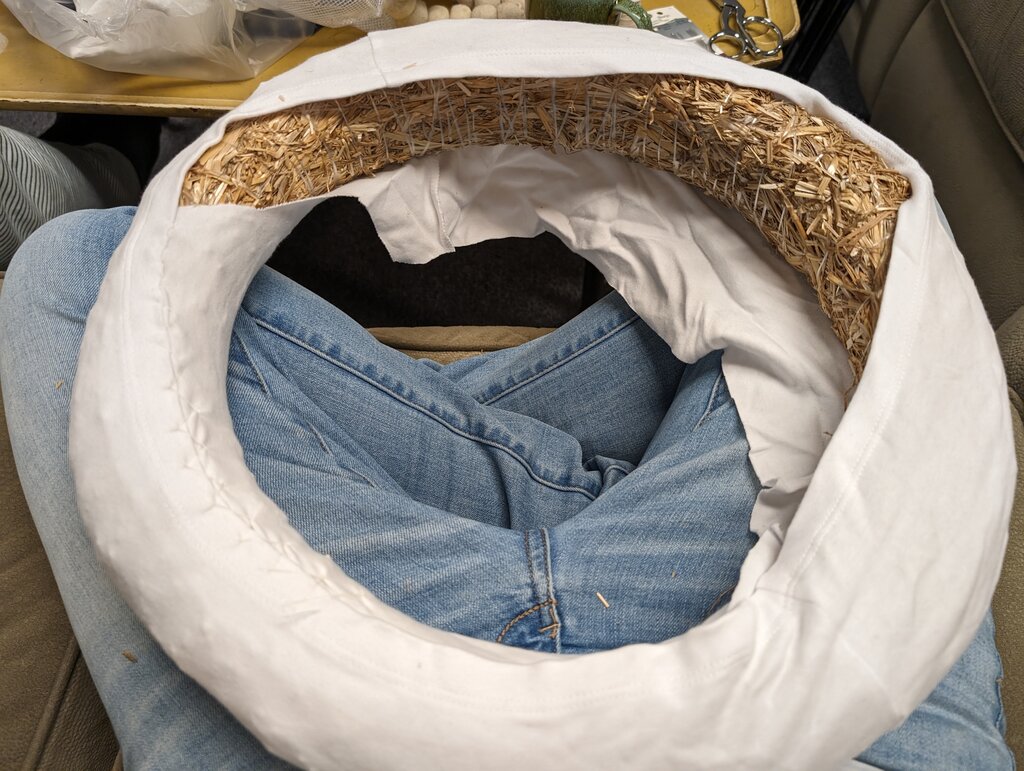
My amazing plan was to make a wreath of wool balls. Yes, I know, you probably figured that out by now on account of the wreath form and the wool balls. Well anyway, this is not a unique idea. I’ve seen and coveted these adorable colorful wool balls wreaths all over pinterest (yes I get lots of pin suggestions of wool balls). But I’ve needle felted my own and it took me forever. This is why I wanted 35 feet of wool balls. These balls are not colorful though, so originally I thought I would dye them. Unfortunately I realized wool doesn’t take my favorite dye (fiber reactive) well since it’s an animal fiber. Instead, I finally put my plan into action using the cut off bottom from that team rocket shirt I made, a bit of additional colored wool roving and the aforementioned wreath form and wool balls.
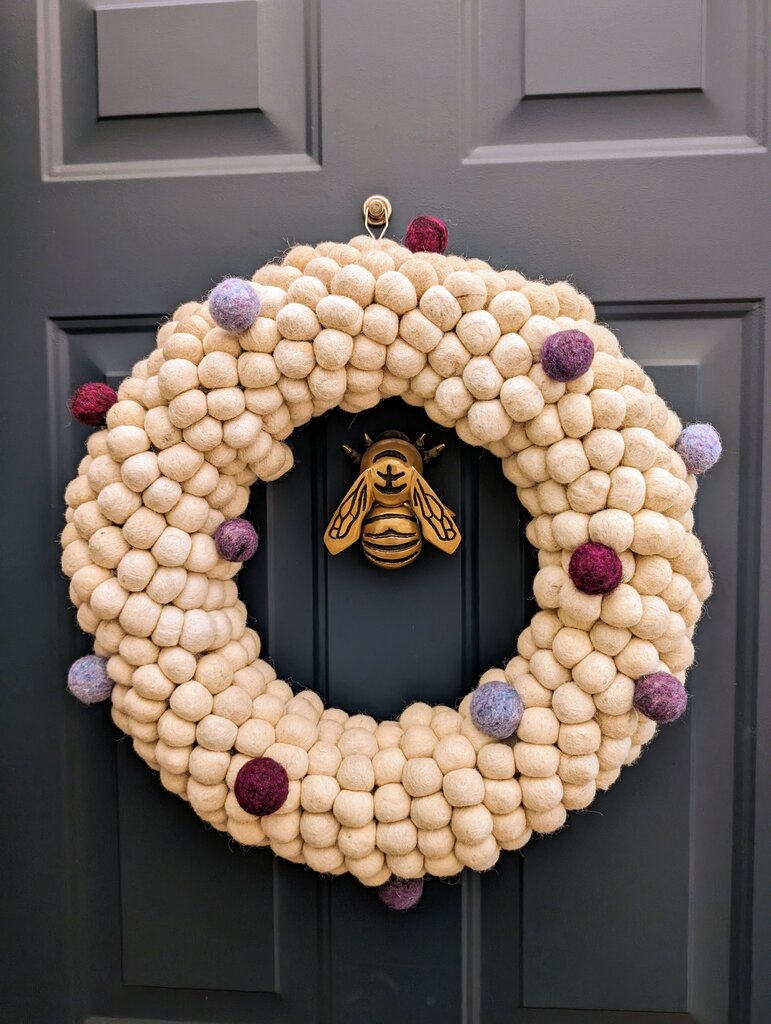
Super Awesome Wool Ball Wreath
What you’ll need:
- A crap ton of 1″ wool balls (I used around 420 wool balls)
- A straw wreath form (mine was 15″ wide)
- sharp needle and thread
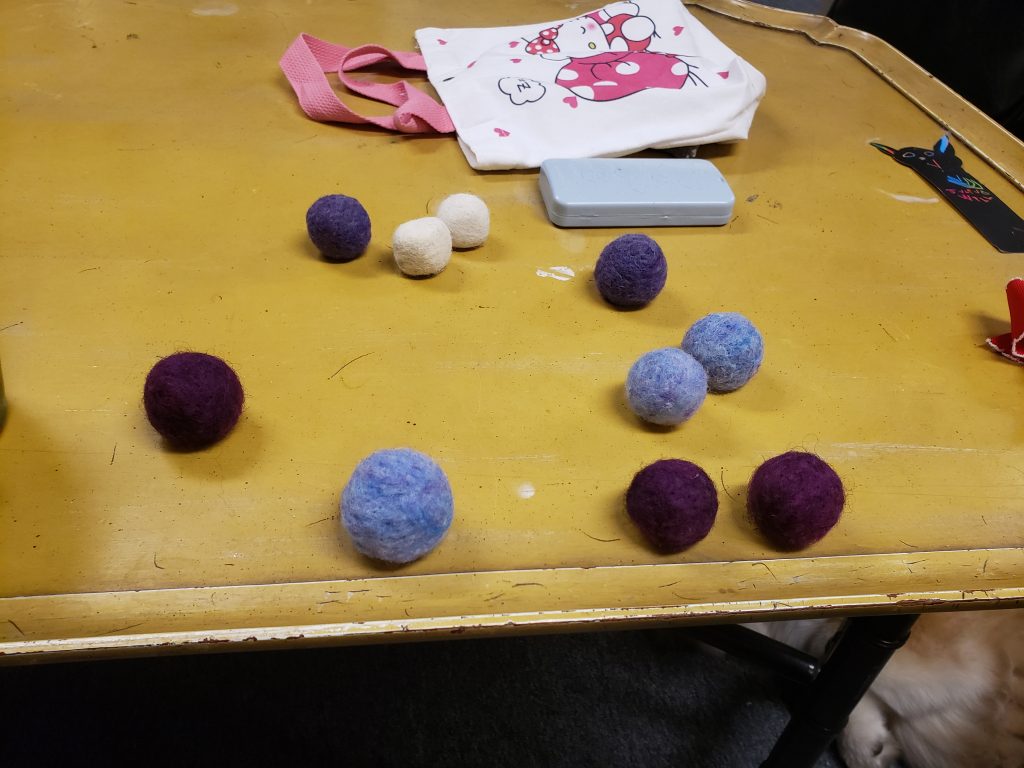
- wool roving dyed in various colors (you will only need a small amount, enough to cover 16-20 balls)
- fabric to cover the wreath form (mine was knit fabric from the bottom of an old tshirt)
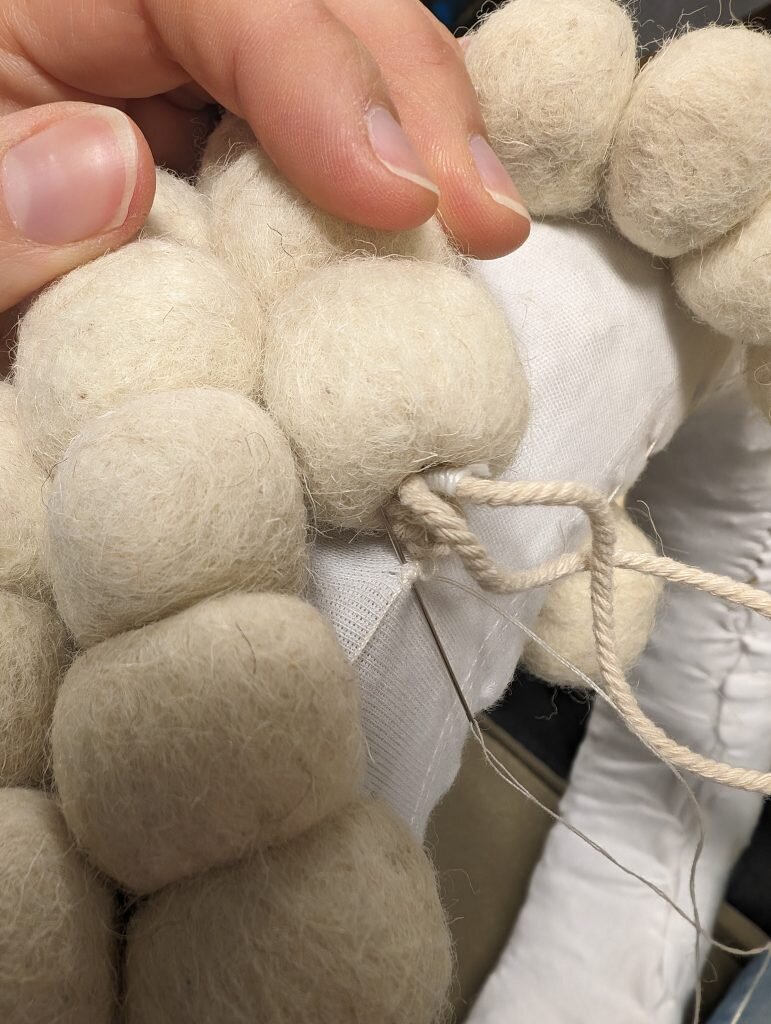
- Wrap your knit fabric around your wreath form to cover all the straw. Stitch in place.

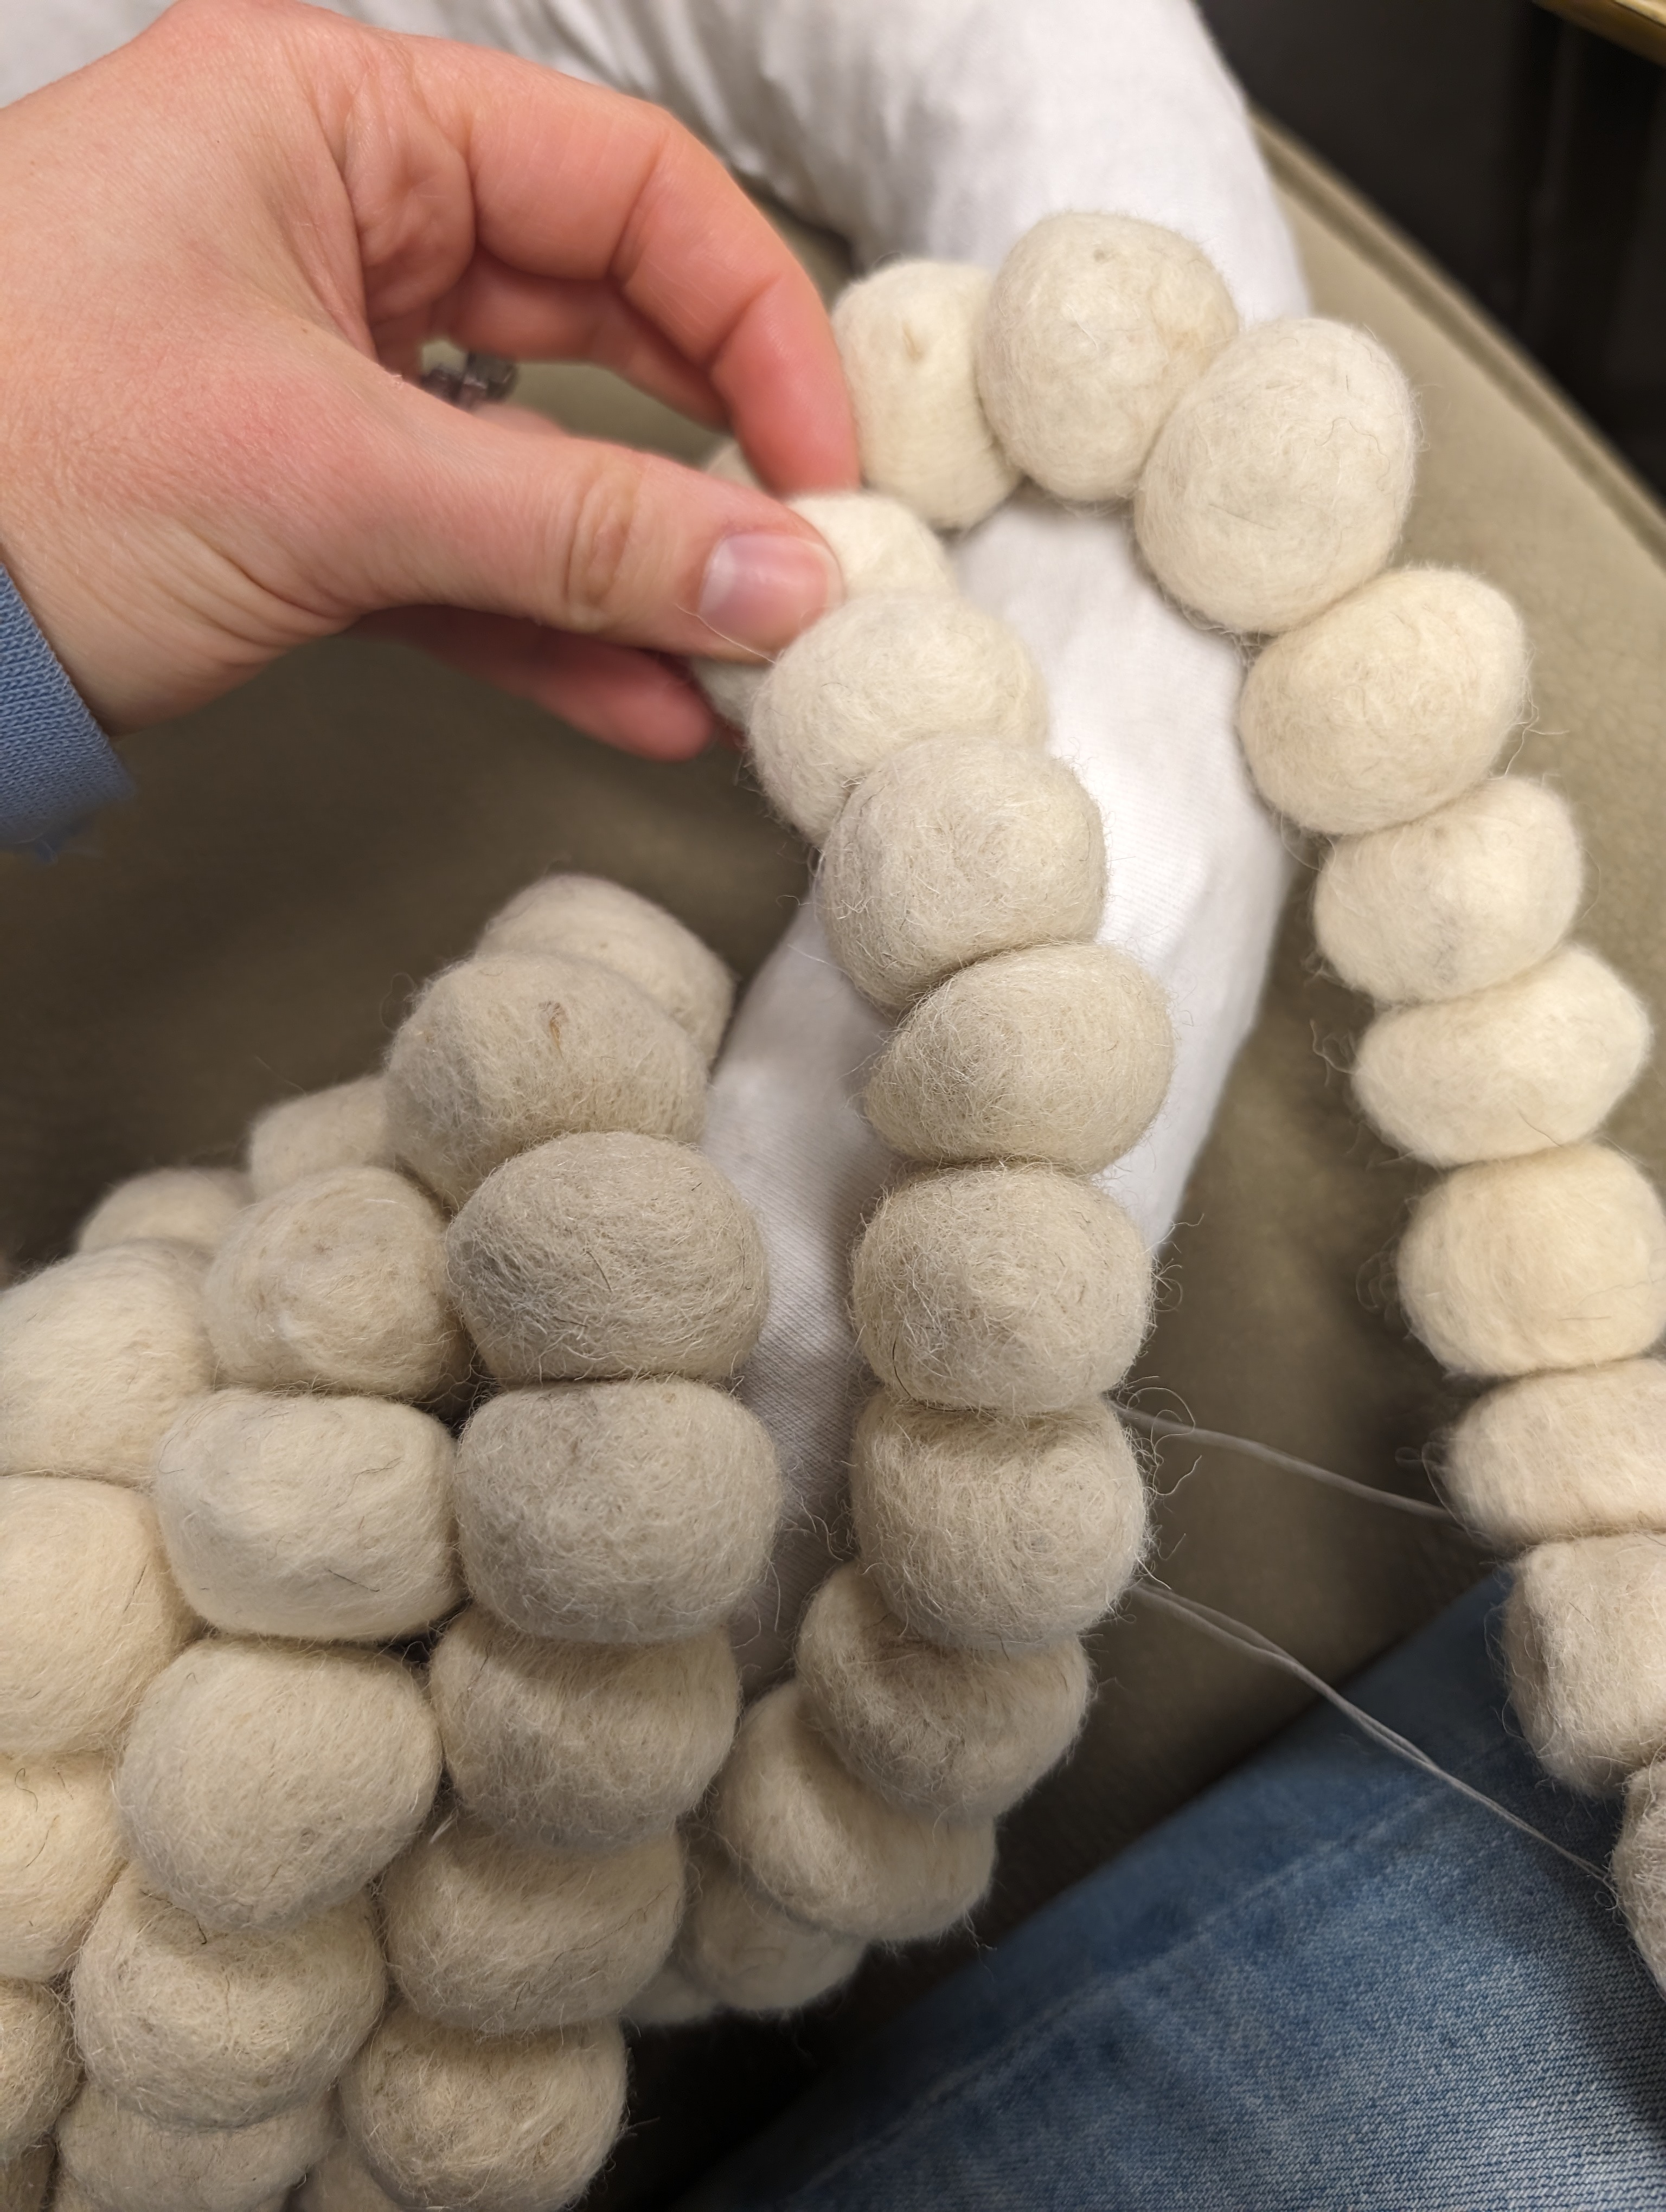
- Next, if your balls are not strung on a thread, string onto a thread. Tie the ends so the balls cannot fall off. Mine were already threaded so it saved me a step.
- Lay the wreath on a flat surface and place one end of the ball chain to the outside of the wreath along the table. Affix with needle and thread by stitching thru the wool ball and thru the fabric covering the wreath.
- Pull the string of balls over the wreath and affix to the wreath by stitching into the fabric, securing the thread, then looping it between two balls over the string or thread used to hold the ball chain together and back into the fabric. Secure.

- Affix the center of the line of balls you just attached, by again stitching into the fabric, securing the thread, then looping it between two balls in the center of the line then back into the fabric. Secure.
- Bring the balls back across the front of the wreath towards the outside again and again affix on the outside of the wreath using the technique in step 4.
- Again follow step 5.
- Repeat steps 4-7 until you come to where you meet on the inside of the wreath form. Here you will need to be a bit more creative, and fill and stitch things in a ‘v’ pattern instead of in a line pattern.
- Once you get to the last gap, stitch down the last ball you secured, thru the wool.
- Next cut off the string of remaining balls, 3″ or 4″ down from where you secured the last ball. Remove the balls that are not secured and then knot the string/thread holding the balls on the wreath. Secure the knot on the underside of the wreath.
- Add a loop of string on the back side of the wreath form.
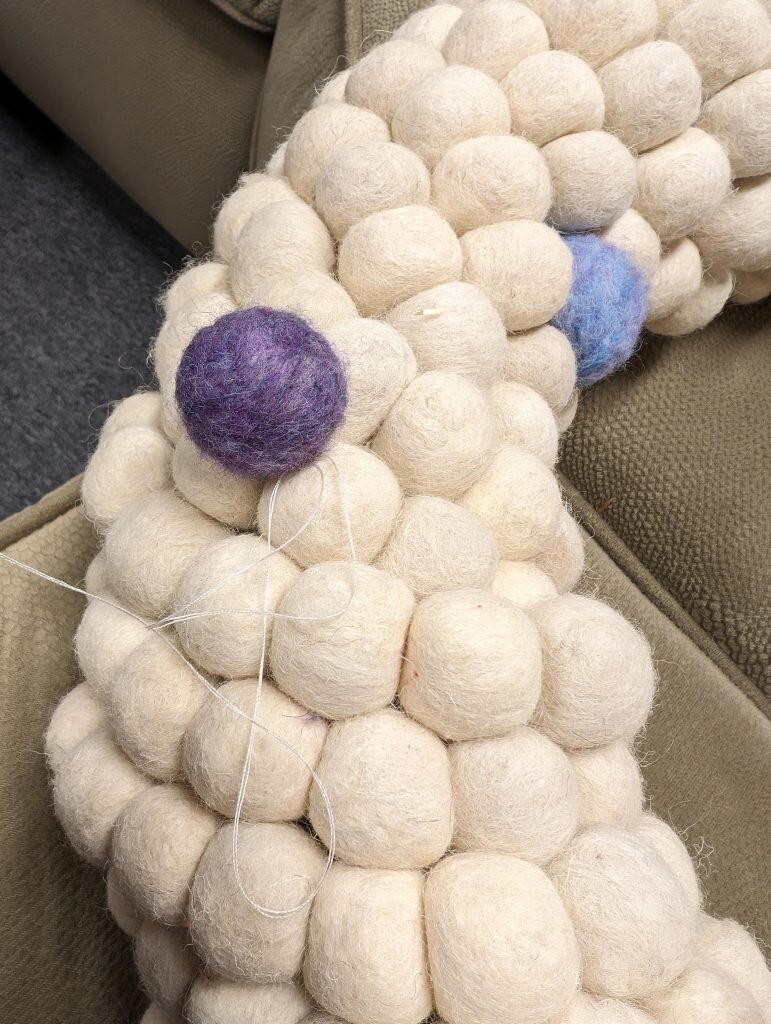
- Needle felt colorful roving on top of 16-20 remaining balls – you can make them various colors and sizes. I made mine in shades of purple because it felt very snowy and wintry.
- Take your needle and thread and attach each ball to the wreath by stitching thru the wool ball and the balls where you want to attach.
- Voila!
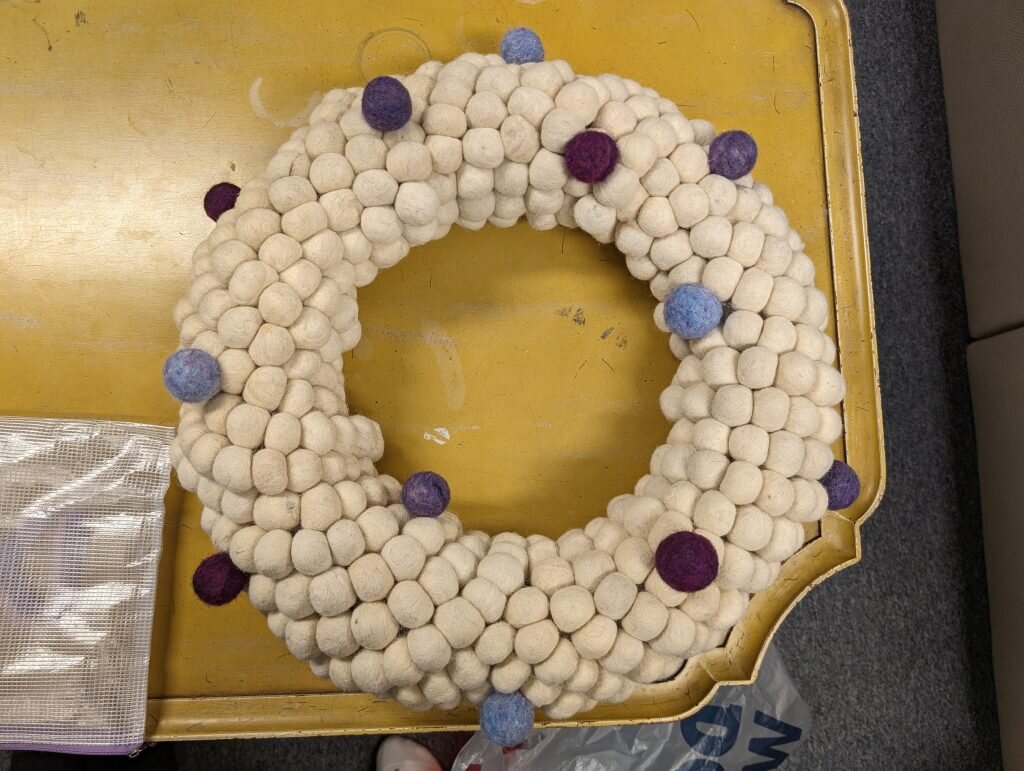


Note – my wreath is huge – it’s probably 18″ wide. You can always make a smaller one with less balls and a smaller wreath form!

I love “cupcakes”.
Makes me think of the Shoshana’s lunch between two slices of bread. You know, “smaniches”.
I meant to say “cupcapes”…damn auto correct.
Hahaha I love smaniches!
Super cute project!
Thanks Amy!!!
love the wreath!
Thanks Mom!!!