
Will and I cleaned the entire house this weekend!! I know that a bunch of people are going to comment that cleaning your house is a sign of nesting… but that just isn’t true for me. I really don’t believe nesting exists or if it does exist I don’t believe I have gotten it. I have a perfectly logical reason for cleaning our house – it was REALLY messy. All the lovely gifts that everyone shipped to us took up a lot of space so they’ve been occupying our living room, the babies room and the upstairs landing. Really creating quite a trip hazard. Last week, when my leave from work started, I washed everything – diapers, baby clothes, blankets, etc. (And that was also not because of nesting, just because at some point I needed to wash everything, and since the baby could arrive at any moment sooner was better than later. Plus without any washed baby clothes I couldn’t fully pack my maternity bag and at 38 weeks everyone tells you you are crazy if your bag isn’t packed yet.)
After I did all the washing I was left with piles of packaging and boxes that needed to be sorted appropriately into recycling and trash. I also quickly realized I had no where to put the baby’s clothes except the closet which at the time was holding all our spare linens. In order to create space for the baby’s clothes in the closet I had to move the billion comforters and sheets and sleeping bags into other locations around the house, which meant slightly reorganizing two other closets. (There is perfect logic to this – I didn’t just decide – ‘this random closet is messy, let me clean it’! I was forced to reorganize to make room for all this new gear we got for the baby!) Anyway. After that was done I was left with more piles of things – things to donate. All these piles of recycling and donations and gifts means poor Roomba hasn’t been able to properly run for weeks. And have I ever mentioned that corgis are notorious shedders? Hence in the last few weeks our house became dirty and filled with piles of crap! Are you starting to believe I just needed to clean? I hope so.
Anyway – Will helped me break down all the boxes, and then took a ton of the boxes to our recycling center because we literally ran out of room in our garage. Then we moved all the donation stuff to the back of my car (I’ll need to make a trip to Savers at some point soon). And I somehow managed to get all the gifts put away after reorganizing the closets. Finally we dusted and vacuumed and now the house looks glorious! See? Perfectly logical, non-hormonal reasons for cleaning the house.
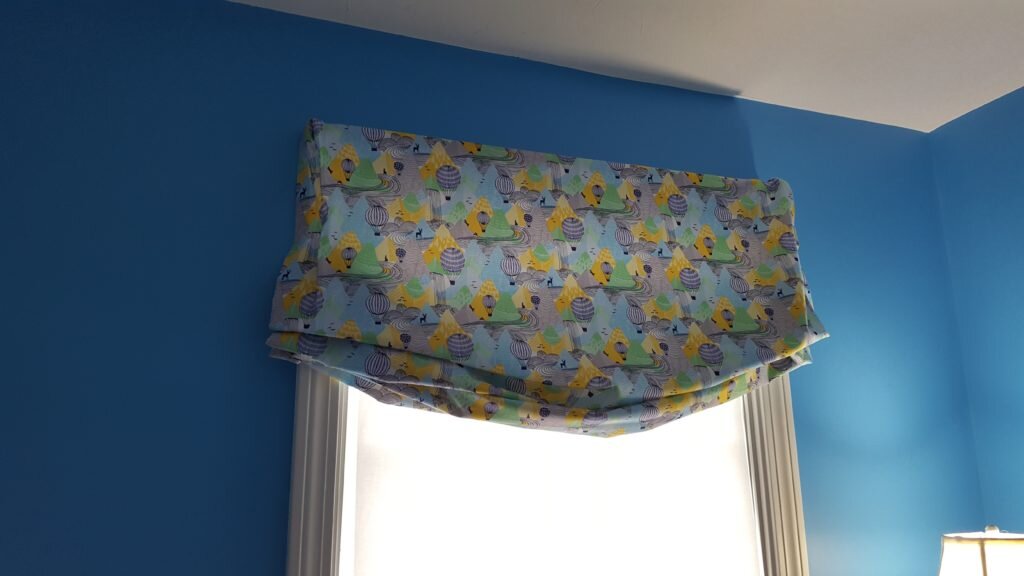
On top of cleaning and decluttering the house, I was able to actually finish the curtains for the nursery! I finally found some fabric I liked! I ordered way too much so I have been working on several projects that will use the print. The curtains I made are basic relaxed roman shades. They have a single swag, so they were pretty simple to make. Since cords are not child-friendly I decided to make them faux-roman shades. They are simply tied permanently in their current position (well semi-permanently, I could eventually convert to real shades if I wanted). All total they took me about 2 days to make and one of those days was 90% measuring and cutting!
Relaxed roman shades
DIY Relaxed Roman Shades
What you’ll need:
- Fabric and lining fabric – this will depend on your total measurements from step 1 and 2 and the width of your fabric. I required 5 yards of 44″ fabric.
- 1/4″ dowel – mine needed to be 36 5/8″ wide
- 10-12 1/2″ plastic rings
- string or ribbon
- scrap wood in your window width
- 3 “L” mounting brackets
- staple gun
- Using a fabric measuring tape measure the droop of the swag. For me my window width was 36 5/8″ and my swag with droop looked best at 39″. Next measure the total drop of your shade – if you want a functional shade this should be the entire length of the window from where you are going to hang it to the sill. Non-functional shades can be less. Also choose what size wood you will use for mounting. I used scrap wood from my friend that was 2″x2″.
- To find the width of your shade add the depth of the mount (2″ for me), the droop of the swag, and 3″ for seam allowance. Add 3″ seam allowance to the total drop of your shade for the length.
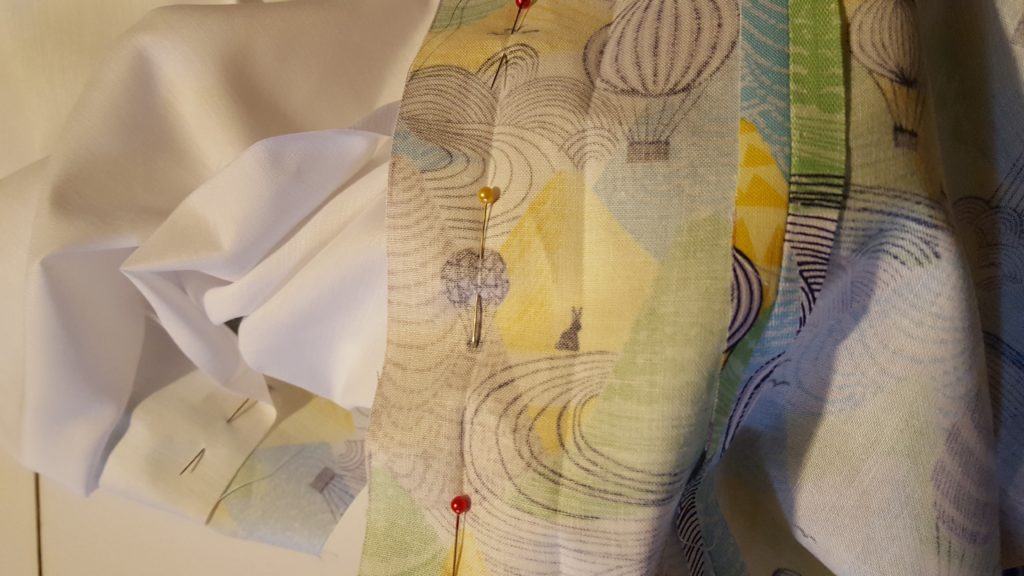
- Cut out a length of fabric for your shade that is the width and length you found in step 2. Note: if your fabric width is less than the width you need for your shade, you will need to attach two pieces of fabric together. Make the seamline on the corners of the fabric (where the corner of the mount will hit) and add 1/2″ to each piece of fabric so you can stitch it together.
- Cut out a length of fabric for your lining that is the width – 3″ x length – 3″ in step 2. (This should be the width and length minus seam allowance).
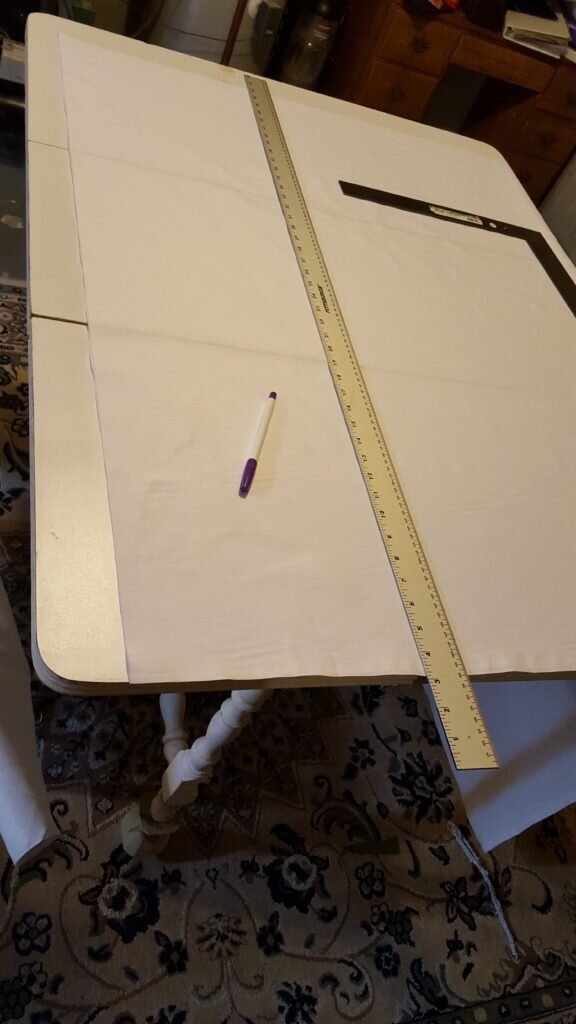
Cut out lining fabric for curtains – omit seam allowance.
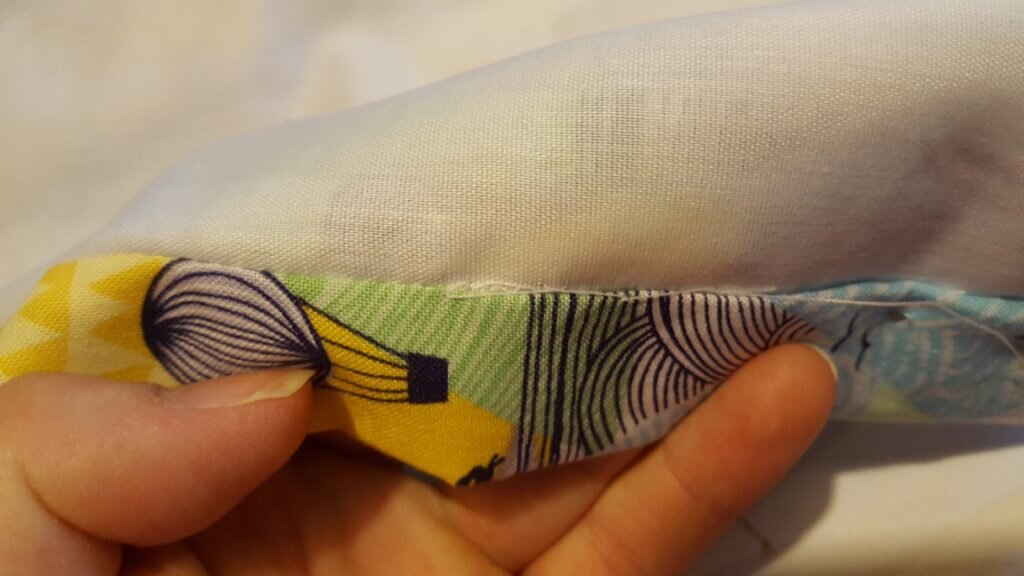
- Fold and press the length of the fabric under 1/2″ on either end. Fold and press under another inch.
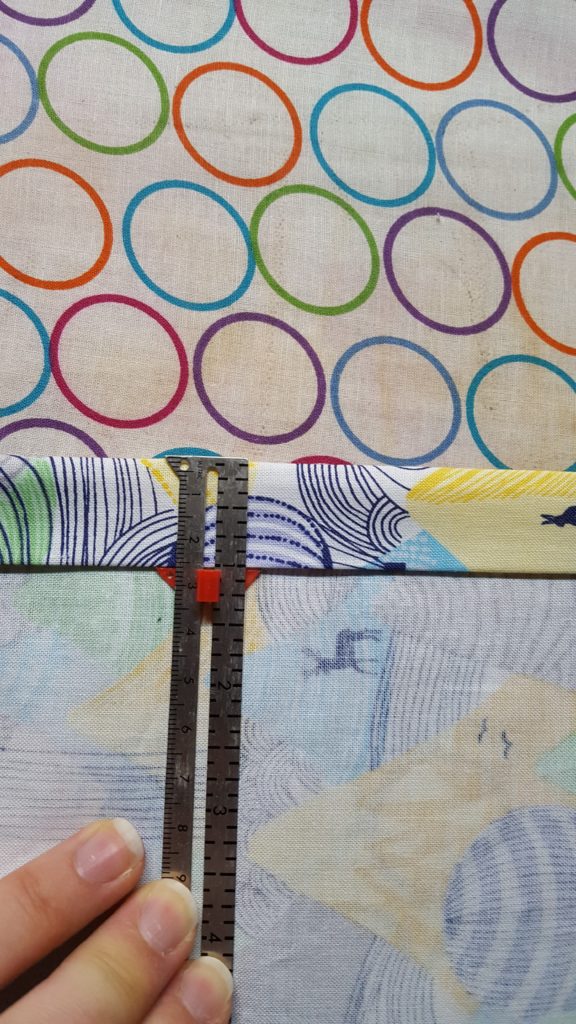
Press under 1/2″ and 1″ along length. (Shown here pressing the final 1″)
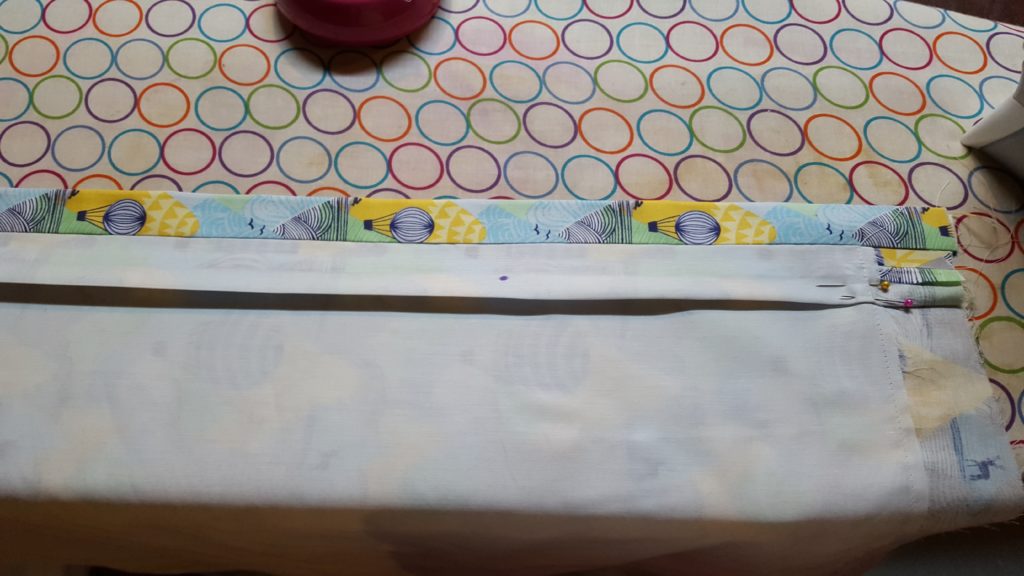
- Slip the lining inside your fabric so the edges of the lining touch the folds you made in step 5. Make sure the place the lining so it sits 1.5″ from the top and bottom of the main fabric.
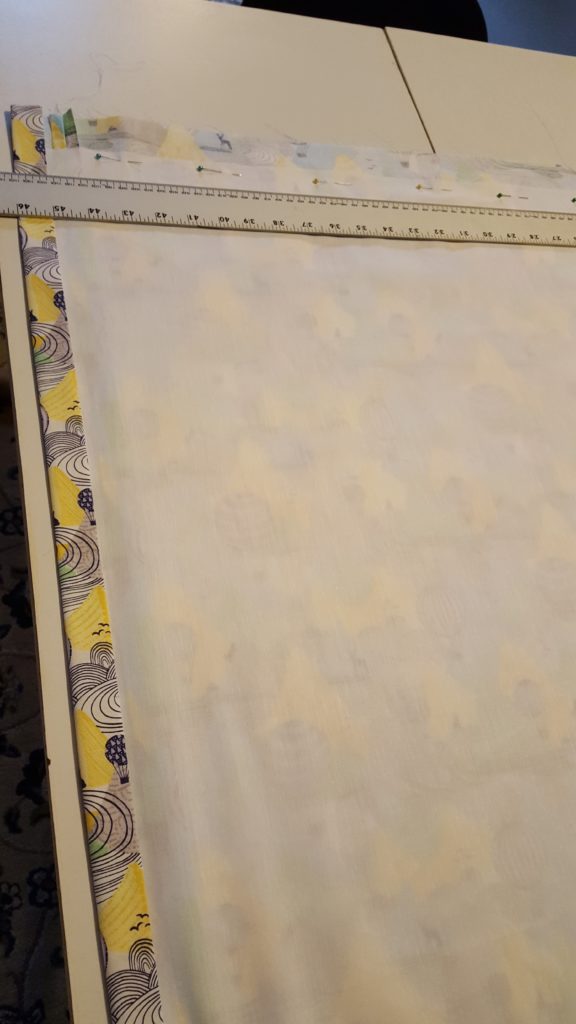
- Pin the main fabric to the lining along the 1/2″ fold line, right sides together. (The edge of the fabric should be 1/2″ from the edge of the lining.) Stitch along the fold line, stopping 1″ from the lining on top and bottom, then repeat for the second edge.
Pin lining along first foldline.
- For the bottom and top hem, fold under 1/2″ and press, then 1″ and press. Form a mitered corner. I explain mitered corners in this post. (Note the picture shows a thinner top hem, but it is easier if you keep all the same hems the same width like I specify in the instructions here. )

Hem top and bottom of curtain as in step above, and add a mitered corner.
- Hand stitch the top and bottom hem using the flat catch stitch. At this point you should insert a dowel into the center of the bottom hem. Width should be the width of your window.
Flat catch stitch the top and bottom hems.
- Next press your excess drop length into a pleat down from the the corner of the mount. For me I had about 1 1/8″ of excess on each end, and I have a 2″ deep mount. So I marked the 2″ line and folded under slightly more than 1/2″ of fabric to meet this line and pressed.
Press excess drop width
- Repeat on the other side.
- Starting at the bottom hem, mark in 1 foot increments up the shade, along the mount depth line (for me this was 2″ in). This is the positioning for your rings.
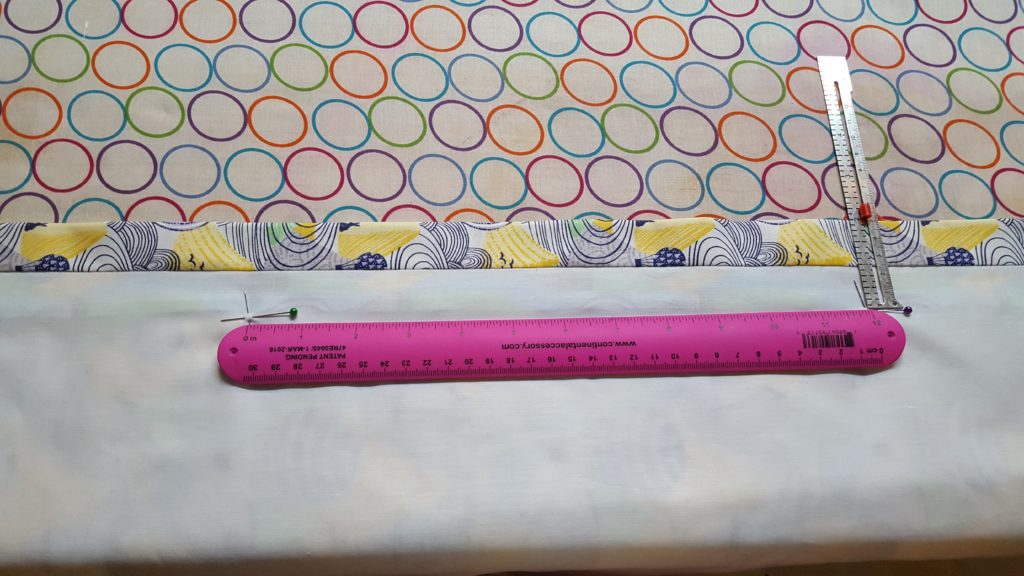
Mark down the fabric in1 foot increments from the mount corner . This will be your ring positioning.
- Hand sew rings up the shade at the positions you marked.
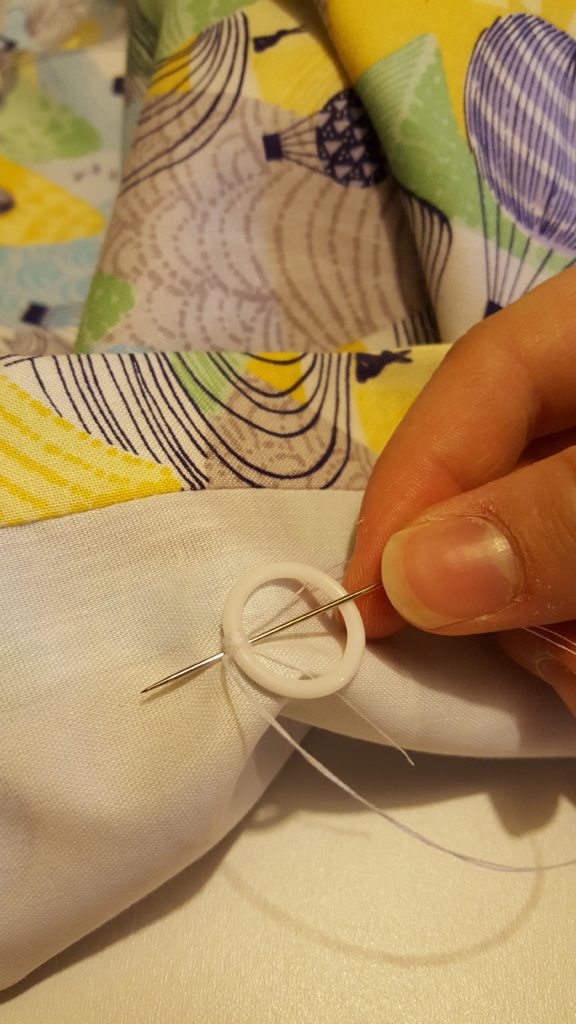
Hand stitch rings along the markings you made.
- Prepare your shade mount by cutting it to the width of the window.
Cut your shade mount to the width of the window.
- Cover the mount in cheap scrap fabric using a staple gun.
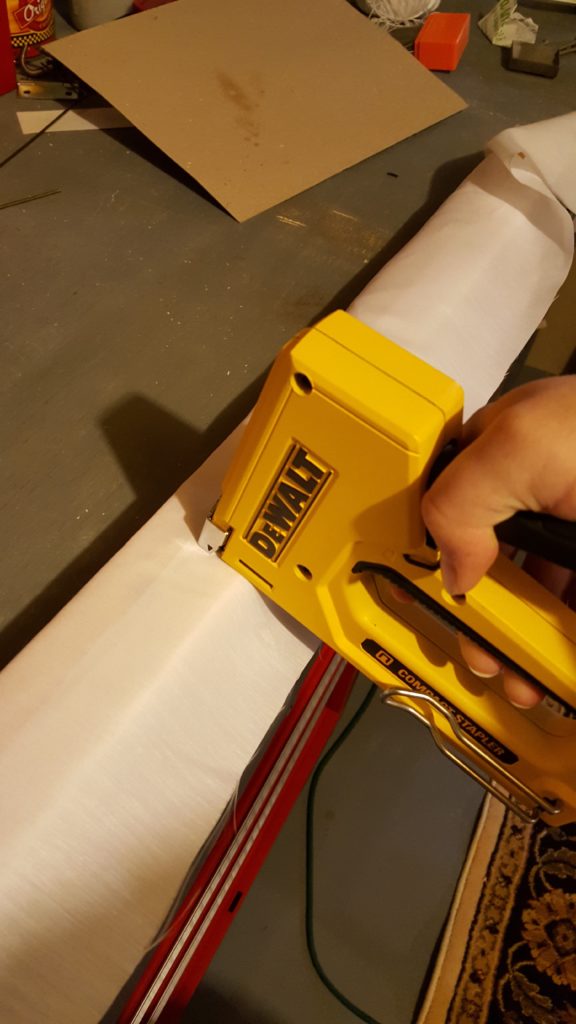
Cover the mount in scrap fabric.
- Staple the top of the shade to the top of your mount, lining up the edges of the shade with where the mount will hit the wall, and the pleats with the front corner of the mount.
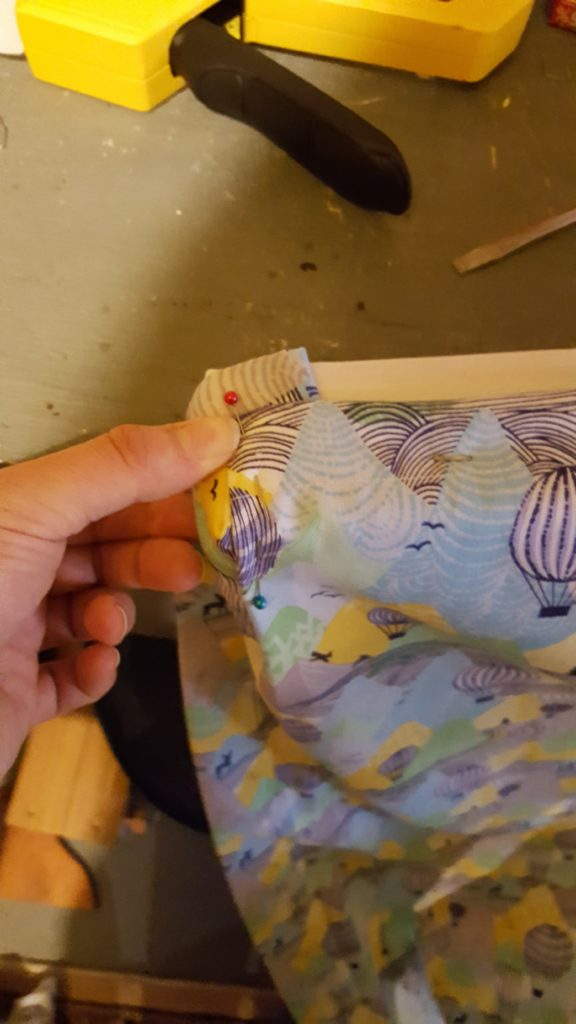
Staple top of shade to top of mount, use care to keep pleats intact.
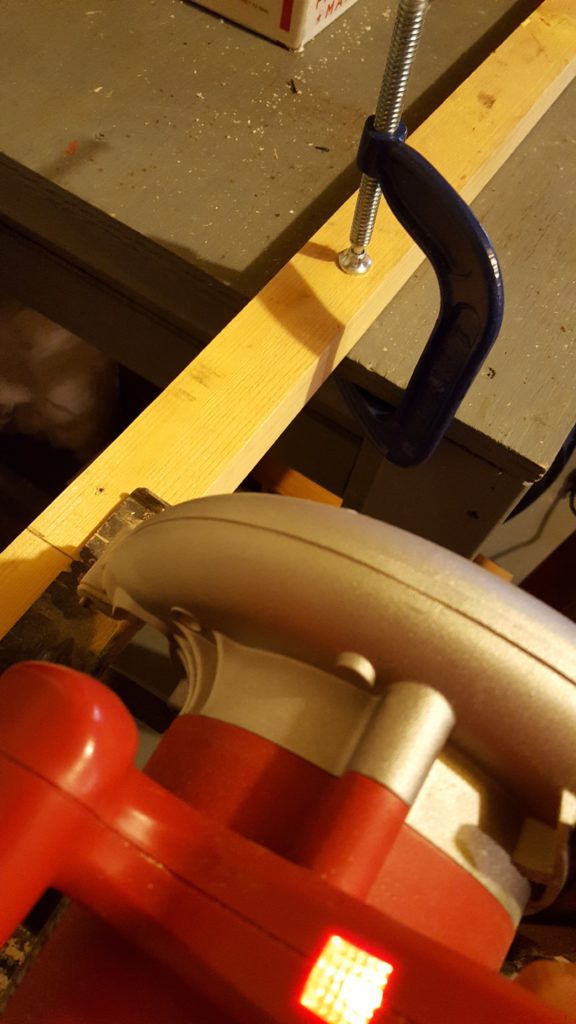
- Mount your shade to the wall by screwing “L” brackets to the bottom of your mounting board. Screw the “L” brackets into your wall above the window.
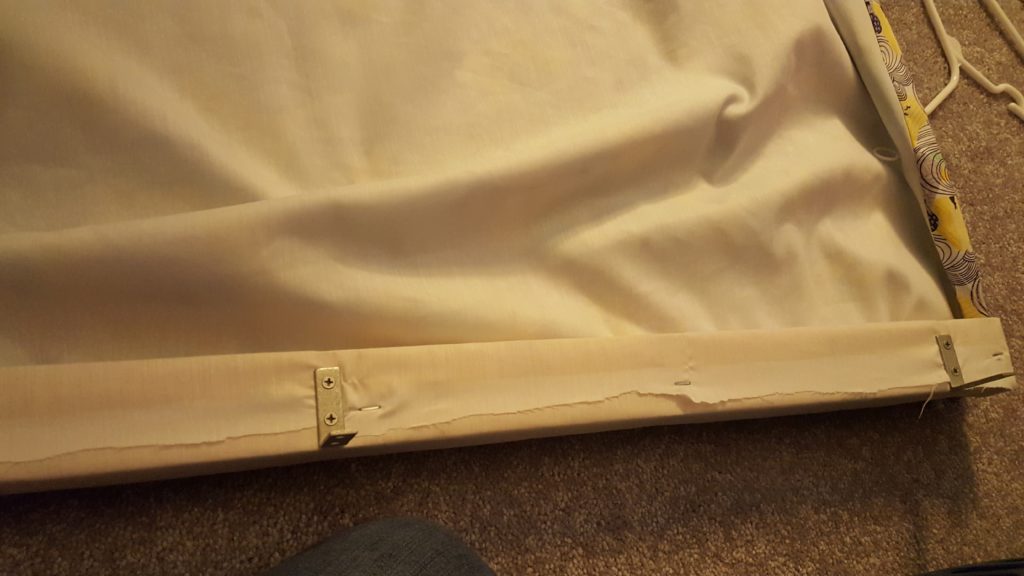
Screw “L” brackets to bottom side of mounting board.
- Finally thread some string or ribbon through the rings on each side of the fabric and tie together at your desired height.

Finished curtains tied at highest height.
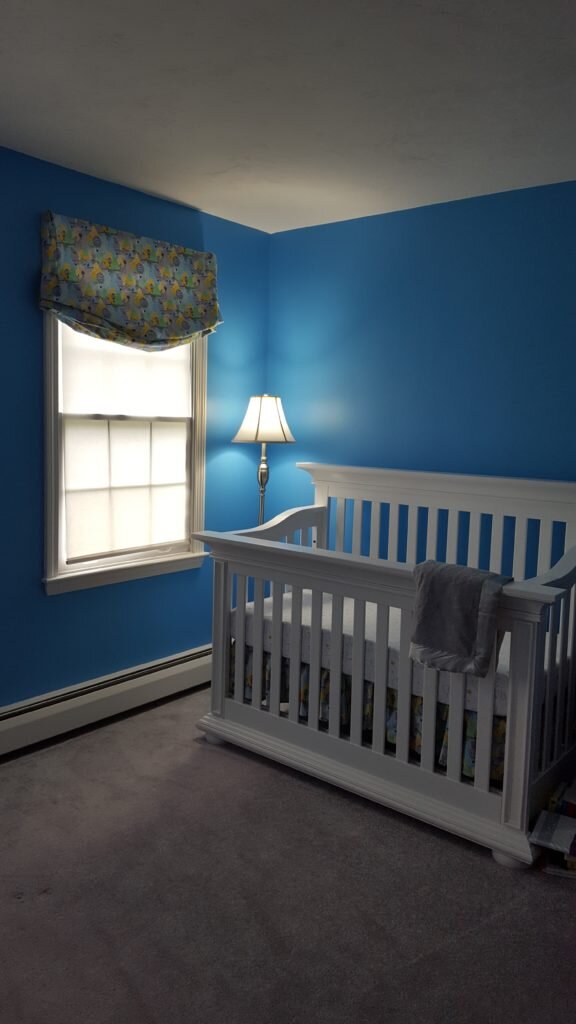
Curtain and crib.
