See Ya Suckers

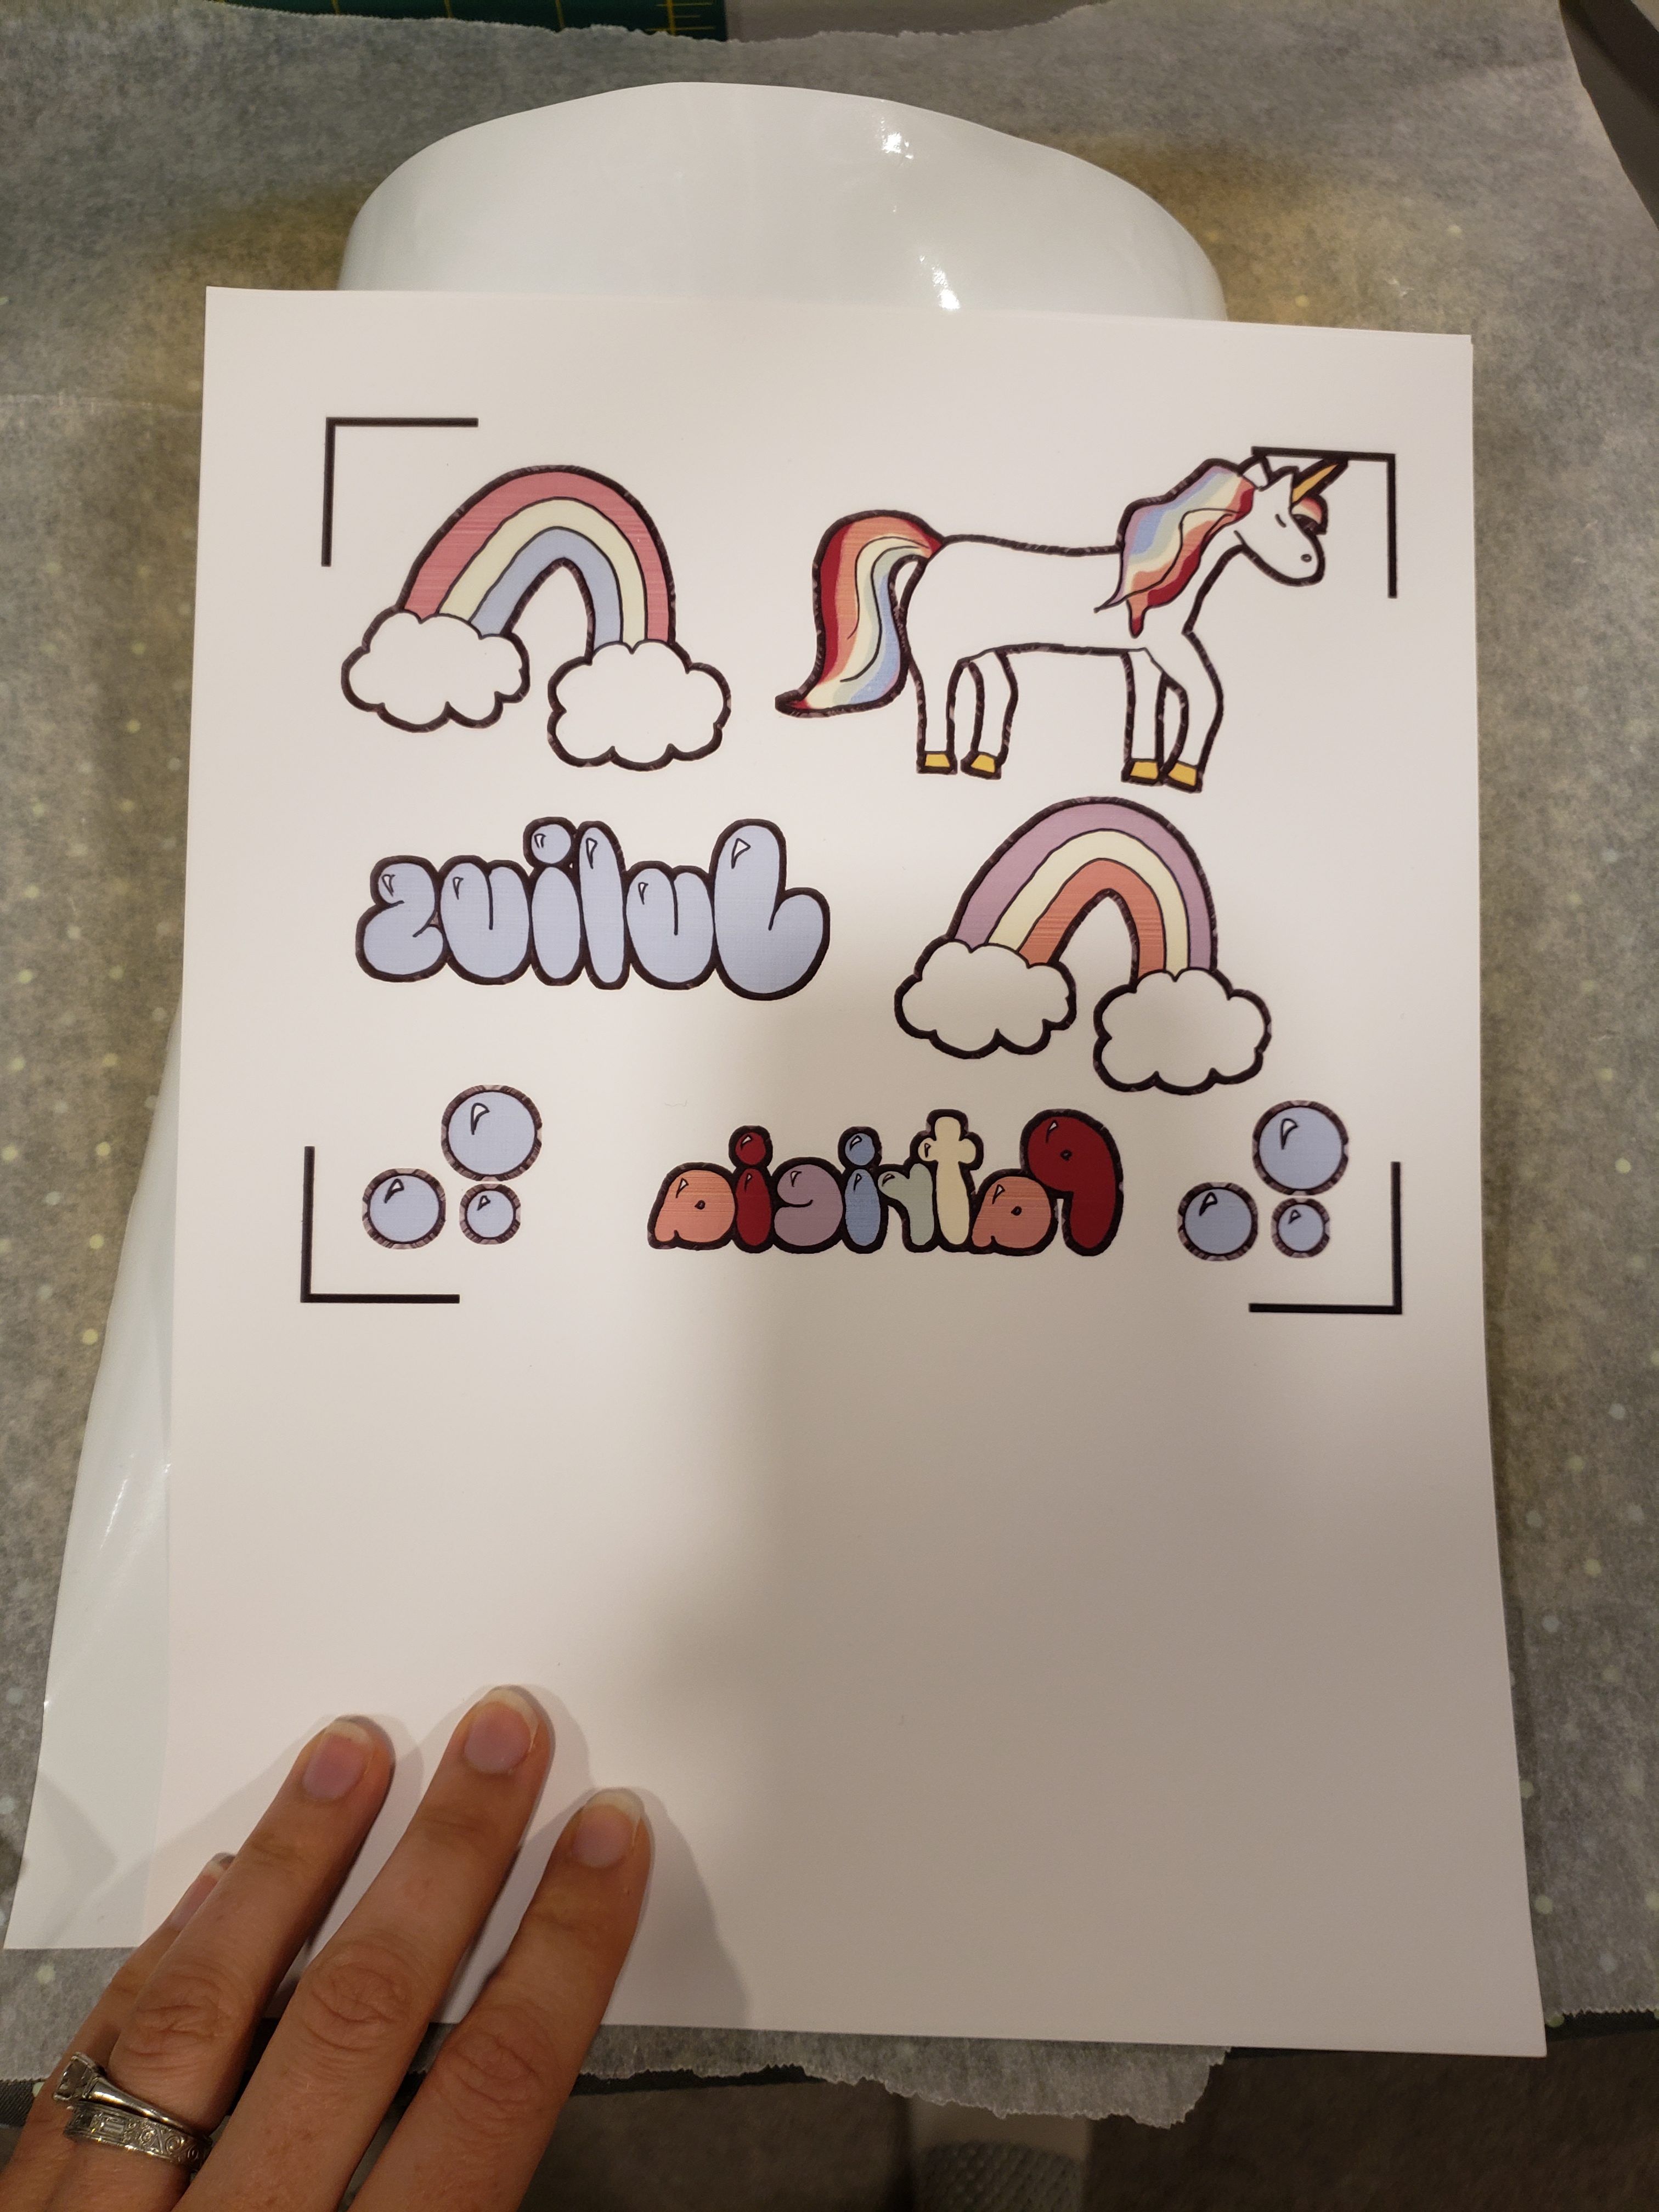
Well you probably have been wondering where I was last week!  Or maybe you didn’t even notice!  Last week I was swamped between Halloween and finishing up a bunch of crafts/prep work for Julius’s birthday party this past Sunday.  It was a wild party, but I’ll tell you about that in a later post.  Today I’m getting together presents for Julius’ actual birthday tomorrow and doing more things for Patricia’s party this weekend.  Yeesh.  Talk about my marathon month!

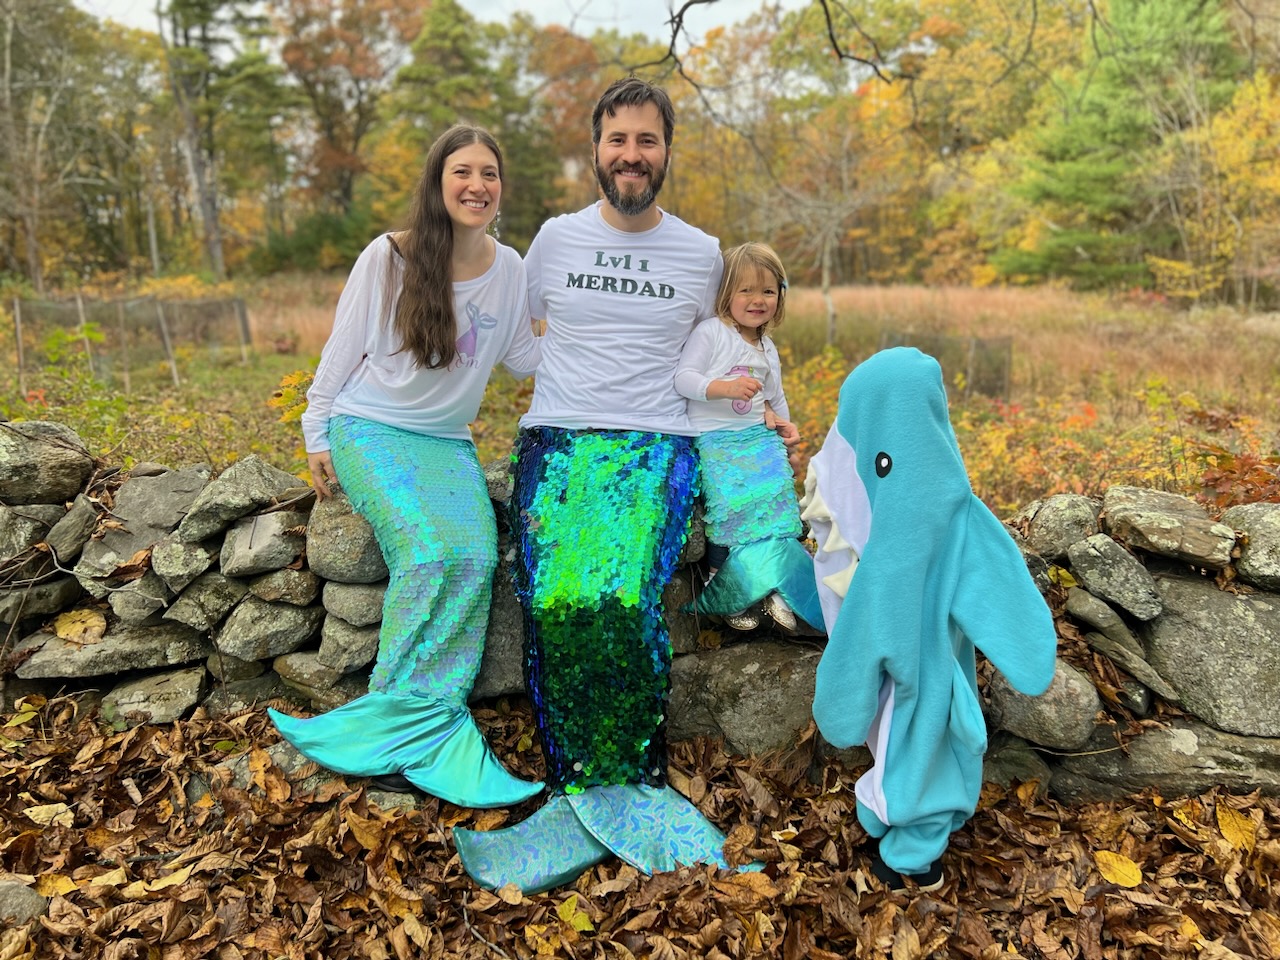
I have sooo many adorable quotes though from the last couple weeks, that I thought I would share some of those, plus share some pictures from a celebration that is nearly a year old now that I haven’t found the right time to post!  It’s a win win win!  First for the quotes…

First, apparently Julius has been teaching Patricia the colors of the traffic lights.  But maybe not just the traffic lights… here is a conversation I overheard that slayed me:

Julius: What’s the green light mean?

Patricia: Go.

Julius: What’s the red light mean?

Patricia: Stop.

Julius: What’s the yellow light mean?

Patricia: Police is comin’.

Julius: Nope I stumped you!

Patricia: Slow down.

Julius: What’s the blue light mean?

Patricia: Police is comin’.

Okay another one that I have to put on here is this conversation between Julius and Patricia, talking about her “babies”, a myriad of stuffed animals who she won’t go anywhere without.

Patricia: My baby has a rash.

Julius: My baby has a rash too.

Patricia: Is Gaga your baby?  (Note: Gaga is Julius’s stuffed toy dog)

Julius: No he’s a 10 year old.

Patricia: Oh does he go to gymnastics?

Julius: No.

Patricia: Does he live in preschool?

Here’s one that I love.  One of the online card games Will plays has a card called “Beast Mama” and when you play it it says, “best mama is the beast mama”.  My children quote this everytime they are happy with me.  For instance, “you’re the best mama. Best mama is the beast mama!”  Then Patricia said this poetic slant rhyme:

Best mama is the beast mama

Best dada loves the beast mama

And a few one offs:

Patricia: A-R-A-R (or other random string of letters) I love you!  (Julius spells I L-O-V-E Y-O-U a lot)

Patricia: “Silly mama!” Said in a cheerful laughing voice whenever I do anything wrong.  It makes everything better.  For instance, “Dada left my pants at home today, isn’t that so silly?!  Silly dada!”

Patricia (While “reading” the little critter Halloween book):  “Me and my sister are going Halloween-ing”

And finally:

Patricia: “Mary had an oxygen who lives on white tail lane”

Okay now for the fabulous virtual party I have been waiting to show you!  My dear friend and co-worker Roger retired this past February.  No one was going into the office those days (let’s be honest I’m still not going in), so Amy and I arranged Roger a silly virtual retirement party complete with our good buddies Pat&Ron, snarky cookies and a silly banner for Roger to use on zoom calls.  Roger dubbed the 3 of us “AARP” (Amy Alexis Roger Pannell) many years ago and the acronym stuck.  You may remember other shenanigans with Roger such as peeps, more peeps, and decorating Amy’s cube with her own private island consisting of 300lbs of play sand (why don’t I have a picture of this?!)  Anywho, I have been so sad Roger was leaving me at work that I thought I would make him this very honest cookie.  You might have to zoom in and read between the lines.
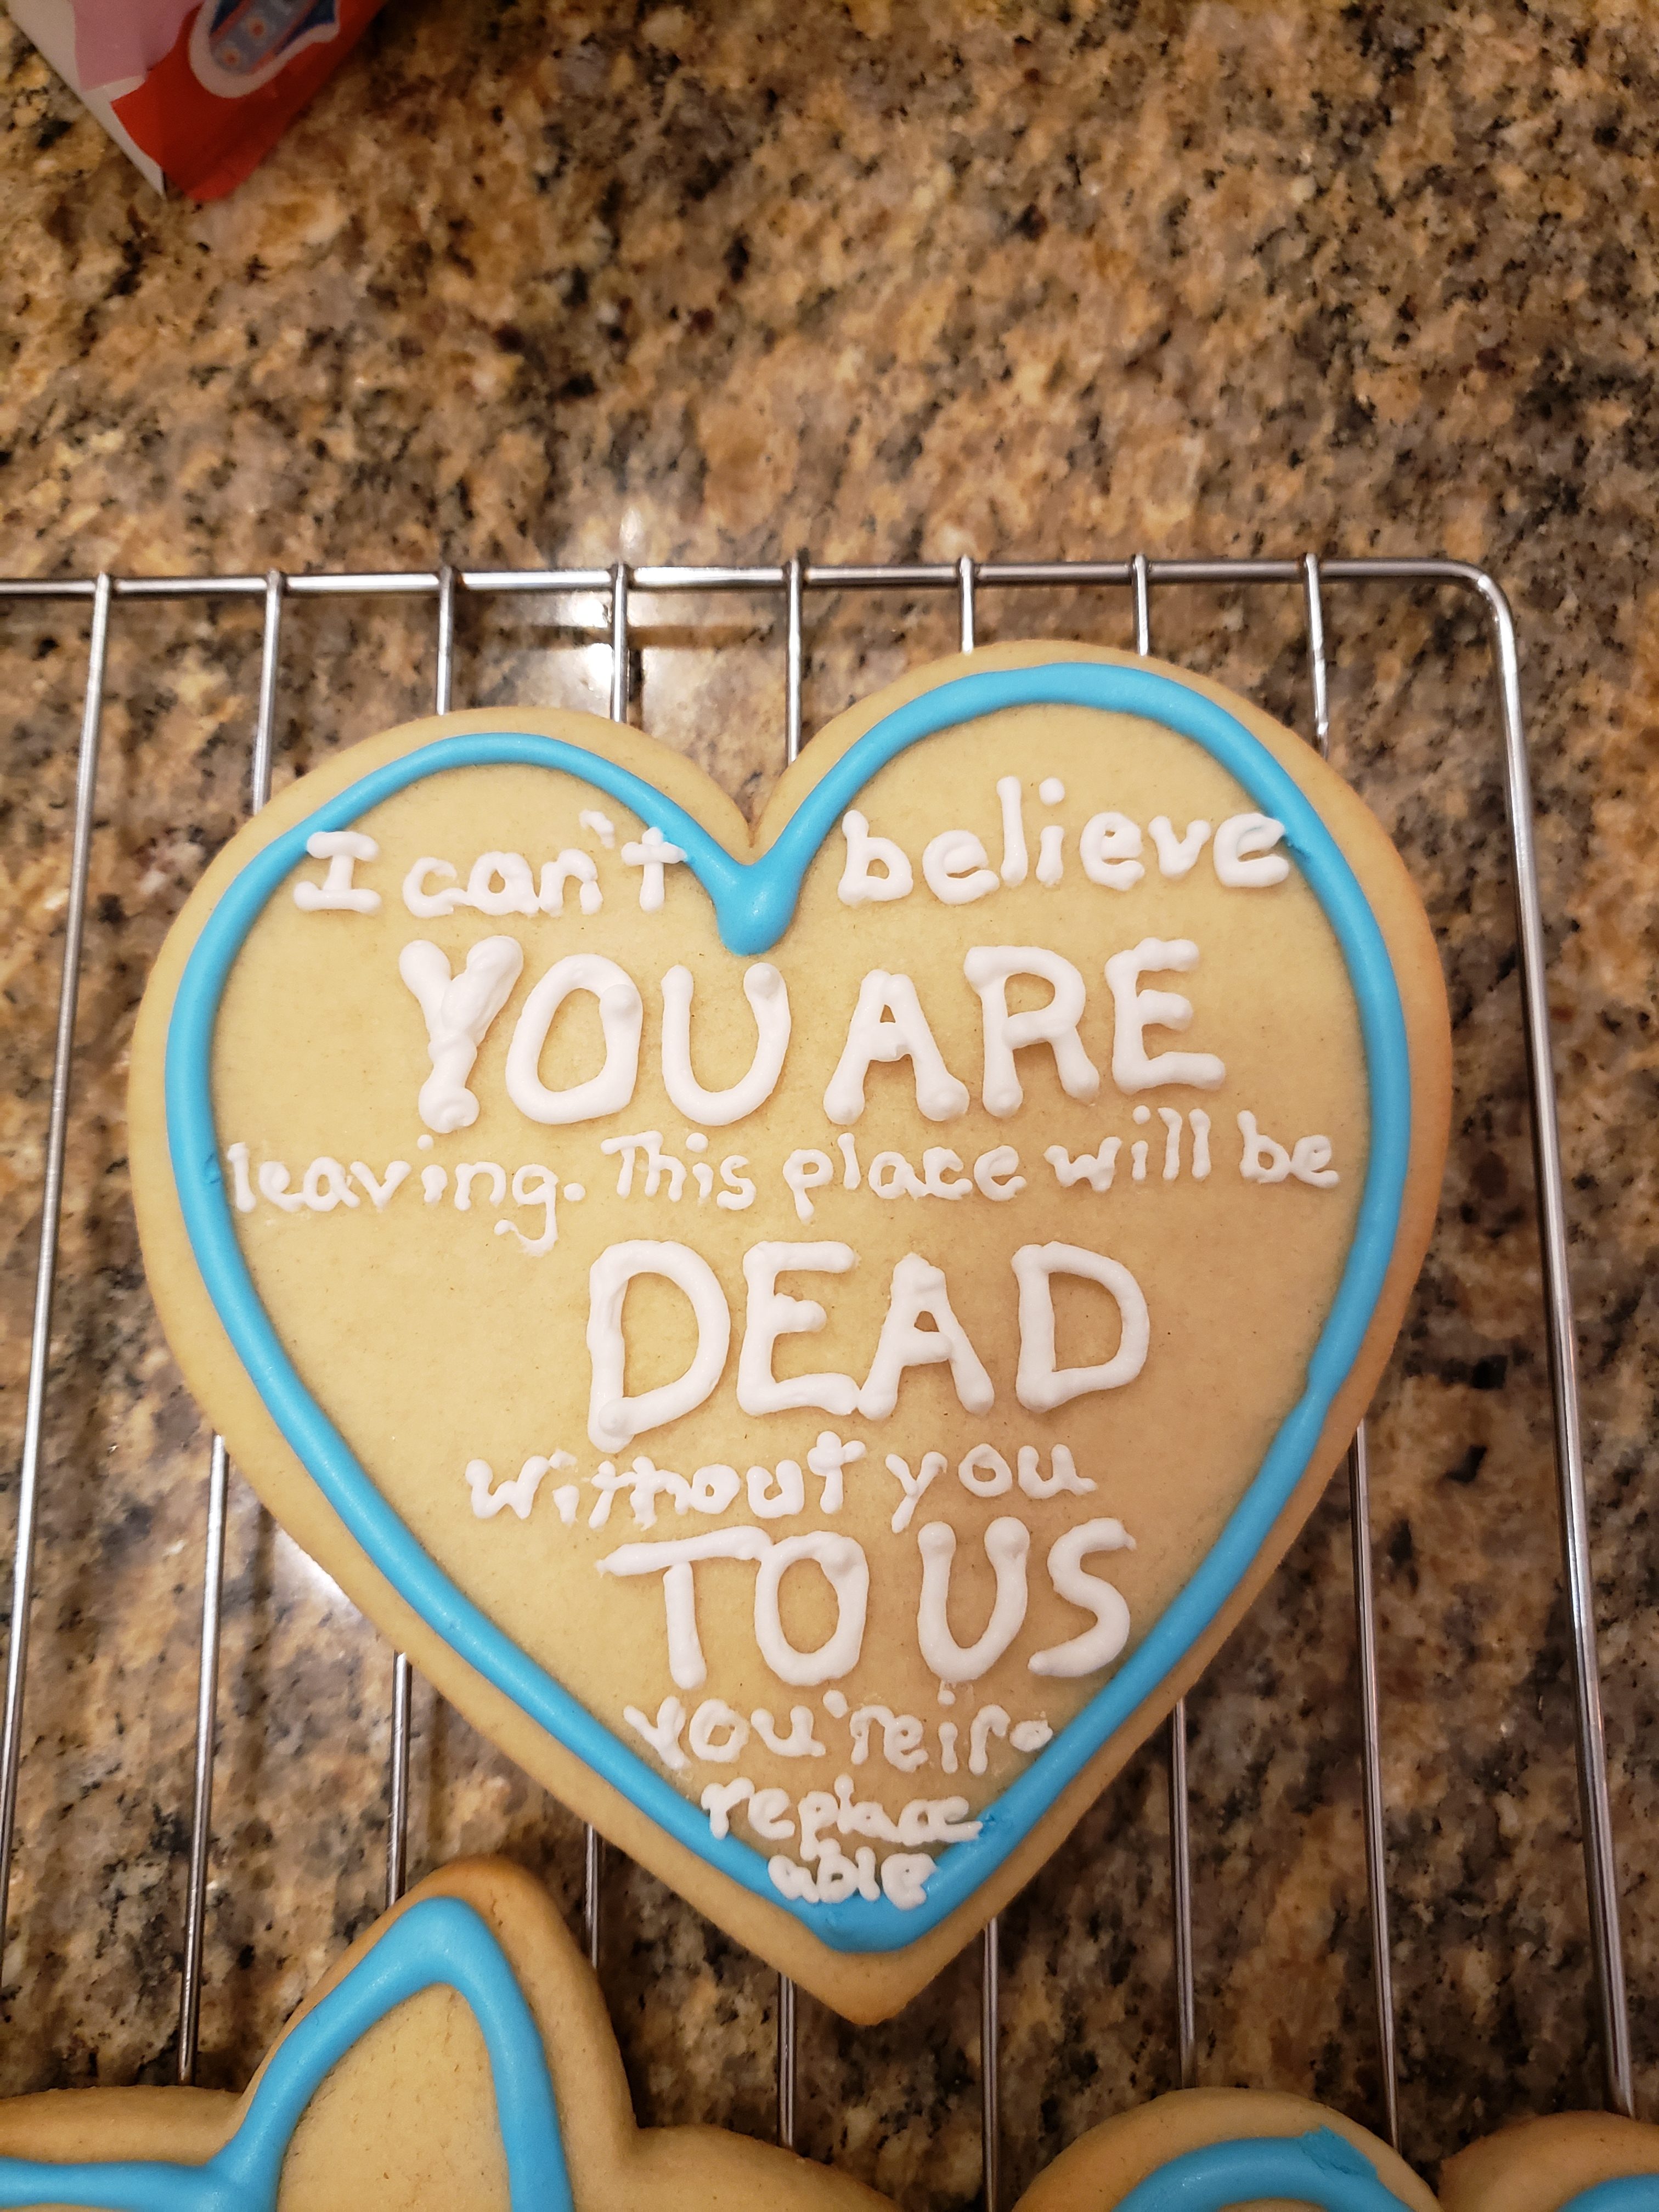
All true.

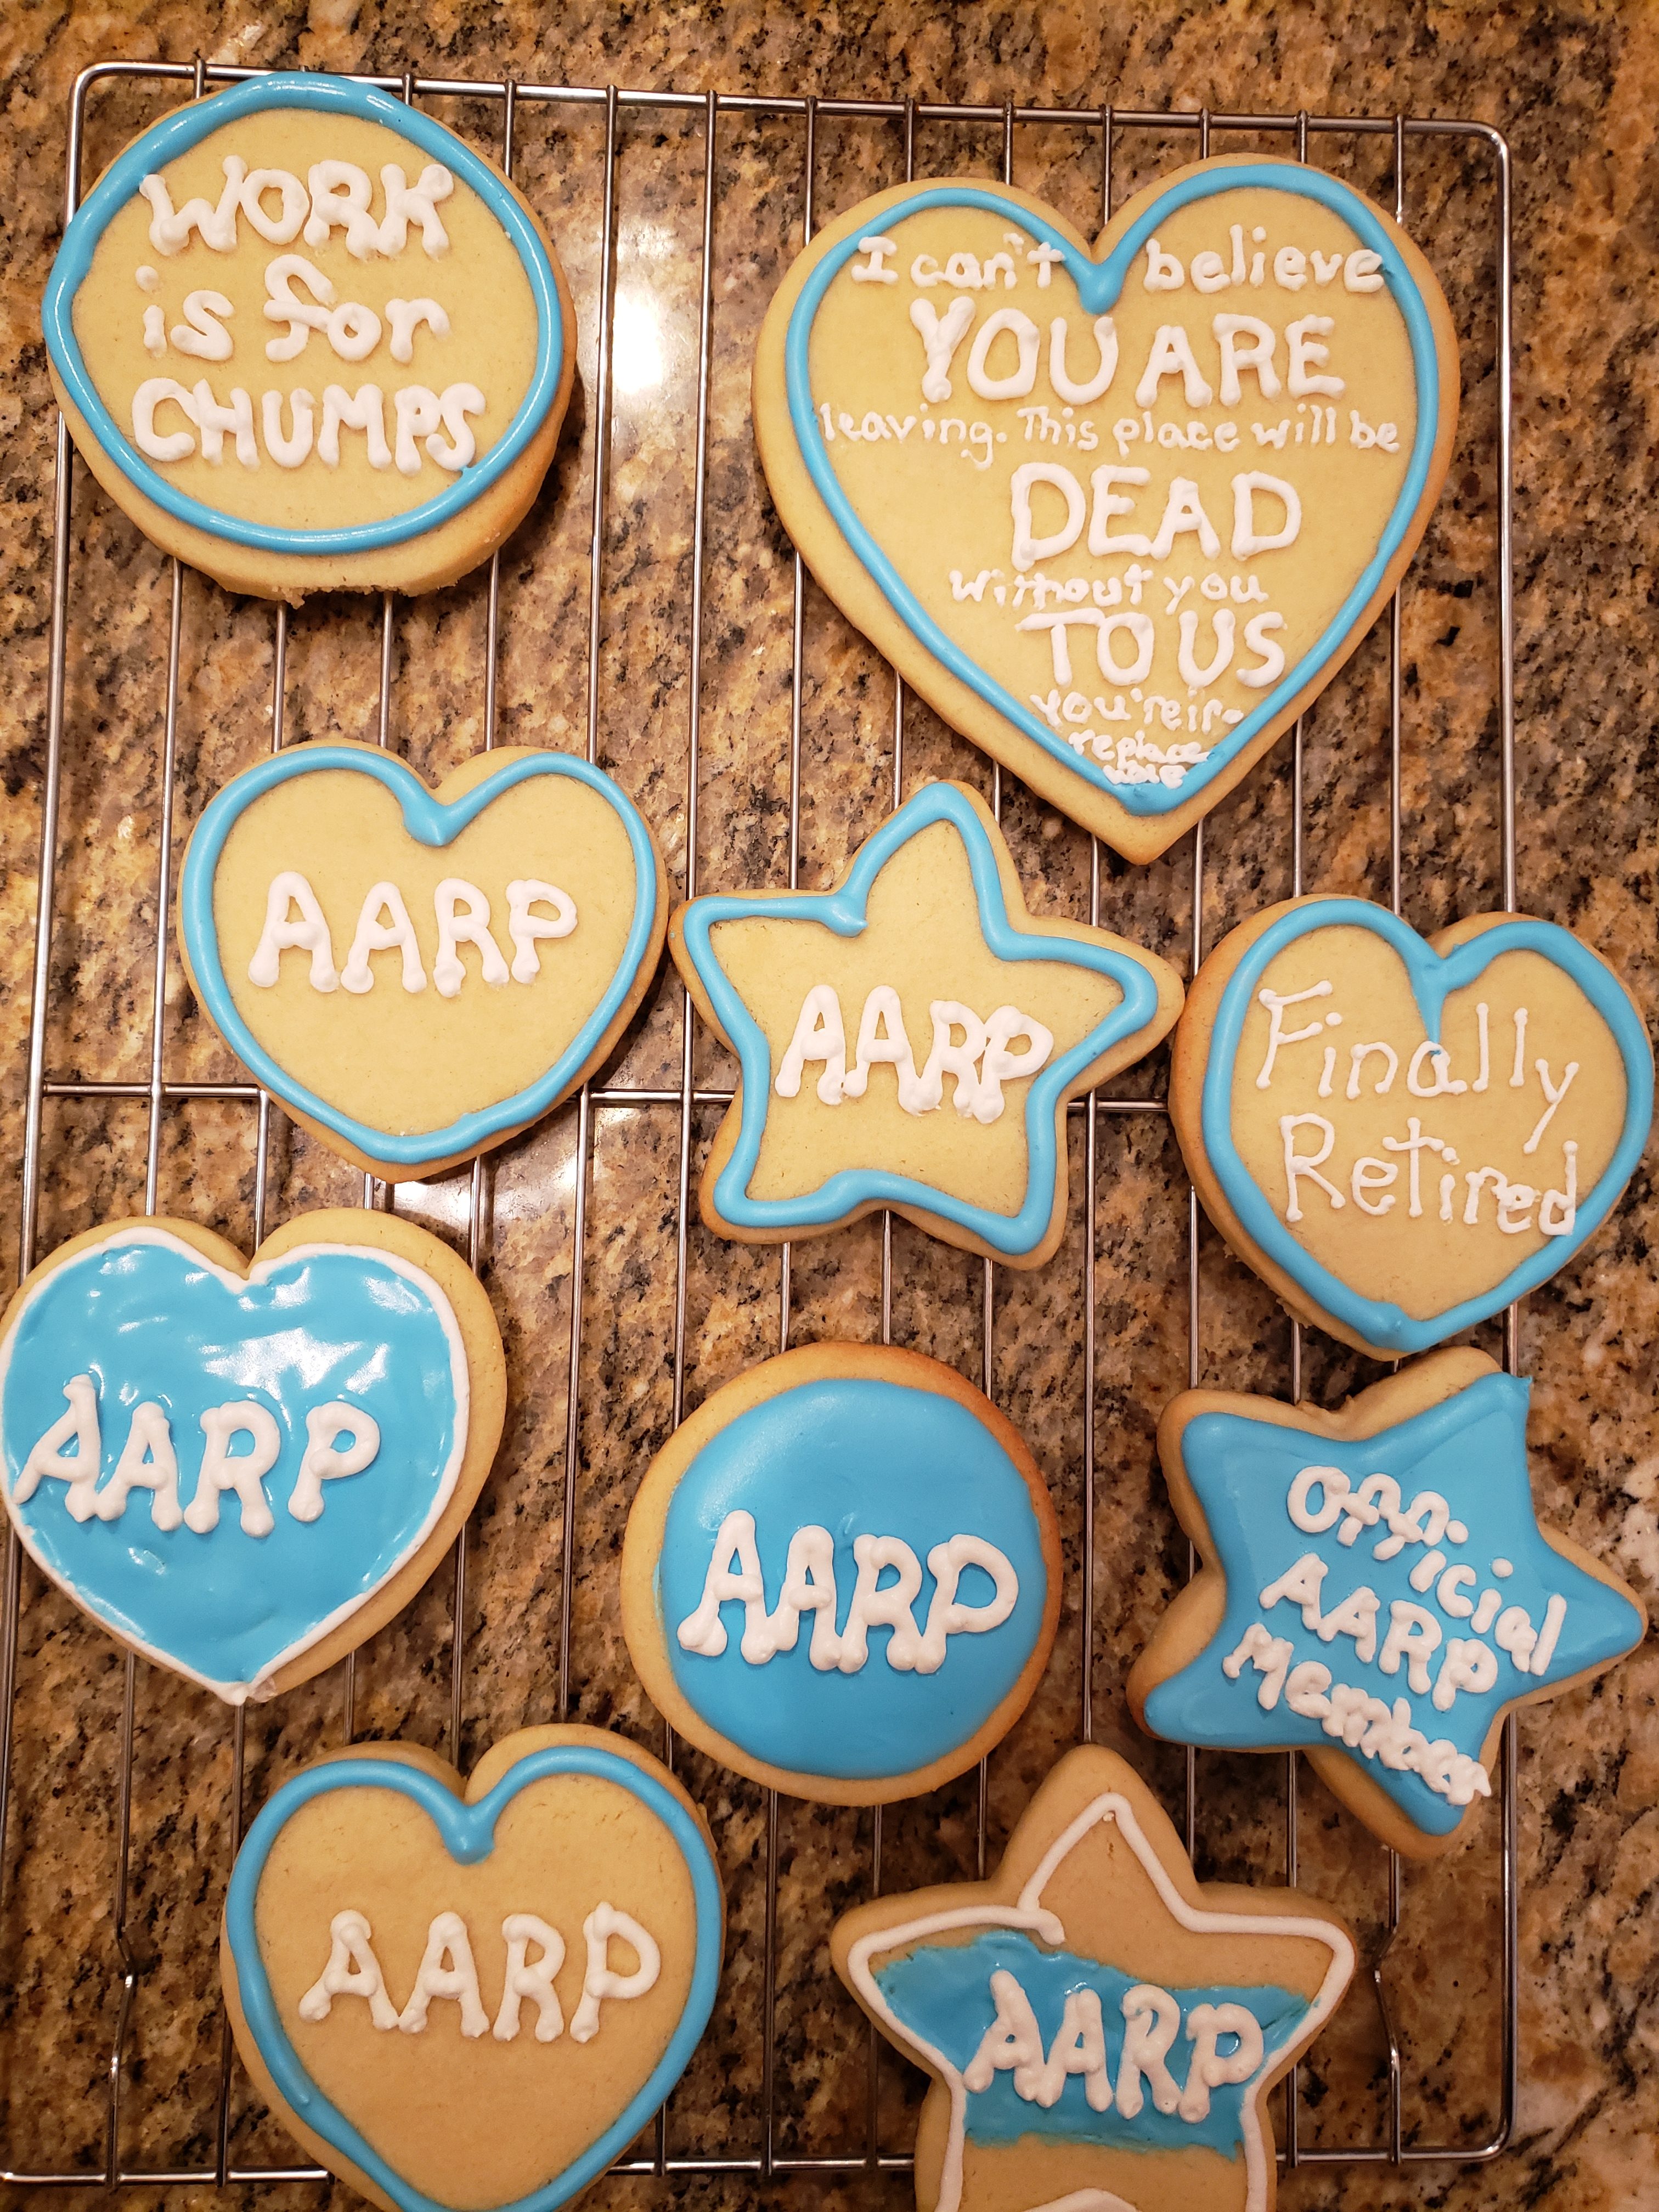
Here’s the rest of the batch. Obviously Intel colors…

I’m not actually sure if Roger ate them because I did accidentally “poison him” many years ago… and you know, that memory kind of sticks.

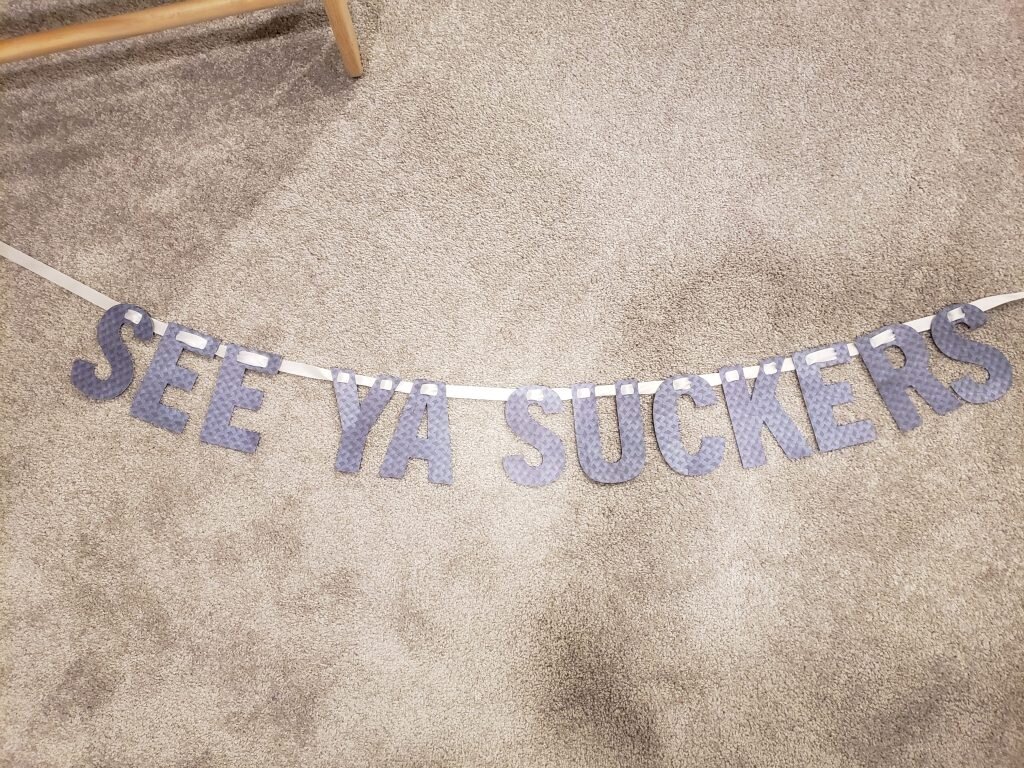
Okay but for the piece de resistance – I made Roger this banner that I hoped he would appreciate.  As far as I know he used it for several zoom calls on his last day.

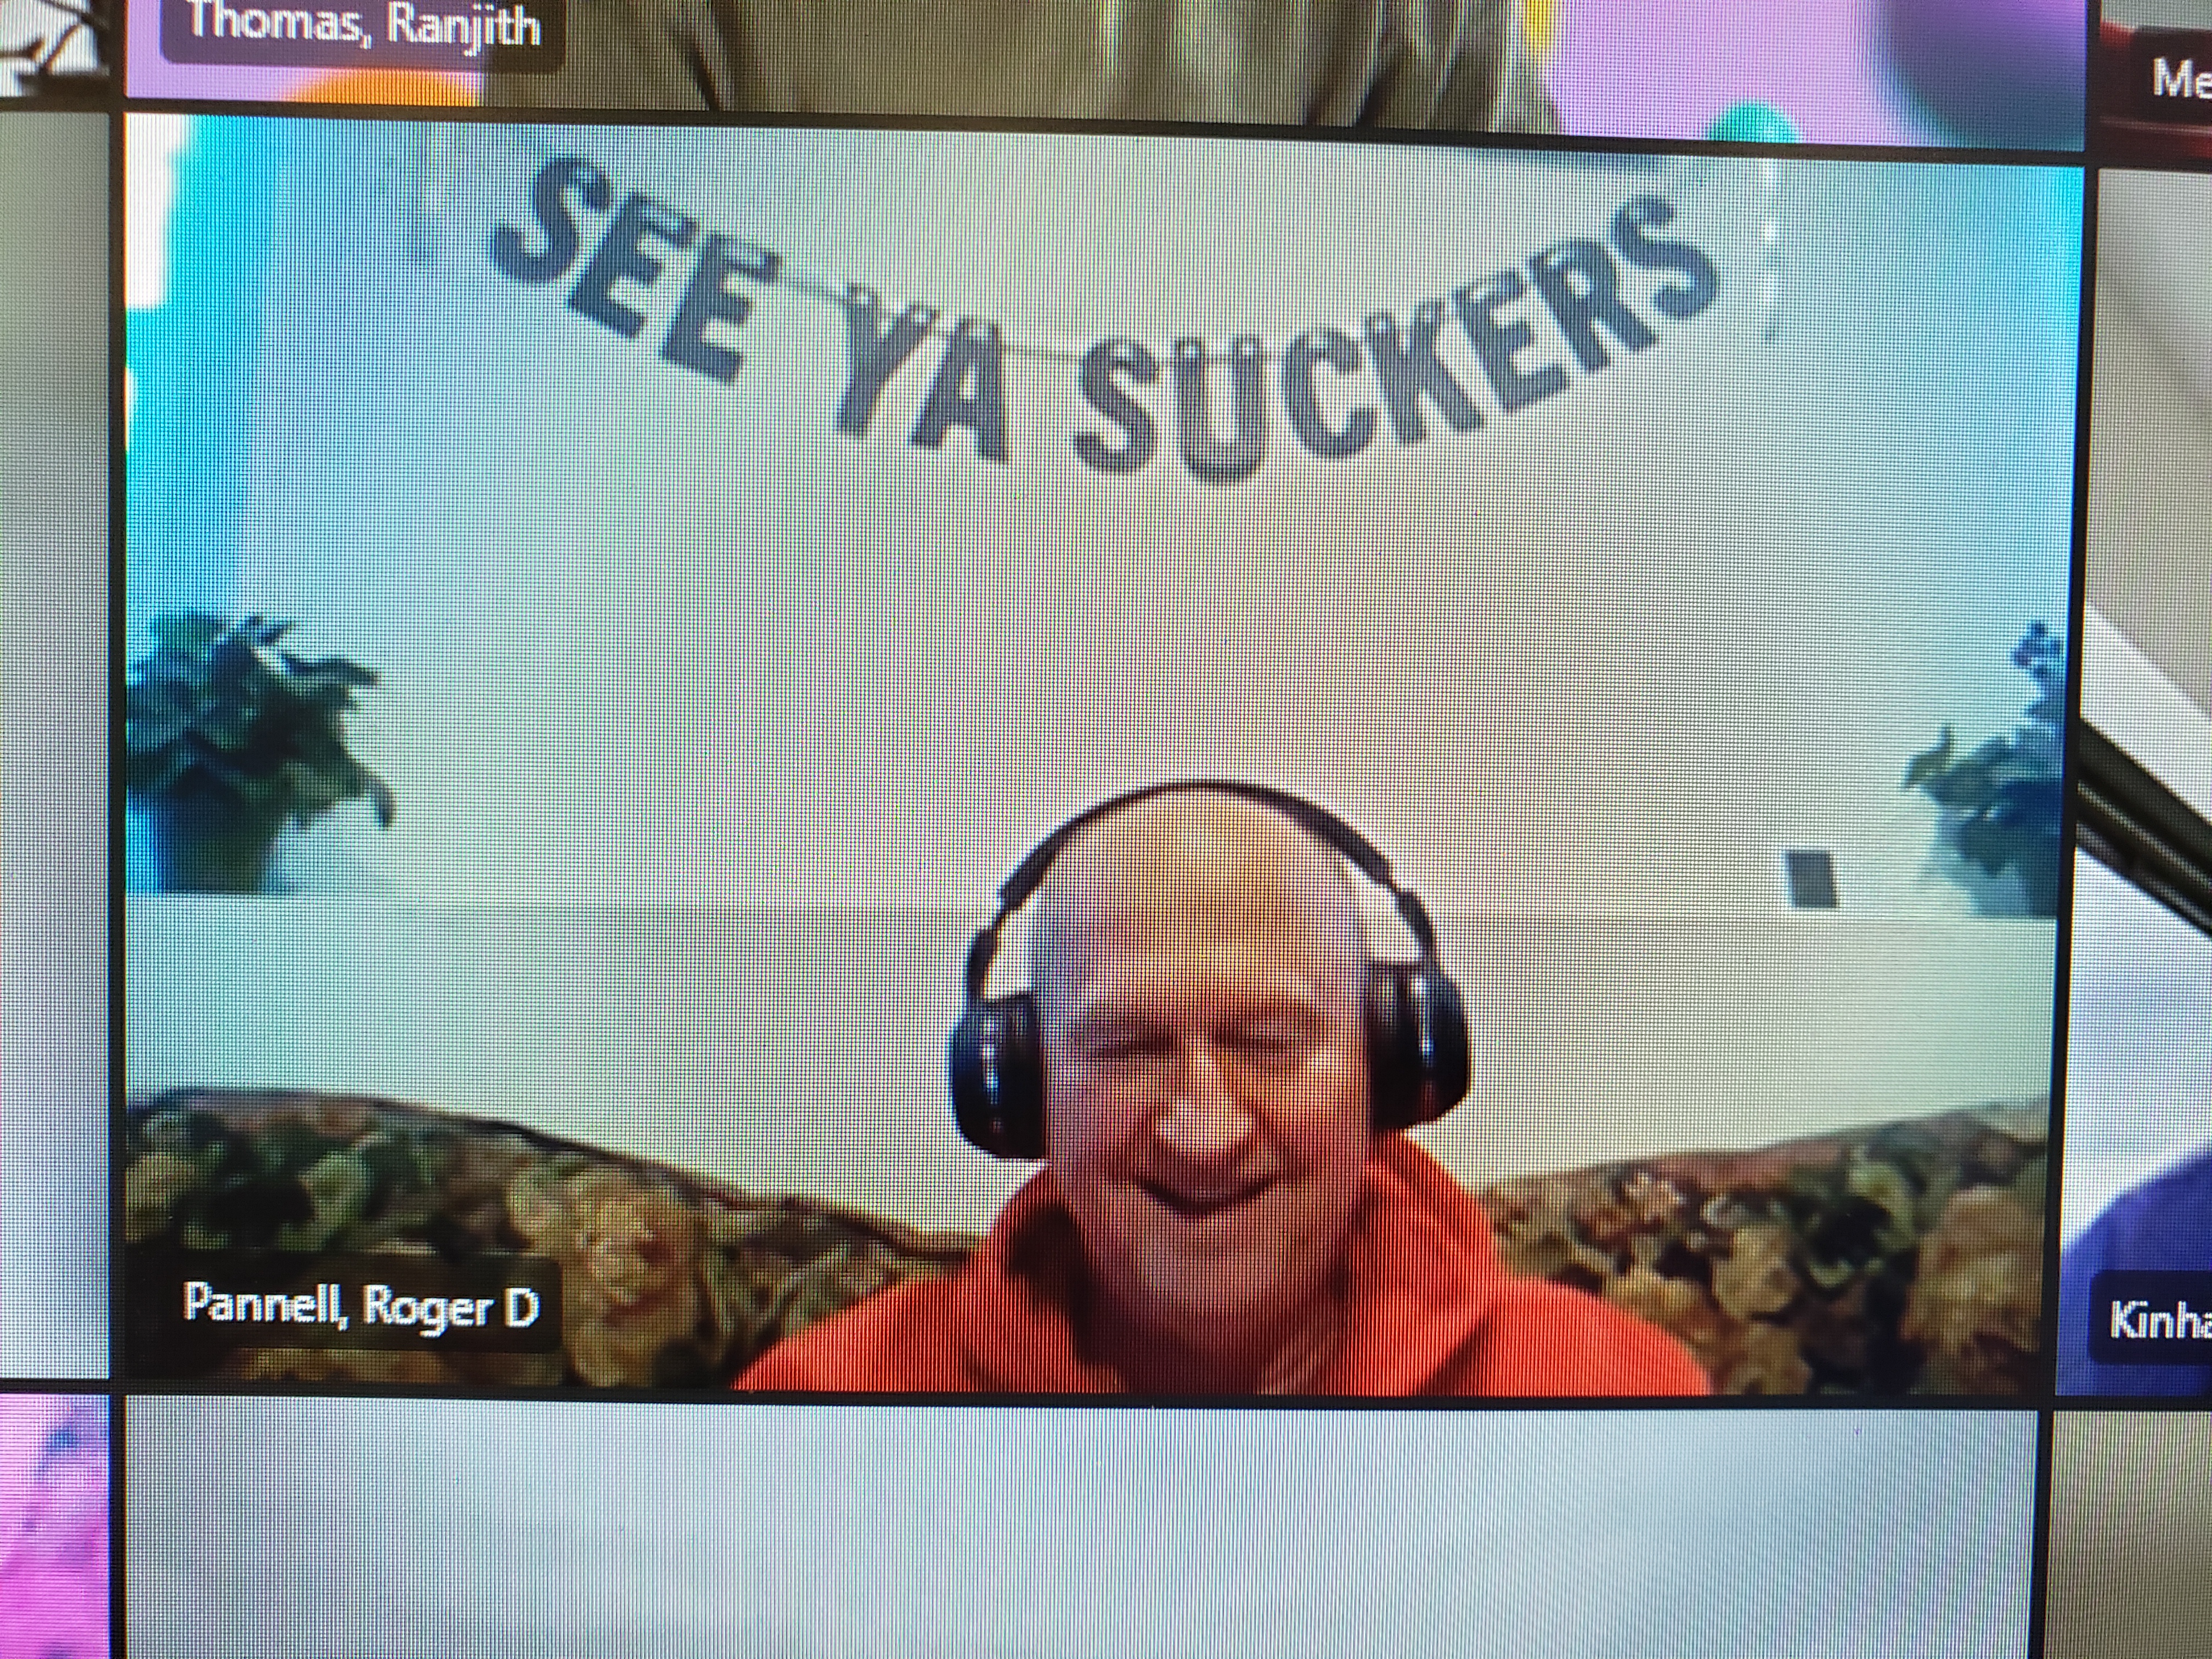
If you want to make your own for someone who is peacing out you can use my cricut pattern below!

See Ya Suckers Retirement Zoom Banner

What you’ll need: 

  • 2 12×12 pieces of cardstock in pattern of your choice
  • Cricut with basic cutting tool (I have the ExploreAir)
  • 2 yards of 5/8″ satin ribbon
  • Cricut Pattern Here
  1. Mount cardstock on 12×12 cutting mat and select appropriate material for cutting.
  2. Let Cricut cut out the letters, removing the letters from the mat when complete.  Repeat for second page.
  3. If using polyester satin ribbon melt the ends of your ribbon to prevent fraying by putting them close to a flame.
  4. Thread ribbon through the tops of the letters in order of S-E-E-Y-A-S-U-C-K-E-R-S.
  5. Hang!PS – Happy late birthday Roger!!!
Posted in Crafts & Sewing, Culinary Delights, Parties | 2 Comments

Lvl 1 Merdad

The leaves are AMAZING!  Last week everything was in full spectacular color and it was too beautiful to ignore!  I guess I’ve been annoying Patricia the last few weeks by pointing out how incredible all the colors are.  Now every time I point out a spectacular tree Patricia gets all pouty and says, “NO! Not even one tree is beautiful!  They are all just green!” Every. Single. Time.  It makes me chuckle.  No one can get me down because October is the best month!

Well I finished the Halloween costumes a whole 2 weeks early this year! Amazing, right?!  I will be honest.  I cheated slightly.  I only had to make 2.5 costumes this year.  Maybe more if you count the shirts.  You probably wouldn’t count the shirts.  Julius has wanted to be a shark since July.  Patricia has gone between octopus and sea turtle a few times before settling on mermaid.  And…. her mermaid tail from her first birthday party still fits her.  So there’s one mermaid tail down.  And did I mention I started making tails for Will and I for Patricia’s party but didn’t finish? So I had a half-made tail for myself.  As for the tops.  It is October on the east coast.  It’s cold.  And no one wants to see us all half naked.  No one.  So we decided to lean in and go for the “mer-family” look.  We decided to wear graphic tees that a mermaid family might wear…

Mine says “Mer-Mom”.  I think I might wear this one outside Halloween.  Will’s says “Lvl 1 Merdad” which is a reference to once of our favorite comics, Litterbox Comics.  They are basically us, but, like, cats.  (The comic I linked above is an actual conversation we once had complete with crying child over peeled banana.)  Patricia’s shirt is masterful.  Will gets full credit.  I asked “what would a toddler mermaid wear” and Will responded, “sea unicorn”.

“21st Century Mer-Family”

I designed all the shirts myself then used this method of sublimation here.  I briefly considered using the cricut to cut some sparkley HTV out, but sublimation was easier.  I’ve included my pngs below so you could use them yourself.  (As always, only for personal use.  If you want to sell stuff, come talk to me first.)  Don’t forget to mirror before you print!

Posted in Crafts & Sewing | 4 Comments

God bless the daylight

We had a great weekend visiting our college BFF Ryan and his lovely wife Lydia in LA.  Ryan had a billion amazing things planned for our visit to LA, including, the highlight for me, a Death Cab for Cutie and The Postal Service concert.  The last time I saw Death Cab was in college with Ryan.  They’ve apparently become a bit bigger since then, but were just as awesome.  It’s not every day I get to see my favorite band with some of my favorite people in the world.  I’m always sad when a vacation ends and I’m especially down this time.  The ray of sunshine is that I had happy kiddos waiting for me when I got home.

Now that I’m home, it’s real crunch time for Halloween/double birthday extravaganza season. I’ve already been staying up way too late for the last week making Halloween costumes.  I finished Julius’ right before my trip, but I’ll probably show you that next week.  He was delighted with his costume and wants to wear it all the time, so I consider that a win.

I should have written this on our 6 hour plane flight back, but since I didn’t, and it’s crunch time I’ll keep this short.  I’m going to show you a tutorial for a renaissance garment I made many years ago, but recently perfected.  It is a pocket!  It is such an easy thing to make, but can hold all the things!  I actually resurrected this pocket a few weeks ago because the awesome leather belt/pouch I got doesn’t really work over my more elegant ren dresses (which is basically all of them, because let’s be real, I’m a wanna be princess).

Ren Pocket to Hold all the Things

What you’ll need:

  • 1/4 yard of structured fabric (scraps are great – I used scrap corduroy fabric)
  • 1.5 yards 1/2″ ribbon
  1. Cut out fabric as per pattern above.
  2. Fold fabric down 3/4″ on the top of one of the pouch halves (right side out).  Stitch.  Repeat with second half. Note:  the picture shows step 2 after step 3, but I do not recommend doing it in this order.
  3. Place pouch halves on top of each other (right side in).
  4. Stitch all around the pouch, leaving the top hem side opened.  Turn right side out.
  5. Pin the ribbon to one side of the pouch opening, in the center of the ribbon length. Stitch.
  6. One more thing – if you used polyester ribbon you can move the ends close to the flame to melt the ribbon and prevent it from fraying.
  7. Tie around your waist to wear!

See the pocket over my dress here? It blends in rather nicely!


Posted in Crafts & Sewing | Leave a comment

Sweet Little Pumpkins

Hello dear friends, I hope you all basked in the glory of another fall weekend.  I know we sure did!  On Saturday I woke up with a headache but since I was watching the kids I eventually stopped noticing it.  A bonus of trying to keep up with your kids.  It was a rainy Saturday but that didn’t stop us.  We headed over to home depot to make a couple of float planes, read a few books at home and ate lunch that Will had prepared with Julius from one of Julius’ many cookbooks.  After lunch we headed over to the local paint your own pottery place to do some pottery painting.

For dinner I convinced the kids to go to IHOP.  Will was baffled by this decision on my part.  I love breakfast though, and once I told Julius what IHOP stood for, he was sold.  The kids soon decided IHOP was their new favorite restaurant.  Each kids menu had unique coloring and activities, like mad libs, which we had a great time with.  They had like 8 options for kids meals and they were very inexpensive and not just a platter of sugar.  I mean, Julius did get something called the cupcake pancake sampler, in which the dessert was the main course, but it also came with protein and we ordered a side of fruit so I call it a wash. Patricia got mac & cheese and applesauce (and fruit).  She ate pretty much the entire meal even after putting pepper in her applesauce.  Oh and the food came out insanely quickly given it’s a diner which is another win in the kid’s books.

After dinner we came home, finished up our float planes, and then flew them upstairs to the tub…. where they promptly sunk.  The kids were not upset.  We finished off the night by reading some Halloween books (my favorite).

The next day was absolutely beautiful fall weather.  We’ve been promising Julius that once he got his training wheels off and practiced for a while he could bike to the orchard with us.  He has been diligently practicing, so this weekend we took another fall bike ride to the local farm!  With the extra room in the wagon we went a teeeeeensy bit overboard with pumpkins.  We bought 7 pumpkins total and a half bushel of apples.  Patricia was a good sport making sure the pumpkins didn’t fall out of the trailer.

Julius biking!

Picking pumpkins in one of the patches.

That’s not even all the pumpkins.

This is all the pumpkins

Well, time to show you how I made Patricia’s overdress.  I am so happy with how the overdress came out that I’m thinking of making a new one for myself/re-doing my old one.  The overdress I made for maternity/nursing doesn’t fit quite so well anymore… (read: it looks like a sack).  The underdress still fits great though!  All the fabric I had in my stash… I’d bought this fabric from the thrift store a while back for a steal.

Toddler Overdress

Note: this was drafted to fit my daughter who is a 3T/4T but it fits my son who is a 5T and could probably fit loosely on someone smaller. 

What you’ll need:

  • 2 yards of midweight cotton, linen or similar woven fabric
  • Lightweight sew in interfacing
  • 6 5/8″ grommets
  • ribbon in coordinating color for lacing bodice.
  • Pattern <Note – I will post this pattern before 10/9/23, if you need it sooner than that ping me and I’ll prioritize posting it>
  1. Cut out pattern pieces as indicated.
  2. Stitch lightweight interfacing to one set of bodice fronts and back.
  3. Stitch bodice fronts and backs together at side seams and shoulder seams.
  4. Repeat for bodice lining.
  5. Place bodice outside and bodice lining right sides together and stitch all along the neck and front edges.
  6. Turn right side out, press.
  7. Stitch along the edges of neck and front, very close to the fold.  
  8. Turn armscye seam allowance in, then pin and stitch.
  9. Turn bottom of bodice seam allowance in then pin.
  10. Stitch 4 panels of skirt together at side seams.  If desired, serge.
  11. Form a rolled hem along the two sides of the skirt. Press and stitch.
  12. Attach skirt to underside of bodice by un-pinning and re-pinning (pins from step 9) and pleating as you go.  My pleats were fairly large, about 1″ long.
  13. Place grommets at indicated points on the pattern as per package instructions (usually involves a hammer)

    Grommet location drawn on dress

  14. Hem the bottom skirt to desired length.  (I left my hem fairly wide in hopes I could let it down an inch if needed.
  15. Lace bodice with ribbon as desired!

    Check out this cutie in costume!

    Close up of the bodice and my snuggle bug.


Posted in Crafts & Sewing, Thrift Finds | 5 Comments

Underdressed

Hello friends.  Monday again.  I hope you all had wonderful weekends.  I had such a great weekend.  On Saturday we went to our town’s craft and book fair and had a fun time browsing the crafts, booths and books.  Then we went for a short bike ride on the backroads near our house so Julius could practice road biking.  On Sunday we went to the local renaissance faire, which after our shenanigans a couple years ago you probably thought I might never go to again. Actually, it has been 7 years since I had the shop at the faire!  Time really flies.

My renaissance family

Laughing at the jousting

This guy was a little taller than Julius. (Will and I think it was John Mulaney under that costume.)

Julius’s favorite part – the fairy circle.  Fun fact – I used to tie a wish on the fairy circle every single day of the faire that we worked there.

Voyage to the new world

Why yes that is the underdress I made a few years ago… and the dress I made in high school… (And the hat I made in between.)

I spent the week before the faire making Patricia a costume.  I thought it was really darn cute.  She, however, was being very her usual contrarian self and refused to put it on for the final fitting.  Julius wanted to put it on, so he tried it on instead.  That’s how we know it fits either a size 3T/4T Patricia or a size 5T Julius.  Julius afterwards told us he wanted to keep it and wished boys wore dresses so he could have one.  I never know how to respond in these scenarios.  Last year I made him a tutu when he was sad that Patricia got a tutu, but he never wears it.  I would love to make him a dress to make him happy and f**k the status quo, but I am being cautious to avoid making him a subject of ridicule at school (kids are mean and he may not yet realize that).  Ultimately I resorted to saying something like, ‘you tell me if you really want one and I’ll work on it’.  We shall see what he decides.

My beautiful boy modeling Patricia’s outfit.

Patricia on the other hand is a complete gender conformist and has always been into dolls.  (Much the opposite of me as a child.)  She carries a baby doll around with her everywhere she goes.  It’s wild.  At the faire she carried around a stuffed baby doll she named “baby Sydney” (after my cousin’s adorable baby who she met in real life a couple months ago).  She also has another baby (girl) doll named George who she used to carry around all the time.  George seems to have fallen out of favor in recent weeks.  Patricia actually told us the other day “George died”.  Which was a bit disturbing, but she’s probably just processing my grandpa’s death.  When she told us George died, Julius looked at us shocked.  Julius is still Patricia’s favorite.  Patricia won’t let anyone hold her baby dolls except Julius because “my baby likes just only me and Julius”.  When asked this morning what she did over the weekend during her round table at preschool, she said “I played with my brother”.  Clearly that is the highlight of her weekend.

Two love bugs

My highlight of the weekend?  Probably when Patricia and Julius went into “the Jester’s maze” by themselves and Patricia came out a solid 5 minutes before Julius did.  I have no idea how she found her way to the end before he did but it was hilarious.  When asked where Julius was she responded, “Julius wouldn’t listen”.  Not sure what that meant!

Patricia down the slide first

Toddler Medieval Underdress

What you’ll need:

  • about 1.5 yards of linen shirting (or cotton)
  • about 1 yard of 1/2″ twill tape
  • 1 foot of 1/4″ elastic.
  1. I followed the instructions I used for my medieval overdress except I made a couple of modifications for the neckline and sleeve ruffles.  I actually might make these modifications to my own dress I was so pleased with them!
  2. I followed steps 1&2 and plugged in Patricia’s measurements and came out with the following.  The only adjustments I made were to add 2″ for ruffles in the arm.  (Obviously it is not drawn to scale.)  Note the arms came out about 3/4 length!  If you want them longer, you will need to add more length! 
  3. I followed steps 3-5.  Then instead of step 6 I did the following…
  4. Cut a 4″ slit in the center neckline on one side.
  5. Fold the side areas of the slit under so the unfinished edges are inside and stitch.  
  6. Next fold under the top hem by 1/4″ then fold over again by 3/4″ Stitch close to the bottom fold line.
  7. Instead of inserting elastic, insert twill tape through the hem.  Make sure the tape is a few inches longer than the entire neckline.  Gather. 
  8. Skip steps 6-9 in the adult medieval underdress pattern.
  9. After hemming the sleeves, add some twill tape on the end of the sleeve hem inside the shirt.  Sew close to the edges of the twill tape to form a casing for the elastic.  Be sure to leave a gap to insert the elastic.  
  10. Feed elastic into the casing you just made, pull it tightly so it forms a ruffle and then tie or stitch the elastic together at your desired length.  
  11. You can then finish enclosing the elastic in the tape by stitching the ends closed.  Repeat for second sleeve. 
Posted in Crafts & Sewing | Leave a comment

Extra Padding

We just put up our Halloween decorations decorations this week, so it’s officially the most wonderful time of the year.  I just love the fall!  The leaves turning, the weather getting cooler, apple picking, pumpkins, harvest and craft festivals, then costumes, ghosts, bats, scary stories, warm apple cider and wrapping it all up with Thanksgiving.  What isn’t to love?!  I cannot tell you.  It is the perfect season and it brings me great joy.  Maybe that’s why both my babies were born in the fall, because my body knew all good things happen in fall.

I don’t know if it’s the fall or what, but I’ve picked up my motivation levels a bit.  Perhaps it’s all the crafts I need to complete in the next month – renaissance costumes, Halloween costumes and TWO birthday parties and birthdays.  Despite the looming deadlines I finally managed to finish up a project I started ages ago – chair pads for my kitchen chairs.

You may remember that my children were offended when I replaced the kitchen chairs with rush chairs.  I think the rush chairs are beautiful, but Patricia is constantly smashing crumbs into them, so I wanted something that might be easier to clean.  Someone was giving away some outdoor chair pads that were pretty beat up and I knew I could save them from the garbage and also get some free stuffing!  I disassembled all the cushions and removed their foam and zippers.  I’m not sure if I can do anything with the fabric since it’s outdoor fabric and pretty beat up, but I’m still thinking.  The first pad took some time including the pattern creation, but after that the other 3 were a breeze!  Oh and you may recognize this fabric when I made the play kitchen back less ugly a work of art.  This fabric is awesome for chair pads.  The morning after I made Patricia’s chair pad she covered it in blueberry juice.  You can’t even tell.  It looks like part of the artwork.

Custom Chair Pads

What you’ll need:

  • upholstery fabric
  • 1.5″ foam
  • zipper
  • velcro
  1. All chair sizes are different.  For starters you’ll need to measure out your chair and make a template from paper.  As a tip, I made a first draft, then used a ruler to draw a more straight and even version, folding it in half along the center to make sure it is symmetric across the center.
  2. Next you’ll need to cut 2 pieces of fabric from your template, one for the top and one for the bottom.  The template has no seam allowance, so be sure to add 1/2″ seam allowance all around.
  3. Measure the length around your chair, omitting the back piece (this is where the zipper will go).  Cut a strip of fabric that is 2.5″ wide and the length you measured around your chair, plus 1″.   If you have little indents for the chairs back, add another 1″.
  4. Stitch the strip of fabric around the length of one of your chair pad pieces, right sides together, leaving the back portion opened.  If you have little indents for the chair back and plan to add ties, do not stitch inside the indents at this time.  At each corner, stop, then backstitch to reinforce.  Then fold the fabric down and continue sewing.
  5. If you would like to add tie tabs, cut 4 strips 2″x5″.
  6. Fold strips in half, right sides in.  Stitch around the top and side of the fabric then turn inside out to form a tie.
  7. To integrate ties, trim down ends of the strip of fabric you sewed in step 4 so only 1/2″ remains.  Position a tie on top of one end of strip so the unfinished end of the tie matches the unfinished end of the strip.  Tie should be centered in the strip.  Place trimmed piece of strip on top of this piece to form a sandwich.  Stitch these 3 pieces together.
  8. Stitch remaining strip along the indent.
  9. Repeat step 7 and 8 for the other side of the chair.
  10. Measure the back portion of your chair (the part you omitted in step 3). Cut two 1 3/4″ wide pieces of  fabric to this length.
  11. Fold down 1/2″ of material along the length of the strip.
  12. With the zipper closed pin the folded strip to the zipper.  The fold should be at the center of the zipper.  Use a zipper foot to stitch.
  13. Repeat steps 11 & 12 for second side.
  14. Stitch the zipper placket to the back opened portion of the chair.
  15. Repeat step 7 for the tie where the zipper and indent strip meet.   Repeat for other side.
  16. Stitch the entire top seat pad to the strip and zipper placket you attached in step 4-14.
  17. Clip corners and snip into inner corners (if any exist in your design).
  18. Open zipper and turn right side out.
  19. Stitch velcro onto your tabs.  Be sure to imagine how the tabs will wrap around your chair back in order to properly place the velcro.
  20. Use your template to draw onto your foam.
  21. Cut foam with no seam allowance.  Mine came with batting, I also cut this down.
  22. Fold foam in half and insert into the case you made.
  23. Use on your chairs!

    Ignore the mess on my counter. Do you see what I’m working with in the way of spills?


Posted in Crafts & Sewing, Home Improvement | Leave a comment

Waterproof, not Toddler Proof

Hello friends!  I’m in another exciting town meeting again, so what better to do than zone out and daydream until they call for a vote?!  Despite a truly horrible week last week (Patricia was sick and home from school without care for 4 days last week) we had a great time this past weekend.  We bounced at the trampoline park, went apple picking and even had a tea party.  As the icing on the cake, Patricia is finally back to her usual cheerful self today after 7 days of being a sad lady.  Oh and Julius learned to bike with his training wheels off too!  What a week!

Patricia despite her crankiness, still had her moments.  Everything she says at this age is pure gold.  I love to listen to Patricia and Julius converse during their imagination play.  Julius doesn’t just pull her along for the ride, he actually has her fully participate.  For instance yesterday we excused them from the table yesterday and they both ran over to the couches (their sleeper trains) and Julius, slightly behind, shouted, “Patricia is the train leaving?”  To which she responded, “oh no, not yet don’t worry.”  It is great to have a friend to play with and I love watching the two of them interact.

I also (usually) love her frankness.  Yesterday in the car she was wearing a baseball cap and she exclaimed, “I am the coolest!”  She was being so silly so I said, “what about me?  Am I the coolest?” She quickly responded, “No mama.  You aren’t the coolest ‘cause you don’t look like this ‘cause you don’t have your hat on.”  I then put on my really, really (un)attractive “desert sun hat” (yes you read that right, complete with wide brim, neck coverage, a lanyard and detachable veil).  I asked, “how ‘bout now?”  She quickly responded, “oh yeah, now you’re the coolest.”  Satisfaction.

Now for Julius.  He still is adorable of course.  He’s also doing great with reading; reading well above his grade level.  (Luckily his kindergarten teacher is awesome, aware of his reading skill and working to keep him engaged with harder content.)  Because of this, I tend to treat him as a big guy, and I forget that he’s really just a little guy.  The other day at cub scouts the leader called for a toast.  Before the toast, he asked the kids if anyone knew what “a toast” was.  Julius raised his hand and said, “it’s when you take bread, and you cook it again in the oven so it gets crispy”.  The adults in the back were trying really hard not to chuckle too loudly.  It was so adorable.

Okay so I don’t know if you can call my stickers adorable, but if you like them, they are yours.  I love to draw doodles, so I will probably draw some in the future.  After I explain how I made these (again reminder, I’m still not sure this is the best method) I’ll have a follow up on how I got them to stay on toddler water bottles.  Toddlers, who frequently do tape removal activities in preschool, also love to peel stickers it turns out.  Patricia’s water bottle survived several days when it was just her using it, and then on the first day back to preschool 75% of the stickers had been peeled off.  I’m not sure if she finally succumbed to the temptation, or if her friends circled the water bottle like vultures when she returned.  Let me just say that “permanent” cricut vinyl is not toddler tested.

Sublimation Stickers on Vinyl

What you’ll need:

  • Sublimation printer, ink and paper
  • White Permanent Vinyl
  • Heat press
  • heat resistant tape
  • parchment paper
  • My sticker sheet!  (If you so desire)
  1. Using your sublimation printer, print out your design on sublimation paper (remember to mirror the image!).
  2. Set your heat press to 350F and wait for it to heat.
  3. Use heat resistant tape to tape sublimation paper image to vinyl, face down.
  4. Cover the design in parchment paper then heat press for 30 seconds.  Make sure to do this in a well ventilated area.  Next time I’m wearing a respirator.
  5. Let cool.
  6. Remove tape and remove design, it will probably have stuck to the vinyl.
  7. Wet the rest of the paper under the faucet and gently rub your hands over the remaining paper to remove.
  8. You can then cut your stickers out (or if you used the cricut print and cut option, you can cut them with your cricut!)

Posted in Crafts & Sewing | Leave a comment

Thermostly Ready

Well the kids both have a couple weeks of their new classes under their belts.  Julius seems to still be enjoying class and he even made a friend in his class who is also in extended day.  (Fewf.)  We’ve been waiting for him to tell us he made a friend.  Though he told me this morning he was a bit lonely on the bus because no one sat with him.  (Trying not to let this break my heart.)  Julius has also started both gymnastics and cub scouts so we’re hoping he has a lot of fun in both.  So far so good.

Patricia is having a bit of trouble adjusting to the preschool class.  For the entire first week she refused to go into the room and would cling to us when we left.  We’d literally have to push her off us and run out the door to get her to go to preschool.  Talk about heartbreaking.  The teachers don’t seem as helpful as her last class to help distract her or motivate her to play while I’m trying desperately to leave.  To be honest the few times that leaving her in the class went smoothly was when one of her previous teachers, Ms. Jen or Ms. Sara, happened to be walking by and helped her into the classroom.  Patricia, Will and I had a discussion about going into preschool mid last week.  The last couple times she has been very brave going into the classroom and didn’t even cry when we left.  I’m very proud of her.  Now we just have to work on all the accidents she’s been having.

I loved getting new things for back to school.  New pencils and notebooks, etc.  Well kindergarteners and preschoolers don’t need pencils or notebooks… and I really hate buying new things for the sake of buying new things so I decided to revamp all their old stuff.  I resewed some seams on Patricia’s unicorn backpack (which I got from the buy nothing group), then we got an LL Bean backpack (also off the buy nothing group).  It was in perfect condition, so I just embroidered Julius’ initials on it and asked him what he wanted to decorate it with.  I bought a bunch of shark embroidery patches that I hand sewed on it.  He was quite pleased with it.  (Side note – is it so adorable watching him walk with the LL Bean backpack on.  It’s like as big as he is.)

I also repaired Julius’ lunchbox (yes this one) that he’s had forever.  This is the one thing where I asked Julius straight up if he wanted to pick out a new one, and he flat out refused.  He actually broke down crying when I suggested such a thing.  Instead I completely re-stitched all the seams on the lunchbox and once again repaired the velcro.  It is like 1″ smaller than when it started, so it’s starting to become difficult to fit an ice pack inside.  Massachusetts gives free lunches to all schoolkids though, so luckily all his lunchbox needs to hold is snacks!  I also am working on a new lunchbox for him in secret as a present.

The only picture I have of Julius backpack.

The last thing I did was redo their water bottles.  I LOVE the “funtainer” thermos waterbottles.  They are stainless steel, a great size for kids, they have a handle, and the straws are easily replaceable and even sold at Target.  Julius’ water bottle used to have the Paw Patrol pups on it, but they’ve long since scratched off.  Patricia’s had some space unicorns, that somehow had also scratched off, in far less time.  I decided to redo Julius’ with sharks, and Patricia’s with unicorns.  I didn’t have sticker paper and waterproof material so I decided to experiment with sublimation on vinyl.  I’m not yet sure I recommend this method.  I had a horrible headache for the next day afterwards, and I’m not sure if it was because of off-gassing from the vinyl.  So take all this with a grain of salt, and if you do try it, be sure to do so in a well ventilated space, potentially wearing a properly rated respirator (I usually wear one, but for some reason I didn’t this time).  I’ll post about the sticker making next week; for now I’ll show you how to get your water bottle looking as good as new!  I used 4 different methods (including steel wool, dremel polishing, and melamine foam pads)  to get Julius’ water bottle looking good again before finding the right solution.

  Upgrade a Worn Thermos Funtainer

What you’ll need:

  • 12 oz Thermos Funtainer
  • Waterproof Vinyl Stickers
  • 220 grit sandpaper
  • Dust mask/ventilator and eye protection
  1. Remove the cap and bottom of the funtainer Thermos.  (Yes the bottom is removable, but you have to pull very hard to pop it off the first time.)

    Here’s a before image – it’s pretty gross looking.

  2. Put on your mask and eye protection and sand the waterbottle, always going in the same direction around the circumference of the bottle.
  3. Periodically wipe the dust off the bottle and check to see if any marks remain.  Continue until satisfied.

    That look pretty darn good to me!

  4. Wash the entire bottle, lid and bottom inside and out with hot soapy water.
  5. Dry then reassemble the bottle.
  6. Apply stickers as desired.

Posted in Crafts & Sewing | 3 Comments

Child Gardening

Wow Julius’ first week at kindergarten!  And Patricia’s first week at preschool!  Will took Patricia to school on her first day and she was very (understandably) confused and sad that she wasn’t heading to preschool with Julius.  We decided to keep her at her school for another year since she is still 3 years away from Kindergarten, and we thought was technically too young for preschool but then we found out they were moving her up a class in her school.  So now she’s in preschool!  My kiddos are both so big now!

For some weirdness, Patricia is the age Julius was during the pandemic when we were drowning and watching him/plopping him in front of the tv while we worked from home.  Ah memories.  Honestly the one good thing about those times is that I got to spend a lot of time with Julius.  I took Julius in the mornings, so Will got up early and worked and I took Julius on walks or did outside play or went to the farm and picked fruit until my first meetings at 10am.  Then I’d work until late, usually stopping to put Julius to bed, but frequently just eating dinner at my desk.  (Which was pretty depressing, not going to lie.) Will was the real hero for doing the brunt of the childcare during the work day.

But alas, now we have two big kids!  It’s so bittersweet.  I am so proud watching them grow, but where have my adorable babies gone?  Honestly, I’ve never been that into babies, except my own, and I think the toddler years are my very favorite.  This is part of the reason I was so horrified she’s a preschooler now.  No more toddler?! I told Will that when Julius was Patricia’s age we treated Julius like a big kid because he looked so grown up compared to when he was a baby (our only comparison).  But now, looking back at pictures from that time he was really just a little guy!  We put a lot of pressure on that little guy.  For Patricia we have a constant side by side comparison with big brother Julius, so she’s always going to seem like our little lady.  So she gets away with a lot more than Julius did, and everything she says right now is still so darn cute.  For instance, she dropped some cheese on the floor the other day and she asked Alexa, “Lexa, can Dany eat cheese?”   (We’ve been teaching her that many things are not safe for dogs to eat.)

Well, here are my two big kiddos off to school.  I made them this back to school chalkboard, modified from one I got for three dollars at Savers.  I made it reusable so we can fill in “first” or “last” day of school.  (We’ll see if I remember.)  I love my little nuggets and I’m so proud of them both!

Patricia’s first day of Preschool!

Julius’s first day of Kindergarten!

First/Last Day of School Sign

What you’ll need:

  • Chalkboard (I modified a bistro chalkboard I got at savers).
  • Cricut and my pattern here
  • White permanent adhesive vinyl (I used oracal, which I haven’t used before but was the cheapest at Michaels)
  • Transfer paper

0. First I modified the bistro chalkboard I got by removing the hardware, chopping off the feet, and fixing up the paint to match.

Before

After

  1. Make sure your chalkboard is clean and dry.
  2. Load the pattern I provided above onto your cricut (note – my chalkboard is 11″x14″ so you might need to modify it to fit your chalkboard)
  3. Place adhesive vinyl on regular grip 12″x24″ mat.  Cut pattern.
  4. Weed the while spaces (everywhere but the dots and letters and banner.
  5. Using a brayer, press a piece of transfer tape over the design, gently peel the back off the adhesive vinyl so it sticks to the transfer tape.
  6. Position transfer tape with design over the chalkboard, then press down to adhere.
  7. Use the brayer again to really press the vinyl onto the chalkboard.
  8. Gently remove the transfer tape.


Posted in Crafts & Sewing | 4 Comments

Not the Wurst

I’M ON A TRAIN!!!!  Not going to lie, it is awesome and everything I wanted it to be!  I am in a sleeper car which is apparently first class and has a lot of fun perks.  We’re going from Worcester to Chicago.  It’s kind of a bucket list item for me, though Will joked now I’m going to be booking 3 train rides a year.  I would if it wasn’t so expensive for the sleeper car!  The coach cars have super nice looking seats with much more legroom than planes, though I don’t know if I could handle that many hours in a coach seat.

I got to sleep on the top bunk last night which was surprisingly comfortable.  The rocking lulled me off to sleep around 10:30pm.  The shades on the windows worked really well and the train is surprisingly quiet, so we didn’t wake up until 7:30am!  Oh and the windows for the top bunk are super cool so you get a great view in the morning.  I don’t know how but everything we drove by last night was beautiful!  Everything was next to bodies of water and rivers and we saw brooks, swamps, rivers and forests.  This morning we’re on to farm country, passing tons of corn fields.  There was a 2 hour delay due to a mechanical issue, but despite that I’m having a great time.  I can see why my grandma loved the train!

Kiddos starting the adventure.

Total bliss

Here’s our car!

Dinner in the dining car!

Will snuggling up for bed.

Julius on the top bunk

Second day chilling

Arriving in Chicago!

Speaking of my grandparents, my grandpa passed away last week so I’ve been pretty teary reflecting on my grandparents and how good they were to us.  My one main regret of being vegetarian is having to forgo German delicacies.  Liverwurst, schnitzel, swedish meatballs, fleischsalat (or even just bologna), sauerbraten, goulash, rouladen are just some of my favorites that my grandma used to make.  And then of course there are all the wursts.  My favorite (other than liverwurst) was always knockwurst.  My grandparents went to their favorite delis to get their wurst, and one of them is up in MA, right next to the German club.  When Will’s family talked about “the club” they refer to the country club, when my grandparents refer to “the club” they are referring to the German club.

My family and I joined my grandparents occasionally at the club (in Pawtucket) for Oktoberfest and the Christmas celebration.  The club was mostly (at that time) septuagenarians, but the food was absolutely amazing.  My grandpa was always proud to suggest what we eat (2 or 3 dinners worth), and we’d end up stuffed and happy.  In recent years Will and I met my grandparents at the Walpole club for Oktoberfest which was a much bigger production, but still had the authentic food options.  My grandparents would bring their folding chairs, listen to the oompah band and chat up anyone who mentioned Germany.  I got the feeling in more recent years, though, that the food had become less authentic, the crowds had gotten bigger and rowdier and we were the ones encouraging my grandparents to go.  I think I’ll go this year and think of my grandparents.

Well all this talk of sausages is reminding me of frankfurters and those remind me of the bastardized American version, hot dogs.  Well I’ve been to the beach a lot this summer and I associate the beach with hot dogs.  You see, my mom used to carry a thermos full of hot dogs and boiling water to the beach and we’d have piping-hot hot dogs when we were hungry from our day of play.  With your hands imparting salt from the water and the unavoidable grit from a piece or ten of sand, the hot dogs were a little piece of heaven.  I started bringing hot dogs to the beach myself when I hit adulthood and twice this summer I was asked how it works.  So I thought it was high time to make a blog post about mom’s hot dogs.

Mom’s Beach Hot Dogs

What you’ll need:

  • A vacuum thermos (I used this one: https://a.co/d/4loVYkq)
  • a package of hot dogs (regular ball park size ones, bun size ones are too big) or vegan hot dogs**
  • buns (New England style, do I really have to specify?)
  • condiments (I do chopped onions and mustard)
  • a fork or teeny tongs
  1. Boil a teapot of water.  When it comes to a boil pour into thermos and seal.

    Pour boiling water into thermos and seal

  2. While thermos is coming to temp, boil hot dogs in a separate pot of water.**
  3. When hot dogs come to a boil, start a second teapot of water to boil.
  4. When second teapot of water starts to boil, open thermos and pour water down the drain.
  5. Using tongs, move hot dogs into the thermos (in my thermos I can fit about 10 hot dogs)
  6. Immediate pour the boiling water from the teapot over the hot dogs, filling the thermos to the top.

    Pour boiling water over hot dogs.

  7. Close the lid and let sit until ready to enjoy.***
  8. When you’re ready to serve, remove the cover from your thermos and use a fork or tongs to remove the hot dogs and serve.  (My mom used to pour the hot dogs into the cup the thermos comes with, which is a pro move I haven’t mastered.)

    Remove hot dogs with tongs for serving.

    Hot dog station ready

**Note, I’ve made beach hot dogs with vegan hot dogs as well (I like the light life brand) but you cannot boil the hot dogs before putting them in the container or they fall apart.  Instead, just prep the thermos with boiling water, let it sit for 5 minutes, then dump water, insert vegan hot dogs in the container, and refill with boiling water.

***Another note:  last time I made hot dogs with this method I had made a second thermos that was never opened.  When I got home I opened the hot dogs and checked the temp with a meat thermometer – the hot dogs were just over 165 F which is the internal FDA food safety temp!  That was from 8am to 9:45pm!  Those concerned about hot dog food safety, fear not!

Posted in Culinary Delights | 3 Comments