Wow what a weekend! We spent the last weekend give or take a day on either end having our annual DanyCon Convention! It was a blast. I’m so exhausted though that the last two nights I fell asleep on the couch after dinner and slept for 2 hours. Not exactly ideal.
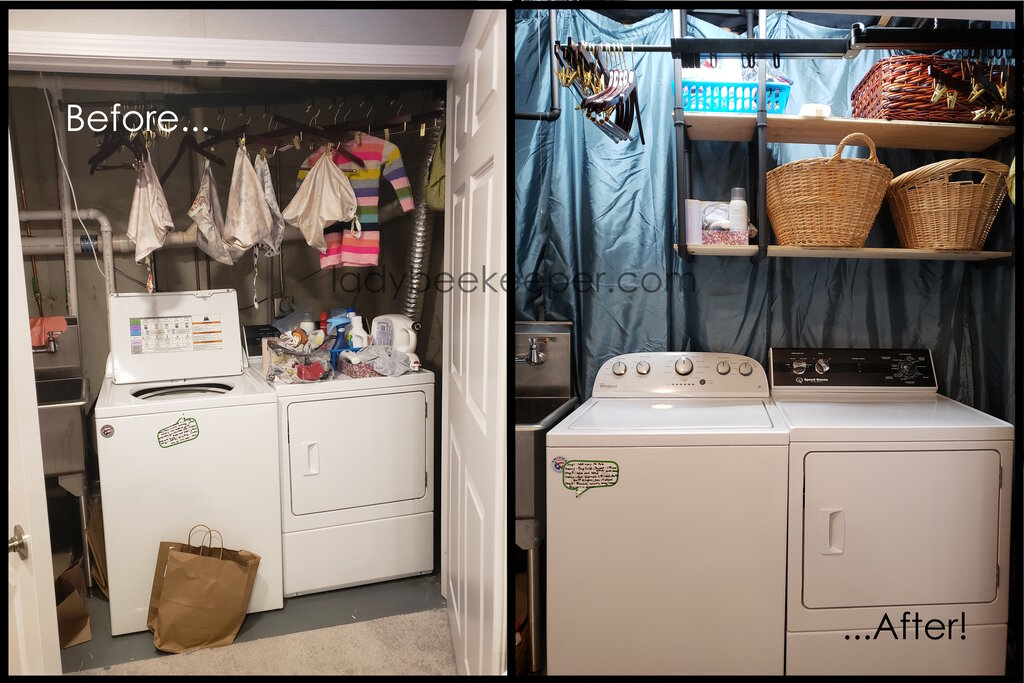
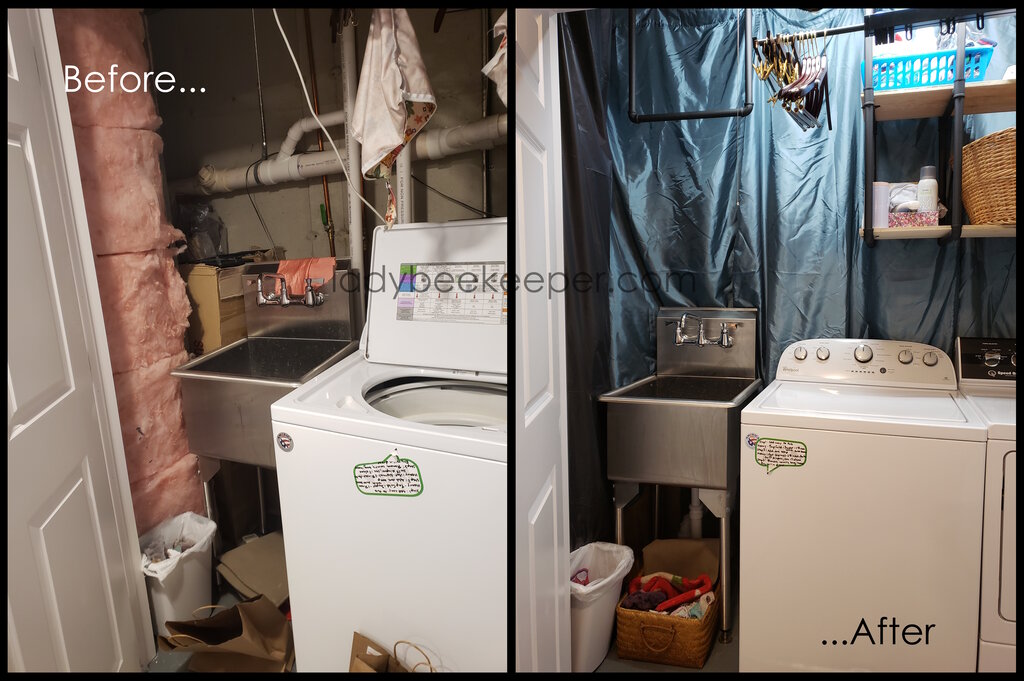
Because I’m so tired I’m going to just cut to the chase and show you the latest thing I’ve been working on. It’s my washing machine closet! When we redid the basement they basically walled off the area with my washing machine, dryer and sink and added some double doors so I could have full access. It’s worked out okay, but because there is no insulation behind the doors the cold basically oozes out of there. The first thing I did when I moved my desk downstairs was to add weather stripping to the base of the doors and between the doors and just that little change it made it so much warmer.
I also immediately installed a retractable arm to hang clothing from. I used to have a clothesline hanging across my basement so I could dry my clothes easily, but it felt odd to add that back to the nice finished space. So I used some 2″x4″s to attach a retractable laundry rod above the washer and dryer. Instead of using a line and clothespins, I used the rod and pants hangers with clips to hang all the diaper covers and other clothes that I don’t put in the dryer. It works great!
My next problem was that I had this shiny new basement and the area for my laundry was just so ugly! It was functional, but it was messy with all the bare pipes and unfinished floor showing. So I spent a lot of time envisioning ways I could add shelving and cover up the pipes. The other thing that I was annoyed with is because they didn’t finish the area with the washer and dryer, they left all the insulation exposed on the inside of the closet. Since I was going in there all the time I didn’t want insulation brushing off on my skin or clothes. This lead me to realize that the ceiling in the closet (and the unfinished back area) is also totally exposed insulation! So, if there was any insulation shards getting lose with day to day wear I’ve been breathing that in for years.
So my next step was to tackle the exposed insulation. I used black sheeting to cover up both the insulation on the inside of the walls as well as the insulation on the ceiling. I used a staple gun on the ceiling, but on the walls (which are steel braces) I had to use duct tape. Seems to be holding up okay so far.
After that was done, I finally could get to work on adding shelves. I had a couple goals for the shelves. I wanted to get all the junk on top of the dryer out of the way and onto a shelf so I could fold, and I needed a place to store my laundry baskets when they weren’t in use. This meant I was slightly size constrained. Again, my walls were unfinished concrete with pipes sticking out everywhere so the only place to mount shelves was from the ceiling. I found these super cool ones off Amazon that look like industrial pipes. They also happened to be the right measurements to hold my laundry baskets. I cut down some scrap plywood I had leftover from my kitchen shelving project to the right size to use as shelves (it seems they don’t sell them without the planks which is too bad because it was half the price).
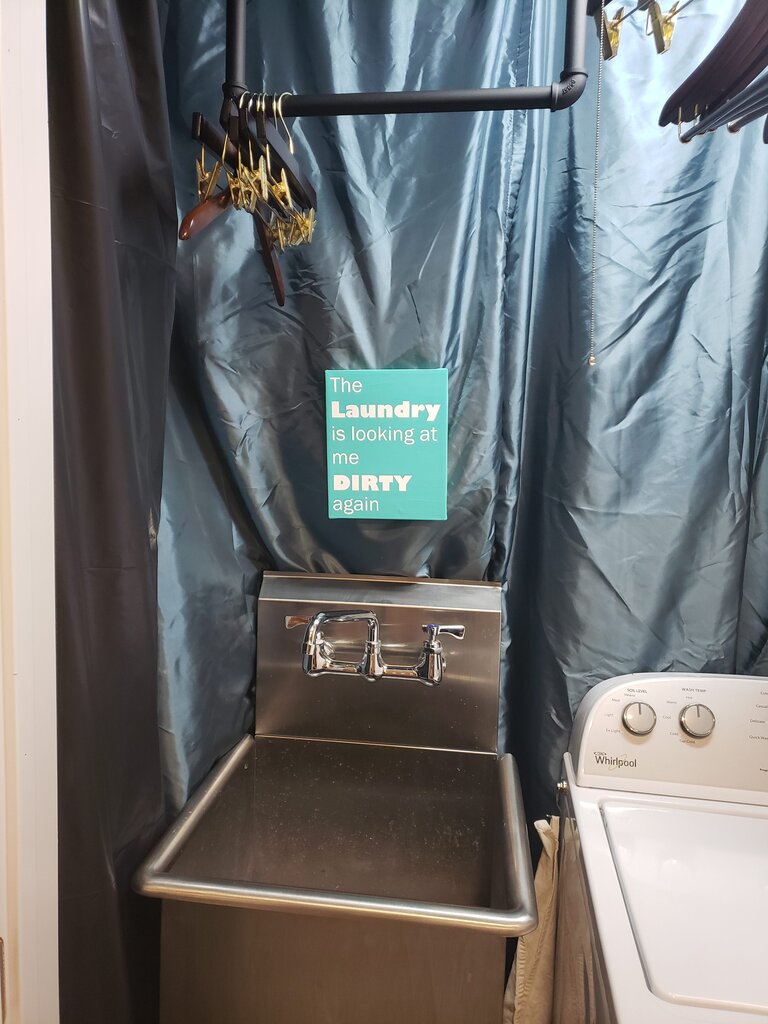
Since I used rather long plywood for the shelving I needed 3 braces to support the shelves. This left me with one extra brace to use somewhere else. I chose to use it as an additional laundry hanging space over the utility sink (a requirement I found I needed when hanging tie dye shirts to dry). I was able to reconfigure the pipes to make the bar longer in width.
Next I wanted to hide the pipes. For this I bought 4 matching polyester curtains from Savers and straight up staple gunned them to the ceiling. I hemmed the curtain over the dryer to make sure it comes no where near the back. (This was another reason to use polyester.) This makes the whole closet feel much cozier, and infinitely less ugly!
The last step was to add a silly laundry canvas I made (sidenote: there are so many good laundry puns, it was hard to choose). I staple gunned this to the fabric as well, in case you’re wondering. I also threw a basket under the sink for dirty laundry that isn’t immediately bound for the wash, and hung up two hooks on the inside of the door.
I’m in love with the mini-renovation. I keep opening up the closet to admire it while I’m working. And it makes me so much happier to do laundry when everything is so tidy and organized. (Plus it motivates me to fold the laundry immediately to keep things tidy.) The total cost for everything I needed to purchase for the reno (which was the plastic sheeting, curtains, shelf mounts, and the retractable hanging arm) was less than $250.
Next I guess I have to tackle the ceiling in the unfinished area… I’m dreading that!
Julius can read now, luckily he is still too young to understand my humor.
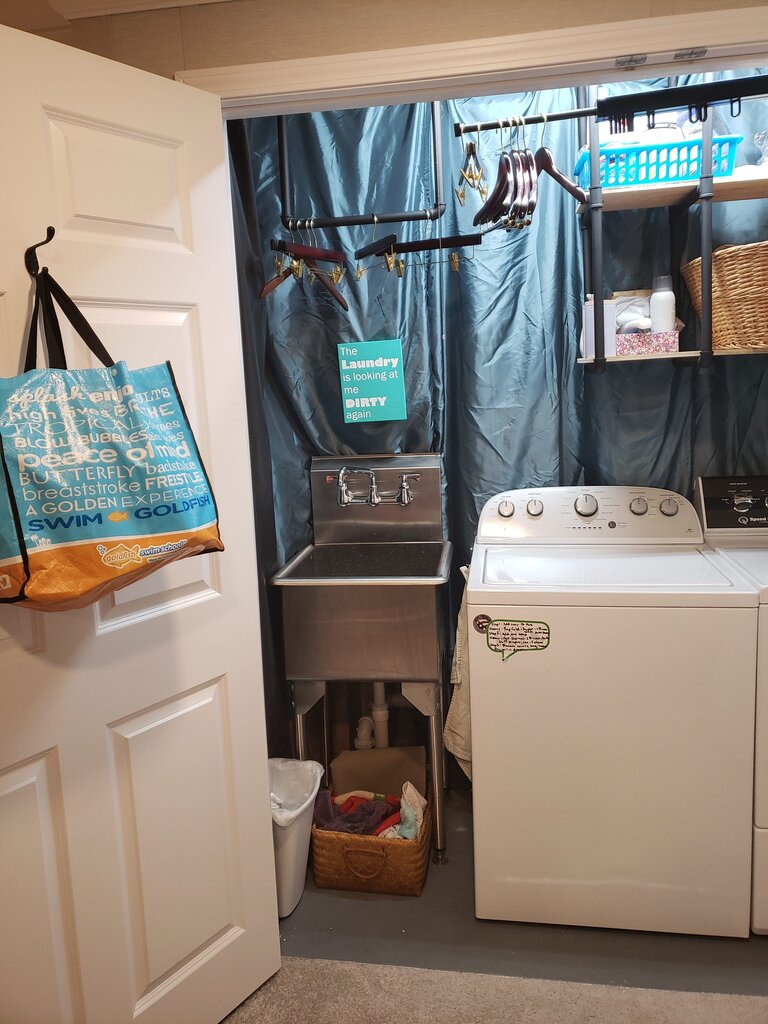
You can barely see the black sheeting on the left side because it blends in so well. This picture shows the hook on one of the doors as well as the bar over the sink for wet clothes. Oh and I forgot to mention I put a hand towel on a magnet hanging from the washing machine, and a bottle of soap on the shelf so I can wash my hands here when they are really messy. (Read: frequently)
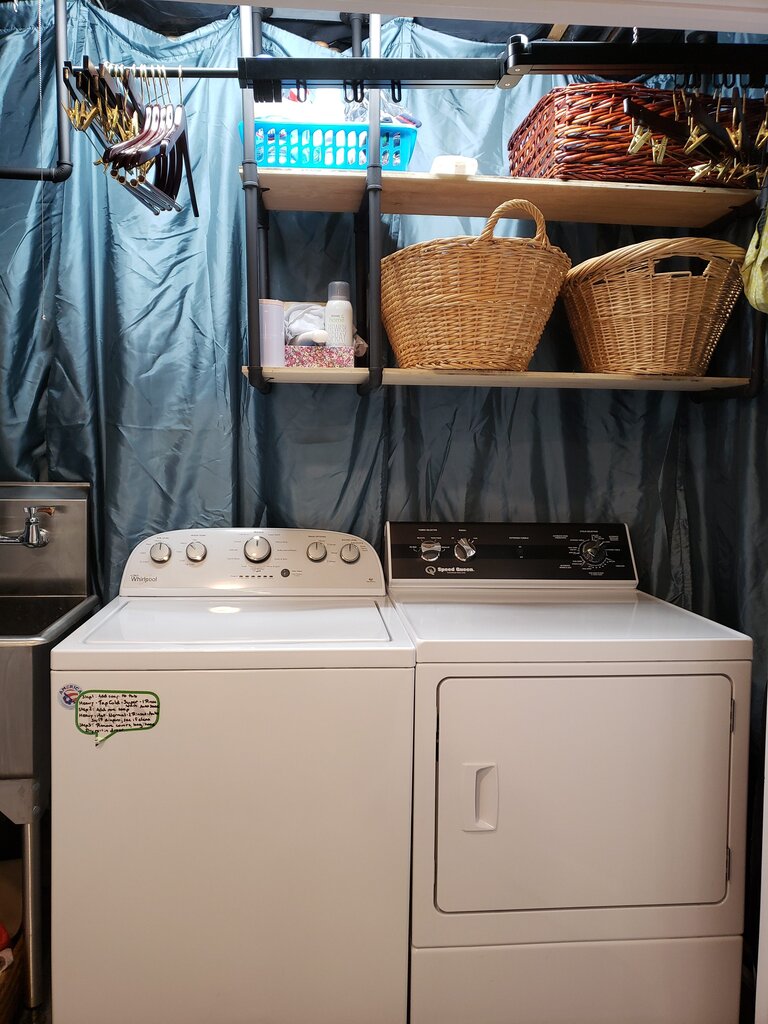
Here’s a better view of the shelves which perfectly fit laundry baskets stacked 3 high. In the foreground you can see the retractable clothes hanger.
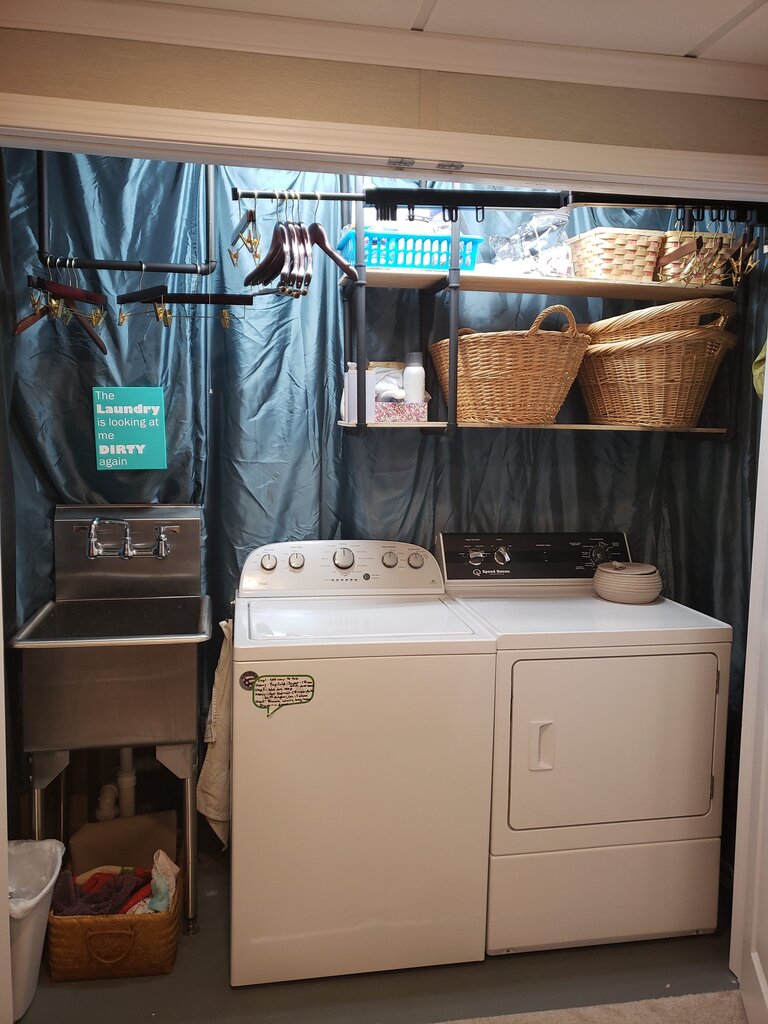
Full view of the closet. No more pipes seen!